3D printed 80 lower jig
▷ ar15 80 lower jig 3d models 【 STLFinder 】
80% AR15 lower jig
thingiverse
This is a jig I made for your 80% lower receivers. This fit my friend's Mil-Spec 80% lower and we used this to mill out the lower as well as my 80% receiver. Read first: The Lower jig itself is not designed for you to drill the holes (It may or may...
AR15 80 Percent Lower Drill Jig
pinshape
This is a 4 piece design for the Ar15 lower. Itll fit almost all lowers and slides together. The drill holes and milling out section are to Mill spec. Unlike metal the edges will degrade over use with an End mill. ...Ive used the same jig on 5 lowers. ..
AR15 80% Lower Milling Upright Jig for Drill Press
thingiverse
A friend asked me to create a support for them to make finishing AR15 80% lowers on their drill press easier. The method he was currently using was putting a vise block in the magwell (specifically designed for this) and then clamp it down in a...
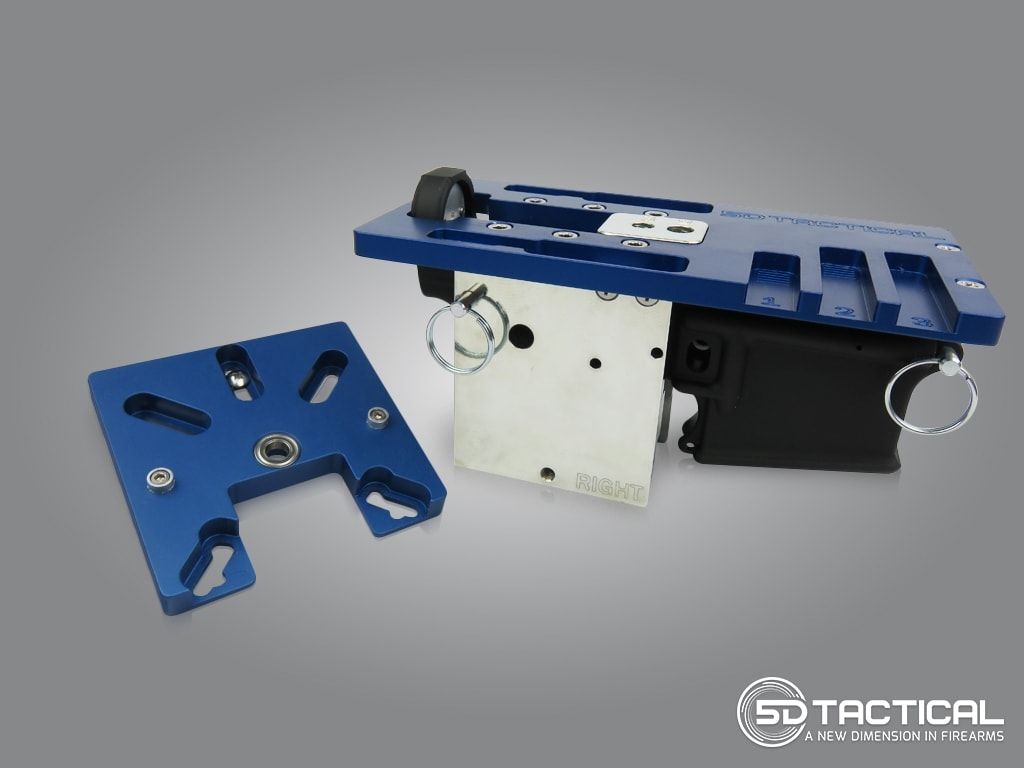
AR15 80% tooling jig
grabcad
This jig was modeled for a tooling concept.
Fixture Plates for machining an AR15 80% lower receiver
thingiverse
These fixture plates are designed to produce softjaws that allow for holding an 80% AR15 lower receiver to machine the trigger group pocket. Also, depending upon how produced it can provide guide bushings to drill out the three holes in the...
Printable AR-15 80% Lower Receiver Milling Jig
thingiverse
This is a remake of 80% Arms Gen 1 self-aligning milling jig for making the proper cuts on a AR15 80% lower receiver. I printed mine with ASA, but I'm sure you can print in PLA if you'd like. You will need a drill press to use this obviously, but...
AR-15_80_percent_Lower_Drill_Jig_v1-Shadowfall
grabcad
AR-15_80_percent_Lower_Drill_Jig_v1-ShadowfallThis is found In FOSSCAD - Re-hosting - **Added Trigger Slot Location
we gbbr ar15 lower
cults3d
Fully functional WE AR15 GBBR lower inspired from VLTOR. The rear of the lower, near the buffer is reinforced for plastic use. ...Printed demo in the pictures 2 versions: - classic texts - pew pew texts
ar15 stripped lower
grabcad
probably not to specI used a spec sheet from http://biggerhammer.net/ar15/cad/ar15_receiver.pdfand used a ruler and eyeballed some measurements from my friends ruger 556I added the fun hole though
ar15 lower (PHOBOS)
thingiverse
ar-15 lower this lower has been tested i am not responsible for any accidents for educational purposes
AR15 LIGHTWEIGHT LOWER
cults3d
High quality AR-15 lower STL model. (10.4MB) Real steel spec. 2 versions included. Receiver body is in ZIP file. ... For reference and educational purposes.
AR15 Receiver Engraving Jig
thingiverse
AR-15 Lower engraving jig - mounting holes are 3" apart (vertically) - Lower to be secured utilizing 2 #10 screws, via the mag-release button hole and the fire selector lever hole. -- underside of the jig captures 2 #10 nuts for retaining the...
AR15 Trigger Jig
thingiverse
... make some changes.
https://www.thingiverse.com/thing:3589325 Model I modified, https://grabcad.com/library/mil-spec-ar-15-lower-2 Grip I used, https://www.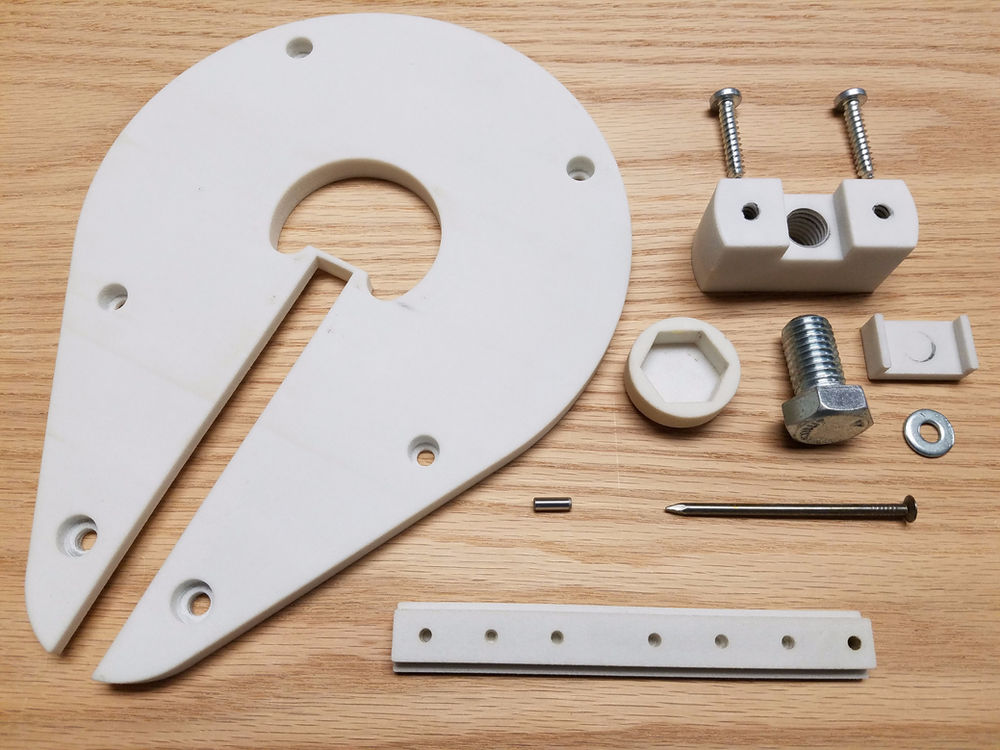 thingiverse.com/thing:2499366 Trigger Guard I used, https://www.thingiverse.com/thing:2479358
Printable AR-15 80% Lower Receiver Milling Jig - Drilling Plate (BETA)
thingiverse
... to test this out myself. That being said, if you choose to use this to finish out an incomplete lower receiver of your own it is, of course, at your own discretion. Either way, let me know how it goes! ...I can ALWAYS tweak the hole placement!
AR15 Upper/Lower Receiver Set
cults3d
Lower Receiver is a New Design View Video: https://youtu.be/7O1NWc9QSNw Exact Dimensions as an AR15 556/.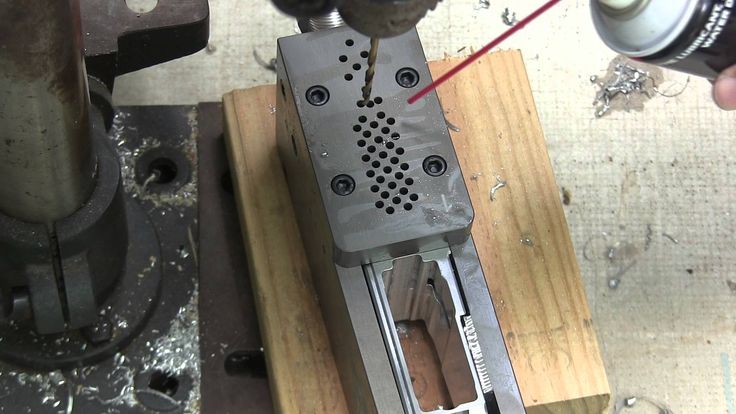 223 Rifle. You will need a Lower parts kit, buffer tube/stock, barrel, and hand guard of your choosing for the build. ... Files: -STL Upper/Lower...
AR15 Lower Assembly Blank - custom
grabcad
NOT a standard AR15 lower assembly. For those who want to modify lower assembly: reinforce takedown pin areas, cutomize grip, etc.Model Features:- Trigger Slot- Magazine Well (resized for 3D Printing)- Trigger Pin Hole- Hammer Pin Hole-...
Custom 22lr AR15 Lower receiver
cults3d
Here,s one to play with, A custom ar15 lower. As I do not have a printer yet to try this out it is a concept and listed as such. I still retain the rights for the design and it is not to be commercially produced. It may require a bit of filing and...
oculus rift lower (ar15 style)
thingiverse
ar lower converted into oculus controller add on . This is the lower add your choice of upper. ...when on build plat turn 15 degrees.
AR15 Lower Receiver Painting Stand
thingiverse
You'll need a 1/4-28 screw (I think mine are 2.5 inches) to secure the lower. I had this made before I could print things myself and had to drill out the hole for the screw. ...Scaling it up a little should rectify that, but I don't know how much.
BigJohn AR15 Hammer Trigger Jig
thingiverse
AR 15 Hammer Jig
AR15/MCX 223 EJECTOR JIG
thingiverse
A simple jig to remove and replace the ejector on you 223 AR bolt
AR15 lower support plate for engraving
thingiverse
Made this to be able to engrave pictures/letters on an AR15 lower with my cheap 3018 CNC. Lower goes on top and this make it leveled. For one side only (left). The support plate is made by looking at a 80pct jig plate. I am including Freecad source.
AR-15 Lower Jig
thingiverse
This is version 3.2 of my AR-15 lower jig. Parts lists and instructions are included in the documentation. Long-form video instructions and backups of the filepacks can be found on my Odysee channel: https://odysee.com/@swolebro:4 I've also...
AR10 80% Jig
thingiverse
This is a jig for completing an 80% AR-10 lower (DPMS gen 1.) This was built using the measurements on several CAD drawings found online as well as my own lower to work off of.
It is made up of two halves (frame and frame mirror) with some snap in. ..
..
AR15 Upper/lower link (for cleaning)
thingiverse
... find it when I needed it, so I re-designed it. ... Helps (with or without the retaining pin in place) to keep upper and lower at a certain angle while cleaning or maintaining. ... I printed it on the side to use the extra strenght of the layers
AR15 Bolt Ejector Disassembly / Reassembly Jig
thingiverse
Inspired by KEVINhenderson's tool, I decided to get a little more used to Fusion 360 (versus my native CREO 5.0 CAD) and designed a fully 3d printable jig with a few extra features: 1) Both Jig and Power screw are 3D printed 2) Hold bolt from. ..
..
AR15 TO M16/M4 FA DRILLING JIG
thingiverse
##Please check with your local laws to see if its permitted before attempting to drill your Lower, This is a full auto sear drilling jig for converting your AR 15 to accept the M4/M16 sear, clamp the jig in place making sure the the top if the jig...
AR15 TO M16/M4 FA DRILLING JIG
cults3d
##Please check with your local laws to see if its permitted before attempting to drill your Lower, This is a full auto sear drilling jig for converting your AR 15 to accept the M$/M16 sear, clamp the jig in place making sure the the top if the jig. ..
..
AR15 Lower Cover
thingiverse
Drill holes to spec.. ...Otherwise self explanatory.
JMT AR15 lower receiver machine guide for CNC
grabcad
AR15 James Madison Tactical polymer 80% lower receiver fixture cutting guide. JMT sells their lowers with a plastic machining guide. It holds the 80% lower square and guides those using a manual mill to machine out their lower. I use CNC and just...
Someone got STL for a 3D Printed 80% 308 Lower Jig? : DIYGuns
Looks like you're using new Reddit on an old browser. The site may not work properly if you don't update your browser ! If you do not update your browser, we suggest you visit old reddit .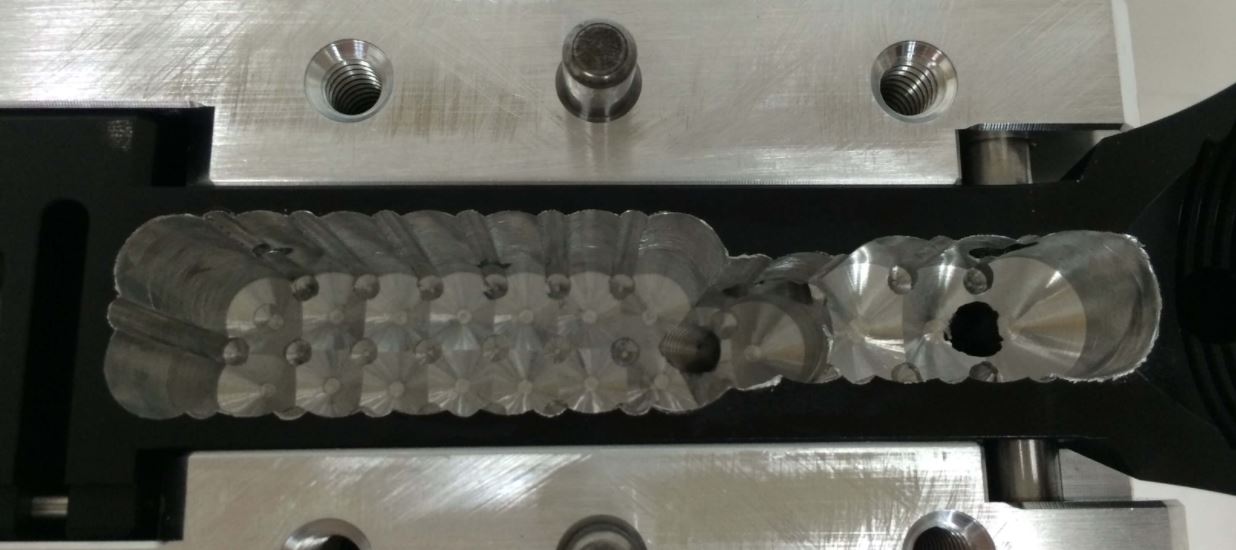
Press J to jump to the feed. Press question mark to learn the rest of the keyboard shortcuts
Search all of RedditFound the internet!
Feeds
Popular
Topics
ValheimGenshin ImpactMinecraftPokimaneHalo InfiniteCall of Duty: WarzonePath of ExileHollow Knight: SilksongEscape from TarkovWatch Dogs: Legion
NFLNBAMegan AndersonAtlanta HawksLos Angeles LakersBoston CelticsArsenal F.C.Philadelphia 76ersPremier LeagueUFC
GameStopModernaPfizerJohnson & JohnsonAstraZenecaWalgreensBest BuyNovavaxSpaceXTesla
CardanoDogecoinAlgorandBitcoinLitecoinBasic Attention TokenBitcoin Cash
The Real Housewives of AtlantaThe BachelorSister Wives90 Day FianceWife SwapThe Amazing Race AustraliaMarried at First SightThe Real Housewives of DallasMy 600-lb LifeLast Week Tonight with John Oliver
Kim KardashianDoja CatIggy AzaleaAnya Taylor-JoyJamie Lee CurtisNatalie PortmanHenry CavillMillie Bobby BrownTom HiddlestonKeanu Reeves
Animals and PetsAnimeArtCars and Motor VehiclesCrafts and DIYCulture, Race, and EthnicityEthics and PhilosophyFashionFood and DrinkHistoryHobbiesLawLearning and EducationMilitaryMoviesMusicPlacePodcasts and StreamersPoliticsProgrammingReading, Writing, and LiteratureReligion and SpiritualityScienceTabletop GamesTechnologyTravel
Create an account to follow your favorite communities and start taking part in conversations.
r/
DIYGuns
r/DIYGuns
About Community
r/DIYGuns
Show your gun building skills! Share your pics and experience in gun fabrication, gun restoration, gun cabinets, steel targets or anything else that you make yourself or modify that has anything to do with weapons. In a SHTF situation, what you share here could save lives!
Created Feb 21, 2013
22.4k
Members
15
Online
Similar to this post
r/DIYGuns
Canada is officially lost.
96%
69
4d
r/DIYGuns
My first 3d printed gun. File by chairmanwon
98%
25
2d
r/DIYGuns
HK G11 Update. Feed System Components
97%
4
10h
r/DIYGuns
Is this OK? 1mm ish from the "slope" of the casing
97%
11
1d
r/DIYGuns
Well it certainly didn't fire.
92%
6
22h
r/DIYGuns
Chairman G26 Printing Slow = way better prints I’ll post...
97%
0
1d
r/DIYGuns
I'm a 3D modeling noob, what's the easiest way to texture...
83%
7
5d
r/DIYGuns
Chairmanwon G26 Done ✔️
96%
0
1d
r/DIYGuns
30 Cal Pistol Safe
93%
25
5d
r/DIYGuns
Retay Ekol ect
88%
10
2d
r/DIYGuns
Would the Savage Axis Stripped Actions of jaoutdoors work...
100%
1
1d
r/DIYGuns
what budget desktop cnc machine can complete 80% aluminum...
71%
8
1d
r/DIYGuns
I'm offering my art free for any type of Hydro dipping!.
 ..
..58%
0
5d
r/DIYGuns
What can I build with a 30 cal barrel offcut?
57%
17
4d
r/DIYGuns
Help
50%
3
1d
Reddit and its partners use cookies and similar technologies to provide you with a better experience.By accepting all cookies, you agree to our use of cookies to deliver and maintain our services and site, improve the quality of Reddit, personalize Reddit content and advertising, and measure the effectiveness of advertising.By rejecting non-essential cookies, Reddit may still use certain cookies to ensure the proper functionality of our platform.For more information, please see our Cookie Notice and our Privacy Policy .
Advertisement
What size should your 3D printer nozzle be?
Although most 3D printers come fully assembled or with all necessary components, there is no reason to limit yourself to the default parts. Having more alternative components gives you some extra flexibility when working with different filaments or wanting different results on your prints.
The extruder nozzle is one of the parts of the 3D printer that is fairly easy to replace. However, switching from one jet to another can have a significant impact on printer performance and product quality. If you still don't know what size nozzle to use, we've put together this guide just for you.
Factors to consider when choosing a nozzle diameter
Most 3D printers will ship with a 0.4mm diameter brass nozzle. This tip works great and gives satisfactory results in most cases. However, learning how to change the nozzle of your 3D printer opens up new ways to customize the look and quality of your finished product.
Layer Height
The layer height of a 3D printing project is often given as a fraction of the nozzle diameter. The slight compression that is created allows for better adhesion between layers and also increases the level of detail in the vertical plane. As a general rule, setting the layer height to about 80% of the nozzle diameter works well in almost all circumstances.
If your design has a lot of curved surfaces, being able to install thinner layers also means they can look more curved instead of just stacking on top of each other. For professional applications, the thinner layers also mean that less work is required to polish the surfaces as the layer lines are less pronounced.
Wall Thickness
The wall thickness of any 3D printing project is also determined by the nozzle diameter. In contrast to the layer height, the wall thickness is specified as a multiple of the nozzle diameter, not the shot diameter. In most cases, a wall thickness that is twice the nozzle diameter is sufficient for standard 3D printing projects. For heavier applications, it can be increased up to three or four times.
Although the total wall thickness can be increased indefinitely, the advantage of a smaller nozzle is that it allows finer control of wall thickness settings.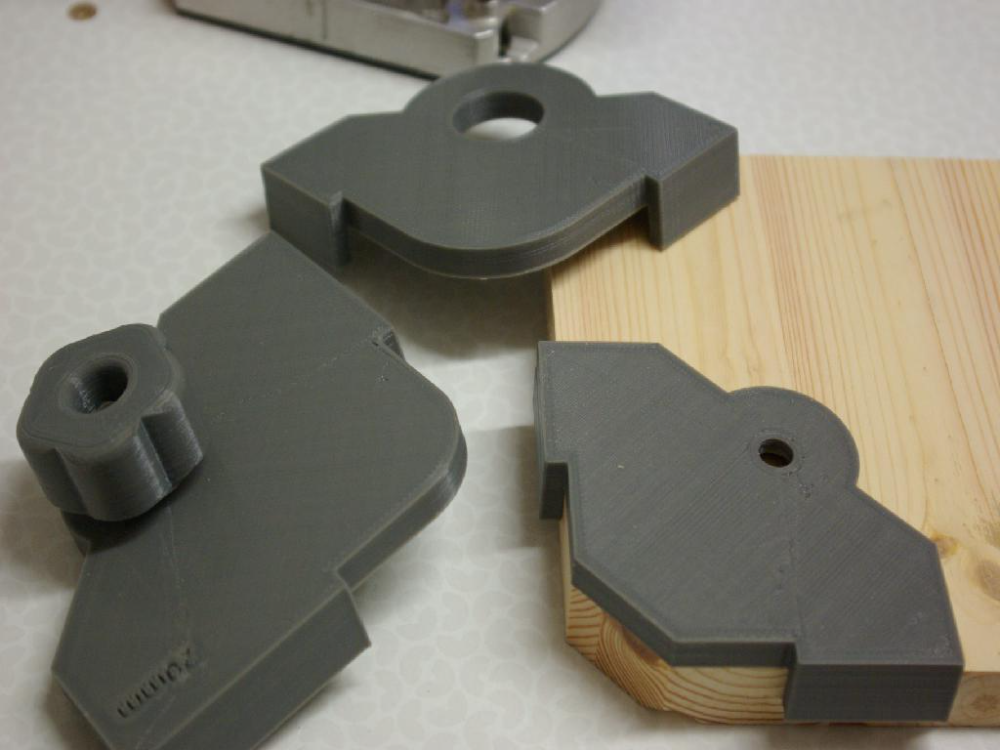 This is especially important if you have specific dimensions for the finished product.
Smaller nozzle produces finer detail in a horizontal plane or in a plane parallel to the print platform. For example, any text on the top surface of the model can be recreated more legibly if you work with a smaller nozzle.
Print Time
When it comes to choosing between different nozzle sizes, it often comes down to a compromise between level of detail and print time. While smaller nozzles are great for recreating very fine detail, larger nozzles can significantly reduce print times for any model.
Keep in mind that layer height settings play the biggest role in determining print time. To realize this benefit of a wider nozzle, you will have to increase the layer height, thereby reducing the number of times the nozzle needs to move around the perimeter of the model. With some settings, you can achieve an overall print time that is three to four times faster than if you were using a standard 0. 4mm nozzle.
Strength and impact resistance
Layer lines are an essential feature of everything 3D printed using FDM technology. These clearly visible lines are the boundaries between the individual layers. In addition to their characteristic ugliness, these layer lines also create weaknesses in any project.
Another important advantage of printing with wider nozzles and thicker layers is that it greatly reduces the number of layer lines in any given design. This reduction in weak points makes the product stronger and more resistant to breakage due to stress or impact. For example, a model printed with a 0.6mm nozzle can withstand 25% higher energy compared to the same model printed with a 0.4mm nozzle.
Optical properties
3D printing an object that needs to be as clear as glass is particularly challenging. Not only do you need to use high quality, contaminant-free clear filament, but you also need to adjust the printer settings to maintain transparency. For reference, transparency is achieved by allowing light to pass through the material with minimal internal reflections.
A problem with FDM printing is that the layer lines themselves can contribute to internal reflections, especially if there is poor interlayer adhesion. There are several measures to solve this problem, such as increasing the printing temperature and increasing the extrusion speed. Using a wider nozzle is also beneficial as it allows for fewer layer lines.
Removing supports
We have already seen how a wider nozzle supports increased strength. While desirable for a real project, this is a huge downside when it comes to support. Support structures should be strong enough to hold overhangs, but not too strong to be difficult to remove. If you are printing a huge model with a large diameter nozzle and you need support structures, be prepared to remove them with pliers and other cutting tools - this will take some time.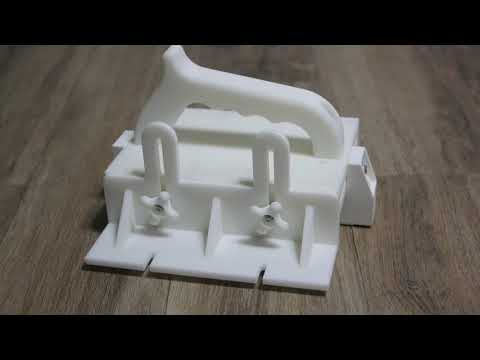
Abrasive filament types
Composite filaments refer to filaments that contain hard particles embedded in a plastic matrix. Notable examples of composite threads are wood, metal and marble fibers.
One of the main problems with composite filament is that the hard particles abrade the 3D printer components. This is most noticeable at the extruder nozzle, as the filament material must be highly compressed as it passes through the nozzle opening.
To avoid abrasion problems, the simplest solution is to use a wide diameter nozzle made of wear resistant material.
Which applications are suitable for different nozzle sizes?
All things considered, the 0.4mm nozzle that comes with most 3D printers strikes the perfect balance. It can print models with a reasonable level of detail, but it doesn't take long to complete a project. For most print jobs, the standard nozzle is fine.
However, it is always possible to obtain an alternative nozzle that has either a smaller or wider opening.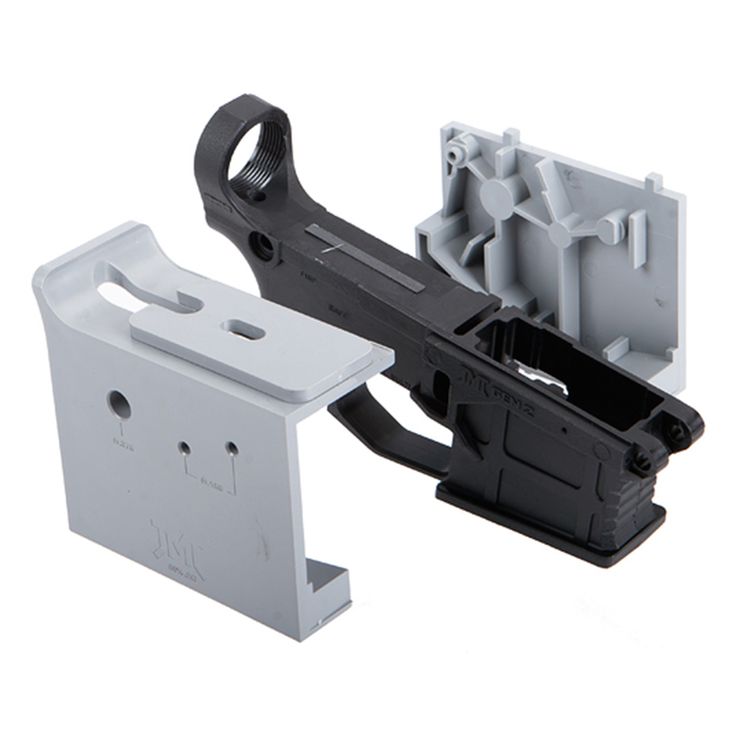 Common options include 0.25 mm or 0.60 mm, although heights up to 1 mm are not unheard of. Some 3D printing firms are experimenting with nozzles as small as 0.1 millimeters, although it is unlikely that such nozzles will be sold commercially.
Before starting the job of replacing a 3D printer nozzle, first ask yourself - are you using the right nozzle for the job? Here are some tips for you to answer this question.
Use 0.25 mm nozzle if….
You don't mind the extra wait time
The difference between the level of detail between the 0.4mm and 0.25mm nozzles is so small you'll have to look closely to notice the difference. The difference in print times is much more obvious. When you switch to a new nozzle, you can easily get print times that are almost double the time it would take with a standard nozzle. If time is not an issue, then replacing the smaller nozzle should not be an issue.
Do you print custom miniatures and decorations
The smaller nozzle really comes in handy when you are recreating small models such as miniatures. This also applies to jewelry, especially if the reference model has many thin and clear lines. The use of small nozzles is limited to small projects also due to the increase in print times.
Your models contain text
Printing small models that come with text can be extremely difficult with the standard 0.4mm nozzle. This is a job that requires smaller nozzles, especially if the text is on the top surface of the model. Use the 0.60mm nozzle if… , than usual. Not only are they larger than the usual things that are made in 3D printers, but their design is also quite simple - no intricate details or small text needed. In addition, large nozzle printing gives these products a slight advantage in terms of mechanical strength.
You want to finish quickly
Using a wider nozzle and adjusting layer height accordingly can speed up the 3D printing process significantly. This can be very useful, especially if you are working on large scale projects.
Use the 1mm nozzle if...
You don't mind the visible layer lines. Thicker layers can reduce the amount of layer lines, but it also means those lines are more visible than ever. This is not necessarily a bad thing - you can do some unusual aesthetic work. The advantage is that you can print projects up to five times faster than if you were doing it with a standard nozzle.
You are trying to make crisp 3D prints
The extra wide nozzle is a great tool for printing with clear filament. The fewer layer lines, the fewer "borders" that can contribute to internal reflection. The ability to print layers thicker than 0.5mm provides a clearer optical path for light. Just print at a higher temperature as you want these layers to blend together effectively.
In conclusion
The nozzle is one of the most easily customizable parts of a 3D printer because it is readily available and replacement nozzles are not expensive. Replacing nozzles can be not only a tool for setting up 3D printers, but also very useful, whether you want more precise details in your prints or you want to reduce print times. Replacing nozzles is a small change that can bring huge benefits.
Author Joseph Flint
Source
3D printer, FDM technology, 3D prints, nozzle diameter
13 notes on 3D printing , after 3 years of owning a 3D printer / Habr
This article will be, first of all, of interest both to those who have directly dealt with 3D printing, that is, who owns a 3D printer, but also to those who are just about to join the ranks of 3D printers and are thinking about buying their own printer.
In the framework of this article, I would like to present my observations as a direct owner of a 3D printer for more than 3 years.
Despite the fact that 3D printers have been known for a long time and, in my memory, have become widely used, judging by the information on various resources, starting around 2010 (I may be wrong, these are my subjective observations), for a long time I ignored this area, it’s hard to say why…
Probably, he considered it some kind of “childish pampering”, another hype topic for which there is simply not enough time…
The break happened when one of the wheels on my travel suitcase wore out. You know, a big plastic suitcase, with four spinning wheels on the bottom. Unfortunately, it is a “rather disposable thing”, due to the lack of bearings on the wheels, which is why the wear of the friction point of the axle and wheel allows the suitcase to last no more than one or two seasons.
And it’s like “lightning flashed in the middle of the day: 3D printer!” It is with his help that I can fix this problem! Looking ahead, I’ll say that I didn’t succeed in fixing the suitcase in this way, so I had to use a different approach ...
As a result, I "upped" him - by installing wheels from unnecessary roller skates. Thanks to this “up”, the suitcase has become a real all-terrain vehicle and, even being very loaded, it rides easily - pushed forward even with “one finger”. And even in the snow, 5-6 cm thick. A tank, not a suitcase turned out! By the way - I took spinning wheeled "units" in Leroy. Then he removed and threw out his native plastic wheels, inserting them from roller skates:
But this thought itself became a kind of trigger that allowed me to finally join the world of printers and buy my first 3D printer.
Like many, before buying it, I studied various forums and sites for a long time, delving into all the subtleties. And for some reason, I immediately liked the type of printer called the delta printer. Probably because during operation it looks like some kind of "alien device".
If at your leisure you like to sit “looking into the carpet”, then with the advent of such a printer you will have a much more interesting activity, even, one might say, hypnotizing :-))
And this, in fact, is my delta (if anyone interesting), which went, let's say, "ultimate up": all the electronics were placed upstairs, on a self-made welded frame, covered with polyethylene and a magnetic door was made. The coil with a bar is installed at the top, on the frame. The axis on which the coil is put on is machined on a lathe from aluminum and a bearing from the VAZ timing is inserted into it. As a result, the coil - "rotates even from the passage of a fly nearby":
Well, yes, I won’t argue for a long time, let’s start reviewing the main facts that I have accumulated as a result of owning this car . .. The facts are purely subjective and may differ from your vision. In any case, I will be glad to comments, clarifications, etc.
▍ NOTE 1. Delta is good, but...
Here I should give a number of my observations regarding the delta printer:
- It contains a completely finished frame of the future box, which makes it easy to form a heat chamber. I understand that many printers are made in the form factor of a “certain box” (but this point cannot be ignored), which greatly facilitates the process of wrapping this box with heat-insulating material. In my case, as such a material, I used a plastic film.
- Already thanks to its design, delta allows you to work at much higher speeds than XY printers. By the way, it is on the delta principle that many modern high-speed industrial robots are built to sort various parts directly on the conveyor belt:
However, this plus does not allow to fully realize the occurrence of parasitic vibrations, even despite their suppressors:
Thus, accurate printing is possible, only at speeds (at least that was the case for me), no more than 60 mm per second. A complex procedure for aligning the movement of the head parallel to the table, which is why, for many, the so-called "lens" appears. People struggle with it with varying degrees of success, but I have not encountered this on my printer and for me, therefore, the “lens” has never been a problem. At the same point, it is worth noting the calibration of the table, which was initially absent on the first deltas, and I had to use an external third-party solution from one American do-it-yourselfer called EZBED. This solution was a hardware-software complex that allows you to quickly and easily calibrate the printing table, that is, to let the printer understand its geometry. Modern printers do not have this issue as they come with a built-in calibration solution. It is worth noting that I solved this problem by attaching a limit switch to the print head, and using the Marlin-1.1.9 firmware.
▍ NOTE 2. "Size doesn't matter..." :-)
When I got the printer, I was impressed by the possibility of huge printouts, a la the handguards of some futuristic rifles, huge body parts, etc.
However, if you try to analyze the results of your many years of practice, it turns out that in most cases, rather small objects were printed that easily fit in the palm of your hand, a maximum of two palms. Despite such a seemingly small size, the printing of these details took a significant amount of time. Of course, this very much depends on which nozzle you print with. But, despite this, it is difficult to disagree with the fact that most of the printed parts will be quite utilitarian and small in size.
Therefore, to be honest, the need for a printer that allows you to print "Venus de Milo in life size" is not obvious.
Of course, you can object to me that “I’m going to buy a printer, I’ll get used to it a bit and I’ll get started!!!”
Here you need to take into account one simple point: there are no universal things. And in order to understand how much 3D printing in general and your printer, in particular, you will need to solve your problems, and how much it will be able to solve such problems, you just need to first try the 3D printing method personally and then a lot will become clear to you .
Therefore, for a beginner, I recommend taking a small printer that allows you to print extremely small items that fit in the palm of two. With such a device, you will definitely never lose, as it will always be needed. In addition, with its help you will be able to get used to the printing process and, if necessary, purchase a larger device, already clearly understanding its capabilities and ability to solve your set of tasks.
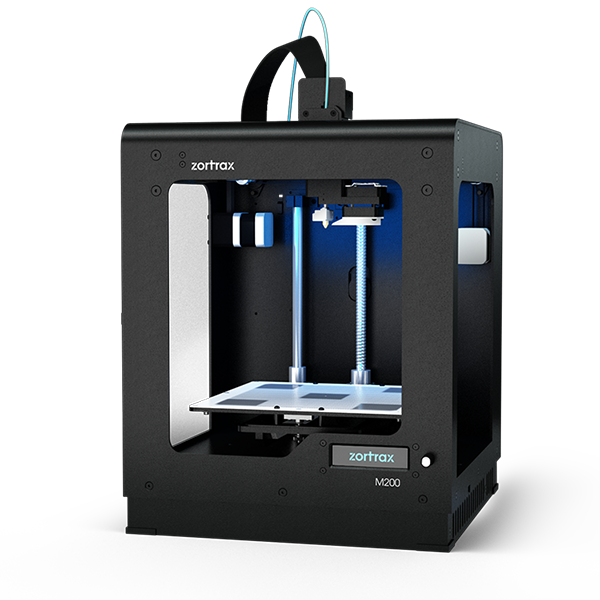
▍ NOTE 3. "What type of printer to get."
Based on the foregoing, I do not recommend taking a delta printer and this can be said right away.
Not because it is bad, in fact, it prints quite accurately, its main problem (in my opinion) is the inability to print rectangular flat, fairly large case components, as well as the inability to fully realize high-speed work, since the quality drops critically. Here it turns out to be a rather offensive situation - the printer can work quickly, but this cannot be done, since the quality will be “nothing”.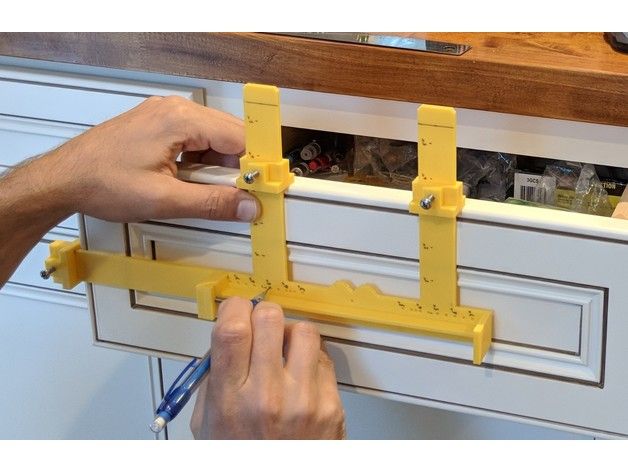
And then what kind to take? Depending on the budget and capabilities, I recommend taking any cube printer, for example, the same Core XY (the head moves, and the table goes down as the model “grows”, from top to bottom):
Image source: thingiverse.com
Such a printer allows you to easily print fairly large flat parts of cases, has good speed and accuracy. In addition, the presence of a rigid box-shaped frame makes it easy to cover it with polyethylene to create a sealed heat chamber. In addition, the very fact that the table does not move while working helps to reduce the number of problems with model peeling off.
However, the advantages of this printer will not be fully revealed if it has a direct extruder. On the one hand, it will allow printing with rubber-like materials, on the other -
large inertia and head weight. And these are parasitic vibrations, wear of the fur. parts, etc. (like everything in life, “we treat one thing and cripple another” :-))
At the initial stages, this may not be necessary, but in the future it may be necessary to print, for example, tires for your homemade car. And with this, the Bowden extruder has obvious problems. Although, in fairness, printing with such a rubber-like material is far from a daily need. However, whoever seeks will always find: over time, I found a way to “upgrade” my printer with a Bowden extruder to print with flexible materials. "Crutches" of course. But even so.
By the way, there are printers of a cheaper type, the so-called "drygostol", printing by moving the table and head:
They are inexpensive, moderately accurate, but they require a sufficiently high-quality gluing of the printed model to the table, because the table moves, and the model can come off when the table is jerked sharply. When printing large models, this can be a problem.
▍ NOTE 4. What to print with?
It's only a matter of taste and purpose. That is, if your printout will only stand on a shelf and should differ in some kind of aesthetic appearance, these are some requirements, if the printout is an engineering part that will be operated under conditions of increased mechanical load, these are different requirements. That is, in the first case, you can use any PLA, SBS plastics, and others with similar properties.
For engineering parts, for example, I only use ABS. It combines high hardness, strength and low price. Although I understand that now this last statement will cause a storm of comments in the style of “no! - there is even stronger, even better, the same PETG, etc. ":-)
I just wanted to say here that thanks to the low price and the practical experiments that I conducted with ABS plastic, I realized that it is completely meets all my requirements.
However, the fact that ABS plastic releases carcinogenic substances when heated is quite annoying and forces you to take measures to prevent poisoning. For this, my printer prints completely closed and on an open balcony. After printing, the printer chamber opens, and it remains open in this form until it is completely ventilated and cools down.
▍ NOTE 5. "ABS is difficult to type on, it separates, peels off the table, and in general.
 .."
.." With a properly configured printer (in my case, at a print temperature of 205 degrees, a thermal chamber and a desktop temperature of 100 degrees), the use of auxiliary techniques, for example, among which, one can name the so-called ABS juice (which is ABS- plastic dissolved in acetone), you can create wear-resistant and durable things, without any hypothetical problems.
For example, my printer has been printing for many hours at temperatures well below freezing. And this happened more than once, not twice, not three! And the print quality was excellent:
12-hour ABS printing at -4 C
▍ NOTE 6. Acetone for post-processing and ABS juicing
At one time, I wrote a fairly detailed article on this topic and I will try to give the main excerpts from it. The essence of the issue here is as follows: due to the fact that different GOSTs are used for the production of acetone, acetone differs in quality. Despite the fact that it would seem that “acetone is also acetone in Africa,” nevertheless, one type of acetone can differ significantly from each other. For example, ordinary acetone, which can be bought at any hardware store, such as "1000 little things", "store near the house" and the like, is very low quality acetone, smells disgusting (although someone like it, maybe someone likes its pleasant building aroma and "aftertaste" :-))).
In contrast, there is a much higher quality acetone, which, however, is not found at all in any household stores, even large chain stores, such as Auchan or Leroy Merlin.
This type of acetone is found exclusively in shops that sell varnishes and paints for automotive work, i.e. these are highly specialized shops for car workshops:
Acetone, which can be purchased there, is of excellent quality, smells almost like alcohol, quickly disappears,
:-) - this is a joke, of course, don't even try it.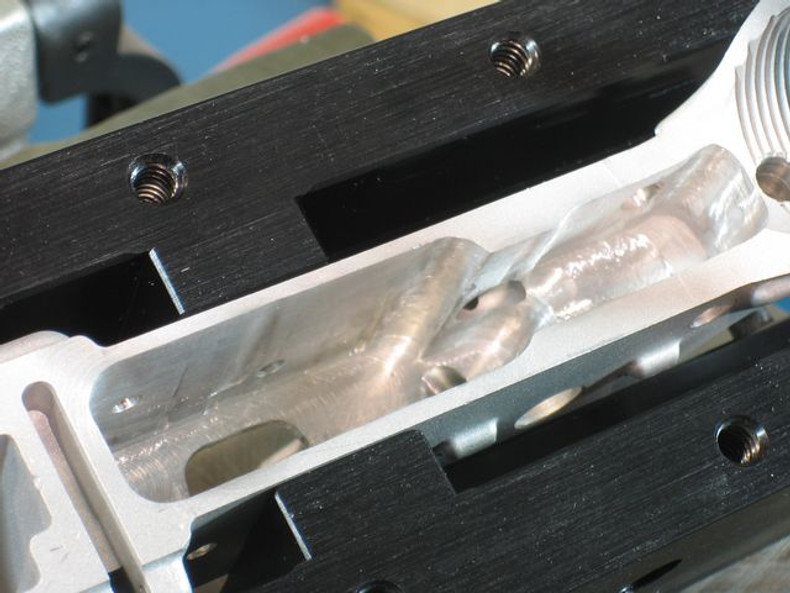
However, its main advantage, compared to household type acetone, is that it perfectly dissolves ABS plastic and does not allow it to precipitate. For me personally, it was a very surprising observation when the same ABS plastic was perfectly dissolved with acetone from an auto shop, and completely precipitated when I tried to use household acetone (I just ran out of good acetone, and I had to use "what is ").
Therefore, if you want your result to be always excellent, then here is the right acetone. It should be labeled "for professional use":
▍ NOTE 7. What about ABS juice?
"ABS juice" is what printers call a mixture of acetone and pieces of ABS plastic dissolved in it. This mixture is smeared on the surface of the desktop before printing and allowed to dry. Thanks to this spread, the model easily sticks to the desktop and does not peel off during the printing process. After printing is completed and the platen has cooled down, the model can be easily separated.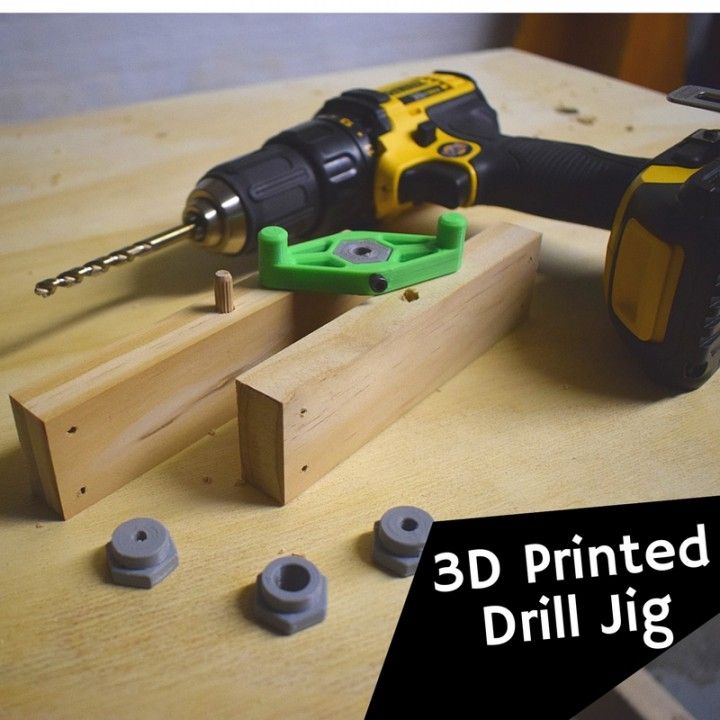
All that needs to be said here is that, after trying different approaches over time, I settled on using flexible metal spatulas, also called “Japanese-style spatulas”:
According to the results of many tests, this method of spreading turned out to be one of the most convenient options, such spatulas can be cleaned very quickly and easily after work. In other words, highly recommended!
▍ NOTE 8. "Yes, nothing sensible can be done on it, I indulged a little and decided to sell it - you can't use it for anything good anyway"
I absolutely disagree with the statement above, which is periodically heard from newcomers to 3D printing. You can even say more: at the moment I can’t even imagine how I used to live without a 3D printer! Since it is he who makes it possible for any do-it-yourselfer to significantly expand their capabilities and make piece products, almost of factory quality! Of course, for this, the appropriate hands must be applied to the 3D printer, but that’s another question… and take on things that I would never have thought to take on before!
For example, among my homemade products, the following can be listed:
- Heated sole for boots, which is a hose integrated into the insole (and filled with household silicone from a household store), through which water flows, heated with a catalytic type hand warmer.
 Water is pumped using a small peristaltic pump. The engine with a metal gearbox, which is used in the creation of this pump, allows you to develop a force of 3 kg, which is even redundant for this homemade product. The engine is powered by Peltier elements mounted next to the catalytic heater. The project is currently in progress.
- Centrifugal water pump mounted on the shaft of an internal combustion engine that drives a high-pressure wearable air compressor with a pressure of 500 bar. The pump pumps coolant through the casing of the high pressure pump, or rather its second stage. Despite the fact that the pump is 3D printed and runs at over 6000 rpm, nothing “fell apart, fell apart, didn’t break.” As you can see in the photo, the pump is installed instead of the “starter”, that is, the armstarter. The compressor scheme as a whole is as follows: 2 engines. Connected by clutch. One is heavy duty. The second is modified and turned into a high pressure compressor:
Yes, before assembling this, I also did not believe that this was possible.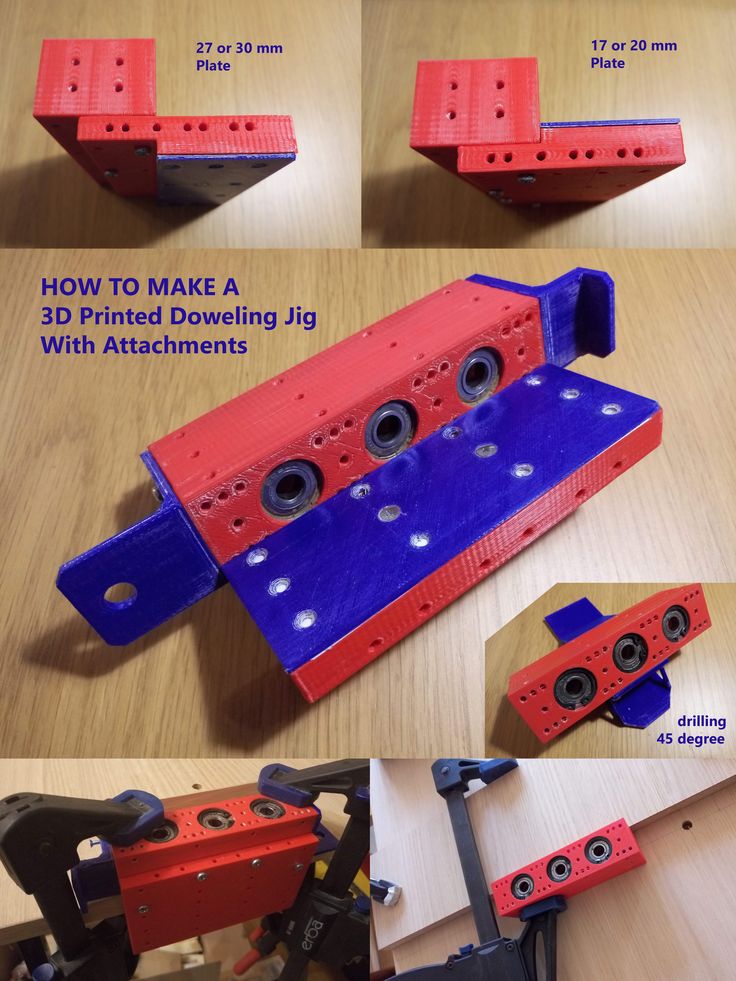 Moreover, even when I collected it, I did not believe my eyes :-))). However, it is a fact…
- I printed a number of Rank-Hilsch test tubes, the essence of which I have described in detail in this article.
- Printed mass of parts, more than 100 pieces, to create 10 web-controlled robots. There was also a detailed article about this here.
Well, and a bunch of all sorts of useful and not very crafts. As you can see from my crafts above, I have a special passion for creating some useful things, a utilitarian direction. That is, so that the printout is useful, and does not belong to the type “yyy breathe, Mikola, what am I doing here” :-), and then put it on the shelf and that's it. Although, engineers are also no strangers to beauty, and this will be my next fact below.
▍ NOTE 9. Proper placement of the model when printing is half the battle
It would seem an obvious fact, but many underestimate it. Here I mean the following: by experience, I accidentally discovered that when printing various statues (in which I, completely unexpectedly for myself, discovered another passion of mine), it is advisable to place the statues at an angle to the printing table.
This allows the layers in the printout to run at an angle of approximately 45-50 degrees to the model. The result of this is that the printed model is almost completely invisible layers and the model looks like it has been post-processed, but at the same time retains a deep matte color, which, to my personal taste, is more like a marble than a glossy result of processing in an acetone bath :
An additional advantage of this method is that the layers going at an angle of 45-50 ° to the model give it additional strength. This is especially true for printing statues, which contain many thin elements that are easily chipped when the statue is accidentally dropped from a table or shelf (learned from bitter experience, this happened to me many times, and ruined some fairly decent prints).
That is, layers running across the model, if the model has a large extension in height, does not allow it to maintain sufficient strength. For better understanding, I tried to illustrate this point in the figures below:
▍ NOTE 10. "Blurring" must be taken into account when printing, especially if the model is made up of separate parts and must be assembled by joining these parts to each other, entering into each other, etc.
I tried to illustrate this point in the figures below. The implication here is that if you're printing a composite model, you need to correct for the amount of bleed on the plastic (I'm not sure what it's called, but at least I tried to convey what I mean). If this is not taken into account, then the model will not fit.
For example, in my case this correction is 0.2 mm per diameter - if I want the model to fit more tightly; if I need a free joint, without excessive density, then 0.3 mm per diameter:
That is, suppose that the blue part has a size of 10x10mm.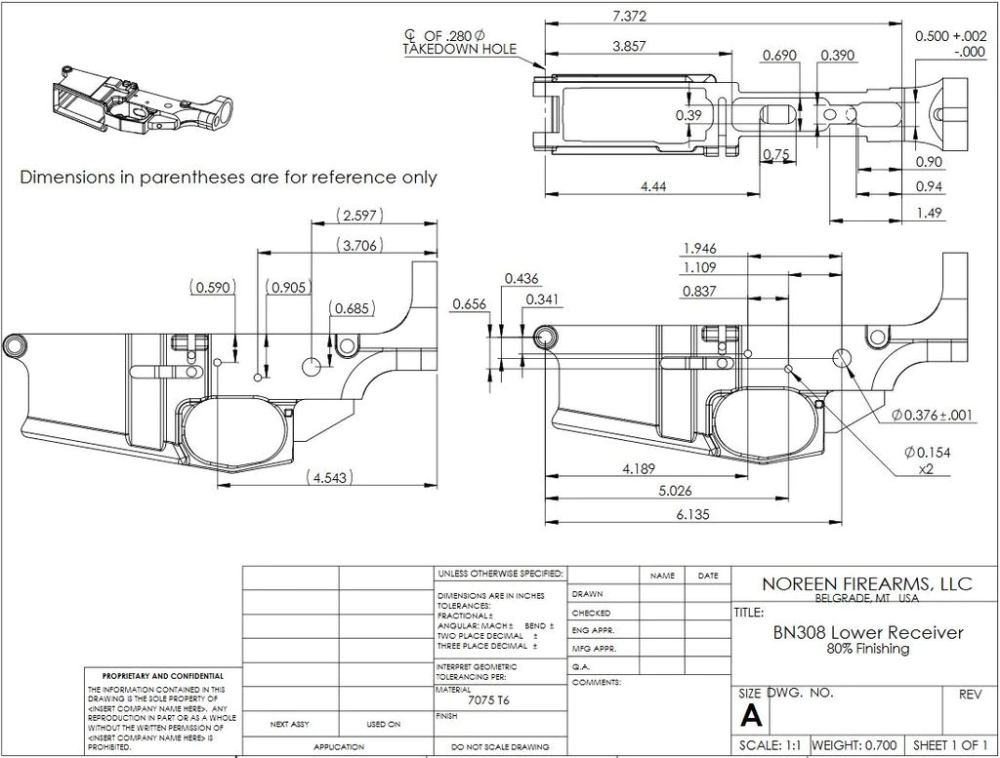 So it must be modeled in a CAD program as 9.8x9.8 mm (if we want it to sit tight) or 9.7x9.7 mm (to sit freely). Well, or expand the hole in the green part, and leave the blue one as it is.
This is often a problem when you download a prefabricated model from the Internet - but it is not going to, even if you crack! But because no amendments have been made…
For your particular case, the amendments may be different.
▍ NOTE 11. What if...
In fact, this note complements note number 8. Using a 3D printer allows you to create metal parts using a printed 3D model. For this, the casting method is used according to the lost wax or burnt model. In our case, we will deal mainly with metal casting on a burnt model.
Briefly, it looks like this: printing a 3D model (using PLA plastic) → pouring it with plaster → burning the PLA plastic, simultaneously with burning the mold, in a conventional stove oven → pouring the resulting shape with molten metal (melted in a conventional microwave) .
Image source: 3dtopo.com
I told about a simple method of melting metals in a home microwave oven here.
There was even a good article about casting on Habré.
▍ NOTE 12. Durability?
Despite the fact that ABS plastic is called exposed to ultraviolet radiation and, accordingly, burns out, losing its strength in the sun, in my practice, even printouts that are constantly exposed to the sun have not lost their strength and color at all, continuing to be successfully used and Currently.
It should also be added here that printouts are constantly exposed not only to the rays of the sun, but also work continuously in damp conditions!
As such printouts, I can give an example of winglets for technical cranes, which I printed out, but, unfortunately, did not photograph this process; as well as fasteners on shoes that I use “both in the snow, and in the heat and in the pouring rain, and in general, always with me”:
▍ NOTE 13.