Toy box 3d printer reviews
Toybox 3D Printer Review: A Fun Way to Create Toys
Skip to main contentWhen you purchase through links on our site, we may earn an affiliate commission. Here’s how it works.
While not the most sophisticated 3D Printer, the Toybox does a good job of printing basic toys quickly and without much hassle.
Editor's Choice
Tom's Guide Verdict
Young makers will get a big kick out of watching this neat, cheap 3D printer produce toys for them.
Pros
- +
Prints simple toys quickly and efficiently
- +
Easy setup and interface
- +
Wide selection of simple toys available to print
Cons
- -
Hot and moving parts make it unsuitable for younger users without supervision
- -
Unheated print bed means prints don't always stick.
Why you can trust Tom's Guide Our expert reviewers spend hours testing and comparing products and services so you can choose the best for you. Find out more about how we test.
Today's best Toybox 3D Printer deals
$299
View
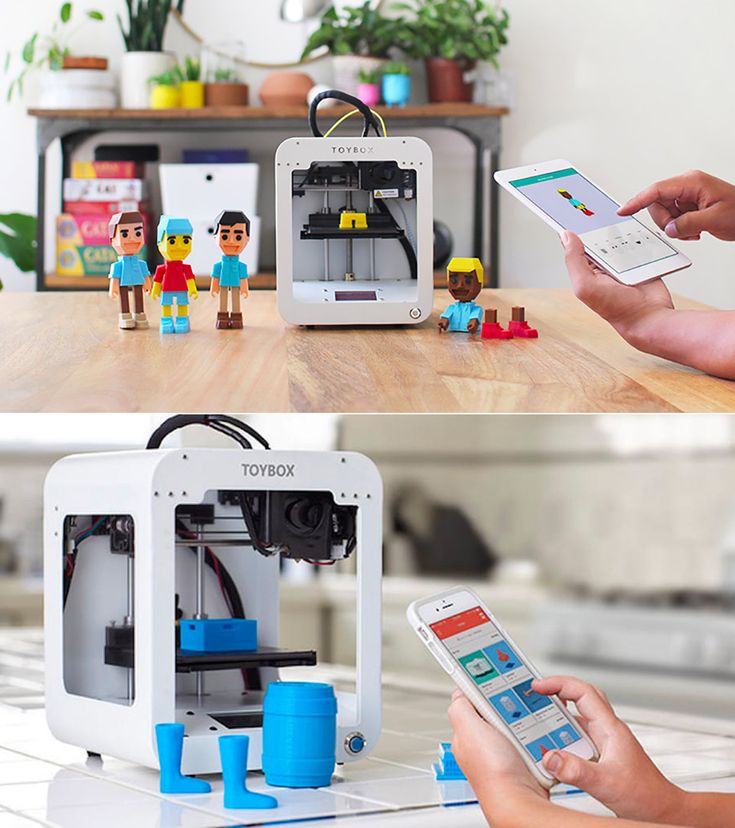
Part of 3D printing's promise is that you'll be able to print useful things at home. And that's precisely what the Toybox from Make.Toys does: it simply and quickly prints toys. You just pick the toy you want from a selection on the company's website, hit the print button and wait. Your completed toy then pops out, ready for play.
The process works, mostly: We were able to print some of the best toys like trains, track, castle parts and walls and small action figures from the simple-to-use web interface, and they were faithfully printed in sturdy, nontoxic PLA in a range of colors. But, like growing up, there are a few teething issues you need to get through first with the Toybox, such as the odd failed print and an interface with a few rough edges.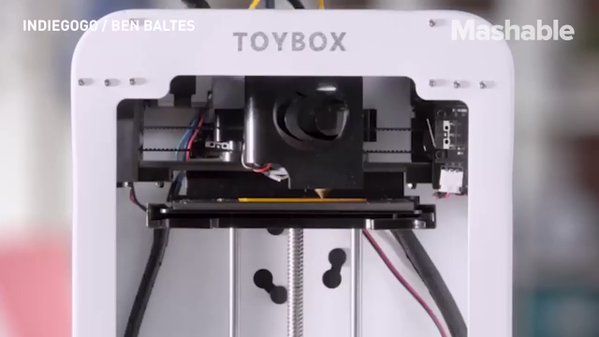
Still, if you look at 3D printing as a hobby for you and your kids can enjoy together, Toybox is one of the best 3D printers you can buy.
- Toybox 3D Printer (White) at Amazon for $299
Toybox 3D printer review: Price and availability
The Toybox 3D printer debuted a few years ago for $399. These days, the starter bundle costs $299, and you buy it directly from Make.Toys .
Not to put too fine a point on it, but the Toybox is cute. It's a small printer, less than 8 inches wide and a little more than 9 inches high. The frame is metal, with open areas revealing the printhead and removable print bed. The print bed is a magnetic sheet that holds tightly onto the base, but which slides off easily when the print is done. Because this base is flexible, you can remove prints by bending it until they lift off.
Spare print beds are cheap: three will cost you $14. The filament comes in 0.5lb (about 220g) reels that cost $10 each and fit onto the back of the printer.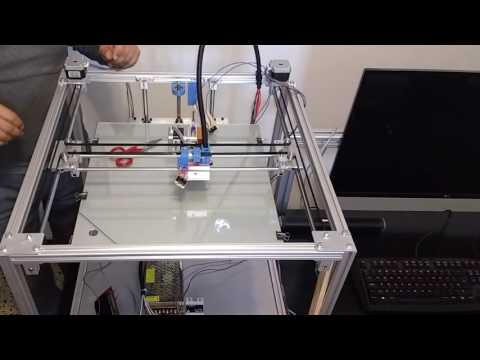 Although these reels are smaller than most and carry only 0.5lb of filament, you can use any 1.75mm PLA filament if you can work out a way to feed it to the printer.
The Toybox can't produce large prints: they are limited to just over 3 inches on each side. Considering the size of the printer, that is no big surprise, and the toys on offer are either small, or print in small parts. The train track, for instance, can be printed in 2-inch lengths that fit together to produce a larger model. The layer height (the thickness of the layers used to create the print) is also fixed at 0.2mm, which is pretty standard for small printers.
Make.Toys plays up the cute angle with the naming of the parts: the power supply is an "electron feeder" and the filament is "printer food." The food metaphor stretches to the colors as well: green filament is called apple, purple is grape, white is coconut and so on. It's a cute idea, but it also has to be accompanied by the warning that the filaments are not edible.
MORE: 10 Things You Never Knew Your 3D Printer Could Produce
Although the Toybox is designed to print toys, there are a few things about the printer that aren't kid-friendly. The hot printhead can be touched fairly easily, and fingers could be crushed by the moving printhead. (Update, 12/17: Make.Toys tells us that the Toybox uses low torque motors, so the motors should stop rather than crush anything.) There is also another curious omission: There is no way to stop the print midway on the device itself. The only way to stop it is to pull the power plug out, or hit the stop button in the web print interface. The latter method takes a couple of seconds to take effect.
Toybox 3D printer review: Controls
The Toybox keeps the controls on the printer itself simple. There's a single small LCD touch screen that shows the status of the printer and offers a simple interface to load filament, set up the printer and configure a few other basic settings. The printer connects to the Make.Toys online service over 2.4GHz Wi-Fi, so you'll need to set up an online account to control your printer.
There's are a great selection of free toys available at Make.Toys, from trains and tracks to castles, miniature figures, seasonal toys like a cute pumpkin and oddities like an owl cookie cutter. The Make.Toys web interface also allows you to create your own toys, either by modifying one of the available models or uploading your own.
To print one of the existing models, you just select the model and hit print. The service does the rest; there is no need to copy files, connect cables or process files. An online editor lets you create personalized figures or tweak an existing model by stretching and scaling it. The service's 3D editor is pretty basic, but I could build a few simple models without problems.
You can load existing 3D models in .stl or .obj formats, but the editing tools are still pretty basic. If there is a problem with the model (such as a hole in the 3d mesh), the system will warn you, but can’t fix it. We also found that more complex models, such as the geometric sculpture and set of planetary gears we typically use in testing, were a bit much for this system to cope with. That's not surprising, as both are complex models designed to confuse a printer, and are not really what the Toybox was intended to work with.
Toybox 3D printer review: Print process
Once you've chosen or created your toy, you hit print in the web interface, and your object starts printing. All of the hard work of configuring the print, creating the print file and sending it to the printer is done by Make.Toys' online service.
We found printing to be mostly successful, but we did have a few failures. The PLA print material does not always stick to the Toybox's unheated print bed, so we had some prints fail at the beginning as parts came loose and stuck to the extruder rather than the printhead. On more than one occasion, I had to pry a goopy lump of melted PLA off the extruder when it became stuck.
Other prints failed partway through the process, ruining the print. A print of the train track bridge, for instance, failed when one of the towers of the bridge came loose and stuck to another part of the print.
But these cases were more the exception than the rule. Most of our test prints on the Toybox worked flawlessly, creating prints that stuck to the print bed and which were easily removed from the print bed afterward.
Toybox 3D printer review: Print speed
Because of the small size of the print area of the Toybox, we were not able to do our full comparative tests that feature a 4-inch-high print. Toybox prints max out at a little more than 3 inches tall. However, we did find that the Toybox is a fairly fast printer — a 3-inch high version of our Thinker print took just 1 hour and 45 minutes to print.
Toybox 3D printer review: Print quality
We were generally impressed with the quality of the prints produced by the Toybox, which were clean and well printed. The thick layers of the print are somewhat obvious (look at the close-up photo of the Thinker statue, for instance), but don't usually detract from the look and playability of the prints.
The Toybox did struggle with some fine details,though: The clips that hold the wheels on the train were not very well formed, so the wheels had a tendency to stick as they went around, or to sometimes fall off.
Toybox 3D printer review: Verdict
The Toybox is a lot of fun, allowing you to print simple, colorful and fun toys on demand that might give a young maker insight into how things are made. And the process is wonderfully simple: no messing with installing apps and configuring slicers. It is just press print, wait and play. But the Toybox is not perfect: We had a certain number of failed prints and other quirks that make it not quite the hassle-free process you might hope for.
So, is this 3D printer going to replace a big box of Legos? No. The prints the Toybox produces are not as high quality as mass-produced plastic blocks, and some users will find the print times frustrating. But for older children who know where not to stick their fingers, and who want to add a creative angle to their play, the Toybox is a great and not overly expensive printer.
Today's best Toybox 3D Printer deals
$299
View
Richard Baguley has been working as a technology writer and journalist since 1993. As well as contributing to Tom's Guide, he writes for Cnet, T3, Wired and many other publications.
Tom's Guide is part of Future US Inc, an international media group and leading digital publisher. Visit our corporate site .
© Future US, Inc. Full 7th Floor, 130 West 42nd Street, New York, NY 10036.
Toybox 3D Printer Review: Reasons Not To Buy
This 4D Filtration resource is user-supported by donations, affiliate links, and/or ads.
The Toybox is a $300 FDM 3D printer that is marketed towards younger kids.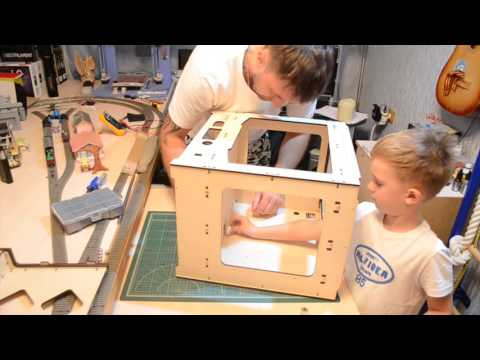 The printer is operated over Wi-fi on an app that kids can use to print drawings or choose from a file catalog. It is simple to operate but has very low functionality given its price point.
We typically recommend printers like the Anycubic Kobra or Artillery Genius that have increased functionality and more quality of life features. When 3D printer shopping for kids, choosing a printer like the two mentioned will allow them to grow into an advanced user and provide the entire family the opportunity to take advantage of its capabilities.
Photo credits: (c) Toybox - toybox.com
The Toybox printer has a small build volume
The Toybox's build volume is 70 x 80 x 90 mm or 504 cubic centimeters. The majority of FDM printers on the market today are at least 220 x 220 x 250 mm or 12,100 cubic centimeters. This makes the Toybox's build volume at least 24 times smaller than most printers.
The Toybox printer does not have a heated bed
While PLA is one of the filaments that does not necessarily require a heated bed, using one can increase the chance of success for a print. The Toybox printer does not have a heated bed, which explains why one of the more common issues is prints detaching from the bed.
The Toybox printing relies on the app and Wi-Fi
The only method of printing for the Toybox printer is over Wi-Fi, while most printers allow for SD cards and USB drives. This makes the functionality of the printer reliable on the stability of the Toybox servers, your internet, and your local Wi-Fi connection.
The Toybox printer is still not safe for young kids
The Toybox printer uses a metal nozzle that is heated to ~200°C (392°F) which is pretty toasty. All FDM 3D printers use elevated temperatures to melt the plastic, and curious kids can be burned if they are intent on touching the nozzle.
PLA is one of the safest filaments you can use with a printer but it is still not without some small risks. Printing with PLA can release nanoplastic particulates and trace amounts of tetrachloroethylene, formaldehyde, and methyl methacrylate gasses. This can be mitigated by having a small air filter next to the printer - the air filter should have a MERV or HEPA particulate filter and activated carbon, ideally granules.
The Toybox printer food is expensive
The Toybox printer food is 0.5 lb spools of PLA that sell for $10-14 each, which is $42-62 per kg. In comparison, Prusament is one of the better PLA filaments on the market and it is only $30 per kg. There are plenty of other quality brands that sell PLA in 1 kg spools for $20.
What are the benefits of the Toybox printer?
- Printing is pretty straightforward for simple prints, when it works.
- There is a flexible magnetic bed for easy print removal.
- There is a vast catalogue to select prints from, but some of the files are paid.
- The Toybox app allows kids to draw an object and print it right away.
What are the alternatives to Toybox?
There are a few $200 FDM printers that are decent and you can find those on our printer table page. You will likely run into Creality printers such as the Ender 3 being suggested to you, and we can not recommend any of those printers at all since they are generally poorly designed and the company has poor quality control. Instead, printers like the Anycubic Kobra and Artillery Genius below have the additional quality of life features, and the companies are known for producing reliable printers.
Toybox
$300
Assembly: Fully
Extruder: Bowden
Auto-Leveling: No
Max Nozzle Temp: ~200°C
Max Bed Temp: N/A
Print Volume: 70mm (L) 80mm (W) 90mm (H)
Amazon
Anycubic Kobra
$300
($10 Off)
Assembly: Partial
Extruder: Direct Drive
Auto-Leveling: Yes
Max Nozzle Temp: 230°C (260°C)
Max Bed Temp: 110°C
Print Volume: 220mm (L) 220mm (W) 250mm (H)
Kobra vs Vyper
AnycubicAmazonAliExpress
Artillery Genius Pro
$350
Assembly: Partial
Extruder: Direct Drive
Auto-Leveling: Yes
Max Nozzle Temp: 230°C (240°C)
Max Bed Temp: 130°C
Print Volume: 220mm (L) 220mm (W) 250mm (H)
Genius vs Prusa Mini
AliExpressBanggood
To compare resin printers, browse resin, and get equipment inspiration visit our Ultimate Resin Guide.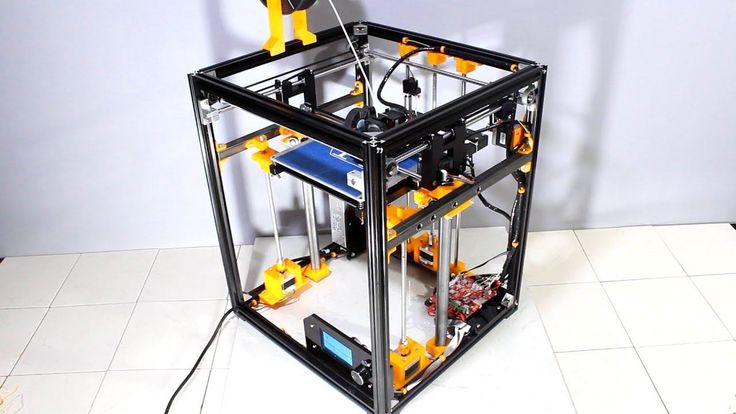
To compare FDM printers via an interactive table, side-by-sides, and in-depth articles.
Application & Safety FAQ answers common questions about resin.
Ventilation Simulations has animations for common DIY venting setups, and Heating Resin Printers during winter provides data for specific heat sources.
Our Resin Print Settings Table has associated images, mixes, and does a resin giveaway.
To browse resin properties and find your ideal strong, durable, flexible, or high-temp resin visit our Resin Properties Table. To find properties of filaments, visit our FDM Properties Table.
Disclaimer: You assume all responsibility and risk for the use of, but not limited to, the resources, advice, and opinions of 4D Filtration or its employees. 4D Filtration or its employees do not assume any liability or create any warranty for the use of any information. 4D Filtration may receive commissions for referral links. Prices are approximated for simplicity and they may fluctuate due to sales or markdowns. Amazon .com should refer you to your local amazon site if you are not in the United States; there is a chance Amazon's link redirect system will take you to a different product.
My first 3D printer out of the box that just prints
Attention! The article contains a lot of text.
Buying a 3D printer for home is quite expensive and few people need a thing, judging by the ads for sale, many have played enough and decided to get rid of their machines.
I've been looking at 3D printing for about a year and now I decided to buy a printer, weighed the pros and cons for months and outweighed the cons, but with a wave of my hand I decided to break into this area and try it live. Moreover, I saw that a new competition from Filamentarno had opened and decided to time the article with the competition 'My 3D printer', nomination '3D printer out of the box'. My main purpose of buying a 3D printer is prototyping devices, housings, secondary small accessories for the kitchen, home and toys, where would they be without them.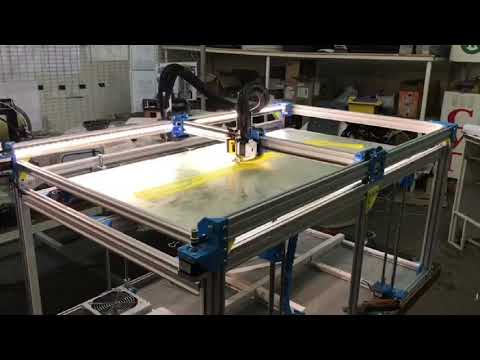
Printer Overview
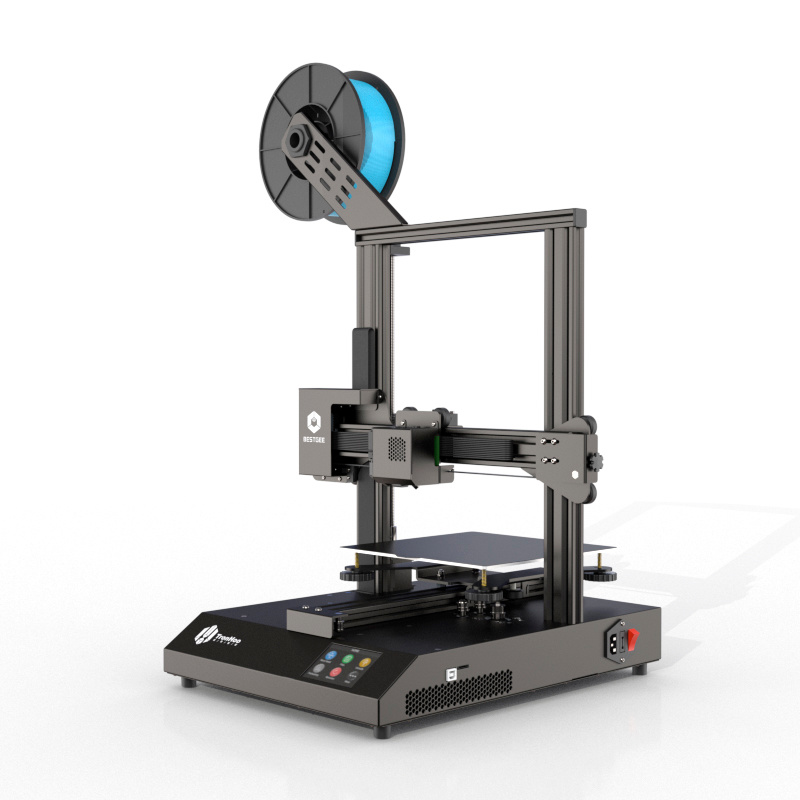
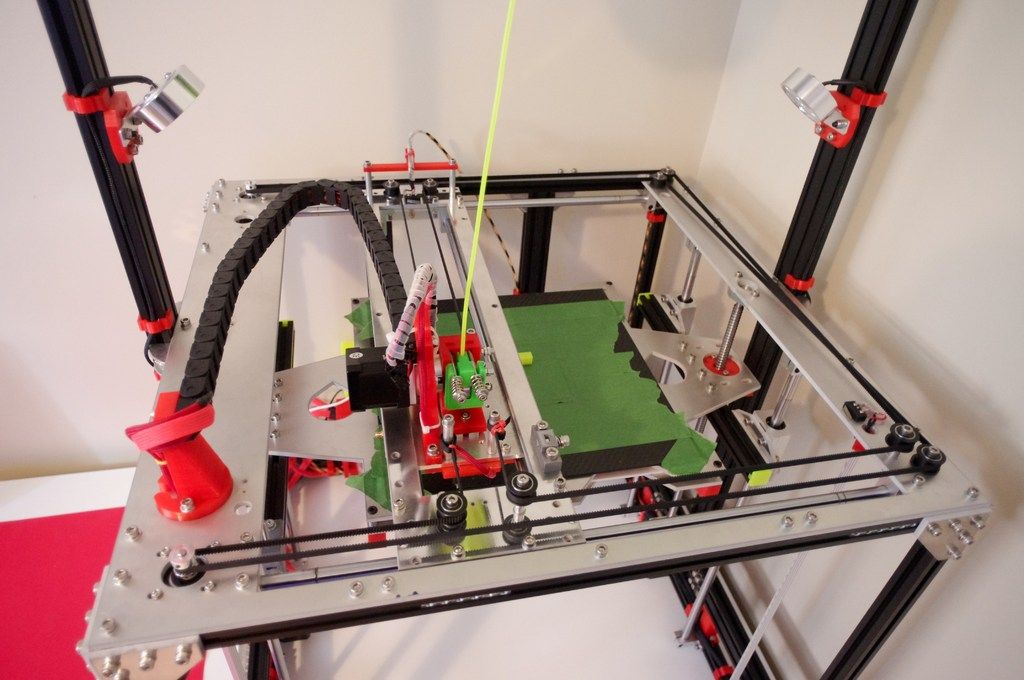
I like deltas and H-bots for their print quality... so I bought a dry table. Yes, it sounds strange, but no, I have a lot of time to assemble, test and fine-tune the device to an acceptable print quality. It was decided to find a Chinese printer out of the box that just prints. Having rummaged through aliexpress, I found this miracle Anycubic i3 Mega with a discount and delivery from a warehouse in Russia. This printer is similar to all its counterparts and does not differ in anything revolutionary. Judging by the description, the printer has:
- Simplified calibration system. We twist each point of the table to a characteristic signal. We pass a couple of times in a circle to make sure the exact calibration of the table. During the first return pass, some points deviate and have to be adjusted again.
- Resume printing.
- Touch screen. Not gorilla glass, but it is also more convenient than the knobs / buttons.
- Sturdy construction.

- Half an hour for assembly and first print. And yes it is!
The printer came from Boxberry transport company in 5 days from Moscow to Maykop, the printer itself cost 15 tr. + delivery 4 tr. The box and its contents are in perfect order, packed well in a pile of foam:
The printer's equipment is sufficient, although only a 10 meter PLA probe is made of plastic, below is a picture with a package from the documentation.
Assembly involves screwing in 8 screws and cutting off a pair of wire clamps and the printer is ready for calibration. There were no instructions in the box, and only after assembly I discovered that the assembly documentation and the Cura slicer were on the sealed SD card. Printer assembly:
The video from the manufacturer clearly shows how to assemble it and start printing.
Specifications are listed on this page, I will not repeat, there is nothing supernatural. The only thing I liked was the heated aluminum table (as for me it is crooked in places) and a rough substrate is glued to which everything sticks well and does not lag behind when printing, but with effort lags behind the table after cooling. I have already ordered additional substrates, but nothing has come off this one either, although the printer has been working for almost a month for 10-12 hours a day.
A little about calibration. Working with an inductive sensor is simple, we turn it to a squeak and it seems like everything is calibrated, but! This does not work for all plastics. For example, for PLA, after calibration by the sensor, it sticks well to the table, but if you put SBS plastic, the plastic does not stick at all with the same calibration. Over time, calibration by the sensor does not give adequate results at all, then a sheet of paper or a hidden item in the menu comes to the rescue, which allows you to set the Z offset for the sensor relative to the table, adjusting this value can temporarily solve the calibration problem.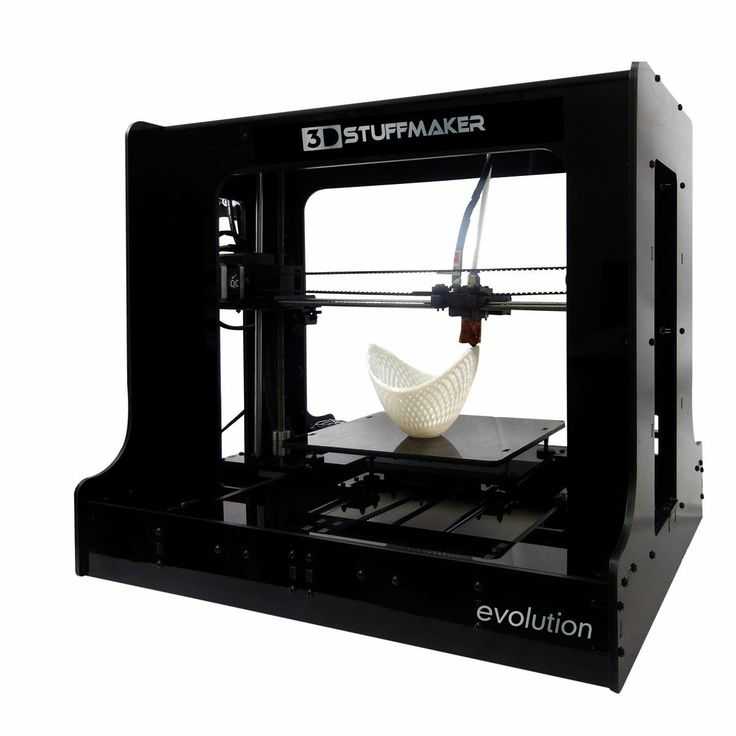 You can call this miracle screen by holding the I (info) button for a long time. I managed to calibrate the position through this screen a couple of times, but then I scored and began to calibrate by eye or by a piece of paper, there were no loose parts on the native surface of the printer even when calibrating by eye.
A little about the support of the printer by the Chinese. There is no support, for the sake of interest I tried to call them, write to different places, but everything is as always, silence.
Problems resulting from the operation
The printer was 99% complete and I hoped that there would be no problems at least for the first month. But they appeared after two weeks of active operation.
What problems does my model have:
- One of the curved screws, the photo shows the problem, the seller sent a replacement.
- At first, the fans are very buzzing, but over time they warm up and everything is fine.
- One leg of the base is slightly shorter, the whole printer wobbles unless you change the leg or put some paper on it.
 I solved this problem with polymorphus, grew a leg.
 - Closed firmware, but because inside TriGorilla, RAMPS compatible, can be flashed in the future.
- Over time, the structure loosened imperceptibly and a rattle appeared in some sections of the movement along the guides. I decided simply. I unscrewed what holds the guides and empirically determined what needs to be tightened first of all so that the creak disappears (when moving along the guides, I pressed on different sides to find out at what pressure vector the creak disappears).
Chatted with the owner group of this printer on thingiverse. I found out that some have a problem with calibrating the table by the sensor, one of them had a motor flying along the Z axis. Squeaks are also heard along the guides, as a rule, WD-40 solved this issue. So, when you bribe on Ali, do not rush to click on the receipt of the goods, it is better to extend the protection of the buyer and test the printer for a month, in case of a breakdown, you can demand from the seller a note of the defective part.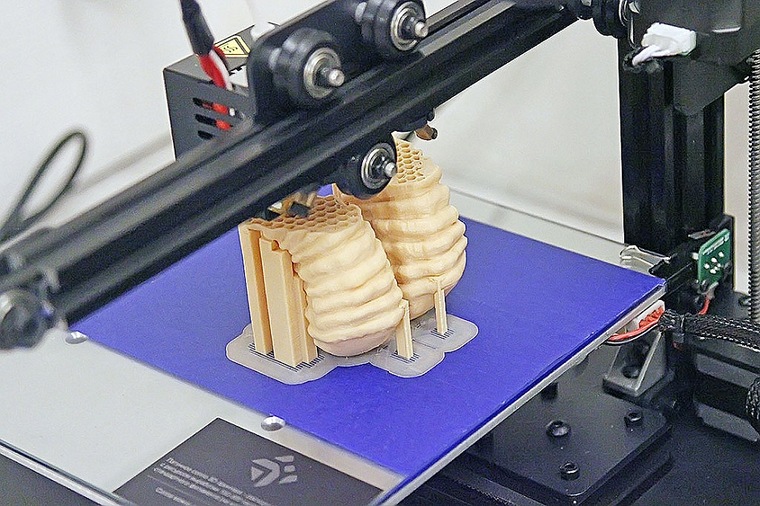
Test print
I printed a test cube on PLA plastic that came with the kit, nozzle 0.4, layer thickness 0.15, main speed 60, mileage 120. The picture shows that there are small jambs on the edges of the letters, but for this speed and mechanics the quality seems quite good to me normal - I'm not picky.
First print. Refinement of the printer
Opening thingiverse and typing in the name of the printer, a lotion was found for the printer that will eliminate possible flaws, namely the problem of pulling the cable out of the print head connector. Print parameters: layer thickness 0.1, main speed 40, run 80, print time 40 minutes.
The quality is excellent compared to the cube, I am completely satisfied.
In addition, I printed out a part for the feeder, which should solve the problem of winding soft plastic on the shaft. Of course, softness is relative, for example, the same TPU will not wind, but it will not print either, you need a direct for printing with soft, rubber-like plastics.
First printing of a case for my craft
Prototyping and building my own electronic devices has always been a hobby of mine. Sometimes it turns out to create something convenient and useful that you want to share with it. And so it happened with my last idea - a wireless programmable keyboard for a computer, the first working version looks like this:
For each key through the software on the computer, you can set an arbitrary command, key combination or text (acts as a password storage). This version of the keyboard has been working for more than half a year and almost everything suits me, except for the body and keys. But if the keys can be put on Cherry MX, then you will have to tinker with the case.
I designed the first version of the case in Fusion 360 and it was supposed to look something like this:
Since there is no money for revision, but I can put up with the current device, I decided to go to Indiegogo with all these materials, made a lot of mistakes , which is made by beginners, raised less than $100 and decided to stop the company, made a refund and began to think about the fact that you should first complete the device completely and try again on crowdfunding but with a more accurate price and end goal. I understand that the audience for such a device is one and a half people - very specific, but since this is still a hobby, you can try again.
Returning to Fusion 360 finished the body to the printed state and made the first print, speed 60, layer 0.25, plastic Filamentarno M-Soft metallic (good color and pleasant to the touch):
it is clear that the case should be thoroughly reworked, as well as the mechanical keys themselves, it is possible to move towards membrane or shortened Chinese cherry, to abandon the 18650 lit-ion in the direction of flat brothers. This is not the end of the story, I will continue to work on the keyboard and keys, I hope the plastic from Filamentarno will help me, it brightens up the overall picture well. With the keycaps I will also test translucent on Filamentarno plastic and will share the results with you later, as well as the final result of this prototype with a redesigned electronics.
Printing a phone case
My wife likes to cross-stitch on AIDA 14 plastic canvas in her free time.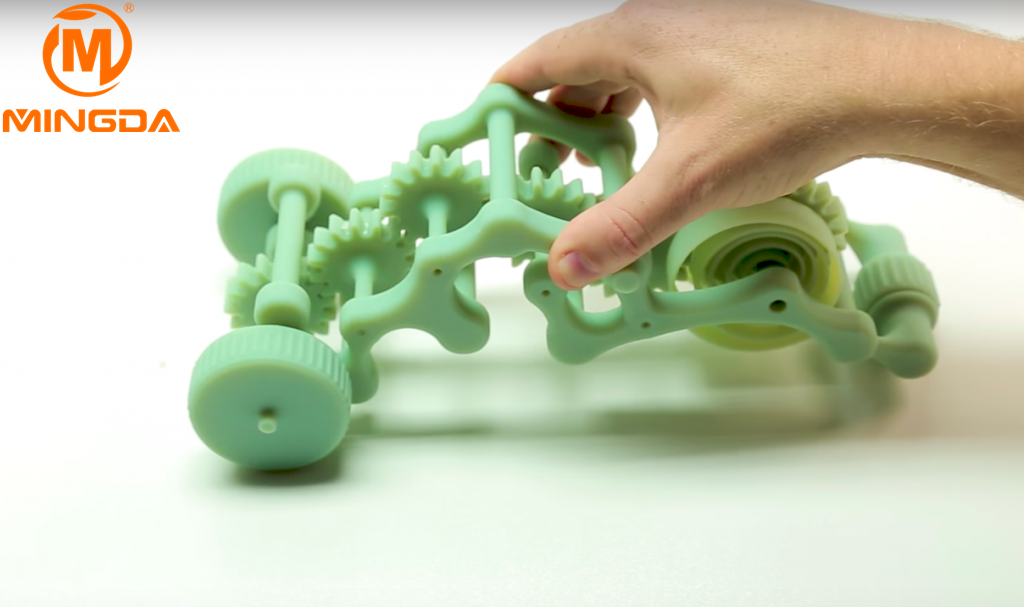 When she saw an iPhone case on which the picture was embroidered, she really liked it, but since we are BlackBerry owners, there are no such cases existed in nature. This was safely forgotten before buying a 3D printer, and now it's time to try it out.
The simplest in my opinion body in Fusion 360 was designed, holes with a diameter of 1 mm were added with a distance of 1 mm. The thickness of the main surface is 1.2 mm. The model looks like this:
At the time of printing I only had SBS-PRO and M-Soft metallic from Filamentarno. Printing was carried out on all possible sides, lying down - no holes were printed, on a long or short side there was a slight deformation due to thin walls, and also terrible ears and lousy quality support were obtained. In the photo you can see a small but last part of the tests that were printed on the side:
And here is how many slicers prepared the model in the prone position:
square and it was a success. Square holes were superbly sealed, leaked a little, were pressed out, squeezed out by a round nozzle, and as a result a round hole was obtained. Having changed the model and printed it lying down, it became clear that you can already try to embroider on this. Of course, the ears are not perfect, but it can be improved, this is the least of the problems. As a result, the optimal location of the cover came out along the Y axis. Printing was carried out at a speed of 40, mileage 100, nozzle temperature 240, table 80 M-Soft plastic. The beginning of embroidery is below in the picture:
Later I tried u3print Super Carbon Nylon. It printed well, but I don’t know how carbon feels to the touch, this plastic is more like paper of medium softness - cardboard. In the photo, after two days of active crushing, it did not burst, but was slightly deformed, it can be seen from the far corner, although this is not a problem when pulling the case, everything falls into place.
Total
The printer has been working for almost a month every day without stopping, the queue of jobs for it is a month ahead, there are already three articles on the development on this printer on the pencil. I am definitely happy with this purchase, after the end of the print queue, I will upgrade the extruder for printing with flexible plastics and also change the firmware.
Plastic printing allows you to turn ideas and 3D models into real objects that you can touch and that's cool! I remember how in the year 2006, in the Murzilka aka 'Hacker' magazine, there were notes on 3D printing, it described the creation of footwear, clothing, food products from special cylinders, the device is used for synthesis at the atomic level and the output is a finished product, then, as now it is seems fantastic, but having a printer that already prints plastic (and in some cases chocolate) in every home, you don’t know what might happen in 10 years.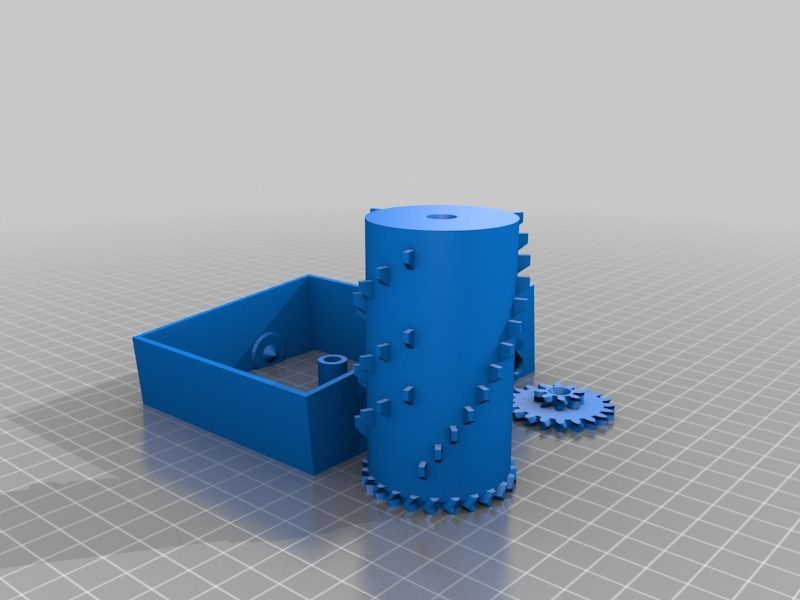
Afterword
Plastic manufacturers, be kind to beginners. When you buy a printer, you don’t mind buying a bunch of plastic spools :) but it’s not clear what you will like in terms of print quality, sensations.
I turned to manufacturers that I once heard about:
- Filamentarno - they sent the requested samples without any problems, after which the coils were bought
- Bestfilament - they also sent samples without problems, after testing all the probes I will order composites from them and PLA.
- U3Print - despite the purchase, the request to send samples was not satisfied.
- REC - paid samples. If you buy at least one coil, they will put it for free.
Thank you for reading to the end.
Selpic Star A / 3D printers, machines and accessories / iXBT Live
Today we are going to review a 3D printer from Selpic.
A US based company specializing in the manufacture of various printing devices. At the moment, he has two miniature handheld printers and cartridges for them in his arsenal, as well as the printer that we will talk about today (they are currently running a Kickstarter campaign and pre-order is available for $ 99).
There is a website where you can view and purchase all products. Free international shipping (DHL) is available.
This printer is positioned as the most optimal for beginners due to ease of assembly and installation, as well as low cost. But it's also open source, allowing advanced users to make modifications.
Printer promo video:
The package with the printer is light and small, its weight is just over 3 kilograms.
Packing:
Contents:
Among other things, the kit includes one set of 10 meters of PLA plastic, as well as an 8GB flash drive and a Netac card reader.
To my surprise, there are no instructions in the package, although the main audience of printers is beginners.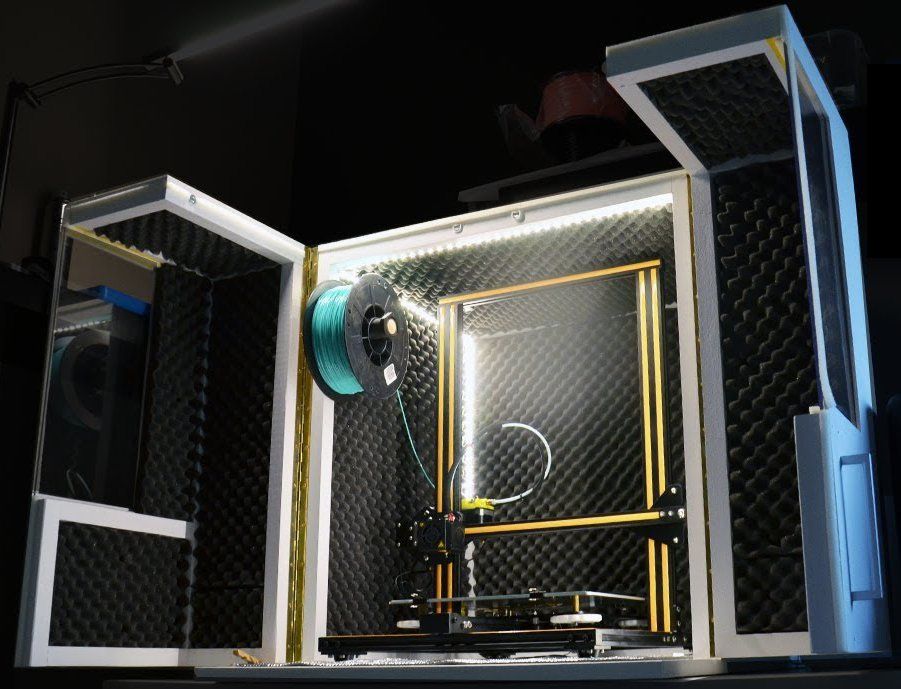 As it turned out later, the instruction was in electronic form on a USB flash drive, but there is not a word about how to connect and work with the laser head.
Also on the flash drive are drivers, G-codes for two models for printing, and an installation file for the Cura application for macOS and Windows.
The length of the cable for connecting the printer to the computer is 51 cm, as for me, this is a significant drawback, especially if a person uses a stationary PC and not a laptop.
The length of the power cable is sufficient and is 149cm.
Features:
I would also mention the presence of a heating platform, a 2.4-inch touch screen and a laser engraving head (1.6 W). It should be noted that these accessories are not included in the basic package and are purchased separately.
It would be nice if the manufacturer provided the ability to choose the power of the laser engraving head. However, it can also be purchased separately on Aliexpress.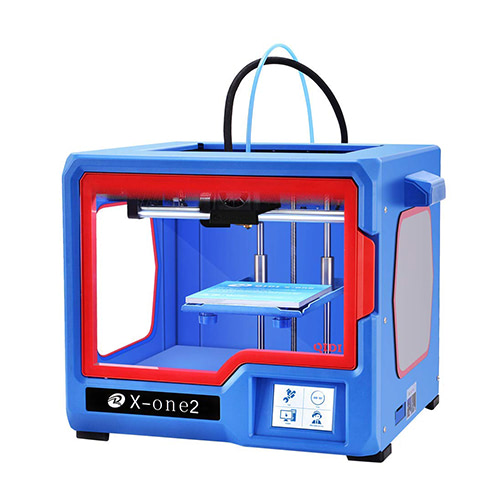
Comparison with analogues:
Printer assembly steps:
Photos in the assembled state:
Minor manufacturing flaws:
without removing anything).
Bottom view:
The disadvantages include the lack of anti-slip inserts. Not that it slides much on smooth surfaces, but they wouldn't get in the way anyway.
The plastic holder can hold up to 250 grams. The weight of the plastic that comes with the kit is 30 grams. It is worth noting that the holder clings to the printer simply on hooks, that is, without a strong and reliable fixation, and at the slightest movement it walks back and forth and strives to fly off.
After turning on the printer, it must be calibrated, the distance between the nozzle and the desktop in each corner should be minimal (adjustment is done using the wheels in each corner).
Next, load the printing material: you need to click on the “+” and the nozzle will start heating (about 1 minute), after which we push the plastic into the hole until it comes out of the extruder (then click on “+” again to complete the process).
All processes are accompanied by light indicators of control buttons and are described in detail in the instructions.
Printing is set up and started in the Cura application.
Application setting:
Print setting:
Nozzle standby temperature is about 23 degrees. Heating up to 180° occurs in an average of 2.5 minutes.
After the first start of printing, it started to do something like this:
As I understand it, this was due to too small a distance between the nozzle and the working surface. In order for everything to be normal, you need to accurately guess with the optimal distance: so that it is not too tight, but also so that the A4 sheet does not crawl freely.
Noise during operation averages 47dB. The biggest noise comes from the extruder fan.
Printing rocket (height 4 cm) took 1 hour 25 minutes.
The problem was that the bottom of the figurine stuck too strongly to the work surface, so much so that the rocket broke away from it and flew away, and I had to tear it off, melting the plastic with fire and tearing it off with a knife.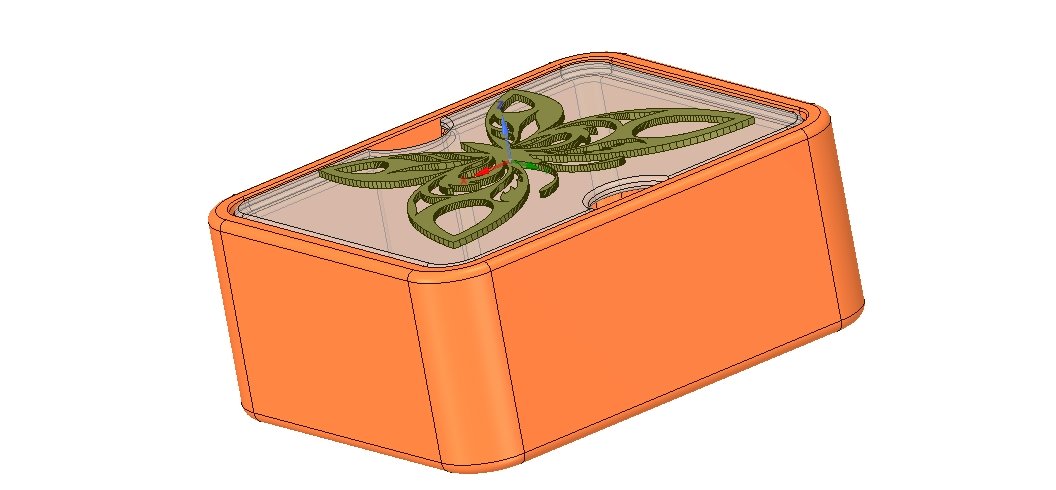
The second figurine (height 5 cm) was printed from a memory card (the file must be in the root of the card), it took 3 hours and 35 minutes to print it.
As for the print quality, there are no questions about it, especially the cost of the printer and the fact that it can be used almost immediately from the box.
Print timelapse:
Unfortunately, due to the lack of instructions on how to connect and work with laser engraving, I can’t say anything about its operation. If anyone can tell me how to connect it and make it work - I will be grateful!
Results
Summing up, we can say that the idea of a ready-made printer for beginners with advanced features is definitely interesting and promising, but the implementation requires some improvements.
Among the advantages, I would like to note the following: ease of installation and operation, light weight and compact size, large print area and quiet operation, as well as the possibility of various customizations.