3D print retraction test
How to Get the Best Retraction Length & Speed Settings – 3D Printerly
There are many settings that we can adjust and improve on our 3D printers, one of them being retraction settings. It took me a while to figure out how important they were, and once I did, my 3D printing experience changed for the better.
Many people don’t realize how important retraction can be until they are troubleshooting poor print quality in certain models.
Retraction settings are related to the speed and length at which your filament is pulled back within your extrusion path, so the melted filament at the nozzle doesn’t leak out while moving. Retraction can improve overall print quality and stop print imperfections such as blobs and zits.
What is Retraction in 3D Printing?
When you hear that rotating noise backwards and see filament actually getting pulled back, that is retraction occurring. It is a setting which you’ll find in your slicer software, but it isn’t always enabled.
After you have understood the basics of printing speed, temperature settings, layer heights and widths, then you start to get into the more nuance settings like retraction.
We can be specific on telling our 3D printer how exactly to retract, whether that be the length of retraction, or the speed at which the filament is retracted.
Accurate retraction length and distance can reduce the chances of different problems mainly the stringing and oozing.
Now that you have a basic understanding of retraction in 3D printing, let’s explain the basic retraction terms, retraction length and retraction distance.
1.
 Retraction Length
Retraction distance or retraction length specifies the length of the filament that will be extruded from the nozzle. The retraction distance should be adjusted accurately because both too low and too high retraction distance can cause printing problems.
The distance will tell the nozzle to pull back the amount of filament according to the specified length.
According to the experts, the retraction distance should be between the 2mm to 7mm distance for Bowden extruders and should not be more than the length of the printing nozzle. The default retraction distance on Cura is 5mm.
For Direct Drive extruders, retraction distance is on the lower end, of around 1mm to 3mm.
While adjusting the retraction distance, increase or decrease it in small increments to get the best suitable length because it varies depending on the type of filament you are using.
2. Retraction Speed
Retraction speed is the rate at which the filament will retract from the nozzle while printing. Just like the retraction distance, setting the most suitable retraction speed is necessary to get better results.
Retraction speed should not be too low because the filament will begin to ooze from the nozzle before it reaches the exact point.
It should not be too fast because the extruder motor will reach the next location quickly and the filament will extrude from the nozzle after a short delay. A distance too long can cause a decline in print quality because of that delay.
It can also result in the filament getting ground and chewed up when the speed generates too much biting pressure and rotation.
Most of the time the retraction speed works perfectly at its default range but you may need to adjust it while switching from one filament material to another.
How to Get the Best Retraction Length & Speed Settings?
To get the best retraction settings you can adopt one of the different ways.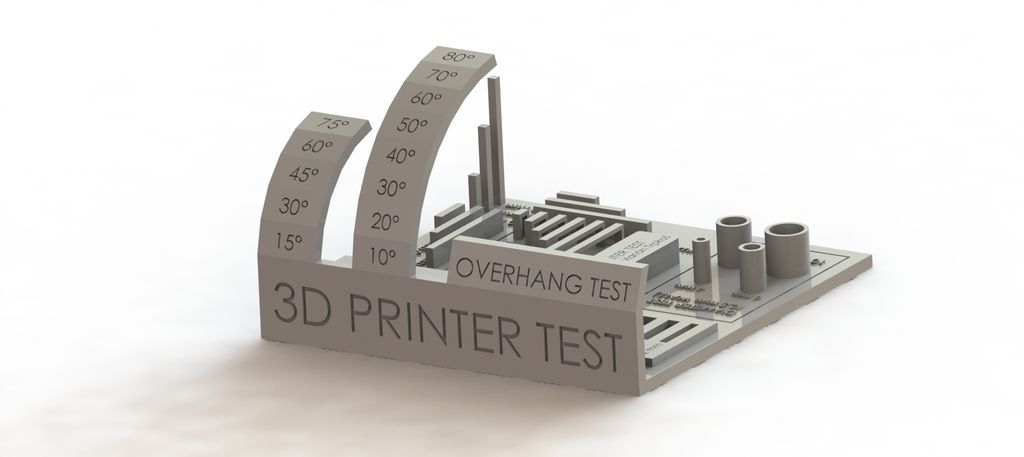 Implementing these processes will surely help you to get the best retraction settings and print the object just as you expected.
Notice that the retraction settings will be different depending on the fact that whether you have a Bowden setup or a Direct Drive setup.
Trial and Error
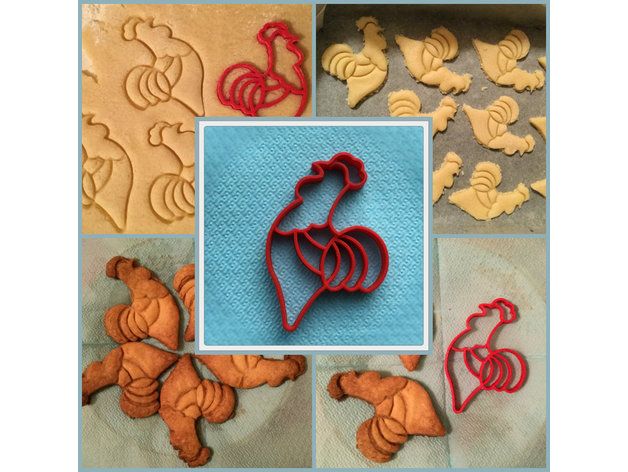
Trial and error is one of the best techniques to get the best retraction settings. You can print a basic retraction test from Thingiverse which doesn’t take very long.
Based on the results, you can then start to adjust your retraction speed and retraction distance little by little to see if you get improvements.
Changes Between Materials
The retraction settings are usually different for every filament material being used. You have to calibrate the retraction settings accordingly every time you use a new filament material such as PLA, ABS, etc.
Cura has actually released a new method to dial in your retraction settings directly within the software.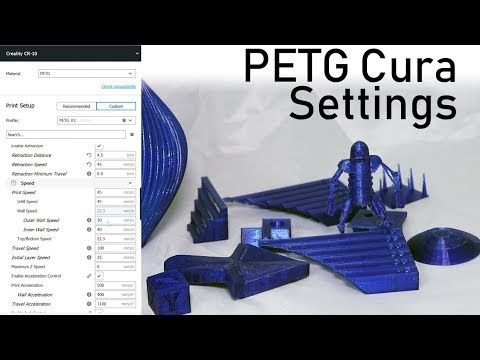
The video below by CHEP explains it really well so check it out. There are specific objects that you can put on your build plate within Cura, along with a custom script that automatically changes retraction settings during the print so you can compare within the same model.
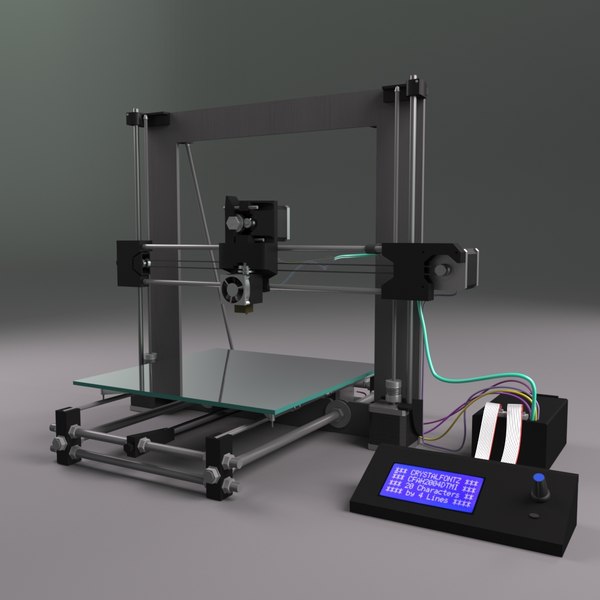
Cura Retraction Settings on Ender 3
The Cura retraction settings on Ender 3 printers usually include different settings and the ideal and expert choice for these settings will be as follows:
- Retraction Enabling: First, go to the ‘Travel’ settings and check the ‘Enable Retraction’ box to enable it
- Retraction Speed: It is recommended to test a print at the default 45mm/s and if you notice any issues in the filament, try decreasing the speed by 10mm and stop when you notice improvements.

- Retraction Distance: On Ender 3, the retraction distance should be within 2mm to 7mm. Begin at 5mm and then adjust it until the nozzle stops oozing.
The best thing you can do on your Ender 3 is implement a retraction tower to calibrate the best retraction settings. How this works is you can set your Ender 3 to use increments of each setting per ‘tower’ or block to see which gives the best quality.
So, you would do a retraction tower to start with a retraction distance of 2mm, to move up in 1mm increments to 3mm, 4mm, 5mm, up to 6mm and see which retraction setting gives the best results.
What 3D Printing Problems Do Retraction Settings Fix?
As mentioned above, stringing or oozing is the major and most common problem that occurs just because of wrong retraction settings.
It is essential that the retraction settings should be calibrated accurately to get a well-crafted, high-quality print.
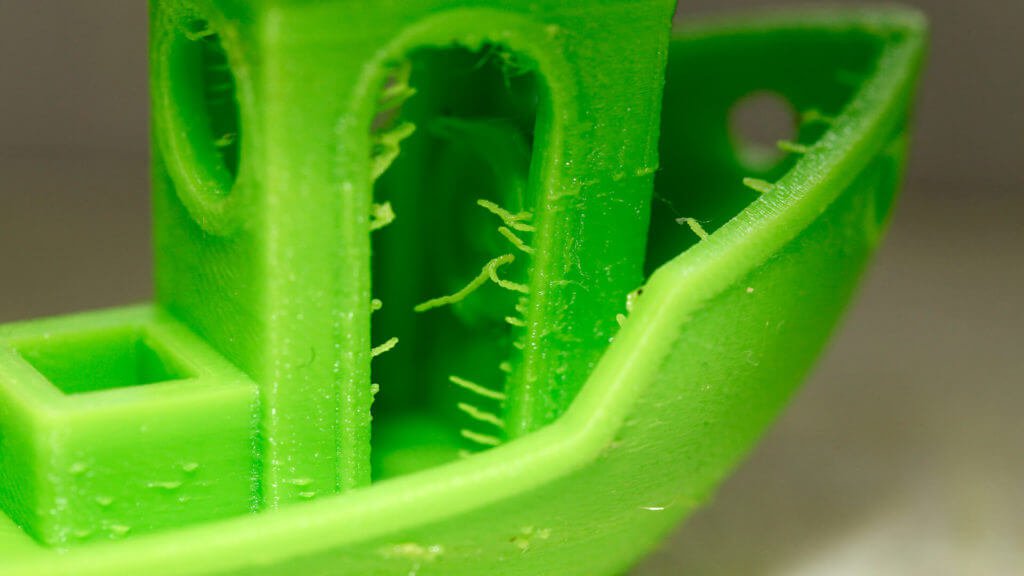
Stringing is referred to as a problem in which the print has some strands or threads of filament between two printing points. These strands occur in an open space and can mess up the beauty and charm of your 3D prints.
When the retraction speed or retraction distance isn’t calibrated, the filament can drop or ooze from the nozzle, and this oozing results in stringing.
Most of the 3D printer experts and manufacturers suggest adjusting the retraction settings to avoid the oozing and stringing problems effectively. Calibrate retraction settings according to the filament you are using and the object you are printing.
How to Avoid Stringing in Flexible Filament (TPU, TPE)
Flexible filaments such as TPU or TPE are used for 3D printing because of their amazing non-slip and impact resistance properties. Keep this fact in mind that flexible filaments are more prone to oozing and stringing but the problem can be stopped by taking care of printing settings.
- The first and most important thing is to enable retraction settings every time you are using flexible filament.

- Set up a perfect temperature because high temperatures can cause the problem as the filament will melt quickly and may start dropping.
- Flexible filaments are soft, do a test print by adjusting retraction speed and retraction distance because a bit of difference can cause stringing.
- Adjust the cooling fan according to the printing speed.
- Focus on the flow rate of the filament from the nozzle, usually flexible filaments work well at 100% flow rate.
How to Fix Too Much Retraction in 3D Prints
It’s definitely possible to have retraction settings that are too high, leading to printing issues. One issue would be a high retraction distance, which would cause filament to retract too far back, leading to filament being closer to the hotend.
Another issue would be a high retraction speed which might reduce the grip and not actually retract properly.
To fix retractions that are too high, turn your retraction distance and speed down to a lower value to see if it fixes retraction issues. You can find some standard retraction settings for your extruder and 3D printer in places like user forums.
Stringing or Oozing | Simplify3D Software
Stringing or Oozing
Stringing (otherwise known as oozing, whiskers, or “hairy” prints) occurs when small strings of plastic are left behind on a 3D printed model. This is typically due to plastic oozing out of the nozzle while the extruder is moving to a new location. Thankfully, there are several settings within Simplify3D that can help with this issue. The most common setting that is used to combat excessive stringing is something that is known as retraction. If retraction is enabled, when the extruder is done printing one section of your model, the filament will be pulled backwards into the nozzle to act as a countermeasure against oozing. When it is time to begin printing again, the filament will be pushed back into the nozzle so that plastic once again begins extruding from the tip. To ensure retraction is enabled, click “Edit Process Settings” and click on the Extruder tab. Ensure that the retraction option is enabled for each of your extruders. In the sections below, we will discuss the important retraction settings as well as several other settings that can be used to combat stringing, such as the extruder temperature settings.
Common Solutions
Retraction distance
The most important retraction setting is the retraction distance. This determines how much plastic is pulled out of the nozzle. In general, the more plastic that is retracted from the nozzle, the less likely the nozzle is to ooze while moving. Most direct-drive extruders only require a retraction distance of 0.5-2.0mm, while some Bowden extruders may require a retraction distance as high as 15mm due to the longer distance between the extruder drive gear and the heated nozzle. If you encounter stringing with your prints, try increasing the retraction distance by 1mm and test again to see if the performance improves.
Retraction speed
The next retraction setting that you should check is the retraction speed. This determines how fast the filament is retracted from the nozzle. If you retract too slowly, the plastic will slowly ooze down through the nozzle and may start leaking before the extruder is done moving to its new destination. If you retract too quickly, the filament may separate from the hot plastic inside the nozzle, or the quick movement of the drive gear may even grind away pieces of your filament. There is usually a sweet spot somewhere between 1200-6000 mm/min (20-100 mm/s) where retraction performs best. Thankfully, Simplify3D has already provided many pre-configured profiles that can give you a starting point for what retraction speed works best, but the ideal value can vary depending on the material that you are using, so you may want to experiment to see if different speeds decrease the amount of stringing that you see.
Temperature is too high
Once you have checked your retraction settings, the next most common cause for excessive stringing is the extruder temperature. If the temperature is too high, the plastic inside the nozzle will become less viscous and will leak out of the nozzle much more easily. However, if the temperature is too low, the plastic will still be somewhat solid and will have difficulty extruding from the nozzle. If you feel you have the correct retraction settings, but you are still encountering these issues, try decreasing your extruder temperature by 5-10 degrees. This can have a significant impact on the final print quality. You can adjust these settings by clicking “Edit Process Settings” and selecting the Temperature tab. Select your extruder from the list on the left, and then double-click on the temperature setpoint you wish to edit.
Long movements over open spaces
As we discussed above, stringing occurs when the extruder is moving between two different locations, and during that move, plastic starts to ooze out of the nozzle. The length of this movement can have a large impact on how much oozing takes place. Short moves may be quick enough that the plastic does not have time to ooze out of the nozzle. However, long movements are much more likely to create strings. Thankfully, Simplify3D includes an extremely useful feature that can help minimize the length of these movements. The software is smart enough that it can automatically adjust the travel path to make sure that nozzle has a very short distance to travel over an open space. In fact, in many cases, the software may be able to find a travel path that avoids crossing an open space all together! This means that there is no possibility to create a string, because the nozzle will always be on top of the solid plastic and will never travel outside the part. To use this feature, click on the Advanced tab and enable the “Avoid crossing outline for travel movement” option.
Movement Speed
Finally, you may also find that increasing the movement speed of your machine can also reduce the amount of time that the extruder can ooze when moving between parts.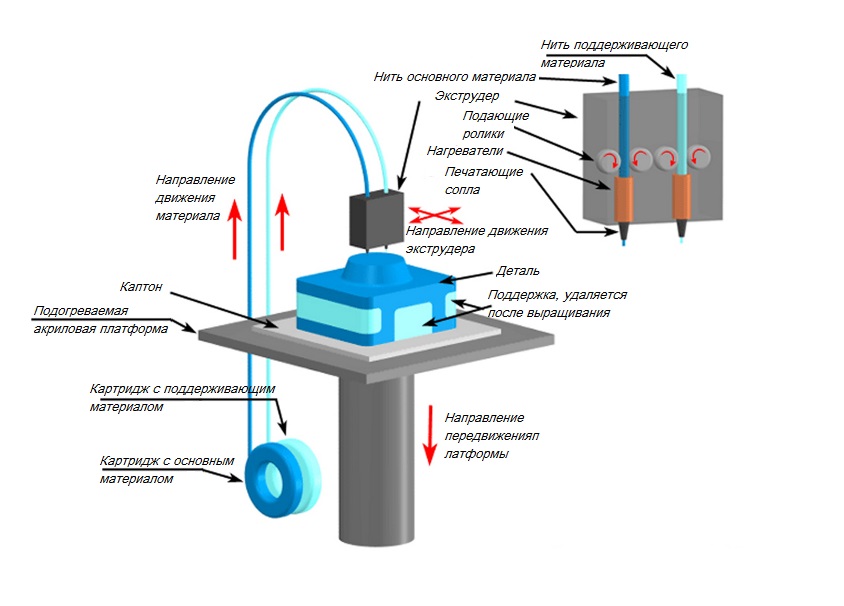 You can verify what movement speeds your machine is using by clicking on the Speeds tab of your process settings. The X/Y Axis Movement Speed represents the side-to-side travel speed, and is frequently directly related to the amount of time your extruder spends moving over open air. If your machine can handle moving at higher speeds, you may find that increasing this settings can also reduce stringing between parts.
Related Topics
10 models for 3D printer calibration. Set up your printer
Before you start printing on a 3D printer, you need to test it. For this, special models are most often used to diagnose and calibrate the device. Next, we will list the top 10 models for calibration, in our opinion.
3D Benchy
Among all 3D printing tests, the flagship is 3D Benchy. This model is a boat that can test everything from protrusions to extrusion. If you want to test your 3D printer, then the benches will help you determine the optimal settings for the ideal result.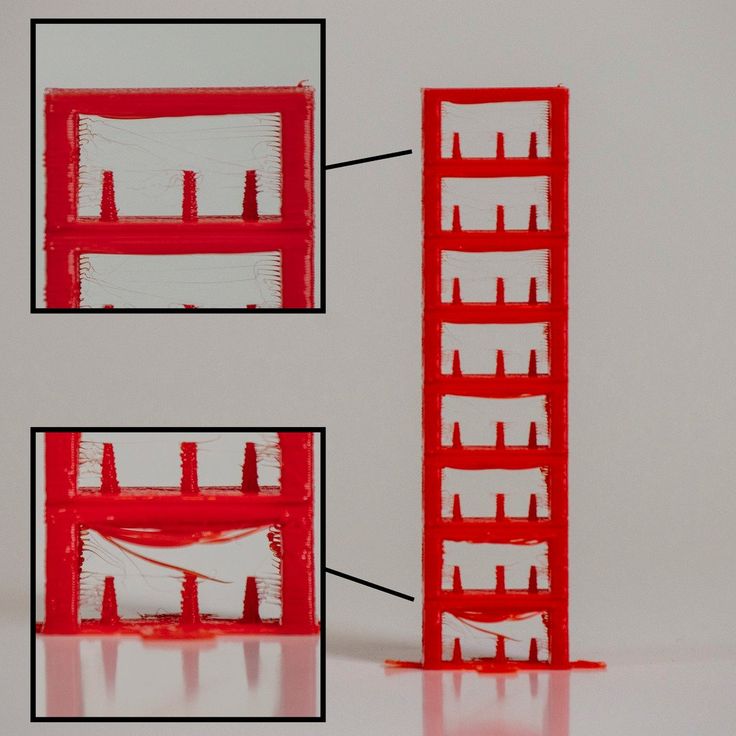 On Thingiverse, more than three thousand users posted photos with their samples, and the boat itself was printed by more than a hundred machines and no fewer materials.
Model reference
All-In-One
A very interesting model, which is called “all-in-one”. Everything is presented in the model: canopy, bridge, string, temperature and belt tension test, extrusion. This is an ideal model for testing the device at several levels at once. A manual is included with the model to help you troubleshoot any issues you find. On Thingiverse, more than 75 users have posted test results on different 3D printers and different materials.
Model Reference
XYZ Calibration Cube
Very simple and fast model for testing. This is a cube with a side of 20mm. It helps to gain dimension by adjusting the steps in millimeters. Also, the model allows you to test extrusion, vibration, temperature. This cube was printed simply by countless 3D printers and a variety of materials.
Model Link
Cali Cat
Nice little calibration cat or just Cali Cat is a simple model that allows you to test the accuracy of the device, as well as detailing, lugs, bridges, vibration and extrusion. And all this in just one hour. More than 2.5 hundred users have submitted their test results on the service.
Model Reference
Phil A. Ment
The MatterHackers Mascot is a Phil A. Ment test model. It was originally intended for manufacturers. The description mentions the fact that Phil has several functions. And they were originally designed specifically for 3D printers. The model has small inserts, relief details, cylinders of vertical and horizontal orientation, ledges. In addition, the model contains chamfers, bridges and fillets. And this miracle is performed by a domed helmet. The record size on the service is 5,1397mm. A total of 84 models were published.
Model Link
Calibration Temperature Tower
You can use this model to adjust the heat of your 3D printer. You can also test for different materials at what temperature the print comes out better.
NEW model Autodesk
This is a new model, or rather not even a model, but a whole procedure that will allow 3D printer manufacturers to show all the capabilities of devices to Kickstarter supporters. And of course, calibrate. The test was developed by Andreas Bastian and is a consolidated STL file that is able to test the system for the following indicators:
- authorization;
- alignment;
- accuracy;
- bridge, etc.
The model has it all. For example, if the 3D printer is set up well, then the horizontal function will be performed with a minimum of problems.
Model Link
PolyPearl Tower
If you want to test curves, cuts, bridges, cuts, then this model can be a great solution. In the description for this test model, the name "torture tower with a twist" appears. It is worth trying to use it for calibration.
Model Link
Rapid Screening
This model is a very quick test to check temperature, cooling, and retract function. Among the advantages of the model is its cost-effectiveness. The model will weigh only 0.23g. With its help, you can immediately remove the "strings".
Model Reference
Parametric Calibration Object
A particular difficulty in calibrating a 3D printer is lowering the stage level. With this model, you can draw the right conclusions to improve the first layer of printing, and as a result, get better prints.
Model Reference
Resin 3D Printing Test File. Calibration
Calibration is required from time to time for all 3D printers and photopolymer devices are no exception in this case. We have collected here the most popular test 3D models, with which you can carry out diagnostics and calibration.
3D printing technology
Among 3D printing technologies, photopolymer stands apart. This is the second most popular printing method after FDM, the essence of which is squeezing molten plastic through a nozzle. A relatively inexpensive plastic thread is used as a material in FDM technology.
Photopolymer printing uses resins that cure with light. There are several variations of technology: SLA, LCD and DLP . They differ in light source and printing speed. But in any case, this is always the exposure of the photopolymer resin layers. The finished model, due to the peculiarities of the printing technology and the material itself, needs to be washed and additionally cured.
Resin printing technologies are different, but they all rely on a number of common settings and factors. Among them:
- authorization;
- interlayer adhesion;
- exposure time;
- smoothing index;
- resin characteristics.
How do I check the print settings and determine if they need to be adjusted? For this, calibration or test models were created. Such models allow you to test the settings. There are many options, but there are several popular ones that have proven their effectiveness in practice:
- AmeraLabs Town
- HARZ Labs Test
- Siraya Tech
- Validation Matrix
Let's dwell on each in more detail ... /www.thingiverse.com/thing:2810666
Lithuanian photopolymer resin manufacturer AmeraLabs has developed a universal Town calibration model for testing purposes. It is called a universal part because it allows you to check not only the printer settings, but also the quality of the resin. A total of ten tests are included in the model. Each is enclosed in "buildings" of different heights and located at different angles. The model is very effective and therefore can often be seen in tutorials and simple resin printing videos.
There are ten tests in total, as mentioned earlier, we note three to understand the possibilities:
- gaps of different widths (0.
1-1mm) - checking the quality of the light source and exposure time;
- holes of different heights - checking exposure time, adhesion of layers;
- cross bridge - checks layer height and resin quality.
Analysis of deformations, inconsistencies allows you to identify problems and make appropriate adjustments.
3D model for HARZ Labs Test calibration
Download link (copy the link and paste in the address bar): https://www.thingiverse.com/thing:2776522
HARZ Labs is a leading company in the production of photopolymer resin. But it produces resins for photopolymer printing. For the purpose of testing, a calibration model was developed.
Siraya Tech
calibration 3D model Download link (copy the link and paste it into the address bar): https://www.thingiverse.com/thing:5438127
Test model from a Hong Kong resin manufacturer. There are five testing sections in the model. Three are for checking exposure. The model allows you to quickly find and fix the problem. The fact is that resolution and exposure are checked right during printing, problems will be visible even before the model is printed to the end. With a print height of 3.5 mm, holes, recessed text, objects of a round and triangular shape should be clearly visible. If you print the model to the end, then the cube and arch will allow you to check the smoothing and suitability for printing.
3D model for calibration Validation Matrix
Download link (copy the link and paste into the address bar): https://www.thingiverse.com/thing:4910573
This validation matrix is the model for the fastest testing. Another advantage is the minimal use of resin. In total, the test matrix has 4 functions, and all of them are focused on exposure balance. To get the most accurate results, you should choose the lowest number of layers equal to 4.