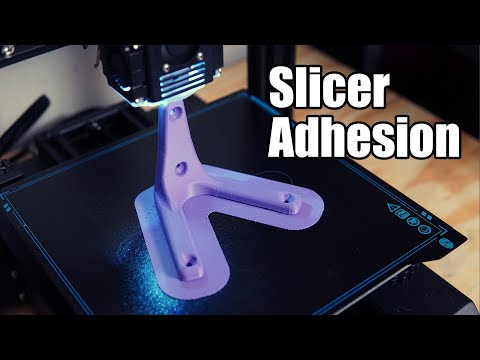
3D print raft hard to remove
Guide to Dealing with Rafts that Won't Come Off
Most FDM 3D printers can print models on the raft, a flat structure made with the first few layers of filament to increase adhesion and dimensional accuracy. More intricate models also need additional support structures to keep overhangs from falling. In a single-extrusion 3D printer, the raft and support structures need to be manually removed from the model once the 3D printing is done. In most cases it’s a very simple step. But sometimes the raft and supports become so firmly attached to the model that it’s almost impossible to split them up. Here’s why it happens and how to deal with it.
Stay Cool
The issue is usually caused by material’s overheating. If ambient temperature in the room exceeds 28°C, the extruded material does not have enough time to cool down. Facts Ambient temperature should be kept below 28°C. Proper platform calibration is very important. Layers bond too heavily when the material is overheated. As a result, the individual layers of the model become viscous, heavily fixed to each other and make the raft and support removal impossible. The next possible reason is platform calibration. If the distance between the nozzle and the platform has not been properly set, which means the platform and the nozzle are too close to each other, the material does not have enough space to be deposited. Thus, the material gets overheated and respective layers of the model bond with each other too much.Another probable reason is a clogged nozzle or hotend. When there are material residues in one of these parts, the extruded material gets overheated and causes the model’s layers to fuse with each other.
Hardware Issues
A simple part-malfunction can make the raft and support firmly bond with the model. The list of parts responsible for proper model-cooling includes: extruder fans,Facts Resistance on the heater exceeding 16 ohm can cause material overheating. Malfunctioning fans cannot provide proper material cooling.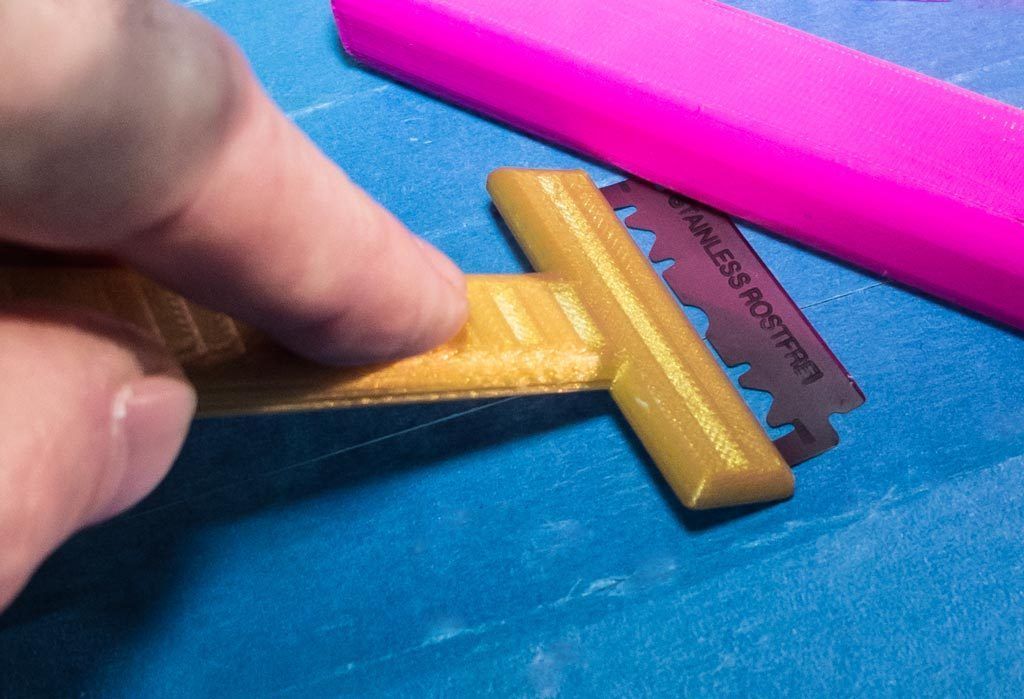 Replacement of the extruder’s printed circuit board or the motherboard is the last resort. the heater&thermocouple, extruder printed circuit board (PCB), extruder cable, and motherboard. When the extruder lower fan is not in a good condition, for example, its blades spin too slow or do not spin at all, the model is not accurately cooled down, and the raft and support structures are difficult to remove. Bu there are more possible reasons. If resistance on the heater exceeds 16 ohm, the heater&thermocouple will start to overheat the material.Additionally, when one of the extruder cable’s paths is broken, the cable can’t transmit appropriate information about the temperature from the motherboard to the PCB. Same thing happens when either the PCB the motherboard’s got damaged. If that’s the case, a proper extrusion temperature for a particular material is exceeded and the model gets overheated.
Fix it Yourself
To prevent your models from overheating, it is important to provide suitable printing conditions by ensuring an ambient temperature stays in between 23 to 28 °C. Facts If side covers are used, try to 3D print without them. Overheating can be caused by a clogged nozzle. Nozzles clogged with ABS can be cleaned with acetone. If you have already encountered the problem and your printer is equipped with side covers, it’s best to remove them. Moreover, remember the platform should be well-calibrated. If you cannot reach proper calibration values, follow the platform maintenance procedure available at our Support Center that will allow you to remove material residues causing bulges under the perforated plate.
If you use ABS-based filaments, try cleaning the nozzle with acetone to get rid of material leftovers. In case you have used other filaments, it is recommended to install a new nozzle. If neither cleaning the nozzle or replacing it has helped, you should get a new hotend. Further, if any of the above-mentioned suggestions has not solved the problem, you need to consider replacing the heater&thermocouple together with the extruder PCB, then the extruder cable, and, as a last resort, the motherboard. That’s how you can deal with 3D printed rafts and supports that won’t come off.
How To Easily Remove a Raft on 3D Prints – The 3D Bros
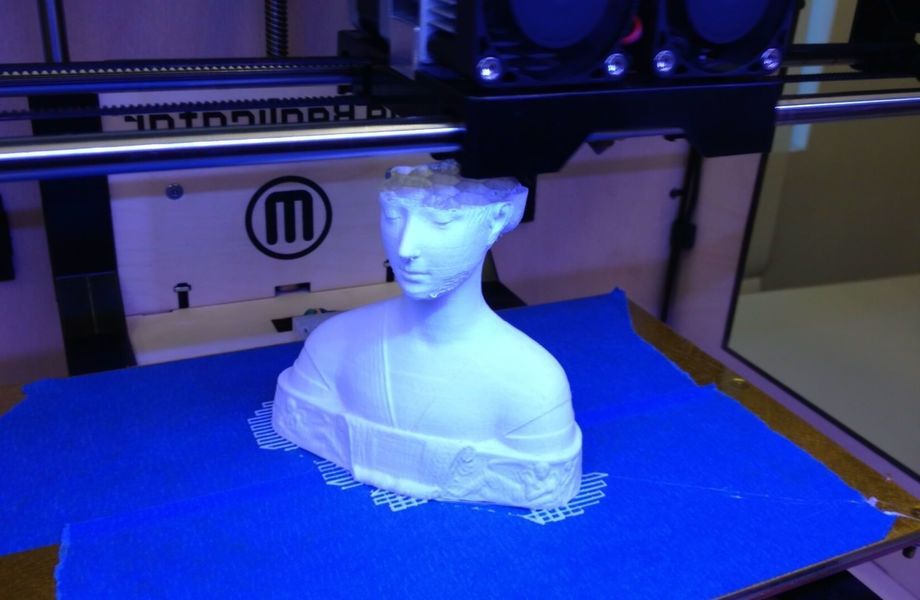
When printing 3D images on any surface, you’re likely to use some rafts, brims, or supports to get the final image. Rafts help the 3D image stick better to the bed and make it easier to remove the print once done. However, once you’re done printing, you may notice that the raft also sticks to the surface, and you’ll need to find ways to remove it.
To easily remove a raft on 3D prints, you can either use soluble materials, have the right software settings, or make some adjustments to your software settings. Whichever the case, removing rafts from your 3D images isn’t a hard process.
If you’ve been wondering how to remove the 3D rafts, you’ll find this article particularly helpful. We’ll highlight three effective methods that you can use to remove them. But first, let’s look at what rafts are and how important they are when printing 3D prints.
What Are Rafts?
The easiest way to understand rafts is to think of them as a base that the printer creates below the model to ensure the 3D image sticks on the surface. Rafts achieve this by creating more surface area for the image.
Rafts create a base under the entire model, which can be several layers tall, depending on your printer settings. The number of layers you need for your print will determine how much plastic you use since rafts create the underneath base using plastic.
Although they are left behind after printing the 3D image, rafts are relatively easy to get off. Whenever you add rafts when printing 3D models, you benefit from a stable base.
Whenever you use rafts to create your 3D images, the slicer software you use makes the contact points relatively easy to remove from the model. If you’re printing a model that has some delicate parts, using brims becomes a necessity.
Rafts come in handy when you’re dealing with incredibly delicate 3D images.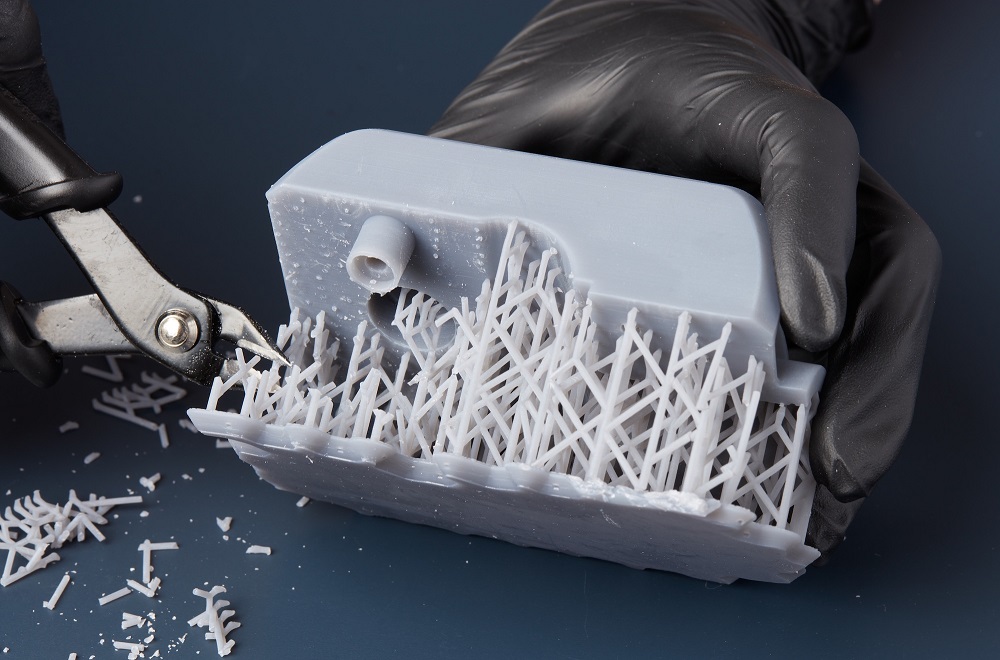 The rafts help provide more stability, provide better print bed adhesion, and get rid of warping.
You can still print your 3D images without rafts, for which you’ll need proper printer calibration and maintenance. You may also have to use a heated build plate or print bed adhesives to get the image stuck on the surface.
Once 3D printing is done, the raft is manually removed, and this is usually a simple process. However, sometimes it’s almost impossible to separate the raft from the model. Let’s look at why this may happen.
Why 3D Print Raft Can Be Difficult To Remove
Normally, 3D print rafts are designed for easy peeling off after the printing process is complete. If your raft is difficult to remove, the following are the likely reasons why:
- Overheating: If the extruded material for creating your 3D model overheats, the different layers remain viscous longer than they should. This means they’ll stick to each other hence making separation from the raft an uphill task.
 Overheating can occur for various reasons: if the ambient temperature is more than 28°C (82.4°F), the nozzle and platform are too close, or having a clogged hotend or nozzle.
- Hardware malfunction: There are a number of machine parts responsible for effective model-cooling, e.g., the thermocouple & heater, the extruder cable & fans, the motherboard, and the extruder printed circuit board (PCB). If any of these parts malfunctions, the final result is an overheated model, which will result in the draft and model fusing too tightly to each other.
So you’ve already got your 3D image printed, but the rafts left behind are a hindrance. How do you go about it?
Here are some proven steps you can take to eliminate the rafts in your 3D images completely.
Check Your Software Settings
Often, the software slicer you use when printing your 3D images will come with some preset settings. Most people don’t know that your software settings play a crucial role in removing the rafts from your 3D creations.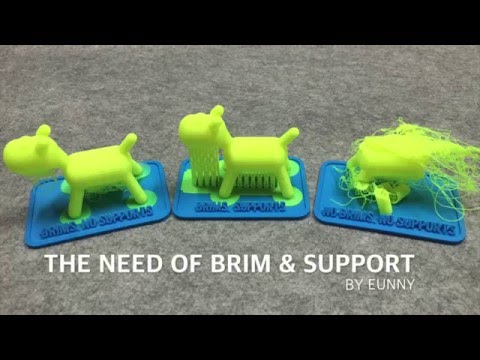
Be sure to double-check your software settings before you begin printing.
For example, if you navigate to the ‘Raft Air Gap’ setting, you can make some adjustments to make it easier to remove the raft so that it’s easier to peel it off.
Whenever you adjust these settings, you can raise the first layer of the raft bond by a few layers to decrease the bond between the raft and the model. The settings adjustments you make on the raft ensure that you don’t need any special equipment to peel it off.
If you want to achieve a smooth finish, ensure that the raft has two or more top layers. Additionally, your printing temperature shouldn’t be too high that it affects the adhesion between the raft and the model.
Incorporate Soluble Materials
If you have a 3D printer that comes with a double extruder, you’re going to love this tip. Using soluble materials can help you remove the rafts from your 3D prints much faster.
When using rafts to print your 3D models, some filaments useful in providing support dissolve when they contact certain liquids.
For example, if you’re using PVA and HIPS filaments, you can quickly eliminate the rafts left behind by immersing them in a water solution. It dissolves them completely.
If you’re looking to remove rafts without leaving any marks behind, this should be your go-to solution.
Use soluble materials to get rid of 3D printing rafts that are difficult to remove. It gets rid of all residual material that may be stuck at the bottom of the model, which leaves you with a clean and smooth image.
Ensure the Hardware Is in Top-Notch Condition
As we’ve stated above, sometimes, your models may overheat if you don’t provide the right printing conditions. The extra heat makes the rafts stick even harder to your 3D models.
Your printer’s hardware issue may stem from a malfunction of the various model-cooling features available, including extruder fans, printed circuit board, motherboard, and extruder cable.
For example, if the extruder blower fan isn’t in exquisite condition, the blades will either spin too slow or not at all, which provides inadequate cooling for the 3D model.
If you’ve met all the ideal printing conditions and you still have an overheating problem, check that your nozzles aren’t clogged. Using acetone to clean the nozzles gets rid of the residue, and consequently, the overheating of hardware when printing.
You may have to install a new nozzle if you’ve used other filaments before that produced printing that was hard to separate from the rafts.
If you still have a problem after trying the above suggestions, you may have to replace the heater, extruder cable, extruder PCB, thermocouple, and even motherboard in some extreme cases.
The Best Tools for Removing Rafts on 3D Prints
Now that you know how to get rid of the rafts, you’re probably wondering what tools you should start buying. Luckily for you, you don’t need a ton of equipment to get the perfect 3D image.
A needle nose plier will especially come in handy when you’re trying to get rid of that extra filament. Ideally, it would be best if you also got some sandpaper. Once you have the residual rafts removed, you’re bound to have some rough edges. The sandpaper will be helpful if you’re looking to achieve smooth edges.
However, the rough edges are an excellent idea if the artist in you feels a bit adventurous.
Parting Shot
Anyone who’s done 3D printing will agree that it’s almost impossible to ignore rafts when you’re trying to get the perfect image, especially when the details are a bit complicated.
That said, taking off the rafts from your 3D image shouldn’t be the cause of all your troubles. If you check your software settings before printing, you should have an easier time getting rid of them. Additionally, using soluble materials makes it easier to get rid of the raft residual. If the problem persists, you should probably check your hardware and ensure it’s in top-notch working condition.
Sources
- Home 3D Print Guide: 3D Printer Supports vs. Rafts vs. Brims
- Zortrax: Guide to Dealing with 3D printed Rafts That Won’t Come Off
- 3D Printerly: How to Easily Rem0ove Brims and Rafts From Your 3D Prints
- 3D Hubs: Best Ways to Remove Rafts
- All 3DP: 3D printing Raft
(There is a solution) Is the raft hard to get off?
abs fdm rafts fff
I've been having a hard time getting the raft off the ABS prints lately.
Is this a symptom of the nozzle or table being too hot? Or is there some other factor that should be taken into account?
I have a UP mini which I modified both the nozzle and the table to adjust the temperature.
The table heats up to 100°C and the nozzle is either 266°C for UP ABS filament or 236°C for unbranded ABS filament. nine0003
@Shpigford, ♥7
Discussion
4 Answer
Best answer:
▲ 7
A pair of things that should be taken into account:
- Make sure your mounting plate is flat and even. A non-parallel HBP can cause the object to "weld" to the raft.
- Reduce nozzle temperature. It is likely that the material during extrusion heats up more than it needs. This results in a slower "cooling rate". So, if it takes more time to cool the thread between the raft and the first layers of the object, then.
 Therefore, cooling occurs in such a way that they bind to some extent. nine0030
 - Personally, 266C seems VERY high to me. I have mostly used ABS only on my MakerBot and have successfully printed with a nozzle temperature of 225°C +-5°C and an HBP temperature of 110°C +-2°C.
- Usually you want to extrude slightly above the melting point. You don't want to liquefy the material, but make it malleable enough to bond with other layers of material (or BP).
, @ tbm0115
▲ 2
You can try to lower the temperature of the hotend. If you use too high a temperature, the ABS will "work" and stick to the raft.
Which slicer do you use? I found that the quality of the raft is highly dependent on the cut I used. In my experience, MakerBot and Simplify3D produce the most beautiful and easy to remove rafts. I have also had success with Cura.
Unless you change your hotend temperature or switch to a new slicer, you can always try printing without a raft. By the sound, your table is hot enough. Do you have Kapton on the table? If so, take a picture of the seal without the raft. If sticking is the problem, try painting the table with a mixture of ABS and acetone before starting. nine0003
, @ Jason King
▲ 1
Do you allow the filament to cool completely (5-10 minutes or longer after printing) before you start removing the rafters, or do you remove the printed piece immediately after printing is complete and start removing the rafters?
I have found in my experience that the rafter is easier to remove if the part is still slightly warm from the heated table.
, @ J. Roibal - BlockchainEng
▲ 0
I don't have a heated printer so I only tested this on PLA, but I found that editing the G code to have the printer cool the nozzle and then heat it up again gives the raft enough time to cool down to it peeled off more easily when the print was finished.
, @ user802599
(There is a solution) When should I use a raft, when should I use a brim?
rafts Brims
Taken from the answer provided by @EricJohnson,
When should I use a raft and when should I use a brim? What advantages does each have over the other?
Raft
Brim
@Matt Clark, 👍19
4 Answers
Best Answer:
▲ 11
The raft will provide better adhesion for the entire print as the raft is attached to the printed surface, the raft is attached to the printed surface. The rafts go all the way under the print and are made up of multiple layers while the edge is only 1 layer and on the outside of the print. Rafts are generally more difficult to remove than margins due to increased contact with the print. nine0003
In my own experience, margins don't help much with layer sticking since they only make up 1 layer. I usually use a raft when I need a nice 1st layer that isn't on the table or when there aren't enough contact points.
, @ Eric Johnson
▲ 5
The raft helps when the part has few points of contact with the platen and therefore does not stick well at points inside and outside the part.
Margins help when the part does not fit well around the perimeter of the part. nine0003
There are very rare situations where you will need both, but usually you will only use one or the other.
, @ Adam Davis
▲ 8
The raft is used to prevent deformation. Instead of printing directly onto the assembly surface, parts are created on top of it. You remove and dispose of the raft after printing. The raft is larger than the part and therefore has more adhesion.