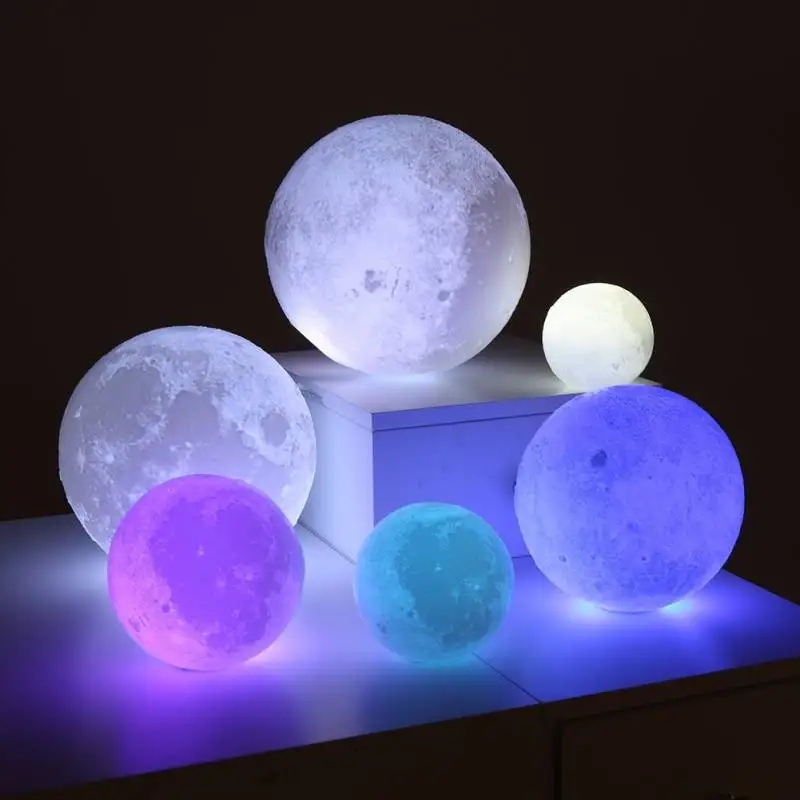
3D print moon
Moon best STL files for 3D printing・Cults
4x 75x42mm base with moon surface
€2.52
sun moon
€24
Polymer Clay Cutter Moon Pack
€1.47
Sailor Moon Crescent Moon Wand 3D Model for 3D Printing
€5.88
Alien Spine Tower 1
€13.77
Sailor Moon Moon Stick for Cosplay
€9.90
PENDANT: Sun end Moon
€2.50
4x 80mm base with moon surface
€2.52
Cat Moon or Artemis Defense
€2.45
10x 28mm base with moon surface
€2.52
Posa Vasos Sailor Venus
€0. 80
Luna cookie cutter
€0.98
Sonic Moon Lamp
€1.25
Rainbow High Stud Earrings
€8.50
star candle
€1
The Space Launch System (SLS): NASA’s Artemis I Moon Rocket with platform. File STL-OBJ for 3D Printer
€2.90
28mm base with moon surface (sample)
Free
sailor venus card lithophane
€1.31
sailor mercury card lithophane
€1.31
sailor jupiter card lithophane
€1.31
sailor moon card lithophane
€1.31
sailor scouts card lithophane
€1.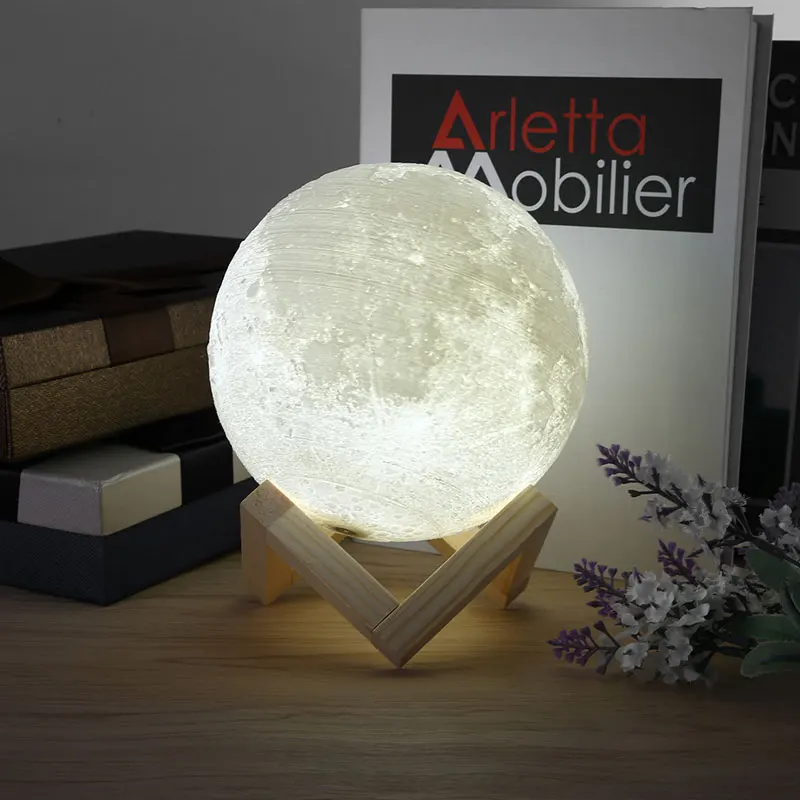 31
31
Heart-shaped moon lamp
€1.25
Multiple modell of phatom galaxy, James Webb/Hubble/ both
€5
low poli James Webb phantom galaxy picture 3D software analysis
Free
James Webb phantom galaxy picture 3D software analysis
€2.50
Asteroid/Moon bases - 40mm hero and 90mm x 52.5mm Oval toppers
€0.81
Asteroid/Moonscape - 28mm base toppers
€0.81
Tripple Moon Tarot Card Shelf, Holder, Organizer
€0.69
Ninja Moon Throwing Star
Free
Moon Zero Two Gun / Pistol / Revolver / Colt
€5 -20% €4
Low resolution Ant nebula Hubble deep sky object 3D software analysis
Free
robot moon
€1.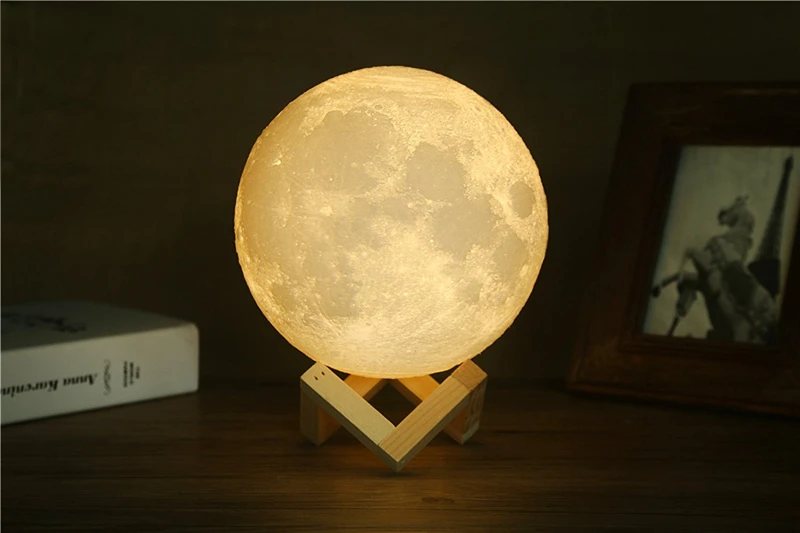 47
47
Cat, moon, stars wall art decor and stencil, SET of 3 STL files
€0.72
Sailor Pluto's keys
€5.39
Skull moon sun ring
€25
Skull moon sun pendant
€25
Moon craters ring 5 mm
€15
POLYMER CLAY CUTTERS/EULITEC.COM/CC/COPYRIGHTED LICENSE
€2.24
Sailor Moon 3D Logo
€1
Funko Motorizado biker
€3.20
Pokemon - Stufful
Free
Coffin Heart Earrings
€0.64
sullivan box monster inc
Free
Sailor Moon Serena toothless grinder
€1.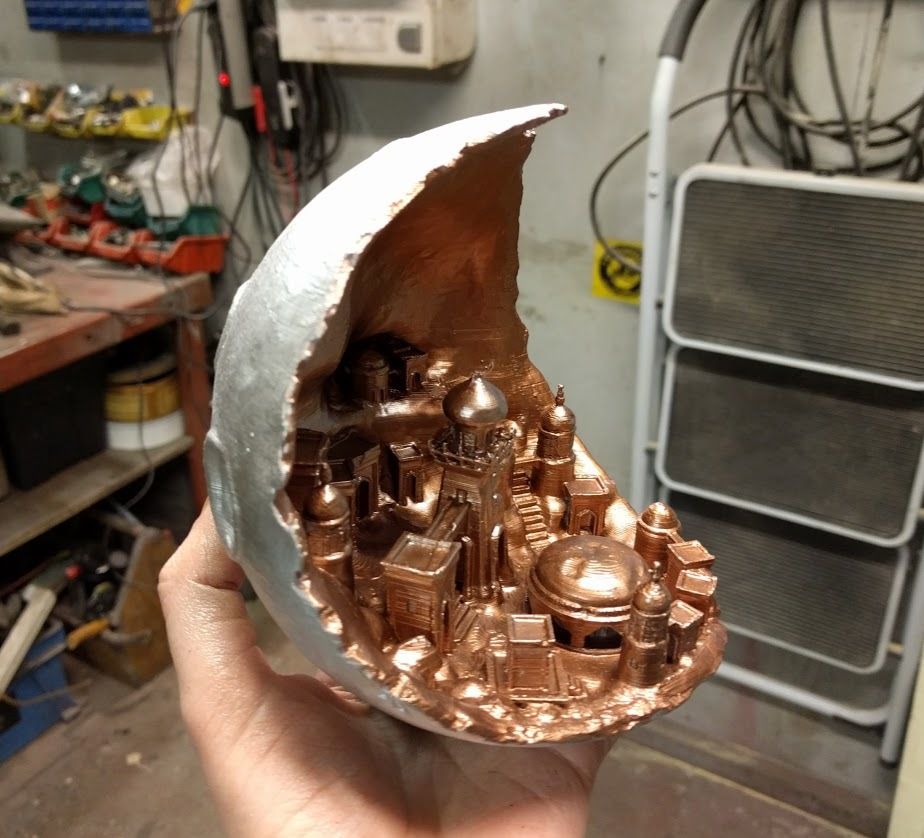 75
75
Usagi Witchcostume- FREE
Free
LITHOPHANE HEARTLAMP (I LOVE YOU)
€2
Wolf and Lion Lamp
€2
3d Printed Moon - Etsy.de
Etsy is no longer supporting older versions of your web browser in order to ensure that user data remains secure. Please update to the latest version.
Take full advantage of our site features by enabling JavaScript.
Find something memorable, join a community doing good.
(1,000+ relevant results)
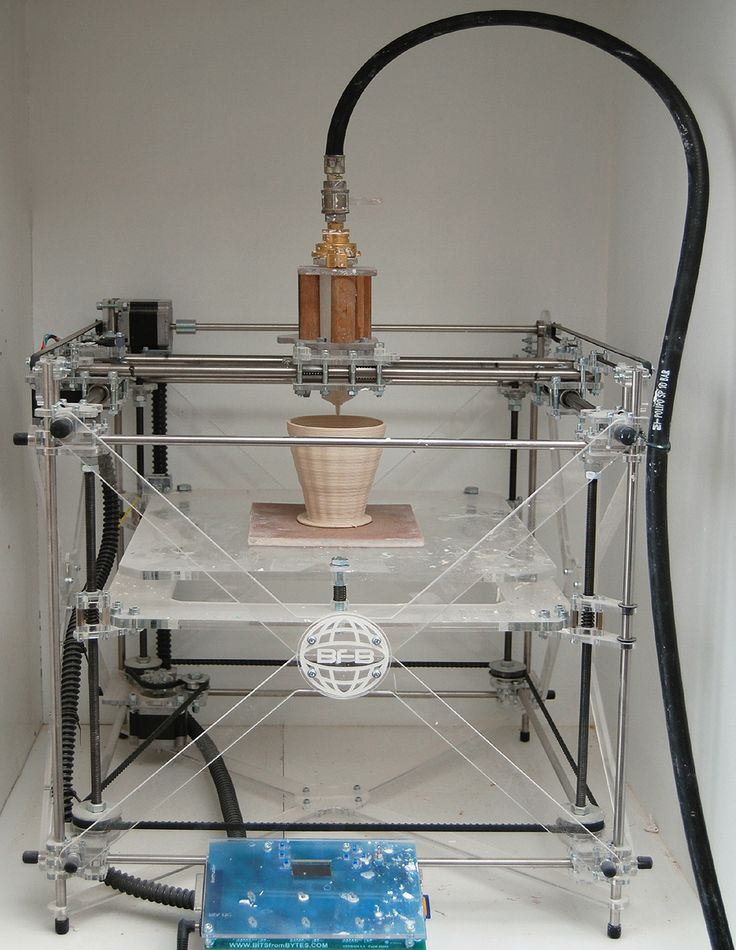
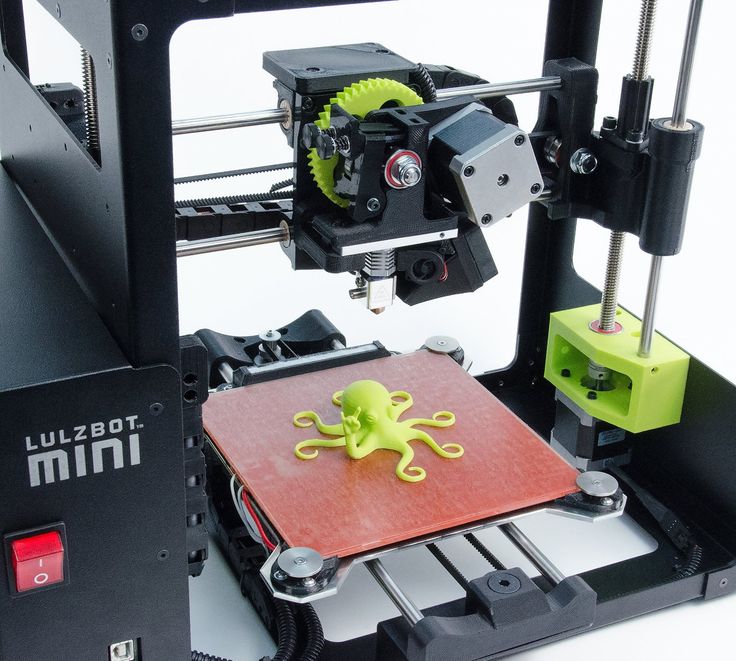
How to create your own Moon / Sudo Null IT News
This article shows you how to make a 3D model of the Moon from scratch.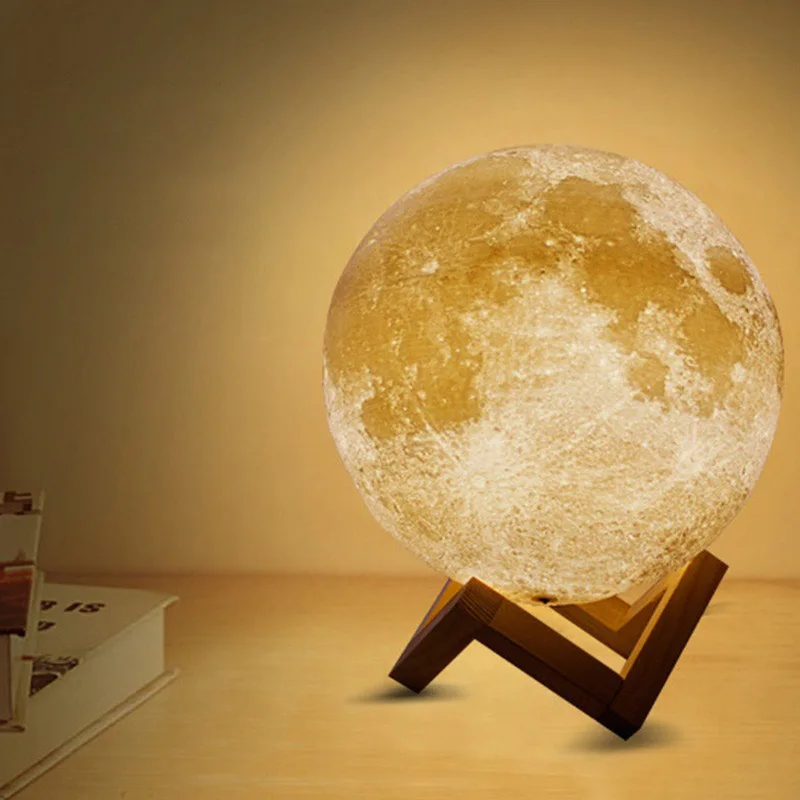 It would seem, Why create a model of the Moon yourself, if you can buy it? If only because when you make a model of the Moon yourself, you can set the desired parameters, for example, the dimensions and thickness of the shell, image resolution, rotation limits, the position of the cutting plane, you can make a hole for the lamp, and so on. Let us proceed to the creation of our own moon.
A variety of 3D models of the Moon can be found on the Internet. Some can be purchased from online stores, others can be downloaded as files and printed on a 3D printer. Finished models can be divided into 2 categories:
-
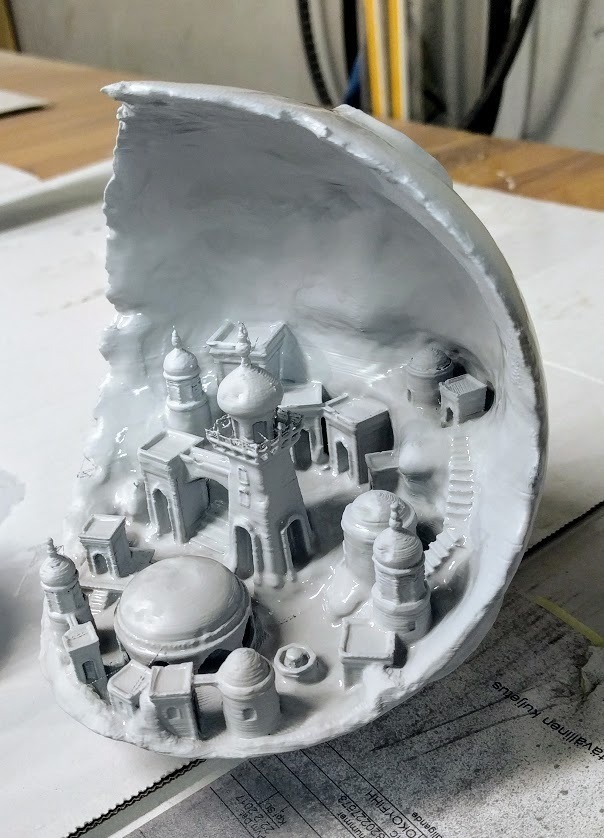
The surface of the moon is drawn in detail and with high quality, but if a light source is placed in the model, its details are not highlighted from the inside.
-
Surface details are well drawn when illuminated from the inside, but without illumination they are not visible.
Step 1: Draw details
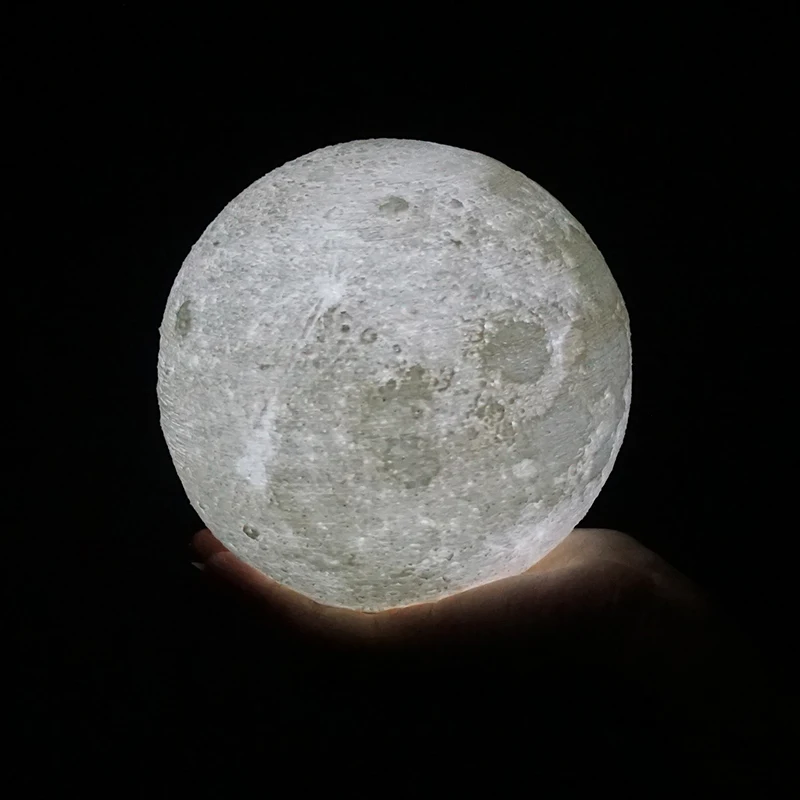
Details do not light up from the inside when a light source is placed insideDetails are drawn well when illuminated from the inside
If you do not have a 3D printer, you can buy a lamp like Moon Lamp on the Internet.
Step 2: Prepare the software
Below is a list of the software involved. After familiarizing yourself with the technique, you will be able to do the same thing as I did with ordinary tools.
Modeling Tools
Download my custom version of Banate CAD from GitHub .
Banate CAD is written in Lua, so install Lua for Windows to run scripts on Windows.
STL Editing Tools
Meshmixer
Step 3 Preparing Materials
Plastic for Printing
The images above show PLA products. Products resulting from 3D printing using different types of white PLA plastic may have different shades. The plastic supplier claims that option B is the best, but that, alas, is stuck in my printer.
Light source
The moon model can be illuminated in different ways, the light source can be powered by batteries, mains, and so on. The size of the model also affects the choice of light source. There are a lot of options, and if we start discussing them here, we will deviate from the topic of printing. It is enough to understand that there are a lot of options. I want to note that the warm white light of the source is more pleasing to the eye.
Matte Spray Paint
Most PLA models are highly reflective, so I recommend a matte finish. Matte spray paint will easily solve the problem.
Step 4. Images of the Moon
Two images of the Moon are required for the simulation. They are located in the BanteCAD/Examples folder. I reduced the resolution to 720x360, it should be enough for the model. If necessary, search for higher resolution images online.
Bump map
There is a special map for surface modeling, usually called a bump map. The shade of gray indicates the height of the corresponding point on the sphere. Having a bump map, you can accurately display all the details of the surface on the model. However, if you compare the bump map with the moon in the sky, you will notice that they are different from each other.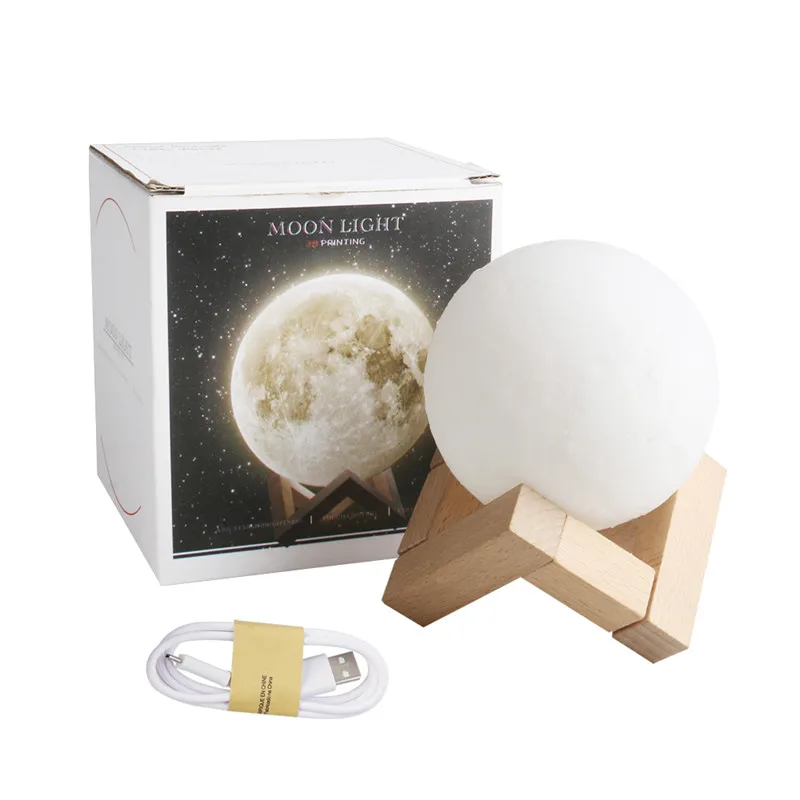
Visual map
Details of the real moon are not only different heights at different points. Color is also important. Naturally, we can instruct the printer to print different colors, but, fortunately, we see the real moon in grayscale. To allow light to pass through the model at different intensities, you can print the model with different wall thicknesses and superimpose a grayscale image on the model. To adjust the wall thickness of the model, we need a visual map of the moon.
Post-processing
-
Lunar surface map is a regular bump map. I need to take into account the internal thickness, so using the Level function (Level) I shift the value to the right (a brighter image will be displayed on the bump map).
-
Inner map of the Moon is the shape of the inner surface of the model. From this map, we determine the thickness at each point of the surface, that is, the desired shade of gray. This map is built from a visual map, which in turn has thickness settings based on a bump map applied to it.
 Or, to use another calculation method, by subtracting the bump map from the inverted visual map.
Adjustable Parameters
-
If you lower the bump map level, the elevations on the surface will be smaller, and the sag will decrease, but the surface details will have to be distributed differently.
-
If you move the level of the visual map to the left, the shell will become thicker, and vice versa. In this case, it must be remembered that the level should not be shifted too far to the right. The cladding must be at least 0.4 mm thick (if a 0.4 mm extruder nozzle is used), otherwise the cladding must be manually punched.
-
The range of the light gray scale depends on the level range of the visual map.
Attached files: moon.xcf
Step 5: Control the layer thickness above. If the shell is thinner than it is possible to print, the printer simply will not print anything, holes may even form on the surface in unexpected places.
 You can fix it like this.
 -
Open the STL file generated by BanateCAD with Meshmixer.
-
Delete the inner surface model.
-
Run the Edit command.
-
Select the Hollow command.
-
Set thickness to 0.5mm (for extruder size 0.4mm).
-
Run the Hollow command again.
-
Accept the changes, now the thickness of the shell of the lunar surface is 0.5 mm.
-
Rotation and cutting of the plane are carried out in the same way as in the settings of the lunar shell.
-
Export the STL file.
-
Open the moon shell STL file in Microsoft 3d Builder.
-
Repair any defects.
-
Open the STL file of the lunar surface with a shell thickness of 0.5 mm.
-
Repair object defects.
-
Select the entire object.
-
Accept the changes, now the thickness of the lunar shell is 0.
 5 mm.
5 mm. -
Export the STL file.
Step 6 Modeling - BanateCAD
BanateCAD can model a 3D shape from a bump map. In the examples folder, I posted the corresponding script. It reads a map of the surface and an internal map of the moon, and then models both shapes. The following are the steps for modeling with BanateCAD:
-
Open the BanateCAD.wlua file.
-
On the File menu, choose Open.
-
Open the file moonlamp.lua in the Examples folder.
-
Optional: change parameters.
-
From the Compile menu, choose Compile and Render.
-
After a while, the 3D model will appear.
-
From the File menu, choose Export -> Export STL.
-
Enter a name for the STL file and click the save button.
Configurable Parameters
Output sphere diameter in inches, bump map and internal map are generated from this parameter:
local outputSize = 3 -- inches
Surface height factor:
local outputSize = 3 -- inches
The resolution must not be greater than the resolution of the PNG image:
USteps = 720, WSteps = 360,
Step 7: Create a Shell – Meshmixer
Based on the shapes made in BanateCAD, we can create a shell by subtracting the surface of the inner shape from the shape.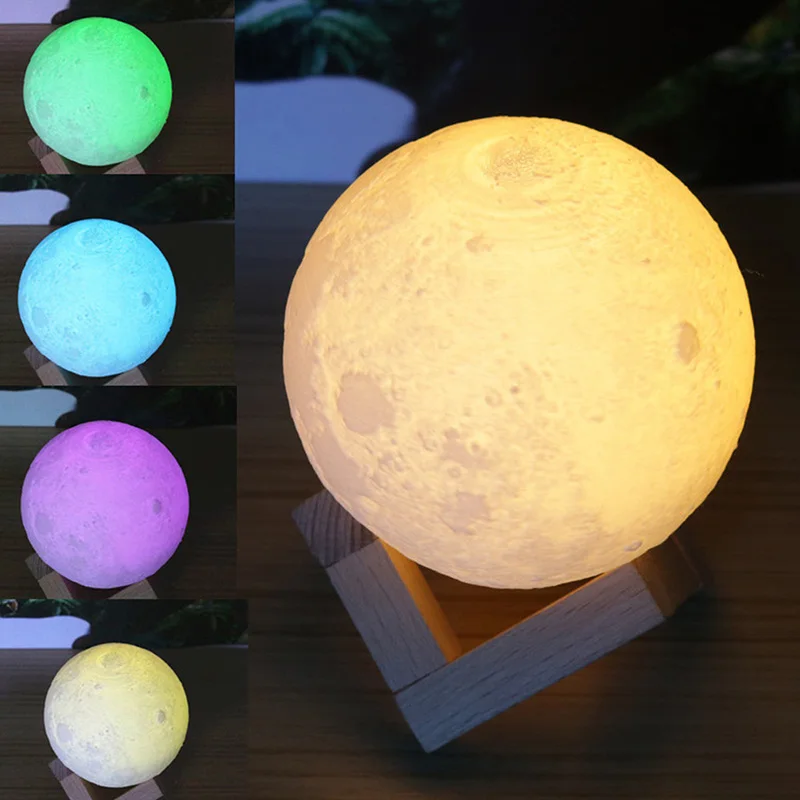
The following describes the steps to create a wrapper with Meshmixer:
-
Open the exported STL file with Meshmixer.
-
Wait for the download to complete.
-
Select both models in the Object Browser.
-
On the left toolbar, select Edit, then select Boolean Difference.
-
Wait for the calculation to complete.
-
Select Accept.
-
Wait for the calculation to complete.
-
Leave one model in the Object Browser, this will be the lunar shell.
-
Save the file.
Step 8. Modify and output the model - Meshmixer
Before 3D printing, you can configure any parameters. The options are:
-
If you want to put a model of the moon on your desktop, I suggest that the z-axis rotates from -45 to -60 degrees, so the moon will be directed towards you in its usual direction.
-
If you want to hang the moon model from the ceiling, I suggest that the z-axis rotate 120 to 135 degrees for the same reason as above.
-
If you want to install a backlight inside, do not forget to make a hole for the wire (if you have difficulty printing a hole on a 3D printer, you can, like me, just drill a hole after printing with a drill.
-
90% percent The cutaway moons are flat, so you can hide the seams and print it easily without sagging.0003
When finished, export the STL file for printing.
Step 9: 3D Print
Open the object in the 3D Slicer, make sure there are no holes in the shell, and start printing.
If the moon needs to be perfect, you can skip the previous step with cutting the plane and turn on the support option. But, in my opinion, removing the remnants of the caliper is quite difficult.
If the previous step was difficult for you and you could not print the STL file, use my file.
Assemble the top, light source and bottom together.
Step 10: Coating the Surface with Matte Paint
Most PLA 3D prints are highly reflective, so I recommend coating the resulting surface with Matte Paint.
Now I'm trying to print a larger diameter moon lamp - 110mm, which is the largest size that can be printed with the Robo C2 printer. One printout will take tens of hours. I want a moon with these parameters:
local r = 52 local h = 3
Final!
You did it! Now you can brag to the familiar results of your work or just give the finished model to your friends!
Learn how to pump in other specialties or master them from scratch:
-
Profession Data Scientist
-
Profession Data Analyst
-
Course on Data Engineering
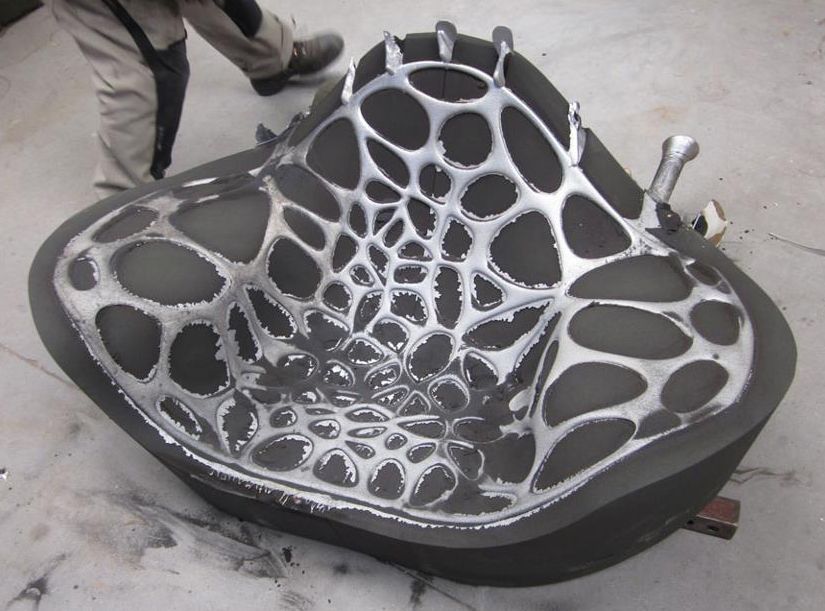
0011 Database Analystation DevOPS News Subscribe I do not want Aspirate Center for the Skolkovo Center Science and Technology in Design, Manufacturing Technologies and Materials Maxim Isachenkov, together with researcher Svyatoslav Chugunov and professors Iskander Akhatov and Igor Shishkovsky, spoke about the possibility of using additive technologies to support future missions to explore the Moon in their review published in the journal Acta Astronautica. The scientists' article contains a comprehensive description of the properties of the lunar soil (regolith) and its imitators - mineralogy, morphology and chemical composition in light of the use of this natural material as a raw material for 3D printing on the lunar surface. The authors analyzed the applicability of various 3D printing methods presented in the literature, including selective sintering of lunar soil with laser, microwave and concentrated solar radiation for the construction of infrastructure for future habitable lunar stations. Among the main factors for analysis, the authors chose the possibility of adapting additive manufacturing methods to lunar gravity, energy consumption, technology scalability and autonomy of application. “3D printing technologies will form the basis for creating the necessary infrastructure for lunar exploration, providing future astronauts with the protection of habitation modules, landing sites, necessary tools and spare parts, using local resources. The team of authors hope that the published review will help researchers working in this field to find the most promising directions for further research and development, as well as attract the attention of scientists and engineers working in related fields. Now a team of scientists led by Professor Shishkovsky has moved from the analysis of foreign developments in this area and is conducting their own research. The laboratory of additive technologies at the CDMM Center at Skoltech launched work on the applicability of various additive technologies for 3D printing of lunar regolith. The scientists focused on stereolithographic printing methods, which make it possible to obtain high-strength precision ceramic products. From left to right: lunar regolith simulator, paste obtained from it and samples printed by stereolithography The Skoltech team plans to produce more complex functional products, up to the construction of residential blocks, conduct mechanical tests and adapt such technologies for autonomous operation in lunar gravity. Press release Do you have interesting news? Share your developments with us, and we will tell the whole world about them! We are waiting for your ideas at [email protected] Space Moon Skoltech regolith Follow Don't want 5 5 Subscribe Don't want Scientists from the Perm National Research Polytechnic University have designed an exp. 3D 3D Lip the basis for colonization of the moon
Subscribe to the author
 ” He believes that “there is no one universal 3D printing method suitable for solving all these problems. It would be advisable to develop a strategy for using a whole range of different 3D printing methods, choosing the most suitable approaches for specific purposes,” says Maxim Isachenkov.
  First samples (pictured) obtained at the Skoltech Additive Manufacturing Laboratory from a lunar soil simulator developed by the NASA Lunar Surface and Asteroid Research (CLASS) Center showed the fundamental possibility of such an approach.
 Follow the author
More interesting articles
Subscribe to the author
Learn more