3D print leaning
How to Fix 3D Prints That are Leaning or Not Printing Straight – 3D Printerly
3D prints that start learning or don’t print straight can ruin the success of a model and will definitely reduce the dimensional accuracy. This article will take you through how to fix 3D prints that lean and don’t print straight.
To fix 3D prints that are leaning or slanted, check for loose belts or pulleys and get those tightened up to a good level. You want to ensure your print bed and frame is stable by tightening up any loose eccentric nuts. Also check that your frame on each axis is actually straight and not uneven.
This is the basic answer but keep on reading for more information on how to solve this issue of 3D prints coming out sideways, leaning or slanted.
Why Are My 3D Prints Coming Out Leaning & Slanted?
There are several reasons why your 3D prints are coming out leaning and slanted and I have listed them below;
- Loose belts and/or pulleys
- Print bed isn’t stable
- You have a loose gantry/frame
- Printing speed is too high
- Your X & Y axis gantry isn’t straight
- The 3D model design is slanted itself
- There are layer shifting issues
A user also mentioned that if the slant or lean is always towards the same direction, then it could be that the axis motor is losing steps. It could also be that one of the axes’ rods is crooked and needs to be changed.
These are the most common causes of leaning or slanted 3D prints so paying attention to them may help solve the issue.
Now that you already have an idea of the reasons your 3D prints come out leaning or slanted, let’s take a look at the easy steps you can take to fix your 3D prints.
How to Fix a 3D Print That is Leaning or Not Straight
Tighten the Belts and Pulleys
When your 3D prints come out slanted or leaning, one of the important things to check is the belts or pulleys. Your 3D printer belts are the motion system movements of your 3D printer and they move along the X and Y axes.
You need to tighten them if you find that they are loose. Some 3D printers will have XY belt tensions which you can simply twist; otherwise, you’ll have to use tools. Then you can proceed to loosen the bolt and screws and adjust the belts as needed.
You should not make the belts too tight to avoid friction and other print issues.
The right level of belt tension is tightening the belt to the point where there isn’t any slack, but it shouldn’t be too hard to pull/pluck.
A user whose prints were leaning found that their printer’s belts were loose and not as tight as required when they checked. Tightening up the belts solved the issue for them and they were able to make good 3D prints.
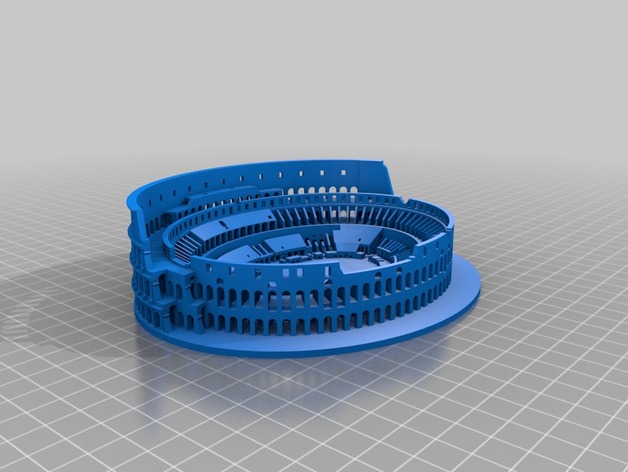
The example below was a clear case of having a very loose X-axis belt. Once the user tightened the belt, their 3D prints went back to normal.
Prints Leaning To The Right from ender3
Check out the video below to see how to tension 3D printer belts properly.
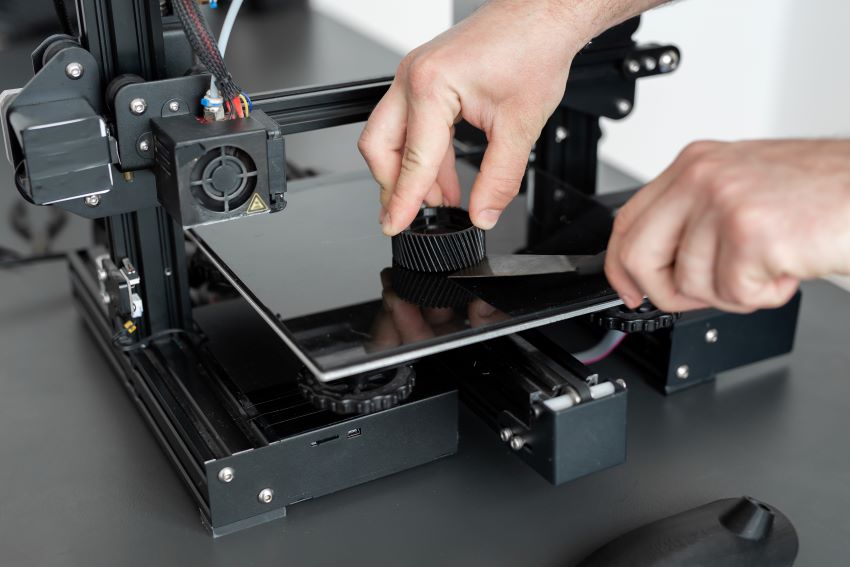
Level & Secure Your Print BedOne of the first things you should do when you experience 3D prints that are leaning or not straight is to level and secure your print bed.
The reason for this is that when you have an uneven or warped build surface, it means your first layers might not adhere very well to the surface, causing issues further in the printing process.
It may also be the case that your bed isn’t stable due to the eccentric nuts not being tight enough underneath the 3D printer.
3D printers can’t calculate where to go based on how level the bed is by themselves. They only follow a series of instructions that are in the 3D printer file.
Ideally, you want to check that your aluminum plate on the base of your 3D printer isn’t warped, then check the actual build surface on top to see if that’s warped.
If you do find it’s warped or uneven, then correct this by levelling the bed, or changing out the warped part of your 3D printer.
You can actually install an auto-levelling bed sensor like the Creality BL Touch to correct any imbalances from an uneven print bed though. Some people swear by it, while others just stick to levelling their beds manually.
Check and Fix Loose Gantry with Eccentric Nuts
The next thing to look at if 3D prints are leaning or slanted is whether your eccentric nuts are tight enough on the X & Y axis, similar to the fix above.
The gantry is the frame that supports and guides the printer head along the X and Y axes. To fix 3D prints that lean or slant, you should check if the gantry or frame is loose and fix it so the X and Y axes don’t cause issues.
You can fix the gantry by tightening the eccentric hex nut. It is also possible that the eccentric nut is not fixed correctly.
A user who has had a year of slanted and leaning 3D prints found that they put their eccentric nut on backward so the bottom wheel was not in the guide correctly. You should also be careful not to overtighten the screw.
However, before tightening the screw, you should make sure the gantry/frame is well leveled first so it won’t be misaligned.
Reduce the Printing Speed
A user whose prints were slanting said they reduced their printing speed and no longer had slanting prints. If your printing speed is too high, it can make either of the axes jerk thereby causing them to slip.
If you reduce the speed to a reasonable extent, around 40-60mm/s you may be able to solve the slanting or leaning issues. If your 3D printer can’t reach higher speeds without your 3D prints leaning, there’s probably an underlying problem that you want to fix beforehand though.
I’d try out the other methods as a priority.
Level the Printer – X & Y Axis Gantry
Similar to checking your eccentric nuts on the gantry, you also want to check that the actual frame across the X axis is straight, the gantry going from left to right.
One user experienced leaning 3D prints but after squaring up their X gantry, they finally solved the problem.
They were having successful 3D prints, but once they required two 3D printed parts to fit together, that’s when issues arose. The user started implementing a carpenter’s square to ensure things were level and that’s when they found the issue.
Another who was experiencing leaning 3D prints figured out that his Y axis extrusion was leaning upwards slightly after dismantling part of their 3D printer.
What they did to fix this was to take a Digital Angle Gauge and zeroed it on the vertical extrusion, then adjusted the horizontal Y extrusion until the gauge read 90 degrees.
You can get yourself the Wixey Digital Gauge Type 2 Magnetic Base from Amazon for a good price.
Check That the 3D Model isn’t Slanted
One user mentioned that rather than their 3D printer having the problem, it was actually the 3D printing file they were using. They designed a simple box model, but figured out that the model actually had a tiny slant in it.
If you find that the issue happens with multiple 3D prints, then this is likely not your issue.
Fix Layer Shifting Issues
In some cases, you may actually be experiencing a series of layer shifts that make your 3D print look like it’s leaning, printing diagonally, or crooked. It may be an X axis or Y axis shift, depending on the direction the model is shifting to.
To fix layer shifting issues, make sure your 3D printer bed is secured into place so there isn’t any movement during printing.
You can also try decreasing your jerk and acceleration settings, as well as making sure your belts doesn’t have slack in them. Check for any obstructions such as cables or your filament getting caught on something.
It’s a good idea to try and watch some of your 3D print or get a camera to view it so you can see exactly what is happening.
Get a Dual Z-Axis Leadscrew Kit
A user who was having the same issue on their Ender 3 V2 said they had to get a Dual Z Axis Kit from Amazon to solve the leaning and slanting prints.
Another person mentioned that when they first got their CR-10 3D printer, it only comes with one Z-stepper and leadscrew, but if their X gantry eccentric nuts weren’t very tight, they would experience a lean in models.
This was due to the side of the gantry that had the most distance from the leadscrew would have a slight lag on each Z movement.
A second leadscrew can help out a lot in an instance like that.
Here’s a video you can watch that can in fine-tuning your Ender 3 V2 or 3D printer in general.
Slanted 3D Prints? Here’s What To Do
The art of 3D printing is one that is growing in popularity, with many different industries utilizing the benefits of it. Whether you are starting your own 3D printing business or you are working on 3D prints for your own purposes, it’s important to understand why your prints are having the issues that they have.
So, why are your prints slanted and how can you fix it?
Why are your prints slanted?
There are several reasons why your prints may be slanted, including:
- The Stepper Driver, which could be overheating then shutting down.
- Print pulls too hard on the filament reel.
- Belts/pulleys are slipping.
- Print bed is shifting as printing occurs.
- Z-axis isn’t perpendicular to your print bed.
If the problem is something that you are consistently having, there is likely something wrong with the axis pulleys or belts.
How can you fix slanted 3D Prints?
The first thing that you need to do is to make sure that the issues with the printing isn’t as a result of the file that you are using to create the print. If this issue only happens with a specific model that you are trying to print, the file you are using is likely the problem. You may need to reload the file to fix any bugs in it to ensure proper printing.
If this is an issue that you are noticing on all your prints, you should check out the mechanical aspects inside, looking for issues like the belts and pulleys slipping or not properly placed in the printer. It may even be an issue as simple as tightening the drive set screw.
It could be a good idea to check out your printer’s user manual to see what they suggest for troubleshooting this issue in your specific model of printer.
Why are your prints misaligned?
Another common issue that is similar to this problem is that they layers shift, making your prints misaligned. This can be something that can happen simply by you accidentally bumping into the printer while it’s printing. However, if you do notice an issue with your layers shifting, there are a few reasons why this can happen such as:
- Toolhead Moves Faster
If this part moves too fast, the 3D printer may not be able to keep up with your needs. By moving faster than the toolhead can handle, you will get misaligned prints. Try reducing the printing speed to see if this fixes the issue.
- Internal Printing Issues
There could also be a mechanical or electrical issue that is causing the problem. If after reducing the motor speed there is still an issue, it’s likely an issue with the electrical or mechanical processes of the printer.
One issue that is common here is the belts, which can stretch out over time after several uses, as it’s made out of rubber material mixed with fiber. Once the tension from the belt becomes too loose, it may slip off of the pulley while it is rotating so that the pulley isn’t rotating anything anymore. A belt that is too tight can also be a problem.
Lastly, you should check the motor. Sometimes a screw can come loose and lead to a variety of different issues including that the pulleys aren’t rotating together with the motor shaft, causing misalignment.
What are some other issues that can occur with 3D prints?
There other issues that you may notice with 3D prints, including:
- Warping
Warping can happen as the plastic from the model begins to cool and contract. When this happens, the plastic can shrink as it pulls on itself and this could eventually bend up and warp. You can prevent this by using a heated platform as this can prevent the model from getting to that point of solid where it starts to warp. It needs to be bonded to this platform and it should be level to avoid any warping issues.
- Leaning
Is your print leaning? The friction within the print head is usually responsible for this type of problem. When this happens, the print head doesn’t move the distance required, rather it goes a shorter distance. To fix this specific issue, you will need to make sure that there is no friction, which is generally caused by the belts that connect the stepper motors and axes rubbing up against the printer.
- Pillowing
This refers to when bumps appear on the top of the surface, sometimes these are open and sometimes these are closed. One way to prevent this problem is by ensuring that the cooling fans are moving at the highest speed when laying down the top layer of the model. If this isn’t properly cooled, that’s when the ends will start to curl and stick up over the surface of the top layer. Another way to prevent this is by ensuring that you create a thick enough top layer so that the printer is able to properly close the model.
- Elephant’s Foot
This is a common issue that you may notice when printing out your model. In many cases, the first few layers are printed out wider than you may have intended. The reason this happens is because you want to make sure that the base layer can be properly attached to the platform. By lowering the temperature that you are using and moving the nozzle a little away from the bed, you can decrease the impact that this effect has on the model. There’s also the option of using a chamfer at the bottom of the model, but you’ll have to do some trial and error to make sure you use it properly.
- Stringing
Stringing refers to the little strings of plastic are left on the object you have printed out. The best way to prevent this from happening is by ensuring that you have retraction enabled as you print, which will cause the filament to suck in just a little bit to prevent the plastic from drizzling out of the nozzle. In addition to changing your settings for retraction, you can also increase the travel speed to prevent this issue.
What do you need to know about part orientation?
The part orientation plays a major role in the completed project. For instance, if the orientation is vertical you can lay down circles on top of each other to make a cylinder. However, if they are horizontal this will end up making a rectangular shape instead. There is a very noticeable difference when you see the same thing printed with a different orientation of the parts.
Not only can this impact the look of the model, but it can also impact how long it takes to print something. When you print something out with the horizontal orientation, it can take a lot less time to print out the model than if you use a vertical orientation because the printer will have to print out fewer layers.
It can also have an impact on the strength of the object printed, which is especially important to look at when you are printing out parts for something. If you are printing out parts, you will need to make sure that you use the right orientation for that objects needs. If you print out objects in the XY direction, this will make the piece significantly strong than when compared to the Z direction.
This all means that it’s important to consider the use of the object that you are printing out to help determine the best approach for printing.
What is 3D printing and how it can be used! Interesting!
What is 3D printing
3D printing technology was patented in the 80s of the last century, but gained popularity relatively recently. New, promising techniques have been developed and the possibilities of 3D technologies have reached a completely new level. However, to this day, the technique is not known in all circles, and not everyone is aware of what 3D printing is. In today's article, we will try to explain in detail and in an accessible way what 3D printing is and where it is used.
In short, 3D printing is a technique for manufacturing three-dimensional products based on digital models. Regardless of the specific technology, the essence of the process is the gradual layer-by-layer reproduction of objects.
This process uses a special device - a 3D printer, which prints certain types of materials. More details about it are written here. Other names for the technology are rapid prototyping or additive manufacturing. Often the phrase "additive technologies" is used in the meaning of "3D technologies".
3D printing steps
To make it clearer what 3D printing is, let's take a look at the playback process step by step. Below are the specific stages of 3D printing. How it works:
- 3D modeling of the required object is performed according to certain rules;
- The file with the digital model is loaded into the slicer program, which generates the control code for the 3D printer;
- Sets required 3D printing options;
- The code is written to a removable memory that connects to the 3D printer;
- 3D model reproduced.
Objects are reproduced gradually. According to the required shape, the selected material is applied layer by layer, forming the finished product. It is worth noting that the possibilities of 3D printing are almost limitless, that is, anything can be made. In some technologies, very thin overhanging elements are provided with supports, thanks to which they can be avoided from sagging.
Naturally, this is a very simplified description of the stages of 3D printing, but they give a very clear idea of the essence of the technique.
Other questions and answers about 3D printers and 3D printing:
- Basics What is 3D scanning?
- Basics What is a 3D model?
3D Printing Technologies
Different 3D printing technologies are used to reproduce different objects. They differ both in the consumables used, and in the speed and accuracy of printing. Here are the main 3D printing technologies:
- Fused deposition modeling (FDM) .
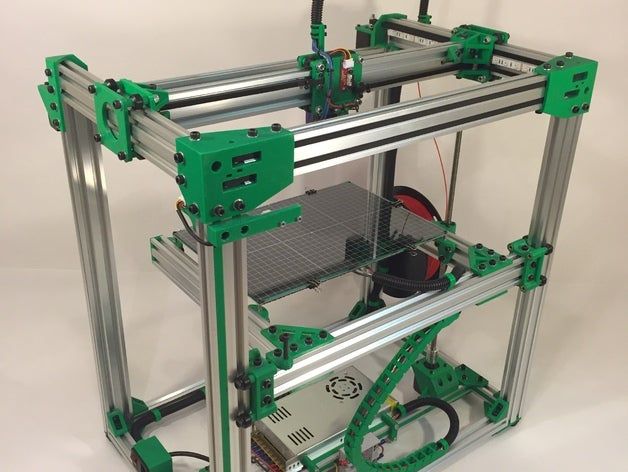
 One of the most common 3D printing technologies, used in most desktop 3D printers, and represents an ideal price / quality ratio. Printing occurs by layer-by-layer supply of a thread of molten plastic;
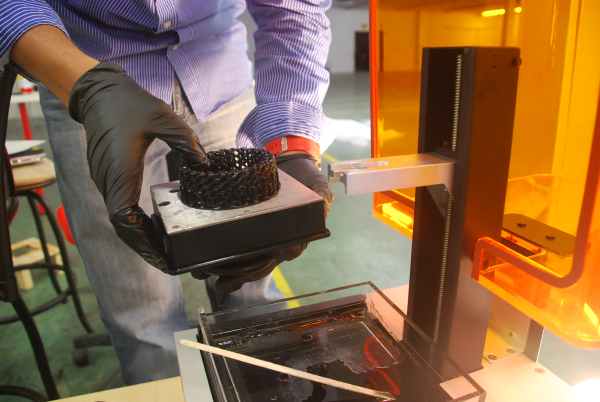
 - Laser stereolithography (SLA) . The formation of the object occurs due to the layer-by-layer illumination of a liquid photopolymer resin by a laser, which hardens under the influence of radiation. One of the variations of this technology is DLP 3D printing. It uses a special projector instead of a laser. Both 3D printing methods are used to create objects with a high degree of detail. In the case of DLP printing, speed is also an added advantage;
- Selective laser sintering (SLS) . Reproduction is performed by layer-by-layer melting of a special powder under the action of laser radiation. This 3D printing method is widely used in the industry for the manufacture of durable metal elements
3D Printing Applications
As you may have guessed by now, 3D printing is extremely versatile. The second name of the technology - rapid prototyping - speaks for itself. In the manufacture of prototypes and models of models, 3D printing can be simply indispensable. It is also a very cost-effective solution for small-scale production. In the aerospace and automotive industries, 3D technologies are already being used with might and main due to the high profitability and speed of manufacturing components. Culinary professionals are working on the development of 3D food printers, and in medicine, 3D printing has become something of a technology of the future. With the help of 3D bioprinting, it is planned to produce bones, organs and living tissues, but for now, implants and full-fledged medicines are printed on 3D printers. Desktop 3D printers can be used for domestic purposes: for repairs, making various household items, and so on. And designers, fashion designers, sculptors and artists appreciate the possibilities of 3D printing and 3D modeling as an unusual way to realize their talent.
Well, that was a brief description of what 3D printing is. We hope we were able to provide the necessary information in an accessible way. If you have additional questions that we have not covered, write to us by e-mail and we, if necessary, will add your questions! Best regards, 3DDevice team.
We also want to remind you about the possibility to order 3D printing, 3D scanning, 3D modeling services or purchase of related equipment and consumables with delivery throughout Ukraine in 3DDevice. If you have any questions, please contact us at one of the phone numbers listed here. We look forward to collaborating!
Return to the main page
3D printing on order in Nizhny Novgorod, cost of services
The cost of printing on a 3d printer allows you to use the service not only for commercial and state enterprises, but also for individuals - innovative production technologies have become widely available. Prototyping of 3d models is the reading of information from a computer program by special equipment and translation into a real object by successive building up layer by layer until the formation of a finished product. ProPlast-NN LLC carries out 3d printing to order - the price of is calculated individually depending on the size of the object, the number of ordered samples, the material from which they will be made and the method of prototyping.
3d printing and prototyping - the latest technologies in practice
The combination of computer technology with production allows you to multiply the speed of production, reduce the cost of creating the necessary items. Volumetric printing is developing at a rapid pace, from the realm of fantasy, it has become a familiar production process, which can be carried out using various methods. Order 3d printing in Nizhny Novgorod for one model or batch of products, just call Pro Plast-NN LLC at the numbers listed on the site. The customer will receive a three-dimensional plastic part, made with a high degree of accuracy according to the drawings or based on a real analogue. Small-scale production of products by 3D printing and prototyping is possible.
Where created 3d models and prototypes are used
Prototyping on 3d printers allows you to quickly and at low cost get a sample of the desired part from a polymer material, made with a high degree of accuracy, without roughness or distortion. Depending on the technology used and the material from which the sample is made, the product acquires high-tech properties: ideal shape, strength, plasticity, temperature stability. Models have found application in many areas, so they make custom 3d printing companies of different specializations:
- medicine;
- automotive;
- serial industrial production: mechanical engineering, instrumentation, metallurgy;
- architecture - when creating models of buildings and complexes;
- designs;
- souvenir production.
How 3d prototyping is carried out
The basis for prototyping is a 3d image of an object, compiled by a computer program with three-dimensional modeling functions. 3d custom prototyping is performed with high accuracy of transferring an image into a physical object using one of several possible methods:
- FDM (Fused Deposition Modeling). A moving molten polymer thread forms an object of complex geometric shape in layers, which can subsequently withstand high mechanical and thermal loads.
- SLS (Eng. Selective Laser Sintering). This is the sintering of a powder in a container under the targeted action of a laser beam.
- MJM (from the English. Multi Jet Modeling - modeling with many nozzles). Multi-nozzle 3d printer prototyping , applying molten material with multiple inkjet heads, based on the principle of a laser printer.
- LOM (from the English Laminated Object Manufacturing - the production of an object by lamination). Bonding layer by layer of thin films, as is done with lamination. After reaching the desired volume with a laser tool, an object of the desired shape is cut out of the mass.
- SLM (from English Selective Laser Melting - selective laser melting). Selective fusion of metal with a targeted laser beam, resulting in a solid object.
- EBM (from the English Electron Beam Melting - electron beam melting). Creation of a product from a powder that is melted by a directed electron beam.
- STL (from English stereolithography - stereolithography). Purposeful formation of a solid object by a laser beam directed into a container with liquid polymer rubber.
Benefits of 3d printing and prototyping
What are the advantages and benefits for a customer who decides to order a 3D printing with a printer?
Before launching a new product into mass production, an enterprise can purchase a prototype, test it, make changes to avoid errors in the design development of the product, and reduce the cost of production.
If a private or public enterprise needs to produce a small batch of products, it is more profitable for him to apply for a small-scale prototyping service than to carry out design and engineering development and testing of prototypes, reconfigure production, use labor resources and equipment. Printing on a 3D printer at affordable prices will save businesses a significant amount, reduce production costs.
The desired samples can be obtained in a short period, regardless of the degree of complexity of the object being created. Typically, the prototyping process lasts from one to ten days, depending on the specifics of the chosen manufacturing method. You can place an order for 3D printing at Pro Plast-NN LLC - we will answer your questions, calculate the cost, conclude an agreement and print products in a short time.
The cost of 3d printing with the printer is low, which allows customers to reduce their own costs for design development, testing and sample production. LLC "Pro Plast-NN" makes high-quality 3D printing - the price is calculated by managers individually, depending on the volume, complexity of the work, the chosen manufacturing method and the material from which the sample is printed.
The cost of prototyping and creating 3d models
Answer to question how much it costs to print on a 3d printer depends primarily on the number of ordered products, the material from which the product is made, the size of the object, and the technology of its manufacture.