3D print layers
How to troubleshoot 3D print layer separation
As a 3D printer user, you know that layer separation is one of the biggest challenges to setting up and maintaining your prints.
You’ve probably encountered it multiple times and have wasted loads of time fiddling with settings and precariously attempting re-prints in order to get rid of layer lift or separation.
That’s why today we’re here to provide you with easy steps you can use as troubleshooting techniques for avoiding further issues with 3D print layer separation altogether!
What is 3D printing layer separation and what are the symptoms?
3D printing layer separation refers to when the layers of a 3D printed object do not adhere properly to one another. This can happen during the printing process, resulting in a weak and poorly finished object.
Symptoms of layer separation include weak or brittle sections of the object, visible gaps or inconsistencies in the surface of the object, and the object breaking or falling apart easily. In more severe cases, the object may not even finish printing as the layers will separate during the process.
Causes of 3D printing layer separation
3D printing layer separation can be caused by several factors, including:
- Insufficient adhesion between layers: This can occur if the build plate is dirty or not level, or if the wrong type of bed surface is being used.
- Incorrect print temperature: The temperature of the hot end and bed should be set correctly for the material being used. If the temperature is too low, the filament may not adhere properly to the previous layer, resulting in layer separation.
- Incorrect bed leveling: The bed should be level and the distance between the nozzle and the bed should be consistent. If the bed is not level or the distance is not consistent, the filament may not be laid down correctly, resulting in layer separation. So, it's recommended to use an auto leveling 3D printer.

- Incorrect flow rate: The flow rate of the filament should be set correctly to ensure that the layers are being laid down correctly. If the flow rate is too high, the filament may be extruded too quickly, causing the layers to separate.
- Over-extrusion: If the printer is extruding too much filament, it can cause the layers to separate.
- Incorrect slicing settings: The slicing settings should be adjusted to ensure that the layers are being printed at the correct height and thickness. If the slicing settings are incorrect, the layers may be too thin or too thick, causing them to separate.
- Filament Quality: Using low-quality filament can also cause layer separation, as it may not have the proper properties for adhesion. It's important to keep in mind that it can be a combination of these factors that cause layer separation and that it's important to check all the possible causes to solve the problem.

Additionally, it is important to notice that the symptoms can vary depending on the severity of the separation, for example in some cases the separation can be seen only in certain areas of the print, while in other cases the separation can be seen across the entire print.
In any case, it is important to troubleshoot the issue and make the necessary adjustments to prevent it from happening again.
How to troubleshoot 3D printing layer separation
Now that you understand the various causes of layer separation, it's time to troubleshoot the problem. Here are some steps that you can take to troubleshoot layer separation:
1. Bed Adhesion
Another factor that can contribute to layer separation is bed adhesion. If you find that your prints are sticking too well to the bed—which can cause parts of them to rip off if they’re removed—this can lead to weaker parts due to excess stress on the part during removal.
To fix this issue, adjust your bed leveling and/or try a different build surface material like painter’s tape or Kapton tape which provides better adhesion than a glass plate alone. Additionally, reduce your print speed slightly so there isn’t as much pressure when removing your print from the bed.
2. Temperature Settings
One way to prevent layer separation is by ensuring your temperature settings are correct. If they’re too high, the filament won’t bond together properly, leading to weak spots and potentially causing your print to break apart later on down the line.
Most filaments will come with specific temperature settings printed on their packaging; make sure you follow these closely so that you don’t run into any problems during the printing process.
3. Speed Settings
Another factor that can contribute to layer separation is speed settings that are too fast for your printer model. This generally applies more when working with larger objects since smaller objects tend not to have any issues with higher speeds.
That being said, it’s still a good idea to double-check your speed settings before starting a print just in case. Generally speaking, slower speeds will result in better-quality prints overall, so it pays off in more ways than one!
4. Check Your Extruder Nozzle
Finally, it’s important to check your 3D printer extruder nozzle for any blockages or debris that may be causing poor filament flow and resulting in incomplete layers within a 3D print job. Check both sides of your nozzle for any obstructions and clean them with an appropriate cleaning solution if necessary.
You may also need to replace worn nozzles if they become clogged more frequently than usual—an increasingly common problem due to the high temperatures used in today’s printers which can wear down metal nozzles over time.
The 3D print first layer plays a major role in the overall quality and accuracy of the finished product. So make sure your 3D print first layer is perfect!
Conclusion
Layer separation is one of the most common issues encountered when 3D printing, but it doesn’t have to be something you have to deal with every time you use your printer!
By making sure your temperature and speed settings are correct, as well as checking for any other potential problems before starting a print, you should be able to avoid most instances of layer separation without having any major issues down the line.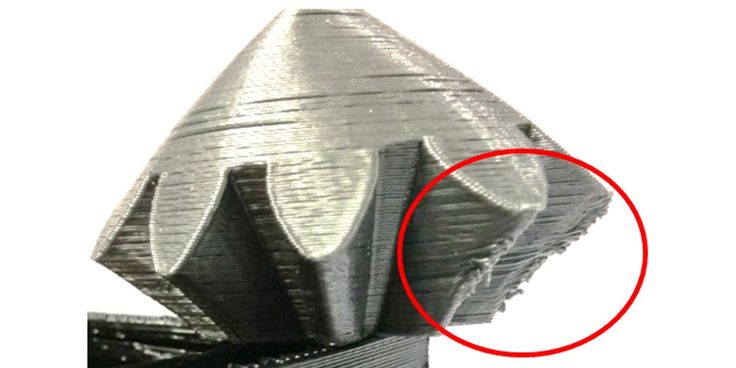 With a little bit of care and attention, you should be able enjoy all of the amazing things 3D printing has to offer!
3D Printing 101: How to Succeed with a Perfect First Layer for Every 3D Print
The first layer of your 3D print is the foundation of everything that comes after, which makes it such an important part of the 3D printing process.
Updated on November 14, 2022
by
Alec Richter
At MatterHackers we want to equip you with the knowledge and confidence to succeed with each and every print. To start - let’s discuss the initial layer that is printed for any part - we refer to it as, not surprisingly, the “First Layer.” Let's dive into the details.
Preparing the Bed Surface
The first layer of any 3D print is the foundation all subsequent layers are built on, which makes it important - it is also critical to remember that bed surface and material compatibility play a role in the outcome of the first layer. There isn't a universal bed surface material that every 3D printing filament will work with; some can handle most filaments, but others are targeted for the success of specific filaments. Take a look at our articles about how to succeed with any 3D printing material to gain the knowledge you need for the 3D printing filament you are struggling with and see a deep dive of the bed surface materials that are compatible.
Once you know that the bed surface material and printing material will work together, you are ready to clean and prepare the bed for maximum adhesion. Generally, a little rub down of the highest strength isoproyl alcohol (99% is best) will help remove any old residue or oils left by your fingers that would hinder the ability of the freshly laid filament from sticking to the bed. Some bed surfaces can get more extreme and require you to scuff it with sandpaper or more lightly with steel wool. Be sure to follow the recommendations for each material because you wouldn't want to use sandpaper on a glass bed, but it is recommended to use 220 grit on a LayerLock Garolite bed.
Depending on the surface, you may even need to use an adhesive as well in order to get the 3D print to stick. Printing PETG and its derivatives on LayerLock Powder-coated PEI doesn't require any adhesive, but printing PLA will necessitate a thin layer of PVA glue stick to keep everything locked down. Don't apply the adhesive too thick! On any surface you want just enough to keep your 3D prints in place and not so much that it adds considerable thickness or that it's nearly impossible to remove a 3D print, completed or otherwise.
What is a Z-Offset?
In the far off year of 2016, 3D printers didn't really use Z-offsets. The print job was started, the printer was homed (send to the minimum or maximum of each axis), and then got to printing the supplied gcode. Overall the 3D printing user experience, along with the technology, has made major improvements. Now, when you start your 3D print, you will often have the ability to "baby-step" the first layer, that is "adjust the first layer, during a running print job, to bring the nozzle as close or as far from the bed as necessary. "
"
Originally, when your 3D printer would "home" it would move to Z0, the theoretical height that the printer's bed is at. You would then adjust the bed (usually with wingnuts or thumbscrews below each of the four corners) to raise or lower the bed so it is uniformly the same distance from the nozzle everywhere across the build plate. After that if you started your print and it was too far or even too close, you would have to adjust each of those screws to bring your bed into alignment. If you got good at it you could adjust it while the printer is busy printing the skirt, but often it meant canceling the print, making adjustments, and trying again.
Now, with Z-offset functionalities like baby-stepping you are essentially telling the 3D printer to add "0.05mm" to where it thinks Z0, instantly adjusting the print head to bring it closer or further from the print bed for a better first layer.
What Makes a Perfect First Layer
Now that you have an understanding about how you can affect your first layer it's time to take a look at what makes it perfect. We’ve compiled some examples of a small square at various Z offsets to show you the right way to adjust your printer settings to achieve a perfect first layer for your parts every time.
The perfect Z-offset will have a first layer with a top surface that looks like the top surface of a finished 3D print; neatly laid out extrusions that overlap each other without pushing up previous extrusions or bunching up at the edges. Underneath, its bottom surface has a clean and uniform pattern. If you were to print a cube with this setting, you wouldn’t see any flare out or tapered in at the base from the Z-offset being too far or too close, respectively.
A calibration 3D print with the Z-Offset set perfectly.
Below, you can see the “0.1mm too close” print has ripples along the top where each pass of solid infill slightly pushes up the previous pass of solid infill. On the bottom, it is clean and smooth but has a cell-like pattern to it. While it looks fine, this will cause the bottom face of the 3D print to flare out, which means if it needs to fit in another part it will need to be trimmed back in order to fit, and the ripples from above can eventually catch on the nozzle and peel up the entire first layer.
A calibration 3D print with the Z-Offset set approximately 0.1mm too close.
A first layer that is “0.05mm too close” is almost perfect. This sort of first layer is acceptable and isn’t likely to lead to complications, other than creating a tight fit if it needs to fit in a different part. There is some bunching up of filament near the edges, but not enough to cause any major issues.
A calibration 3D print with the Z-Offset set approximately 0.05mm too close.
“0.05mm too far” and you start to see between the infill as the solid infill is only slightly squished into each other. You may not be able to see through the gaps in this layer, but with this offset you are beginning to lose surface area touching the build plate, and therefore bed adhesion.
A calibration 3D print with the Z-Offset set approximately 0.05mm too far.
At “0.1mm too far”, you will begin to experience lifting, maybe at the corners or at thin features.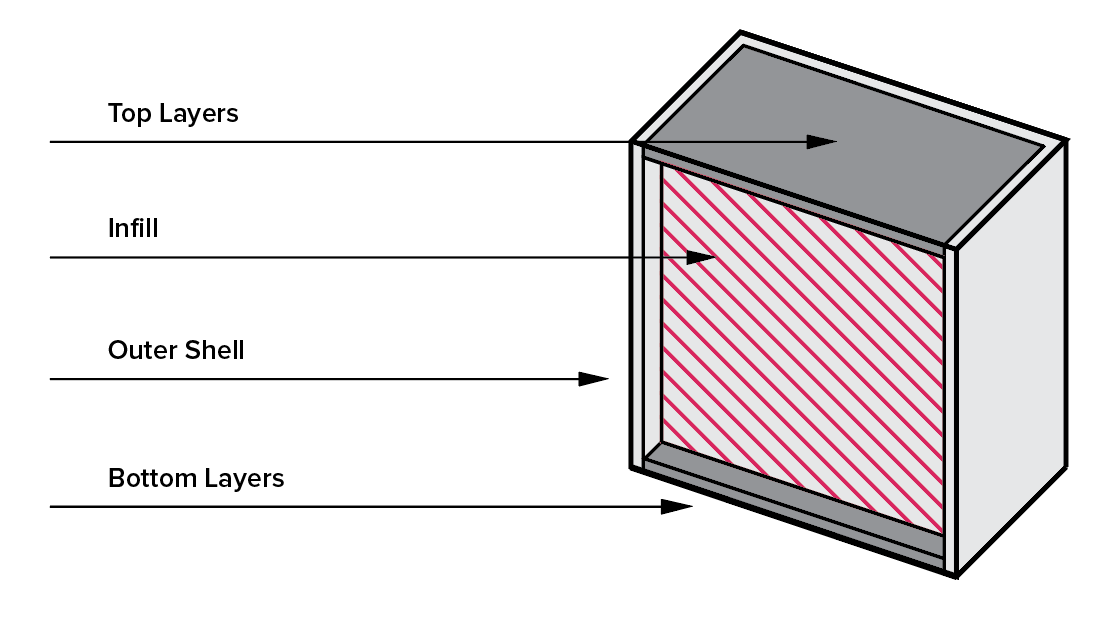 At this point, the infill lines are easily seen without fully adhering to each other and are able to be split apart from the perimeters or even each other. If you're lucky your part stays adhered to the bed throughout the print. Even so, that print may be slightly too tall as the first layer wasn't squished down enough. It may only be 0.1mm too tall, but that may be enough to provide complications for joinery that doesn't have that sort of wiggle room.
A calibration 3D print with the Z-Offset set approximately 0.1mm too far.
Bed Leveling Methods: Manual vs Automatic Leveling
Your printer either has manual or automatic bed leveling hardware capabilities, and it may also have some helpful wizards and features to make it easier to set your first layer, while others often lack those features and require a more attentive touch. Even if your printer doesn’t have an automatic bed leveling sensor doesn’t mean it can’t be upgraded. The BL-Touch is one of the most commonly chosen bed leveling sensors for upgrades as it works on nearly every bed surface and is easy to install and test.
What is a Wizard?
Just like computers and other electronic devices, 3D printers often have built-in wizards to help guide someone with any level of 3D printing knowledge - even those that are brand new to 3D printing. These wizards will usually take the form of a guided walkthrough of the different steps you will need to take to make a change, like prompting you to adjust some thumbscrew for the heated bed or moving some sensor out of the way. Not every printer has one, but in general these are used on printers that have the room on their screens for a verbose and coherent explanation of what you need to do.
A Calibration Wizard on the Craftbot FLOW IDEX XL that walks the user through setting a perfect first layer.
What is an Automatic Bed Leveling Sensor?
Automatic Bed Leveling sensors (ABLs) are used in the place of setting the first layer by a user’s sense of touch and calibrating by eye and instead calibrate the first layer consistently with some electronic sensor.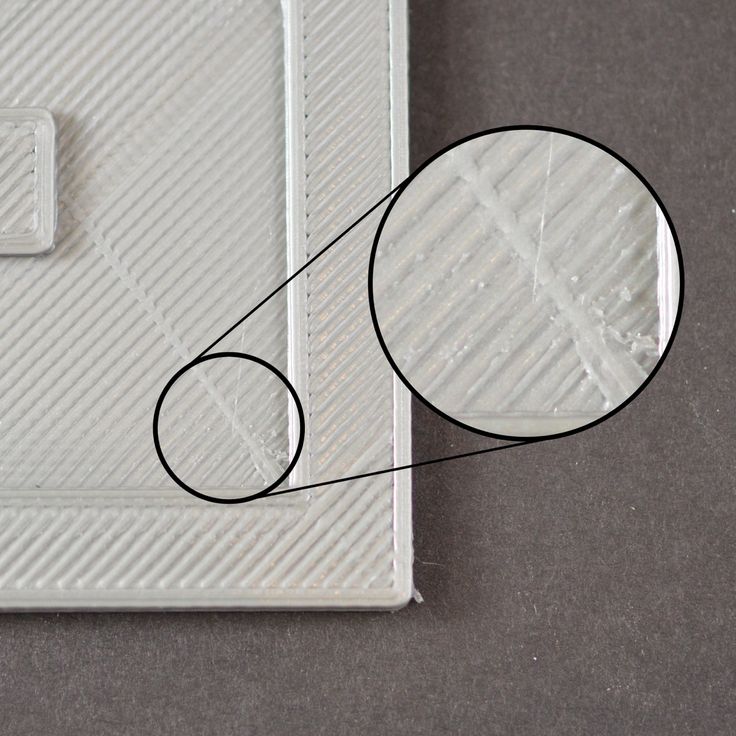 They come in many different forms with some better at detecting materials than others, like inductive probes being able to consistently detect metallic objects from nearly the same distance every time, but they are not able to detect anything non-metallic whatsoever. Or there are IR sensors that don’t require touching the bed surface to detect the bed, but have a tough time registering bed materials that are too reflective. Because there is so much variety in how they work, installing them differs for every form factor if you are choosing to upgrade a printer.
Without Wizards, Auto Bed Levelling
While most 3D printers that include a bed leveling sensor will also feature some code in the firmware to make it easier to use, in the form of a wizard, not all 3D printers will have additional aids. Some home built 3D printers may have a sensor but no wizards to back them up, which requires a hands-on approach to successfully adjust the first layer Z-Offset. It’s not often that users will need to consider this approach, but if you’d like to learn more about how this process differs, you can read more about it here.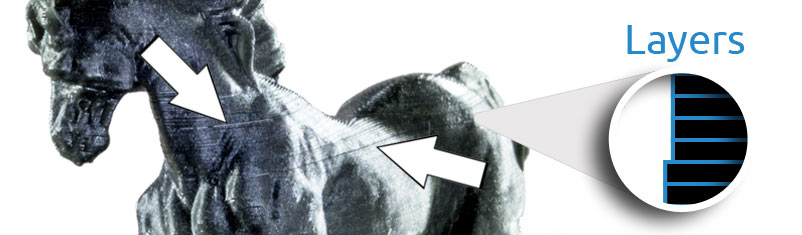
Without Wizards, Manual Adjustment
Without any additional features to make setting your first layer easier, you will have to recalibrate your level bed. A bed that is perfectly leveled but is 1mm too far away from the nozzle at the start of a print is as good as a bed that starts 100mm away, so you need to know how to level your bed properly, and for that it’s important to watch our bed leveling guide here.
With Wizards, Manually Adjusted
The Craftbot Plus Pro features a guided leveling procedure, moving the print head over the bed leveling screws as you manually turn the thumbscrews to adjust the bed. Some printers can get complex with their wizards and take even more of the guesswork out of first layer calibrations. The BCN3D Epsilon W27’s wizard will print multiple lines side by side and ask you which one looks best, then remember the Z-Offset used to produce that result and apply that to the firmware, saving the offset for all Gcodes printed on that specific machine.
The Craftbot Plus Pro being levelled utilizing a guided manual bed levelling process.
With Wizards, Automatic
This is one of the most hands-off processes that you can have for your first layer. The sensor will detect the relative mesh of the bed using the probe, then apply the currently saved Z-offset before running through a test print that you can adjust with babystepping to create a clean first layer. It’s really that easy.
A Pulse E-Series 3D printer utilizes wizards and an automatic bed levelling sensor to achieve a perfect first layer.
After a few runs it will be easy to identify a perfect first layer, but this guide should offer guidance to point you in the right direction to become an expert in troubleshooting your 3D prints and calibrating your 3D printers in no time. If this guide has proven helpful to you and gives you a better understanding of what to look out for in a first layer and how to diagnose whether or not you need to make adjustments to your 3D prints, be sure to check out some of our other 3D Printing Essentials tutorials to help you develop your 3D printing skillset.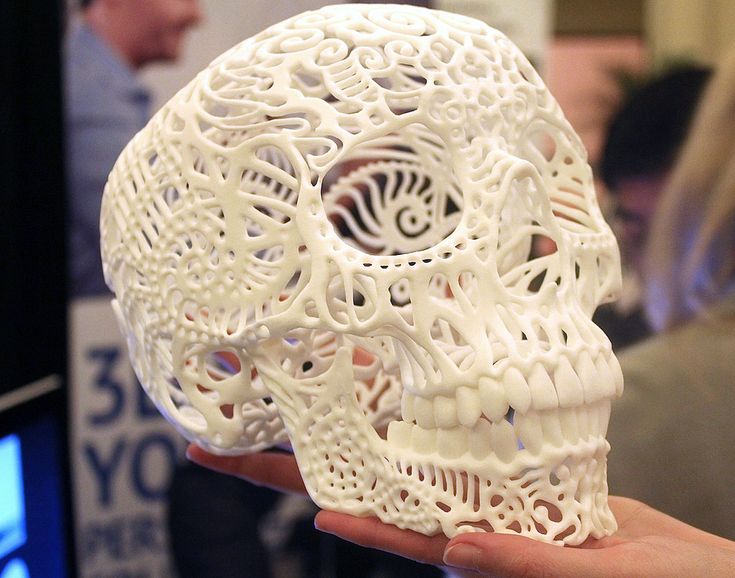
Happy Printing!
Article Tags
- 3D Printing
- Firmware
- 3D Design
- MatterControl
- Press Releases
- Small Business
- Automotive
- E3D
- Jewelry Making
- Engineering
- Entertainment Industry
- MatterControl Touch
- ESD Materials
- NylonX
- BCN3D
- Open Source
- Crafty Pen
- Digital Fabrication Anatomy
- How To
- Hardware and Upgrades
- Tips and Tricks
- Weekend Builds
- Top Ten
- Education
- Tech Breakdown
- Women in 3D Printing
- Project Ideas
- Advanced Materials
- Reference
- Vacuum Forming
- Pulse Dual Extrusion
- Product Spotlight
- Aerospace
- Jobs
- Military & Government
- Multi-Tool Machines
- Getting Started
- Healthcare
- How To Succeed With Any 3D Printing Material
- Creality3D
- Architecture
- 3D Printer Reviews
- Hacker of the Month
Related Products
View all related products3D print layer height: how important is it?
3DPrintStory 3D printing process 3D print layer height: how important is it?
Layer height is actually the height of each layer of plastic, extruded, vulcanized or sintered on a 3D printer. This setting is configured with your slicer and has a much larger impact on the final 3D printed model than it might seem at first glance. When used correctly, this setting will increase the speed, resolution, and quality of 3D printing in general.
The height of a 3D printed layer is usually measured in microns. One micron is equivalent to 0.001 mm.
Things to watch out for when playing with layer height on FDM printers: a thinner vertical layer results in a thicker horizontal line, and a thicker vertical layer results in a thinner horizontal line. This can reduce horizontal accuracy, especially in small moving parts.
Different printers have different maximum layer height resolution. The standard minimum height is typically 50 to 100 microns (0.05 to 0.1 mm). Cheaper 3D printers usually do not have such high accuracy. In printers such as the Anet A8, the minimum layer height is 100 microns (0.1 mm). Therefore, when buying a 3D printer, you should consider the minimum layer height.
SLA and laser 3D printers typically have a much lower minimum compared to FDM printers, which explains the insanely detailed models they can print.
Optimizing 3D print speed
One of the most common reasons for changing 3D printer layer height settings is to increase 3D print speed. The higher layer height means the printer doesn't have to print multiple layers to achieve the same overall height, resulting in much faster 3D printing.
In general, increasing the layer height reduces the resolution and print quality. Thus, this "trick" is best suited for large 3D models, where close-up details will either be ignored or corrected during any post-processing.
The layer height can be optimized for each model separately to achieve maximum print speed while maintaining a specific resolution. However, this is something that should be judged individually for each 3D printer, as effective 3D printing will require some play around with the settings.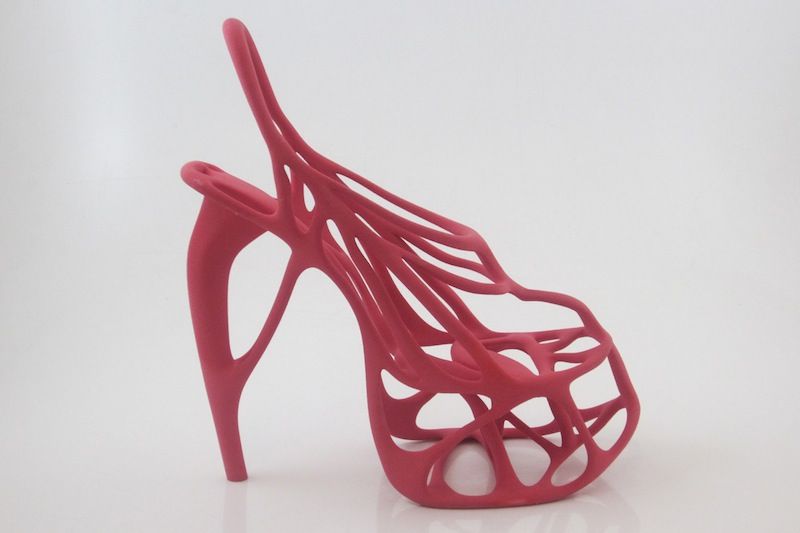
Increasing resolution
A little-known fact in the 3D printing community is that most 3D printers have higher vertical resolution than horizontal resolution. Why? The lead screws provide your 3D printer with a much more precise vertical position than the drive belts used for other axes. Thus, the printer can create sharper patterns in the vertical plane than in the horizontal plane.
This is one of the reasons why aaskedall's "Fillenium Malcon" model is so popular (among Star Wars enthusiasts). It is because of the presence of such amazing details that can be implemented on a huge number of 3D printers.
A lower layer height on your 3D printer will, of course, slow down printing, but the printer will apply more layers for a given height, resulting in much higher detail.
Smoothing out a surface
Another use for the extreme detail available at lower layer heights is to smooth 3D models. With a lower layer height, they become less noticeable, and the details become smoother. As the layer height increases, the surface of the model becomes rough, and the layers are clearly visible.
With this knowledge, you can ensure that parts that require a very smooth finish (such as axles or shafts) are as smooth as possible by reducing the 3D print layer height. As you might have guessed, this increases detail but reduces 3D printing speed, so keep this in mind when printing large 3D models.
Slicer developers have noticed this point and the PrusaSlicer software has even added a setting to increase the smoothness of the print by changing the layer height. For more information on how to anti-alias models, you can check out this PLA anti-aliasing tutorial.
3D printing in plastics, basic parameters
Plastics such as ABS and PLA have long been and will continue to be the most popular materials for 3D printing for a long time. The main reason is their affordability in conjunction with relatively high strength characteristics compared to other materials.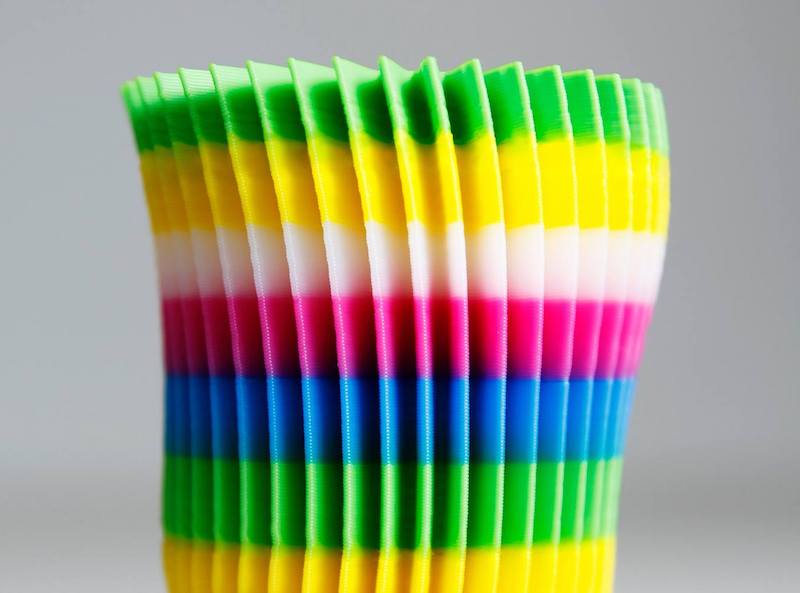 In this article, we will not delve into the reasons for the popularity of the plastics described above, fully describe their characteristics, or delve into the features of 3D printing technology. Here we want to highlight the influence of print settings/parameters and the position of the part on the printing platform, when printing with FDM (FFF) technology, on the final strength of the product.
You can learn about how a 3D printer works here, about 3D printing technologies (including FFF, FDM) and how they differ here.
The strength characteristics of a 3D model can be affected by 3 main factors: layer thickness, filling and orientation of the model relative to the printing platform.
Layer Thickness
Layer Thickness is an adjustable parameter that determines how much vertically (Z-axis) the furnace head moves when moving to the next 3d print layer. There are 4 standard sizes: 0.1, 0.15, 0.2 and 0. 3 mm. There are smaller values, but, frankly, with a standard 0.4 mm nozzle, they make no sense (there will be no noticeable difference in quality). There are larger sizes, but they require a larger diameter nozzle. The typical value for this parameter with a typical 0.4 mm nozzle is 0.2 mm (200 microns).
First of all, it is worth mentioning that the layer thickness directly affects the surface quality (this is especially noticeable on surfaces slightly deviated from the horizontal or vertical), the lower the layer height, the higher the surface quality. This of course will depend on the type of printer, speed settings, etc., but we will not go into this. The higher the layer thickness, the correspondingly lower surface quality, while a simple transition from 0.2 to 0.3 mm will be noticeable.
Further, it is worth mentioning that the higher the layer height, the faster the printing takes place and, accordingly, it costs less. So 0.1 from 0.2 differs in speed by 2 times and in cost by 1. 5-1.7 times.
And finally - strength. Without going into technical justifications, let's just say that the greater the thickness of the layer, the greater the overall strength of the product.
Infill
Infill in 3D printing with plastic is a configurable parameter that controls the amount of material and voids inside the outline of the model.
The outline of the model (default 1.2 mm) is the wall separating the outer space from the interior of the model. Since the printable models have a closed volume, when the print is finished, the interior space is completely hidden.
By default, the parameter is set to 12.5% (12.5% - material, 87.5% - void), which creates the required minimum strength. The higher the infill, the greater the weight and printing time of the model, and, accordingly, the cost.
For printing on plastics, you can choose any infill from 10 to 100%. It is better not to choose more than 90% to keep the minimum headroom for depreciation. Many tests have proven that 90% filling is stronger than 100%. The presence of free space inside adds additional strength under dynamic loads and object operation in changing conditions (for example, cooling-heating), due to the ability of the material to absorb into empty space. Moreover, 100% filling has a negative effect on the quality of the surface: small excesses appear on it plastic.
The relationship between filling and strength is simple: the higher the filling, the higher the strength. It is also worth remembering: the higher the filling, the greater the cost.
Location of the part on the printing platform
The location of the part on the working platform is regulated by the 3D printer operator and can significantly affect both the strength and the quality of the surface of certain areas. In some cases, this parameter is unregulated, since the very shape of the model dictates the only correct location. For example, a thin plane with a small relief on one side (a plate with letters) should not lie on a plane (and not stand on an edge) so that the letters are directed upwards.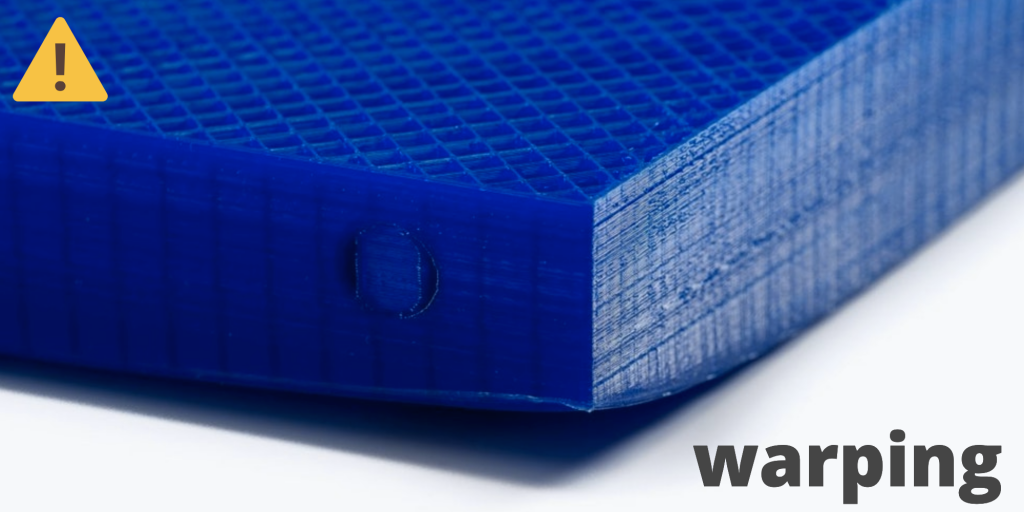
We can probably write a separate article about the location of the part, since the quality of the surface from different sides will largely depend on the shape of the model and the presence / absence of support. To do this, you need to understand the principle of operation of the FDM (FFF) technology, you can find it here.
Effect of location on strength. For example, let's take a 10/10/1 cm parallelepiped. When printing "lying down" (the 10/10 cm plane is placed on the platform), the layers are located along the main plane. When printing "on edge" (plane 10/1 cm), the layers are arranged across the main plane. The strength of the model across the main plane will differ up to 6 times. (layers along the plane, the model is stronger).
Accordingly, when 3D printing, it is necessary to take into account which parts of the product should have greater strength and place the model accordingly. It must also be remembered that when printing one model with the same settings, the time and weight of the print may differ (due to supporting structures), and sometimes, all significantly.