3D scanner ps4 camera
Sony is Working on a 3D Scanner that will Allow Users to Put Real-World Items Into Video Games
By Peter Hunt Szpytek
Sony has expressed interest in allowing players to scan physical items into games in the past, but a recent patent suggests that it's going all in.
Fresh off the heels of a showcase at CES 2022 detailing the technical specs of the PS VR2, Sony has updated a patent for even more VR technology. The tech in question would allow players to scan real-world items into virtual reality, making anything interactive in the VR space.
This patent isn't actually anything new as Sony filed it on June 23, 2021, however, the patent office took issue with some of its claims requiring the tech giant to rework some details and resubmit. It would seem that, as of yesterday, Sony and the patent office have begun moving forward with the process following updates and revisions by Sony.
RELATED: Sony Says No Comment on Backward Compatibility for PSVR2
It's currently unclear exactly what the applications of the patent would be for. There are obvious ways that technology like that could be implemented in video games, however, with how much is still unknown about PS VR2 and the titles coming to it, there's not enough information to say for sure that it's going to be used in VR games. The tech could just as easily be used for non-VR experiences as well depending on the game.
It's important to note that Sony hasn't been granted the patent just yet and that it's still being processed so fans shouldn't expect this tech to be featured in games any time soon. It seems to be using similar ideas as the "anything can be a controller, yes, even a banana" patent that the company filed in March, but with a bigger scope in terms of application.
According to the patent mock-up, it seems as if players will be able to scan larger items than the handheld ones featured in the banana patent such as full-sized lamps. The only caveat seems to be that players will need to be able to have a 360-degree view of the item in order to bring it into the digital world.
While this might seem like a dream come true for big VR fans, there are still plenty of hurdles to jump before it can truly be included in a game as a one-to-one recreation. With the growing popularity of the Metaverse, this technology seems like it could be used for VR recreations of real-world spaces, however, Sony hasn't said much about whether or not its newest VR headset will be usable in spaces like that or if the company is even interested in it.
PS VR2 is in development.
MORE: How PlayStation VR2 Specs Compare to the Original Model
Subscribe to our newsletter
Related Topics
- Gaming News
- PS5
- PlayStation VR
- Sony
About The Author
If you're looking for him, Peter can usually be found dropping hot in Apex Legends with his friends. A fan of games of all types including JRPGs, third-person shooters and survival horror, Peter is a journalism graduate of North Central College and can be reached at [email protected]. Twitter: @PeterSpittech
PlayStation Camera | Stream your gaming sessions and connect to PS VR
Discover incredible PlayStation VR experiences and unlock exciting features on your PlayStation 4.
Get free shipping on any accessories purchases* when you buy direct from PlayStation.
*Offer expires 9/30/22 11:59 PM PT, while supplies last.
PLAY, CHALLENGE AND SHARE
Your epic gaming moments
PlayStation Camera doesn’t just let you see, hear, cheer and share your fantastic feats with friends. It’s also your entry to staggering Virtual Reality worlds thanks to PlayStation VR support, and the stylish, redesigned model also comes with an adaptable stand so it’s never been easier to capture your legendary gaming sessions.
PlayStation Camera includes a number of great features, such as:
- Video broadcasting: livestream yourself and your gameplay to the world.
- Facial recognition: use the PlayStation Camera to recognise your face to login to your PS4 instantly, hands-free.
- Voice commands: Dish out in-game orders, search your library and launch games with just a few simple words.
- Accurate tracking: Gain an advantage on your in-game enemies and control certain games with your movements via precise head and gesture tracking.
Get your PlayStation Camera now
Buy from an online retailer
Get your PlayStation Camera now
Buy from an online retailer
YOUR GATEWAY TO PS VR
Incredible immersion
Thanks to dual lenses and 3D depth-sensing technology, PlayStation Camera can track the position and orientation of your VR headset, helping to deliver an unbelievable sense of presence in a variety of amazing virtual gaming worlds.
Not only that – PlayStation Camera works with the light bar on your DUALSHOCK 4 wireless controller light bar or PlayStation Move motion controller spheres, so you can interact with your surroundings with precision and ease.
Learn more
GAMING GREATNESS ACROSS THE GLOBE
Share your play
Broadcast your skills
Live Broadcast your PS4 gameplay on Twitch, YouTube and Dailymotion, and add picture-in-picture video of yourself with PlayStation Camera. Share your gaming mastery and expert knowledge to build an audience of admirers.
Personalize SHAREfactory videos
Add a personal touch to your SHAREfactory videos with picture-in-picture video commentary, allowing you to create vibrant play-by-play walkthroughs, reviews and more in stunning HD.
Be the star of your own show
Create your own personalised broadcasting stage and host live online shows with AR Studio, a free add-on for the pre-installed PLAYROOM App on PlayStation 4.
An amazing new reality
Discover THE PLAYROOM
Combine the PlayStation Camera with the unique features of the DUALSHOCK 4 wireless controller for augmented reality fun in THE PLAYROOM.
BEHIND THE LENS
More fantastic features
There’s even more to discover with the PlayStation Camera:
- Facial recognition: use the PlayStation Camera to recognise your face to login to your PS4 instantly, hands-free.
- Voice commands: Dish out in-game orders, search your library and launch games with just a few simple words.
- Accurate tracking: Gain an advantage on your in-game enemies and control certain games with your movements via precise head and gesture tracking.
Top Ten 3D Scanners from $100 to $100,000 / Sudo Null IT News There are several ways for you: you can of course create your 3D model from scratch in a 3D modeling program or find a suitable one on the Internet, but you can also scan an existing object! The purpose of this review is to help you understand the variety of 3D scanners available and offer the best in every price segment from a photogrammetric smartphone app to professional 3D scanners.
 nine0003
 Scanners are listed in ascending price order so you can choose the one that suits your budget and use the resulting 3D models for both 3D printing and animation.
If you are not satisfied with the proposed solutions, there is an extended overview at this link.
3D scanner in hand:
1. Best smartphone app: Autodesk 123D Catch (free)
Autodesk 123D Catch is a free photogrammetric application. It allows you to create a 3D model from photographs of an object taken from different angles. You can use it to scan objects, people, and even the landscape. For some applications, if you don't need perfect accuracy, you don't need special equipment. This application actually provides quite good detail and is easy to use. However, it will take you at least 30 minutes for the app to process your photos as the processing takes place on the server and it takes time to send them. nine0003
2. Best DIY 3D Scanner: Kinect ($99. 99)
99)
The Xbox Kinect is designed to expand your gaming experience. It is not designed for 3D scanning, but you can easily find manuals and third party software (like ReconstructMe) to turn it into a 3D scanner. If your arms are growing out of your shoulders, this is an interesting and inexpensive solution for 3D scanning.
Price: $99.99
Resolution: 0.051mm
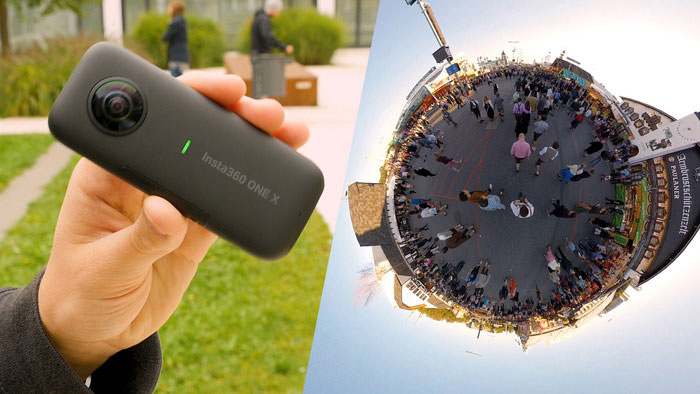
)
This scanner can be attached to your tablet or phone (generally designed for iPad, but can be adapted to other devices). Lightweight and easy to use, with a very good resolution. Suitable for large items (can scan a full-length person) and outdoor scanning. You will be able to use it with software running on Occipital's SDK. This will increase the resolution and give you access to special features like room scanning. It probably won't be something you'll use for 3D printing, but it's interesting for game development, for example. nine0003
Price: $ 379
Resolution up to: 0.5 mm
accuracy to: 4 mm
4. The best of cheap manual 3D scanners: Cubife ($ 399)
3D 3D-scanners can be quite affordable and easy to use if you choose from inexpensive portable models. Cubify fits these criteria very well and has a relatively good resolution. But still, its capabilities are not enough for texture scanning and it is better to use it for subsequent 3D printing of one-color models. nine0003
Price: $ 399
Resolution: 0.9 mm
Resolution at a distance of 0.5 m: 1 mm
3D scanner on the table:
5. Best and cheapest table 3D 3D 3D 3D 3D 3D 3D- Scanner: Matter and Form ($519)
If you're looking to take your quality to the next level, you can purchase a desktop 3D scanner. This model is compact, easy to use, and delivers good resolution, especially considering the price (not your go-to option if you're looking for perfection, but great for educational and demo purposes).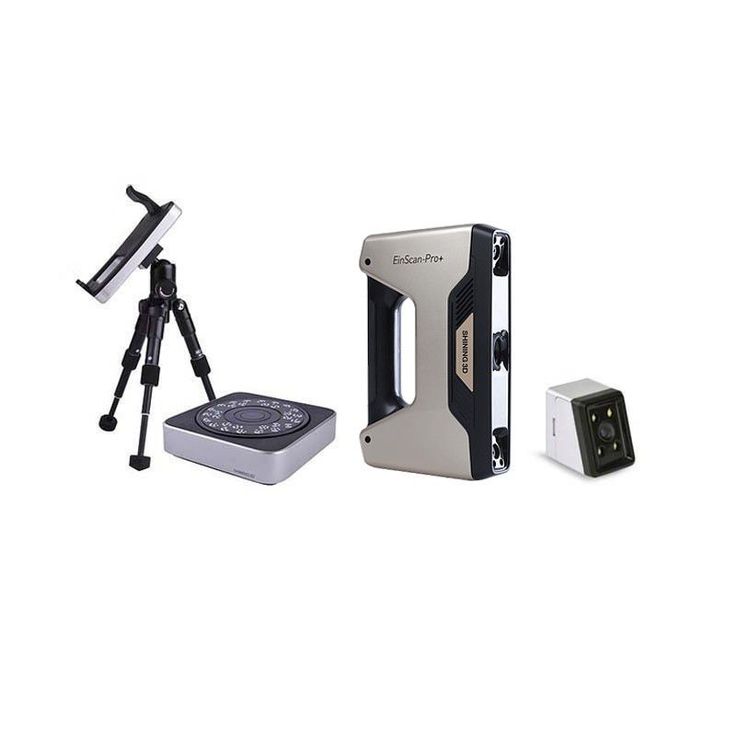 The scanning process takes place with the help of a laser and a rotating platform. The scan takes about five minutes and simultaneously reads the texture of the object. nine0003
Price: $ 519
Resolution: 0.43 mm
accuracy: ± 0.25 mm
6. The best device "two in one": XYZPRINTING DA VINCI 1.0 ($ 600)
is inexpensive combines a 3D scanner and a 3D printer. The quality of the models is not too high, but the price is very low for such a combined device. This makes the XYZprinting Da Vinci the easiest solution for beginners who want to get into the world of 3D scanning-printing. nine0003
Professional 3D scanners:
7. Best value for money portable 3D scanner: Fuel3D Scanify ($1490)
Very easy to use, intuitive, and feels good in the hand, this scanner delivers good accuracy and texture quality. The only limitation is that the size of the scanned area is limited, which is great for small objects, but for scanning a full-length person, for example, it will not work.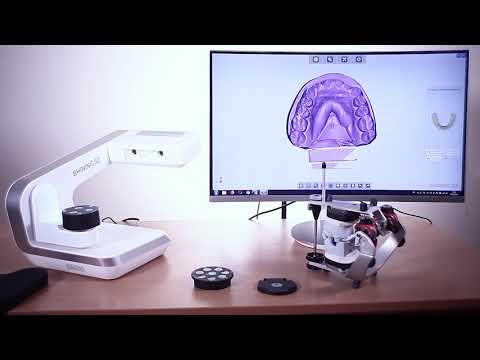 nine0003
Price: $ 1490
Resolution: 0.35 mm
accuracy: to 0.3 mm
8. Best price The scanner uses a different scanning technology than others. Instead of a dual laser scanning system, it uses a structured light source and cameras for fast scanning with very fine detail down to 0.06mm! The scanner comes with DAVID Pro Edition 3 software that works with OBJ, STL and PLY 3D file formats that can be exported to other programs for further editing. nine0003 Price: $ 3995 9. The best table professional 3D-scanner: SolutionIX REXAN 4 ($ 79 900)
Resolution: 0.06 mm
accuracy: 0.5% of the size of the object
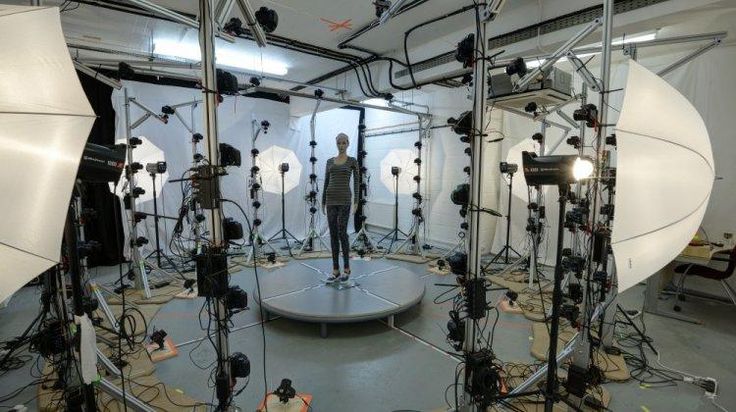 The scanner can be used to scan larger objects by increasing productivity with a photogrammetric system. As an option, it can be equipped with an automatically rotating platform capable of supporting up to 50 kg of weight. nine0003
Price: $ 79 900
accuracy: from 0.03 to 0.71 mm
10. Best professional manual 3D scanner: Metrascan 750 ($ 50,000 - $ 100,000)
Creaform Metrascan 750 is a complete professional, production solution for accurate 3D scanning. It is light, accurate, fast, and scans objects of any surface quality, with any texture with excellent accuracy.
Price: $79900
Resolution: 0.050 mm
Accuracy: Up to 0.03 mm
We hope this was a useful read and you found a 3D scanning solution suitable for your needs and your budget! If you want to learn more about photogrammetry, you can read this article.
Good luck with your 3D scanning!
DIY 3D Scanner
Fiend3d
The highest purpose of mathematics is that to find hidden order in the chaos that surrounds us
Norbert Wiener
Hello!
This material is about how to create a 3d Scanner with your own hands.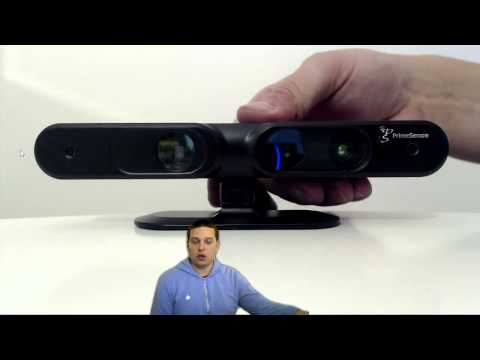 I will try to explain the logic of his work on the fingers.
Inspired by this:
http://en.wikipedia.org/wiki/3d_scanner
I also wanted to make myself such a thing. More precisely, this is one option for solving this problem from an infinite number. This, of course, will not be an ultra-precise instrument, but I hope you will be interested. nine0003
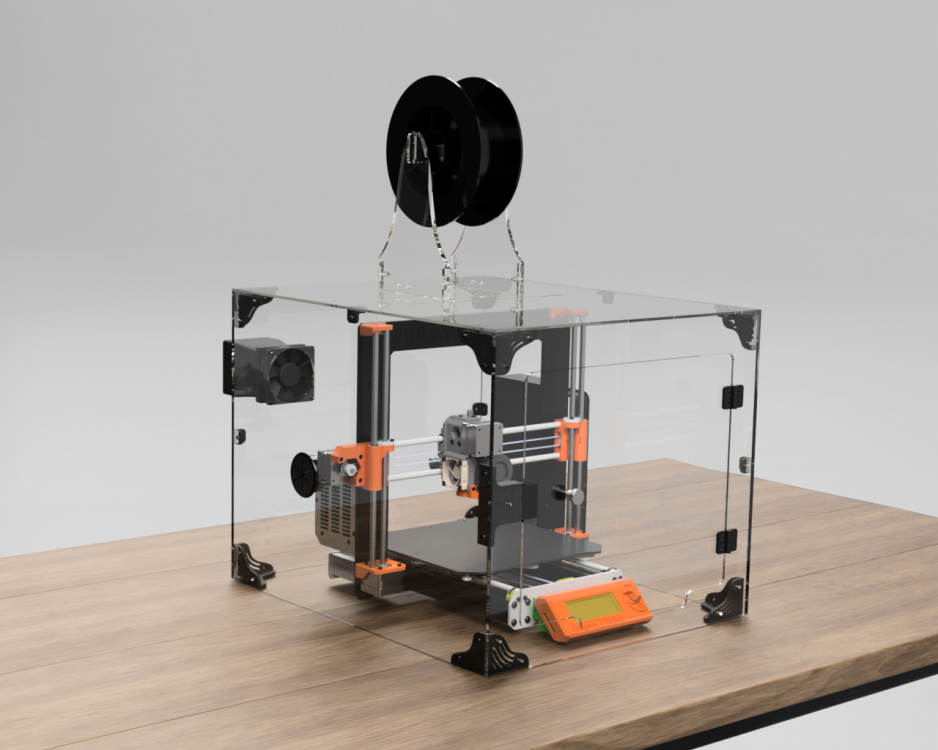
What you need to start the scanner:
1. Web-camera.
2. Lamp.
3. Two square sheets perpendicular to each other.
Web-cameras are now very cheap: it cost me 600 rubles. (D-Link DSB C320). Of course, the better the camera, the better the results.
I'm proud to present you my device:
Shadow-casting cardboard (should be flat and cast a shadow in one plane). This will mimic the operation of a laser that shines in a plane, which you can also use if you have one (you can order it on the Internet, it costs about 20 USD). Naturally, the laser is better than the lamp. nine0003
Now about the principle of operation. Let's look at this picture:
We see a shadow falling. The shadow line should be clearly visible both on square planes and on the scanned object. Angle ABC is (as you should have guessed) a right angle.
Let's take a closer look at what we need from this:
Notice the line of intersection with the square planes and the scan line. All points on these lines lie in the same plane. If you look closely at the line of intersection with the planes, you will find that they form three points (A,B,C) of intersection with the planes. This means that we know three points from the plane in which the scan line (and the line of intersection) lies. Three points is all that is needed to construct the equation of the plane. nine0003
Knowing the coordinate of the camera, we can emit a beam from the camera to the scanning line. The intersection with the shadow plane will be the future 3d object.
It is very difficult to calculate the camera coordinate with points 0,1,2,3,4,5. However, we can manually calibrate the camera in the 3d editor.
I prefer Maya and will do in it and describe everything in MEL.
If you think about it, everything is very simple. I even believe that the human brain is guided by the same principles when judging the distance with one eye. If we count the picture without a shadow, then the objects will “hang in the air”, i.e. the eye cannot determine the location of the object. Its coordinate can only be calculated if the object is moving...but I'm tired. nine0003
And so. If you do not understand what the equation of a plane is, then I will try to tell you how I understand it.
Despite its invaluable power, the plane is described simply:
Ax + By + Cz + D = 0 (where A, B, C and D are constants, and A, B and C are not equal to zero at the same time)
This is the general equation of the plane. In other words, on the Internet you can find a lot of things about the plane.
References have very complex-sounding definitions. Personally, I think of a plane as a normal and the distance to the plane from the center of coordinates. The normal is a unit vector and the distance is a scalar. nine0008 Imagine a normal: it describes a plane passing through the center of coordinates, and then move this plane in the direction of the normal by a known distance. It turns out that the plane is four scalars or one vector and a scalar.
In MEL, a plane can be described as follows:
float $plane[4];
It's just four numbers. You can get them from three points (three points are three vectors). An example of a solution in MEL:
It looks cumbersome, because I try very hard to comment in detail, but if something is not clear to you, then these are simple operations on vectors. Consult any reference (or even the Maya manual). There is nothing super complicated here. nine0003
We already know how to find the plane. Now the camera position is vital. To calculate the beam from the camera to the scan line.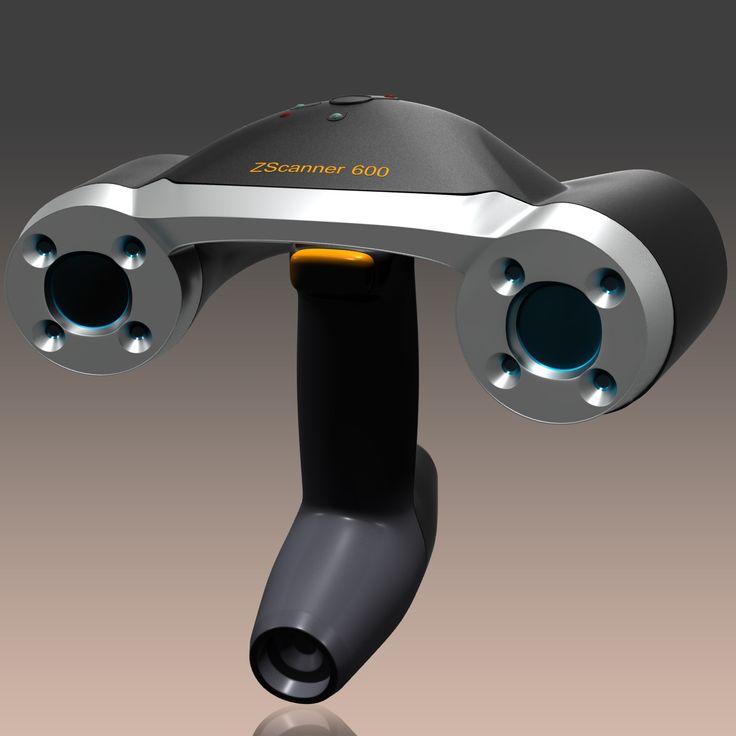
Camera calibration is a very complex mathematical problem. And I did not dare to torture myself and (God forbid) you with this occupation. I thought that the easiest way is to manually set up the camera and take the coordinate from it.
To do this, I created a scene in which I created a personal camera and a frame for fitting future points, which will also be assigned manually. nine0008 Yes ... it's not very fast, boring, but there are no restrictions on the material of the sanitized object and its environment. So there are plenty of pluses in this method (the best plus is, perhaps, the ease of implementation).
It is convenient to perform camera calibration when the picture is adjusted to the Resolution Gate.
The camera position has appeared. Now you need to learn how to calculate the intersection of a ray with a plane. To do this, you need to understand what a beam is. A ray is two vectors. One vector is the beam start coordinate (in our case it is the camera), the other one is its direction. A direction, like a normal, is a unit vector (a normalized vector). nine0003
You can explain in words how to calculate the intersection:
As you can see, the solution is very elegant:
Well, the math is over.
The scanning process itself looks like this:
The function ( createScannerPoint ) creates points (spheres) of the future object and places them in a special group (final_group), which is convenient to show and hide from view using additional buttons on the interface:
If you can call it an interface. And what else can you come up with. It seems to me that the code of complex interfaces is extremely inconvenient to read (even if you wrote it yourself), but this is still a lesson.
Resources:
1) Project Maya 8.5 (ma)
2) Script
Run Maya project and script (source "3dScanner.mel";).
We look at how everything works: we pull the locators. Now we shoot video from the webcam:
We adjust main_camera together with the connected Image Plane (with playback of the frame sequence from avi enabled).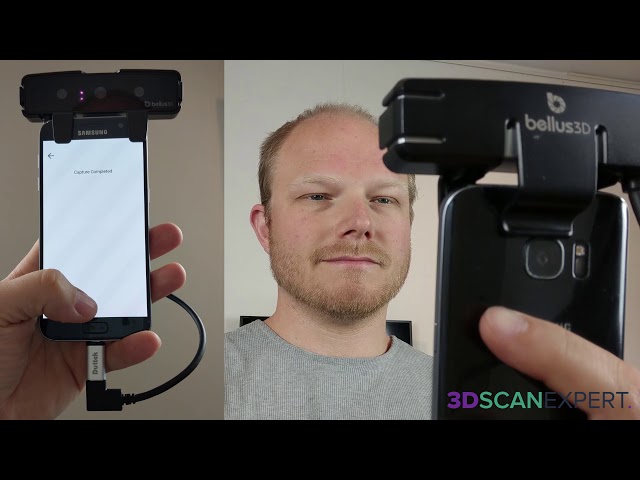 As I said, it’s convenient to customize according to Resolution Gate:
To increase the accuracy, first use alt and the mouse, and then Move Tool, Rotate Tool and tweak the viewing angle a little, if necessary. After fitting, make the camera Lock (in the additional window tools, this is done with one button).
I have my unfortunate digital camera that can shoot a maximum of 640 * 480 and it does it terribly. In principle, you can use a digital camera or camcorder connected to a computer. Since 640*480, then these numbers should be in the Image Size settings. nine0003
Now, without being nervous, manually move the sight (target) along the scanning line, remembering to move the locators that form the shadow plane (p1,p2,p3). It is also convenient to put the createScannerPoint command on the hotkey or use the G button after running the command from the Script Editor.
As a result, we get a set of points in three coordinates. The more accurate your movements and technique were, the less noise the final result looks like.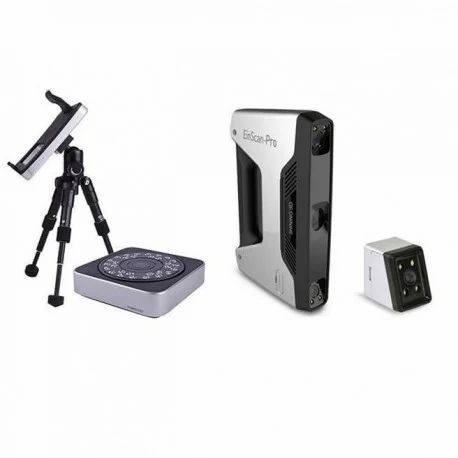
That's it.
In fact, I was very upset by the quality of my technique: a soapy and very small picture, there are catastrophically few frames per second and my monitor is too small for accurate work. The biggest bummer is the lamp. It gives a diffused shadow in any case. A special laser is needed (although it is cheap, but my experience with our mail discouraged the desire to order it). nine0003
You can make a NURBS curve from each scanned line and run a loft surface on them. Or write a script that builds a grid based on the received points, the coordinates of which you can take from the spheres.
The lesson is structured in such a way that it would be difficult to scan without understanding how it works. I don’t even know if this is good or bad, but I thought that the principle here is more interesting than the implementation and this was the focus of the lesson (or article?). In short, I myself do not know what I wrote. nine0003
I hope you enjoyed it and thank you for your attention.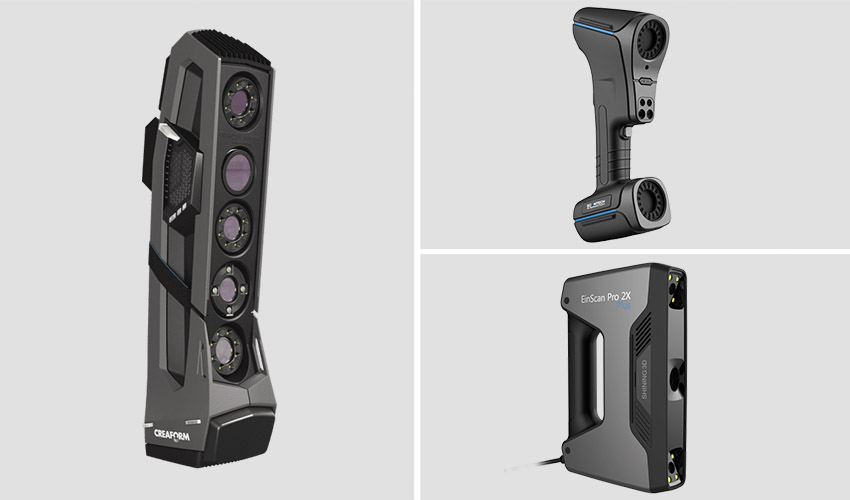
694 0 850 38
27
2007-10-09
I would like to add that the method is not tied to a program. You can implement this in any 3d graphics application that has a built-in interpreter.
2007-10-09
Maybe, of course, I'm not far from the intricacies of programming scanners, but I didn't smile at all that this is all done in Maya itself, the question follows - why do you need to scoff at the program like that? if there are already free programs with similar capabilities and even better, I can envy the current in one thing - this is that MEL to know this archive is important for Maya, and so I will put an average score. nine0003
2007-10-10
Yes, of course, all this is interesting, but in practice there is little use..... without a license) and a laser is required). And the one that is, has a lot of limitations, although it is inexpensive. The benefit appears if you use an HD camera and a laser. And I don't have them. The accuracy of my webcam is sorely lacking. In conjunction with the lamp especially. But even in such conditions, I can scan the teapot. This will take me a little time. If you increase the size of the sheets, get a very bright lamp (preferably a laser for 20 bucks), then you can scan a person's face. And in this case, there is no restriction on the material (the skin is translucent and can confuse the beam search algorithms). You can judge for yourself what quality my sources were. And their availability. In paid (I'm talking about the cheapest) devices (written in the instructions), you need to ENTER the camera coordinate. I find calibration in Maya a thousand times more convenient, accurate, and faster. I wanted it to be interesting. Still, I think everyone understands that it is unreasonable to expect great use from a table lamp, but it is fun to play with it :) The description of constructing a surface by points deserves a separate article. I suggested only doing Loft according to the scanned curves.
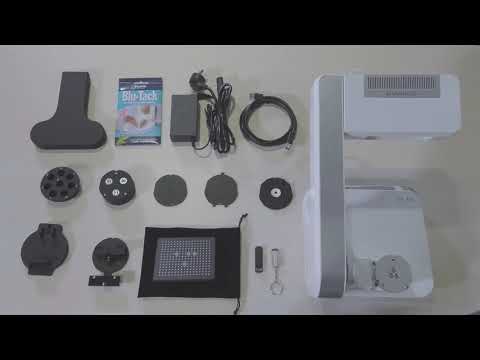 This should work. nine0003
2007-10-10
If you are interested :) Then read this [url]http://www.vision.caltech.edu/bouguetj/index.html[/url] Solutions based on small scripts are very flexible and change to the necessary needs in half an hour. Pay attention to this example: [url]http://www.vision.caltech.edu/bouguetj/SunScan/images/car_anim.gif[/url] If you find the same platform with the car, and measure the height of the wall, then you can model this sketch in Maya (blender, xi, 3dmax ...) and calculate the equation of the plane from the shadow cast by the stick that he manually moves. After being calibrated into the chamber. [url]http://www.vision.caltech.edu/bouguetj/SunScan/images/car6s.gif[/url] [url]http://www.vision.caltech.edu/bouguetj/SunScan/images/car4s.jpg[/url] In my opinion, a lot of fun. The flexibility that 3D editors provide is hard to overestimate. nine0003
2007-10-10
[quote] if there are already free programs with similar features [/ quote] dimson3d, this tutorial proves that Maua's possibilities are almost limitless.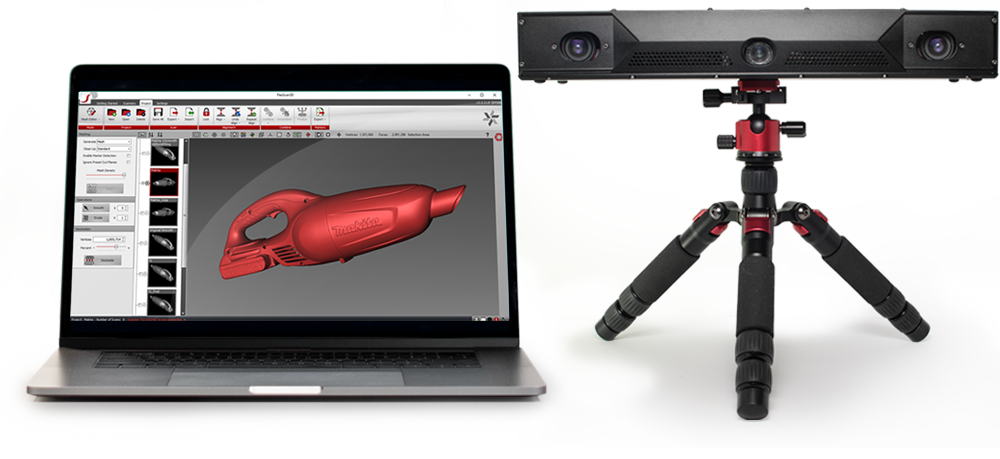 The lesson is interesting and original. 5\5 Of course, in practice this is rarely applicable, but still)) IN EXCEPTIONALLY GOOD SENSE :)))))))) 5/5
2007-10-10
I didn't understand anything. 5/5 :)
2007-10-10
I seem to have seen this lesson (similar) somewhere else I don’t know who the avtar was, but we cross our fingers that you are, and that you didn’t drag him away :) and finally the quality of the resulting models is not very good :)
2007-10-11
It's not good to accuse people of plagiarism. I provided links to the source code at the beginning of the article. I am sure that you saw not a tutorial, but paid programs.
2007-10-11
This is not exactly plagiarism... This type of scanner was announced here on render.ru. But for him there was a separate program and he used the construction level (laser) So the idea is not his, but well done that he transferred it to max .... Although there is little sense from this .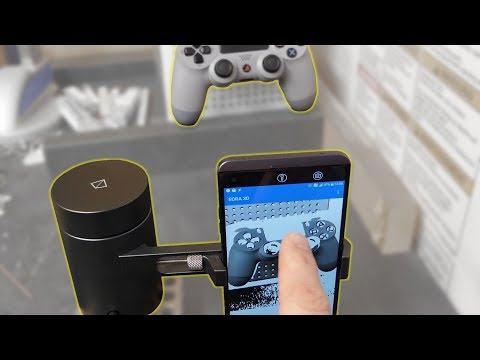 . Programs easily export to * .3DS. Yes, and it’s not actual ... Draw a teapot for 10 skunds, and if you want more, for example, the head will turn out from this scanner so crap that it will be scary to look at. For now, I stick to the old-fashioned methods, if you need something, we can make it with shoulder straps
2007-10-11
I have been writing this article for three weeks. Multiple implementations. I fucking hate the accusations. I did not compete with paid projects: I wrote an article about how to implement it myself and I think that I coped with this task.
2007-10-12
[quote] I have been writing this article for three weeks. Multiple implementations. I fucking hate the accusations. I did not compete with paid projects: I wrote an article about how to implement it myself and I think that I coped with this task.[/quote] The start is good. I like it. And the topic is relevant. Still, if you improve the system, it can be very useful in the future. But I consider this lesson unfinished, because. only the scan result is present. And it would be worth continuing until the final modeling of the scanned object. So 5/4 from me. And the fact that the lesson was written for three weeks is a little more. I think those who made similar paid programs or scripts have been working on this topic for more than one month. And so the quality is better. And you don't have to compete with them. If you are satisfied with this principle of the scanner, then it is not necessary that others will like it. My advice to the author is to continue to develop the topic and improve the scanning technique. Ato is tired of the fact that everything good is invented in the West. You look in a couple of years the script will turn into a full-fledged software product. Which is what I want. nine0003
2007-10-12
"Shadow casting card (should be flat and cast a shadow in one plane). This will simulate the operation of a laser that shines in a plane, which you can also use if you have one (you you can order it online, it costs about $20. Naturally, a laser is better than a lamp." In my childhood, having nothing to do, I shone through a laser pointer through everything that was translucent, and now I noticed an interesting feature for this case, that if a test tube from a school chemist is placed in front of the laser pointer. laboratory, then the laser beam is refracted into a plane, if you recall the movie "Alien" in which the spacecraft was scanned ... In general, I wanted to say that the above principle can be brought to mind, instead of a test tube, use some kind of prism or pipette, etc. place on a tripod and move with the ease of your hand and not spend $20 on a bourgeois device...
2007-10-12
>There is no free software for this (they work for free but don't save anything (no license) your statement is not true http://www.david-laserscanner.com/ the program is free, saves in obj, gives very satisfactory results instead of the calibration proposed by the author of the article, the program uses a special template that greatly simplifies this procedure >And in this case there is no limit on the material scan glass object
2007-10-12
by the way, the mentioned program not only saves the geometry in obj, but also captures the texture, UV (all this in a free module)
2007-10-12
remember the movie "Alien" in which the spacecraft was scanned .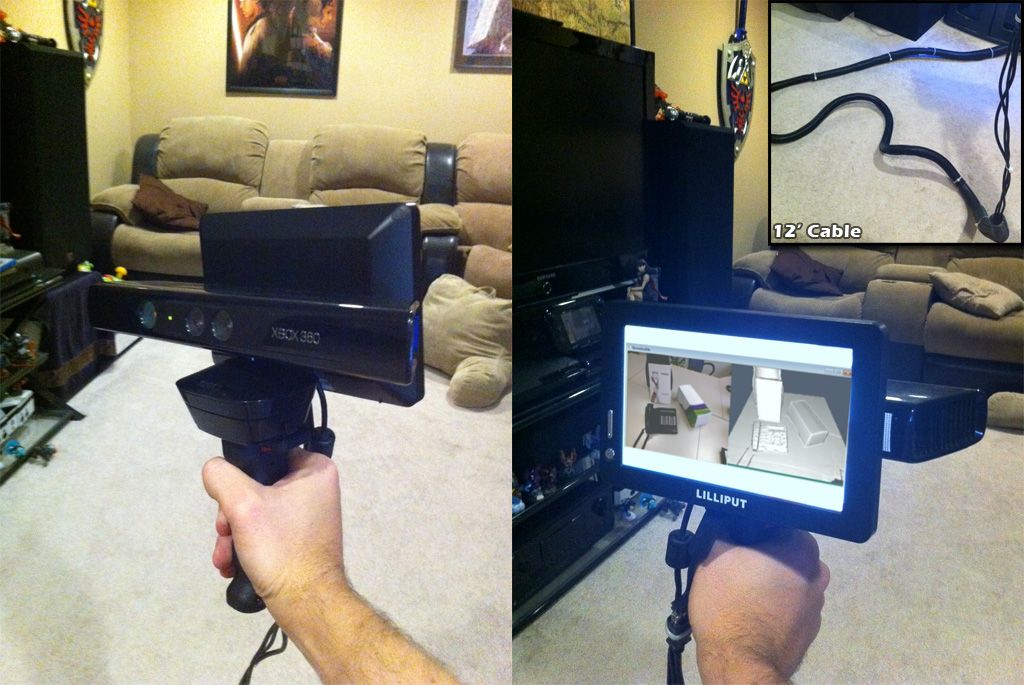 .. this is very intersting! but in general, a laser level is suitable - they are cheap and available
2007-10-12
ps This program did not start for me. And I can scan a car :) Can this program scan a car with a fence? Before you criticize, please read the lesson, it's not about that at all. nine0003
2007-10-12
You can also use sunlight and a stick. In theory, if a laser pointer is placed on a fast motor, then a % line should appear in the frame (but I haven’t tried it) Lots of things you can think of. This is what I wanted to say.
2007-10-14
As an idea, interesting, though not new. I understand that a lot of work has been done, but you must admit that it's "raw" ... For the efforts 5/5
2007-10-15
Bought a Deja Vu CD. In additions, there was a mention of the LIDAR 3d scanner, which was used to create three-dimensional rooms. Here's what I've dug up so far: [url]http://www.fxguide.com/article114.html[/url] Pay attention to the line: [quote]A Lidar scan was completed of a real church interior located in Los Angeles to serve as a guide for the look of the CG church. Pixel Magic's 3D department modified the geometry of the Lidar scan in order to give the illusion of a 300ft height ceiling, and to add more detail where needed. Lighting of the virtual set was matched to a master clip of the real church interior.[/quote] And further: [url]http://en.wikipedia.org/wiki/LIDAR[/url]
2007-10-16
>Dip in flour and scan %) will you wash it yourself? :) >And I can scan a car :) Can this program scan a car with a fence? I guess, yes at least a full-length human body has been scanned by someone >Before you criticize, please read the lesson, it's not about that at all who is criticizing? you just said that there are no free programs, that they do not save anything - and I corrected you and so - quite an interesting article
2007-10-16
I have a cool cat figurine. Thought it would be cool to scan it. But it's matte black. The camera sensitivity was not enough to see the illuminated part. Decided to dump it in flour.