Robot arduino 3d print
💾 Best STL files 3D printed for Arduino & Raspberry Pi・Cults
💾 Best STL files 3D printed for Arduino & Raspberry Pi
Download 3D files of accessories for Arduino & Raspberry Pi
Discover a selection of the best STL files to use with a 3D printer in order to create great projects coupled with an Arduino or Raspberry Pi card. Turn the corner and bring your 3D printing to life with electronic components!
Iron Man MK6 MK 6 Suit
Free
Han Solo in Carbonite - Raspberry Pi 2/B+ Case
Free
The Animated Pixel Lamp
Free
BCN3D MOVEO - A fully OpenSource 3D printed Robot Arm
Free
SMARS modular Robot
Free
Terminator - ARRIVAL - by SPARX
Free
DIY 3D Printed Dremel CNC
Free
Poppy Humanoid
Free
DIY Alien vs.
Free
Gyro Winder / Watch Winder
€2.50
RGB LED Lamp
Free
Terminator – THE FACTORY - by SPARX
Free
Arduino Uno Snug Case
Free
Raspberry Pi 3 (B/B+), Pi 2 B, and Pi 1 B+ case with VESA mounts and more
Free
Proteus Solder Station - 80mm/120mm fan
Free
Snes Mini Raspberry Pi
Free
SMARS V4 vertical Ultrasonic
Free
Bumper for Arduino Uno Clone
Free
Malolo's screw-less / snap fit Raspberry Pi 4 Model B Case & Stands
Free
LED bridge lamp
Free
Guardian Robot Hackable – Bottom Remix
Free
CNC Machine
Free
Raspberry Pi 3 (2 or B+) case
Free
Shovel DLC for SMARS
Free
PropMaker LightSaber
Free
Arduino Mega 2560 Snug Case
Free
UFO Abduction Lamp with blinking lights
Free
3D Printed Case for Arduino Uno, Leonardo.

Free
Arduino Uno R3 Snug Case
Free
RC Soviet tractor DT-75 Kazakhstan (1\10 scale)
Free
Otto DIY build your own robot
Free
Triple A connector + connector extender for SMARS
Free
OctoPrint Raspberry Pi Rig 3.5" PiTFT Touch Display
Free
Arduino box
Free
3A batteries mod for SMARS
Free
BOARDUINO – ARDUINO ALL IN ONE BREADBOARD STAND
Free
SMARS QUAD MOD
Free
Mini plotter (CNC Plotter) Arduino
Free
Raspberry Pi 3 B+ enclosure
Free
Arduino Mega 2560 holder
Free
7in Portable Raspberry Pi Multi-Touch Tablet
Free
Kame: 8DOF small quadruped robot
Free
Malolo's screw-less / snap fit Raspberry Pi 3 Model B+ Case & Stands
Free
Raspberry Pi Pipboy 3000 MKVI
Free
Twitch Drone Chassis for ZeroBot
Free
Particle Raspberry Pi Case
Free
Bubble Maker
Free
Magnetic levitating lamp
Free
Moving T-800 Terminator Skull
Back to the Future Jules Verne Time Train with lights and smoke
ARDUINO UNO PORTABLE LAB CASE
Moving T-800 Terminator Skull
Here is our selection of the best STL files for Arduino & Raspberry Pi, all these accessories are from the 3D file library Cults and are perfectly 3D printable.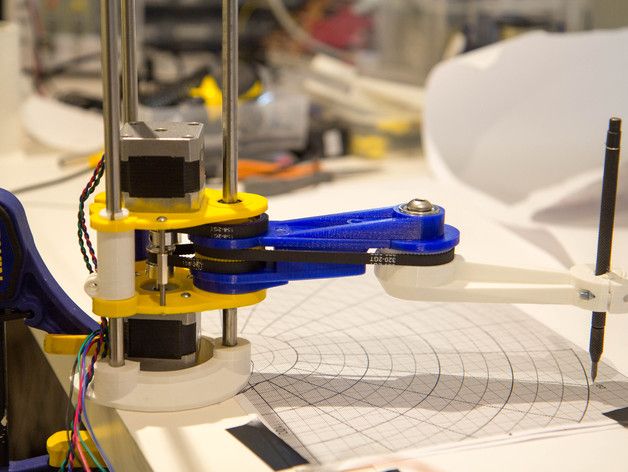
This collection includes free and paid 3D files of accessories to use with your Arduino or Raspberry Pi card. The many 3D models were created by our community of members 3D designers but also big fans of electronics and Do It Yourself. You will find here many projects ranging from simple storage for your card to the most incredible robot. There are, for example, automated robotic arms, smart cars, stopwatches, games, musical instruments, robots, etc.
Just download 3D models and integrate your Arduino or Raspberry Pi card into it. Installation instructions and the code for using the electronic component are provided. This necessarily requires more work than a simple object 3D printed, but you will have the real satisfaction of having successfully completed a project, of having coded it and of being able to really make it work.
Top 12 3D-Printed Robots — From Amphibians to Humanoids
Published on August 26, 2021 by Mikahila L.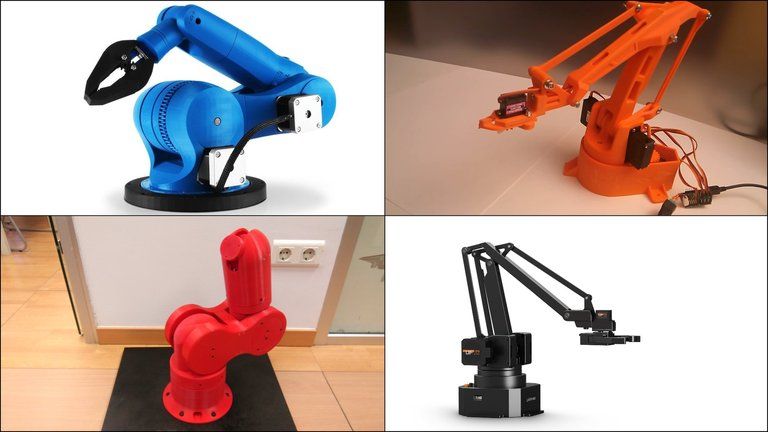
Robotics brings together all the technologies that make it possible to design autonomous machines; combining knowledge in electronics, mechanics, and even biology. This is a field that has evolved quite a bit since C-3PO first hit the movie screens in Star Wars in1973. Roboticists have been in constant search of innovations that result in greater speed and productivity. Today, we have smarter robots because of advancements in artificial intelligence, machine learning, and of course, additive manufacturing. Indeed, 3D printing is widely used to manufacture robots, whether in the prototyping or final production stage, to imagine structure, materials, and new functionality. This is why we wanted to present to you some of the fascinating 3D printed robots we’ve come across, everything from humanoids, research tools, or even DIY machines—a section that should be of interest to all makers!
DIY Projects
Intel Openbot
Research organization Intel Labs used 3D printing to develop the Openbot, one of the robots that caught our team’s attention the most.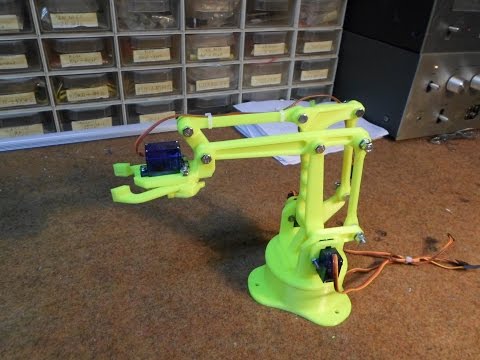 The objective of the project was to create a small electric vehicle intended for smartphones, with the motto ‘Transforming smartphones into robots‘. The device is equipped with vast networks of sensors and has powerful computing capabilities allowing it to take advantage of the advanced functionalities of smartphones. Intel experts say they have opted for 3D printing because of its great accessibility, and also thanks to free software that facilitates the development of this type of project.
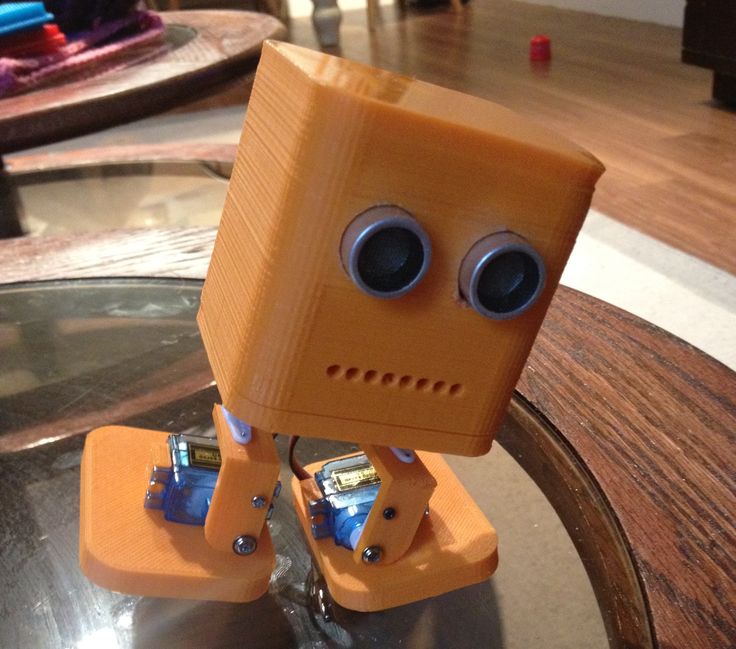
LittleBots is another project that you can do at home with your 3D printer. This robotics kit was created to serve as an introduction to robotics. It features all the necessary components of robotics: sensors, decision-making, and articulation, all in one simple, easy-to-assemble kit. What’s interesting is that LittleBot is fully 3D printed, so it can be made with just 3 screws. The device is open-source and controlled by an Arduino Nano, to take advantage of the global community around it.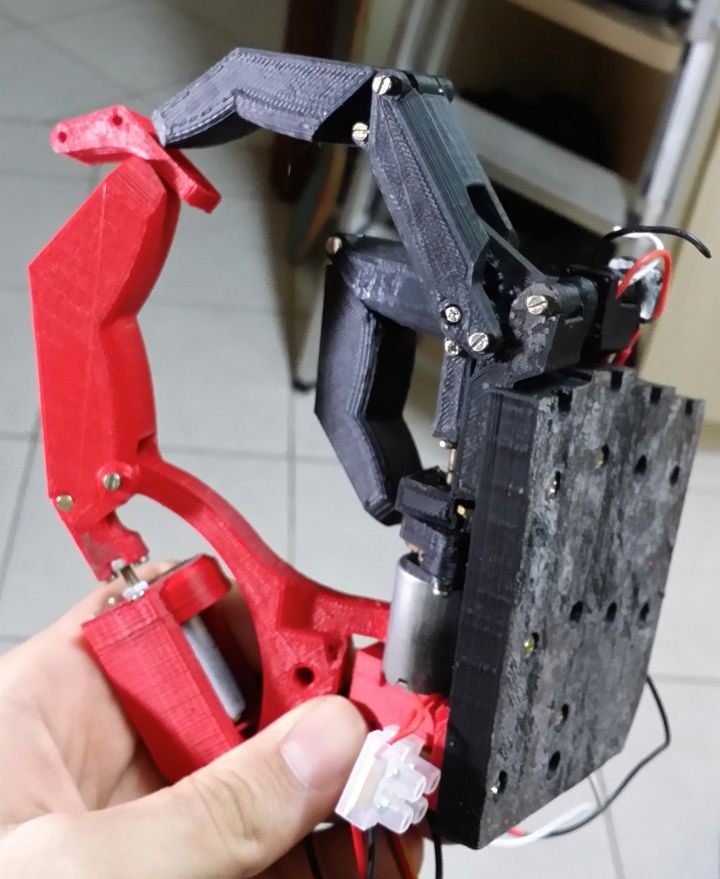 You can find the 3D print files of these robots through Thingiverse; The Arduino code can be found on the LittleBots download page.
Humanoids
Atlas by Boston Dynamics
Boston Dynamics’ Atlas humanoid robots have recently caused quite a stir online with their performance during an obstacle course. Although they have already had some success, Boston Dynamics aims to test the limits of what is possible and continue developing Atlas to make robots withstand extreme conditions. The company relied on 3D printed components for the development of Atlas robots. For example, the legs are 3D printed, which made it possible to integrate hydraulic lines into the structure. Additive manufacturing has also been used to produce custom servo valves.
We could have classified the InMoov robot in the DIY category, as it is an open-source project. Indeed, it is the first human-sized open-source 3D printed robot in the world, created in 2012 by the French Gaël Langevin. Anyone with a 3D printer can therefore design their humanoid robot at home, all you need is a printing area of 120 x 120 x 120 mm. The different parts of the body are printed separately—arms, head, neck, back, shoulder, etc. Everything is meticulously detailed on the dedicated site, whether it is the printing, assembly, and commissioning of this 3D printed robot.
PoppyThe humanoid robot ‘Poppy’ was developed by INRIA Flowers Laboratory in Bordeaux, France. Poppy is open-source and is used by a community of educators, scientists, and artists by sharing hardware, software, and web tools used for a wide variety of visual programming, simulation, and experiments.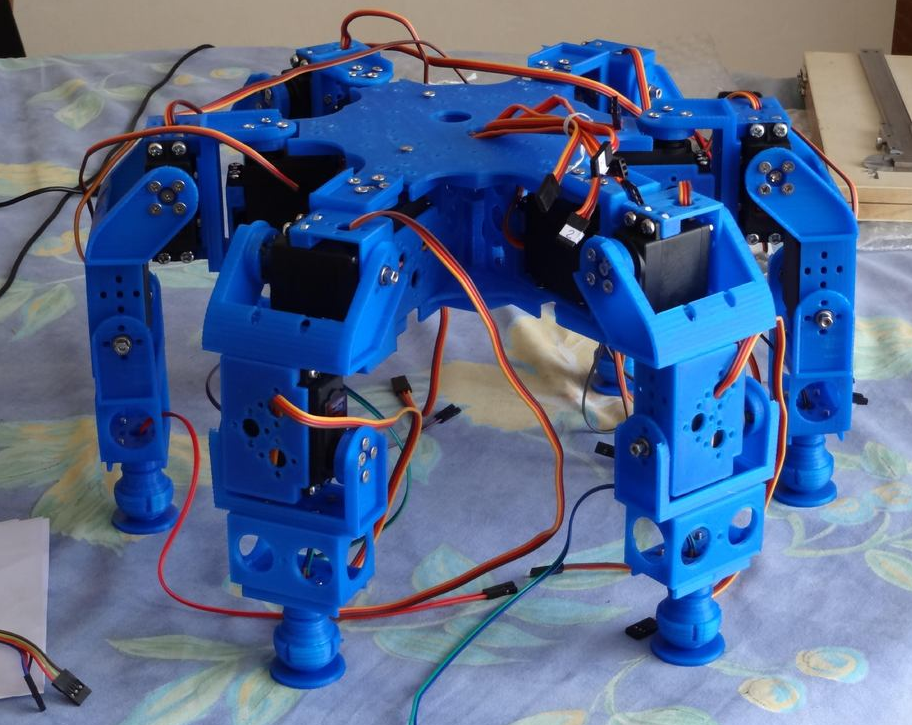 The robot relies on 3D-printed components made using polyamide material, giving the robot thermal and high-abrasion resistance. Standing at 83 cm tall (32.6 inches) and weighing 3.5 kg (7.7 lbs), Poppy includes a series of electronic components including a 4.2-inch screen and HD camera and costs about €9,039 ($10,610), with less expensive versions available including the Poppy Torso and Ergo Jr.
Jimmy is a 3D printed robot that was developed by the 21st Century Robot company with the goal of getting as many people as possible to build and customize their own robot through 3D printing. Jimmy is made up of custom 3D printed shells that cover his humanoid endoskeleton. Completely open-source, it is powered by an Intel Edison microcomputer, and controlled via WiFi on a smartphone, tablet, or PC using a dedicated application.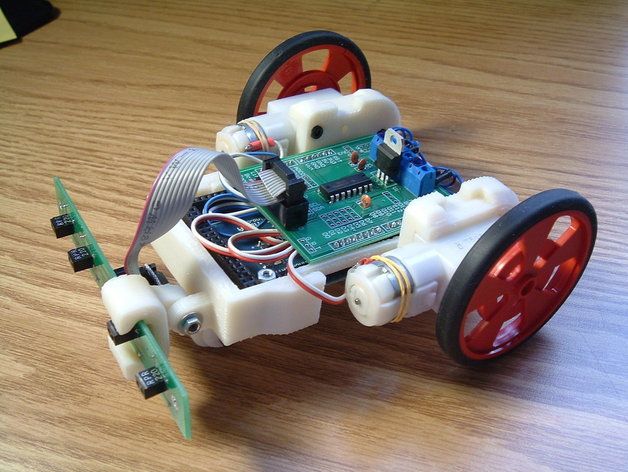
Pollen Robotics Reachy
Another offering from the French company Pollen Robotics (also the creators of Pollen), Reachy is described by the company as an expressive open-source humanoid platform that is programmable with Python and made using 3D printing. Though really just a torso, head, and arms, the main drawing point of this particular robot is not just how expressive it is but also how good it is at interacting with people and manipulating objects. The robot’s maneuverability is to thank for these features. For example, its head is free-moving and it can use antennas to convey emotions. Its two arms have similar dimensions, proportions, and movement as an adult human arm, capable of lifting up to 500 grams. Best of all, the robot is completely customizable and learns thanks to machine learning and AI capabilities.
Research Projects
JSK Laboratory’s Kengoro
Researchers at the JSK laboratory in Tokyo have succeeded in developing a humanoid robot capable of doing push-ups.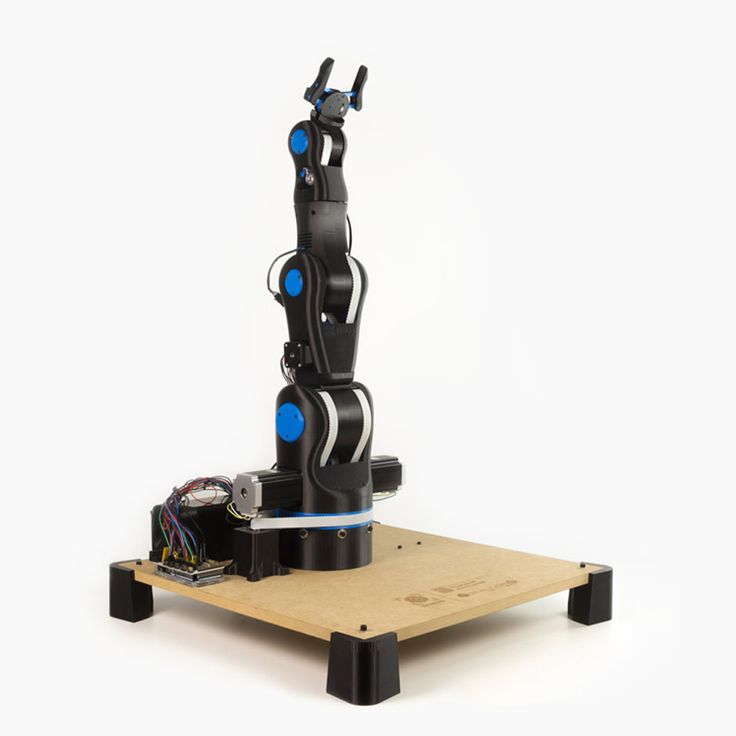 But playing sports is not Kengoro’s only special feature—its 3D printed metal coating also makes it unique. A well-known problem with humanoid robots is the overheating of motors. In order to better dissipate the heat generated by the 108 engines, the research team opted for an efficient cooling system that can be implemented using SLS 3D printing. The process made it possible to integrate a cooling system into the Kengoro housing and to modify the energy density of the material at various points. This allows water to escape easily and increases Kengoro’s performance. You might even think that the robot sweats during its athletic efforts!
Pleurobot the Amphibious Robot
Pleurobot is a 3D-printed robot that mimics a salamander and was designed by the Ecole Polytechnique de Lausanne in Switzerland. This amphibious robot has practical application for neuroscientists, biomechanists, functional morphologists, and paleontologists as well as roboticists. For instance, Pleurobot will enable research that benefits quadriplegic patients as researchers gain better insights into anatomy and motor skills.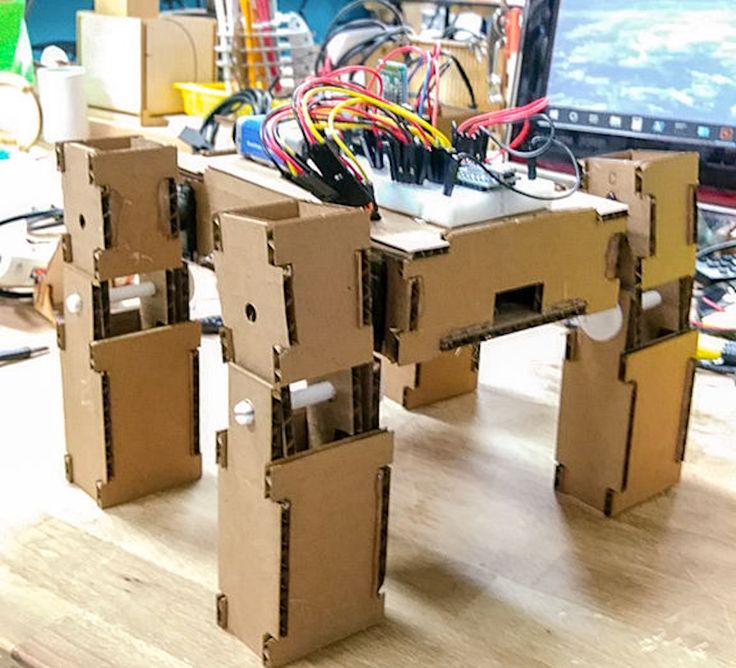 Research may also focus on the evolution of the passage from a swimming animal to one that walks. Swiss engineers also replicated a nervous system using electronic components with a careful scan of a real salamander. Equipped with motors, Pleurobot can swim, crawl and walk like its amphibian counterparts.
‘Astro’, the Intelligent Robodog that Sees and Hears
Scientists at Florida Atlantic University’s Cognitive Robotics and Machine Perception Laboratory (MPCR) have developed Astro, one of the few quadrupedal robots in the world. Unlike many robots, Astro is specified to have a computerized brain inside his head. This one, which looks like that of a Doberman, has been 3D printed. But the commonalities with dogs don’t end with the physical. Astro also has artificial intelligence and machine learning that allows it to learn like a canine.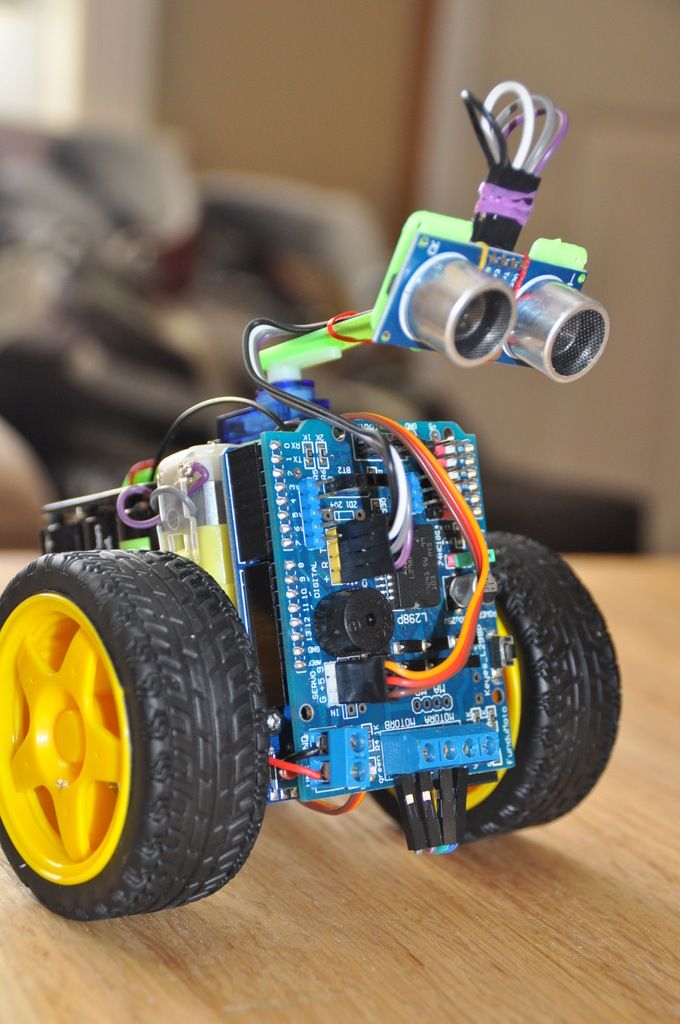 Equipped with sensors, radars, and a microphone, the robotic dog responds to classic commands such as “sit”, “stand” and “lie down”. In some time, Astro will be able to help the police as a scout dog or as a service dog for the visually impaired.
“Micro-Bristle-Bots”
While most of the time human-designed robots are large, this is not always the case. At the Georgia Institute of Technology, researchers have developed microscopic 3D printed robots. Dubbed ‘micro-bristle-bots’, they are barely visible to the naked eye and can be controlled by tiny vibrations. Like ants, microscopic robots work in teams and are able to transport materials. To manufacture the ‘micro-bristle-bots’, the Georgia Tech team used Nanoscribe’s Photonic Professional GT 3D printer, based on the two-photon polymerization (TPP) process. According to the manufacturer, this technology achieves a high level of precision and detail and is ideally suited for micro-printing.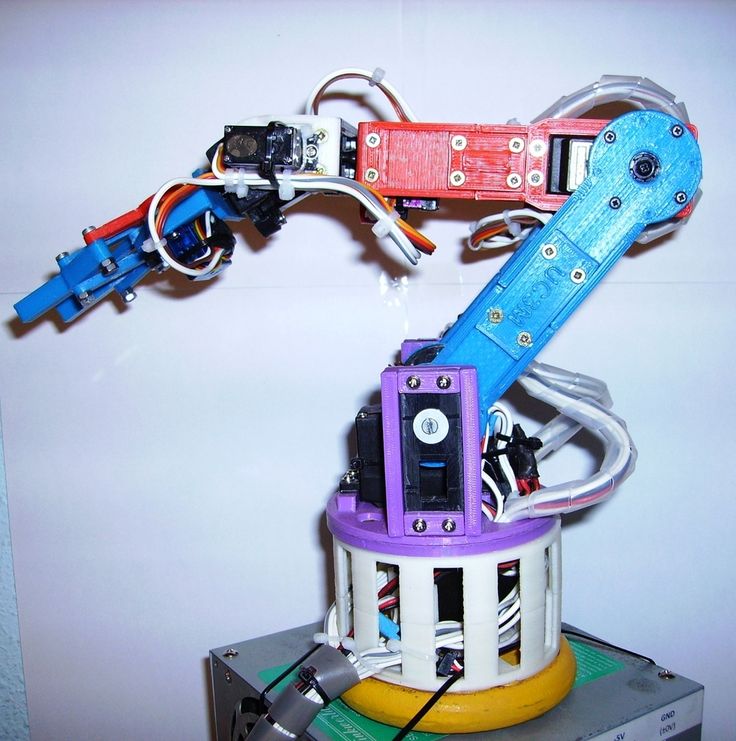
Soft Robots from UC San Diego Jacobs School of Engineering
At the University of California San Diego’s Jacobs School of Engineering, engineers have been working on soft robotics, or the construction of robots from compliant materials, often taking significant inspiration from the movements of living organisms. One such recent project was when researchers designed and tested 3D-printed insect-like robotics. Using FDM and filaments like ABS or PLA, the insects were made using a flexoskeleton process that added rigid features to key components, allowing them to keep their flexibility. This is not the only 3D-printed soft robotics project coming from the school with more expected in the future.
What do you think of our selection of 3D-printed robots? Let us know in a comment below or on our Facebook and Twitter pages.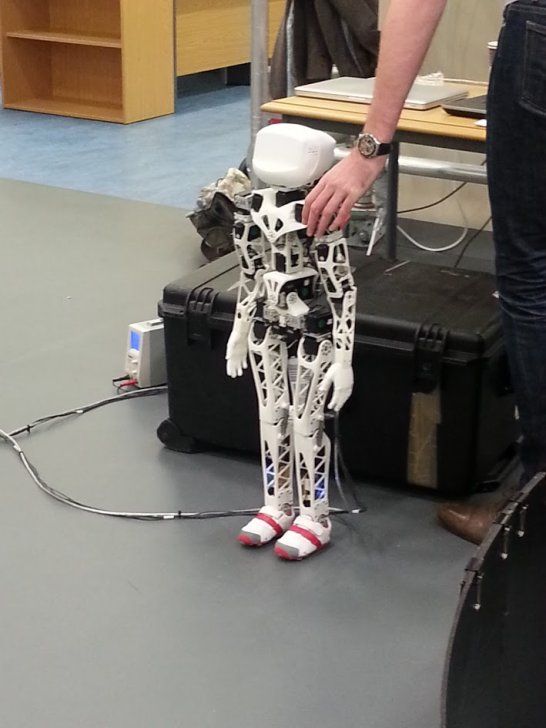 Don’t forget to sign up for our free weekly newsletter, with all the latest news in 3D printing delivered straight to your inbox!
are the droids you are looking for
Good day!
Constructors - male holy of holies. Everyone remembers from childhood terrible Soviet sets that had to be assembled with nothing more than a set of screwdrivers. Or more “casual” colored Lego bricks. Regardless of the form, the content has always been the same - a huge scope for creativity. Many are no longer boys, but husbands still remember their childhood hobbies and even buy huge sets that they could only lick their lips at as children. But new technologies are doing their bit - modern kits have fantastic potential.
ROBOTICS
Having assembled another spaceship or a land-based machine that destroys civilizations, before we could only take this fruit of our creativity into our hands and with joyful: “ Vuuuuuzhzhyyyyyy! ” rush around the room and attack the creations of their less fortunate comrades. What is the modern world ready to offer small dominators?
Robotics kits! Now there are a number of kits on the market that allow you to assemble a real robot without a set of special technical knowledge or skills. No fools. For a long time I wanted to join robotics, but I was always repelled by some “closedness of the club”. To assemble the simplest robot, you had to solder, study a bunch of instructions and delve into a number of different software boards. The ready set became my choice.
Having decided on the concept, so to speak, I began to study what sets the market offers. In general, two options seemed to be the best: a kind of “young technician” from LEGO and a robotics kit from bq. I chose the latter, of course. And not without reason:
- First and foremost: a bunch of ready-made designs. bq already has several different robots in its asset, the body elements of which and assembly instructions are freely available;
- The second, following from the first: the active use of a 3D printer when assembling a robot.
 Hence the additional “chips” - I can throw classic models into the editor, where without any problems they can be customized, improved and upgraded in every possible way for my future robot;
 - Oddly enough, service. The bq-shnom robotics kit has all the required gentleman's kit, including a potentiometer or a bluetooth module. Lego also has a bunch of cool pieces, but most of them are ordered separately ... From the west. The Russian branch of this company believes that our country has not “grown up” to such toys (:
After looking at bq designs, I chose a simple robot in the form of a walking crab and ordered a kit in their store:
Conventionally, the creation of a robot can be divided into three stages:
- Preparatory work.
- Assembly
- Firmware
We will consider each of them in detail. And let the adventure of creating a deep-sea monster that crushes worlds begin!
Preparatory work.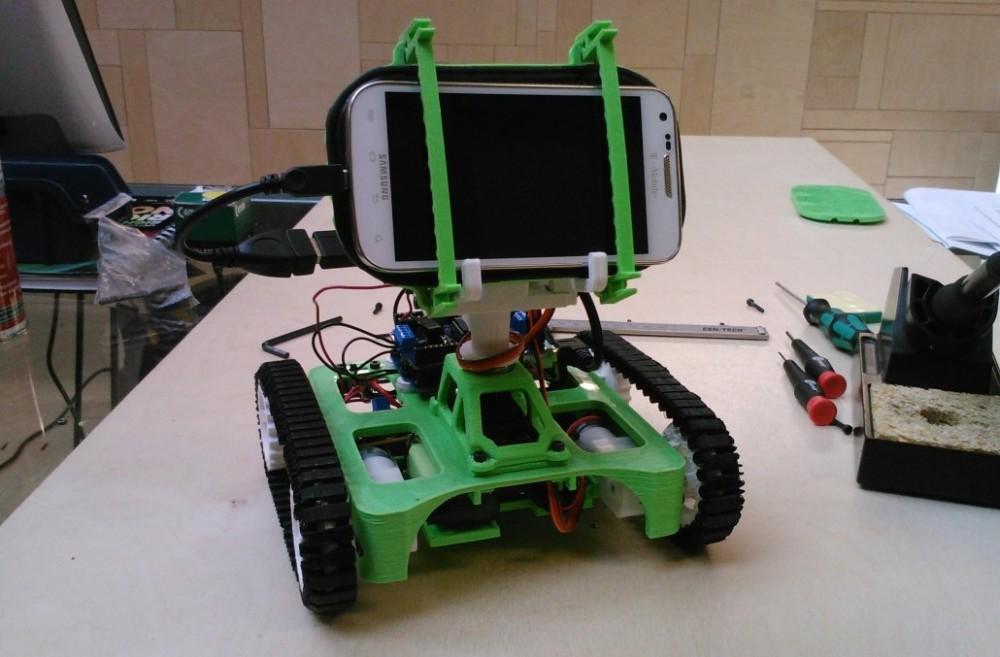
The first thing to understand is what kind of robot you want. As I said, bq has several designs, one more fun than the other. You can find all of them on their thingiverse page. Each design includes . stl parts of cases, folders with necessary codes and libraries for Arduino and complete assembly instructions in pdf- format. True, the latter is most often in Spanish - but who will stop it?
In total, it took me about a day to print the robot. I saved a lot of time by taking another crab shell design from thingiverse - “lightweight”.
I also decided to diversify the appearance of the crab a little, but more on that below. So, the next morning I had all the necessary parts to start building the robot!
For the first time, it was decided to strictly and unconditionally follow the instructions (which, by the way, I failed).
Robot assembly.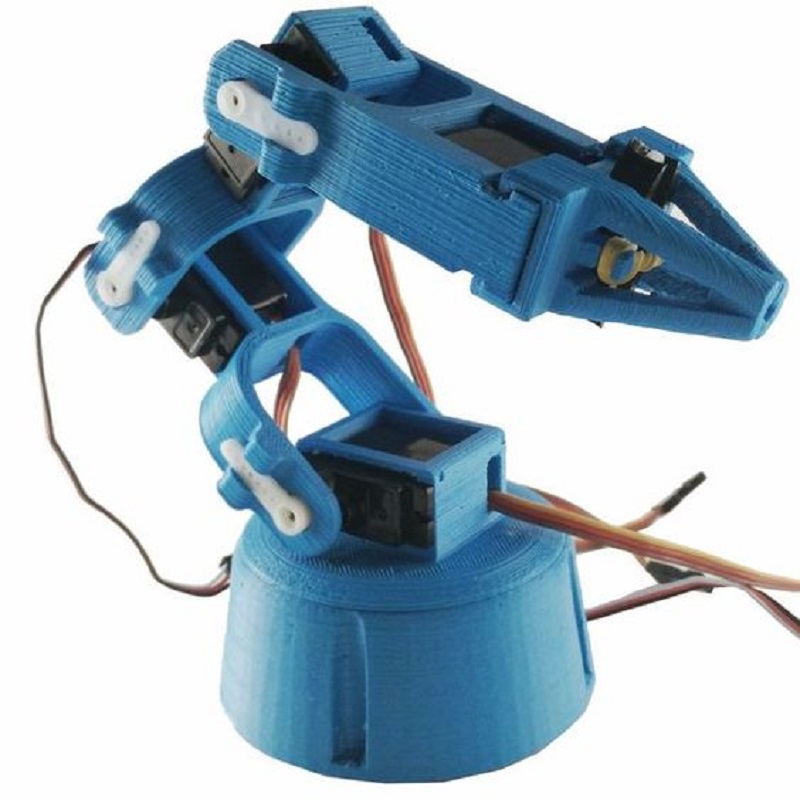
The first stage of assembly is the installation of the servos on the target platform. We have only three of them: on the front, middle and back pairs of legs. As they say, “If nothing else helps, finally read the instructions” - I read the instructions, which I warn everyone against, read inattentively. As a result, when moving, my robot most of all resembled a mixture of a sofa and a tank with a driver asleep on the steering wheel. Why? As it turned out in the end, everything is simple - after installing the servos, you need to plug them into the board and “determine”.
To do this, through Arduino you must upload the code from a specific folder to the board. Servo drives are instantly detected and take their “zero” position.
After installing the drives, you need to install the legs on them. This is done easily and simply, especially if you periodically glance at the long-suffering instructions - for nothing that there is “not in our way”, everything is extremely clear from the pictures.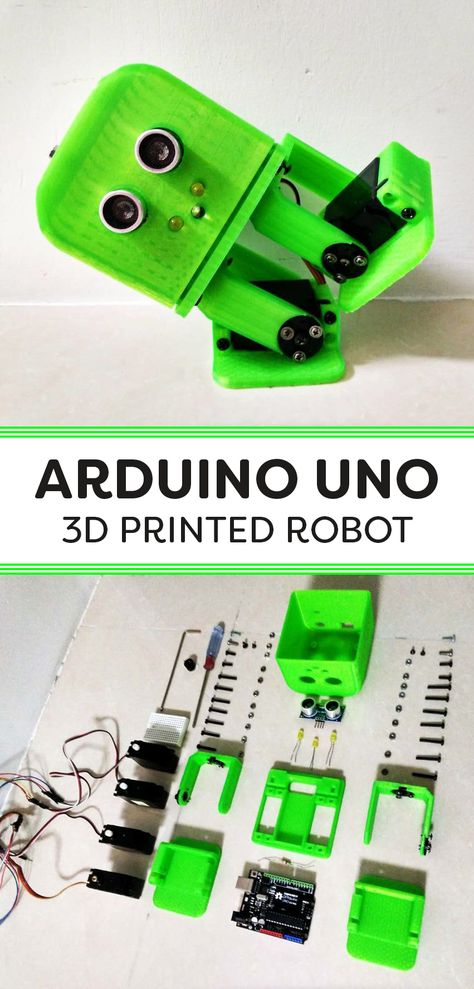 So, after a while, your walking platform that brings death is ready!
Now you need to install the remaining elements of the body and the claws. It takes quite a bit of time and, finally, the robot is fully assembled.
I don’t know who exactly you will collect, but I got such a claw-nosed tyrannosaurus . True, most people believe that he looks more like a mad turtle. In any case, the malicious pranksters who mock the short legs of the T-Rex will be punished.
The claws of this robot are not equipped with automatics and the role of the “closing organ” is performed by an elastic band. The bq has special “bugs” with automatic mandibles and mobile control, but as mentioned above, I was strictly targeting the crab.
Firmware.
Having assembled your robot according to bq designs, your strict concept or, like me, for fun, you need to bring it to life. Fortunately, the basic code is in the public domain and the folder with it in the archive you downloaded (unless, of course, you are developing from scratch). The code is extremely nice - logical, with a bunch of comments (but again in Spanish). Ideal for learning basic Arduino functions. For those who want to dig deeper, the design involves connecting via bluetooth .
In general, the firmware process is as follows:
1) Download Arduino if it is not already on your PC;
2) In the downloaded folder with the robot design, find the folder with Arduino codes (if you get lost, you can always look at the name of the desired folder in the attached pdf-instruction)
3) After opening the code in Arduino, connect your robot board to the computer via micro-USB ;
4) Just in case, check that the port to which the board is connected and the type of board itself is specified in the program settings - I have an Arduino UNO;
5) Click Upload. Ready! The code is loaded on your board
As you can see, the shell does not have a back wall, which makes it easy to get to the board. The advantages of this approach are obvious - you do not have to remove the upper part of the case in which case. For example, it was very unpleasant for me to remove the “legs” from the servo due to the fact that I was too lazy to bring the drives “to zero” before I screwed these same legs. Well, it's time to see how he moves?
Slightly more intriguing video:
Traditional instead of afterword.
So, what did working on this claw-like dinosaur bring me?
Once again, she pumped my understanding of creativity.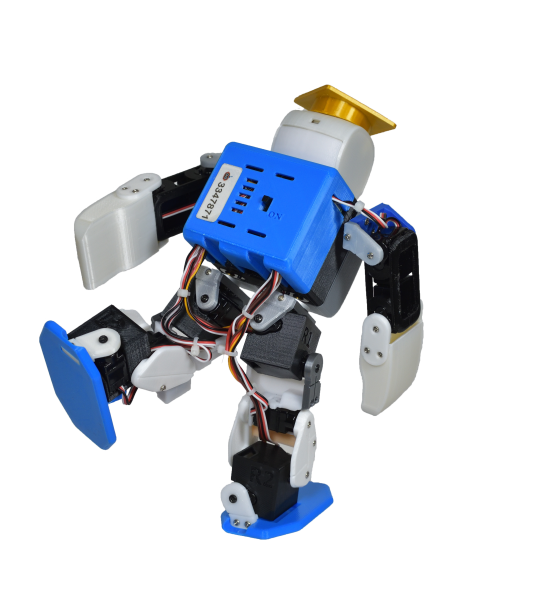 When I could painfully do interesting things with manual labor. Since this summer, I have been doing these most interesting things with the help of a printer. Now, within reasonable limits, electronics are also subject to me
ROBOTICS & 3D PRINTING
By combining these two areas, you can do really amazing things. I already have several projects that I will be working on soon;
- Gentle and easy introduction to electronics. It is always difficult to take the first step, especially when it comes to the area where you are neither a dream nor a spirit. At first, all this electronics only frightened, but now at least a primitive understanding of “what and where” has come. And now, on my table there are already a soldering iron and a guide to Arduino ;
- This is FUCKING fun! My girlfriend and dog played with the robot all evening. I can only imagine what a pleasure it is to collect it with children;
- The most important thing is that it's available
Thank you all for your attention.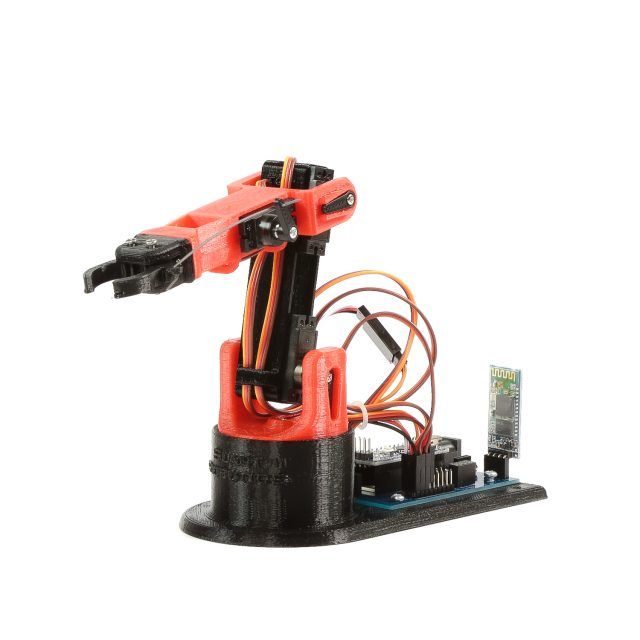 Good luck with your creativity
Robot piggy bank
Creativity
Flyingbear Ghost
Hello. Two years ago, we filed this project, shot a video and put it on the shelf. All this time, an unclosed gestalt, mixed with moving to a new city and renovation, dominated everyday life. The time of the New Year holidays finally allowed to sort things out. And now it's time to get the dusty folder off the shelf and show you its contents. Meet! This is a robot piggy bank.
Robot responds to movement. If you put a small object in his trough, he opens his mouth and throws the object inside himself. To implement the project, you will need a 3D printer, a soldering iron, an installed Arduino IDE programming environment, basic Arduino skills and a few electronic components:
- Arduino pro mini
- HC-SR04 ultrasonic range finder
- SG90 servo or similar
- 5V power supply or batteries
- 3D printed housing
- LED and 220 ohm resistor (optional)
Printing the housing
Download files for printing on a 3d printer from Thingeverse and assemble according to the instructions. If desired, you can paint the case with acrylic paints.
Animation with assembly process. Click on the picture below to enable animation.
Soldering the electronics
Flashing the controller before soldering. Here Download the sketch to upload to the Arduino IDE. Then we solder according to the scheme. Instead of Arduino Uno (on the diagram), you need to use Arduino Pro Mini. The compact board easily fits in the head of the robot, that's why it is mini.
To power the robot, a wire was removed from the back of its head to connect the power supply unit to 5 volts.
And goodbye video with the assembly process and a demonstration of the result.
Article comments
More interesting articles
mirskam
Loading
10/30/2022
940
13
Subscribe to the author
Subscribe
Don't want to
Hello everyone, my little and not so fans of 3d printing, hello my friends and foes, buvelki and kr.