Raspberry pi 3 3d print
Raspberry Pi Case best 3D printing files・Cults
Raspi_Box_Octoprint
Free
Raspberry Pi 3 MODEL B+ Octopi case for the Prusa i3 MK3s
Free
OctoPrint Base for Fabrikator Mini and TinyBoy
Free
Raspiberry Pi B512 overclock case
Free
Pi3 Recabox Case
Free
Raspberry Pi1 revB LCD 16x2 Case (Piforcetools)
Free
Raspberry Pi B+/Pi2 case for overclocking
Free
Raspberry Pi Controller For Dremel CNC Case
Free
Picroft Housing
Free
π64 (mini N64 case for RPi3 & 4)
Free
RetroPie Tribute Case
Free
OUYA Case for Raspberry Pi 3
Free
Raspberry Pi 4 VESA case w/ HDD/ SSD compartment
Free
Flat Portable Raspberry Pi Zero Enclosure
Free
Pi Case for Arducam HDMI Adapter With Fan (30mm or 40mm)
Free
Anet A8 Enclosure for MKS Gen 1.
Free
Arduino RaspBerry Pi Rasbian On Site Programmer
€10
Raspberry Pi Sleeve Case
Free
Raspberry Pi 3b Touchscreen Box (e.g. for Octroprint)
Free
Raspberry Pi 4 Case with Homematic RPI-RF-MOD
Free
Ender 3 Bigtreetech SKR 1.3 + Mini 1.1 and Raspberry Pi 3 Case 80mm Fan
Free
Raspberry Pi 4 OMEN Accelerator Case
Free
Raspberry Pi 3 OMEN Accelerator Case v2
Free
Simple cover for Pi power hat.
Free
Anycubic Predator D Raspberry Pi mount
Free
RPi4 layer case VESA backplate mount
Free
Amiga 3000 Mini (Raspberry Pi 4)
Free
Raspberry Pi4 fan and header cover
Free
RPi Vertical 2020 Mount with exposed GPIO pins
Free
Swanky OctoPi Fan, CSI, GIPO
Free
Raspberry Pi 2/3 case with room for extras
Free
Raspberry Pi 3 Wall Mount Case
Free
Pi Plates
Free
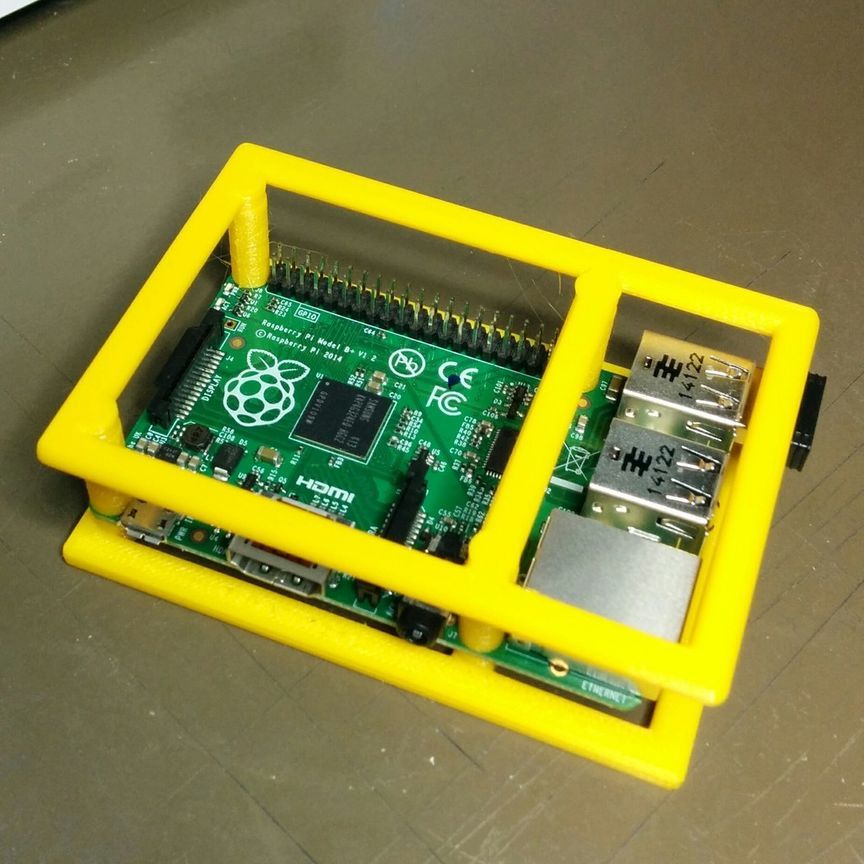
Raspberry Pi mounting frame
Free
Micro SD Card Holder + adapter
Free
Raspberry Pi case lid for 3x7cm prototype PCB
Free
Raspberry Pi 3B+ box + Suptronics X820 v3.
 0
0Free
Vertical Fan Duct Universal Rear Electronics Case for Ender 3
Free
Raspberry Pi Model A Case for Ender 3 or 2020 Frame
Free
Raspberry Pi 3 Backplate for Ender 3
Free
Raspberry pi 3 boitier + écran 4 pouces
Free
Artillery Sidewinder X1 RPi3 case
Free
Quiet Raspberry Pi 4B case with active cooling
Free
Raspberry Pi 3 case for 2020 / 2040 extrusion
Free
Raspberry Pi case with 40mm fan
Free
Raspberry Pi 3 Case
Free
Pi Palette- Hacker's Cosmetic Case
Free
MacPi Pro Tiny v1.
 2 (Raspberry Pi Zero Case)
Free
Awesome Raspberry Pi cases to 3D print at home
Unless you’re planning to fit your Raspberry Pi inside a build, you may find yourself in need of a case to protect it from dust, damage and/or the occasional pet attack. Here are some of our favourite 3D-printed cases, for which files are available online so you can recreate them at home.
TARDIS
Since I am an avid Whovian, it’s not surprising that this case made its way onto the list. Its outside is aesthetically pleasing to the aspiring Time Lord, and it snugly fits your treasured Pi.
Pop this case on your desk and chuckle with glee every time someone asks what’s inside it:
Person: What’s that?
You: My Raspberry Pi.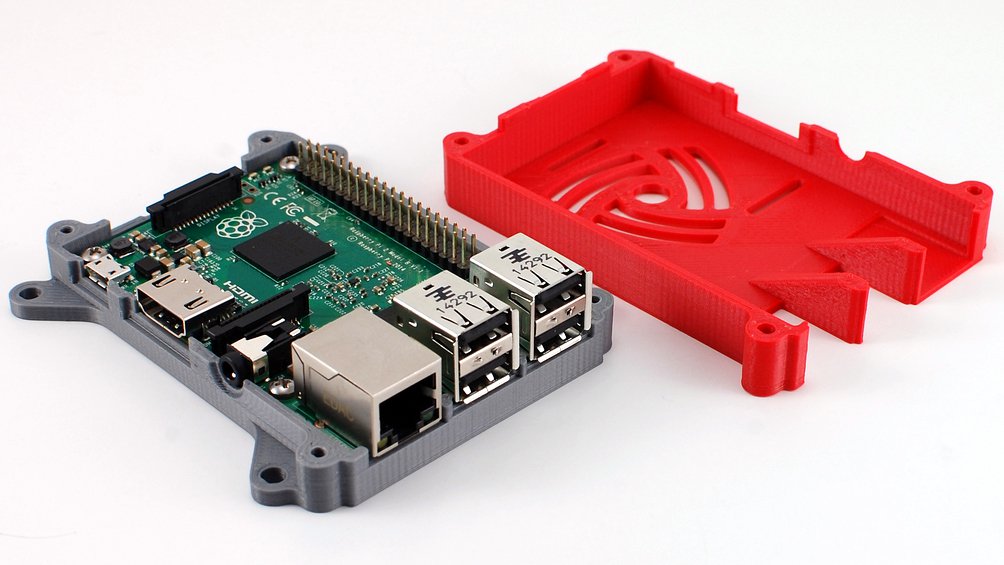
Person: What’s a Raspberry Pi?
You: It’s a computer!
Person: There’s a whole computer in that tiny case?
You: Yes…it’s BIGGER ON THE INSIDE!
I’ll get my coat.
Pi crust
Yes, we all wish we’d thought of it first. What better case for a Raspberry Pi than a pie crust?
While the case is designed to fit the Raspberry Pi Model B, you will be able to upgrade the build to accommodate newer models with a few tweaks.
Just make sure that if you do, you credit Marco Valenzuela, its original baker.
Consoles
Since many people use the Raspberry Pi to run RetroPie, there is a growing trend of 3D-printed console-style Pi cases.
So why not pop your Raspberry Pi into a case made to look like your favourite vintage console, such as the Nintendo NES or N64?
You could also use an adapter to fit a Raspberry Pi Zero within an actual Atari cartridge, or go modern and print a PlayStation 4 case!
Functional
Maybe you’re looking to use your Raspberry Pi as a component of a larger project, such as a home automation system, learning suite, or makerspace. In that case you may need to attach it to a wall, under a desk, or behind a monitor.
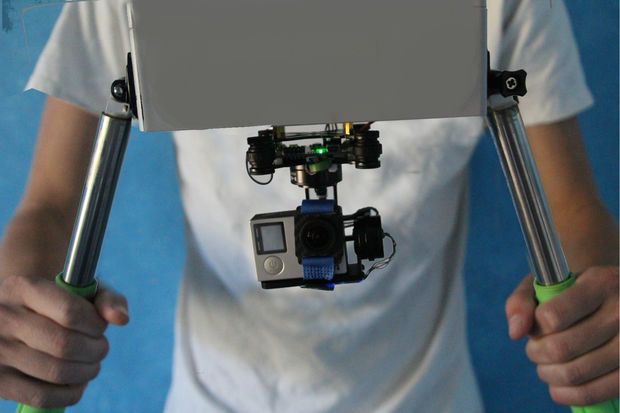
Coo! Coo!
The Pidgeon, shown above, allows you to turn your Zero W into a surveillance camera, while the piPad lets you keep a breadboard attached for easy access to your Pi’s GPIO pins.
Functional cases with added brackets are great for incorporating your Pi on the sly. The VESA mount case will allow you to attach your Pi to any VESA-compatible monitor, and the Fallout 4 Terminal is just really cool.
Cute
You might want your case to just look cute, especially if it’s going to sit in full view on your desk or shelf.
The tired cube above is the only one of our featured 3D prints for which you have to buy the files ($1.30), but its adorable face begged to be shared anyway.
If you’d rather save your money for another day, you may want to check out this adorable monster from Adafruit. Be aware that this case will also need some altering to fit newer versions of the Pi.
Our cases
Finally, there are great options for you if you don’t have access to a 3D printer, or if you would like to help the Raspberry Pi Foundation’s mission. You can buy one of the official Raspberry Pi cases for the Raspberry Pi 3 and Raspberry Pi Zero (and Zero W)!
As with all official Raspberry Pi accessories (and with the Pi itself), your money goes toward helping the Foundation to put the power of digital making into the hands of people all over the world.
You could also print a replica of the official Astro Pi cases, in which two Pis are currently orbiting the earth on the International Space Station.
Design your own Raspberry Pi case!
If you’ve built a case for your Raspberry Pi, be it with a 3D printer, laser-cutter, or your bare hands, make sure to share it with us in the comments below, or via our social media channels.
And if you’d like to give 3D printing a go, there are plenty of free online learning resources, and sites that offer tutorials and software to get you started, such as TinkerCAD, Instructables, and Adafruit.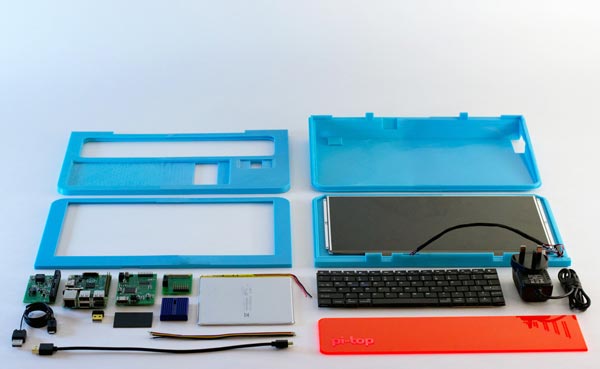
Raspberry Pi 3 and Raspberry Pi 4 power module. We feed the raspberries from the power supply of the 3D printer.
Hello everyone! Oh, and I haven't written anything interesting for a long time. It's time to stretch your fingers and share useful information. This article will focus on the power supply of the Raspberry Pi single-board computer. By and large, the topic is hackneyed. But I dug up something. Not the fact that infa is unique. But I got to the bottom of this myself, I hasten to share with you.
And so. This article will primarily be useful to 3D printers. But smart home lovers will also learn something useful. I won't pull. Who cares, welcome under cat. nine0003
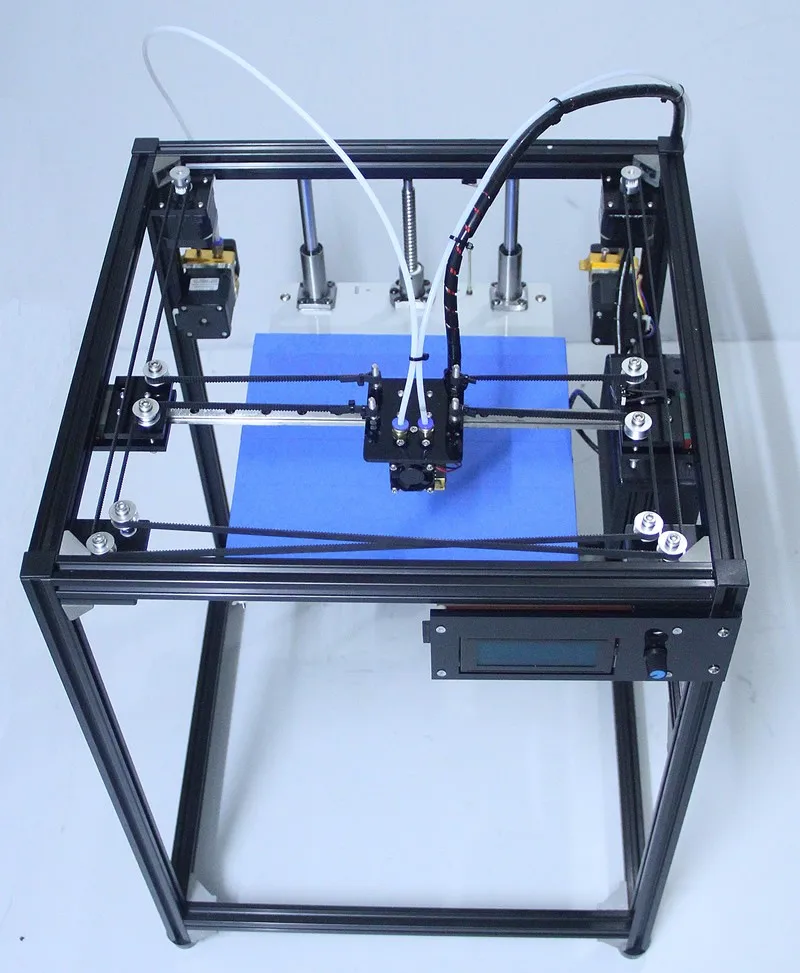
Those who have been interested in the Ulti Steel 3D printer are most likely aware that it has a place to install a Raspberry Pi single board computer. What for? Well, here everyone decides for himself. Someone needs a print server, for example, based on Octoprint or Astroprint, so as not to rush from the printer to the computer and back with a flash drive. And someone is not satisfied with the functionality of the marlin and he wants a clipper. Anyway. In order for this feature to work, you need a single-payer. Well, since there is a place for it in the case, it is quite logical to put it there. But the question arises, how to organize food for a single-payer? nine0003
There are several options:
- Separate power supply
- DC-DC converter
- Expansion board
So, let's look at each of the options. Let's start in order
Hotel power supply, perhaps one of the most obvious options. But, as we know, 3 and 4 raspberries are very voracious and require powerful power supplies of at least 5 V 3A for stable, and if for good, then 5V 5A is better. Agree, not a lot. But among other things, the power supply must be of very high quality, because. if raspberries feel that the food is not organized enough for it, it will start complaining about it in the logs, and in some cases it may turn off. nine0003
A good option for organizing such a power supply would be the Mean Well RS-25-5 power supply, however, here you may encounter a wiring and connection problem.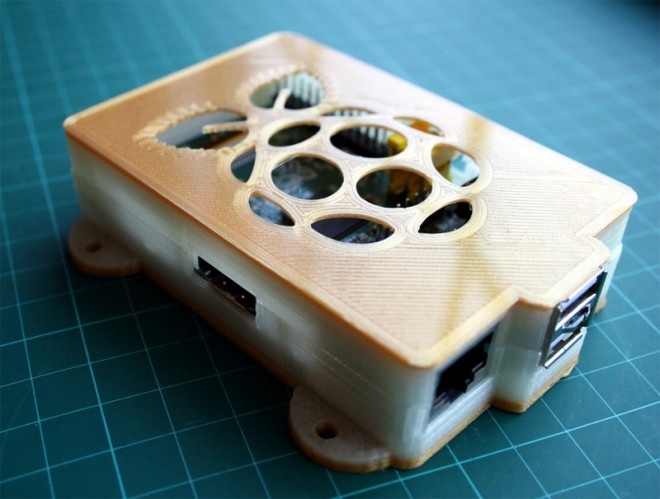 Somewhere you will have to look for the appropriate connector (Miniusb or usb type-c) to connect this power supply to the Raspberry pi, or crimp the wires and power the raspberry through the GPIO comb. In addition, it is necessary to supply 220 volts (attention! dangerous voltage) to this power supply. you will have to fiddle around with the wires. Yes, and solve the issue of placing this power supply inside the 3D printer itself, because. fasteners for the second power supply is not provided. nine0003
DC-DC Converter. The Ulti Steel power supply has a solid power reserve and, in principle, nothing prevents you from installing a DC-DC converter and powering the raspberries through it. BUT! I have never seen a Chinese lower that can satisfy the exquisite nutritional tastes of the Raspberry Pi. Not a fact, maybe there are such, but I did not come across them. In this case, you will also have to tinker with the wires and the placement of additional modules inside the case.
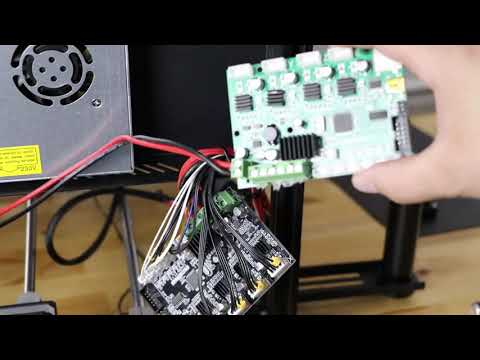
Well, the third option is a power shield for Raspberry pi 3/4.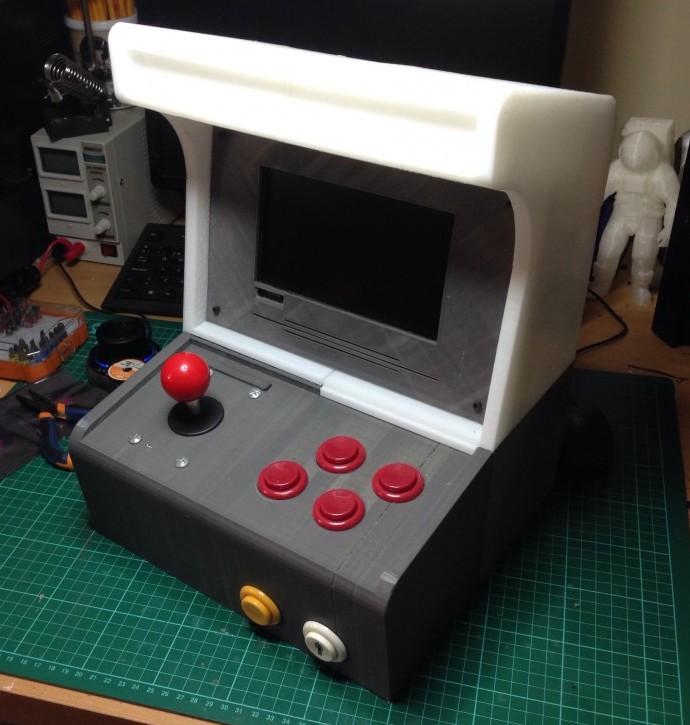 The Chinese have enough of these shields, but not all of them are of good quality. The advantage of this solution is the ease of assembly and a minimum of wires. Because As a rule, such shields are installed directly on raspberries. nine0003
Not so long ago, while studying the issue of connecting hard drives to the Raspberry Pi, I came across an interesting seller of various expansion boards for raspberries. The store is called GeekBord (mda .. apparently their marketer is not very competent, who named the store with an error). Among the huge range of expansion boards for Raspberry Pi, the RasPi X710 board caught my attention.
The great thing about the RasPi X710 board is that it allows you to power your Raspberry Pi 3 or Raspberry Pi 4 with voltages from 6 to 36 volts! This range of supply voltages intersects with the output voltages of the power supplies of a very large number of 3D printers! Well, in my case, through it you can easily power the Raspberry Pi from the Ulti Steel power supply. (Output voltage b/p Ulti Steel 12 Volts). nine0003
In addition, the board comes in a shield form factor, which allows you to assemble a “sandwich” from RasPi X710 and Raspberry 3 B+. Well, of course, install this assembly on regular mounts.
All that remains is to remove the wire from the power supply and connect it to this board.
For those who are unsure or in doubt, this "sandwich" will work with both Ender 3 and Anycubic i3 mega. It remains only to solve the issue of its placement inside the case. nine0003
Well, as a cherry on the cake - the module has a fan that is installed like this. to cool the Raspberry Pi processor. Attention! The fan is specific - it works from 5 volts. But if desired, it can be turned off and generally dismantled.
The first impression of the board is positive! Good workmanship. Great build and soldering. There are no traces of flux. Works good. As long as I'm happy with everything. Let's see how it will show itself with long-term operation.
For those who are interested in the parameters of this power module, here is a link to the wiki with a description of all the characteristics and connection diagrams: http://raspberrypiwiki.com/X710
I ordered the module itself from the link RasPi X710
I hope this information was useful to you.
If you like the article and want to support the site and receive notifications of new materials, join our Vkontakte group: https://vk.com/ionline_by
If you want to be notified when new articles are released, connect yourself to PUSH notifications link: https://ionlineby.pushassist.com/
How I made friends with a raspberry octopus
Why crimson when the octopus is green on the official OctoPrint logo? Yes, everything is simple - he loves to eat raspberries and oranges, and because. I got hooked on raspberries, so I acquired the appropriate color :)
There is quite a lot of information about OctoPrint on the site, but it is scattered - you need to collect everything in separate articles, but I want to tell my little way from the beginning to the present moment.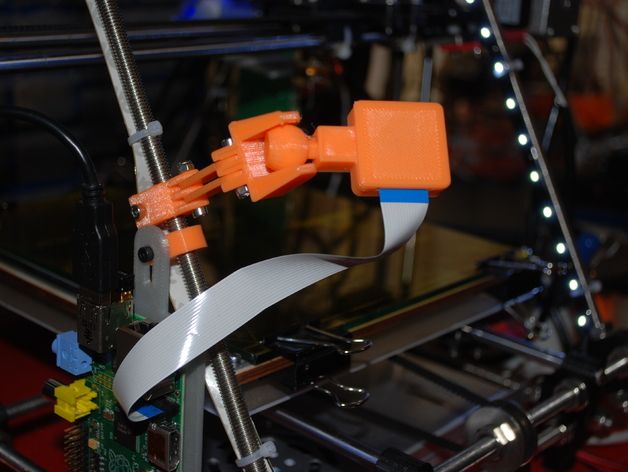
So, I have already read a lot about OctoPrint, but somehow this information always passed by and was not put aside in my head, I was more interested in simple issues of establishing stable printing and getting rid of jambs. But over time, I realized that it was already necessary to somehow automate and simplify the printing process. nine0003
I first attached an existing Axis IP camera to monitor the printer when I was away. Already good, but in which case it was not possible to influence the process in any way. Then I installed the GCodePrintr application on an Android tablet to be able to more conveniently manage a 3D printer, but these were all half measures, but I wanted a comprehensive solution.
What questions would you like to solve:
- Not to run to the printer for every reason, but to be able to remotely turn on the printer, start heating the table and extruder, monitor the temperature, etc. nine0012
- Auto power off the printer after printing is complete.
- Get rid of the memory card as a carrier of models between the computer and the printer.
- Ability to monitor printing via webcam and automatic recording of time-lapses for subsequent analysis of the print progress.
- More convenient axis control for quick adjustment of the table level. And in general, simpler control. Navigating through the Marlin menus with the encoder is still a pleasure.
After reading a dozen articles on OctoPrint, I realized that I need to run for Raspberry Pi 3 or Orange Pi. The second option is cheaper, but requires a deeper dive into the topic. The first option should work 'out of the box' and Wi-Fi and 4 USB slots are already on board. Because there was no question of making it as cheap as possible and it was easy to buy Raspberry Pi 3 in neighboring stores, then I settled on this particular board. nine0003
The second task is to buy a webcam. There is very little information here. There is information about compatible cameras, but it is not clear which is better and why.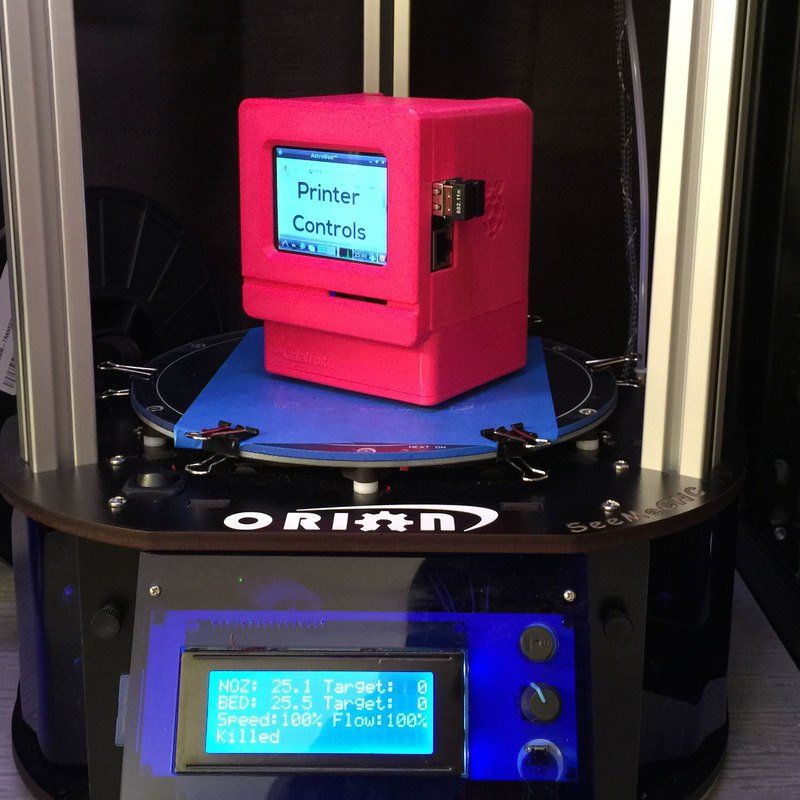 Somewhere in the subconscious, information has settled that you need to choose Logitech. I don’t remember where I got this from, but after analyzing the compatibility table and the availability of cameras in the store, I settled on the C270 model. Then I already found out that it is also sold as a bundle from the official site. We managed to find everything in one place near the house, which pleased us with the quick solution of the task. nine0003
I was very pleased with the box of the original Raspberry Pi - a trifle, but nice :)
I already prepared a card with OctoPint for Raspberry in advance - I found a microSD for 2 Gigabytes and, following a simple instruction, installed everything in 10 minutes. There is also a detailed video on the download page.
To install, you will need to download the OctoPrint image and Etcher. Unzip the zip file, launch Etcher and transfer the image to the memory card.
The second step is to set up access to the Wi-Fi network (not required if an Ethernet cable connection will be used). To configure, you need to uncomment the lines with the settings in the octopi-network.txt file (marked in red) and enter your Wi-Fi network access data (marked in green). nine0003
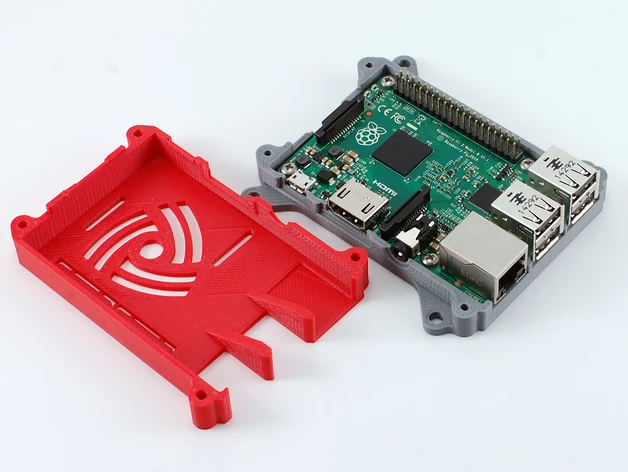
Now you can insert the card from the back of the raspberry, find a microUSB charger in the household, connect the cable from the webcam and printer. At the same time, I bought a case for a raspberry in the store, although then I thought that for this money I could take half a kilo of FDplast plastic and print a lot of cases :)
Then it is recommended to connect using Putty and change the default password, but this can be done later. Now it’s enough to look at the router which IP address the raspberry received, drive it into the browser and get a welcome window for entering a new user. nine0003
After creating a user, the system offers to update to the latest version - we agree, reboot and get a ready-made system for remote work with a 3D printer.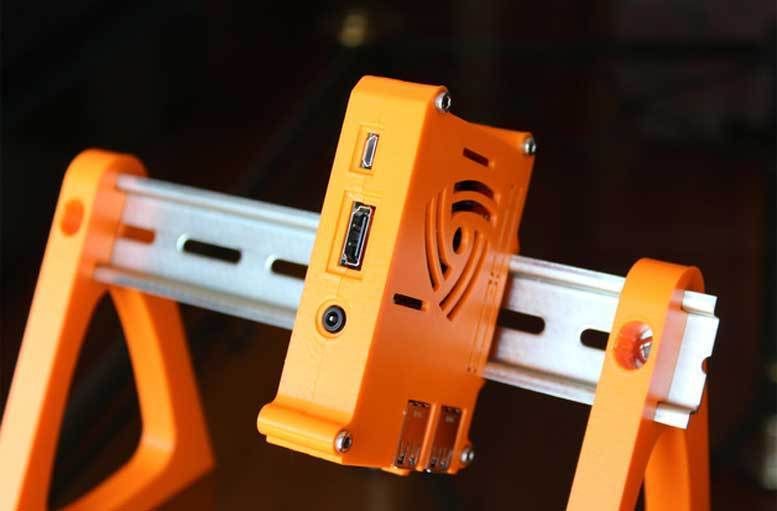 It remains to make a small number of settings and you can print the first model.
Webcam picked up automatically. But the quality of the picture at first did not make me very happy - the near objects were out of focus, the angle of the lens captured only part of the table, and the mount is more likely to be placed on the monitor. We had to solve two problems - to deal with the focus and print a more convenient camera attachment to the printer. nine0003
With the focus, the issue was resolved quite quickly - praise to Logitech engineers that their camera is disassembled without the use of swear words and is also simply assembled back. After removing the top cover and unscrewing three screws, the board with the installed matrix and lens becomes available. The lens is already adjusted and fixed with a drop of glue. By twisting the ring and tearing the fixation further, you can already adjust the focus to the desired distance.
Next, it was necessary to close the issue with the mount.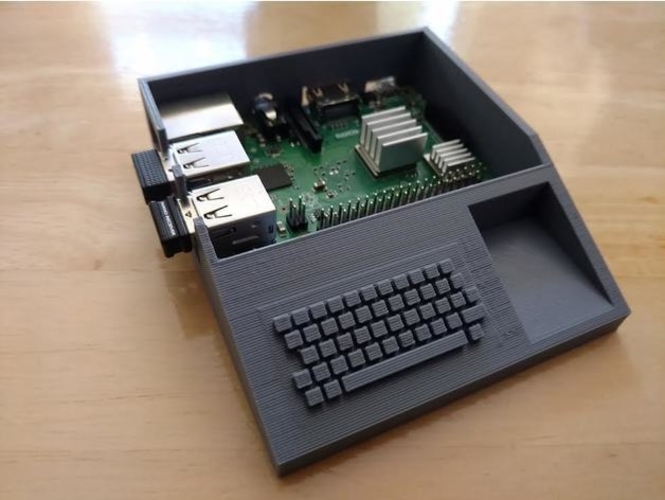 On thingiverse.com there were quite a few models for this camera, but none of them fit 100%. nine0003
' Another opportunity to practice SOLIDWORKS ' - I thought, and started modeling the mount for my printer. I did not know the exact distance by how much the camera should be moved outside the perimeter and how much lowered to see the nozzle under the blowing system, so I had to make a custom mount. After modeling, this model came out:
Again, thanks to Logitech engineers for the fact that the standard mount can be carefully removed and the eye can be used at your discretion. It took some more time to print, and then the camera took its place:
Adjusted the desired position according to the image and tightened all the screws.
Mounting model can be downloaded here. When I started uploading STL files, I realized that during the modeling process I got carried away and did not optimally position the model in space - when printing, the 'front' view is used, and the models were located in other planes and did not lie optimally on the table. Of course, you can rotate everything before printing, but it's not good to force people to make unnecessary movements.
I began to study how to fix this, spent another hour, but did not find a solution. All videos on solid said that you can redefine the planes. Yes, it works for inside position, but STL files were still saved with XY coordinates in the 'front' plane. Studying the file saving options, I came across the concept of 'active coordinate system'. nine0003
Having promoted this topic, I was able to save the STL file in the correct orientation. To do this, go to 'Reference Geometry' - 'Coordinate System'. We indicate the edges that lie in the desired direction and then save the file with the new coordinate system.
I got distracted. We return to our octopus. The camera is fixed, everything is set. I decided to run the test model for printing without approaching the printer at all. The table is calibrated and smeared with glue stick, white ABS filled.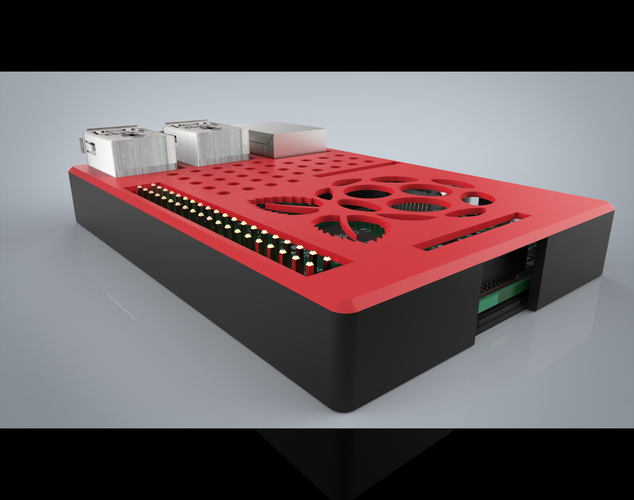 I turn on the heating of the table and then I start the model for printing, observing the rule - we don’t approach the printer :)
Surprisingly everything went smoothly. At the beginning of the print there were 'snot', which I usually remove with tweezers, but then they smeared themselves with the nozzle.
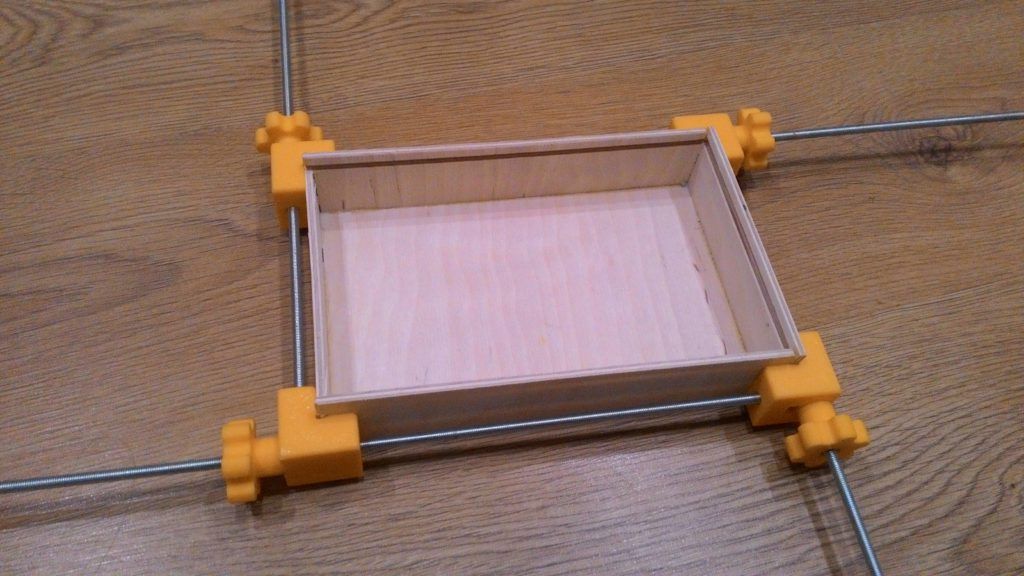
The output turned out to be a normal box, even though the printer was not suitable :)
Having understood at what distance I need to fix the camera, I decided to simplify the holder and transfer the mount to a vertical profile.
Great, the camera works. But it works on basic settings - with a resolution of 640x480 and 10 frames per second. The C270 is capable of 1280x720 HD resolution. We take the card, find the octopi.txt file in the root and edit the USB camera settings:
Now the picture is more familiar to 16:9 monitors
One task was successfully completed. Next was the task of managing the power of the printer. I had already begun to study the experience of my colleagues, when I suddenly remembered that my Z-Wave smart home system has one controlled socket module, which I have not been able to find a use for for a long time. I connected the printer to it and at least got the opportunity to manage power remotely through the smart home system.
But for automation, it was necessary to train OctoPrint to control this relay. One of the control options is using http requests to the smart home server. The PSU Control plugin helped me with this task. Chose control through System Command. By writing command
curl 'http://192.168.2.10:3480/data_request?id=lu_action&DeviceNum=57&serviceId=urn:upnp-org:serviceId:SwitchPower1&action=SetTarget&newTargetValue=1' turn off the power at the end.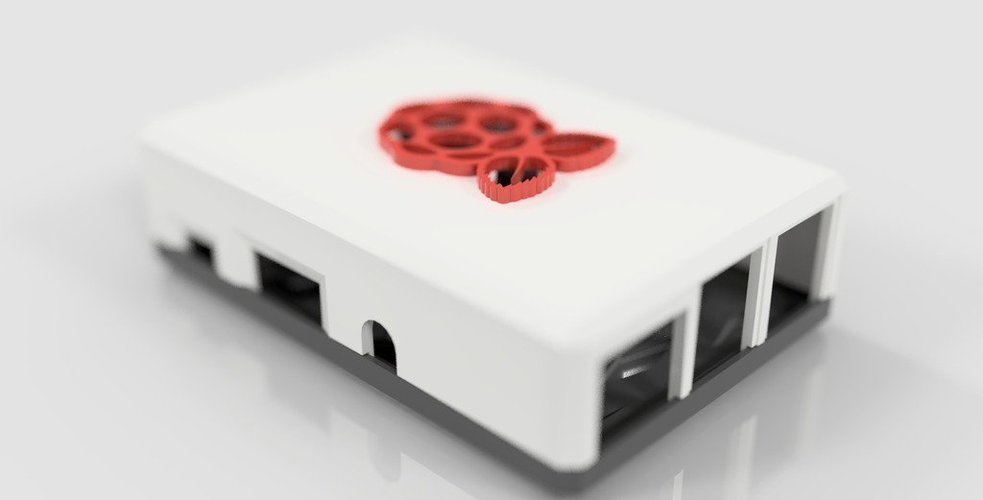
Now the printer turns itself on when sending commands to warm up the table or move the motors and turns itself off after printing is finished. Well, you can always manually enable/disable using the button in the OctoPrint interface. The consumption of Raspberry powered by the webcam and Mega via USB is only about 4W, which means you can safely leave it always on and be able to start the printer remotely at any time. nine0003
The system has become smarter, but that's not all ;)
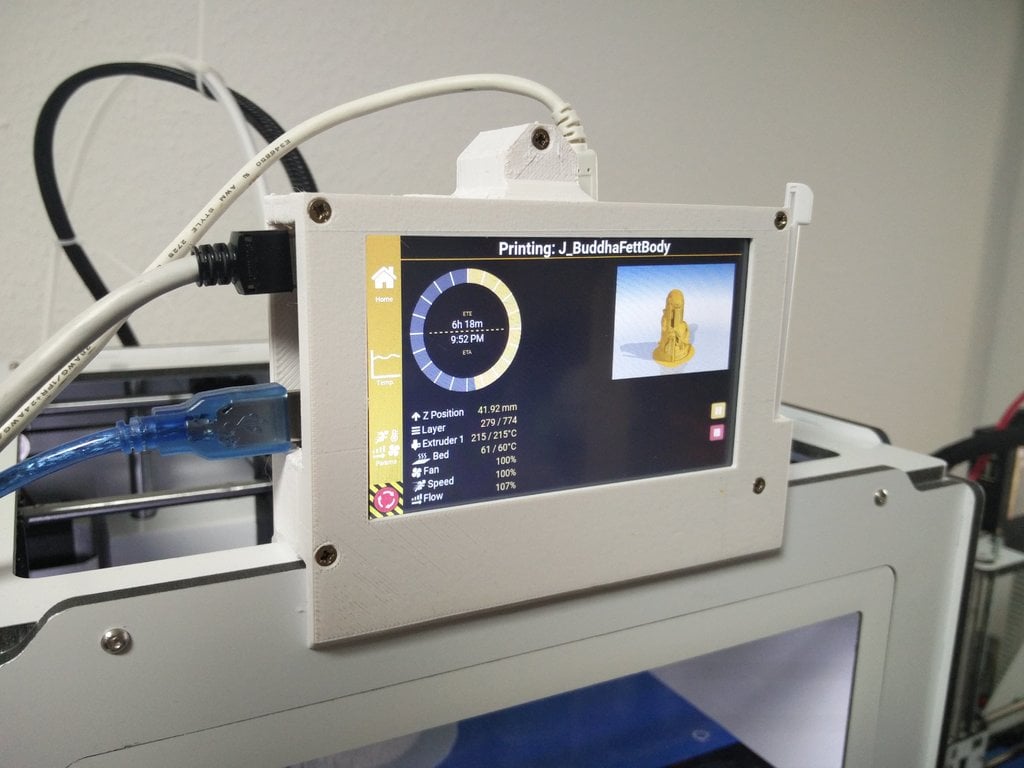
The next plugin was Touch UI. It offers a more user-friendly interface for smartphones and tablets. With it, you can quickly move the motors while near the printer with a tablet, as well as perform all other actions, including monitoring the printing process.
The following plug-ins were also installed:
- Fullscreen Webcam - allows you to double-click to enlarge the image from the camera or even switch to full screen mode. nine0012
- Pushover - sending Push notifications to the smartphone about all events (printing completion, unsuccessful printing, stops to change plastic, etc.
 )
) - DisplayZ - adds the output of the Z coordinate to the print progress.
- Printer Statistics - detailed printing statistics
- DisplayProgress - displaying printing progress on the printer screen (nothing is displayed by default)
- Custom Control Editor - the ability to add custom buttons to the interface. For example, I added a plastic change button with the command M600
- OctoPrint-Tempsgraph - improved temperature graph
On a 2 GB card, a little less than 400 megabytes remain for model and timelapse files. This is quite enough, but I thought that it would limit, so I bought a 16 GB card (I wanted 8, but they were more expensive!) Class 10 and deployed everything again. As a bonus, I got a faster assembly of time-lapses due to the higher speed of reading / writing the card.
In summary, a typical use of OctoPrint can be summarized as follows:
- We sit at the computer and watch something interesting on thingiverse.
 com or create our own in the editor.
 - Suddenly we understand that it is already necessary to prepare the printer for printing - open the Octo interface and turn on the table heating - the power supply automatically turns on and warming up begins.
- We look at the temperature of the table on the chart and after it warms up, we also turn on the heating of the hotend.
- Slice the model, save the G-code and load it into the octopus.
- When everything is warmed up, or we immediately start printing remotely, or we still approach the printer, we check everything, stretch out some plastic, check the table calibration, and only then start printing. nine0012
- We control the first layer and calmly leave to do our business, periodically glancing at the picture from the webcam. If necessary, we go for a walk with the dog / to work / shopping.
- At the end of printing, a push notification is sent to the phone, and after cooling down, the power is automatically turned off.
- If we observe during the printing process that the edges have moved away or some other trouble has happened, then we stop printing, turn off the power and think about what happened ...
- If you wish, download the print time lapse and see how everything happened. nine0012
I am satisfied with the new thing, but there are always unresolved tasks and wishes.
So far I have written the following for myself:
- It is desirable to have a second camera with a general view, where you could see the entire printer, the spool of plastic and the position of the head in any part of the table. I will solve the issue simply with an additional IP camera, or should the C270 be taken out a little further, or maybe find a lens with a wider viewing angle for it.
- I would like to connect a physical keyboard to control the printer not only through the tablet, but also quickly using the physical keys when you are nearby. There is an option to use Arduino and a matrix keyboard, but it will probably be easier to connect a regular small USB keyboard.

Learn more