
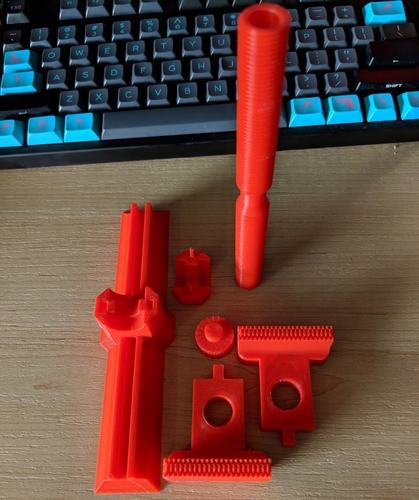
Pinhole camera 3d print
3d Printed Pinhole Camera : 5 Steps (with Pictures)
Introduction: 3d Printed Pinhole Camera
I'm a big photography aficionado and always wanted to make my own analog camera. Thanks to 3D printing, it is now possible to make a fully funcional pinhole camera. Just print the camera and start shooting. No assembly required.
Step 1: 3D Design + and Pinhole
First, I got inspired by old retro cameras which I wanted to base my design. I used 3D studio MAX to design my camera but you can use whatever you feel most comfortable with. Here are some 3D renderings of my design.
I won't go into detail on what a pinhole camera is but in essence, it is a simple camera with no lens but a small aperture (made with a pin) that projects an inverted image into the film. There are many factors to consider for the pinhole specially the diameter of the hole, the distance to the film and the type of film you are going to use. I found a website called MrPinhole that summarizes the most important features.
Step 2: Printing the STL Files!
I printed the parts on OBJET Printers which are amazing. The resolution is really accurate and it made sense as we want good precision for the pinhole. Unfortunately I only had white color to print my camera so I had to paint them black afterwards.
I uploaded the STL files for you to print and customize! Let me know how things turned out.
:)
Attachments
Step 3: Paiting
As I didn't have a black material to print my camera I had to paint them black. I used Rust Oleum universal paint primer in one black gloss for the outside and the same one but BLACK FLAT for the inside so I had no light reflection. You need to paint both sided because only one side will not make it lightproof. Any light that gets into the black box will expose your film.
Step 4: Load Your Film
Here are the instructions of use:
- Put the lid on first. As there is no shutter in pinhole camera, the lid will be our shutter.
 If you remove the shutter light will pass through the pinhole and therefore projecting the image on the film. Check MrPinhole website to see how long your exposure has to be. In general they are about 1-2 seconds depending on how shiny the day is.
 - Load the film on the small pole and pull it towards the longer pole.
- Place the film inside the slot of the long pole.
- Close the camera putting the back body.
- Lock the viewfinder (this will prevent the camera from opening accidentally).
- Spin the long pole one turn.
- Remove the lid to take your first photo. Spin the long pole one turn for the next picture.
- Once you ran out of film. Turn the short pole to rewind the film.
Step 5: Customize and Enjoy Your Camera!
Pinhole cameras are really exciting and 3d printing brings endless possibilities to play around with the diameter as well as the focal length. Please use the files and make your own cameras.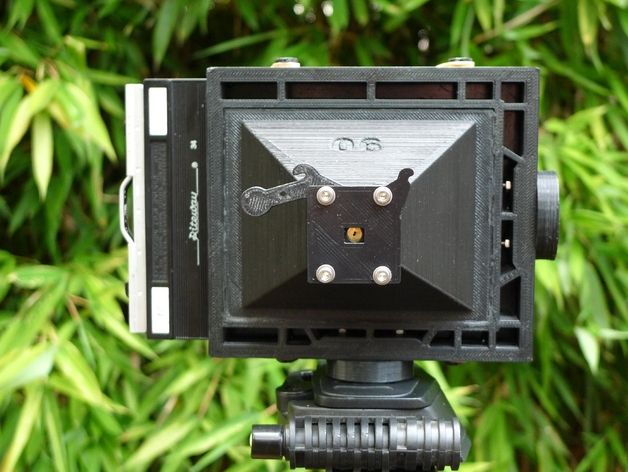 Customize the lid, design a logo and make your own cameras! Please send your photos!
I will be editing this post and adding new pictures and new camera features. My plan is to have different "lenses" with diameters and focal lengths.
Finalist in the
Lomography Analog Photography Contest
1 Person Made This Project!
Did you make this project? Share it with us!
Recommendations
Free STL file 3D printed pinhole camera・Design to download and 3D print・Cults
Batman cookie cutter
Free
Mixable dog models - Puzzle game
Free
Lighting Christmas Tree NeoPixel
Free
Dog cookie cutter
Free
Lighting Christmas Tree RGB LED - auto change color - button cell - DIY
Free
Marble ramp DIY (marble run)
Free
3D Printed Chain
Free
Rotating Keychain - Raindrop shape
Free
Best 3D printer files of the Gadget category
Mobile Phone Stand
Free
XL-RCM 8.
 0 XYPHER: Mini foldable FPV quad H frame for V929/HK Q-Bot
Free
GoT House Stark Sigil for iStein
Free
Pencil cup
Free
Piano Hole Punch Music Box
€2.44
Mini Quad Acro 120mm Micro Pico F3 Brushless 1103 2S 10.000kv
Free
Micro Train
€1.46
Avocado Seed Grower
€0.75
Best sellers of the category Gadget
App to create switchable business cards
€3.54
Mechanical Spinning Top Dice Box
€3.86
Karambit keychain spinner tiktok keyrambit NO BEARING
€1. -10% €1.54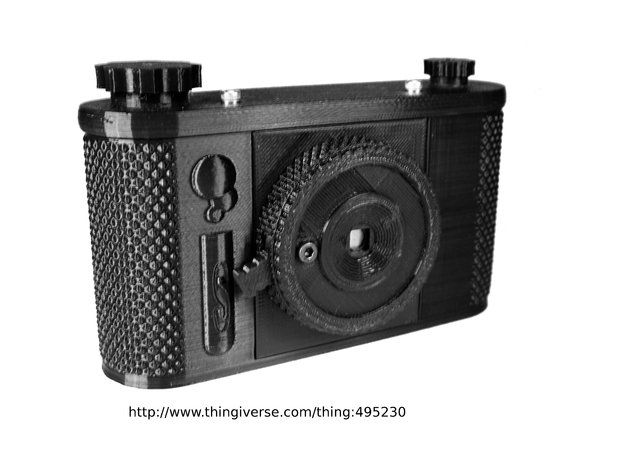 71
71
Writing Machine V2.0 - 2D Pen Plotter
€6.57
ENGINE CYLINDER BLOCK - WALL KEY HANGER
€1.82
Owl - Wall Key Holder
€1.85
Bone Finger Updated
€6.59
V8 engine print in place
€0.88
Speedloader for Mini ADDER v3, Alligator 2
€2
PIXEL 7 PRO case (two designs)
€0.96
App to create dual text illusion
€3.54
Air motor, printed fully assembled, ready to use
€3.22
WALL KEY HOLDER - EYE (ENTIRE COLLECTION)
€1. 88
88
Survival Arrow Gun
€6.39
G26 frame DD26 - Super enforced
€7
App for Cookie Cutters
€3.49
Would you like to support Cults?
You like Cults and you want to help us continue the adventure independently? Please note that we are a small team of 3 people, therefore it is very simple to support us to maintain the activity and create future developments. Here are 4 solutions accessible to all:
ADVERTISING: Disable your AdBlock banner blocker and click on our banner ads.
AFFILIATION: Make your purchases online by clicking on our affiliate links here Amazon.
DONATE: If you want, you can make a donation via PayPal.
WORD OF MOUTH: Invite your friends to come, discover the platform and the magnificent 3D files shared by the community!
3D Printed Pinhole Camera | 3DPmake
The camera obscura or pinhole is the simplest camera, and it is not surprising that many enthusiastic photographers are attracted by the opportunity to create such a device using 3D printing. Clint O'Connor from Austin, Texas has been into pinhole cameras and photography for many years. Like most other photographers, he switched to digital cameras and never looked back - except for pinhole photography.
"Pinhole offers a unique view of the world that is not possible with lenses or digital cameras," says O'Connor. Clint perceives the beauty of the world through his eyes and camera. "As a deaf person, the visual impact of an image has always been of great importance to me."
Mount Baker Stream, Washington (c) 2005 Clint O'Connor
"Landscapes and water are two of my favorite subjects - long pinhole exposures can capture water flowing smoothly like a mist while keeping movement and flow in a still photo. Pinholes also capture depth of field and close subjects are similarly focused." , as well as objects in the far background. I found that no matter how I imagined a photo, the result is often unexpected. Some of my best shots were taken by accident.
The pinhole camera is an inexhaustible source of creative ideas and experiments."
O'Connor made his own cameras using cardboard, wood, and metal cans, or by modifying existing film cameras. Since purchasing the Solidoodle 3D printer, O'Connor has been designing and building cameras through 3D printing. "I thought it was a great way to create a new series of pinholes. 3D printing makes it possible to produce cameras with a solid body and various features at an affordable price."
O'Connor's first printed camera obscura, called the Flyer, is made from ABS plastic and has a durable, lightweight design. The camera is very easy to use, you can load it with film and start taking pictures in less than 30 seconds. "Pinhole produces 6cm x 6cm images and uses 120 x 12 frame type film, just like the Hasselblad camera. The camera can be mounted on a tripod and has a rotary shutter that is easy to use. Angle of view is 70 degrees at capture 133 degrees," says O'Connor.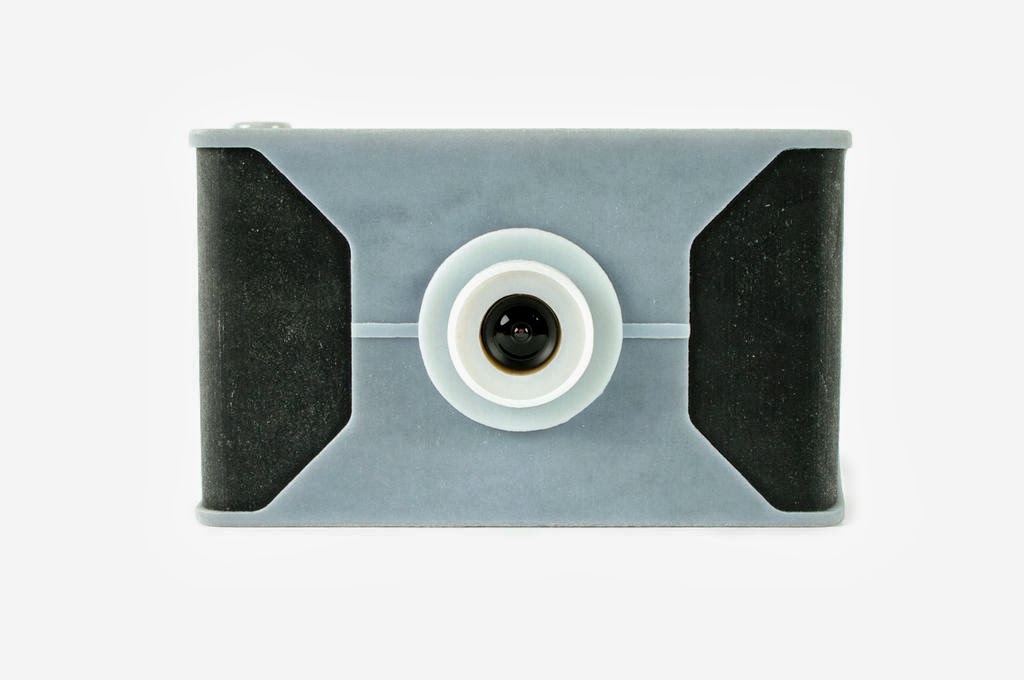
O'Connor launched his Kickstarter project to complete the design and printing of the cameras, as well as acquiring the required amount of film to develop exposure charts and reference shots. "After making over 35 design changes in the CAD application, tweaks after test prints, and using 4 spools of filament, I finally got close to my goal," says O'Connor.
Hamilton Pool Lake (c) 2013 Clint O'Connor (shot on Flyer 6x6)
If you have a 3D printer and want to build your own camera, you can get the STL files and instructions for $20. You can also purchase a $29 build kit or Edition Flyers and a complete $49 Pinhole camera from Kickstarter. The project raised the target amount of $1200 in 13.5 hours.
3D printed camera in retro style
Archive
Subscribe author
Subscribe
Don't want to
Stenope, also known as "pinhole" or "camera obscura" - such devices began the development of the era of photographic equipment. A characteristic feature of the "pinhole" is the absence of a lens, instead of which a small hole is used. Of course, since the creation of such cameras, photographic equipment has advanced far, but there are still amateur photographers who independently manufacture such cameras (due to the simplicity of the design, this is quite possible).
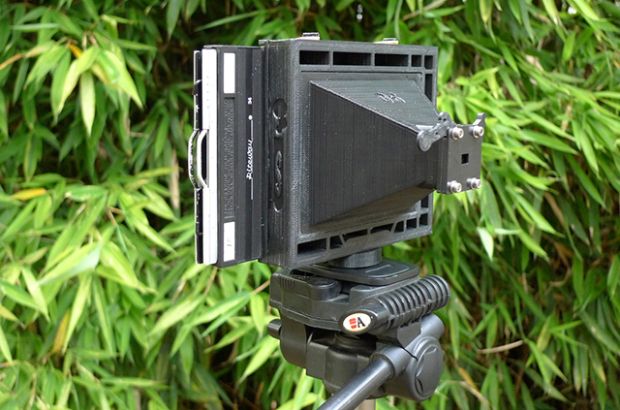
The other day, on the Thingiverse 3D printing portal, a user named schlem published a model of a pinhole camera he created and printed (called PINH5AD) with a frame size of 4 by 5 inches. The basis for the design was an old film holder, which has a special shutter to protect against exposure (which made it possible to simplify the design of the lens). Black ABS plastic was used for printing, from which the frame for the film holder, the main part of the body, the lens and the bracket for mounting on a tripod were made (after all, the shutter speed for taking pictures on such cameras must be really long). The design of the camera is extremely simple, because the shutter curtain is its only moving part.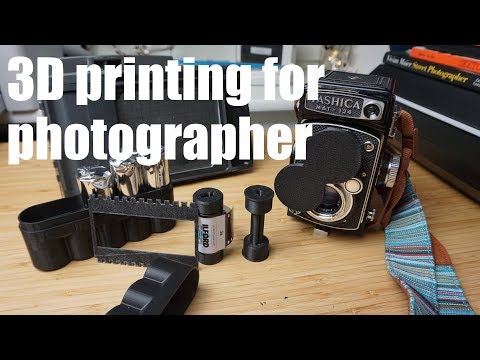
As proof that the camera works, the author posted on Flickr a large number of black and white and color pictures taken with it.
Pretty good for a homemade camera, right? You can see the rest of the photos on the Flickr website: http://www.flickr.com/photos/theschlem/sets/72157635189094287/
In the description of the model on the Thingiverse website, the author described in detail the process of creating the model, its technical characteristics (there are two options with focal lengths 90 and 150 mm) and posted ready-to-print 3D models.
For amateur photographers, we publish the technical characteristics of both camera options:
Article prepared for 3DToday.ru
Article comments
More interesting articles
7
Follow the author
Subscribe
Don't want
Volgograd student Mikhail Kozenko joined the ranks of 3D-makers by designing his own 3D-.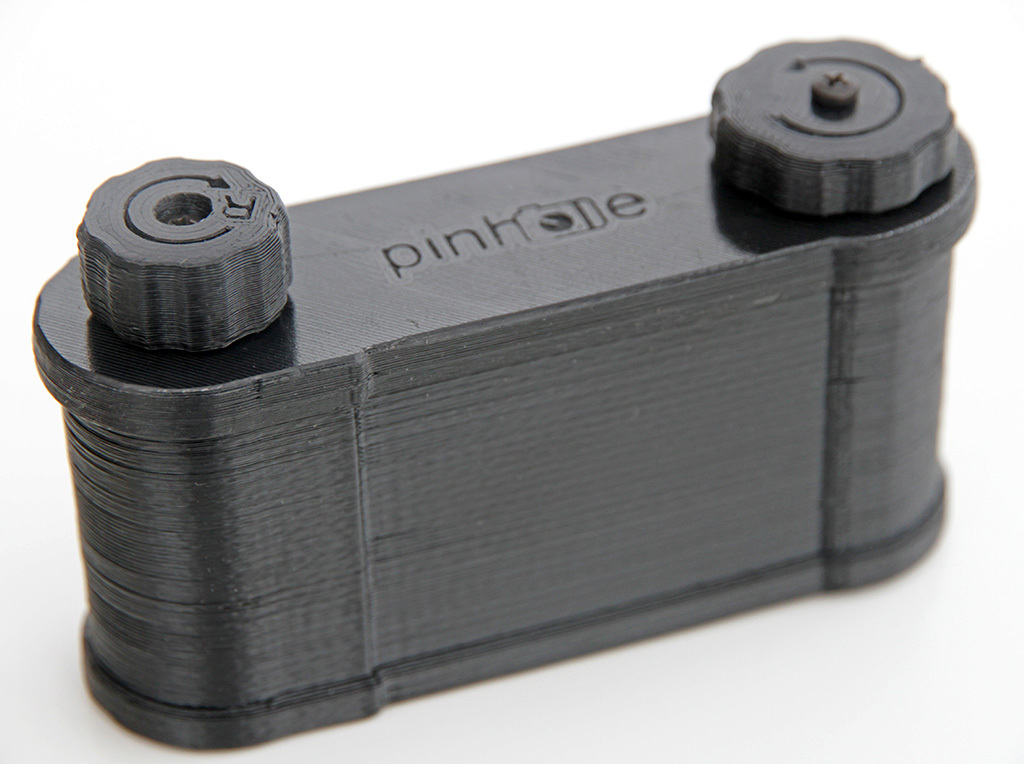


/cdn0.vox-cdn.com/uploads/chorus_asset/file/8170811/passivdom_autonomous_house_designboom_03_16_2017_818_001_818x544.jpg)
