Mew 3d print
Mew best 3D printer files・Cults
Squirtle Poké Ball for christmas tree
€3.76
Mewtwo and Mew Xmas
€6 -16% €5.04
Mewtwo Christmas Star
€4.70
Squirtle Christmas Star /Pokémon
€4.70
bulbasaur Poké Ball / Pokémon
€2.82
Charmander Christmas star/ Pokémon
€4.70
BULBASAUR CHRISTMAS STAR
€4.70
snubull christmas star
€4.70
vaporeon christmas star
€4.70
Pokemon - Christmas Ornament Celebi
€2. 12
MEW Christmas star/Pokémon
€4.70
keychainamon
€0.94
MEW CHRISTMAS ORNAMENT POKÉMON
€0.65
BASE FOR POKÉMON ACTION FIGURES (CHERISH BALL)
€2.48
Berry - Tokyo Mew Mew
€3.06
Mew Pokemon Figure
€2
TAURUS GOLD ARMOR - SAINT SEIYA
€1.42
Mew Pokemon
€5
Cyber MewTwo on Birth Capsule
€47.04
Mewtwo Pokemon Coin TCG
€0.55
POKEMON MEW POKEBALL BOX
€1
Zakuro - Tokyo Mew Mew New
€1. 88
88
Tokyo Mew Mew Zakuro Fujiwara Weapon ZaCross Whip
€7.06
BASE FOR POKÉMON ACTION FIGURES (HEAL BALL)
€1.77
BASE FOR POKÉMON ACTION FIGURES (ULTRA BALL)
€1.77
Cat Head Sculpture v2 [ANIMALS]
Free
POKEMON - MEW (EASY PRINT NO SUPPORT)
€2.59
pokemon mew badge
Free
Fat Gen 1 Pikachu figure pre-supported
€1.50
POKEMON - MEWTWO (EASY PRINT NO SUPPORT)
€1.49
BASE FOR POKÉMON ACTION FIGURES (POKÉBALL)
€1.77
BASE FOR POKÉMON ACTION FIGURES (MASTER BALL)
€1. 77
77
POKEMON - TYRANITAR PACK
€2.19
POKEMON - TYRANITAR
€1.29
POKEMON - TYRANITAR
€1.29
Pokemon The Movie Ancient Mew Tablet
€3.15
ASTRONAUT PIKACHU PACK
€2.10
ASTRONAUT PIKACHU
€1.39
ASTRONAUT PIKACHU
€1.39
Mewtwo - Low Poly - Pokemon - Fan Art
Free
Pokemon Mew Bookend
€1.52
Mew (Easy print no support)
€1.25
Ancient Mew Table
€2
Mew - Pokemon - Low Poly Fan Art
Free
Mew&Happy Mew
€2
Mewtwo Pot - POKEMON
€2
Mew Pot - POKEMON
€2
MinTone Arrow
€3
Mew Pokemon 3D Print - Etsy.
 de
deEtsy is no longer supporting older versions of your web browser in order to ensure that user data remains secure. Please update to the latest version.
Take full advantage of our site features by enabling JavaScript.
Click to zoom
1 sale
from €42. 75
75
Loading
Only 1 available
VAT included (where applicable), plus shipping
Primary color
Select a color Gray (€42.75) Painted (€71.25)
Please select a color
Rare find — this item is hard to come by.
Listed on Aug 21, 2022
3 favorites
Report this item to Etsy
Choose a reason…There’s a problem with my orderIt uses my intellectual property without permissionI don’t think it meets Etsy’s policiesChoose a reason…
The first thing you should do is contact the seller directly.
If you’ve already done that, your item hasn’t arrived, or it’s not as described, you can report that to Etsy by opening a case.
Report a problem with an order
We take intellectual property concerns very seriously, but many of these problems can be resolved directly by the parties involved. We suggest contacting the seller directly to respectfully share your concerns.
If you’d like to file an allegation of infringement, you’ll need to follow the process described in our Copyright and Intellectual Property Policy.
Review how we define handmade, vintage and supplies
See a list of prohibited items and materials
Read our mature content policy
The item for sale is…not handmade
not vintage (20+ years)
not craft supplies
prohibited or that use prohibited materials
not properly labeled as mature content
Please choose a reason
Tell us more about how this item violates our policies. Tell us more about how this item violates our policies.
Mew STL file (easy printing without support)・3D printing design for download3D・Cults
Dwebble (easy printing and easy assembly)
1.25 €
Psyduck (easy printing and easy assembly)
1.25 €
Gengar (easy printing without support)
1.25 €
nine0003 Eevee (easy printing without support)1.25 €
Toothless (Easy print no support)
0.50 €
Bender (easy printing without support)
0,50 €
Baby Yoda (Easy print no support)
0,50 €
Happy Minion (Easy print no support)
0. 50 €
50 €
Ghost minion (light printing without support)
0,50 €
Minion Tim Singing (Easy print no support)
0,50 €
Fluffy The Unicorn (Easy print no support)
0,50 €
SpongeBob (easy printing without support)
0,50 €
nine0005Best Files for 3D Printers in the Art Category
Pumpkin Hut
2,50 €
LED wall panels (thermoformer)
Free
Kratos - God of War: Ragnarok
9 € -40% 5. 40€
40€
Sunflower plant V1
Free
Dragon Sushi Cinderwing3D Food Articulation Printing In Place No Support Cute
3.76 €
Reloj Chewbacca
Free
2020
Free
Art category bestsellers nine0053
Flexi PRINT-IN-PLACE Hand
1,83 €
Elf on shelf in carbonite
€8.47 -fifty% 4.23 €
Cute frog with flexi print
1.83 €
nine0003 Pink Dragon, Valentine's Day, Articulating Animal Flexi Wiggle, Print on the Spot, Fantasy 3. 82€
82€
Adorable articulated axolotl, imprinted body, snap head, cute flexi
3,27 €
Cute T-Rex dinosaur with flexi print
2,78 €
CUTE CROCODILE WITH FLEXIBLE PRINT IN PLACE
2.78 €
Crystal Dragon Articulating Animal Flexi Wiggle Pet Print On The Spot Fantasy
3.76 €
Stitch Love (easy printing without support)
1,50 €
FLEXIBLE STANDING STANDING YETI
2,78 €
Skeleton hand with flexi print
1.87 €
Baby Crystalwing, Cinderwing3D, articulating Flexi Wiggle Pet, print on site, fantasy
3,76 €
GHOST ZU - GHOST WITH FEET
2. 71 €
71 €
Cute sloth with flexi print
2.78 €
Leopard Gecko Articulated Toy, Printed Body, Snap Head, Cute Flex
3.27 €
Triceratops on flexi printer
2,78 €
Do you want to support Cults?
Do you like Cults and want to help us continue our journey on our own ? Please note that we are a small team of 3 people, so it is very easy to support us in maintaining activities and creating future developments. Here are 4 solutions available to everyone:
-
AD: Disable the AdBlock banner blocker and click on our banner ads.
-
AFFILIATION: Shop online with our affiliate links here Amazon.
-
DONATIONS: If you want, you can donate via PayPal here.
-
* INVITE FRIENDS: * Invite your friends, discover the platform and great 3D files shared by the community! nine0006
Creality Ender 7 3D Printer Review
Welcome to the Color World.
At the end of the article you can watch the video version of the review.
Creality's 3D printers have been around for a few years now. The Ender-3 model has already become popular during this time, and everyone who is at least a little fond of 3D printing has heard about it.
But besides the Ender-3, the company over the years has managed to release many other printers with different kinematics, sizes and prices. nine0006
Some of them were successful, some not so much. Today we want to tell you about one of the latest 3D printers from Creality - Ender-7.
It stands out quite strongly from most modern printers, at least for the reason that Creality promises us really high print speeds, up to 250mm/s, thanks to a solid construction, powerful motors and CoreXY kinematics. In this review, we will take a closer look at it and check what it is capable of in real use. nine0006
The printer is delivered in a semi-disassembled state in a rather large and rather heavy box.
At the top we find detailed assembly and calibration instructions. A half kilo spool of white PLA plastic.
The power cord is in a separate box. Convenient wrench for unscrewing the nozzle. Regular side cutters, a few hexes and a screwdriver needed to assemble the printer. Needle for cleaning the nozzle, a few ties. Three plastic holders for wires. Two spare nozzles, two fitting holders. MicroSD flash drive 8 GB with card reader. Screws and nuts needed to assemble the printer. And a small metal spatula for removing models from the platform. nine0006
Next is the fully assembled gantry with XY axes and extruder.
Vertical profiles, one of which has a Z-axis mechanism and motor.
Separately, there is a table wrapped in stretch film.
And at the very bottom we find the control unit with all the electronics and electrics.
Printer assembly is easy. A profile with a Z-axis mechanism and side vertical racks-profiles must be screwed to the control unit. Each one is attached with 4 screws.
Next, you need to fix the table with 8 screws on top and 4 more on the back.
A decorative plastic cap is also installed on top.
After that, you can install the entire portal from above and screw the vertical posts to it, as well as from below, with 4 screws on each.
It only remains to attach the holder for the spool of filament and connect the wires.
With wires, everything is quite simple. From the table comes one wire with a convenient plug. And from the control unit to the portal, all the wires are brought into one loop and connected to a port specially displayed for this. nine0006
The cable can be attached to the profile with the plastic clips supplied.
Let's get to know the printer better. The print area is 250 x 250 x 300 millimeters.
In order to get to the kinematic mechanisms, it is necessary to remove the decorative plastic cover from the portal, to do this, unscrew a few screws from the bottom.
We climbed there before assembling the printer for easy access, but you can do it on the assembled printer. Under the plastic casing, we see all the kinematics, it's here CoreXY. nine0006
We will not go into the subtleties of the structure of the CoreXY kinematics, but its essence lies in the fact that it has two long belts, and when one of the motors rotates, the extruder carriage moves diagonally. To make rectilinear coaxial movements, both motors must rotate synchronously. It immediately catches the eye that the belts are thrown through a kind of block system, this is usually not done.
At the same time, rather large pulleys are installed on the motors, this allows you to increase the speed of movement of the axes. True, the accuracy is reduced. nine0006
The belts here are 10mm Gates.
The motors themselves on the XY axes from Moons are Nema17 in size, but are much longer and more powerful than are usually installed on printers of this size. Again, it's not very clear why, apparently Creality decided that this was necessary.
Portal frame made of 8mm anodized aluminium. Clearly with a large margin of safety.
It has two 12 mm rails from an unknown manufacturer on the sides. nine0006
Rails are, of course, wonderful. But such noname rails often come across as sticking or “backlashing”. When they are installed on a purchased printer, one can only hope that the manufacturer has checked them. In our case, there are no complaints about the rails. Everything moves quite smoothly and evenly.
The X-beam is also impressive, made from 6mm aluminium. And a 12 mm rail is also screwed to it.
Of course, an 8 mm rail and a not so thick beam would be enough to move the extruder carriage. In this case, the weight of the moving elements of the kinematics would be significantly reduced. But the motors are powerful, they should cope. nine0006
Distribution board located at the back. All wires from the extruder and motors are connected to it. There is a free port for connecting a BLTouch auto-calibration sensor.
There is only one cable from the distribution board to the control unit. Looking ahead, let's say that although this solution is working, there are questions to it. With fast printing, this cable heats up, not much, 40-50 degrees. But, obviously, this is a weak point, and it needs to be looked after.
Bowden extruder installed here. That is, the feed mechanism with the motor is moved outside the print head, and the plastic is fed to the hot end through a Teflon tube. nine0006
The idea is clear, Creality wanted to lighten the print head. Bowden extruder can of course move faster than direct. But we must not forget about its shortcomings. Retracts have to be set very long, and they take a lot of time. There is no possibility to print soft flex. In addition, it is not possible to fully use the very useful Linear Advance algorithm, which allows you to get rid of protruding corners and uneven laying of lines on sharp turns. nine0006
Feeder is good. We have already seen this one on the 3DPrintMill CR-30 conveyor printer.
It has two feed gears, but unlike BMG-like mechanisms, it has no reduction.
On the other hand, the motor on the feeder is also powerful and its torque should be more than enough to push plastic at high speeds. Immediately below the feeder is a filament end sensor.
The hotend here is unusual, we have never seen such a hotend before. The radiator is very peculiar with wavy fins. nine0006
The area of this fin is not that big, but at first glance it is larger than the standard heatsink that Creality put on their printers. It is cooled by a 4010 fan bolted to the front through spacers.
The heating block is also original and measures approximately 20 x 20 x 14 mm.
At the same time, the nozzle in it is also non-standard, you may have noticed this while unpacking. It's a cross between a regular MK8 and a long E3D Voclano. nine0006
Clearly, Creality wanted to increase the melt zone of the material so that the extruder could handle printing at high speeds. But proprietary nozzles carry a lot of difficulties, as their choice is very limited. And given that the printer is unlikely to become very popular in the community, it is unlikely that you will find nozzles of different diameters for it or hardened ones, for example.
There is a through thermal barrier, a Teflon tube runs to the very nozzle. Therefore, printing with high-temperature plastics with this hot end is not desirable. nine0006
Two 4010 turbine fans with small air ducts are used to cool the print area. All fans of the hot end are of decent quality, do not vibrate and are quite quiet.
The heated table is made according to the standard scheme. 3mm aluminum plate with 24V heater. On top of it lies the glass "Ultrabaza".
When the table is heated, the micropores of this coating should hold the part well, and after cooling the part should peel off by itself. nine0006
The glass is held in place by 4 metal brackets.
They are bolted rigidly at the back, and fold to the sides at the front, allowing you to quickly and easily remove and install the glass in place. A heater is glued to the bottom of the heater, which is good, but for some reason it does not cover the entire area of the table.
Also from below we see rather large metal corners, which are stiffening ribs. Considering that the table is cantilevered, only on one side, the rigidity here will obviously not be superfluous. nine0006
Moves the Z axis using the OpenBuilds system, on rollers that roll directly on the aluminum profile. Lots of people don't like this way of moving around, but with the right use and setup, an OpenBuilds system can run long and well, and it's also quiet.
Two carriages with 4 rollers on each move along the profile.
They are independent, but when the table is installed, the whole structure becomes one-piece. Each carriage has eccentric nuts on one side. nine0006
They allow you to adjust the pressure of the rollers to the profile. And here we are faced with an unpleasant moment. At the factory, all the rollers were tightened. And because of the strong pressure for a long time in one position, all the rollers were slightly deformed. Because of this, the carriages moved along the profile with characteristic jams.
In a good way, such "squared" rollers need to be replaced with new ones, since they are not expensive and, in fact, are consumables. But if there are no new videos at hand, but you want to print, there is one slightly barbaric way to temporarily solve this problem. It is necessary to press all the rollers a little more and actively move the carriages along the profile for some time. nine0006
Due to friction and pressure, the rollers will wear a little and will inevitably take the correct shape. The main thing is to keep patience. After that, the roller pressure must be adjusted so that nothing plays, but at the same time moves smoothly. In this way, we managed to achieve an almost perfectly smooth movement.
The table is driven by a Nema17 motor through a rigid split coupling with an 8 mm 4 lead screw.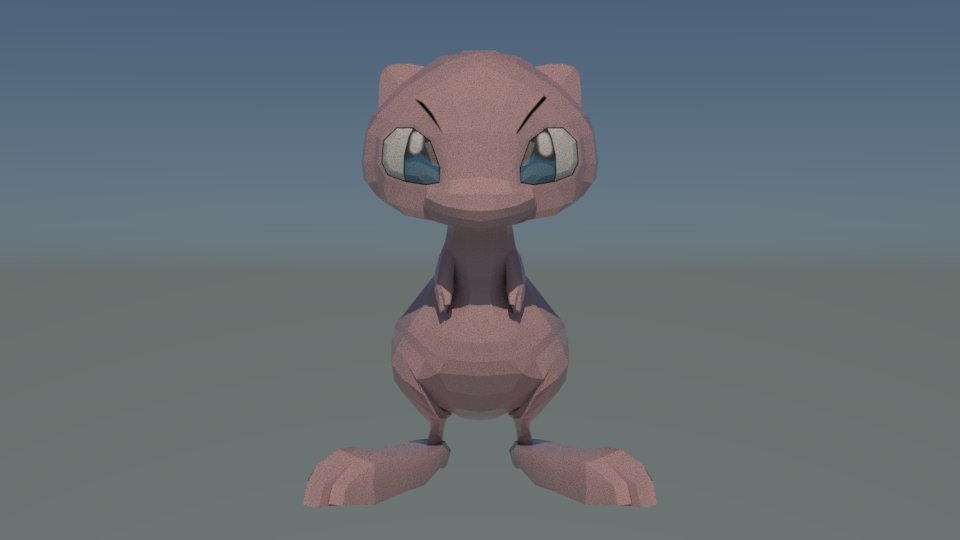
Anti-wobble spring-loaded running nut is installed here. nine0006
Here the complaint is only about the type of propeller. The fact is that the 4 lead screws have a rather strong inclination at the thread. Because of this, even with a small load with the motors turned off, the table itself slides down. Not always and not until the very end, but sometimes it happens. When printing, this is not important, but if the power suddenly turns off, the table may well slide down a little. And therefore, when you turn on and restore printing, the printer will start printing over the air. This makes the recovery function after a power outage simply useless. I am glad that the screw is smooth, there is no beating during rotation. nine0006
Let's look at the control unit. The board here is proprietary from Creality.
Microcontroller 32-bit STM32F103. Soldered silent drivers are installed on the Z axis and the extruder, which ones are not visible under the glued heatsinks, but most likely it is TMC2208 or 2209.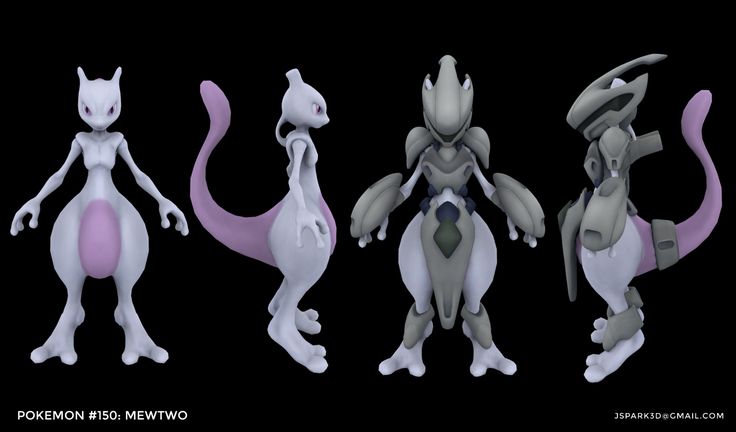 There are trimmers for adjusting the voltage.
Drivers for the X and Y axes are not included on the board. And the thing is that they are external here. These are huge DM542 drivers from Leadshine.
Such drivers are rarely used on 3D printers of this size. Apparently, ordinary drivers could no longer cope with the rotation of powerful motors of the XY axes. It seems that Creality was going to make a CNC router, but then changed their minds and decided to make a 3D printer out of it. nine0006
The control board is cooled by one 4020 turbine fan located on the side. Powers all Creality 24 volt 350 watt power supply.
A touch screen from DWIN is installed here.
The screen itself works fine, it responds well to pressing, no false positives were noticed. But the menu interface does not have the widest possibilities, although all the most necessary functions are there.
In the settings section there is a table calibration menu, already sharpened for the installation of an auto-calibration sensor. nine0006
It is not very clear why he is here, because there is no auto-calibration in the stock. But there is also a simple calibration assistant that moves the carriage around the corners and center of the table.
At each point, manually adjust the table with the comfortable large knobs so that a piece of paper or a special calibration probe passes with little resistance. Here you can also set the indent along the Z axis.
There is a menu for loading and unloading the filament.
Manual movement of the axes, with the ability to clearly define the coordinates to be moved. nine0006
There is also a shutdown of motors and a choice of interface language (Russian, by the way, is).
In the Temperature menu, you can enable pre-heating, manually set the required temperature, turn off all heating and turn off the fan.
And of course the print menu, nothing special.
There are no fine printer settings in the screen menu, accelerations, jerks, steps per mm. All this, if necessary, can be reconfigured by connecting the printer via USB to a computer. By the way, the connection port here is USB Type-C, we have not seen this before. nine0006
The port is good, modern, reliable, but USB Type-c wires are not provided with the printer.
Enough technical information, let's move on to printing tests. The flash drive with the printer comes with the Creality slicer, which is essentially a slightly redesigned and outdated version of Cura.
Therefore, we decided not to use it, but simply set up the Ender-7 in a regular Cura, transferring the settings one by one from the Creality slicer.
Filled with blue PLA+ plastic from Tiger3D and tried to print a low poly fox. Since Creality claims that the printer can print fast, we decided not to be modest and set the main speed to 150 mm / s. The outer walls, as usual, were printed twice as slow as 75 mm/s. By default, the firmware has accelerations of 1500 mm/s2 and jerks of 15 mm/s. This is not much, but we decided to first test the printer in the form in which the manufacturer intended it. nine0006
There were no major printing problems. The plastic managed to melt, the feeder pushed it through without any problems. There were no gaps or layer shifts. However, the quality of the printed fox can hardly be called good.
Even though in most places the printer did not have time to accelerate to the set speed, and in some areas the slicer slowed down due to the limitation of the layer printing time. The corners stick out quite strongly on the model, and after sharp turns there is a decent echo. nine0006
I was very pleasantly surprised by the fact that the place under the muzzle with a strong overhang turned out very neat. Has Creality finally learned how to make a good airflow model? The total print time was 2 hours 28 minutes, which is ok but nothing outstanding.
For comparison, the same fox was printed, but the speeds were set to 80 and 40mm/s. At the same time, accelerations and jerks were made the same as they are usually set at the factory on Ender-3 or Ender-5 printers, 500mm/s2 and 10mm/s.
There are no questions about print quality. Fox did well. The corners do not stick out, there is practically no echo, the layers are laid evenly over the entire height. There are no strings between the ears. Overhanging under the muzzle also turned out great. However, the print time has increased to 3 hours 36 minutes, the difference is very impressive. nine0006
By the way, before printing the second model, a strange glitch was discovered. If you remove and insert the SD card while the printer is on, the entire printer will reboot. Most likely, this is a software problem and it will be solved in the next firmware. But the sediment remained.
Well, they tried to print the last fox with accelerations of 3000mm / s2 and jerks of 30 mm / s, that is, twice as much as in stock. At the same time, the speed was left at 80 by 40 mm / s.
The printing time was average between the first and second fox, 2 hours 54 minutes. However, the quality is almost the same as the second option. Except that the corners stick out a little more. nine0006
Some full-fledged conclusions cannot be drawn from these tests, but we can say for sure that at a speed of 150 mm / s with stock acceleration and jerk settings, the printer prints, but the problems of “overweighted” kinematics are already clearly manifested.
Benchy ship, of course, we also tried to print, where without it.
At 150mm/s with stock acceleration and jerk settings, the boat printed mediocre. There are a couple of strange plastic smudges that appeared for no apparent reason. There is a slight uneven laying of the layers. There is also an echo after turns. The inscription on the back is smudged and unreadable. Again, I was pleasantly surprised by the print quality of the overhanging elements. The lids closed well. Pipes are straight. There are no gaps or shifts. The printing time of this boat was 1 hour 11 minutes. nine0006
But this test again proved that, contrary to the manufacturer's statements, the printer is not very suitable for high speeds. For printing not complex technical models that do not require accuracy, this quality is quite acceptable. But models that need to look beautiful will have to be printed at normal speeds, no more than 80mm/s.
You might say: "But the manufacturer promised 250mm/s, not 150. What happens when printing at this speed?" And we also checked this, and in a really hard mode. Accelerations and jerks were again increased to 3000 and 30 so that the printer had time to accelerate to the set speed. In addition, the minimum print time of the layer was completely disabled so that the slicer does not underestimate the speed at all. And all speeds, including the printing of the outer walls, were set to 250mm / s. nine0006
Well, here the printer already had a hard time. The motors got pretty hot. The printer, along with the table on which it stood, just trembled. Naturally, the power of blowing has already begun to be missed. But, despite all the difficulties, the extruder continued to crush the plastic, the feeder did not bite into the bar and did not skip steps. The motors of the X and Y axes also coped despite the heat. The ship was printed in just 38 minutes. Of course, there is no question of any quality here. But it is quite possible to say that the printer coped with the task. This is indeed a Benchy boat, albeit an ugly one. Surprisingly, when printing the infill and top covers, the plastic stacked normally. Even the slopes more or less turned out. The pipe, of course, strongly melted, but this is not surprising. nine0006
In general, the printer is technically capable of printing at real 250mm/s, but we highly recommend not torturing the printer and printing at such high speeds. As the saying goes: "More quietly, you will continue." To print beautiful models, it is better not to exceed the speed of 80mm/s. For models that are not demanding on quality, you can raise it to 150.
To check the evenness of the stacking of layers, we decided to print the vase in a spiral mode. And, unfortunately, faced with a very unpleasant problem. When printing in spiral mode, the Z-axis does not transition between layers, but gradually rises up in micro-steps, while the extruder lays one long line in a spiral. nine0006
And it turned out that Ender-7 can't do that. Immediately after printing the floor, the printer starts to slow down terribly, jamming almost every millimeter.
And with every stop there are plastic streaks. It was hoped that a newer firmware would fix the problem, but there is none yet. The latest version is installed on the printer. Somehow the problem is solved when printing via USB-wire from a computer, slowdowns become much less, but they still remain.
As a result, the vase turned out, but its entire surface is dotted with small plastic smudges. nine0006
There is an assumption that the control board cannot properly synchronize the work of different drivers. Let's hope that Creality will be able to correct this misunderstanding programmatically in the next firmware.
Let's not make the video too long and quickly go through the rest of the printing tests. An interesting flower pot was printed with PETG plastic from Bestfilament. It has been scaled up to 200%.
It took almost 18 hours to print, considering its size, it's not bad. If you do not look closely, the pot turned out well. However, upon closer inspection, there are some minor flaws. The corners stick out a little, there is an obvious echo after the turns. There were a few thin strings inside, although this is common with PETG, especially when printing with a bowden extruder. But given the rather high print speed, the quality can be rated as a four. nine0006
The same plastic was used to print a model with a mechanism, the so-called Infinity Cube. When printing such models, everything is important: positioning accuracy, correct flow, and cooling.
Infinity Cybe printed fine. Mechanisms work, nothing sticks together and does not fall apart.
ABS plastic from Tiger3D tried to print a prefabricated recorder. To play it safe, the surface of the table was covered with 3D printing glue. The model is printed without supports in one go. nine0006
And the flute turned out well. Everything is smooth and even. It didn’t work out right away, I had to sand the joints a little, as the layers clung to each other and interfered. But after a little post-processing, it was assembled and even earned. Nobody knows how to play the flute, but you can listen to a couple of selected melodies in our video review.
We tried to print a larger model with the same plastic. Of course, it is quite difficult to print large models with ABS plastic on an open printer. But this ABS plastic from Tiger3D has a fairly low shrinkage, besides, it melts quite normally at a temperature of 235 degrees. That is, the Teflon tube in the hotend should not suffer much because of this. This is a stand in the form of waves for tablets or large smartphones. nine0006
And it turned out very worthy. Everything is smooth and even, even the slopes turned out well, despite the completely turned off airflow.
Nothing came off the table. By the way, when heated to 100 degrees, the table remained quite even, and the first layers lay down well.
Let's draw conclusions. The printer turned out to be very controversial. On the one hand, it has a very rigid body with a huge margin of safety, powerful motors and drivers from CNC machines, as well as a hot end adapted for printing at high speeds. But at the same time, it was enough to simply reduce the weight of the moving elements of the kinematics, and almost all of this would simply not be necessary. nine0006
There are obvious problems with the software side, but most likely Creality will fix them with the next firmware updates.
Creality's claims that the Ender-7 can print at 250mm/s are partly true.