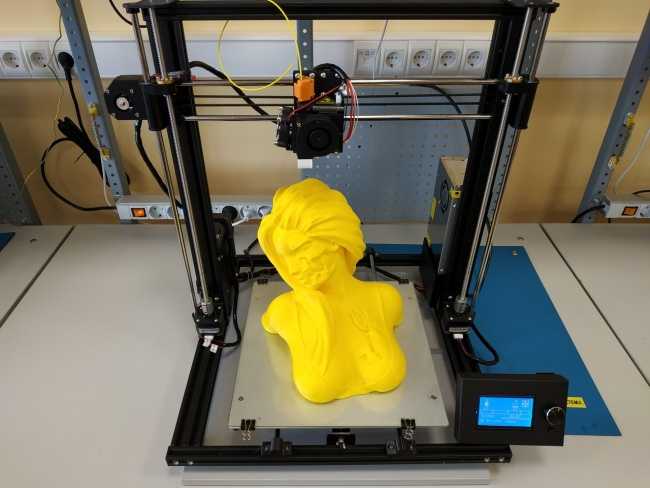
How to make strong 3d prints
5 Tips to Strengthen 3D Printed Parts
Structural integrity in 3D printing is important as 3D prints must not collapse while functioning. 3D printing is a popular manufacturing process with wide acceptance because of the quality it delivers. In terms of improving the strength of 3D printed parts, there are many things that come to play.
This article will provide details on how to make strong 3D prints and it is helpful for those either having a personal 3D printer or want to outsource to rapid prototyping services. If you have a personal 3D printer, you will learn how to tweak the settings to achieve the best results. If you want to outsource your projects, you will get information about different materials and recent post-processing technologies that will give you an idea of how to communicate to the prototyping service better. Go through a simplified version of how to make 3D printed parts strong.
Adjust Printer SettingsHaving a 3D printer for your personal works is more efficient and effective in personal product manufacture. However, unless you are deeply into 3D printing with knowledge surrounding its use, you might have a little trouble making a strong 3D print. There are many settings on your 3D printer that you can tweak for a high-quality and strong print. Below are how to make strong 3D prints using them.
One way of increasing the strength of a 3D print is by increasing the interior density. The interior density ranges from 0% to 100%, with zero means totally hollow while 100 means totally solid.
Theoretically, having a 100 infill density should make your 3D print very strong. However, practically most designers have noticed that anything beyond 70% has a lesser impact on strengthening the 3D print. Instead, there is a tremendous increase in filament use, printing time, cost, and burden on the 3D printer.
Note: Have at least a 20% infill density for strength and, if possible, tweak the wall thickness (explained below) before increasing the infill density.
The wall thickness of a 3D printed material is measured by “Wall Line Count” and “Outer Line Width.” It shows how thick the wall and increasing it is a critical way to make strong 3D prints. Increasing wall thickness will increase strength as 3D printed parts have more strain on the outside than the inside.
Not only does increasing the wall thickness strengthen the printed material, but it also improves overhangs (geometry shapes in 3D models that are difficult to print) and water tightness.
Note: For a regular product, at least have a wall thickness ≥ 1.2mm. You can then increase it for more strength.
Use Thinner LayersUsing a thin layer will lead to better adhesion and density between subsequent layers, which strengthens 3D printed parts. Designers have said that going as low as 0.1mm (100 microns) will maximize strength. However, there is also a complementary increase in printing time.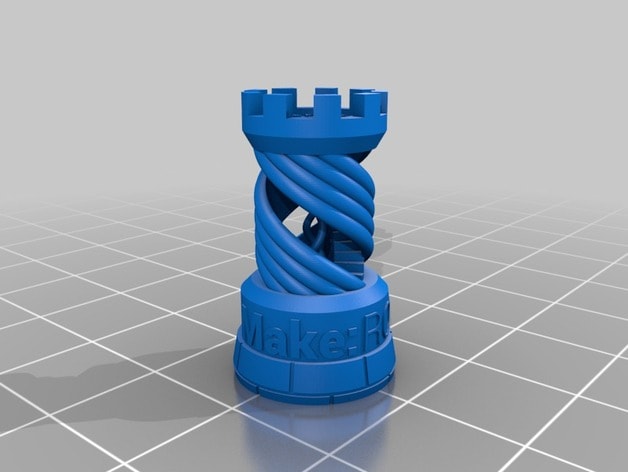
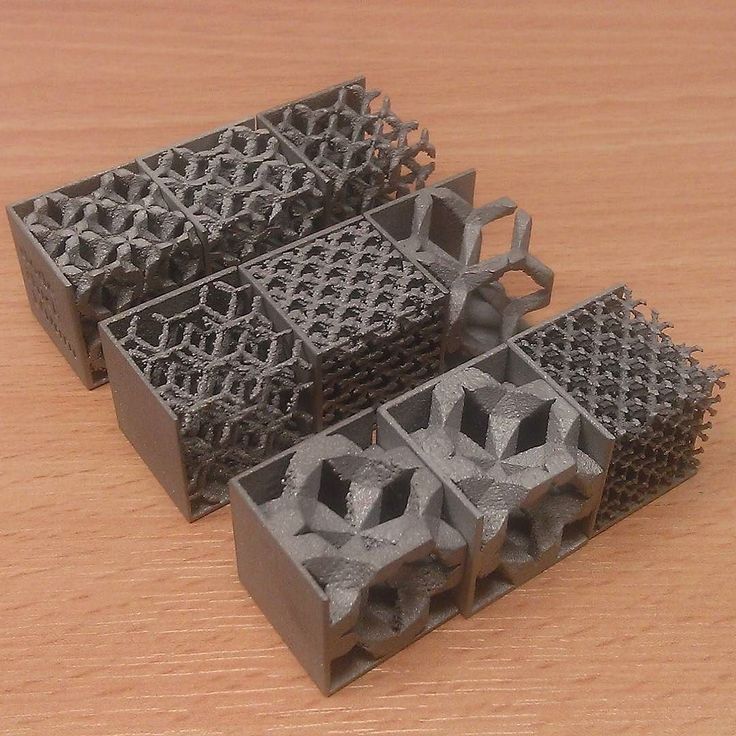
Another way of reinforcing 3D prints is by using the right infill pattern. Infill patterns work with infill density, and they serve as an internal support structure for 3D prints. They also add some stiffness to the part and prevent wall deformation. On how to make strong 3D prints using infill patterns, you should use a dense infill pattern ranging from 30-50%.
The type of infill pattern you use also determines how strong the 3D print will be. Three infills you can try are listed below:
· Triangular Infill PatternTriangular infill patterns are strong as they have a lesser chance of deforming, and they provide the best support structure. Most 3D enthusiasts attribute this to triangles being the strongest shape.
Using a triangular infill also improves print speed due to the straight-line movement of the printhead. Consequently, strength and speed make triangular infills the best choice among many 3D enthusiasts.
Rectangular infills can achieve 100% infill density due to their grid of parallel and perpendicular extrusions. Like the triangular infill, it also has a high print speed due to the print head’s straight-line movement.
· Hexagonal Infill PatternThey have tessellated hexagons and the highest strength to weight ratio. Unlike the previous two infill patterns, printing is slow due to the printhead constantly changing direction, but they are also effective in reinforcing 3D prints.
Adjust Flow RateAdjusting the flow rate can also be an ideal method to make 3D printed parts strong. However, using this method, you must be careful such that you do not cause under and over extrusion. Therefore, most designers make sure they only make small changes.
You can adjust the flow rate for the following:
- Wall Flow (Outer Wall Flow & Inner Wall Flow)
- Infill Flow
- Support Flow
You can adjust the flow rate to strengthen 3D prints. However, most people adjust the flow rate to fix other 3D printing issues such as the inability to achieve volumetric flow and to improve accuracy.
According to Cura, a popular slicer, you can strengthen your 3D prints by adjusting the line width to an even multiple of the layer height. However, you must be careful as this setting is directly related to extrusion, i.e., a massive change in line width can lead to over and under extrusion.
Reduce CoolingCooling is an important process in 3D printing which affects the adhesion of layers after setting. Quick cooling can reduce the adhesion due to a subsequent layer’s inability to bond with another. However, cooling also depends on the material you are using. For example, PLA works best under the action of a strong cooling fan. Therefore, you should reduce the cooling rate based on the material you are working with.
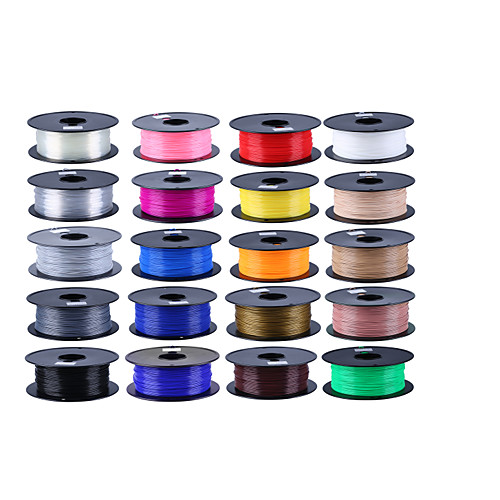
Select Strong Material to Make Strong 3D PrintsIn 3D printing, there are some materials that are known to be weak. Therefore, making a strong 3D print can be about using strong 3D printing materials. There are three major materials with properties synonymous with strength.
ABS is a great 3D printing material for making strong 3D prints that are not suitable for heavy use. It is a thermoplastic with tough and light properties, which makes it a top plastic polymer in 3D printing.
PLAPLA is an expensive 3D printing material suitable for prints with heavy use and high resolution. It has a tensile strength of 7250 psi but will degrade on exposure to light.
PETGThis is a new filament recently gaining popularity due to its strength. It has a tensile strength of about 4100-8500 psi which makes it stronger than PLA and weaker than ABS. However, it is less flexible than PLA and more than ABS.
Choosing the Right MaterialTo choose the right material of the three, you have to consider the resistive force, bonding between later, bending forces, rigidity, and ability to resist impacts. Below is a comparison of the three in terms of each:
- Resistive force: PETG > PLA > ABS
- Bonding between layers: PETG > ABS and PLA
- Bending force: ABS > PETG > PLA
- Impact resistance: ABS = PETG > PLA
To learn more about the differences between PLA vs ABS, check out the article on RapidDirect.
Determine Part OrientationAnother way of reinforcing 3D prints is using part orientation. Part orientation is the positioning of a part on the 3D printer. 3D printers work by depositing thin layers of melted materials at a gradually increasing height. The gradual increase in height is what forms the 3-dimensional parts. On the deposition of a layer, it bonds with the previous layer. However, the interface between the two layers is a weak point, and 3D prints break at these interfaces.
A good way to understand this is by making a bracket used for a shelf. The thing you will notice is that the largest force will act downward where the bracket attaches to the shelf. Therefore, it is better to print on a side with an interface that is opposite the force.
If the part orientation is challenging, you should use materials that have a better bonding tendency, for example, PETG. Also, note that part orientation will affect the smoothest of the print surface and the print cost due to the requirement for many materials.
Applying Epoxy Coating to 3D PrintsThis is not a direct way of making strong 3D prints as it occurs after printing. It involves using epoxy/polyepoxide to strengthen 3D prints. Epoxy coating is an insoluble surface coating made from a hardener and epoxy coating. It is solvent resistance, durable and tough, making it a suitable way to coat materials such as PLA, ABS, and SLA.
Applying an epoxy coating to 3D prints is an easy task. Follow the steps below on how you could go about it:
- 3D prints the product according to the product design
- Let it cool and clean the surface.
- Pour a little part in a cup and warm it to achieve a viscous fluid
- Using a brush, apply the epoxy coating using a brush on the model without allowing the coating to drip down its side.
 Also, use small brushes to get access to crevices and corners.
 - Allow the 3D print to dry.
You do not need to use much as a little of the hardener can coat and strengthen the print. Applying epoxy coating on the 3D print makes it stronger and provides it with a clear and shiny surface.
Other Considerations to Make 3D Printed Parts StrongTweaking the 3D printer settings is not the only way to make a 3D print strong. Aside from the epoxy coating, which is a post-processing method, there are other methods you can use. Below are two important methods popular recent.
Annealing 3D PrintsAnnealing is a method that subjects 3D prints to an increase in temperature for strengthening purposes. According to the test, annealing is said to cause about a 40% increase in strength after use. It is compatible with materials such as PLA, ABS, PETG, and ASA.
Annealing is important in strengthening 3D prints as the structure of plastic makes it prone to failure. Before 3D printing, plastics have an amorphous/unorganized microstructure. However, when you heat the 3D prints, the amorphous structure reorganizes itself to a crystalline form which makes such 3D prints prone to failure.
Annealing is essential here as it changes 3D prints’ crystalline structures from large to small crystals. You can anneal the plastic polymer or the finished 3D printed product. To anneal the plastic polymer or 3D printed parts, heat it at a temperature above its glass transition point and below its melting point.
Electroplating Plastic 3D printsElectroplating is a popular method due to it being practical and affordable. It involves putting the 3D print in an electrolyte and a plating metal (popular industrial metals are zinc, chrome, and nickel. On passing an electric current through the electrolyte, the metallic ion forms a coating around the 3D print. This leads to the formation of durable and long-lasting 3D prints.
While suitable for the purpose, its disadvantage is that it would need many layers for making better 3D parts with high strength.
A strong 3D print is one that does not collapse on use, which makes knowing how to make strong 3D prints. Very important. There are three ways of strengthening 3D prints. One is during the process itself (by tweaking the 3D printer’s Settings), using the right materials, and after-process treatments. Using any of the methods, you have a chance of making strong 3D prints or talking to or communicating with the prototyping service on how to strengthen 3D printed parts.
RapidDirect – Provide Custom 3D Printing Services3D printing is a popular method used for its quality, efficiency, and effectiveness, and its ability to make complex parts. However, improving strengthening a 3D print comes with advanced knowledge on how a 3D printer works, the right material to use, and post-processing techniques.
If you desire a 3D print with the right attributes in the form of strength, durability, aesthetics, and quality, partnering with RapidDirect, one of the best rapid prototyping services in China, is a great choice. We provide custom 3D printing services, and you can get an instant quote for custom machined parts and full-dimensional reports inspection reports. For anything related to 3D printing, contact us today.
Get an Instant Quote For 3D Printed Parts
FAQsHow do you reinforce PLA 3D prints?
PLA is one of the most frequently used materials in 3D printing. It has a huge tensile strength making it suitable for making structural parts. While strong, you can also reinforce PLA 3D prints using the methods highlighted above. Common methods of strengthening the 3D prints include applying epoxy, annealing, or electroplating.
What is the strongest 3D printable material?
Among all the printable materials used in 3D printing, polycarbonate is the strongest. It was dubbed the true king of desktop printing due to its strength (tensile strength of 9800 psi) and heat resistance. The heat resistance makes it require extraordinarily high temperature (bed should be at about 1450 while the head should be at about 2900. You will also need to enclose the material due to it warping in an open environment. Polycarbonate is suitable for making high-strength functional components.
How do I make prints stronger?
There are many ways you can use to make prints stronger. You can tweak your 3D printer’s setting, you can change the materials to stronger materials, and you can use after-processing methods such as coating with epoxy materials, annealing, and electroplating.
11 Ways How To Make 3D Printed Parts Stronger – A Simple Guide – 3D Printerly
3D prints have many functional uses which can require a good amount of strength to perform properly. Even if you have some aesthetic 3D prints, you’ll still want a certain level of strength so it can hold up well.
I decided to write an article detailing how you can make your 3D printed parts stronger, allowing you to have more confidence in the durability of objects you are making.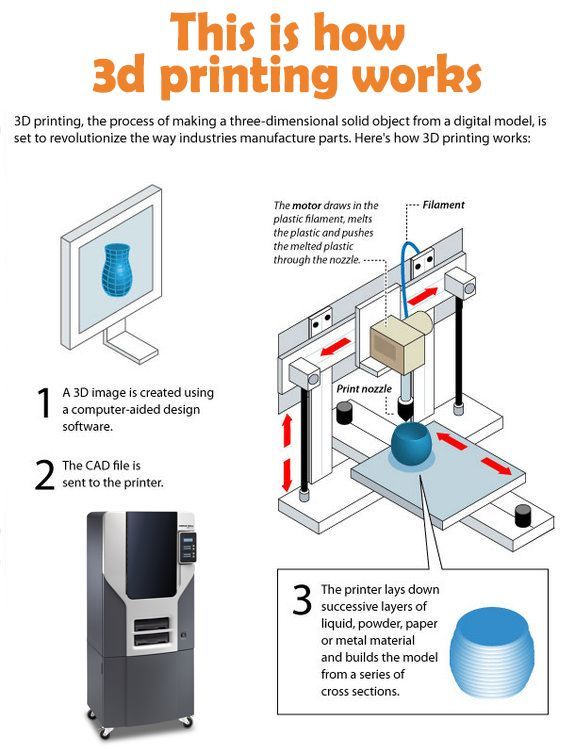
Keep on reading through to get some good tips on how to improve and strengthen your 3D prints.
Why Are Your 3D Prints Coming Out Soft, Weak & Brittle?The main cause of brittle or weak 3D prints is the accumulation of moisture in the filament. Some 3D filaments naturally tend to absorb moisture from the air due to overexposure. Trying to heat filament to a high temperature that has absorbed moisture can cause bubbles and popping, leading to weak extrusion.
What you want to do in this situation is dry your filament. There are a few ways to dry filament effective, the first method being to put your filament spool in an oven at low heat.
You first have to make sure your oven temperature is correctly calibrated with a thermometer because oven temperatures can be quite inaccurate, especially at lower temperatures.
Another more popular method is to use a specialized filament dryer like the SUNLU Filament Dryer from Amazon. Most people who use this are very happy with their results, being able to save filament they thought were no longer effective.
There have been a few mixed reviews though with people saying it doesn’t heat up enough, though these may be faulty units.
One user who 3D prints Nylon, which is notorious for absorbing moisture used the SUNLU Filament Dryer and said his prints are now coming out clean and beautiful.
I’d recommend that you use an extra layer of insulation like a large plastic bag or a cardboard box to retain the heat in.
Other factors that may contribute to a soft, weak, and brittle print is the infill density and wall thickness. I’ll take you through the idea methods to improve strength in your 3D prints below.
How Do You Reinforce & Make 3D Prints Stronger? PLA, ABS, PETG & More1. Use Stronger Materials
Instead of using materials that are known to be weak in some cases, you can choose to use materials that can hold up well with strong forces or impact.
I’d recommend going with something like Polycarbonate with Carbon Fiber Reinforcement from Amazon.
This filament is gaining plenty of traction in the 3D printing community for providing real strength in 3D prints. It has over 600 ratings and is currently at 4.4/5.0 at the time of writing.
The best thing about this is just how easy it is to print compared to ABS, which is another stronger material that people use.
Another widely used filament that people use for functional 3D prints or for strength in general is OVERTURE PETG 1.75mm Filament, known to be a little stronger than PLA, and still pretty easy to 3D print with.
2. Increase Wall Thickness
One of the best methods to strengthen and reinforce your 3D prints is to increase your wall thickness. The wall thickness is simply how thick the exterior wall of your 3D print is, measured by “Wall Line Count” and “Outer Line Width”.
You don’t want a wall thickness less than 1.2mm. I’d recommend having a minimum wall thickness of 1. 6mm, but for more strength, you can definitely go higher.
Increasing wall thickness also has the benefits of improving overhangs as well as making 3D prints more watertight.
3. Increase Infill Density
The infill pattern is the internal structure of the object being printed. The amount of infill you need depends mainly on the object you are creating, but generally speaking, you want an infill of at least 20% for good strength.
If you want to go the extra mile, you can raise it up to 40%+, but there are diminishing returns to increasing infill density.
The more you increase it, the less improvement in strength you’ll get in your 3D printed part. I’d recommend first increasing your wall thickness before increasing infill density so high.
Generally, 3D printer users don’t exceed 40% unless they need some real functionality and the print will be load-bearing.
In many cases, even 10% infill with a Cubic infill pattern works pretty well for strength.
4. Use a Strong Infill Pattern
Using an infill pattern built for strength is a good idea to reinforce your 3D prints and strengthen them. When it comes to strength, people tend to use Grid or the Cubic (Honeycomb) pattern.
The Triangle pattern is really good for strength too, but you will need to have a good top layer thickness to get an even top surface.
Infill patterns work closely with infill density, where some infill patterns at 10% infill density will be much stronger than others. Gyroid is known to perform well at low infill densities, but it isn’t a very strong infill pattern overall.
Gyroid is better for flexible filament and for when you might use dissolvable filament like HIPS.
While you slice your 3D print, you can check out how dense the infill actually is by checking the “Preview” tab.
5. Changing the Orientation (Extrusion Direction)
Simply placing the prints horizontally, diagonally, or vertically on your print bed can change the strength of the prints due to the direction that the 3D prints are created.
Some people have run tests on rectangular 3D prints that are oriented in different directions, and found significant changes in part strength.
It’s mainly to do with the build direction and how 3D prints are built through separate layers that bond together. When a 3D print breaks, it’s usually going to be from a separation of the layer lines.
What you can do is figure out which direction your 3D printed part is going to have the most weight and force behind it, then orient the part to not have layer lines in that same direction, but opposite.
A simple example would be for a shelf bracket, where the force is going to be pointing downwards. 3D-Pros showed how they 3D printed a shelf bracket in two orientations. One failed miserably, while the other stood up strong.
Instead of having the orientation flat on the build plate, you should 3D print the shelf bracket on it’s side, so its layers are built across rather than along the part which has force on it and is more likely to break.
This can be confusing to understand at first, but you can get a better understanding by seeing it visually.
Check the video below for guidance on orienting your 3D prints.
6. Adjust Flow Rate
Adjusting your flow rate slightly is another way to reinforce and strengthen your 3D prints. If you choose to adjust this though, you want to make fairly small changes because you can end up causing under extrusion and over extrusion.
You can adjust the flow for specific parts of your 3D print such as the “Wall Flow” which includes the “Outer Wall Flow” & “Inner Wall Flow”, “Infill Flow”, “Support Flow”, and more.
Though, in most cases, adjusting the flow is a temporary fix for another issue so you would be better to directly increase line width rather than adjust flow rates.
7. Line Width
Cura, which is a popular slicer mentions that adjusting your line width to an even multiple of the layer height of your print can actually make your 3D printed objects stronger.
Try not to adjust Line Width too much, similar to the Flow Rate because it can lead to over and under extrusion again. It’s a good idea to adjust print speed to indirectly adjust the flow and line width to a certain extent.
8. Decrease Print Speed
Using a lower print speed, as mentioned above can increase the strength of 3D prints because it can leave more material behind to fill in any gaps that would occur if the speed was too high.
If you increase your Line Width, you want to also increase Print Speed to keep a more constant Flow Rate. This can also improve print quality when balanced correctly.
If you do decrease your print speed, you may have to decrease your printing temperature to account for the increased period of time your filament will be under heat.
9. Reduce Cooling
Cooling parts too quickly can lead to bad layer adhesion since the heated filament doesn’t have enough time to properly bond with the previous layer.
Depending on what material you are 3D printing, you can try to reduce your cooling fan rate, so your parts can bond together strongly during the printing process.
PLA works best with a fairly strong cooling fan, but can try to balance this with printing temperature, print speed, and flow rate.
10.
 Use Thicker Layers (Increase Layer Height)
The use of thicker layers leads to better adhesion between layers. Thicker layers will present more gaps between the adjacent parts of the layers. Tests have show that larger layer heights have been observed to produce 3D prints that are stronger.
A layer height of 0.3mm has been shown to out-perform a layer height of 0.1mm in the strength category. Try using a larger layer height if print quality is not essential for the specific 3D print. It is also beneficial because it speeds up printing times.
Check the video below for more details about strength testing for different layer heights.
11. Increase Nozzle Size
Not only can you decrease the printing time of your 3D prints, but you can also increase the strength of your parts by using a larger nozzle diameter like 0. 6mm or 0.8mm.
The video below by ModBot goes through the process of just how much faster he could print, as well as the increased strength he got from the increase in layer height.
It’s related to the increased flow rate and increased layer width, leading to a more rigid part. It also improves how smoothly filament can extrude and create better layer adhesion.
Other Things to Try to Strengthen 3D PrintsAnnealing 3D Prints
Annealing 3D prints is a heat treatment process of putting 3D printed objects under an increased temperature to strengthen its integrity. With some testing, people have shown increases in strength of 40% according to Fargo 3D Printing’s testing.
You can check out Josef Prusa’s video on annealing, where he tests 4 different materials – PLA, ABS, PETG, ASA to see just what kind of differences occur by annealing.
Electroplating 3D Prints
This practice is becoming more popular because it is practical and affordable. This involves immersing the printing part in a water and metal salt solution. Electric current is then passed through it, thus causing metal cat-ions, like a thin coating, to form around it.
The result is durable and long-lasting 3D prints. The only downside is that many layers may be required if you want a stronger print. Some plating materials include Zinc, Chrome, and Nickel. These three have the most industrial applications.
What this does is simple, to orient the model such that the weakest point, which is the layer boundary is not so exposed. The result is stronger 3D prints.
For more on electroplating 3D prints, check out the video below.
Check out another great video on electroplating, with simple instructions on how to get great finishes on your models.
How To Strengthen Finished 3D Prints: Use of Epoxy Coating
When you are done printing the model, an Epoxy can be applied correctly to strengthen the model after printing. Epoxy, also known as polyepoxide is a functional hardener, used to make your read-made model stronger.
With the aid of a brush, gently apply the epoxy coating to the 3D prints in a way that the epoxy will not drip down. Use smaller brushes for crevices and hard to reach corners so that every part of the exterior is well covered.
A very popular 3D printing epoxy coating that tons of people have had success with is the XTC-3D High Performance Print Coating from Amazon.
It works with all sorts of 3D printed materials like PLA, ABS, SLA prints, as well as even wood, paper and other materials.
A kit of this epoxy is very long-lasting because you don’t need to use much at all to get good results.
Many people say “a little goes a long way”. After the epoxy cures, you get some extra strength and a lovely clear and shiny surface that looks great.
It is a simple thing to do, but if you would like to know more about applying an epoxy coating to 3D prints, check out the video by Matter Hackers.
How to Strengthen Resin 3D Prints
To strengthen resin 3D prints, increase the wall thickness of the model if it’s hollowed out to around 3mm. You can increase durability by adding around 25% flexible resin to the resin vat so it has some flexible strength. Make sure not to over cure the model which can make resin brittle.
How to 3D print something (even if you don't have a 3D printer)
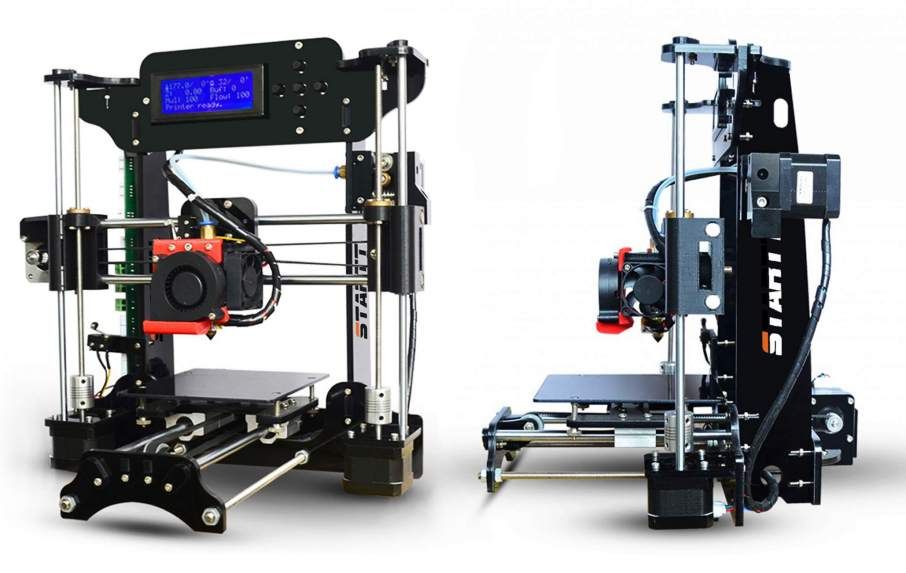
3D printers are amazing tools that allow you to create just about any physical object you can think of (or at least design in a 3D modeling program). One downside? They are stupidly expensive and you probably can't justify the cost. Luckily, you don't need to have one to print your material - there are many services that will do it for you.
RELATED: When should you buy 3D printers for home use?
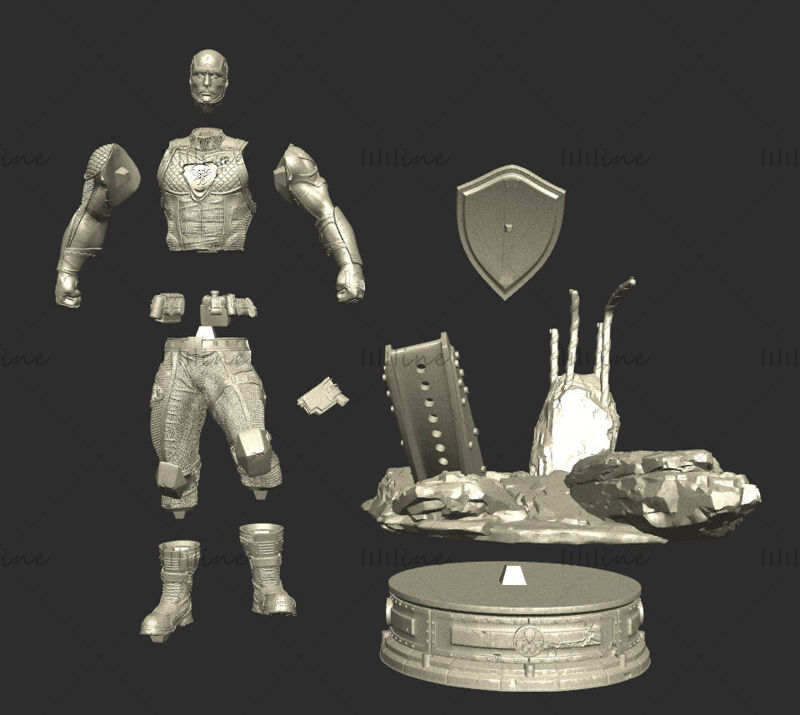
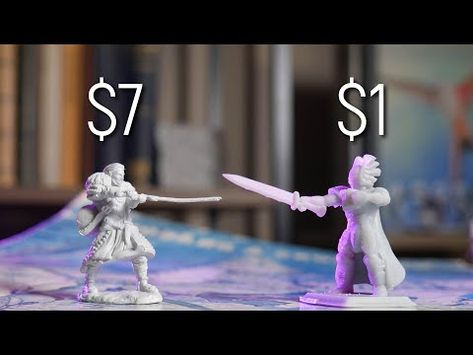
There are many reasons why you might want to 3D print something, but few that justify it. You can print anything from a dedicated GPS mount for your bike to Dungeons & Dragons miniatures and wearable armor for your next Star Wars cosplay. Unless, of course, you'll be printing tons of stuff on a regular printer, none of them are worth the hundreds you have to spend on a 3D printer (or the thousands you'd spend on a really good one).
To help people like you who want to print materials but don't want to spend tons of money on perks, services like Shapeways, Kraftwurx, Ponoko and 3D Hubs have made 3D printing available even if you don't have your own printer . Some offer 3D model stores that you can print directly, or you can download models you made yourself or found online. Each service is slightly different, so we'll take a look at each and highlight the strengths and weaknesses of each.
Shapeways allows you to shop for 3D printing in a ton of materials or upload your own
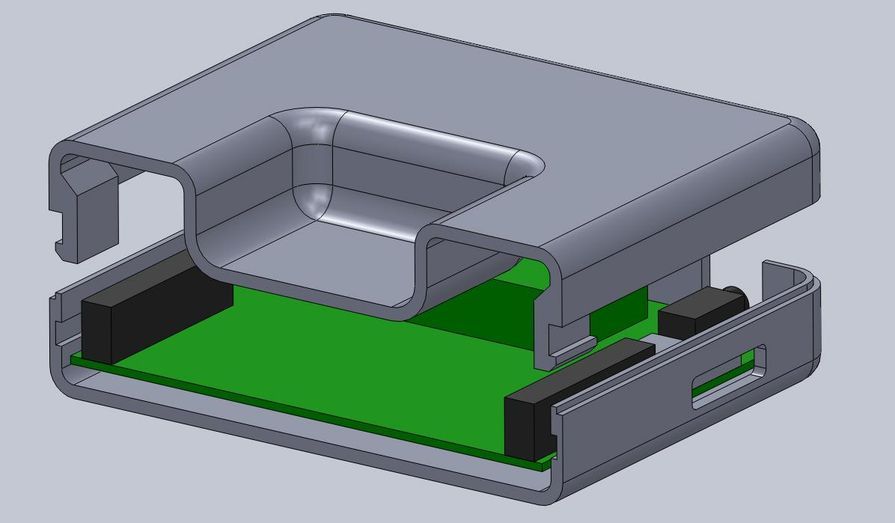
Shapeways is one of the largest and one stop shop for 3D printing. The company has a significant community of 3D modelers and designers who upload their creations for all tastes. You can head to the Shapways store to find jewelry, phone cases, Raspberry Pi parts, desktop gaming accessories, and more. The models you find there are designed to print with no problems, and each model is tested by Shapeways staff to ensure they are structurally sound. 3D printable models need to be made with the utmost care to ensure that the parts are thick enough to not break, and to avoid a host of other issues that most of us don't think about. Some patterns, such as key chains and pendants, are even customizable so you can add your name or personal message.
You can also get prints on various materials. If you've ever seen something that has been 3D printed, it's probably plastic. Shapeways offers engravings in steel, bronze, brass, silver, gold, wax, porcelain, aluminum and several types of plastic. Of course, not every model is available in every material. Some models will print well on plastic, but will fall apart if made from metal or porcelain. However, it's amazing to get a stainless steel dice set without buying a printer.
Shapeways 3D prints are made to order. Because the company uses industrial printers that can produce hundreds of models at once, the prices for what you get are relatively low. For simple plastic prints, you can spend as little as $10 on basic figurines. Even some metal jewelry or trinkets can cost as little as $25, although metal is clearly more expensive than plastic. In general, the larger the print, the more expensive it will be. However, you will have to go for something quite large to compete with the cost of buying a 3D printer that can print at comparable quality.
If you can't find a model for something you want on Shapeways, you can upload your own. However, things get more complicated when you do this. For example, you can find 3D models on sites like TurboSquid, but they are not necessarily meant to be printed. Sites like Thingiverse offer 3D printable models, but they are not tested for printability. You may still find that the design you upload has too thin walls or prints incorrectly. That's fine if you're used to 3D modeling on your own, but for amateurs, you might run into trouble. To help deal with this problem, Shapeways offers a directory where you can hire a designer. Obviously, this will be more expensive than finding a finished print, but if you really need a professional's opinion, you can find it in the Shapeways community.
Speaking of which, Shapeways' main advantage over the other services on this list is its community. Whether you're looking for a finished model or need help building something special, you're likely to find someone to help. Shapeways also offers some of the best prices on single prints. Many 3D printing companies aim to print a large number of products for small companies and are priced accordingly, which leaves their services beyond the reach of the average person. Shapeways is one of the few that allows the average person to place a one-time order for cheap dudad without emptying their wallet.
Kraftwurx is also worth mentioning along with Shapeways as they have a very similar business model. Kraftwurx has a wider selection of materials than Shapeways, but is not as sustainable as the community. For 3D modelers, their tools are a little clunky. However, if you just want to find a model and print it right away but can't find it on Shapeways, Kraftwurx is worth a look.
3D Hubs finds local printers that can make your project
Most people don't need to buy a 3D printer, but many people who buy a high quality 3D printer for thousands of dollars do so to start a business selling prints to other people. 3D Hubs will help you find those people or small companies that can do whatever you want. Although "nearby" is a relative term. 3D Hubs will look for printers halfway across the country if necessary to find a good printer, but that will likely be closer than ordering from a manufacturing facility in Europe.
The result of 3D Hubs is that you can shop around. Some of the "hubs" (as each printer is called) on the site are nothing more than a seasoned enthusiast owning their own printer. Others are small companies with large manufacturing facilities that can handle more complex requests. You can compare prices and services from dozens of different companies to see who can offer you the best price and print quality.
The downside is that 3D hubs don't offer much in terms of quality control on their own. Unlike Shapeways, no one at 3D Hubs looks at your model to make sure it's ready to print and has no major flaws. The computer scans the file for basic errors, but there is no human in the loop to make sure it works. The center you hire to print should do the job, but the quality could hypothetically vary from one company to another. It's a bit like shopping on Etsy. you will probably get a good product, but there is always a chance that you will get something that is rubbish.
Fortunately, if you receive a print you're not happy with, 3D Hubs offers a money-back guarantee. Even though you pay for 3D hubs when you place an order, the printer you hire doesn't get that money until you receive your item and indicate you're happy with it. It's a pretty strong incentive for printers to make sure they get it right the first time.
You also won't get the same community from 3D Hubs that you'll find on sites like Shapeways and, to a lesser extent, Kraftwurx. However, you can browse Thingiverse to find a ton of pre-made models. Once you've found a model you like, you can use the Thingiverse "Apps" to submit the model to 3D Hubs and find a printer in your area.
The real strength of 3D Hubs is fast delivery times. Services like Shapeways and Kraftwurx make all their prints in just a couple of central locations and ship worldwide. 3D Hubs, on the other hand, coordinates a network of hundreds of print shops around the world. You may be able to find a printer in your country or even your state that has a much lower workload and can hopefully get your order done faster than one of the larger services. Some printers even let you pick up your order if you live close enough. If you need printing in a hurry and want to support local businesses, 3D Hubs is the place to be.
Get 3D printed (and laser cut) from Sculpteo
If you're a designer or artist, nothing feels better than selling what you've made yourself. Sculpteo is a 3D printing service that straddles the line between professional and consumer printing, perfect for those just getting started. If you find a model on sites like Thingiverse that you want to print, you can upload it to Sculpteo and get comparable prices to sites like Shapeways. However, you can also order your models in bulk.
For one print, Sculpteo is very similar to Shapeways. You can upload the model, the program will do some automatic checks to make sure there are no obvious errors, and then you can see how much it will cost to print. Sculpteo's prices are somewhat comparable to Shapeways, but they can be more expensive for certain materials or larger builds.
Where Sculpteo really shines is mass printing. Let's say you want to create a simple necklace or keychain, print out a couple dozen, draw on them, and sell them to your friends. You're not starting a Fortune 500 company or anything, but you'd like to do something unique to earn some extra money on the side. Sculpteo will lower the unit price as you order. If you order ten units, you will receive a small discount. Order 100 and get a big discount. For large orders, Sculpteo also gives you special tools like Batch Control that allow you to customize your order to save more money and maximize your profits.
Sculpteo also offers laser cutting, which opens up many new possibilities. If you are a designer who is not very good at 3D design, you can cut your 2D design into acrylic, cardboard, plywood, and some other materials. With this service, you can create custom photo frames, key chains, or even carve your own Arduino robot kit. Again, you can order one item just for yourself, or you can get multiple laser cut items and sell them.
If you've never touched 3D prints or laser cut objects before, it's best to start with one print - and maybe even look at sites like Shapeways or 3D Hubs first - but if you're ready to turn around and maybe even make some money from your hobby, Sculpteo is a great way to improve your game.
Imprints of teeth on the tongue - causes, what it tells us, how to treat it
- Home
- Patients
- Articles
- Causes of teeth marks on the tongue
Causes of teeth marks on the tongue
When diagnosing, the doctor necessarily examines the patient's tongue, evaluates the existing changes. One of these changes, indicating the presence of failures and disorders in the body, are the imprints of the teeth, usually on the sides of the tongue.
Tooth prints on the tongue as a symptom of diseases of the internal organs
Teeth prints are not always associated with dental problems. Language changes can cause diseases of the nervous system or the gastrointestinal tract. Do not ignore the changes or try to diagnose yourself. If clear visible marks from the teeth repeatedly appear on the tongue, a doctor's consultation is needed.
Disorders of the nervous system
Stress is the cause of many diseases. "Driven" inside it can lead to serious disorders of the nervous system. One of the evidence of constant, prolonged stress is the visible imprints of the teeth on the tongue. During nervous tension, the jaws involuntarily close strongly, which leads to the appearance of marks from the teeth, which remain for a long time.
If this happened once, the imprint will pass quickly, but a prolonged process indicates an aggravation of problems with the National Assembly. In such cases, it is not worth the risk. You need to contact a neurologist who will treat the nervous system. As the underlying disease is cured, the imprints of the teeth will also disappear.
Diseases of the endocrine system
Hormonal disruptions can externally manifest themselves with different symptoms. For example, hypothyroidism (thyroid disease associated with a lack of iodine) is often diagnosed after a patient complains of hair loss and brittleness or delamination of nails. As the disease progresses, swelling of the face and neck appears. The tongue swells and increases in size, and traces begin to remain on its surface. A complex of symptoms suggests that it is necessary to visit an endocrinologist.
Another common endocrine disorder is xerostomia. With the development of this disease, the salivary glands stop working properly. The mucous membrane of the mouth becomes dry, the tongue acquires a crimson color, and teeth marks are visible on its surface. Often patients complain that they do not feel the taste of food while eating.
There are many reasons for the failure of the salivary glands. You cannot self-medicate. Usually, to make a correct diagnosis, an examination is required not only of an endocrinologist, but also of other specialists. Diseases of the gastrointestinal tract
Disorders in the work of the gastrointestinal tract always lead to changes on the surface of the tongue. Plaque, swelling, teeth marks - this is a reason to visit a gastroenterologist. Especially if you know about the presence of such diseases in you. It is pointless to treat only prints. Until the underlying disease is cured, the problem will not be solved. External symptoms disappear on their own after stabilization of the condition.
If you have a problem similar to the one described in this article, be sure to contact our specialists.
Do not diagnose yourself!
Why call us now:
- We will answer all your questions in 3 minutes
- Free consultation
- The average work experience of doctors is 12 years
- Convenient location of clinics
Dental Causes of Tooth Imprints
The most common dental cause of dental imprints is malocclusion. Depending on the type of malocclusion, prints are localized on one or both sides of the tongue, sometimes located closer to the tip or, on the contrary, to the root. The appearance of traces is due to the fact that with an incorrect bite, when the jaws are closed, the tongue tries to take a position corresponding to the location of the dentition.
In this case, orthodontic treatment is prescribed. The method of exposure is selected by the doctor depending on the type and severity of the pathology. It is possible to treat malocclusion at any age, but it is better to do it in childhood, immediately after all the milk teeth erupt. Glossitis
Glossitis is a disease that causes inflammation of the tongue. Its surface becomes smooth, as if glossy, the papillae are smoothed out, visible teeth marks appear on the lateral parts. Glossitis is usually accompanied by painful sensations. Erosion on the oral mucosa may develop. Patients complain of an unpleasant smell.
In the early stages, the disease is manifested by slight soreness and burning. As it develops, deep foci of erosion may develop on the mucosa, it becomes difficult for the patient to eat. At this stage, signs of general malaise are added to the main symptoms. The temperature rises, weakness, lethargy appear. Only a doctor can prescribe adequate treatment.
The cause of the appearance of prints can be congenital pathologies. In any case, if you begin to notice changes on the surface of the tongue, you need to consult a doctor.