Filler primer spray 3d print
Best Primer for 3D Prints (Recommendation and Tips)
Are you preparing to paint your 3D printed parts? If you’re a miniature painter or scale modeler using 3D printing, then you’ll want to know that any good paint job starts with a great primer undercoat.
In this article, I share my experience with the painting process of 3D printed miniatures and models. Using an appropriate primer before applying acrylic paints is the key to great results.
TL;DR: What is the Best Primer for 3D Printed Parts and Models?
If you’re in a hurry, check out the top 3 primers for preparing 3D prints for a great paint job:
- Vallejo Surface Primer (All purpose brush-on or airbrush primer)
- Rust-Oleum Primer and Filler (Great for larger models, fills and smooths build lines)
- Testors Enamel Primer (Recommended aerosol spray primer)
Key Points
- The type of primer you use depends on how smooth you want your 3D printed surface
- For best results with PLA printed models for an acrylic paint job, you may want to use a few coats of a primer and filler
- Wet sanding removes material between primer/filler coats for an even smooth surface
- Spray on primers, including aerosol or airbrush primers, or regular brush-on surface primers work great on both PLA or resin miniatures
- Gesso is an easy-to-apply, water-soluble, all-purpose budget primer for larger 3D printed models
One of the great things about 3D printing is that you can print your own models and miniatures. But, if you want to paint them, you’re going to need a good primer. Now let’s take a more in-depth look at each of these points.
RELATED: 3D PRINT TERRAIN AND OTHER TABLETOP GAMING ACCESSORIES (GUIDE AND IDEAS)
How to Determine What Primer to Use for 3D Prints?
3D printed parts can have a wide variety of finishes, from smooth to very rough. The type of primer you use depends on how smooth your 3D printed surface is.
If you have a very smooth surface, such as those from DLP or SLA resin 3D printers, you can probably just use a regular brush-on primer. If your surface is rough, you may want to use a spray-on primer or an airbrush primer.
You can also use a high build filler primer, such as putty, spackle, or gesso. This will help to smooth out any imperfections in your 3D print. Just be sure to sand the surface in between primer + filler coats.
For best results with PLA printed models for an acrylic paint job, for example, you may want to use a few coats of a primer and filler.
Wet sanding between coats of primer/filler will remove any material that has been added, giving you an even smoother surface. A damp tack cloth will help remove any residue from the sanding process.
Of course, if you’re planning to paint a 3D printed miniature with fine detail and texture, then a primer + filler combo isn’t a good choice. Spray paint and primers with filler formulations often cover up those details really easily if you’re not careful.
Worse, a high build filler primer, e.g., automotive primers, will quickly obscure those fine details and textures without much chance of recovery. You can’t go back. For such cases with small 3D printed miniatures, it’s best to just use a regular brush-on primer or apply thin coats of spray on primer.
What is the Best All-Purpose Primer for 3D Print Models?
There are a few different types of primers that can be used on 3D printed parts. These include spray-on primers, airbrush primers, or regular brush-on surface primers.
Here are the top 3 primers I recommend for any 3D printed miniature or model:
- Gesso (thick, paste like coat)
- Vallejo Surface Primer (thin, water-mixable)
- Testors Enamel Primer (aerosol, spray on primer)
Each of these have their merits for priming 3D printed models and parts, with pros and cons.
Gesso is an easy-to-apply, all-purpose budget primer for 3D prints. However, it can be difficult to achieve a smooth finish with gesso, and it can also crack if your 3D printed surface is too rough.
Gesso is a thicker medium that you can thin with water. Apply in thin layers for best results. Be careful not to overwhelm fine details.If you’re looking for an all-purpose primer that is easy to apply and doesn’t require any special equipment, then a surface primer like Vallejo Surface Primer would be a good choice.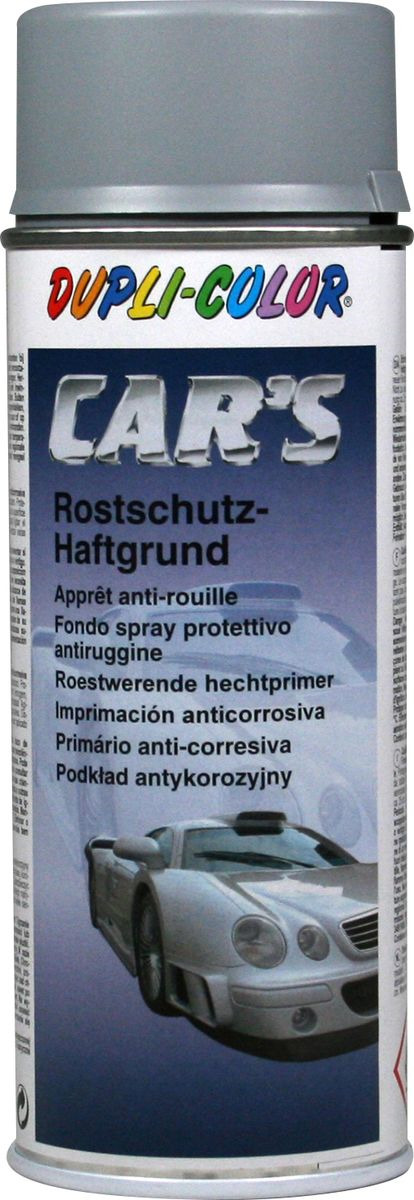 Check out this article for how it can be applied to miniatures.
However, surface primers are not as durable as a volatile spray-on primer on 3D prints and may not adhere as well to a very rough 3D printed surface. It’ll be easier for you to paint, too, if your primer coat sticks.
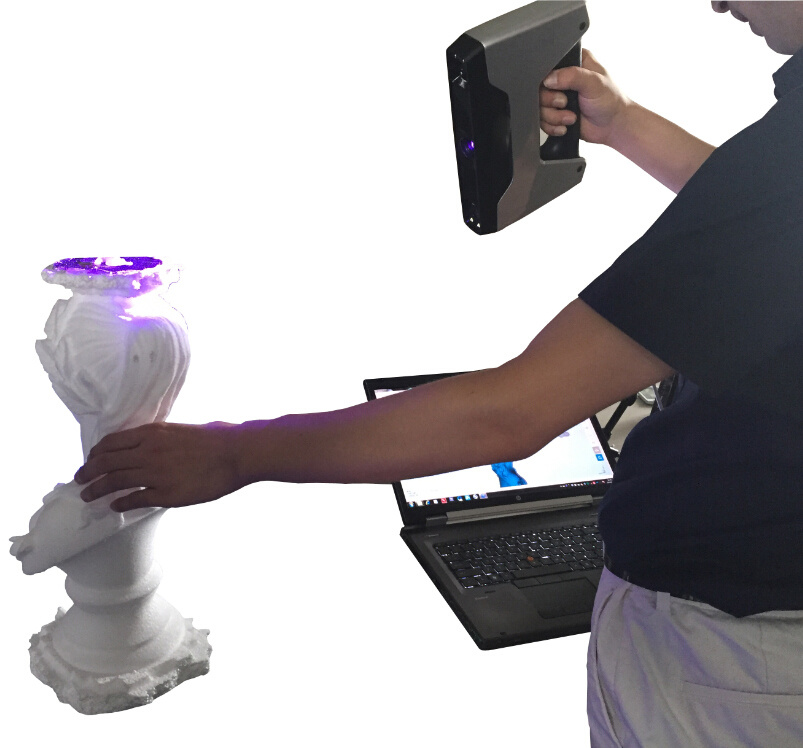
This 3D printed bust has a lot of fine surface detail. A good primer should coat well while preserving these textures for the best paint job possible. You can see how I airbrushed Vallejo Surface Primer (Panzer Gray color) on this resin 3D printed sculpt.For this reason, I recommend applying surface primers in multiple coats for a uniform surface. You may also want to use a spray booth if you’re applying these spray on primers indoors.
Models from the Warhammer 40k universe often make a showing on my painting table. Here I started with a normal airbrush applied primer, which helped me with this paint job using metallic paints and a wide array of washes.
In this case, Testors Enamel Primer is a good choice for undercoating any 3D printed model. It’s an aerosol primer that can be sprayed on and dries quickly. A great alternative to Testors Enamel Primer is Tamiya Surface Primer.
A classic for a reason.Tamiya Surface Primer is a very popular primer for scale model plastic kits, gunpla, and 3D printed miniatures. The use of spray can type primers has a tried and true legacy when painting plastic scale model kits.
Tamiya, a trusted brand by scale model builders everywhere.Note, however, that aerosol primers are generally not as user-friendly, or inexpensive, as a brush-on primer and can be difficult to control when spraying small 3D prints.
Best Spray Primer for 3D Printed Models
The best spray primer in my opinion is the Tamiya Surface Primer or Testors Enamel Primer, as mentioned above. For 3D printed miniatures or models, I highly recommend either aerosol spray primers. Each comes in a rattle can and sprays reliably.
Of course, you’ll need to follow the instructions, e.g., avoid spraying in cold weather or in high ambient humidity. The same goes with normal spray paint, too.
I’m not sure if you’re worried about splatter. But, when you try and spray aerosols in cold weather, you may see this splotchy result. Keep your rattle cans close to room temperature (25C or 75F) for the best spray experience. Photo by Huebert World on Pexels.comI have used these aerosol primers on many different types of 3D printed plastics, including ABS, PLA, and PETG. They also work great for preparing 3D printed resin surfaces for paint jobs.
While the printing process even from the best 3D printers creates tiny lines on a model, these primers work well to hides these imperfections while preserving find detail.
I just love photos like these of miniatures.I recommend getting either gray or white colors for the Tamiya and Testors primers. This is important because it helps you see the coverage as you’re applying it.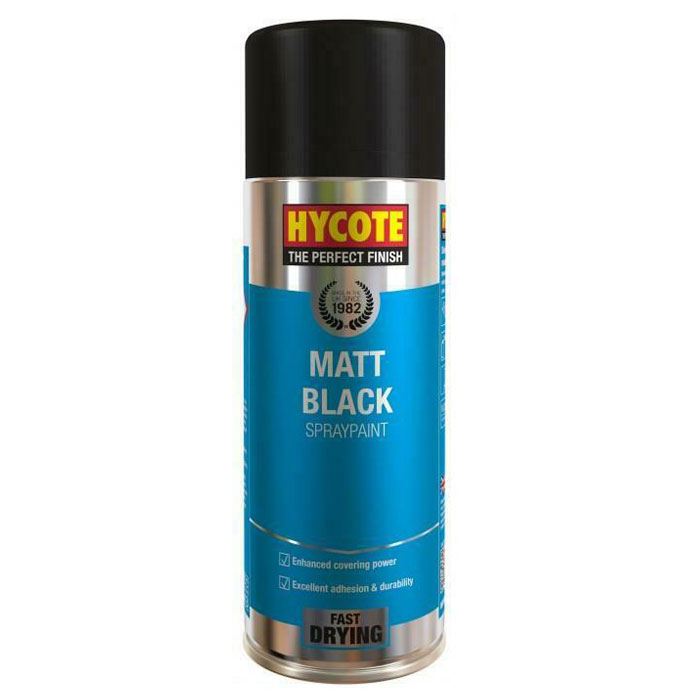
The lighter tone also helps maintain shadow contrast over an unpainted model, which helps when you get to the painting process.
The gray tone in my opinion is the best choice for primer color because it gives you flexibility when painting with all kinds of color schemes.
I’ve found that two or three thin coats works best with these spray primers. When dry, these primers provide a good foundation for paint to adhere to.
Recommended Primers 3D Printed PLA or ABS Parts
For the hobbyists or modeler with larger pieces, e.g., terrain, big sculpts, who 3D prints with ABS or PLA filament, I strongly suggest using some type of primer + filler coat.
READ MORE: BEST GAP FILLERS FOR MINIATURES AND MODEL KITS
Here are two useful primers for larger 3D printed PLA or ABS parts:
- Rust-Oleum 2-in-1 primer and filler
- Krylon Fusion paint and primer
- DupliColor automotive primer
A primer and filler spray provides a very strong foundation for paint to adhere to, while also filling in any imperfections in the surface of the 3D print. Rust Oleum makes a great 2-in-1 primer/filler that comes in a rattle can.
Rust-Oleum is the same brand that makes a host of spray paints for automotive applications. It is applied to any 3D printed surface or other materials like a spray paint. Krylon Fusion also makes a highly rated primer paint spray that is awesome for preparing 3D printed objects for the painting process.
Skip the basecoat with primer and paint combos. There are hobby game brands, available, e.g., GW/Citadel or The Army Painter; but they can be expensive.How to use an aerosol spray primer on 3D printed models
When spraying aerosol primers, work in a well-ventilated area and wear gloves, e.g., nitrile gloves, and respirator mask. In other words, use recommended personal protective equipment (PPE).
Keep the nozzle more than 6″ away from the 3D printed surface and move the spray in a circular motion to avoid over-coating your working area.![]() Using circular motions to spray the primer gives you more control over the application.
Using circular motions to spray the primer gives you more control over the application.
If you’re having trouble with spraying all the exposed surfaces on your 3D print, then try using a painting block or spray paint stand to elevate the surface.
RELATED: NEED A “THIRD-HAND” TO SPRAY YOUR MINIATURES?
Looking for an extra “hand”? Citadel makes painting handles with flexible arms and clips for holding small parts. Use them for spraying 3D printed parts or other things.After the first coat, let the primer dry for about 10-30 minutes. Apply a second coat, a third, or more, if needed. Sanding in-between coat applications will create a much smoother surface as the build layers on your 3D printed PLA part fill in with the primer.
Once the primer is dry, you’re ready to start painting your 3D print!
When Should You Use a Brush-on Surface Primer for 3D Prints (PLA or Resin Miniatures)
Depending on the printing materials, you’ll want to consider using a surface primer.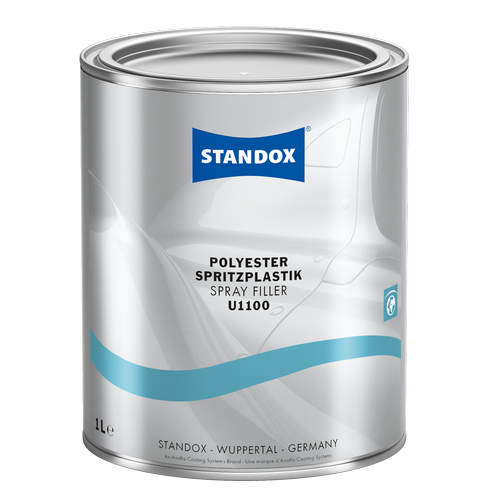 Even the best paints won’t look good if your preliminary step with a primer coat isn’t done well.
The advantage of a brush-on spray primer is that you can more easily control the amount of primer being applied. This is especially important with smaller 3D printed parts.
Here I’m 3D printing a Star Wars X-Wing using clear resin.Additionally, you don’t have to worry about over-spray as you might with a aerosol primer. Another advantage of brush-on primers is that they come in a wider variety of colors. So, if you want to add a little color to your 3D print before painting it, then a brush-on primer is a good way to do that.
This is my 3D printer hard at work making a small terrain feature for decorating a model’s base.The best brush-on primer that I’ve used is the Vallejo Surface Primer. It’s a water-based primer that is very easy to apply with a brush. You can find this primer in both gray and white colors (among the many others). See my full review and tips using Vallejo Surface Primer on wargaming tabletop miniatures.
A cool fact about primers: Most primers have an auto-smoothing property that tightens across the coated surface as it dries, kind of like stretching plastic wrap over dishware. This stretching, tightening process happens as the solvent within the primer evaporates.
My PLA printed post-apocalytic building for Fallout and Infinity Miniature games. After priming the model, I painted this using an airbrush and a variety of different weathering techniques.When the primer dries, it leaves behind an even coat that helps paint stick. If you apply multiple layers of a high quality surface primer, you can achieve a very smooth topcoat that’s perfect for painting finer details. Of course, this means it may take more coats (and work) to hide 3D printed build lines.
How to Get a Smooth Surface on 3D Printed Models
Here are some tips for getting a smoother surface on your 3D printed miniatures and models:
Prepare your 3D printsRemove print supports with flush cutters or the edge of an Exacto knife.![]() Make sure you’ve UV-cured your photopolymer resin, and appropriately sanded support marks on the model. These are ways your finished print will be ready for the first coat of paint.
Make sure you’ve UV-cured your photopolymer resin, and appropriately sanded support marks on the model. These are ways your finished print will be ready for the first coat of paint.
For best results with any primer, always start with a very thin layer. This will help avoid any primer puddles or drips that can ruin the look of your painted model. If you’re spraying your primer, you can use paint blocks to elevate your 3D prints to access hard to reach areas.
Apply your primer using appropriate methodsFor thicker type primers, such as Gesso, you may need to wet sand between coats. A tip for priming resin miniatures is to ensure you’ve removed support marks. Using a pen engraver, like the battery-operated one I use, or even nail buffing sticks can help remove these small nubs and fine lines.
You can use a battery-operated pen engraver to speed up support scaffold removal.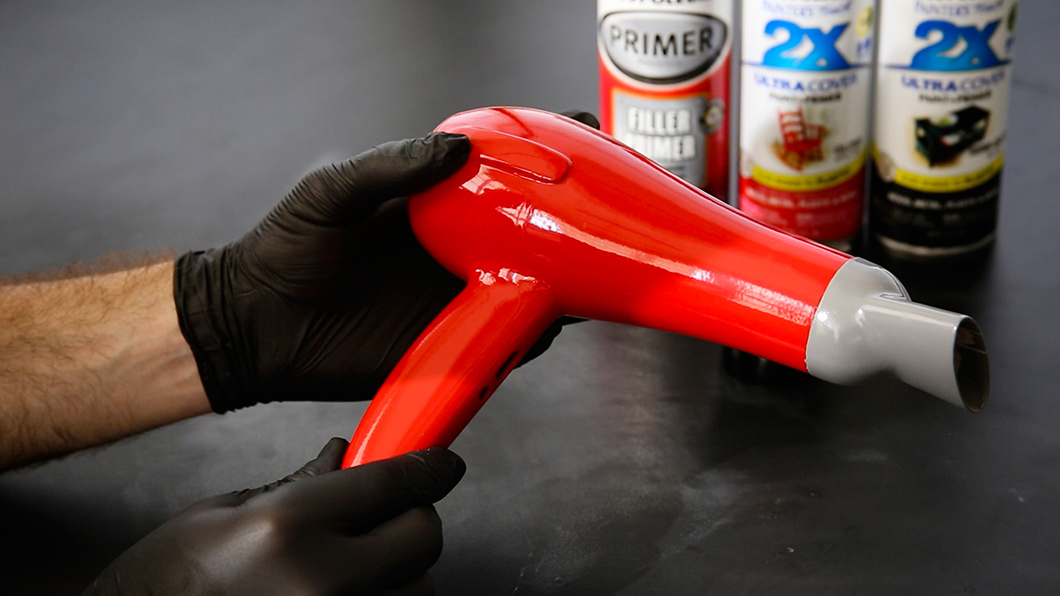
For thinner surface primers that you can brush-on or spray with an airbrush, you should have no issues with puddles or runs if you apply in thin coats. For more details about how to properly apply brush-on primers, check out this article.
Wash and rinse your model before primingTo avoid paint primer issues, always make sure you’ve removed any oils or residue from your 3D printed model. As mentioned, use flush cutters or sand your 3D prints before priming.
I printed this objective marker for a friend to use with his Tyranid Warhammer 40k army. Notice six alien eggs denoting that this is “Objective #6”.To wash your prints, I recommend using isopropyl alcohol (IPA) and water for this. Simply apply the mixture to a lint-free cloth or tack cloth. Soap and water may also work well for non-resin printed materials, e.g., PLA or ABS.
Sanding a primed surface works for FDM printed models
In the finishing process for preparing a 3D printed model, sanding a primed surface can help to create an ultra-smooth base for painting. This is especially true when working with FDM printed models that may have small layer lines or other imperfections on the surface.
When sanding a primed 3D print, it’s important to use a very fine grit sandpaper. I usually start with a 500 grit sandpaper and work my way up to a 2000 grit paper. This will help to avoid any scratches or marks on the surface of the print.
It’s also important to use a light touch when sanding. You don’t want to remove too much primer from the surface of the model. Just focus on lightly sanding any imperfections on the surface of the print.
Clear coating will protect the surface of your painted 3D modelsWith 3D printing, a finish coating with a clear coat varnish will protect the work you put into the model. The top coating acts as a barrier against moisture and other environmental insults to the surface of your model.
There are several great brands of clear coat varnishes you can use and I recommend. For those wondering about the difference between gloss and matte clear coating, check out this comparison article.
If You Could Only Choose One Primer for Painting 3D Printed Miniatures and Models?
In my opinion, the best primer for 3D printed models is Vallejo Surface Primer. It’s perfect for brush-on or airbrush application and provides a smooth, even coat that’s perfect for painting.
If you want to avoid brush marks entirely from any painting, then spraying on Vallejo Surface Primer is the better way to go.
I painted this 3D printed tank and photographed it on my kitchen dining room table.Spray on paints also make it easier for a smoother application, even helping you add gradients, e.g., zenithal highlighting, to your paint job. Take a look at this article for more information about how to thin paints for airbrushing miniatures.
Summary Table: Recommended Primers for 3D Printed Models
| Image | Primer Product | More Details |
|---|---|---|
| Gesso | Check Price | |
| Vallejo Surface Primer | Check Price | |
| Testors Enamel Primer | Check Price | |
| Tamiya Surface Primer | Check Price | |
| Rust-Oleum 2-in-1 primer and filler | Check Price | |
| Krylon Fusion paint and primer | Check Price | |
| DupliColor automotive primer | Check Price |
Conclusion
So, there you have it! I shared my overview of primers I recommend for preparing 3D printed miniatures, models, and more for a great paint job.
Whether you’re using an airbrush, paint brush, or spray can, applying a primer coat to your 3D printed model will help you achieve a beautiful paint job. Just remember to start with a thin layer and sand between coats (if necessary).
Do you have any tips or tricks for priming 3D printed models? Any favorite primers I missed?
Let me know in the comments below!
Grab your FREE photo backdrop bundle for miniature photography in the shop.Enjoying Your Visit? Join Tangible DayFree newsletter with monthly updates (no spam)
Leave a comment below! Follow on Twitter, Instagram, and Facebook.
Grab your FREE photo backdrop bundle for miniature photography in the shop.Like this:
Like Loading...
Ultimate Guide to Painting 3D Prints
Download the full Guide
as a PDF!
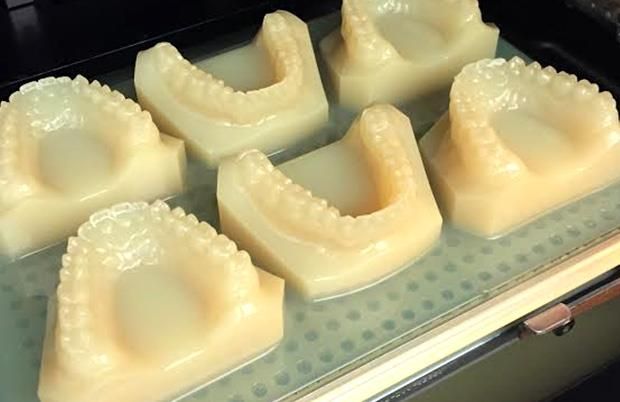
The simple post-processing techniques presented in this guide are an excellent way for professionals to create low-cost silicone molds, threaded inserts for enclosures, vacuum formed parts, and more.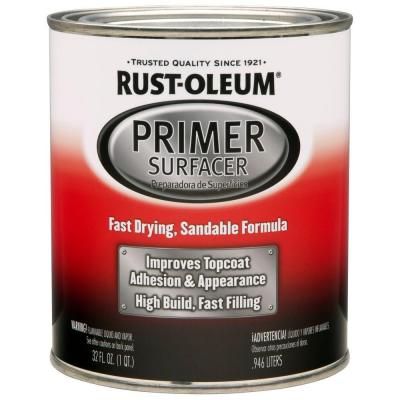
If you’re an engineer or product designer creating concept models, a prop or set designer, artist, or an educator looking to add incorporate a bit more creativity into your classroom 3D printing activities, painting your models can be a great solution.
In this tutorial, we’ll show you how to create a nearly automotive quality paint job on any of your 3D printed objects.
Working time will vary depending on your model. Including drying time, the process shown took us about 6 hours from start to finish.
SUPPLIES
3D Print
Rubbing alcohol
Paper towels
Spray primer/filler
Spray paint
Hanging cord
80, 120, 240, 220, 1000 grit sandpaper
Needlenose pliers
Bondo
Sanding block & sandpaper
Gloves
Eye protection
Respiratory Mask
Need some of these products? We've curated an Amazon wish list for you.
STEP 1: PREPARE & PRINT MODEL
When preparing models for painting in MakerBot Print, keep in mind how your print settings will affect the quality of your paint job.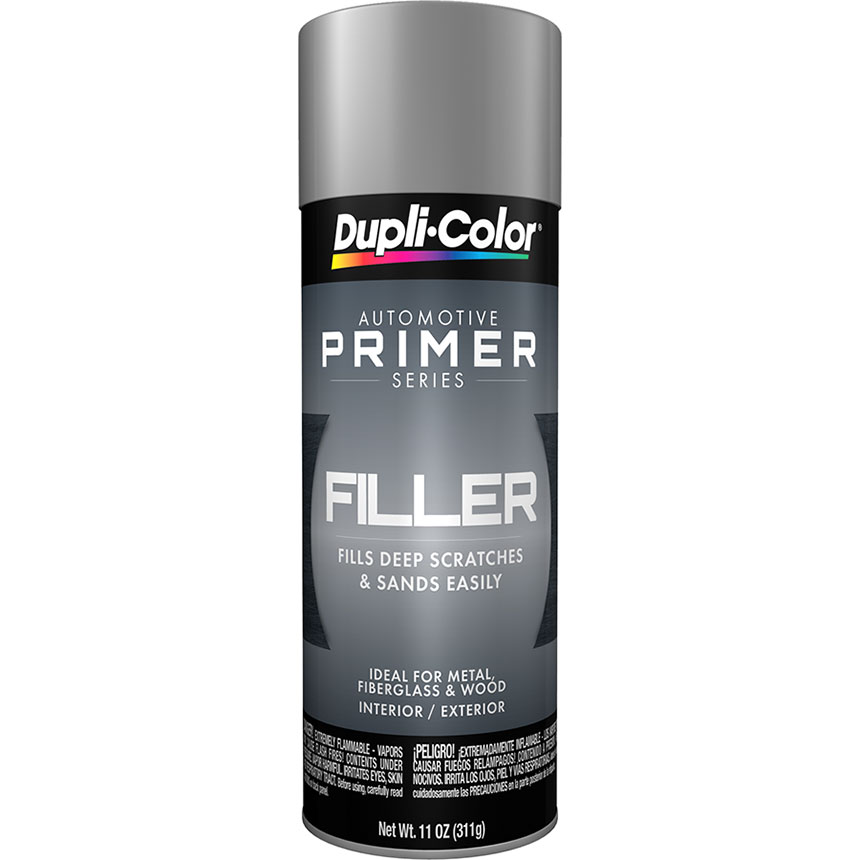
Consider: Print settings, print orientation, number of build plates
Surfaces printed in the Z axis will have the smoothest surface finish.
Printing models in 100 micron layer resolution will result in a slightly smoother surface finish, but will take significantly longer.
If possible, avoid placing support material in places you intend to paint as they will require more post processing to remove completely.
Supplies used: Needle-nose pliers or flush cutters
After you remove your print from the build plate of your printer, you will need to remove any raft or support material.
A. Remove prints from the build plate
B. Remove rafts
C. Remove large pieces of support
D. Approach smaller pieces and fine details
Supplies used: Sanding block, electric sander, 80,120, 240, 400, & 1000 grit sandpaper, Cyanoacrylate glue (super glue), Bondo
For the highest quality paint surface, an optional next step is to sand your model.
Make sure to wear eye protection, gloves, and a respiratory mask.
A. Dry sand the model using 80-240 grit sandpaper
B. Wet sand the model using 400 & 1000 grit sandpaper
C. Glue the parts of your model together
D. Apply filler to any gaps or blemish in your model and sand once dry
Find more detailed information here on gluing and sanding.
The 2021 Guide to 3D Printing Materials
Learn about polymers, composites, and metals all available for 3D Printing!
Supplies used: Hanging cord
Once your model is ready for painting - hang it in an open, dust free space with plenty of ventilation. This will allow you to paint all surfaces evenly without having to handle the model while paint is drying.
A. Tie hanging cord around the model
B. Hang the model in an open room with a tarp
STEP 5: PRIMER/FILLER
Whether you have chosen to sand your model and apply filler or you are simply painting a rough PLA model printed at high resolution, a few layers of primer/filler will fill any small surface imperfections before painting.
Primer filler is a high build spray filler that comes in aerosol form and can be purchased at most local hardware stores.
Before spraying remember to wear gloves, eye protection, and a respiratory mask.
BE SURE TO:
Shake well before use
Use wide strokes beginning and ending in space outside of the model
Hold the can 10-12 inches from the model
Paint in thin layers using a misting technique
AVOID:
Painting in thick layers
Holding the can in any spot for a long time
Holding the can too close to the model
Once you’ve sprayed 2-3 layers of primer/filler, allow your model to dry for 30-40 minutes.
STEP 7: SAND
A. Lightly sand your model with 1000 grit sandpaper (dry). This will smooth the surface of the model as the primer filler tends to create a rough surface texture similar to sandpaper.
B. Evaluate for quality.
C. If there are still surface imperfections you would like to smooth, continue to apply consecutive layers of primer/filler, and sand.
Once you are happy with the model surface, move on to painting.
STEP 8: PAINT
When choosing paint, you typically have a large degree of freedom as to which color and type of paint you use. Make sure to pick something that adheres well to plastic.
A. Choose a paint
B. Test for color in an inconspicuous location before painting the entire model
C. Let the paint sit overnight to cure
TIP:
Typically the paint will be dry to touch within an hour or so, and ready to polish within 24-48 hours.
If you’d like to protect the surface of your painted model, you can also apply a thin clear coat at this point.
In the end, you’re left with a beautiful painted model ready for approval presentation, enhanced for sets or galleries, optimized for better classroom learning, or simply improved for better innovation.
Here you can see just how far we have come.
Visit one of our other applications pages for tips on how to take your print even further.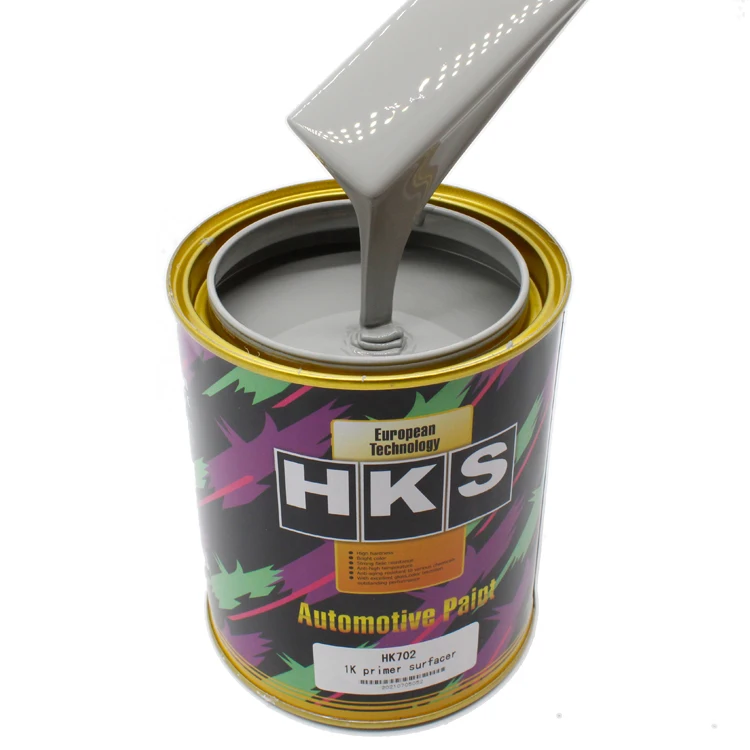
We recommend that you visit our pages on:
Gluing
Sanding
Inserts
Last but not least, remember to share your work with us on Thingiverse and social media @MakerBot.
We can’t wait to see what you make!
Hair Dryer Shell
Ferro
10/2/2015
https://grabcad.com/library/hair-dryer-shell-1
Powered by MakerBot Learning.
How to get a smooth surface on FDM 3D printed parts? - Knowledge
3D printed copies of the Engine Blade. Power Up Props
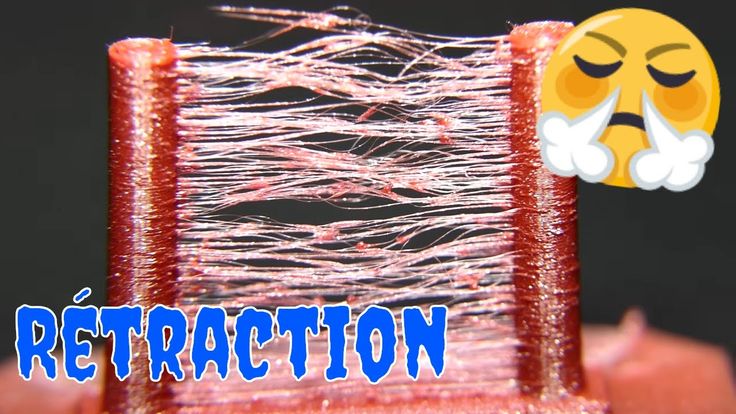
3D printing for cosplay has been gaining popularity in recent years, with increasingly affordable printers giving access to this technology to more people than ever before. Fused filament fabrication, also known as deposition modeling, is the most common type and involves melting plastic. filament and build-up of details in layers. These layers are usually small (100 to 300 microns or 0.1 to 0.3 millimeters) but leave so-called layer lines on prints, the bane of propeller manufacturers worldwide.
Example of layer lines on a raw 3D printed part.
So what's the best way to smooth out 3D printed parts? I'm glad you asked. While there is no one-size-fits-all answer to this question, here is the method I have found to work best for me. All parts shown here were printed on a Prusa i3 MK2S or MK3 3D printer.
Author's note: I have a large paint booth that goes outside with a powerful fan and filters and I still use a respirator when spray painting and using Bondo. Be sure to wear appropriate protective equipment and ventilation when using any of the products listed below. Your health is important, so read the safety warnings and follow their instructions.
Step 1: Filler Primer
Rust-Oleum and other brands make a wonderful spray paint called Filler Primer. It comes in a rattle jar and is a very thick primer that can be sanded down. I mostly print with PLA, and raw PLA doesn't sand well, so I primed it before sanding. Whichever primer you choose, be sure to read the label for how long it needs to dry before moving on to the next step - you'll need at least 24 hours.
Rust-Oleum Primer-Filler.
Step 2: Wet sanding
Once the paint is completely dry, it's time to sand! The wet sanding method works best for me. If you're not familiar with the concept of wet sanding, here's the process:
-
Take a shallow rubber bath, preferably about 6 inches deep. You can use a bucket, but I find it hard on the wrists.
-
Fill the tub with a reasonable amount of water, adding a drop of dish soap.
-
Collect the sandpaper. I like 3M Pro Grade sandpaper the best, but any sandpaper approved for wet sanding will work. (Check the label - if it's dry-only sandpaper, it will spoil.) Start with 120-grit paper; I find anything less rough to roughen the surface rather than smooth it out.
-
Dip the part in water and start sanding above the water. Keep the part you are actively sanding damp by frequently covering it with water.
Then repeat. After you have completely sanded the support, let it dry; apply another coat of primer, let it dry completely, and then sand with 220 or 320 grit sandpaper. When you feel your part is smooth enough, move on to the next step. Sanding up to 1500 or more may be required if you're going for a glossy finish, but read step 3 before you get there.
Low profile plastic container for wet sanding.
Step 3: Filler and Primer
If you find your part is not filled enough with Primer alone, try spot-filling it with 3M Bondo Spot and Glaze Filler. Most hardware stores put this in the automotive section. It's like smearing a prop with peanut butter and I usually do this with plastic putty scrapers or my fingers - with 9 thickness latex gloves of coursesweet!
3D printed parts coated with Bondo Spot Putty.
Avoid skin contact with Bondo and make sure you have proper ventilation while using it; it has a very strong smell. After the putty has dried, sand it (see Step 2) until a smooth paste is obtained.
Wet sanded part after application of spot putty and primer.
Several coats of Bondo primer and putty give the part a varied color and can make it difficult to know where additional putty needs to be applied.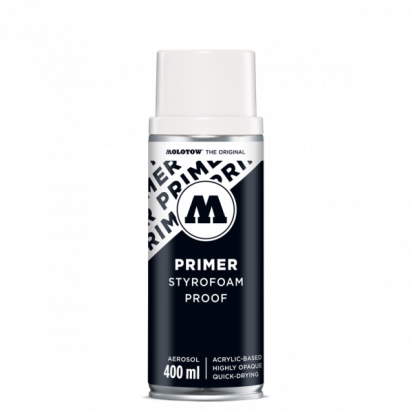 I like to use a matte black primer to check the surface for imperfections. After the primer is completely dry - we pay attention to the labels, remember? - check the finish of your part. If it looks good, do a final wet sanding with up to 400 grit paper (or higher if you want a glossy finish as above).
The same part after priming with matt black primer.
Step 4: Primer or Topcoat
You must be tired of sanding at this stage. The good news is that you are almost there! Now that your piece is primed and smooth, it's time to decide how you're going to finish it. Depending on your support, a metal primer may be suitable. One of my favorite weathering techniques involves using a silver base coat and then a top coat; Once the top coat is dry, you can gently sand the edges to expose the "metal" underneath, giving it a realistic weather effect.
Close-up of the surface finish of a 3D printed part.
Whether you're ready to top coat or top coat, the options are endless. Spray paint, solid acrylics, and airbrush paints are some of my favorites, but find what works for you. Practice these techniques on the cut before using them on the last part, and take your time.
Example of smoothed detail using airbrush and hand painting
Fast turnaround, low cost, comprehensive optimized strategy… FacFox is your one-stop 3D printing service provider!
How to prime and paint 3D printed models (with video)
Primer
Primer is a special paint that adheres strongly to the part and ensures the paint adheres evenly to the surface. There are different primers designed for different purposes. Spray primer is the best way to paint 3D printed parts as it quickly covers the surface in an even coat. There are primers available for brush application, but they are difficult to work with and are better suited for fine finishes. For best results, choose a plastic-compatible primer and paint from the same manufacturer. We love the Krylon and Montana brands (although they are thick), but Tamiya's paint is unparalleled - it forms a very thin and even coat, retaining all minor surface features.
Rotary tool
Sometimes you need to finish sanding quickly. The use of interchangeable nozzles for rotating tools allows you to grind and polish models in various ways. The drum allows you to quickly grind marks from supporting structures, and steel wire cleans marks well on flat surfaces. Rotary tools are designed for rough cleaning, so you will need sandpaper to make the surface smooth. There are many great brands: Dremel and Craftsman are popular in the US, and Proxxon is popular in Europe. In order not to burn your model, reduce the speed to a minimum (usually 500-1000) and do not apply pressure to the tool.
Flat files
These tools are not as clumsy or inaccurate as a hand sander. An elegant instrument...for a more civilized age.
The flat file is one of the simplest yet most effective tools for effectively removing support structures and sanding surfaces. By holding it firmly in your hand, you can remove marks with greater precision than with a rotary tool. Keep a wire brush handy and clean the file blade regularly (otherwise plastic and resin can get stuck in it). Like a rotary tool, a flat file leaves a rough surface, so it is best used for removing large imperfections.
Sandpaper
Sandpaper is the ugliest tool in the workshop. Over the past decade, it has made a real breakthrough with the release of flexible sanding sheets. Flexible sanding sheets can be purchased at hardware stores. They last 15 times longer than paper ones. They won't curl, puncture or bend, and can be used wet to reduce dust and prevent build-up. Thanks to their flexibility, they easily reach small interior spaces and rounded surfaces.
Dust removal
Even after grinding with a damp tool, a small amount of dust remains. Remove plaque with water and a soft brush (an old toothbrush is fine for this purpose). For serious cleaning, you can take an inexpensive ultrasonic device that will quickly remove small particles trapped in corners and surface cracks. If you are working in a hard water area, using deionized or distilled water will help prevent blemishes between coats.
Dust cloth
Dust cloth is a piece of soft and slightly tacky cotton cloth designed to remove residual dust and provide a clean surface for painting. Let your model dry before using the dust cloth: the waxed surface reduces its effectiveness on wet surfaces.
Block, pins and drill
This little trick will save you a lot of trouble in the paint booth (we were ecstatic when we saw this technique in Adam Savage's how-to video). By mounting the model on a pin (you can often use a pre-drilled hole in the part), you can quickly maneuver while spraying and paint the model from all sides, penetrating hard-to-reach places and leaving no fingerprints. If you want to apply an even layer on all sides of the model, this is very important.