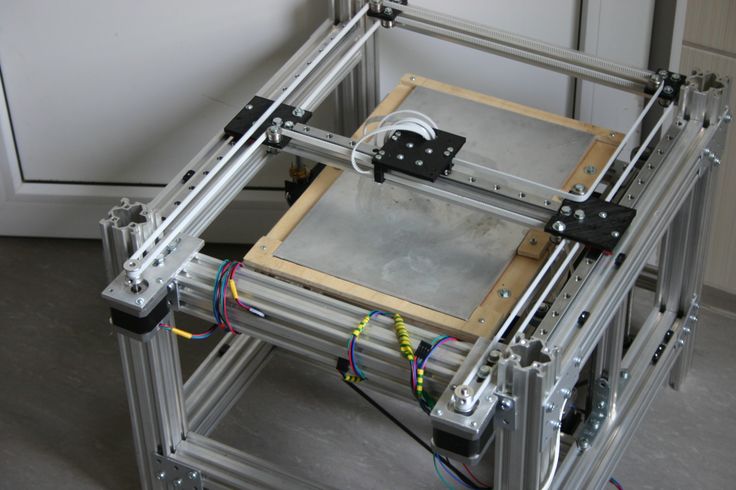
Fatmax 3d printer
▷ fatmax 3d printer 【 STLFinder 】
Spirit Level Stanley FatMax 3d model
cgstudio
On the top of that all the models come with complete UVs and optimized topology, which allows you in no time alter geo or the textures if needed.Also check out our other models, just click on our user name to see complete gallery.3d_molier...
Fatmax Mounts
thingiverse
mounts for your fatmax stuff 350mm between the holes If you like my design feel free to tip my design https://www.paypal.me/Djdenzo
Lid for Stanley FatMax
grabcad
Fits the yellow Stanley FatMax box
Stanley Fatmax Holder
thingiverse
quick and easy tool holder for stanley fatmax
Stanley Fatmax 18V
thingiverse
Powiększenie pojemności baterii Stanley Fatmax 18V z 2Ah do 4 Ah https://youtu. be/dfRF9vnQBpc
STANLEY FatMax Folding workbench
thingiverse
Accessories for Stanley FatMax Folding workbench. I have used a 19 mm round stick for accessories for the booth. ... Wall Lines 5 Infill 50% stronger 80-100% Resolution 0.28mm
Stanley Fatmax organiser boxes
thingiverse
Regular stanley fatmax boxes are to big for my purposes so I created 1/3 and 1/6 size of the regular box. ...I printed them from PLA and PET-G.
Stanley FatMax Cushioned Feet
thingiverse
My Stanley FatMax Car Jumper/Air Compressor jumped around too much, so I decided to design and print in TPU these feet. It's much quieter, and does not move around nearly as much.
...
YES, I DO have a German Shepherd, thus the fur everywhere!!!!
It's much quieter, and does not move around nearly as much.
...
YES, I DO have a German Shepherd, thus the fur everywhere!!!!
Stanley FatMax Replacement Handle
thingiverse
The plastic handle on my toolbox broke, so I removed it and designed this replacement. ... This is for a Stanley FatMax toolbox, and will require 2 of these elbows, a piece of 3/4" dowel rod, and a few screws to attach to the toolbox and dowel rod.
Stanley FatMax organiser inserts
thingiverse
This is a set of dividers for the stanley fatmax organiser cases. Some of the designs are two layers so that the dividers can be even smaller. ...
The file names are organiser-divider-[rows]x[cols]x[layers]-[layer-no].stl
All will print without...
...
The file names are organiser-divider-[rows]x[cols]x[layers]-[layer-no].stl
All will print without...
Stanley FatMax Mini-Boxes
thingiverse
I looked online and nothing was available commercially and on Thingiverse, most of what I found was divider walls which negates the beauty of the FatMax box which is being able to remove a single box. It took a few prototypes until I hit something...
3D Printer
grabcad
3D Printer
3D Printer
grabcad
3D Printer
3D Printer
grabcad
3D Printer
3d Printer
grabcad
3d printer
3D printer
grabcad
3D printer
3D Printer
grabcad
3D Printer
3D Printer
grabcad
3D Printer
3d printer
grabcad
3d printer
3D Printer
grabcad
3D Printer
3d printer
thingiverse
3d printer
3D Printer
grabcad
3D printer
3d printer
grabcad
3d printer
3D-Printer
grabcad
3D-Printer
3D Printer
grabcad
3D Printer
3d printer
grabcad
3d printer
3D printer
grabcad
3D printer
3d printer
grabcad
3d printer
3D PRINTER
grabcad
3D PRINTER
3d printer
grabcad
3d printer
Build a reprap - RepRap
This page has been flagged as containing duplicate material that PartsSupplies also attempts to cover.
These pages should be merged such that both pages do not attempt to cover the duplicate topics.
This page has been flagged as containing duplicate material that Darwin/Buyers Guide also attempts to cover.
These pages should be merged such that both pages do not attempt to cover the duplicate topics.
This page has been flagged as containing duplicate material that What Tooling Do You Have also attempts to cover.
These pages should be merged such that both pages do not attempt to cover the duplicate topics.
This page is out of date --Sebastien Bailard 04:34, 31 October 2010 (UTC)
This page is not only out of date, but contains in part simply nonsense - especially the "Software installation" section. For the lack of editors, this page should be removed. --Traumflug 21:18, 13 April 2011 (UTC)
Contents
- 1 Build a RepRap
- 2 Overview
- 2.1 Object Creation Software
- 2.2 System control Software
- 2.
 3 Installing the Software (experimental)
 - 2.4 Thermoplast extruder
- 2.5 Positioning system
- 2.6 Shopping list
There are multiple ways to build a RepRap or RepStrap; the method selected for these instructions has been chosen to minimize skills and tools needed. If you wish to explore other options click Alternative Build Documentation.
The Classic RepRap Design is "Darwin" pictured on the right. There are very full and accurate building instructions in Make Your Own RepRap.
The RepRap was carefully designed to use only parts that can be made on a RepRap and other cheap parts that you can get anywhere. It was also designed to require few skills to assemble. The one snag is you have to find someone to supply you with the parts that must be made on a RepRap.
RepStrap Darwin Clones are RepRap designs which are fairly accurately copies of the Darwin design but the RepRapped parts are replaced by parts created some other way, Perhaps molded plastic or laser cut acrylic or plywood. Generally parts of one of these machines are interchangeable with RepRapped Darwin parts. Here are some Parts Suppliers.
Other RepStraps, these are 3D printers capable of making RepRap (Darwin) parts but are not structurally similar to Darwin. These machines may vary a lot but may be separated into two kinds. Those like Darwin in which the extruder (print head) is moved in the x and y directions and the work is slowly lowered as the print progresses and others where the work is moved in the x and y directions under a stationary head which gradually moves upwards as the print progresses. Here are some references to various RepStrap Machines.
If this is your first RepRap that you are building, here is a basic guide of which build option you should choose:
- If you have a friend nearby that can print out the RepRap part on their RepRap or some other 3D printer. Choose the Classic Darwin
- If you don't have access to a 3d printer then you have 3 options.
- You can build a Classic Darwin, but this means you will have to use a commercial service to print out parts for you; it can easily cost over $1000 for just those parts depending on what deals you can get. This option is probably the most expensive option.
- You can build a RepStrap Darwin Clone. This means you can either buy a lasercut acrylic kit from Bits from Bytes or make some part yourself by machining them. This option is becoming the more common option especially because soon you will be able to buy a lasercut kit from Ponoko which has offices in the US. This is also usually cheaper than the first option.
- The third option is to build non-clone RepStrap that does not have the same frame as a Darwin, such as McWire which uses pipes for the frame. This option is usually the cheapest, but each RepStrap has it own weaknesses. The good thing is that when complete they can print out parts so that you can build a Classic Darwin. The electronics are compatible with Darwin so you only have to buy them once.

A RepRap or RepStrap (A RepRap can build itself, a RepStrap can build something that can build itself) can be divided into several key areas:
- Object creation Software
- System control Software
- Thermoplastic extruder
- Positioning system (the Cartesian Bot)
- The electronics to control the positioning system
Object Creation Software
Art of Illusion is currently the software most recommended for designing objects to be printed. It's not a CAD package but it is easy to use. The software allows you to create and manipulate 3D shapes. You can store these shapes in STL file format. STL files are object files that are used in Rapid Prototyping. These STL files can be printed off into real 3D objects using your 3D printer (RepRap).
The software is free (GNU GPL version 2) and it is available for Mac OS X, Windows and Linux. If you want to try it out without installing it's available bundled in the Linux distribution liveCD with the rest of the hosted software for the RepRap project.
System control Software
RepRap is controlled via USB or an RS232 interface. You may find a description or download from RepRap Host Software.
There is a RepRap variant which allows you to print an object from a file saved onto a SD card.
Installing the Software (experimental)
This set of instructions tells you how to set up all the software you need for a Reprap in one big blow under Linux Debian.
It involves 5 steps that anyone should be able to complete in a few hours of his/her spare time.
It's easy.
Really.
Warning: Proceed at your own risk. The instructions are not double checked yet.
Prerequisites
You'll need
- a PC (not too old)
- broadband internet access
- some time
Step 1: If you have Windows, go to [Here], get your copy of the Debian installer with one click and start it.
If you already have Linux: Install Debian Lenny some way or the other (you know how to do that ;-)) and continue with Step 3.
Step 2: Follow the instructions. I suggest installing on a 4GB USB stick - but you can also install it all on your hard disk. Be careful to select "testing" instead of stable - this installs Lenny instead of etch. Otherwise the standard settings should be ok in most cases. Don't say "yes" to things you might regret. After a while, a standard system should be installed. Don't forget to install the GRUB boot loader.
Step 3: Log in and say
sudo apt-get install firefox
on the command line.
Step 4: Start firefox and download this Media:Reprap_setup.sh script.
Step 5: Run the script from the shell with
sudo ./Reprap_setup.sh"
Now all the software specific to Reprap is retrieved and installed.
This includes the AVR-Tools, Subversion, Java3d, the Reprap-source tree etc. Installing all that will take some time.
Having successfully reached this point you should try to start the software in reprap-host with:
ant run
If you now see the main window of the host software, you're done.
Congrats! You have made it!
You still have to learn how to use it - but that is another story and another tutorial.
Thermoplast extruder
There are three different extruders all of which, in the end, perform the same function. There is the "official" extruder that can be made by another RepRap. Then there are the kits which are mass produced so it is easier to start printing your first parts. Both kits are designed to be interchangeable with the official extruder.
- RepRapable Thermoplast Extuder
Can be made by another RepRap or commercial rapid prototyper. These are not the only ways the parts can be made but are the easiest. Some builders have made them from machining aluminum or plastic. Others by making molds and casting from resin. This is only for the main pieces of the extruder. The drive screw and other mechanics must be bought or machined. - Kit from Bits from Bytes (laser cut acrylic)
There is an extruder kit currently available from Bits from Bytes who are based in the UK. The kit is part of the silver or gold kits and doesn't need ordering separately unless you want a spare. Assembly instructions are available on the Bits from Bytes website in the 'Assembly Instructions' area:
Bits from Bytes Extruder Assembly instructions
Bits from Bytes Extruder 3d Model - the model requires a recent copy of Adobe Acrobat.
There are videos of the construction process, in the 'Tutorials' section of the website.
Bits from Bytes Heater Barrel Assembly
Bits from Bytes Extruder Drive Assembly
- Kit from Ponoko (laser cut plywood)
A kit will soon be available via Ponoko which has offices in the US.
Positioning system
The positioning system is the greatest part of the size of a RepRap. It is what moves the extruder head from place to place. Kits are available from Bits from Bytes, either the FULL Mechanical Kit - Silver or Gold contain all the components necessary to build a positioning system and extruder. Assembly instructions are available on the bits from bytes website in the 'Assembly Instructions' area:
Bits from Bytes Assembly Instructions
Shopping list
The following list contains all the components necessary to build a RepStrap and enough plastic to print a RepRap. Some handtools are required for assembly, but the only power tool used is a soldering iron.
Extruder and Positioning System
Bits from Bytes - FULL Mechanical Kit - Silver or Gold
Ponoko - coming soon
(only one required)
Electronics
Plastic
The extruders all use 3mm diameter plastic filament/wire. ABS is the recommended plastic for its combination of strength, availability and dimensional stability. Suitable plastic is available from RRRF in 5lb reels. It is also available by request from plasticweldingrod.com.
Total
Shipping and tax vary by country of order but $1000 total is a reasonable approximation.
Best 3D Printer Candidate 2022 / 3D Printers, Machine Tools & Accessories / iXBT Live
If you want quality printing out of the box as well as a solid build, then Kywoo3D Tycoon Max is the one for you. This printer attracted me with interesting features at a low price. And most importantly, what attracted me is a very reliable design. After all, it is she who affects the quality of the print.
I found the first mentions of this manufacturer and printer on Kickstarter, and then on local sites. Then the model was simply discussed, but there were no real owners. But then the first reviews appeared, and to be honest, the printer was not praised in them. Despite the thoughtful design, the printer had problems with airflow and buggy firmware. Therefore, when I needed a 3D printer, I took myself Anet ET4 Pro. But then there was a need for another printer, so I, again returning to the question of choice, decided to take myself a Tycoon Max. And now, having used the printer for several weeks, I realized that I made the right choice. The printer for its price really gives excellent print quality, and if necessary, also a very fast print speed comparable to deltas. nine0003
Characteristics of Kywoo3D Tycoon Max:
Well, in words, I’ll add something that is not in the table:
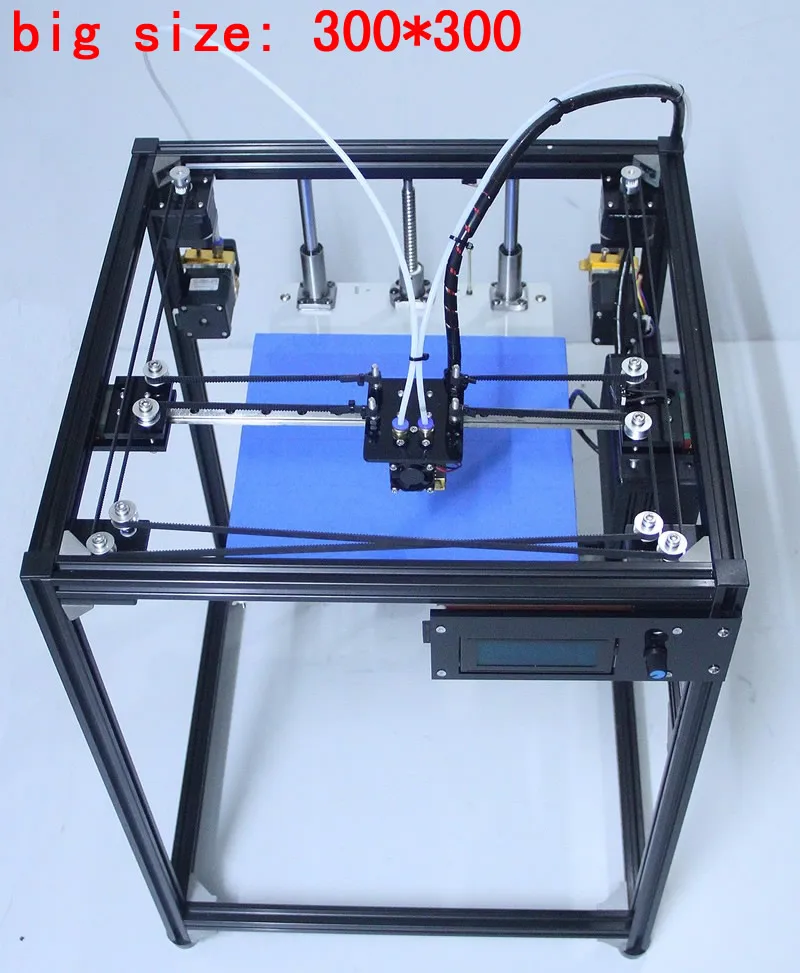
- Print area: 300 * 300 * 230mm
- Print type: FDM
- Number of extruders: 1
- l.
 -0.4mm
 - Nozzle: 0.4mm
- Control: USB, MicroSD card, Wi-Fi
- Power: 350W
- Maximum table temperature: 100C
- Maximum extruder temperature: 260C
- Additional design information:
- High rigidity aluminum profile frame.
- X-axis rails, Y-axis shafts.
- Z-axis motor belt synchronization
- 16-point auto-leveling
- 3.5" touch screen for printer and printing process control
- Convenient filament threading with ring on extruder 90 015
-
Now let's talk about the printer itself. It was ordered from a warehouse in the Russian Federation, and the delivery time took 5 days. A huge box weighing 16kg was received in the mail:
Inside the box is a printer disassembled into two parts. Everything lies in layers, which are laid with foam material. So it is unlikely that anything could be damaged along the way.
 Opening the box, the first layer I saw was the bottom frame of the Y axis with a heating table and ultrabase:
 Below the next layer is the main frame of the Z axis, a reel of PLA test plastic, a box with accessories:
I’ll tell you right away about the complete plastic. It has a weight of 500g, wound on a plastic reel, sealed in a vacuum bag. I printed part of the coil during the tests, and I liked the plastic. nine0003
As for complete accessories, everything is relatively standard. Inside the box are a spatula, a set of hexagons in a convenient case, several spare ties, wire cutters, clamps for the ultrabase, four screws for assembling the printer, a Phillips screwdriver, a piece of heat pipe, a spare 0.4mm nozzle, a needle for cleaning the nozzle, a wrench for unscrewing the nozzle, spare limit switch, USB cable, reel mounting stand. Also included is a card reader and a MicroSD 8Gb flash drive manufactured by Netac ( a good manufacturer, I have several flash drives of this company, and they work well )
The printer is powered through a detachable cord with a European-type plug.
 If necessary, it can be replaced without any problems:
 Also included with the printer is an assembly and configuration manual. It is made on high-quality printing, but, in fact, there is no great benefit from it:
Now let's consider ultrabase glass. It has dimensions of 305*320mm and a thickness of 4mm. On the edge there is an inscription with the logo of the manufacturer:
Having already printed enough parts, I can say that the quality of the Ultrabase is excellent. It is strong, there are no problems with plastic sticking, it heats up evenly. And at the end of printing and cooling, the parts come off without problems.
The ultrabase is attached to the heating table with 4 stationery clips (they are included). The heating table itself is made of metal, and is attached to the frame on shafts through plain bearings. By the way, in order to reduce weight and inertia during movement, the manufacturer made the table itself with holes that do not affect rigidity.
 nine0003
 By the way, the table is connected to the control board via the XT60 connector. This is the first time I see such a solution, but logically, this is a fairly reliable connection.
Another thing I would like to note on the table frame and X-axis is the presence of good legs that can be adjusted in height. This is useful if the printer is not standing on a completely flat surface, and correct adjustment will avoid unnecessary movement of the frame when printing.
Now let's move on to inspecting the frame along the YZ axes. It also contains the control board and power supply. It also has an extruder. This is what it looks like:
The first thing I want to pay attention to is the overall rigidity of the frame. It uses a double frame made of aluminum profile, on which there is a metal box on top. This box serves two purposes: hiding the interior of the printer and adding rigidity to the frame. And it has a very good effect on the quality of the print.
The Z-axis of the printer is fixed on the frame through two shafts rigidly fixed to the frame itself and a closed plain bearing, and for moving there are two studs with stepper motors on both sides.
 Additionally, the manufacturer has added a belt that synchronizes the operation of these stepper motors:
 Rails are installed on the printer to move the extruder. They are quite high quality, and during the work I personally did not have any problems with them. For better sliding, the rails are immediately lubricated from the factory, and the rails themselves also have holes through which this lubricant enters the rails. Also, through these holes, the rails were fastened along the entire length of the frame.
As for the extruder, the manufacturer did not reinvent the wheel, and equipped the printer with a proven solution. This is MK10, but with some modifications. First, it adds an iron frame that looks good while protecting the user from contact with hot extruder elements. I would like to think that this frame also serves as an additional radiator, but if you look at how it is fixed, it immediately becomes clear that there is not much heat coming to it. And the second addition is a special lamb for scrolling plastic when refueling.
 And this is a really handy feature. When refueling, you do not need to press anything, as in other printers. We simply pull the plastic through the plastic sensor, point it into the hole of the extruder and turn the lamb. Plastic itself immediately clings and is pressed through. A simple and elegant solution that is sorely lacking in other printer models. nine0003
 Also immediately above the extruder is a low filament sensor. This is also a pretty good solution, since the distance between the sensor and the extruder is minimized here. And this means that you don’t have to throw out 20-30cm filament bars that simply cannot be pushed into the printer. The amount of waste here is minimal.
As for blowing, a fan with an impeller is used here, which is mounted near the nozzle. Fan model pb04010ms4. The airflow itself is realized through a wide slot. I personally did not notice any problems with blowing during printing, there is enough blowing, and it blows directly on the model. The blowing speed can naturally be adjusted both during the cutting of the model, and already directly during printing, the fan has speed control.
 nine0003
 I also once had to disassemble the extruder to replace the nozzle during printing. What was in the kit, I managed to score on my own stupidity, alternating types of plastics without changing the temperature. Therefore, I will show the extruder in disassembled form:
I also want to draw attention to the fact that the printer has a table auto-calibration function. For this, a BL Touch sensor is installed here. More precisely, there is not the original 3D Touch with a plastic plug.
But by the way, I have no complaints about his work. The table calibrates perfectly, and even if there is a misalignment of fractions of millimeters, everything is taken into account and there are no problems with printing. The table itself is calibrated using 36 points (6*6) and looks like this:
Also, in addition, I can also note the presence of a silicone lining on the hotend, so that the temperature is more stable:
Well, after we have examined both halves of the frame, we can start assembling the printer.
 She's very simple. The existing 4 screws are screwed through the grooves, and we stretch harder.
 Additionally, you need to connect the connector to the table and connect the motor along the X axis. By the way, in the printer, all the wires are laid right away, and where they can be fixed with ties. Therefore, nothing dangles here, does not hang down and is as neat as possible:
That's it, the assembly is finished. This is what the assembled printer looks like, well, with the exception of the ultrabase and the bracket for installing the filament spool.
The bracket itself, by the way, is standard, like most printers in this price range. Metal profile and plastic tube. The bracket is installed at any point of the aluminum profile, through two spacer nuts:
Well, once the printer is assembled, you can consider the rest of the design elements. If you look at the back of the printer, you can see the power button and the port for connecting the power cord:
On the other hand, there is a sticker on the frame with information about the printer:
Separately, I would like to note one more convenient feature of this particular printer, which I have not seen anywhere else.
 These are convenient carrying handles:
 They are metal and rigidly fixed to the frame, you can safely lift the entire structure with them and not worry that something will break. For me, this is very important, since my printer can be transferred to different points around the room, and even between rooms. Depending on how long the print is placed. nine0003
If you look at the printer from the right end, then you can see a slot for a MicroSD card through which a model for printing is thrown onto the printer. There is also a MicroUSB port for connecting to a computer (does anyone use this method of printing?) And another slot for SD cards, the purpose of this slot remains a mystery to me:
Well, now the most interesting. It is, of course, a touch screen. When you turn on the printer, we first see a splash screen with the manufacturer's logo, and then the main desktop, from which you can get to different settings:0003
All items on the desktop are interactive. Management is implemented by clicking on the desired element.
 For example, by clicking on the ruler of XYZ axes, we get to the axis calibration menu:
 And if you click on the flash drive icon, the files for printing located on the flash drive are opened:
The printer sees folders and subfolders without problems, but there are Russian file names Problems. In the current firmware, the Cyrillic alphabet looks like unreadable krakozyabry.
If you click on the gear icon, then naturally we get into the settings menu. Here you can select the temperature of the preheating of the table and extruder, change the filament during printing or in idle time. Find out information about the firmware, set up Wi-fi and select the interface language ( there is no Russian language in the photo, but it has already been added in the latest firmware )
By the way, the printer has a built-in Wi-fi module, and it can be run in access point mode or connected to a home wi-fi network.
In the first case, you can connect to the printer and use an additional plug-in in Cura to send files for printing over the air, as well as monitor the status of the printer:
True, the wi-fi module has one minus.
 It stands inside a metal case, and it dampens the signal very noticeably. If the printer is in the next room, then I can no longer connect to it because the signal level is too weak. In fact, the range of the access point is about 5-6 meters maximum. nine0003
 But back to the screen. Despite the modern 32-bit processor, another disadvantage that I want to point out is the lack of model previews. This option is already firmly in use, and I would like to hope that it will also appear in future firmware. But so far the interface looks pretty simple. By the way, this is also visible at print time, when progress is displayed simply as a blue bar with a percentage of completion.
But in general, the management here is really convenient. You can change the Z-axis gap on the fly, change the speed of the blower fan and the temperatures of the table and extruder. nine0003
Well, I also want to show the inside of the printer without disassembling it. How could I get the camera. The printer is powered by the built-in Mean Well LRS-350-24 power supply.
 Already by the name it is clear that this power supply produces 24v / 350w.
 In the future, I plan to crawl up to this PSU and add a backlight tape to the printer frame so that you can see the printing process.
The brains of the printer are located in the upper part of the case, it is already much more difficult to crawl up there with the camera:
But since the board is sold separately, I'll just add a photo from the manufacturer here:
True, in this photo it is not clear which processor is used in the board. But let's hope it's good enough.
In general, if we talk about the assembly, then it did not raise any questions for me. The frame here is well thought out and very rigid. All axles run smoothly and there is no backlash. The printer is large, solid and heavy. And gravity, as we know from the words of Boris Razor, is good and reliable.
Now it's time to talk about the printing process and the models I have printed
The first thing I decided to do was check the speed characteristics of the printer.
 The specifications indicate that its maximum speed reaches 150mm / s. Therefore, I printed a test cube at this speed:
 I shot with a macro lens so that the flaws in the layers were immediately visible. And they are here, since my plastic is not the best, besides, it’s also old, taken from the remnants.
Then I printed the same cube, but at a speed of 180mm/s, and put it next to the first cube:
Try to guess from the photo which of these two cubes was printed at what speed.
I'll give you a hint. On faster printing, at 180 mm/s, the plastic from the nozzle no longer has time to come out and lay down evenly, so the layers appear thinner, and there are gaps between the layers.
And yes, on the left it's a cube printed at 180mm/s and on the right it was 150mm/s.
And by the way, this speed is quite suitable for printing rough parts, when you need to determine the degree of fit and size, without regard to quality. This saves a lot of printing time.
 nine0003
 Well, at a speed of 150mm / s, you can already print full-fledged models. Here, for example, I printed a model at this speed:
And this is not a draft part, but a full-fledged one, for a commercial order. Here is what I printed, the size of this medal is 22 centimeters:
If you look at macro photography, you can evaluate both the detail and the level of stacking layers at this print speed:
By the way, as you can see, the medal was printed in two colors of PLA plastic. This type of printing is not difficult, just at a certain moment of printing, you can pause the printer and replace the filament. But I want to add that Cura has a handy plugin that allows you to precisely set the pause on the desired layer. To do this, go to the plugins, and select the “Filament Change” function in the post-processing plugins, in which we simply set the layer on which the pause will occur. The printer will stop printing at the right moment, move its head to the extreme left side in front and squeak loudly, calling for a replacement of the filament:
Through this plug-in, you can set the replacement of the filament at least on each of the layers, which is very convenient and allows you to achieve interesting effects when printing art objects.
 I hope my advice will be useful to those who are fond of 3D printing.
 I also printed an axolotl toy for children, which consists of closed links:
Printing was done at a speed of 120mm / s, and could have been more successful if I had not forgotten to remove the automatic supports in Cura. But since there were supports, I had to spend time post-processing and separating the supports, as well as cleaning up excess plastic in the links. This is what this axolotl looks like on a macro shot:
Layer height 0.25mm, travel speed 120mm/s, table temperature 60 degrees, extruder temperature 220 degrees.
The next model was among the models on the flash drive provided with the printer, this is a ghost keychain.
By the way, I want to add a macro photo of the substrate that remained after printing, so that you can evaluate the uniformity of laying layers and tracks:
a piece of ordinary sponge to clean the plastic from dust, which is very visible on white parts.
 Some print different boxes and cases, but I just took a piece of dish sponge and pierced it with a filament, which I then moved on. After that, the parts became noticeably cleaner. nine0003
 Another custom-printed detail. Steering shaft bushings for Nissan Qashkai. Designed to eliminate the runout between the shaft and the tube in the steering reach adjustment mechanism:
Another model. Decepticon logo overlay for standard Mazda car logo:
Spinner gear. A toy that I printed to test the possibility of printing gears:
Stand legs for Sony PlayStation 4 Slim:
Well, there were many other models that were printed to order, but I did not have time to take high-quality photos. I mainly use PLA and Petg plastics when printing. Well, a little ABS, which I really dislike because of its capriciousness to ambient temperature and drafts. And as you can see from the photo, there are no problems with printing. The only problem I had was changing different types of plastic during printing and clogging the nozzle as a result.
 But it's my own fault, I shouldn't have experimented. nine0003
 Conclusion:
As you can see from the review, I really liked the Kywoo3D Tycoon Max 3D printer. It is definitely worth the money, here it is clear that the manufacturer did not save on everything and everyone, as is the case with other manufacturers. I will try to indicate the advantages that the buyer receives:
Reliable design and rigid frame . A double profile and a metal frame are assembled into a single design that is reliable and does not give any backlash. This has a positive effect on detail and print quality, as well as on the maximum print speeds. Also, all cables and wires are correctly laid in the printer immediately from the factory. And the heating table is attached through the XT60 connector, which has long proven its reliability. nine0003
Shafts along the axes Z and X. The presence of shafts and plain bearings also has a positive effect on the accuracy of printing and the reliability of the design as a whole.
 Since they are less subject to wear and play, unlike wheels that drive along a profile.
 Axis rail Y . The advantage of rails over conventional wheels, I think, is not even worth discussing. This is a more accurate movement of the extruder, and the absence of backlash, and durability. Of course, it would be better to have rails on all axes, but this will significantly increase the price of the printer, and it will no longer be so interesting. nine0003
Convenient filament threading with scroll knob . Here I will attribute this not only to pluses, but directly to huge pluses. Such a trifle like, but very much affects the work with the printer, especially if you print a lot and often change the filament.
Short feed extruder MK10 . Allows you to safely print any type of filament, including flex. In addition, unlike Bowden, plastic is saved here. The retract works more adequately. In general, I personally prefer Direct extruders, although I have a printer with a bowden system.
 nine0003
 Availability Wi- fi module. Let it be weak, and not everyone needs it. But for some it will be very useful and necessary.
Axis motor synchronization Z . Another little thing that many manufacturers neglect. Meanwhile, this little thing affects the accuracy of printing. And many people customize their printers by adding a Z-axis belt.
Auto level. The printer builds a table map using 36 points and then takes into account any irregularities during printing. Which is very good for the adhesion of the base layer. Well, of course, there are no dances around the printer with a leaflet for an exact fit. To be honest, this process is what I dislike the most during printing. nine0003
Print area 300*300*230mm. With such dimensions of the printed area, you can print a much larger number of details than with the usual 220 * 220mm in most models.
 True, as a minus, the dimensions of the printer themselves are already acting here. Under it, you need to prepare a surface with dimensions of 62 * 62 centimeters, and not every table is suitable here.
 But to be honest, I did not find any minuses for the printer. Well, except perhaps the dimensions and the weak signal of the Wi-fi module. But I already wrote about this above. Well, perhaps the relatively simple firmware can be attributed to the minuses, although it does not affect the print quality, it's just an interface. nine0003
Kywoo3D Tycoon Max is currently my main 3D printer, on which I print most models. For yourself and to order. Print field 300 * 300 * 230mm allows you to print large enough parts or batches of parts, which suits me completely. I also liked the robust, well-thought-out and monolithic design of the printer, as well as the speed of its operation. As for working on wi-fi, this did not take root for me. At first I dabbled in sending and monitoring, and then, out of habit, I returned to the flash drive and card reader again.
 In terms of noise, the printer does not raise any complaints, it is the same as most FDM printers. Mostly you can only hear the fans. I also cannot fail to note the most convenient type of filling the filament with the help of a lamb, in my opinion, this bribed me very much. nine0003
 Well, as it became clear from the review, I can safely recommend this printer for purchase, especially since its price is quite affordable, and frankly, for its price of $280, I cannot find a single competitor for this model. If you like the printer and want to buy it, you can use the promotional code KY3D06 when ordering, which will give an additional discount. And these printers are in stock in the Russian Federation, so delivery will be fast.
Current price for 3D printer Kywoo3D Tycoon Max
US builds largest metal 3D printer
News
. The system will rely on adapted friction welding technology and will be able to grow parts up to ten meters long.

The work is carried out in the interests of the US military: such 3D printers are planned to be used primarily in the production of mine protection for army vehicles. During the Vietnam War, 73 percent of equipment losses were due to explosions on anti-personnel and anti-tank mines. Modern armored vehicles and armored personnel carriers are designed with enhanced protection, and an important role is played by thick, armored bottoms, often V-shaped and with a minimum of welds. nine0003
An American Cougar armored vehicle that hit a mine in Iraq in 2006 and drove another three kilometers to the safe zone. The personnel escaped with minor injuries. Photo: Marine Sgt. Christopher Clare
Previous work on the Jointless Hull project of the Army ManTech research program has looked at forging, forming and welding at high current density to reduce weld porosity. The results were rated as satisfactory in terms of strength, but at the same time there was a lack of geometric freedom and manufacturing flexibility.
 nine0003
 As a result, they decided to abandon forging, forming and welding in favor of another technology - production by the method of additive friction deposition with mixing (Additive Friction Stir Deposition, AFSD), that is, Friction Stir Welding, adapted for 3D printing, FSW).
Development work consists of two stages. Not the first one is planned to assemble a demonstrator with a construction area measuring 1x1x1 meter to test the technology and software. The design must then be scaled up to a working volume of 10x6.5x4 meters - the largest among "metal" 3D printers. Length is a conditional characteristic, since the portal structure will move along the rails. Siemens is responsible for the control systems and software. nine0003
The large-format version is already being assembled by Ingersoll, which has considerable experience in working on large additive systems. In 2019, this venture helped the University of Maine set three Guinness records at once: to make the largest 3D printed boat (seven meters in length), aka the largest one-piece 3D printed object, on the largest 3D printer for working with polymers and polymer composites.
 The same system is used in the production of large molding tooling, for example for the manufacture of helicopter blades. nine0003
 The new 3D printer, as already mentioned, will deposit metals using friction stir deposition. This technology is being developed by MELD Manufacturing using the Edison Welding Institute (EWI). The build-up is carried out by plastic deformation at temperatures below the melting threshold, thereby achieving high isotropy and density without shrinkage and the risk of hot cracks, without the need for a vacuum chamber or protective gas environment. The technology also allows you to create gradient structures from different metals or alloys. Consumables are usually rounded bars with the possibility of using powders of different fractions and even metal shavings. nine0003
MELD Manufacturing already offers several models of additive systems. The latest commercial offer is the L3 3D printer released in 2020 with a working area of 1143x584x584 mm, although the K2 system with a usable volume of 2100x1100x1000 mm is the leader in terms of dimensions.

Learn more
- Maximum print speed: 0mm/10mm s (personally tested up to 140mm/s and it prints fine)