Blender 3d printing download
3.1 — blender.org
Blender Foundation and the online developers community are proud to present Blender 3.1, a solid update to an already outstanding release.
Released March 9th, 2022
PEDAL TO THE
METAL
Cycles now has a Metal GPU backend, contributed by Apple.
-
Monster
-
Junkshop
-
Classroom
Amount of samples per minute on an Apple M1 Max processor. Higher values are better.
- Unit: Samples per minute
- M1 CPU
- M1 GPU (Metal)
Currently supported on Apple M1 computers running macOS 12. 2 or newer,
and Apple computers with AMD graphics cards running macOS 12.3 or newer.
The new Point Cloud object can be rendered directly with Cycles to create sand, water splashes, particles or even motion graphics.
- Much more memory efficient.
- Faster render times.
- Point Info node.
- Point Clouds can be generated with Geometry Nodes or imported from other software.
Read More
See All Cycles Changes
BUILD
ANYTHING
Blender’s ever-growing procedural system gets 19 new nodes, including mesh modeling tools, access to time, advanced Fields control, incredible performance improvements, fewer unnecessary updates, and much more.
Notice how the Random Value node changes to match the socket type.
USER INTERFACE
DRAG, DROP, SEARCH!
Speed-up your workflow by dragging sockets to get a list of automatically filtered nodes.
- Filtered by matching socket types, see only what can be connected.
- Search for math functions or blend modes.
- Works on input and output sockets.
- Available in Geometry, Shading, and Compositor nodes.
NEW
INSTANCE ATTRIBUTES
Instances can now also have their own dynamic attributes!
This fully elevates them to be their own domain now and enables a powerful workflow by completing the pipeline where realized meshes can inherit data from instances that inherit data from points that inherit data from instances… you get the picture.
Download this .blend file
- Extrude Mesh
- Scale Elements
- Stretch Map using Field at Index
- Accumulate Field
The long awaited Extrude node finally made it into Blender! Now a whole different approach to procedural modeling is possible. In this example a procedural chocolate bar is achieved with multiple steps of simply extruding and scaling. Download this .blend file.
The Scale Elements node goes hand in hand with the new Extrude node. Connected elements of a selection can be scaled around their individual center. So combined with extruding the individual faces and using the top faces as a selection creates the effect you can see right here. Download this .blend file.
The Field at Index node makes it possible to read out the value of an evaluated field at a different index.
This little node is a building block that is important to make all sorts of custom operations possible where elements need to exchange data. Here it is used to generate a directional stretch map based on UV space. Download this .blend file.
The Accumulate Field node let’s you dynamically add up values of a field within a group. Here you can see this used to stack cubes by figuring out the cumulative height of the previous cubes for each cube in a stack. Download this .blend file.
This new primitive is similar to the Curve Circle, but it can create an incomplete circle.
Merge selected mesh vertices or point cloud points within a given distance.
Convert real geometry into an instance.
Transform a mesh’s faces into vertices and vertices into faces.
Reverses the normals of selected faces by reversing the winding order of their vertices and edges.
The Compare Floats node has been upgraded to be more generic.
Return the size of any attribute domain, like the number of vertices in a mesh.
Access the scene’s current time directly without drivers.
Gives access to the number of vertices and faces connected to each vertex.
Gives access to each face’s vertex count and the number of faces connected by an edge.
Gives access to edge vertex indices and their positions.
Tells how many faces use each edge.
Provides access to the surface area of each of a mesh’s faces.
Outputs a separate index for each piece of connected vertices in a mesh.
Gives the angle between the normals of two manifold faces.
Blender 3.1 brings performance in Geometry Nodes to the next level,
many nodes are now multi-threaded and use less memory.
Do more with less.
MODELING
VERTEX
CREASING
It is now possible to mark individual vertices as arbitrarily sharp to create interesting shapes more efficiently.
Support for Pixar OpenSubDiv for modeling, rendering, Alembic and USD import/export.
ANIMATION
COPY
GLOBAL
TRANSFORM
The built-in Copy Global Transform add-on makes it possible to copy the world-space transform of the active object/bone, and paste it onto any object/bone.
Contract
GREASE
PENCIL
The Fill tool now allows negative values, creating a contract effect for styles where an outline is needed.
See all Grease Pencil updates
SUB-DIVIDE
AND CONQUER
Playback in the 3D Viewport is now much faster thanks to GPU acceleration support in the Subdivision modifier.
-
Subdiv. Level 0
-
Subdiv. Level 1
-
Subdiv. Level 2
-
Subdiv. Level 3
Frames per second on Rain character by Blender Studio. Higher values are better.
- Unit: Frames per Second
- GPU (Blender 3.1)
- CPU (Blender 3.0)
FASTER .OBJ
Exporting .obj files is now orders of magnitude faster thanks to porting it to C++.
-
Large File (365MB)
-
Small File (20MB)
Time to export an . obj file. Lower values are better.
- Unit: seconds
- Blender 3.0
- Blender 3.1
-
FBX Export
Time to export a .fbx file. Lower values are better.
- Unit: seconds
- Blender 3.0
- Blender 3.1
FASTER .FBX
A massive improvement can be seen on files with Armatures in REST position.
GO BIG
The Image Editor can now handle much larger images for preview and for editing.
Video shows a 52K image, repeated indefinitely.
So Blender 3.1 is fast, but how fast does it run on your computer?
Download and run the Blender Benchmark to share and compare your score with openly accessible benchmarks provided by the Blender community.
Download the new Blender Benchmark
Blender splash artwork source files are available for you to play with, not only for Blender 3.1 version but for previous versions as well.
List of developers that contributed to Blender 3.1
Blender 3.1 splash by Lorenzo Aiello (orencloud). Cycles point clouds by Mario Hawat. Abandoned House by sozap. Geometry Nodes examples by Simon Thommes. Grease Pencil Fill Tool demo by Matias Mendiola. Snow character by Blender Studio. Benchmark background by Gleb Alexandrov.
Page design and layout by Pablo Vazquez. Features video by SouthernShotty.
Additional help by Blender Institute and the Blender community.
Huge thanks to everyone involved ♥
Blender Foundation statement regarding the situation in Ukraine.
Blender is and will always remain free, forever.
Releases are possible thanks to the members of the Development Fund.
Join today and help to ensure the future of Blender for $6/month
Join the Blender Development Fund
3.
 0 — blender.org
Today, 3December 2021, Blender Foundation announces the release of Blender 3.0, to mark the beginning of a new era for open source 2D/3D content creation.
Released 3 December, 2021
The Freedom to Create, V3
CYCLE FASTER
THAN EVER
Cycles GPU kernels have been rewritten for better performance, rendering between 2x and 8x faster in real-world scenes.
-
Barbershop
-
Pabellon
-
Junkshop
-
Classroom
-
Monster
Render time with an NVIDIA Quadro RTX A6000 and OptiX.
- Unit: seconds
- Blender 2.93
- Blender 3.0
LESS LAG, MORE FUN
Enjoy a more responsive viewport due to new scheduling and display algorithms.
- Viewport Navigation
- Lights Manipulation
Moving around the 3D viewport feels much more responsive now, even with Overlays turned on.
Save time when setting up your lighting.
NICE NOISE
OpenImageDenoise was upgraded to version 1.4, with improved detail preservation. A new pre-filter option was added to control the denoising of auxiliary albedo and normal passes.
Blender 3.0
Blender 3.0
New option to reduce shadow artifacts that often happen with low poly game models. Offset rays from the flat surface to match where they would be for a smooth surface as specified by the normals.
The Geometry Offset option works as follows:
- 0.0: Disabled
- 0.001: Only terminated triangles
- 0.1: Default
- 1.0: All Triangles Affected
Generally, using one or a few levels of subdivision can get rid of artifacts faster than before.
Read More
Say hi to the new shadow catcher, completely rewritten for Blender 3.0
New features include:
- Indirect and environment light support, for more accurate compositing.
- Option for lights to be considered included or excluded, that is if they are real or synthetic objects.
- New Shadow Catcher pass to fully handle coloured indirect light and emission.
Read More
Coloured shadows and precise reflections make blending 3D with real footage much easier.
Blender 3.0
tT
SKIN CARE
Subsurface scattering now supports anisotropy and index of refraction for Random Walk. Realistic skin has an anisotropy around 0.8.
Anisotropy 0.8
- Time-based rendering limit
- Eliminate kernel compilation wait for AMD HIP
- Reduced kernel compilation time for NVIDIA OptiX
- Faster hair using 3D curves in NVIDIA OptiX
- Separate presets for viewport and render sampling
- Improved adaptive sampling
- Geometry Offset option to reduce shadow terminator artifacts
- Light option to be visible to camera rays
- New Position render pass
- Volume sampling quality is now the same for CPU and GPU
- Baking support for denoising and adaptive sampling
- Open Shading Language metadata support for UI labels and checkboxes
- Removed Features and Compatibility
Read More
ASSET BROWSER
The first milestone of the Asset Browser project is here!
Your workflow is about to get much more organized.
EASY AS
DRAG & DROP
Materials, Objects, and World datablocks are supported as part of the first milestone, with more planned to come on the next releases.
Download this Cube Diorama .blend file to play with the new Asset Browser.
AND MORE
GEOMETRY NODES
The procedural system introduced in 2.92 has been extended with a re-imagined method for designing node groups, a new attribute system, around 100 new nodes for interaction with curves, text data, instances, and more.
Discover a new concept for passing around data and functions. Introducing: Fields.
Operations can be built from basic nodes and simply connected together, removing the need for named attributes as a way to store intermediate data, and removing the need for special “Attribute” nodes for simple operations.
- Fields Workflow
- Named Attributes Workflow
“With fields it’s much easier to build node groups for higher level concepts that work together better than before. ”
”
Read More
AHEAD OF THE CURVE
Native curve data joins the Geometry Nodes party. Resample, fill, trim, manipulate the handles, set spline type, convert to mesh, or get started with the included curve primitives.
The Geometry Nodes modifier is now supported on Curve and Text objects with full support for the attribute system.
- Splines have
resolutionandcyclicbuiltin attributes. - Control points have
position,radius,tilt,handle_leftandhandle_rightbuilt-in attributes. - Attributes with any name or data type can be created or removed on splines or control points.
- Attributes can be interpolated between the two curve domains.
Read More
User Manual
MORE THAN WORDS
Got something to say? Use Geometry Nodes! Blender 3.0 brings the first milestone in Text Nodes.
The way geometry nodes works with instances has been improved, to make it more intuitive and much faster.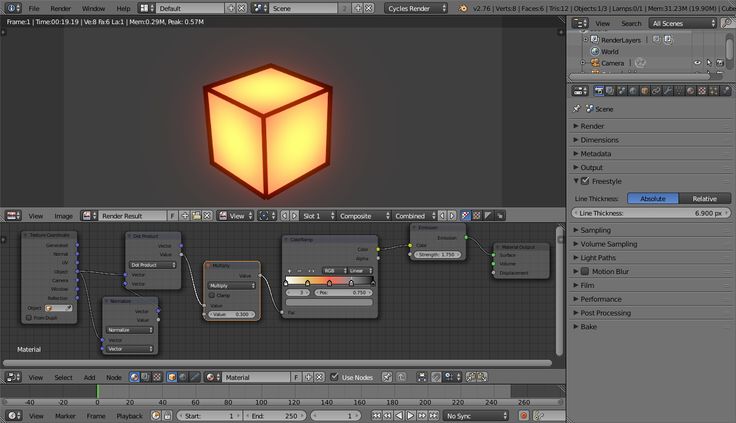
- Geometry can now be instanced directly.
- Mesh modifiers after geometry nodes no longer implicitly realize instances.
- Instances are now exposed properly to nodes, and aren’t converted to real geometry implicitly.
- The Realize Instances node can explicitly convert instances into real geometry.
Read More
Mesh attributes are no longer a Cycles exclusive, Eevee now fully supports attributes including those generated by Geometry Nodes.
OUT IN THE WILD
This week I made procedural power line generator with Blender's geometry nodes. It's controlled by a single curve.#b3d #geometrynodes pic.twitter.com/CzkuuLHSdV
— TomekS (@_TomekS) September 18, 2021
#geometrynodes fully procedural Castle Generator coming someday! #b3d pic.twitter.com/47adUmrEvh
— Miettinen Jesse / Blenderesse (@JesseMiettinen) November 29, 2021
#nodevember2021 days 9-10: round
Undulating curvy curves.
— crossmod (@crossm0d) November 10, 2021#nodevember #b3d #geometrynodes pic.twitter.com/VjAOogXNU6
haven't had much time for blender recently, but I made this autumn leaf thing with geometry nodes pic.twitter.com/6fqD0HluQ8
— Late as usual (@lateasusual_) November 12, 2021
#geometrynodes in #blender 3.0
— Bagattini Antoine (@BagattiniAntoi1) November 15, 2021
There is just one curve =) pic.twitter.com/cRqxUX2ZpN
#nodevember2021 21-22:Tiny / 23-24:Small
— Quackles3D (@Quackles3d) November 26, 2021
GN & Shader nodes#blender3d #b3d #blenderart #geometrynodes #nodevember #toytrain #choochoo pic.twitter.com/fK3jD6Bhns
USER INTERFACE
To celebrate the beginning of a new series, Blender 3.0 sports an updated theme, improvements, and a bunch of new options to further customize the already flexible layout system.
- Theme update focused on improving contrast.
- Panels now have customizable rounded corners and margin between panels to tell them apart more clearly.
- Several widgets have been tweaked for consistency, including menu items customizable roundness.
Corner action zones now allow joining any neighbors. Create new areas much more easily.
Additionally, these improvements were made:
- New “Close Area” option in the context menu.
- Hit size for area resizing has been increased.
- Better snapping of areas while holding Ctrl.
- Improved mouse cursor feedback when joining is not possible.
WHAT YOU SEE
IS WHAT YOU GET
The Video Sequencer now supports thumbnail previews!
- Enable it via the Overlay popover.
- Works with Image and Video strips.
- Preview while transforming.
- Threaded loading for performance.
It is now possible to transform strips directly in the preview region, just like in the 3D Viewport.
- New transform tools and gizmos.
- Press G, R, S for quick transforms.
- Supports axes snapping.
- All pivot points supported.
- Use the new 2D Cursor as pivot.
TAKE CONTROL
Blender 3.0 offers a brand new set of VR controller-based functionality, including the ability to visualize controllers and the ability to navigate one’s way through a scene in VR using controller inputs.
Three types of navigation (teleport, fly, grab) are now available via the built-in VR Scene Inspection add-on.
STRIKE A POSE
Making use of the new Asset Browser, the pose library system in Blender gets a massive revamp.
- Create or set poses directly from the 3D Viewport.
- Click-drag to blend into the pose.
- Right-click on a pose to select or deselect its corresponding bones.
- Quickly flip a pose with just a click.
Read More
- FCurve and NLA modifier properties can now be overridden
- New Keying Set: Location, Rotation, Scale, and Custom Properties
- Ctrl+F in animation editors use channel search
- Translation/rotation/scale options for custom bone shapes
- Remove Target Shear on Copy Transform constraint
- Box (or circle) select on FCurves
- Make object data single user
- Limit Rotation Euler Order
- Improved Restrict Range Borders on FCurve modifiers
- Blend To Neighbour Pose Sliding
- Update All Visible Motion Paths
- Added Scale Y for bendy bones
- Automatic B-Bone Scale toggles
- “Local Space (Owner Orientation)” for Target Space of bone targets
- “Apply”, “Duplicate”, and “Copy constraints to selected”
- Limit Rotation now removes shear before processing
- More Mix mode options in Copy Transforms, Action constraints
- Stretch To default Rotation Type set to Swing
- Pose Sliding / In-Betweens Tool
See all Animation & Rigging updates
GREASE PENCIL
The 2D animation workflow keeps getting better with new modifiers, a polished drawing experience, and Line Art performance has been greatly improved since the last release.
DOT DASH
This new modifier allows you to generate dot-dash lines on strokes automatically, assign different materials, offset, and more.
- Textured Effect Demo
- Design Demo
See all Grease Pencil updates
QUICKSAVE
Loading and saving compressed .blend files is now magnitudes faster
thanks to using the Zstandard algorithm instead of gzip.
Load Fast
-
2.92 splash
-
2.81 splash
-
Ember Forest
-
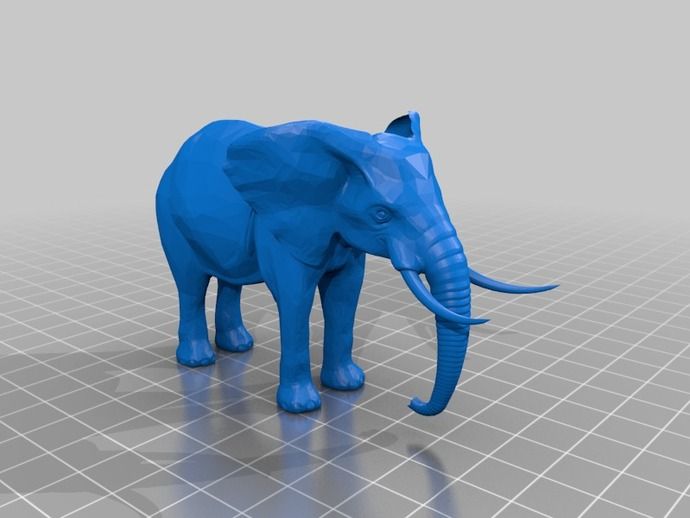
Mr. Elephant
Loading compressed .blend files.
- Unit: seconds
- Blender 2.93
- Blender 3.0
Save Faster
-
2.
 92 splash
 -
2.81 splash
-
Ember Forest
-
Mr. Elephant
Saving .blend files with compression.
- Unit: seconds
- Blender 2.93
- Blender 3.0
Read More
TEAM PLAYER
Interoperability takes a leap forward in 3.0 with the support for importing Pixar’s Universal Scene Description and improvements to Alembic.
The first milestone for importing USD files is here:
- Meshes with UV coordinates, Vertex Colors and Subdivision.
- Cameras, perspective and orthographic.
- Curves including USD Basis and NURBS.
- Volumes as OpenVDB field assets.
- Materials, including an experimental feature to convert shaders to Principled BSDF.
- Lights, does not include USD Dome, Cylinder, Geometry.
Read More
- Support for exporting animated UV maps.
- Import per vertex UV maps.
- Import and export support for generated mesh vertex coordinates (ORCOs).
- New Render and Viewport evaluation modes.
Read More
Read the full list of changes at wiki.blender.org
List of developers that contributed to Blender 3.0
Blender 3.0 splash and interline images by Blender Studio. Cycles noise comparison by Jesus Sandoval. Grease Pencil artwork by Ikarus. Cycles Shadow Catcher balloons demo by Andy Goralczyk. Asset Browser Cube Diorama by Simon Thommes and Julien Kaspar.
Reel video by Francesco Siddi. Page design and layout by Pablo Vazquez. Features video by SouthernShotty. Additional help by Blender Institute, and the Blender community.
Huge thanks to everyone involved ♥
Blender is and will always remain free, forever.
Releases are possible thanks to the members of the Development Fund.
Join today and help to ensure the future of Blender for $6/month
Join the Blender Development Fund
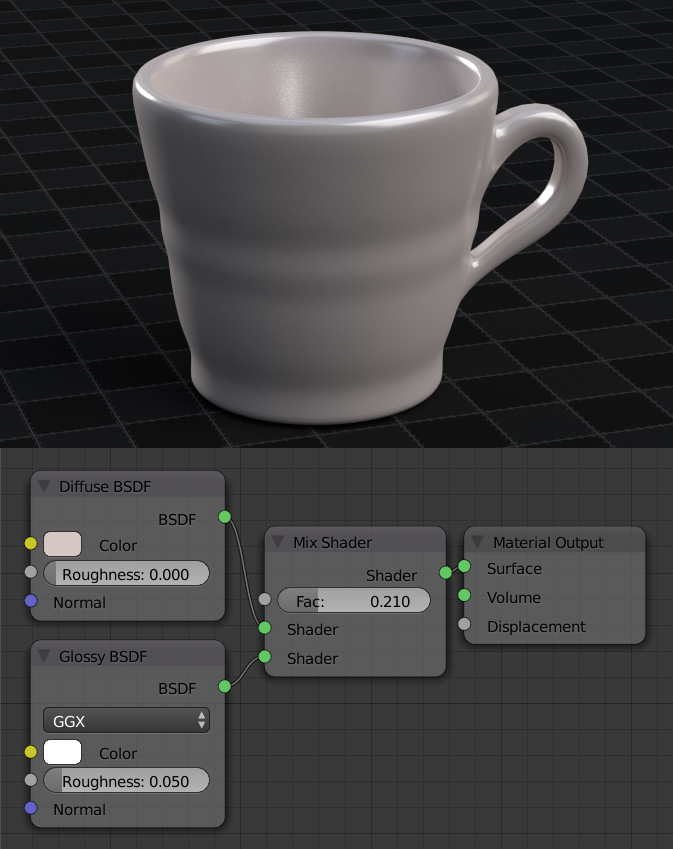
3D printing with Blender
3D printing is a variant of creating an object from scratch according to a pre-existing 3D drawing using the layer-by-layer fusing method. 3D printing allows you to achieve the greatest material savings.
The creation of 3D models is a very versatile issue, and therefore it is not possible to consider it within the framework of a short article. The following describes how already, if not completely finished, then at least a "template" 3D model is being prepared for printing using the Blender program. nine0003
Find open fields
When you have a 3D model created by joining objects or polygon meshes, you first need to know for sure that each part of such a model has absolutely closed edges. To do this, you need to turn on the edit mode by pressing A (once to select any border, twice to deselect), then you need to use the Ctrl-alt-shift-M key combination (on Macintosh operating systems - Ctrl-opt-shift-M ). Go ahead, every open border will be marked. Very often, to correct this error, it is necessary to make another plane with 3-4 borders (F button). nine0003
It happens that wandering edges come across, either not attached to anything, or connected to only one top of the edge. Often such borders are removed without any doubt, except when they are really needed. For example, when they are used to modify a special shape pattern using the Subsurf modifier. In this situation, you must first use this editor, and then remove the useless borders. Also, do not skip open boundaries, which are a particle of intersecting planes. nine0003
It is worth reviewing the edges of all faces marked as open. It is possible that some of them are wrong - either created in the wrong direction (see image above), or have nothing to do with the polygon mesh. Then you need to delete this block and recreate it further manually.
There is one trick that greatly simplifies all the work - you need to mark open areas by right-clicking on the edges and holding down the Ctrl key. Thus, it is possible to mark not only open borders, but also the areas near them. Then click shift-H to hide the other borders. In this way, not open particles of the model will be hidden, and it will be much easier for you to remove all the imperfections. nine0003
Cleanup: Connect the meshes using the Booleans modifier.
Once all meshes are closed, check that they all form one object. You cannot use Booleans modifiers on polygon meshes that refer to the same objects. There is also the ability to separate meshes by selecting all their faces and clicking P. Then select one vertex, then Ctrl-click to select all the others. To select all polygon meshes of one object, press P and click on the "By Loose Parts" function (Unrelated parts). nine0003
After all the meshes are separated, check that they are not open, save the project and a copy of the blender file to create a printable version of it.
After opening the copied file, select each of the objects to be processed one by one. Once you're in object mode, use all the necessary modifiers. Then enter edit mode by pressing the A button once or twice to select all borders. Then press Ctrl-T to triangulate all surfaces. nine0011 Go back to object mode, select the two meshes that intersect each other and click W. Then click on the Union option, then the meshes will be connected (this function does not delete the sources). The connection process takes some time.
Select a new one from connected objects, go to edit mode. You need to press the A key once or twice, then use Ctrl + Alt + Shift + M to select the uncovered areas. In edit mode, such errors are not at all difficult to correct. As a rule, connecting polygon meshes eliminates the problem of open areas, but it is still better to check the model. nine0003
Then select entire meshes and triangulate again. Upon completion, the mesh will be fully prepared for further merging if necessary.
When two meshes have incommensurable face density, subdivision occurs in the part with the fewest vertices. Then the polygon mesh needs to be triangulated, that is, rebuilt into triangles (Ctrl-T). Blender can significantly “slow down” at the same time, these are its features. After merging, always save and only then remove areas that are not closed. nine0003
Finally, set the desired size (scale) for the model and the file can finally be exported to STL - it is absolutely ready for 3D printing.
Don't forget to enable the "3D Printing Toolbox" module in the Blender settings on the Add-ons tab. When enabled, a new 3D Printing tab will appear on the toolbar with tools that make it easier to prepare a model for printing.
Like it? Show your friends!
3D print with Blender
3D print with Blender nine0046 What is 3D printing? 3D printing is a way to create a specific object from scratch according to a given three-dimensional drawing using the layer-by-layer deposition method (if we talk about FDM technology). In metallurgy or mechanical engineering, parts are obtained by turning, using various cutters and cutters. With this approach, a significant part of the material is wasted. When using 3D printing, maximum material savings are achieved.
3D printing technology is far from new. It has existed for more than 30 years, but only recently has it made a significant leap forward and has become widespread. This happened mainly due to its significant reduction in price and in connection with the spread of home 3D printers. Along with this, a lot of services have appeared that provide 3D printing services, in case the capabilities of a home printer are not enough, or it does not exist at all. nine0003
List of lessons
- 1 Introduction
- 2 3D printing applications
- 3 Printer types and companies
- 4 3D printing technologies
- 5 Blender setup and units
- 6 Scale parameter
- 7 Basic model check (non-manifold)
- 8 Version overview 2.67
- 9 Solid and bad contiguos edges checks
- 10Intersections
- 11 Bad edges and edges (Degenerate)
- 12Distorted
- 13Thickness
- 14Edge sharp
- 15 Overhang
- 16 Autocorrection
- 17 Model information and size
- 18Hollow models
- 19Export models
- 20Color model (vertex color)
- 21 Texture paint
- 22 External texture model
- 23 Texture baking (bake)
- 24 Tiger model overview
- 25Model overview tour
- 26 Pirate model overview
- 27 Factors affecting accuracy
- 28Myths
- 29Recommendations
- 30Conclusion
Excerpt from lesson
Blender Version
This course was written in Blender 2.73! The differences from Blender 2.8+ are only in the location of the buttons, not their functionality. Therefore, the course is subject to a 33% discount (due to version differences).
Frequently Asked Questions (FAQ)
- 1 What level of knowledge is required to complete this course?
- 2 Where can I contact if I have problems with payment/download?
- 3 On what OS can I watch this course?
- 4 Is there a physical version of the course?
- 5 What payment options are available for this course?
- 6 Can I pay for the book with PayPal?
By and large, advanced knowledge of Blender is not required to successfully complete this course. All actions are explained in detail and difficulties should not arise. But I recommend that you before purchasing this course, take a free course on the basics of Blender. Information about it can be found at the very bottom of this page. nine0003
If you have any questions, please send an email describing the problem in as much detail as possible.
This course can be run on any OS (Windows, Linux, Mac).
No, the course is only distributed electronically. Course size ~ 2.4 GB. nine0003
You can pay for the course through a Visa/MasterCard bank card or from an electronic wallet in the Yandex.Money system. You can also pay for the goods using the 4 most popular cryptocurrencies, namely: Bitcoin, Ethereum, Bitcoin Cash and Litecoin.
Yes. Send me an email and I'll show you how to do it. nine0003
What you will learn from this course
The goal of this course is to teach you how to create printable 3D models with Blender. Most of the lessons are devoted to the topology of the created objects. This is the most important part when designing a model for 3D printing as not every model can be printed and certain rules must be followed.