Artillery sidewinder x1 3d printer v4 newest model
Artillery 3d printer sidewinder x1 V4 version & New arrials of Hornet 110V yellow bee family machine
Artillery 3d printer sidewinder x1 V4 version & New arrials of Hornet 110V yellow bee family machineWe use cookies to improve your online experience. By continuing browsing this website, we assume you agree our use of cookies.
Your position: Home / 3D Printer
Newsletter
About the latest offers and deals Subscribe today!
Sort by: Most PopularSalesFavoritesNewPrice
-
-
Quick View
10%
OFF Sale -
Artillery® Genius 3D Printer Kit 220*220*250mm Print Size Ultra-Quiet Stepper Motor TFT Touch Screen Ship From Moscow & USA
$279.
00
$309.00Add to Wishlist (96)
-
Quick View
6%
OFF Sale -
Artillery SW-X2 Newest Version ABL Auto Calibration 3d Printer 300*300*400mm Larger Printed Size 11.81*11.81*15.75 inches High Precision 0.05MM FFF
$439.00
$469.00Add to Wishlist (2)
-
Quick View
6%
OFF Sale -
Artillery® Genius Pro 3d Printer Titan Direct Drive Type 8.
 66*8.66*9.84 Inch Build Volume 0.1-0.35mm Resolution Ultra-quiet Stepper Motor 250mm/s TFT
$329.00
$349.00Add to Wishlist (2)
-
Quick View
10%
OFF Sale -
Artillery 3D Printers Hornet 220*220*250mm Printed Size Ultra-quite Printing 32bit Mainboard & DC Heat Plate 0.4mm Nozzle Temperature 180℃ up to 240 C
$179.00
$199.00Add to Wishlist (10)
Newsletter
- YouTube
- VK
Artillery 3d Printers Hornet 220*220*250mm Size Ultra-quite Printing 32bit Mainboard & DC Heat Plate 0.
 4mm Nozzle Temperature 180℃ up to 260 Degree SD
We use cookies to improve your online experience. By continuing browsing this website, we assume you agree our use of cookies.
PDF Format
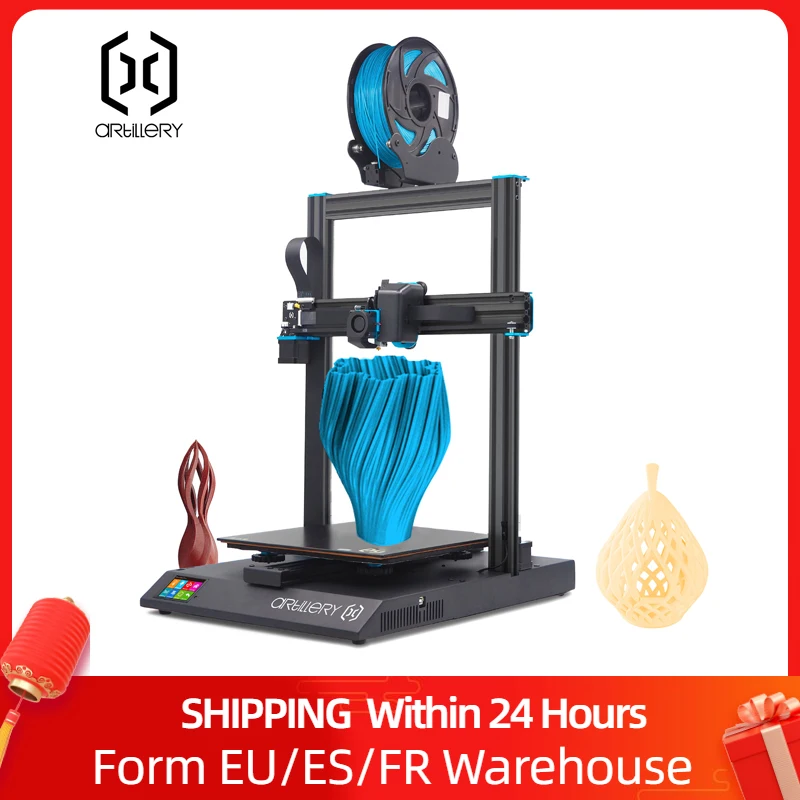
This is a new style of 3d printer, with black & yellow color , and we all call it " Artillery Hornet ".
It is Easy Assembled (90% assembled), In-house developed 32bit mainboard.
The features: Ultra-quiet printing; Easy retrieval of prints ; Easy Connec
- Description
- Artillery Hornet 3d printer 220*220*250 0.4mm Nozz
- Reviews(10)
Welcome To Artillery 3D Official Store !!!
Hello friends, welcome to our Artillery 3D Official store.
Hornet has stock in our CN/US/EU/Russia ware-house.
Order from US/EU/Russia countries will be arranged shipment in normal way within 3-5 working days.
Package Included :
1x Artillery® Hornet 3D Printer Kit ;
1x Accessory & Tools Kits Bag ;
1x Memery Card ...
- 5 star100%
- 4 star0%
- 3 star0%
- 2 star0%
- 1 star0%
Average rating: 5.0 based on 10 reviews
Share your thoughts with other customers
Write a review
Product reviews can be carried out after the member login, please click here to login
-
Artillery® Genius 3D Printer Kit 220*220*250mm Print Size Ultra-Quiet Stepper Motor TFT Touch Screen Ship From Moscow & USA
$279.00
$309.00
-
Artillery SW-X2 Newest Version ABL Auto Calibration 3d Printer 300*300*400mm Larger Printed Size 11.
 81*11.81*15.75 inches High Precision 0.05MM FFF
$439.00
$469.00
-
Artillery® Genius Pro 3d Printer Titan Direct Drive Type 8.66*8.66*9.84 Inch Build Volume 0.1-0.35mm Resolution Ultra-quiet Stepper Motor 250mm/s TFT
$329.00
$349.00
Artillery
Hornet Instructions for installation
Artillery 3D Printer
Read me the first
Complete the assembly and included in the assembly and the inclusion of the printer!
HAZARDS AND WARNINGS
The Artillery Hornet 3D printer has motorized and heated parts.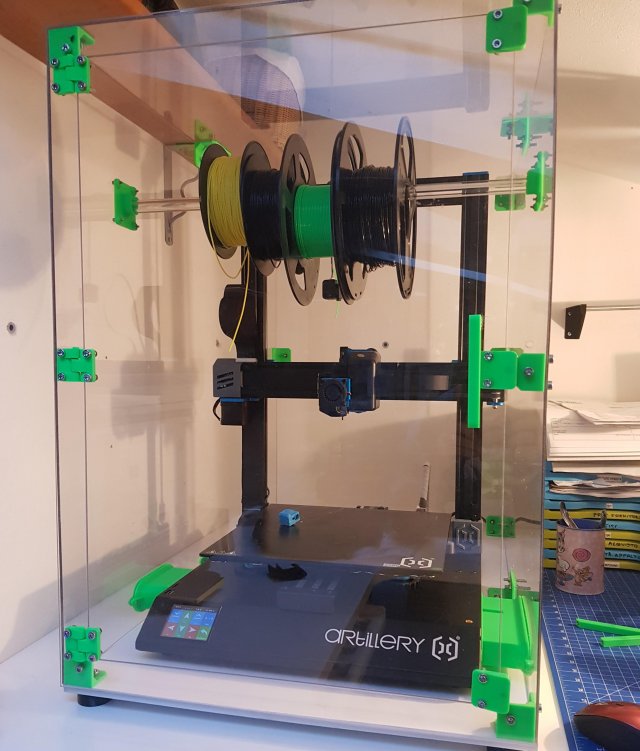 When the printer is in operation, always be aware of the possible
danger.
RISK OF ELECTRIC SHOCK
Never open the printer electronics compartment while the printer is on. Always turn on the power before removing the protective panel.
Turn off the printer and unplug the AC power cord.
FIRE HAZARD
Never touch the extruder nozzle, heating block, or heated bed without first turning off the hot end and heated bed and allowing it to cool completely. It can take up to twenty minutes for the hotel and heated bed to cool completely. Also, never touch newly extruded fibers. The thread may stick to the skin and cause burns. nine0005 FIRE HAZARD
Never leave flammable materials or liquids on or near the printer while it is turned on or in operation. Liquid acetone and vapors are highly flammable.
SAFETY HAZARD
When the printer is in operation, be careful not to touch any moving parts, including belts, pulleys, gears, wheels, or lead screws, with your fingers.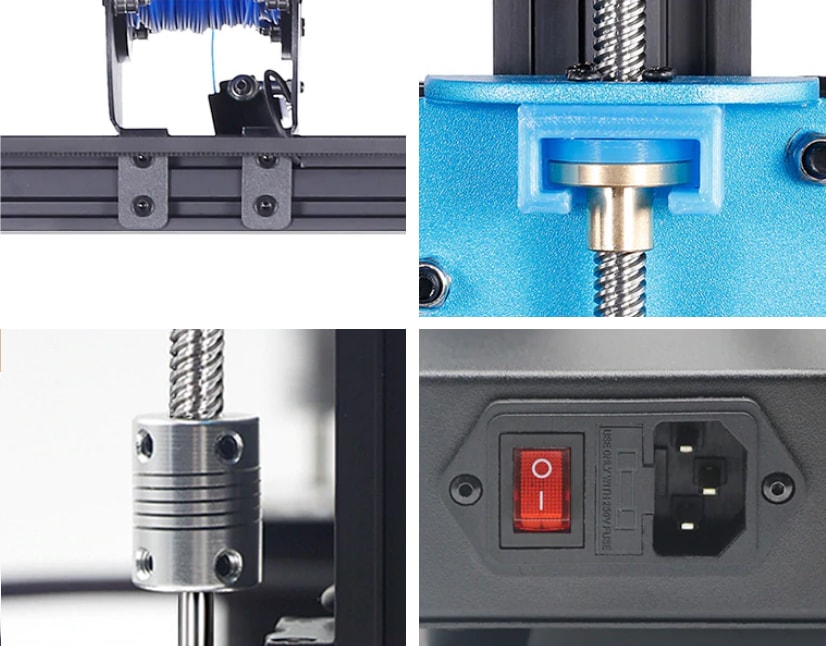
STATIC
Be sure to ground yourself before touching the printer, especially electronics. Electrostatic charge can damage electronic components. To ground yourself, touch a grounded source. nine0005 AGE WARNING
Adult supervision is recommended for users under 18 years of age. Beware of choking around children.
LEGAL
PRODUCT WARRANTY
The Artillery Hornet 3D printer is covered by a limited warranty. Terms of use see https://desk.zoho.com/portal/evnovo/en/kb/articles/evnovo-limited-warranty
GENERAL
All information in this User Guide (the "Guide") is subject to change at any time without notice and is provided as a convenience only. Shenzhen Yuntuchuangzhi Technology Co., Ltd. and our respective affiliates and suppliers ("Artillery") reserve the right to change or revise this Manual at its sole discretion and at any time and undertakes no obligation to provide any such changes, updates, enhancements, or other additions to this Guide in a timely manner or at all.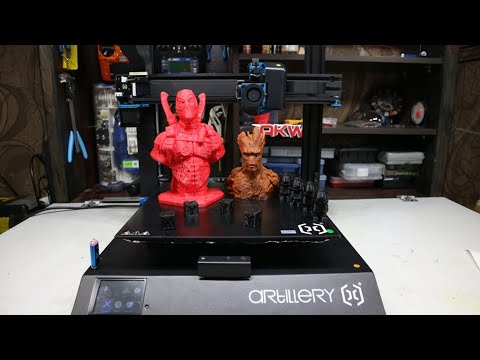 You agree to any changes and/or corrections. Contact the artillery support team for the latest information. nine0014
INTELLECTUAL PROPERTY
The design of this manual and all text, graphics, information, content and other materials are protected by copyright and other laws. The contents are copyrighted by 2020 Artillery. All rights reserved. Certain trademarks, trade names and logos (“Marks”) used in this manual are registered and unregistered trademarks, trade names of Artillery and its subsidiaries. Nothing contained in this Manual grants or shall be construed as granting, by implication, estoppel or otherwise, any license or right to use without the written permission of Artillery. Any unauthorized use of any information, materials, or Marks may violate copyright laws, trademark laws, privacy and publicity laws, and/or other laws and regulations. nine0014
DISCLAIMER
Artillery does not warrant the accuracy or completeness of the information, products or services provided by or through this Guide, and shall not be liable for any typographical, technical or other inaccuracies in this Guide, which is provided "as is" and without any - any express or implied warranties of any kind, including warranties of merchantability, fitness for a particular purpose, or non-infringement of intellectual property rights. In connection with your use of this Manual, Artillery shall not be liable to you for any damages, whether direct, economic, commercial, special, consequential, incidental, exemplary or consequential damages, even if Artillery has been advised of the possibility of such damages, including, without limitation, loss of business revenue or profits, loss of data or lost profits. Artillery is not and will not be liable for any damages or any viruses or malware that may infect your computer, telecommunications equipment or other property caused by or resulting from your downloading of any information or materials related to this Guide. The above exclusions do not apply to the extent prohibited by law, please refer to your local laws for any such prohibitions. nine0014
LETTER FROM ARTILLERY
Dear Customer,
Thank you for choosing the Artillery Hornet 3D Printer.
This guide will guide you through the assembly and first start of the printer. If you experience any problems during assembly, please contact our customer support team or visit our official Facebook group at: https://www.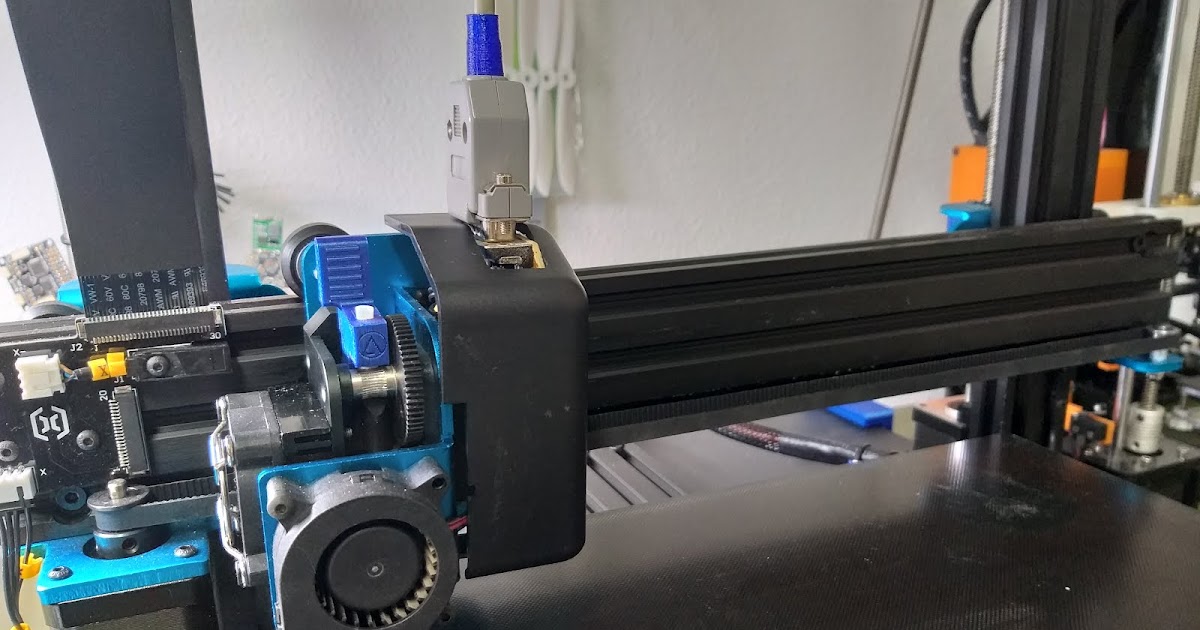 facebook.com/groups/artilleryhornet/
For warranty details, please visit https: //desk.zoho.com/portal/evnovo/kb/articles/evnovo-limitedwarranty
For support, send an email to [email protected] or visit our ticket sales page at https://desk.zoho.com/portal/evnovo/newticket Or you can visit our Facebook group at https:/ /www.facebook.com/artillery3d Regards Artillery
Shenzhen Yuntu Chuangzhi Technology Co., Ltd.
Last Updated: 29
This manual was updated as of the date of printing. If in doubt, please refer to the electronic version. nine0014
ACCESSORIES CHECKLIST
INSTALLATION
STEP 1
M5x25 pre-mounted on base.
STEP 2
Insert the spool holder into the slot on the base as shown in the figure below and press it into place:
STEP 3
stepper motor Z and finally connect the main cable. nine0014
STEP 4
Mount the hot end to the carriage using the M3x6 screws (3 pcs) supplied in the tool bag.
STEP 5
Connect the extruder cable, tighten the cable by turning the locking mechanism.
STEP 6
If necessary, adjust the tension of the eccentric nuts using the wrench provided.
LEVELING BUILDING PLATE
To print good detail, the build plate must be level and the nozzle must be approximately 0.1 mm from the build plate at all points. This is approximately the thickness of one sheet of A4 paper. You want to adjust the height of the build plate so that you can easily move the paper between the nozzle and the build plate with little resistance.
- Select Temperature -> Preheat PLA -> Preheat PLA. This will heat up the bed and nozzle under actual printing conditions, making the alignment more accurate. Wait 1 minute after the machine reaches the set temperature. nine0137
- Select Motion -> Level Corners. This will first return the machine to its original position and then move the nozzle to the first corner.
- Insert a sheet of A4 paper between the nozzle and the worktable.
- Turn the leveling knob under the bed closest to the nozzle until the sheet of paper moves with little effort.
- Select "Next" to move to the next point and repeat step 4.
- Alignment is complete when all 4 points are equalized. nine0137
- You can repeat steps 5-6 2-3 times for better results, as adjusting one corner will affect other corners.
- You may need to fine tune the bed level when you start printing. The first print layer will show if the distance between the nozzle and the build plate is correct. You want it to be slightly pressed into the surface of the build to maximize surface area contact while still maintaining good extrusion flow.
• You can try to carefully adjust the alignment knob during the first layer of printing when the plate moves until there is no distance between the nozzle and the assembly and the plate creates smooth embossed lines. nine0005 • After fine-tuning the platform level during the first layer, you can stop printing, clean the build plate, and restart printing.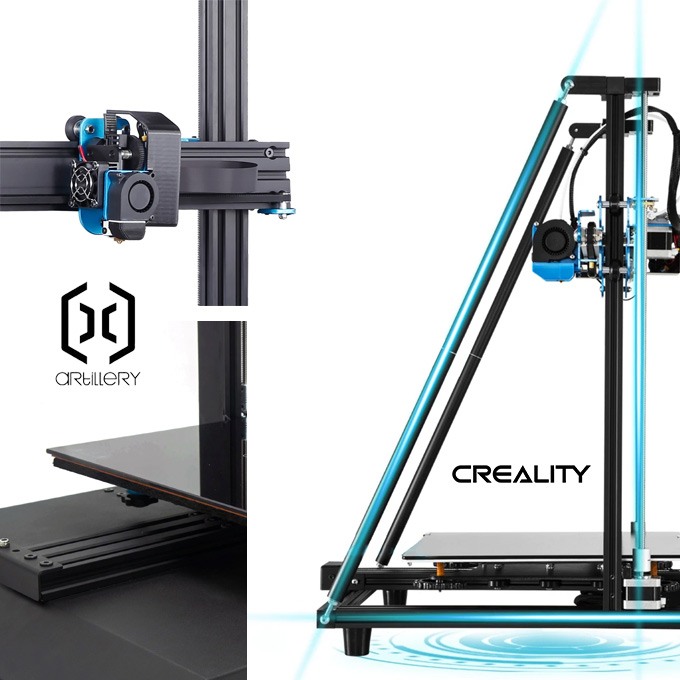
PREPARING THE SLICING SOFTWARE
This printer works with most slicing software such as Slic3r, Cura, Simplify3D, etc. But we will take a closer look at the Cura software and show you how to set it up so you can make your first print . First, we recommend that you install the software on the included memory card, for other operating systems, please download from their official website. nine0005 After installing and running the software, you should see the following screen, continue until you see the Add Printer page:
In Add a non-network printer scroll down to Custom and select C Custom FFF Printer and enter A Artillery Hornet in Printer Name. Then click on the next button.
Fit X (width) , Y (Depth) as 220, Z (Height) as 250. Make sure Heated Bed is checked, then copy and replace the start G-code content. txt and End of G-code.txt on the memory card into the appropriate fields.
Change compatible material diameter to 1.75
On the toolbar, click Settings -> Customize Cura…
Click on 9000 Profiles0004 then click the "Import" button.
Go to memory card and import profile files.
Profile imported successfully.
Click Print Options, a pop-up window will appear.
From profilefile, select the imported profilefile from the drop-down list.
Drag and drop STL file (or other supported format) into slicer or load model file with File -> Open File(S) ... Then press the "Slice" button.
You can click the Save to removable disk (if a memory card is detected) or Save to file button to save the sliced file to the memory card.
Save file to memory card for printing.
Characteristics
016
| Support | desk.zoho.com/portal/evnovo/en/newticket At Artillery, we pride ourselves on offering skilled, responsive and friendly customer support around the world. If you need help solving a problem with your Artillery 3D printer, please visit the web address above to submit a ticket. |
| SALES | [email protected] For other artillery products, please send an email to the above address. nine0245 |
| Feedback | [email protected] For general inquiries or to let us know what's on your mind, please send an email to the address above. We are happy to hear from you. |
Documents / Resources
Recommendations
- desk.zoho.com/portal/evnovo/newticket
- desk.zoho.com/portal/evnovo/en/kb/articles/evnovo-
- desk.zoho.com/portal/evnovo/
- desk.
 zoho.com/portal/evnovo/kb/articles/evnovo-limited-
 - desk.zoho.com/portal/evnovo/en/newticket
- Artillery Hornet 3D Printer 110V Remote Extruder / Exclusive SW-X220 and Genius Super Quiet Stepper Driver New Version Printers Direct Drive Extruder
- Go to Facebook
- Artillery Hornet 3D Printer Owner Group [Official]
3d printer Artillery Sidewinder X1
Hi all.
On the review is an interesting 3D printer from Artillery. This printer compares favorably with those that I already had on the review. It has a heated table from 220V, inductive limit switches and a USB connector! Read more under the cut :)
Assembly and setup is very fast, because. The printer comes almost assembled. Only 4 bolts and the printer is assembled, 4 more and you can put a plastic coil. It took me about 10 minutes to assemble, a little more for the initial setup, maybe 20-30 minutes. nine0005 After all, it will turn out to collect such a handsome man.
Specifications:
– printer dimensions (with reel) 550x405x870mm
– print area 300x300x400mm
— power supply: 24V 10A 240W
- mks gen L board with FS31W01 drivers (TMC2100 clone)
- nozzle heating: up to 270 degrees
– table heating: up to 150 degrees, from the mains 220V
– extruder: Titan, direct !
Hotend: Volcano
- nozzle diameter: 0.4 mm
— filament end sensor
The first problem I encountered was a really huge printer box. I have one printer with the same printable area, but the box is still smaller. Its size is 78x54x25cm. You just imagine these dimensions.
It would seem, well, what's wrong with that, it seems to be not very big. And now, for comparison, the box with the Ender 3 pro on top. Notice the difference?)
Not just because the box was big, the manufacturer took very good care of the safety of his 3D printer. nine0005 You can judge the quality of the packaging from these photos. There are corners made of pressed cardboard, and a huge amount of protective material. The printer is stacked in 2 levels.
Let's start with the base of the printer. It consists of a bent aluminum sheet in which all the electronics are hidden and the base of the frame, on which the top of the printer is mounted. The movement of the table is carried out on a wide aluminum profile 60x20 with the help of 6 rollers! A wide aluminum profile is good, but 4 rollers would be enough, there is not much use from the two central ones. nine0005
Closer to the left side is a TFT color screen. Next to it are slots for microSD cards and a normal USB flash drive.
A little further there are connectors for connecting the Z-axis limit switch and the main printer cable.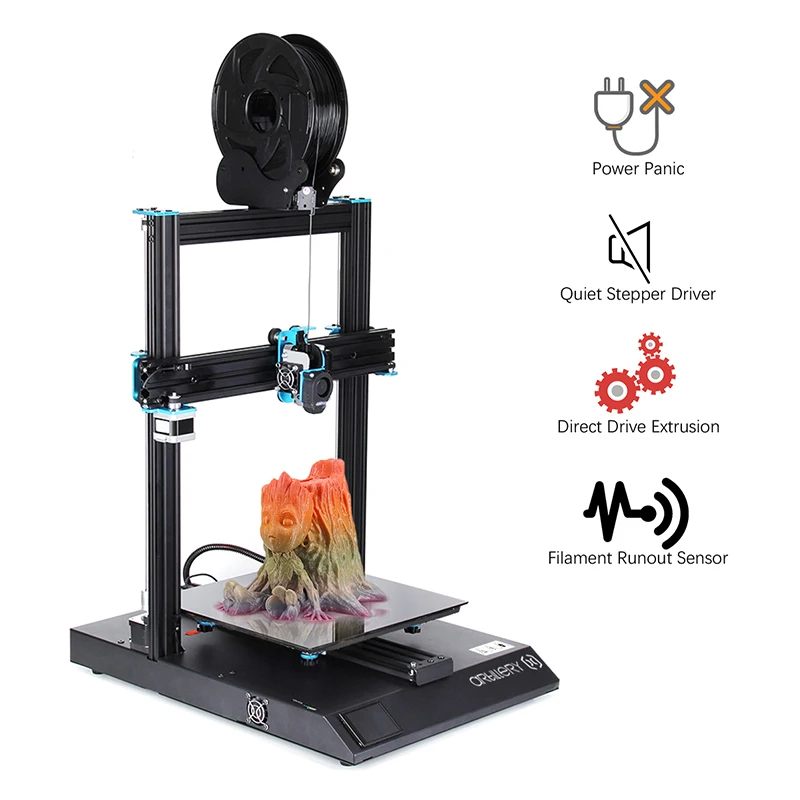
The right side of the printer has air vents and a USB B connector for connecting to a computer.
There is a fused power connector on the back of the printer.
The printer uses Sunx GL-8H inductive limit switches. nine0005
The first thing I decided to do was to adjust the rollers of the table, for this it was necessary to remove the table with the heating element. This is what the table top looks like.
And here is the table itself from the back. This is ultrabase glass with a heating pad from 220V glued on it and thermal insulation. This printer does not use an ordinary sandwich of an aluminum table and glass on top, there is only glass with bolts soldered (pasted) into it. Glass is very expensive (about $40 and without a heating pad), so you should handle it very carefully. nine0005
Now for some printer electronics.
The printer is based on a Makerbase MKS Gen L v1.0 board. This board is based on an 8-bit Atmega2560 microcontroller.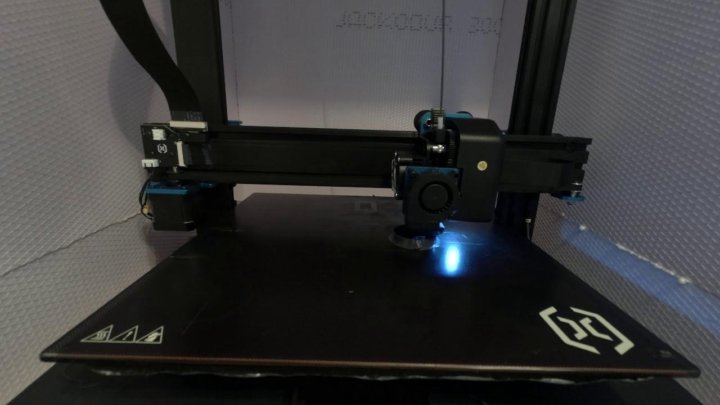 As you can see in the photo, all connectors are fixed with hot glue. The wires connected to the terminal blocks are crimped with lugs. Silent drivers FS31W01 (TMC2100 clone) are used.
Connector marking.
Screen board labeled TFT Controller v1.0, this is a simplified MKS TFT28 board. The board's control microcontroller is a 32-bit STM32F107. There is a wifi symbol on the board. And the board can really work with wifi, you just need to unsolder the IDC 2x4 SMD connector, connect the board with wifi and fix a little config in the screen firmware. nine0005
config
#wifi model(MKS WIFI TFT:0; MKS HLK-WIFI:1) >cfg_wifi_type:0 #wifi mode(0:sta;1:ap) (STA is a client for its network, AP is an access point will make its network) >cfg_wifi_mode:0 #wifi name and password (Your network name and password) >cfg_wifi_ap_name:Art >cfg_wifi_key_code:12345 #0:disable cloud service 1:enable cloud service (To use the cloud) >cfg_cloud_enable:0 #cloud service address >cfg_wifi_cloud_host:www.baizhongyun.cn #cloud service port >cfg_cloud_port:10086 #Dynamic access IP (If 1 - then assign DHCP IP, if 0 then static, write below) >cfg_ip_dhcp_flag:10 #IP/mask/gateway (Here your IPs are static, if DHCP is disabled in the line above and is set to 0) >cfg_ip_address:192.168.1.150 >cfg_ip_mask:255.255.255.0 >cfg_ip_gate:192.168.1.200
Thanks Alevpi from w3bsit3-dns.com
Power supply 24V 10A marked ZL-CB240-24. The wires are crimped, everything looks good.
40A solid state relay for table warmer.
Adapter plate for thin cable.
Electronics blower.
Now consider the top of the printer. It is supplied already assembled. nine0014
General view is shown in the photo. There are 2 motors per Z axis.
The two Z-axis screws are synchronized with a belt drive.
First and second Z-axis motors.
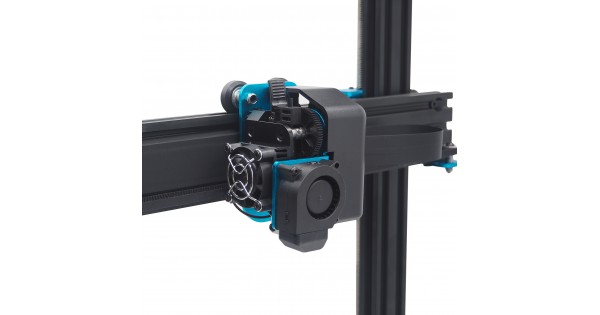
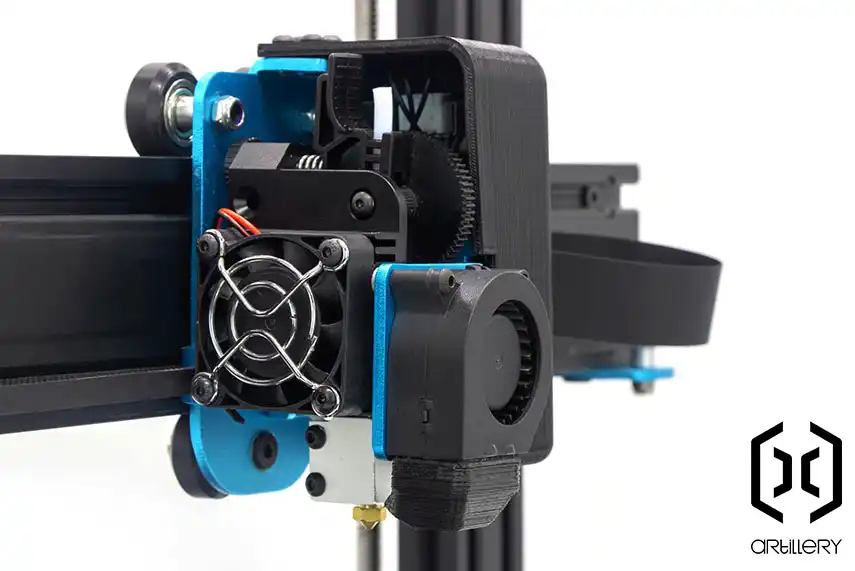
Complete printing mechanism. The printer uses 2 flexible cables. The first is laid on the Z axis and connects the main control board to the distribution board, and the second is on the X axis and connects the distribution board to another such board directly in the printhead block. nine0005
Uses Volcano hotend, silicone sock on thermal barrier. An rgb LED is installed to illuminate the print area. The entire board is covered with a decorative cover. In this version of the printer, it is no longer printed, but cast.
A cable is connected to the distribution board of the printing unit on one side, and on the other side all load elements (fans, hot end heater and temperature sensor, extruder motor and backlight LED.
Titan 9 is installed0447 direct extruder. Direct is good because it allows you to print with flexible plastics without problems. The gear is pretty aggressive.
Contents .
We have waste paper, a plastic spool holder with a filament breakage sensor, a power cable and a bag with a tool.
The purse contained the following: USB cable for connecting the printer to a PC, 2 spare cables, 2 spare rollers, a spare backlight LED, a 0.4 mm nozzle, a piece of Teflon tube, a usb flash drive, a quality key 8-10, bolts for connecting the printer base and upper part, bolts for installing a filament spool holder, a set of hexagons and more. We did not forget about spare bolts, there are 3 different types of them. nine0005
Assembly
The printer is very easy to assemble. He fastens the base and the top of the printer with long bolts, then fixes the coil holder with short bolts and that's it, you can get to work.
! Important. Check all rollers for play and tighten them. And in general, it is better to pinch all the bolts, which I did just in case.
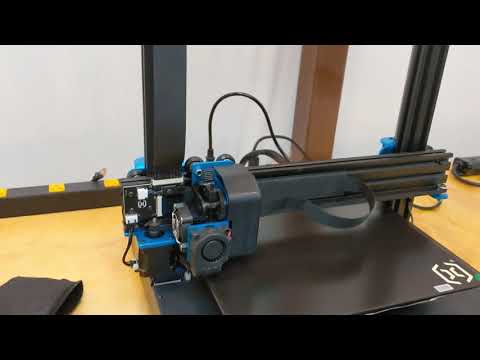
Assembled printer at his workplace.
General description and features.
The screen functionality is significantly cut by the manufacturer and many goodies are not available out of the box.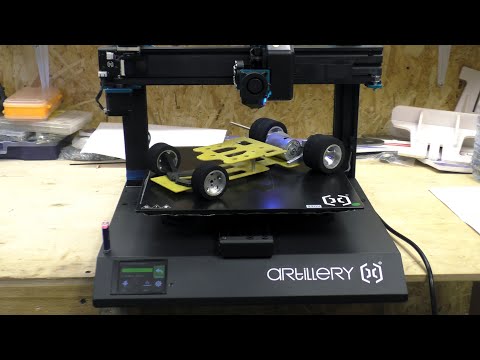 Here eeprom is blocked, there is no LA, and there is no corny Z-offset. But enthusiasts have already made several versions of ready-made firmware for both the main board and the screen. Yes, here they are stitched separately. They are already unlocked with the necessary functions and can easily be connected to BL Touch for automatic table leveling. The best part is that you don’t even need to run any additional wires, you can connect it instead of an rgb LED. By the way, without any problems, you can add your own menu items with certain gcode commands. nine0014
One of the problems I encountered while printing was the nasty squeak of the cooling fan at low speeds. Most likely this is a PWM controller, or the fan itself does not support PWM, I don't know. The squeak comes from the fan itself. There is no squeak at maximum speed.
The table heats up to 100 degrees in just 2m 30s. This result is achieved by using a table heater from 220V.
The printer does not have an auto level, so the table alignment is done manually using 5 points.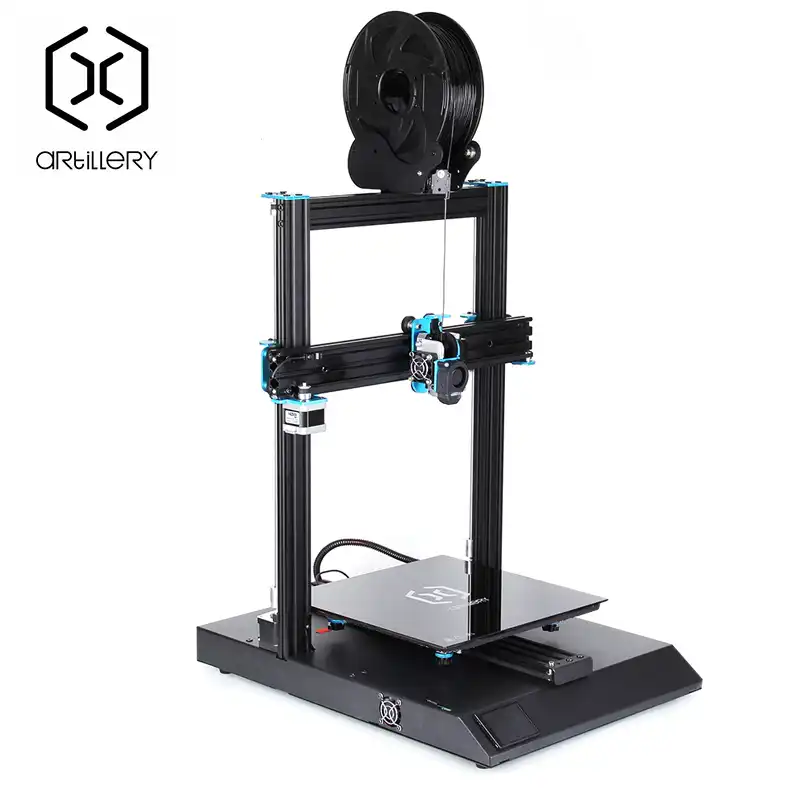 nine0014
Print examples
In all models layer height 0.2mm, speed 60mm/s, Cura slicer.
Test cube made of red translucent petg.
Blue pla vase, spiral print, wall thickness 0.8mm. Very nice layering. It is in the vase mode that the printer mechanics work exclusively, the slicer errors are reduced to 0.
The slope was too large from above and there was not enough airflow, so there are small jambs. nine0005
Reindeer made of pla plastic. Printed entirely without support. There is striping on the model, either the model was cut badly in Cura, or there is a slight skew with the Z axis. I will figure it out.
Initially I printed petg on a clean table, but often the corners of the model came off the table and deformed. Now I use a special glue for 3D printing and there are no such problems anymore, the part is holding tight. When using glue, you need to wait for the table to cool down and only then remove the printed part.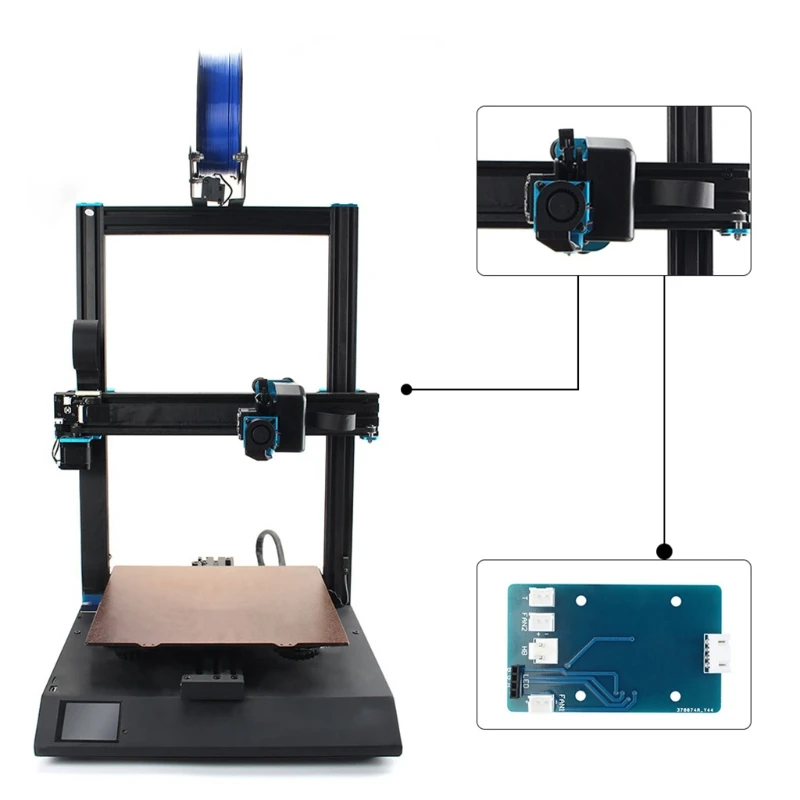 nine0014
Lately I don't like Cura, it often degrades print quality and I would like to completely switch to another slicer like simlyify3d.
Links :
Original printer and screen firmware.
STL modification models:
Reel holder modification
X-axis profile caps
Y-axis profile cap
X-axis cable clamp
Z-axis cable clamp
Upgraded airflow
Bonus
904.85 In fact, just replacing the icons, if the relatives are not satisfied. Just download the required file, extract the files to a USB flash drive and upload to the printer. Upload to a flash drive in the root directory. nine0014
An interesting application for previewing stl files on computer .
github.com/unlimitedbacon/stl-thumb/releases
Short video of vase printing.
Video with 3D animation from the manufacturer.