Abs juice 3d printer
How To Make ABS Juice, Glue, and Slurry
This guide will show you how a few simple mixtures of ABS and acetone will be a helpful new staple in your 3D printing toolbox.
Updated on November 3, 2022
by
Alec Richter
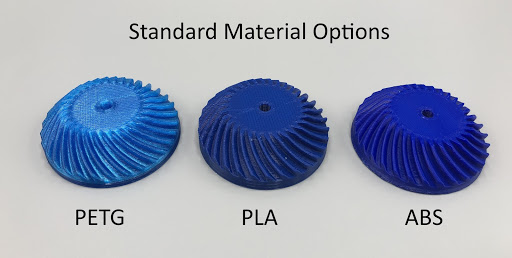
When someone is new to 3D printing, it is highly recommended to start with PLA filament, and having mastered that, to begin experimenting with different and more advanced materials. While PLA and ABS filament are the two most popular filaments, they have drastically different properties from each other.
PLA is such a great beginner material because it doesn't warp, doesn't need high temperatures, and it doesn't give off fumes as you print. ABS has the opposite properties on all accounts, however, what it holds over PLA is its temperature resistance; leave a PLA print and an ABS print in your car on a hot day and you will find the PLA has warped but the ABS hasn't. Additionally, ABS has more finishing techniques available from its chemical makeup: it sands easier than PLA and you can use acetone to melt away the layer lines.
Depending on the amount of ABS you mix with acetone, you create different materials: ABS juice, ABS glue, and ABS slurry.
Materials
- Acetone
- ABS (cut strands off your spool, or you can recycle ABS support material as well)
- Metal, glass, PP plastic, or HDPE plastic container. (You can tell if it's PP or HDPE by looking at the recycling symbol on the bottom)
- Digital scale or a ruler
- Snips or wire cutters
ABS Juice
ABS juice is the best way to get your ABS prints to stick to your print surface. Since it has acetone in it, be sure that it is only applied on kapton tape on glass, or on just the glass. Do not apply this to BuildTak or a plastic print bed.
ABS Juice Instructions:
- Pour 50mL of acetone into your container.
- Measure out 50cm of 2.85mm ABS filament or 4g of ABS scrap.
 Keep in mind your juice will be the same color as the material you put in. Natural ABS won't affect the color of the mixture, making it an ideal choice to be used when printing with any other filament.
 - Snip the filament into small bits to open more surface area to the acetone and allow it to dissolve quicker. If you're using scraps, try and chop it up as small as you can get it.
- Drop the ABS into the acetone and mix it in, this can either be done with a mixing stick or closing the lid and occasionally loosening the lid and burping the fumes it gives off.
- Let the ABS sit in the acetone overnight to ensure all of it dissolves.
- When fully mixed, your ABS juice should look like and have the consistency of milk.
ABS Glue
ABS glue is great for welding two ABS parts together, and is better than using other adhesives, even super glue. ABS glue melts the two pieces, fusing them together into one strong piece instead of two glued pieces.
ABS Glue Instructions:
- Pour 50mL of acetone into your container.
- Measure out 100cm of 2.85mm ABS filament or 8g of ABS scrap. Keep in mind your juice will be the same color as the material you put in. Natural ABS won't affect the color of the mixture, making it an ideal choice to be used when printing with any other filament.
- Snip the filament into small bits to open more surface area to the acetone and allow it to dissolve quicker. If you're using scraps, try and chop it up as small as you can get it.
- Drop the ABS into the acetone and mix it in, this can either be done with a mixing stick or closing the lid and occasionally loosening the lid and burping the fumes it gives off.
- Let the ABS sit in the acetone overnight to ensure all of it dissolves.
- When fully mixed, your ABS glue should look like and have the consistency of white school glue.
ABS Slurry
ABS slurry should be used to blend the seam between the two ABS pieces that were glued together.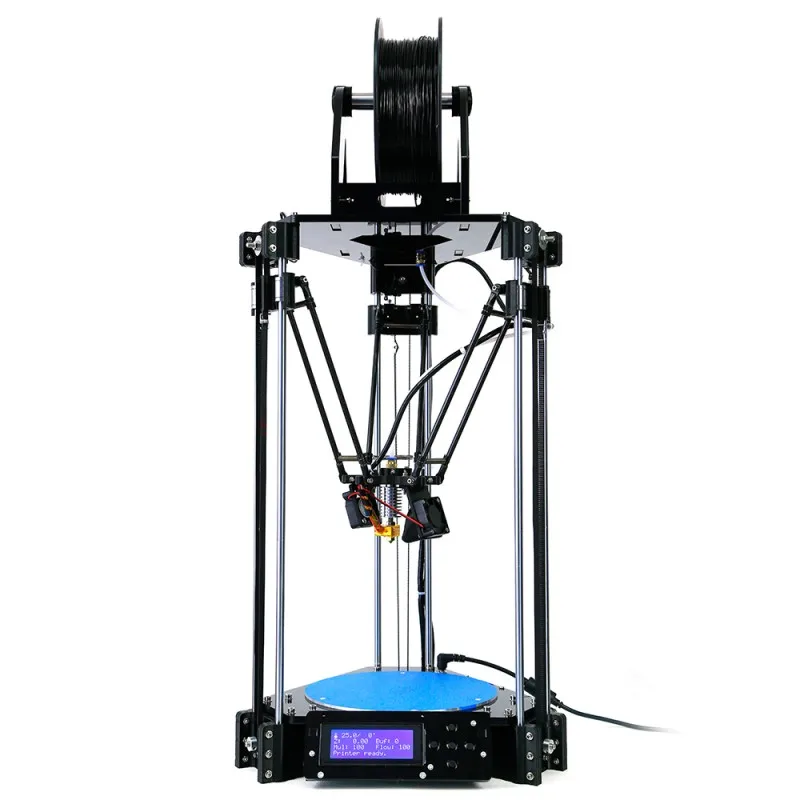 Use it like a filler putty to fill in any gaps between the glued parts or even use it to add more material in places that need to be built up.
ABS Slurry Instructions:
- Pour 50mL of acetone into your container.
- Measure out 250cm of 2.85mm ABS filament or 20g of ABS scrap. Keep in mind your juice will be the same color as the material you put in. Natural ABS won't affect the color of the mixture, making it an ideal choice to be used when printing with any other filament.
- Snip the filament into small bits to open more surface area to the acetone and allow it to dissolve quicker. If you're using scraps, try and chop it up as small as you can get it.
- Drop the ABS into the acetone and mix it in, this can either be done with a mixing stick or closing the lid and occasionally loosening the lid and burping the fumes it gives off.
- Let the ABS sit in the acetone overnight to ensure all of it dissolves.

- When fully mixed, your ABS slurry should look like and have the consistency of putty. It should be very goopy.
Article Tags
- 3D Printing
- Firmware
- 3D Design
- MatterControl
- Press Releases
- Small Business
- Automotive
- E3D
- Jewelry Making
- Engineering
- Entertainment Industry
- MatterControl Touch
- ESD Materials
- NylonX
- BCN3D
- Open Source
- Crafty Pen
- Digital Fabrication Anatomy
- How To
- Hardware and Upgrades
- Tips and Tricks
- Weekend Builds
- Top Ten
- Education
- Tech Breakdown
- Women in 3D Printing
- Project Ideas
- Advanced Materials
- Reference
- Pulse Dual Extrusion
- Product Spotlight
- Aerospace
- Jobs
- Military & Government
- Multi-Tool Machines
- Getting Started
- Healthcare
- How To Succeed With Any 3D Printing Material
- Creality3D
- Architecture
- 3D Printer Reviews
- Hacker of the Month
Related Products
View all related productsHow to Make and Use ABS Slurry, Juice & Glue
- Author
- Recent Posts
Martin
Martin has a M.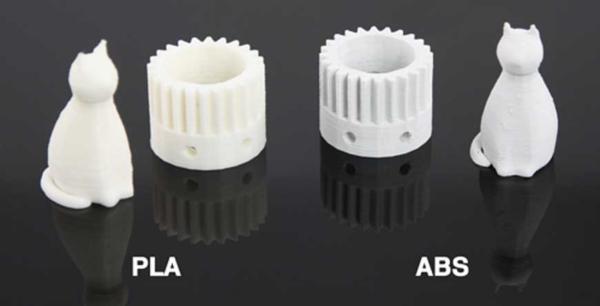 Sc. in physics and has gained many years of experience in industry as a lab manager and quality assurance manager. He has now tested dozens of 3D printers and is happy to share the collected experience with each new article.
Latest posts by Martin (see all)
Disclosure: Links marked with * are Affiliate Links. I earn from qualifying purchases if you decide to make a purchase through these links – at no additional cost for you!
Anyone taking their first steps in the world of 3D printers will probably start by using PLA. PLA stands for “polylactide” and is a thermoplastic made from biodegradable raw materials. Sometimes these are also called “polylactic acid” because they are made from corn starch or sugar cane. PLA is so well suited for beginners because it is very easy to process, but there are key drawbacks: The low melting temperature can ensure that the workpieces, in the worst case, already start to become soft at higher room temperature, and the production of functional parts is hardly possible or not possible at all due to the low stability.
This is the reason why one might want to switch to ABS sooner or later. However, this can lead to problems, because processing is by no means as simple and it is not uncommon for auxiliary materials to be necessary in order for the workpieces to succeed. Three of these auxiliary materials are called “slurry”, “juice” and “glue”.
ABS Juice is used for better adhesion to the printing bed (mixing ratio = 4 g filament to 50 ml acetone). ABS Glue is used to glue ABS parts together (8 g + 50 ml). And ABS Slurry can be used to fill holes or for extreme printing bed adhesion (20 g + 50 ml).
In this article, we will look at how these substances can help improve and optimize ABS parts. We’ll take a closer look at the possibilities and give advice on how best to use them. We will also show how you can make them yourself using very simple means.
Table of Contents:
- 1 What is ABS?
- 2 ABS Glue
- 2.1 How to Make ABS Glue
- 2.2 Tips for Use
- 2.
 3 Alternatives
- 3 ABS Juice
- 3.1 How to Make ABS Juice
- 3.2 Tips for Use
- 3.3 Alternatives
- 4 ABS Slurry
- 4.1 How to Make ABS Slurry
- 4.2 Tips for Use
- 4.3 Alternatives
- 5 ABS Glue, Juice, Slurry – Lifespan
- 6 Related Questions
- 6.1 How should I finish the surface of my workpiece after treatment with ABS Glue or Slurry?
- 6.2 Are there any health risks associated with the use of ABS Juice, Glue or Slurry?
- 6.3 Can PLA filament also be used?
- 7 Conclusion
What is ABS?
Unlike PLA, ABS consists mainly of oil. The abbreviation stands for acrylonitrile butadiene styrene. It is used, among other things, for piping systems in high-pressure environments and for crash helmets.
ABS Filament*Check Price at:
Amazon*
3DJake*
ABS has a high strength but is still a bit flexible and although it is a thermoplastic, it is reasonably resistant to heat and can withstand temperatures of around 100 °C. By comparison, PLA already starts to lose its shape at 45 °C.
However, the good properties also ensure that processing is much more difficult. ABS tends to “warp“, i.e. lose its shape, if you do not pay attention to the printing speed and work with sufficient support structures, “holes” like to appear where the material cannot flow enough and the adhesion force to the bed is usually not exactly high either.
As a countermeasure, the use of some excipients has proven to be effective, three of which are particularly well known, namely “Glue”, “Juice” and “Slurry”.
ABS Glue
As the name suggests, ABS Glue is an adhesive. More precisely, it is an auxiliary material that is used to join two workpieces made of ABS. This can have several causes, for example, the workpiece was planned to be several elements for economic reasons, or perhaps something fell off during printing that needs to be repaired.
ABS Glue is a mixture of ABS and dimethyl ketone, better known as “acetone”. The acetone ensures that the structure of the ABS is dissolved and the particles disperse in the liquid. This creates an adhesive that forms a chemical bond with other parts made of ABS. In principle, this is a “chemical cold welding”.
How to Make ABS Glue
To make ABS Glue, you need a kitchen scale, a measuring cup or syringe, scissors or side cutters, and a container with a lid. For the latter, make sure that it is a material that does not react with the acetone, for example glass, metal or plastics such as PP (polypropylene) or HDPE (high-density polyethylene).
The mixing ratio should be 8 g filament to 50 ml acetone. To do this, first fill the acetone into the glass with the syringe or measuring cup, then weigh or measure the filament. For a diameter of 3 mm, this is 100 cm of filament.
Use the side cutter to put the filament in small pieces into the acetone, then close well with the lid and shake for about 1 minute. For best results, allow the mixture to sit for about 8 – 12 hours before use. The consistency should be similar to craft glue.
Here* you can get cheap acetone.
Tips for Use
- If you want to join workpieces, you should make sure that the filament used is the same color as the printed piece, otherwise, color changes may occur at the joints.
- During the dissolution of ABS, irritating fumes may develop due to the chemical reaction, which is why the process should be carried out in a well-ventilated room.
- For a better result, it may help to roughen the glued areas with some sandpaper.
- You can also use leftovers from old projects to mix it.
Alternatives
If you do not want to mix your own, you can look for special adhesives for plastics sold under the name ABS Cement*. These are suitable for joining ABS workpieces, but differ in handling from ABS Glue and are also not necessarily transparent.
ABS Juice
ABS Juice is another adhesive that consists of the same components, but has completely different properties and is not used for the same purpose. ABS “Juice” is a mixture that is significantly thinner and more liquid than ABS Glue.
As a result, the reaction during application is also significantly lower and no chemical welding takes place. However, the fact that the Juice still has good to very good adhesion properties is exploited.
ABS Juice in a Spray Bottle for easy Application. (source: reddit)How to Make ABS Juice
As with ABS Glue, ABS Juice requires a kitchen scale, scissors or a similar tool, some acetone, and a container that will not react with it, such as glass, metal, or PP and HDPE plastics.
The production works similarly. This time, only 4g of filament are needed. With a filament with a diameter of 3 mm, this corresponds to a length of 50 cm.
To increase the attack surface, the filament should be added to the acetone in small pieces and then shaken for approx. 1 minute. For best results, the mixture should sit for at least 8 to 12 hours before use. After that, the consistency should not be dissimilar to that of milk.
Tips for Use
- Before use, it is advisable to heat the print bed to the desired temperature.
- Do not apply ABS Juice directly, but rub it onto the print bed with a piece of cloth.
- It is recommended to border the print area with heat-resistant tape beforehand to simplify subsequent cleaning.
- ABS Juice must not be used on printing beds that are made of plastic.
Alternatives
There are many methods to increase the adhesion strength of 3D printers. First of all, it is not necessary to produce ABS Juice yourself, as this is also sold directly in the form of pellets*, but here you also have to add the acetone*. As an alternative, various spray adhesives* have proven their worth, especially for plastic beds.
A combination of auxiliary material and auxiliary prints such as a Raft or a Brim is particularly good. This way, the adhesion force can be improved to the maximum if you use ABS Juice and additionally give your workpiece a Raft. The only disadvantage is that you use a lot of filament.
ABS Slurry
The third auxiliary in the bunch is ABS Slurry, which takes its name from its slurry-like consistency. This is due to the fact that the ratio of acetone to ABS is the highest here and thus most of the ABS particles are in the mixture.
ABS Slurry is considered a “last resort” and can be used for several purposes. On the one hand, it is excellent for filling holes or bringing warping elements back into shape. On the other hand, the mixture can also be used for the print bed and has a very high adhesive force, but destroys the surface and therefore leaves a rough surface texture.
How to Make ABS Slurry
To make your own ABS slurry, you need not only enough ABS filament and some acetone, but also a container for the mixture, which must not react with acetone and should therefore be made of glass, metal or plastics such as PP or HDPE. As tools, you should have a pair of scissors or cutting pliers and a kitchen scale ready.
For an optimal mixing ratio, you should weigh out approx. 20 g of ABS filament. This corresponds to a length of 250 cm with a diameter of 3 mm. The filament should be cut into short pieces before it is dissolved in the acetone, as this increases the surface area to be attacked.
Then close the lid and shake the mixture well for about 1 minute. Then leave to infuse for at least 12 hours and check the consistency. It should be very viscous like mud, but not contain visible pieces.
Tips for Use
- As an adhesion aid, spread the slurry on the heated bed with a cloth, possibly masking the printing area with heat-resistant tape.
- To repair, spread the mixture on the appropriate areas with a brush. Do not be sparing and fill any holes completely. It takes up to 24 hours for a spot repaired in this way to dry completely.
- Since this mixture contains a lot of filament, you should use it sparingly and really only use it in emergencies.
Alternatives
At the moment, there is no real alternative to ABS Slurry. If you want to improve the adhesive strength, you can of course use products such as spray adhesive* or special glue sticks*. However, depending on the project, size and print bed, these cannot quite play to their strengths.
For repair, however, ABS Slurry is unrivaled because it is the same material as the actual workpiece, eliminating potential structural weaknesses.
ABS Glue, Juice, Slurry – Lifespan
Acetone evaporates very quickly even at room temperature and should therefore be stored in an airtight container. During processing into ABS Juice, Glue or Slurry, the container is repeatedly opened and the vapors can escape.
Normally, the substances will nevertheless keep for several weeks until a certain “drying out” is noticeable. However, you do not necessarily have to throw away the mixture, but can simply add a little acetone until the desired consistency is achieved again.
Related Questions
How should I finish the surface of my workpiece after treatment with ABS Glue or Slurry?
Any residues should be removed. A fine-grained sandpaper is best suited for this purpose. Subsequently, a thin layer of ABS Juice applied with a brush can be used to improve the surface structure and achieve a beautiful finish.
Are there any health risks associated with the use of ABS Juice, Glue or Slurry?
Normally, there should be no serious health risks if handled correctly. The gases emitted by acetone are flammable and fire-promoting, so should not be brought near a flame. In addition, the mixtures (especially slurry) are irritating to the skin of sensitive people. In this case, gloves should be worn during use and work in a ventilated area.
Can PLA filament also be used?
Unfortunately, this is not possible. Although PLA looks very similar to ABS, it has different properties because it is made from plant substances and does not contain any petroleum. Anyone working with PLA can make do with other auxiliary materials in an emergency, but these are not normally necessary with this material.
Conclusion
Anyone who uses ABS should definitely take a closer look at these ABS/acetone mixtures, because they can minimize or even completely solve many problems that can arise during processing. Ultimately, these are agents that are quickly made, but can make a big difference.
Thanks to the detailed recipes and the tips for use, the decision for the right auxiliary material should now be easy and the workpieces will hopefully succeed quickly and well.
Disclosure: This website is the property of Martin Lütkemeyer and is operated by Martin Lütkemeyer. Martin Lütkemeyer is a member of the Amazon Services LLC and other Affiliate Programs. These are affiliate advertising programs designed to enable websites to earn advertising revenue through advertising and linking to Amazon.com and others. Links marked with * are affiliate links.
Treatment of models with acetone bath and ABS juice.
3D printing
Follow author
Follow
Don't want
32
The first models I printed were in PLA. Now I decided to seriously study ABS printing. This plastic has many disadvantages, but also many advantages. The disadvantages are well known to everyone and described many times on this portal. The advantages include sufficient heat resistance, unlike PLA, the details of which can warp from the summer heat. Another advantage of ABS is its low price. The third advantage is solubility in acetone. Acetone, despite its strong unpleasant odor, is not as harmful as chloromethane and, moreover, chloroethane, which dissolve PLA. The main thing, when practicing with acetone, and even when printing ABS, is to organize a good hood.
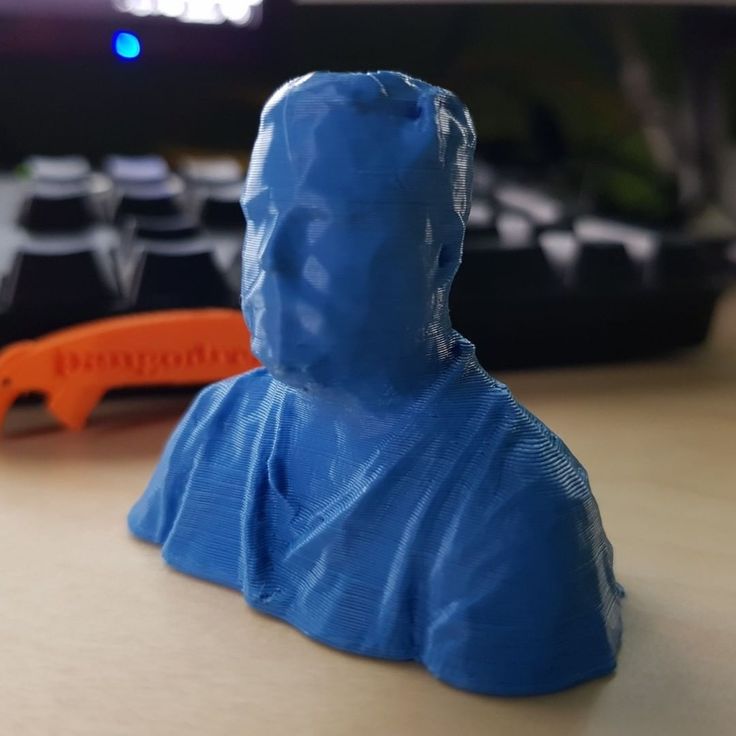
Let me tell you about my experience of using acetone to finish 3D printed ABS products. I have long wanted to print the model "Arsch mit Ohren". I'm not a fan of chopped bodies, but I really like this model, here "cutting" is quite appropriate and helps to express the author's intention :).
ABS decided to print. The part was printed normally, no cracks appeared. Since the 3D printer is at my work, I didn’t wait for it to finish printing, I went home. The next morning I found a part with cracks.
The hot part may have cooled too quickly. The heating had not yet been turned on, and it was already cold at night.
I decided to “treat” the part with an acetone bath.
Small cracks have disappeared, but large ones remain.
Looking ahead, I will say that it was my mistake: first I had to fix the surface to the maximum, and then put it in an acetone bath. In my case, several cycles of the acetone bath followed by the "treatment" resulted in the formation of "Arsch mit Ohren" smudges on the ears.
Before describing the “treatment” technology, let me tell you about the acetone bath.
There are several articles on the portal on how to assemble an acetone bath installation with your own hands, for example:
Treatment with acetone vapor. There are models of parts:
3D model “Elements of an acetone bath” process. My "installation" is very simple:
A little acetone is poured into the bottom of a plastic bucket with a lid. The part is placed on a stand so that the level of the filled acetone is below the stand so that the part does not touch the acetone.
The bucket is closed with a lid. I made a hole in the lid (just in case, maybe not necessary). All this is placed on a heated printer table and aged for an hour or more (or less) at a temperature of about 60 degrees. At a higher temperature, bubbles form on the model, at a lower temperature, more time is needed.
Now, about the treatment:
Many people use a 3D pen for this. I did that too. I did not like. Need a skill. My version is ABS Juice.
Very easy to make: ABS 3D printing waste is filled with acetone and left without air access (so that the acetone does not evaporate). When the ABS is completely dissolved and the solution becomes homogeneous, it can be used. "Juice" is convenient to apply with a brush. Excess material is removed or smoothed with a brush with acetone (without juice).
Here is an example of fixing Master Yoda's model. When removing supports, I accidentally deleted the staff too :( Or maybe it fell off when printing).
The base for the staff is a piece of filament. I smeared it on all sides with “juice” in several stages. Why several? The fact is that ABS dries well in small volumes. When the "juice" is applied in a thick layer, the evaporation of acetone becomes problematic. Therefore, it is better to apply the juice in a thin layer, which quickly hardens. Then the next layer, and so on.
Here is "Arsch mit Ohren" after I covered all the cracks with "juice" and did the final session of the "acetone bath":
Here all the cracks are covered, but smudges on the ears are visible. This is due to the excess acetone bath.
Another experiment I did with an acetone bath and M30 bolt and nut models. Previously, before the upgrade, my printer did not print holes well. A "web" and "droplets" appeared. Then, having printed a bolt with a nut, I had to go through the thread on the nut with a tap. This time the thread printed perfectly. The nut is screwed onto the bolt. I only had to turn it back and forth a few times along the bolt, after which the thread developed and began to rotate more freely. After that, I placed the bolt and nut alternately in the acetone bath. The carving has survived! The nut has not lost its ability to screw onto the bolt.
Subscribe to the author
Subscribe
Don't want
32
ABS glue - the easiest way to glue parts from ABS plastic
1 April 2019
Want to know about ABS adhesive and how to make it? Find out the easiest way to glue your ABS parts together.
Post processing problems
There are times when 3D printing needs the finishing touches, especially when dealing with ABS plastic. This material is very popular, and due to its chemical composition, special substances can be used for further processing. For example, a common use case is to join multiple 3D printed ABS parts.
There are a variety of mixtures or solutions that can be applied to ABS and there is a tendency to confuse them due to their similar composition. ABS glue, ABS juice and ABS solution enjoy special attention and interest.
This article discusses ABS adhesive, its difference from juice and mortar.
Adhesive, juice and mortar
Before describing ABS adhesive and how it differs from juice and mortar, it is important to know that all three are a mixture of ABS fiber and dichloroethane. The main difference is the proportion of the two substances.
- ABS adhesive is an adhesive material that joins ABS parts by melting or welding. The joined parts are chemically melted by the adhesive, melting into one strong piece. The substance has the consistency of white PVA glue.
- ABS Juice is a sticky sap used to enhance grip. It should only be applied to Kapton film or glass. Not recommended for use on other surfaces.
- ABS mortar is a paste-like material used on glued parts to hide seams. It should be used as a filler for gaps or added to places that require extension.
How to make glue
Here's what you'll need:
- 200 cm of 1.75 mm ABS filament in the color you need for glue
- 50 ml dichloroethane
- Glass jar with lid (or container made of polypropylene or HDPE)
Make sure you are in a well-ventilated area before you start making glue:
- Pour dichloroethane into a jar.
- Cut the filament into small pieces. The smaller the pieces, the faster they will dissolve in dichloroethane.
- Add ABS pieces to dichloroethane and stir.
- Leave the mixture overnight.
Where to buy ABS adhesive
As a mixture of ABS and dichloroethane, ABS adhesive is not easy to obtain commercially.