3D tissue printing
3D Bioprinting of Living Tissues
Progress in drug testing and regenerative medicine could greatly benefit from laboratory-engineered human tissues built of a variety of cell types with precise 3D architecture. But production of greater than millimeter sized human tissues has been limited by a lack of methods for building tissues with embedded life-sustaining vascular networks.
Play
In this video, the Wyss Institute and Harvard SEAS team uses a customizable 3D bioprinting method to build a thick vascularized tissue structure comprising human stem cells, collective matrix, and blood vessel endothelial cells. Their work sets the stage for advancement of tissue replacement and tissue engineering techniques.Multidisciplinary research at the Wyss Institute has led to the development of a multi-material 3D bioprinting method that generates vascularized tissues composed of living human cells that are nearly ten-fold thicker than previously engineered tissues and that can sustain their architecture and function for upwards of six weeks. The method uses a customizable, printed silicone mold to house and plumb the printed tissue on a chip. Inside this mold, a grid of larger vascular channels containing living endothelial cells in silicone ink is printed, into which a self-supporting ink containing living mesenchymal stem cells (MSCs) is layered in a separate print job. After printing, a liquid composed of fibroblasts and extracellular matrix is used to fill open regions within the construct, adding a connective tissue component that cross-links and further stabilizes the entire structure.
Confocal microscopy image showing a cross-section of a 3D-printed, 1-centimeter-thick vascularized tissue construct showing stem cell differentiation towards development of bone cells, following one month of active perfusion of fluids, nutrients, and cell growth factors.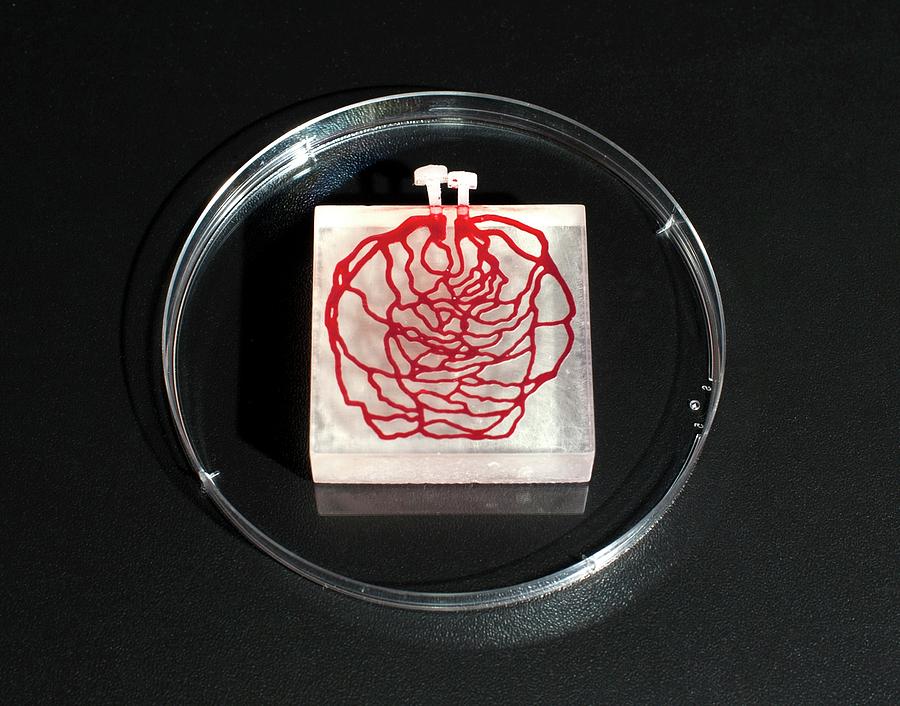 The structure was fabricated using a novel 3D bioprinting strategy invented by Jennifer Lewis and her team at the Wyss Institute and Harvard SEAS. Credit: Lewis Lab, Wyss Institute at Harvard University
The resulting soft tissue structure can be immediately perfused with nutrients as well as growth and differentiation factors via a single inlet and outlet on opposite ends of the chip that connect to the vascular channel to ensure survival and maturation of the cells. In a proof-of-principle study, one centimeter thick bioprinted tissue constructs containing human bone marrow MSCs surrounded by connective tissue and supported by an artificial endothelium-lined vasculature, allowed the circulation of bone growth factors and, subsequently, the induction of bone development.
This innovative bioprinting approach can be modified to create various vascularized 3D tissues for regenerative medicine and drug testing endeavors. The Wyss team is also investigating the use of 3D bioprinting to fabricate new versions of the Institute’s organs on chips devices, which makes their manufacturing process more automated and enables development of increasingly complex microphysiological devices. This effort has resulted in the first entirely 3D-printed organ on a chip – a heart on a chip – with integrated soft strain sensors.
- 1/7 Cross section of long-term perfusion of HUVEC-lined (red) vascular network supporting HNDFladen (green) matrix.
- 2/7 Top-down view of long-term perfusion of HUVEC-lined (red) vascular network supporting HNDFladen (green) matrix.
- 3/7 Photograph cross section of printed tissue construct housed within a perfusion chamber.
- 4/7 Photograph cross section of printed tissue construct housed within a perfusion chamber.
- 5/7 Photograph of a printed tissue construct housed within a perfusion chamber.
- 6/7 Photograph of vasculature network and cell inks.
- 7/7 Photograph of 3D printed vasculature network (red) within Red is the
- Next
- Prev
What is 3D Bioprinting? | Bioprinting Explained
“3D Bioprinting” or “bioprinting” is a form of additive manufacturing that uses cells and biomaterials instead of traditional metals and plastics to create 3D constructs that are functional 3D tissues.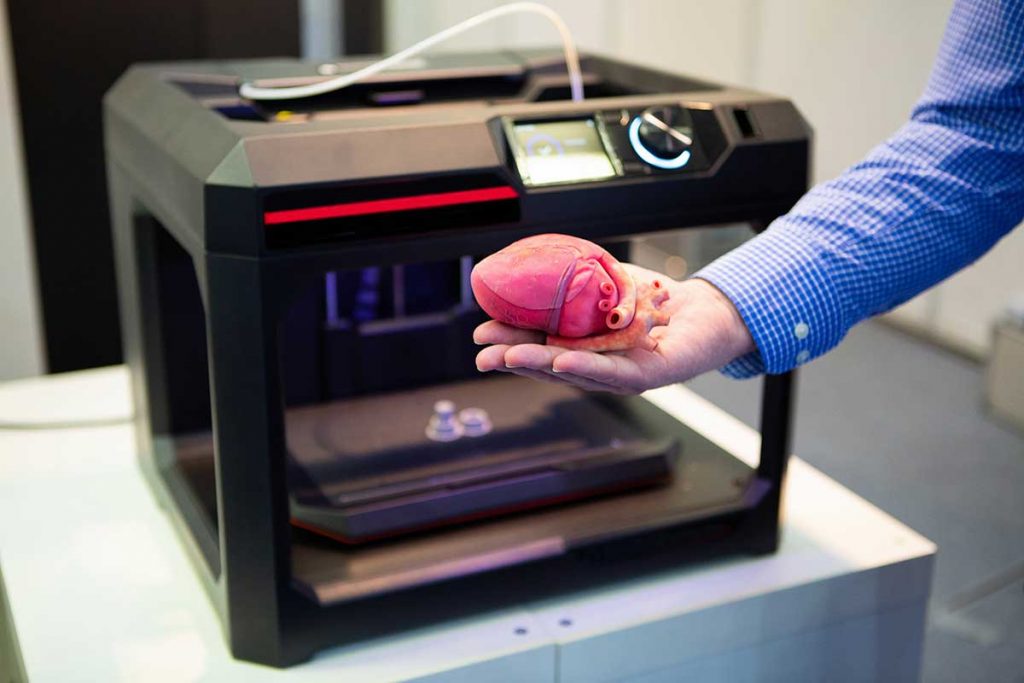 These biomaterials are called bioinks, and they mimic the composition of our tissues. Bioprinting can be applied to a variety of areas including but not limited to regenerative medicine, drug discovery and development, and 3D cell culture.
Bioprinted structures, such as organs-on-chips, can be used to study functions of a human body outside the body, in 3D. The geometry of a 3D bioprinted structure is more similar to that of a naturally occurring biological system than an in vitro 2D model. Structural similarity can in turn lead to functional results that are more physiologically relevant. No other technology enables the level of geometric complexity in engineering tissues that 3D bioprinting enables. That is why this technology has the potential to completely change the way we treat diseases – by replacing animal testing and ending the organ transplant waiting list.
How does 3D bioprinting work?
3D bioprinting starts with a model of a structure, which is recreated layer-by-layer out of a bioink either mixed with living cells, or seeded with cells after the print is complete.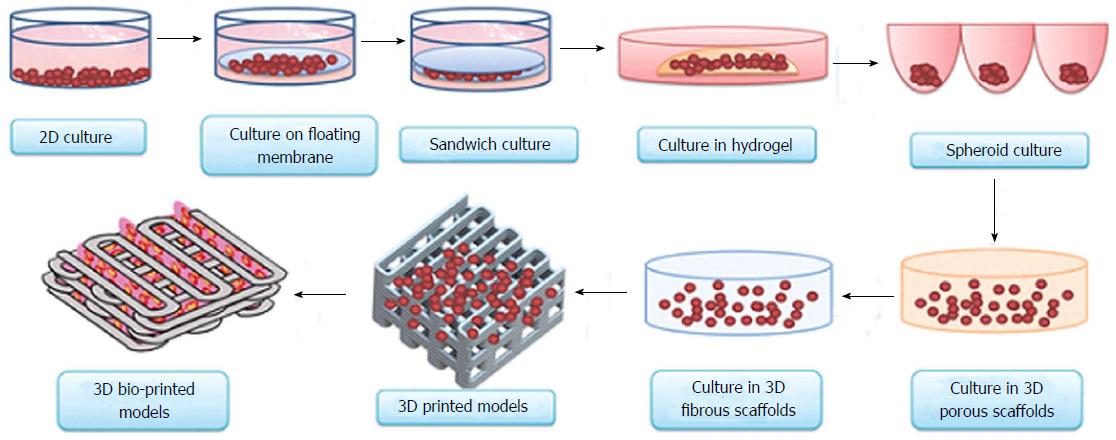 These starting models can come from anywhere – a CT or MRI scan, a computer generated design (CAD) program, or a file downloaded from the internet.
That 3D model file is then fed into a slicer – a specialized kind of computer program which analyzes the geometry of the model and generates a series of thin layers, or slices, which form the shape of the original model when stacked vertically. Cura and slic3r are examples of slicers commonly used in 3D printing. Allevi also has a specialized slicer, optimized specifically for bioprinting, built into our Allevi Bioprint software.
Once a model is sliced, the slices are transformed into path data, stored as a G-code file, which can be sent to a 3D bioprinter for printing. The bioprinter follows instructions in the G-code file in order, including instructions to control for temperature of the extruders, extrusion pressure, bed plate temperature, crosslinking intensity and frequency, and, of course, the 3D movement path generated by the slicer. Once all of the G-code commands are completed, the print is done and can be cultured or seeded with cells as part of a biostudy.
Why is bioprinting important?
Over 120,000 people in the US alone are on waiting lists for organs, and others experience chronic problems due to the long-term damaging effects of post-transplant immunosuppression. There is a large and growing need for an alternative to the organ transplant waiting list. The scientific community has already succeeded in bringing together multidisciplinary teams of researchers, physicians, and engineers to take on the biggest challenges to human health, and 3D bioprinting is an exciting new tool with the potential to eliminate the organ transplant waiting list.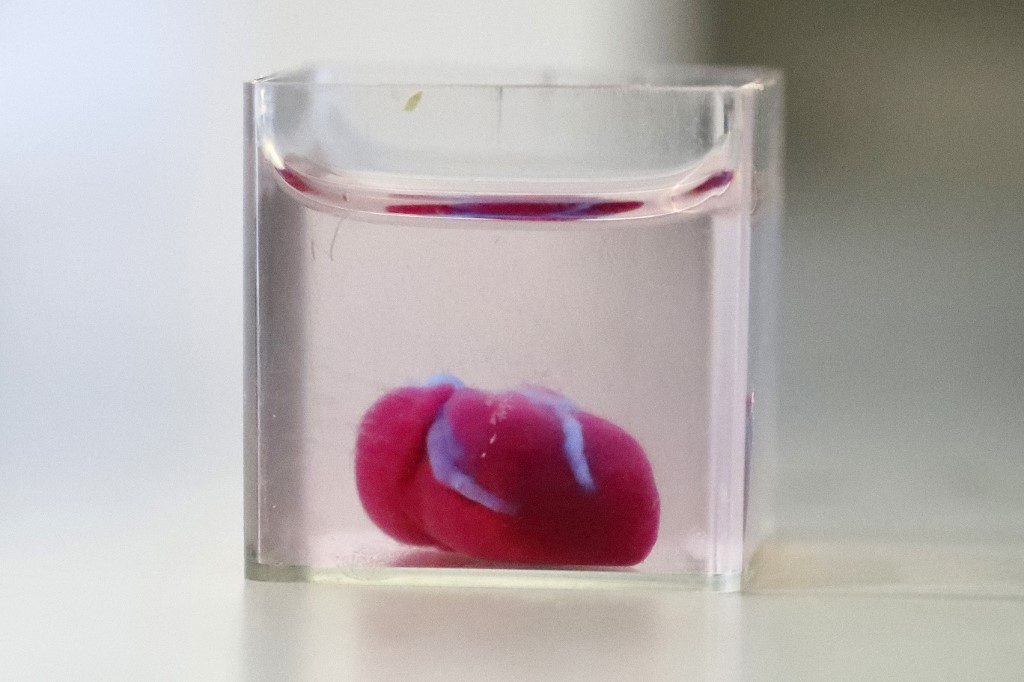
For pharmaceutical development, 3D bioprinting offers a means of testing drugs faster, at a lower cost, and with better biological relevance to humans than animal testing. In the biomedical devices field, 3D bioprinting has enabled new developments such as sugar stents to help surgeons join veins with fewer complications, and systems for improved drug delivery, among others.
As bioprinting evolves, it will become possible to use a patient’s own cells to 3D print skin and bone grafts, organ patches, and even full replacement organs. Personalized and regenerative medicine continue to grow in popularity, and 3D bioprinting will give doctors and researchers the tools to better target treatments and improve patient outcomes.
Further reading
Bioprinting 101 – Allevi
3D Bioprinting – Wikipedia
3D Bioprinting of Living Tissues – Wyss Institute, Harvard
Bioprinting – NIH Director’s Blog
3D printing on fabric - technology features. Ways of applying three-dimensional images to fabric, phone cases, promotional products
Today, 3D printing on fabric is a fairly popular way to create exclusive items.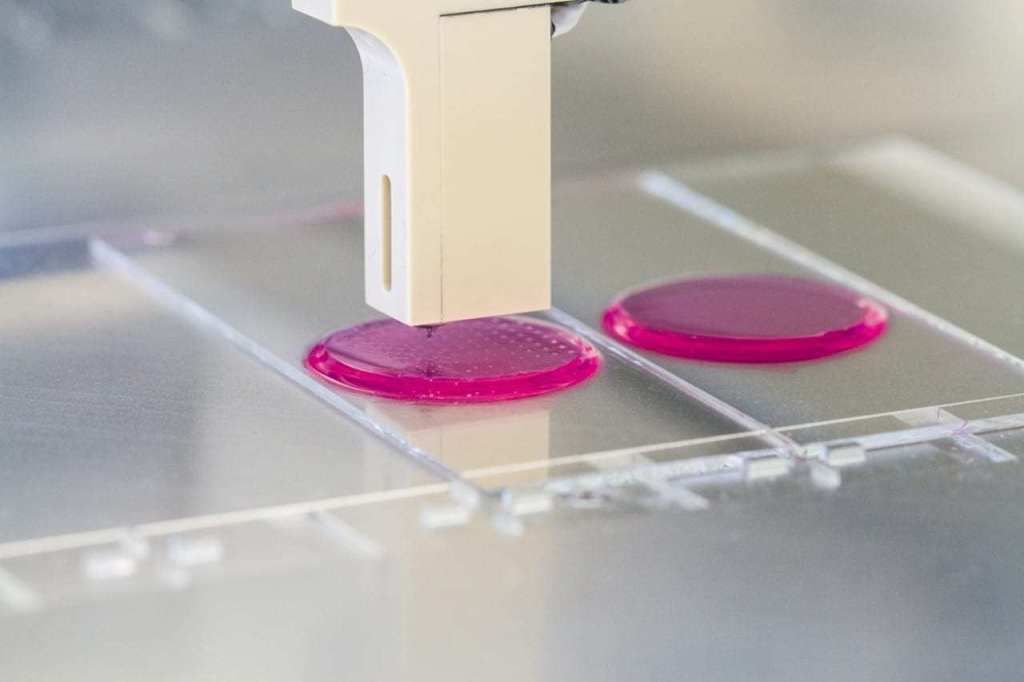 This type of drawing, due to the visual volume and realism, easily attracts attention, which means that it will be in demand among people of different ages for a long time to come.
You can apply 3D drawings on different types of textiles, namely:
- On natural fabrics.
- For synthetic fabrics.
- For tarpaulin.
This type of print is also often used for large format printing, for example for wallpapers, theatrical scenery or exhibitions. The range of use and application of this type of image is great, it would be a fantasy.
Wallpaper with 3D patterns can transform any space
For example, 3D printing on phone cases has also become a fairly popular service among the population.
3D printing on fabric
In order for 3D printing to be applied by the desired method and the image to be bright and durable, it is necessary to take into account a number of factors when choosing the fabric on which the pattern will be applied. Namely, you need to pay attention to:
- Material composition.
- Structure.
- Density. nine0010
- Processing.
- Storage conditions for textiles.
Fabrics can be of textile and knitted weaving. Materials with textile weaving - jeans, linen, silk, velveteen, satin, and with knitted - footer, cooler, interlock, etc.
3D printing is an original way of applying high-quality images of any complexity to fabrics or clothes. Thanks to the latest printing technologies, such designs will perfectly behave after numerous washings and ironings. The main thing is to choose the right transfer method for the image. nine0003
There are several technologies for applying images of this type to textiles:
- Digital printing. The image is applied directly to the fabric, without the use of additional media.
- Sublimation. A special dye is used that penetrates the fibers without changing the properties of the material.

- Silkscreen. Drawing is applied through a special stencil by pushing paint, viscous consistency. nine0010
- Thermal transfer printing. Used film or paper, high temperature and heat press.
All of these 3D printing methods have their pros and cons. For example, digital printing is most often used because of its inexpensive cost, and the silk-screen printing method makes the image durable even on rough fabrics. But the sublimation method limits the client in the choice of fabric, as it is applied only to synthetic materials, but the colors of the image will remain for a long time. So if you need a print on a product that will not lose its appearance for a long time, then it is better to choose a sublimation printing method on a synthetic or semi-synthetic canvas. nine0003
3D printing on fabric and not only from PROpechat
Today, few people do not know what 3D printing is. Images of this type can be used for different purposes due to the originality of the result.
For example, it is practical and profitable to use this type of pattern for advertising purposes to attract customers - printing a three-dimensional image of the company logo will clearly attract potential buyers or partners. So the considered option of applying a print is not only a way to transfer pictures, but also an excellent method of promoting a business. nine0003
And so, we draw conclusions. In order for the image to turn out as realistic and durable as possible, it is necessary to take into account only a few components:
- Choice of 3D printing technology.
- Selection of the material on which the image will be applied.
- Scope of the finished product.
3D printing on fabrics and more is a great option to make an original piece of furniture, a souvenir, promotional items, etc. So turn on your imagination and act. Have questions? Call us right now or contact the manager online! nine0003
3D printed mesh fabric
Prologue
Hello everyone! I am developing "smart sequins" - electromechanical color-reproducing devices for designer clothes.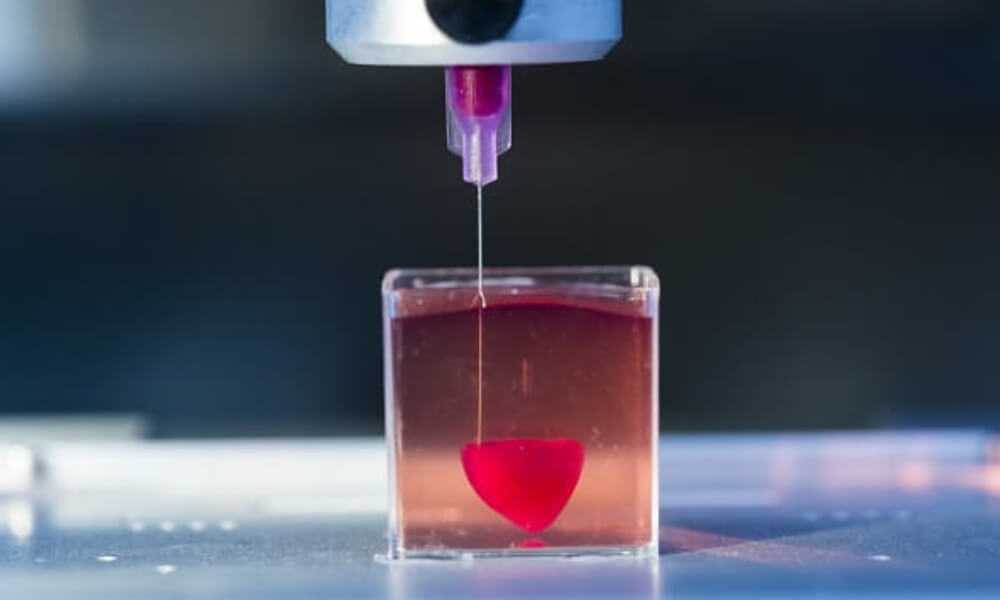 Our team is passionate about the idea of creating clothes and accessories that can change their color at the request of the owner or depending on environmental conditions.
In this article I would like to talk about how we used 3D printing in our project, share our experience and tools. nine0003
3D printing on fabric
One of the tasks that I had to solve was to figure out how to make an elastic fabric out of plastic sequins, which in its properties would resemble textile materials. At the same time, it is necessary to provide for the possibility of easily creating electrical connections between the sequins.
There are quite a few articles and materials about making clothes on a 3D printer. Many different methods have already been invented, from creating hinges right in the printing process to printing with elastic plastics. nine0003
While looking for a solution, I came across this video. From it, I first learned about the method of printing on mesh fabric using a conventional FDM 3D printer.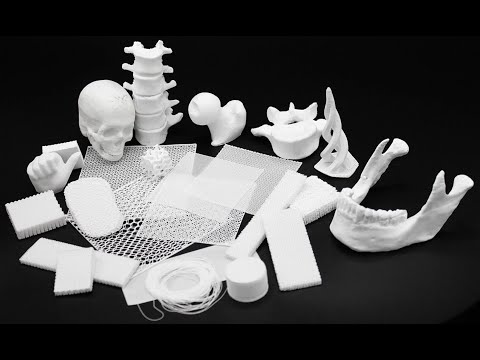
The author himself claims that he spied the idea here: Shorey Designs.
The essence of the method is very simple. We create a 3D model of a fragment of the future canvas, then arrange a lot of fragments so that we get a whole canvas. We start the slicer and prepare the G-code. Before sending it to the printer, you need to insert a pause and raise the extruder before printing a certain layer. The printer will stop during operation. At this point, we cover the printed layers with a mesh cloth. We continue to print. Due to the presence of large holes in the fabric, the layers of plastic will interlock with each other, as in conventional printing, and the mesh fabric will be firmly integrated into the parts. nine0003
Modifying G-code
I use Cura version 3.2.1 as a slicer. 3D printer - homemade H-bot controlled by a board based on ATmega2560 (RAMPS 1.4) with Marlin firmware.
To pause the printer, there is an M25 command. Command for lifting in Z by 20mm: G0 Z20. It is noteworthy that the M25 must go before the rise, otherwise the next command is processed first. Why this happens is a mystery to me, apparently somehow connected with the processing of commands by the printer. nine0003
Add commands to G-code:
Operation automation
Manually searching for the required line in the G-code file and inserting commands is not the most modern solution, I thought and wrote a simple program that allows you to open and view toolpaths.
For the convenience of viewing the layers, the "explode" command is provided, which allows you to visually increase the distance between the layers of the model. After pressing the "insert pause" button, the distance between the marked layer (red) and the previous one increases. This means that the print will be interrupted precisely between these layers. nine0003
To understand where one layer ends and the next begins, I used the comments that Cura kindly provides in its output files. The keyword ";LAYER:X" allows you to accurately find the boundaries of layers in a text file.
Pressing the "write file" button allows you to save the modified G-code in the specified location.
Save the file to the SD card and bring it to the printer.
It's funny that only when preparing this article, I came across a video that tells how you can do the same thing using standard Cura tools ... But the process has already been started, it's too late to slow down! nine0150 Here, starting at 7:30, it is described in detail how to do it. Well ... hurry up - learn how to parse G-code!
Trying to print
Formation of the first layers. We print on glass. Heated table. Table temperature 60⁰С, printing temperature 220⁰С. The print material is PLA plastic. Layer height 0.2mm.
During the pause, lay down the fabric and fix with magnets. Since the table is aluminum (paramagnetic), we put the magnets on the top and bottom sides of the table. Fixation is made in 4 places, in the corners of the part. This is quite enough. The main thing is not to place them too close to the print area, otherwise the magnets will stick to the print head. nine0003
After 40 minutes, this is the structure. The thickness of each 6 carbon element is 1mm. The gap between the elements is 2mm.
In this experiment, tulle was used as the backing fabric. It is a lightweight mesh fabric of medium stiffness, woven from polyester threads.
Experiments have also been made with mosquito net printing. In the hardware store, there were two types of them: fabric and fiberglass. Fabric mesh is softer than tulle, but has greater mechanical tensile strength, as well as less elasticity. The fiberglass mesh is harder than tulle, its mechanical strength is the highest of all participants in the experiment. nine0003
Hexagonal sequin printing on fiberglass mosquito net. The gap between the elements is 1mm. The matrix is very hard.Clearance is clearly not enough.
Round sequin printing on fiberglass mosquito net. The gap between the circles is 2mm. It has a lot of flexibility, but there is too much unfilled space between the sequins.
After several test prints, the fabric mesh was chosen. She formed the basis of the matrix of smart sequins. The resulting matrix can bend in all directions. nine0003
The video demonstrates the operation of the program, the printing process and the final result.
Conclusion
The method of printing on mesh fabric proved to be very good. This is an ideal solution for our task, because the fabric substrate allows us to weave conductive threads into it, which are used to provide electrical connection between the individual sequins of the matrix. Moreover, the formation of a "pattern" of conductors can be carried out at the preparatory stage.