3D printing umn
UMN researchers partner with Medtronic to 3D print patient-specific heart valve models
0Shares
Researchers from the University of Minnesota (UMN) have worked with medical technology firm Medtronic to develop realistic customizable 3D printed aortic models.
Using tailor-made silicone-based polymeric inks, the UMN team fabricated lifelike duplicates of a human aortic root, the vascular section which is attached closest to the heart. The patient-specific replicas could enable surgeons to better prepare for minimally invasive procedures, improving surgical outcomes for cardiovascular patients in the process.
“Physicians can actually test and try the valve implants before the procedure,” explained Michael McAlpine, lead researcher on the study. “Our goal with these 3D printed models is to reduce medical risks and complications by providing patient-specific tools to help doctors understand the exact anatomical structure and mechanical properties of the specific patient’s heart. ”
The hidden dangers of cardiovascular surgeries
As advances in medicinal technology continue to raise life expectancies around the world, maintaining the health of an increasingly aging population has become a pressing issue. Elderly people are particularly vulnerable to cardiovascular diseases, and the common Noncongenital Aortic Stenosis (AS) condition affects 2.7 million people aged over 75 in North America alone.
AS causes the aortic valve to narrow, leading to restricted blood flow from the left ventricle to the aorta, and ultimately to ventricular dysfunction. Given the advanced age of patients that tend to suffer from AS, it is often deemed too risky for many AS patients to receive surgical valve replacement via open heart surgery.
Transcatheter aortic valve replacement (TAVR) offers a minimally-invasive alternative method of aortic treatment. Using a catheter delivery system, a bioprosthetic valve can be implanted into the biological valve, preventing blockages from taking place. Still, like any surgical procedure, TAVR is subject to potential complications, and disturbances triggered by interactions between the prosthetic and the patient’s anatomy can cause leakages.
Paravalvular Leaks (PL) can be serious, and result in left bundle branch blockages or atrioventricular obstruction, leaving the patient needing a permanent pacemaker to live. PLs aren’t necessarily caused by surgical errors though, and a patient’s anatomy and the prosthetic valve’s dimensions can also contribute to post-TAVR complications. As a result, creating implants that are custom-made for individual patients, is vital to surgical success.
The researchers’ aortic root (pictured) featured an integrated sensor array, capable of gathering data about a patient’s anatomy from the inside. Image via the Science Advances journal.The UMN team’s 3D printed aortic valve models
Although 3D printing offers the potential for heart models to be created in a way that precisely matches the biological original, previously printed aortic devices have been designed for post-operative use. As a result, existing heart root replicas have had no impact on the test patient’s chances of survival. Other duplicates have been printed for pre-operative applications, but comprise of rubber-like thermoplastics that don’t attempt to mimic the appearance of the genuine article.
By contrast, the UMN researchers developed lifelike patient-specific models, featuring integrated sensors, which could allow doctors to mitigate the risks of disturbances during TAVR. The fabricated devices were also created using three different materials, with one for each of the aorta, myocardium and calcified regions.
To create a 3D model as a basis for their replica aortic implants, the research team carried out CT scans of a test patient’s cardiac anatomy. The aortic models, consisting of the aortic wall, a portion of the myocardium, leaflets, and calcifications, were 3D printed simultaneously using customized silicone-based polymeric inks. Crucially, the properties of the polymeric material could be adapted to match those of the patient, minimising any potential risk of complications.
In order to assess the anatomic accuracy of their 3D printed models, the researchers CT scanned their replicas, and compared them to the scans of the original patient’s anatomy. Results showed that the team’s 3D printed replica was accurate to within 0.3mm across the implant, with peaks of 0 mm. In order to evaluate the pressure-sensing abilities of their device, the UMN team later implanted a 29-mm valve into the test patient with three different heights.
Mapping the pressure distribution in each case revealed pressure values of 234, 486, and 404 kPa had been generated during surgery. According to separate research carried out using Medtronic implants, contact pressures from 0.43 to 0.7 MPa can cause surgical disturbances, placing the team’s models at the lower end of the spectrum. As a result, the researchers had successfully identified a causal link between patients’ features and the risk of complications.
The UMN research team concluded that the sensor array built into their additive implants has the potential to be combined with many existing clinical practices. Additionally, the customizable nature of the team’s devices could enable doctors to minimize the risk to cardiovascular patients through a more thorough surgical pre-planning process.
A brief history of additive aortic models
A number of universities have also developed 3D printed aortic models in recent years, with the overall ambition of improving the surgical outcomes of aortic surgeries.
An associate professor of radiology and cardiology at the University of Kentucky (UK) College of Medicine, is 3D printing custom heart models to aid physicians and their patients. The low-cost fabricated aortas cost just $5, and are being produced as an accurate, pre-surgical tool to enable precise fittings of heart-assisting implants.
Scientists from ETH Zürich and medical device manufacturer Strait Access Technologies (SAT) are also developing 3D printed heart valves from silicone.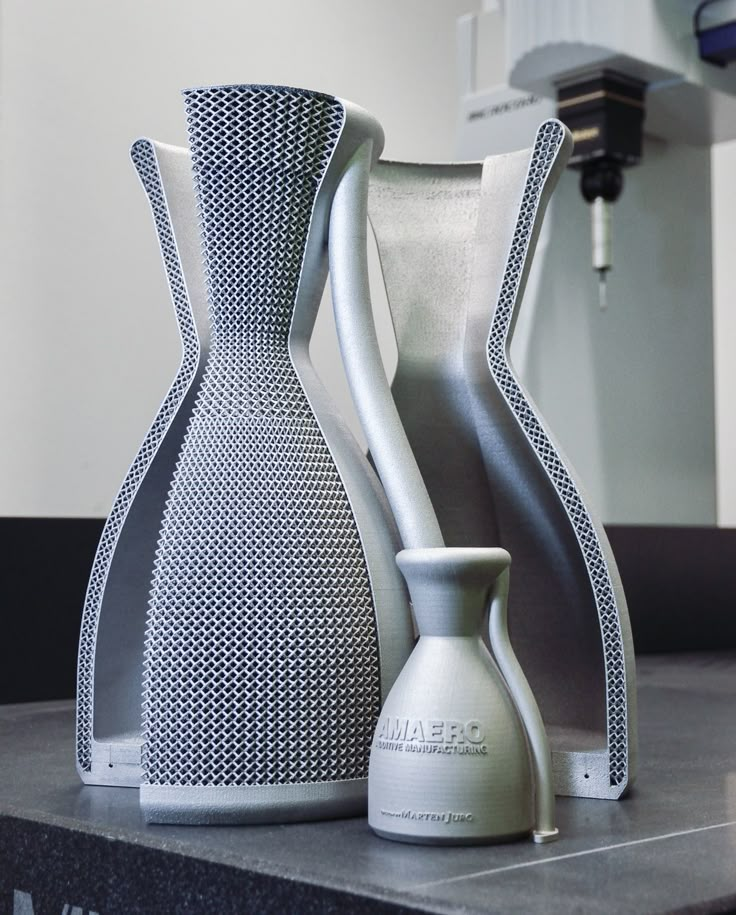 By combining CT scanning with computer simulation, the team have been able to calculate the forces acting on the artificial valve implant and its potential deformation.
Researchers from the Wyss Institute at Harvard University, have created a 3D printing workflow to predict the performance of artificial heart valves during heart operations. In a “try before your buy” approach, the team’s software simulates a valve’s reaction with a patient’s native tissue, providing accurate medical models that are specific to each individual patient.
The researchers’ findings are detailed in their paper titled “3D printed patient-specific aortic root models with internal sensors for minimally invasive applications,” which was published in the Science Advances journal. The report was co-authored by Ghazaleh Haghiashtiani, Kaiyan Qiu, Jorge D. Zhingre Sanchez, Zachary J. Fuenning, Priya Nair, Sarah E. Ahlberg, Paul A. Iaizzo and Michael C. McAlpine.
Nominations for the 2020 3D Printing Industry Awards are still open, let us know who is leading the industry now.
The fourth edition of the 3D Printing Industry Awards Trophy Design Competition is now underway. Enter your design for the chance to win a CraftBot Flow 3D printer.
To stay up to date with the latest 3D printing news, don’t forget to subscribe to the 3D Printing Industry newsletter or follow us on Twitter or liking our page on Facebook.
Are you looking for a job in the additive manufacturing industry? Visit 3D Printing Jobs for a selection of roles in the industry.
Featured image shows a 3D scan of the UMN team’s 3D printed aortic valve. Image via UMN.
Tags ETH Zurich Harvard University Medtronic Michael McAlpine Strait Access Technologies University of Kentucky university of minnesota
Paul Hanaphy
Paul is a history and journalism graduate with a passion for finding the latest scoop in technology news.
Stratasys Donates Cutting-Edge 3D Printers to Visible Heart Laboratories at University of Minnesota Medical School :: Stratasys Ltd.
 (SSYS)
The Visible Heart Laboratories utilize Stratasys 3D printing technology for student and physician education as well as medical device research
EDEN PRAIRIE, Minn. & REHOVOT, Israel--(BUSINESS WIRE)-- Stratasys Ltd. (NASDAQ: SSYS), a leader in polymer 3D printing solutions, today announced that it is sponsoring the University of Minnesota Visible Heart® Laboratories with a donation of Stratasys J750™ Digital Anatomy™ 3D printers, as well as MakerBot METHOD X® and MakerBot SKETCH® 3D printers. The Visible Heart Laboratories are a large research lab located at the University of Minnesota Medical School that supports medical research, student and physician education, and medical device product development and testing.
This press release features multimedia. View the full release here: https://www.businesswire.com/news/home/20220214005103/en/
Students look at a 3D printed anatomic model in the University of Minnesota Visible Heart Laboratories. Credit: U of M Medical School | Visible Heart Laboratories
Stratasys’ Digital Anatomy 3D printers produce anatomic models that mimic the actual feel, responsiveness, and biomechanics of human anatomy. Models can be punctured, sutured, cut, and physically manipulated like actual human tissue. These attributes are especially important to the education, research and product development conducted in the Visible Heart Laboratories.
During their education, all University of Minnesota medical students pass through the Visible Heart Laboratories to learn about the benefits of 3D printing technology and how anatomic models can assist them in their future practice. The Visible Heart Laboratories also are committed to providing outreach education about cardiac anatomy and device therapy to students from middle school age to clinical cardiologists.
“The Visible Heart Laboratories are driven to train the next generation of medical device developers and provide them with the abilities to 3D print prototypes and/or virtually placed devices within real heart anatomies, as today these are considered essential skills,” said Dr. Paul Iaizzo, professor Visible Heart Laboratories, University of Minnesota Medical School.
In addition to student education, physicians at the M Health Fairview University of Minnesota Medical Center utilize 3D printing technology to educate patients with anatomic models that represent a patient’s actual anatomy and pathology. Anatomic models can reflect an individual patient’s demographics, comorbidities, or anatomic details like the accumulation of plaque in an artery or the presence of tumors. With these models, the medical team can easily describe treatment and surgical options with patients, leading to better patient outcomes. 3D printed anatomic models are especially valuable to physicians when preparing for complex cases or in pediatric cases where the models can be scaled to a size where it is easier for physicians to examine the anatomy. By practicing complex surgeries with 3D printed anatomic models, physicians can determine the best surgical approach for each individual patient, which can lead to better patient outcomes, reduced time in surgery, and cost savings for hospitals and healthcare facilities.
In addition to medical student, patient, and physician education, the 3D printing technology in the Visible Heart Laboratories supports medical device research across a variety of coronary medical device applications. 3D printing technology allows physicians, researchers, and medical device product developers to iterate, create, and test existing and new medical devices in anatomic models that mimic actual anatomy and pathology.
“We believe that widespread use of 3D printed anatomic models in healthcare would translate into better and more cost-effective patient care and shorter time to market for new medical device innovations. This sponsorship allows us to support the world-class education and medical device research happening right here in Minnesota,” said Rich Garrity, President, Americas for Stratasys. “At Stratasys, we recognize the importance of supporting the communities in which we live and work, and we are proud to support the University of Minnesota Visible Heart Laboratories and the work they are doing. ”
”
The Visible Heart Laboratories also are home to the University of Minnesota Atlas of Human Cardiac Anatomy, a collection of more than 800 human hearts that can be recreated with 3D printing technology for education and medical device testing and development.
“We are thankful for those who have donated their heart to the Visible Heart Laboratories, these gifts have allowed the lab to give the gift of life to others,” said Dr. Iaizzo. “Mixed reality education utilizing high resolution 3D printing greatly impacts our abilities to better educate residents, fellows, medical students, biomedical engineers and many others.”
To learn more about the University of Minnesota Visible Heart Laboratories visit www.vhlab.umn.edu. To learn more about Stratasys solutions for healthcare, visit www.stratasys.com/medical.
Stratasys is leading the global shift to additive manufacturing with innovative 3D printing solutions for industries such as aerospace, automotive, consumer products and healthcare. Through smart and connected 3D printers, polymer materials, a software ecosystem, and parts on demand, Stratasys solutions deliver competitive advantages at every stage in the product value chain. The world’s leading organizations turn to Stratasys to transform product design, bring agility to manufacturing and supply chains, and improve patient care.
To learn more about Stratasys, visit www.stratasys.com, the Stratasys blog, Twitter, LinkedIn, or Facebook. Stratasys reserves the right to utilize any of the foregoing social media platforms, including the company’s websites, to share material, non-public information pursuant to the SEC’s Regulation FD. To the extent necessary and mandated by applicable law, Stratasys will also include such information in its public disclosure filings.
Stratasys, J750, Digital Anatomy, MakerBot METHOD X and MakerBot SKETCH are trademarks or registered trademarks of Stratasys Ltd. and/or its affiliates. All other trademarks are the property of their respective owners, and Stratasys assumes no responsibility with regard to the selection, performance, or use of these non-Stratasys products.
Attention Editors, if you publish reader-contact information, please use:
- USA +800-801-6491
- Europe/Middle East/Africa +49-7229-7772-0
- Asia Pacific +852 3944-8888
View source version on businesswire.com: https://www.businesswire.com/news/home/20220214005103/en/
Stratasys Corporate & North America
Heather Morris
[email protected]
+1 612-875-2751
Investor Relations
Yonah Lloyd
[email protected]
+972-74-745-4919
Europe, Middle East, & Africa
Jonathan Wake / Miguel Afonso, Incus Media
[email protected]
+44 1737 215200
Brazil, Central America and South America
Erica Massini
[email protected]
+55 (11) 2626-9229
Asia Pacific and Japan
Alice Chiu
[email protected]
+852-9189-7273
University of Minnesota Visible Heart Laboratories
Kat Dodge
kdodge@umn.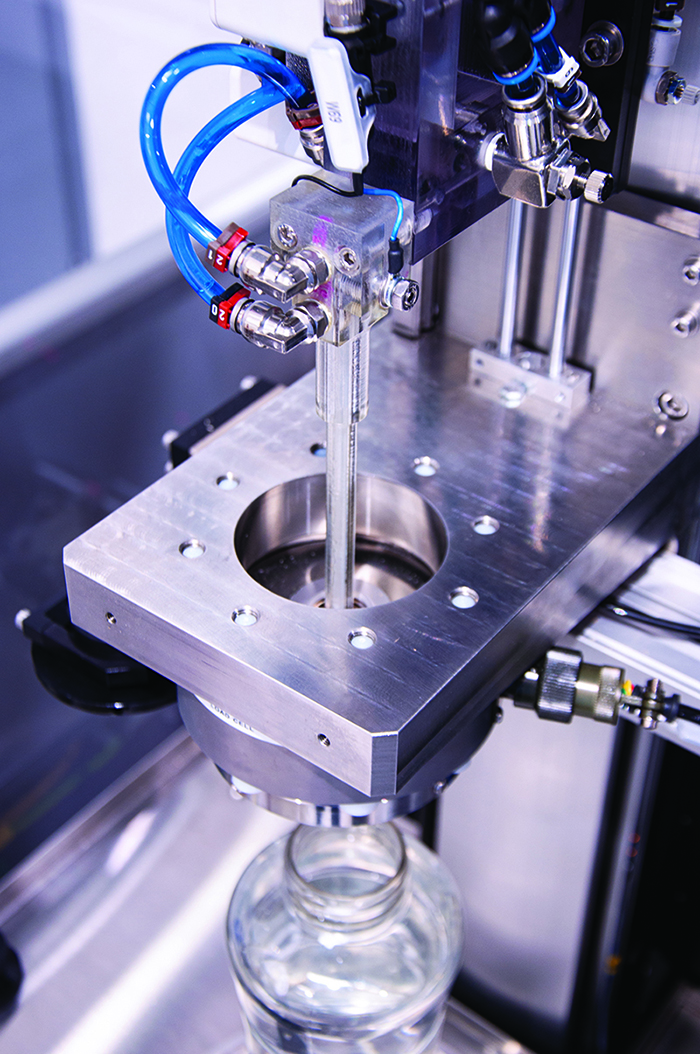 edu
edu
Source: Stratasys Ltd.
Released February 14, 2022
How to 3d print another 3d printer
Already have a 3D printer? Want another one?!
Why is this needed?
Well, let's say you have your own large printer and you can print fairly large objects. Do you believe in the idea of the reprap movement, the printer should be able to reproduce itself!
Or you want to challenge yourself and finally understand how the 3D printer works.
Or your current 3D printer is just sitting around gathering dust in the corner of the room, because you have already printed everything that came to mind, and the most difficult task that worries all 3d printing professionals is how to clone existing equipment on itself.
Step 1: Preface
Let's be honest.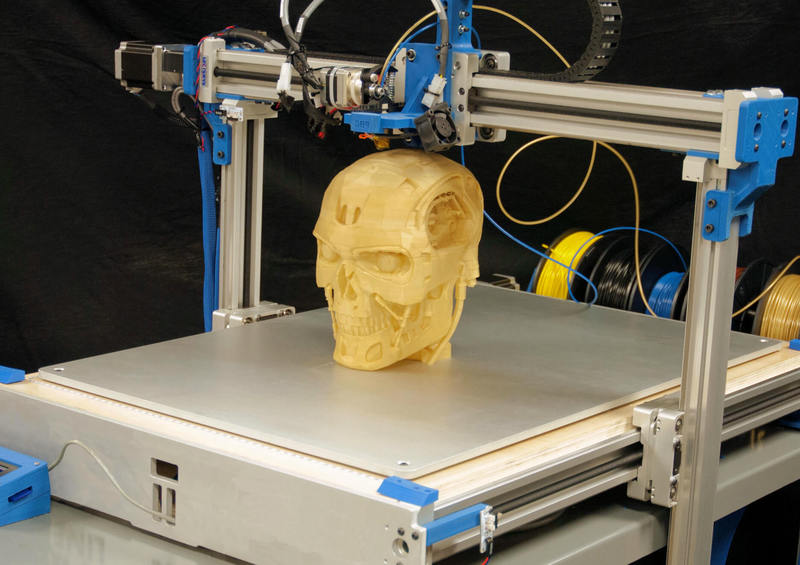 .. the is not the ultra cheap printer. This is not Chery 3D printer for $60. This not is a way to save money or time. This is not first printer.
Now let's talk about what is .
B 3Dtje mini 3D printer is:
- Damn easy to print
- Printed parts from PLA
- Everything fits within 200x200 print volume
- Most parts can be printed in 100x100 print volume
- Most parts are printed without supports , only in some cases they may be needed to improve quality
- Very few few needed tools
- Unlike most crafts that require a laser cutter, the CNC
- You can probably get away with a drill and a hacksaw to prepare 2 rods of the required size
- No source of MDF, or wood, or acrylic sheets or aluminum profiles, which can be expensive
- A Prusa i3 Clone
- This design is not new, nothing revolutionary, but it is reliable, prints well and works with any slicer
- Open source
- All model files can be downloaded free of charge
- You can download them and modify them as you like
- You can even sell them if you need to!
- Simple and interesting printing
- 19 models
- All parts are different and look very interesting together
- Easy to assemble
- All parts are connected with M3 screws and nuts.
- Cutting 2 to 4 metal rails
- Some 3d printed parts are assembled intuitively , you can even ignore photo
- All parts are connected with M3 screws and nuts.
- Really fucking cool!
- Small, portable, low moving parts! This printer can print fast! (when properly configured)
- This 3D printer you will DIY , completely!!
Let's get started!
Step 2: Prerequisites
You will need a 3D printer , well, or find someone with this device.
- Printable area must be at least 200x200mm XY and maybe 200mm Z if you want to print with refills
- PLA 1 kg, can be different, but this is the most convenient option
- I honestly don't know how much it will take. Likely 500g or so
- Tools
- Screwdrivers for screws
- Pliers, cleaning tools for printed objects (a clerical knife is enough)
- Metric drills for opening / cleaning the printed hole (you can also use a screwdriver)
- Knowledge on how to build a 3D printer from scratch
- These are not hard requirements, but knowing how to deal with common printer problems will reduce the amount of swearing when things aren't perfect the first time.

- If you understand firmware Marlin it would be very cool to talk about this, as there is a desire to improve some things.
- These are not hard requirements, but knowing how to deal with common printer problems will reduce the amount of swearing when things aren't perfect the first time.
Step 3: Parts
Right off the bat, I've made a list of exactly what you need and what you can buy to make the best possible quality. But it will be more expensive. Therefore, you choose which set to buy - in principle, they will not differ. In addition, you can order all this from China, it will be cheaper, but the wait will be longer. In any case, you need to look for all the components in English, so we take them from the table and, for example, insert in alliexexspress search .
The table is located at this link.
Step 4: Printing Parts
Now let's move on to the most interesting part, in my opinion - prototyping models. To be honest, I really like to print different things, you feel that you can handle any task when you have a 3d printer at hand. Okay, it's all lyrics.
Here is the project itself, where you can download 3d models for printer for free . Download and start preparing for printing.
The most important thing is to arrange the parts correctly on the table . The idea is to make the models have as few parts hanging in the air as possible. This will allow to drop support for . After all, they spoil the quality very much if you do slicing through Repetier Host with their auto-generation, and not draw them yourself.
You can watch a video showing the optimal arrangement of parts. Print settings I think you know how to do it, if not - there are articles about it with configuration files.
Step 5: Mounting
Let's assume that we have printed everything. Someone may have decided to use metal guides, buying them, for example, from IKEA, and cutting them into sections of the desired length. In any case, writing how to assemble this 3d printer does not make much sense, and it's too lazy, to be honest. In my opinion, there is nothing better than pictures!
Frame assembly
First, I'll lay out how our miracle should look like at the moment of medium readiness. Then we will see how the modules were assembled.
Assault Axis Y
This Axis drives The so -called bed . First we need to install the motor, put a pulley on it . Then we install a freely rotating pulley on the other side and measure 9 for them0003 belt .
And now we will install the bed itself, which will fasten the two ends of the belt to us. Just don't forget to tighten the pulleys and anything that isn't tight yet. The substrate will be massive and it will be inconvenient to crawl there already. The connection will require 200mm x 6mm bolts, so have them ready right away.
It should be noted that the belt must be very tight . This will greatly affect the print quality of . If you cannot do this at the time of assembly, you can use special tensioner . It's basically a simple spring. As for the axes, in this case they are printed, although this is far from mandatory, just the name of the project obliges))
X-axis assembly
Depending on your printer, you may need to make a hole with a 3mm drill in the belt tensioner. This hole should be quite free.
- Attach the motor to the end of the x axis with the connector down
- Attach 20T gear
- Insert 6mm rods 6mm x 180mm into the holes on the motor side. You need to cut these rods if you bought 200mm.
- Assemble the x-axis tensioner with either your own or printed tensioner bearing.
 Make sure the m3 nut is in the tensioner before proceeding.
 - Pass the belt from the left side (engine side), through the gearbox, through the idler bearing to the right side
- At this point, install belt tensioner to the right of the x-axis on the rods
- If you are happy with the length (make sure the x-axis of the tensioner is recessed quite a bit) you can cut the belt. Don't forget to leave extra belt length
- Attach LM6UU bearings in bottom bracket x
- All assembled, attach the straps to the carriage x
- Then it remains to adjust everything a little to make sure that nothing touches each other
Assembling the Z axis
Now we assemble the Z axis. If you have not installed the engines in the course of past work, it's time to do it. As you understand, they should stand on the left and on the right. We will install adapters for screw rods on them, where we will put them, holding them with a hexagon.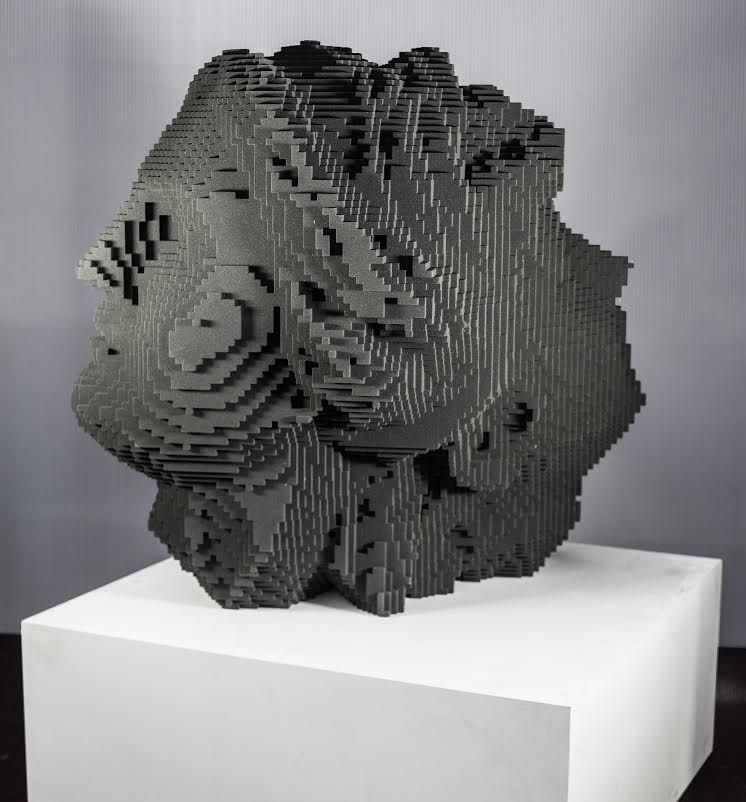
We stick the guides (parallel to the screw rods). We can say that we have finished assembling the case.
Step 6: Assembly of the electrical circuit.
How to lay the wiring is everyone's business. Here the options will be shown in the photo, but it's up to you to decide. The most important thing is to connect everything correctly. I'll also lay out the scheme, but it's better to see how this is done in ordinary 3d printers. For example, in order not to go far, you can go over the following articles directly on this site:
-
Exploring the features of a 3D printer
-
3D printer setup and calibration
-
Ramps 1.4 connection in 3d printer
It is not necessary to read everything - you can see the key places from the pictures and delve into their study.
The picture below shows the green power terminal. This is a very dangerous and unreliable thing that sometimes ignites - it is dangerous to leave a working 3d printer at home unattended. Therefore, in an article about Ramps, it is better to read how to be in this case.
Step 7: Firmware
Since you will (most likely) have an Arduino Mega as the brain of a 3d printer, uploading firmware to it will be quite simple. All you need is the Arduino IDE. The most standard firmware from Marlin. The main thing is to choose the correct configs for the board. I have not seen an article about the firmware on this resource, but it can be easily found on the Internet. Here are useful links:
- Firmware Marlin manual
- May be useful to someone info about reprap electronics, how is it functioning
Step 8: Testing
Finally time to print something! We note right away that the table must be covered with molar tape or Kapton, since we have it without heating. Otherwise there will be no adhesion. Also, before printing, be sure to correctly adjust the distance between the nozzle and the bed . How to do it correctly is discussed here. 3d printer calibration - our everything!!!
Since you were able to print parts for this printer, you can also slicing your own models for its small copy, assembled by yourself. Therefore, we will not talk about the slicer, just do not forget to reduce the print area!
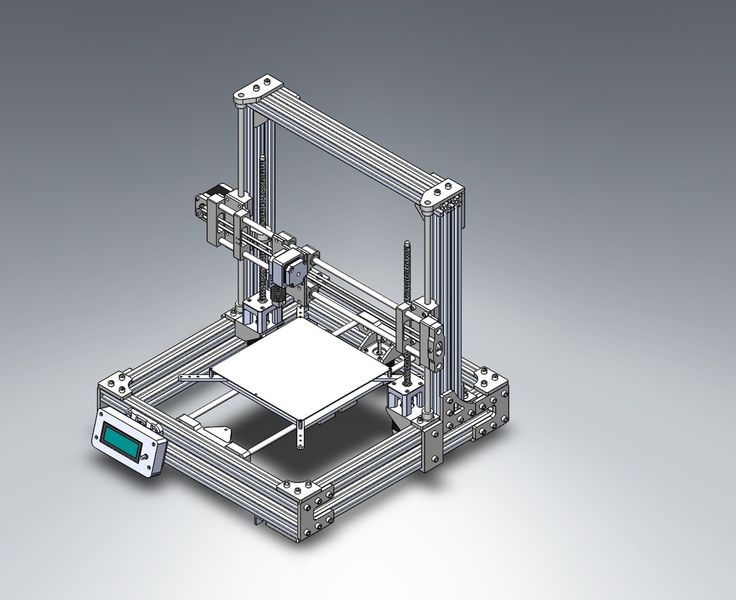
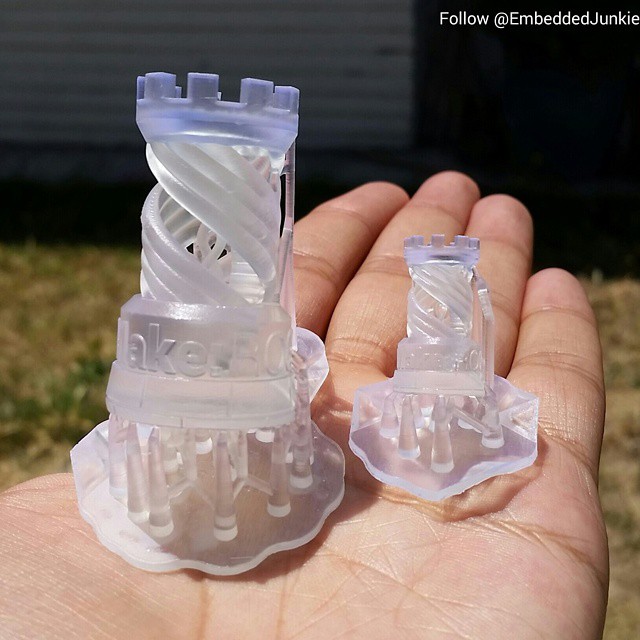
And so that's what each of you can have at the end of this article!
Metal 3D printing on a home 3D printer. Technologies today and near future
While consumer 3D printing has become simple and inexpensive enough for home use, and the range of consumables is growing by leaps and bounds, there remains one area that has not reached its full potential. It's about metal 3D printing.
Actually, no one can be surprised by metal printed products. Enthusiasts and professionals are aware of the possibilities of technologies such as selective laser sintering or electron beam melting. These methods make it possible to create three-dimensional metal models that are practically indistinguishable from cast or stamped parts, but often surpass their traditional counterparts in lightness and affordability, although somewhat inferior in strength.
Unfortunately, the above technologies require the creation of complex, expensive devices with considerable dimensions. Worse, consumables are scarce and often quite expensive, since sintering and smelting methods require the use of powdered materials produced in relatively small quantities.
What are the prospects for 3D metal printing with the now familiar extrusion printers?
Let's start with the fact that it was extrusion printers, that is, devices that print by layer-by-layer deposition (FDM), and became the first 3D metal printers. The existing technology allows the use of a mixed material of metal particles and a binder. The finished model may look like a metal product, but will not have the appropriate mechanical characteristics. As an option, it is possible to fire the finished model for sintering metal particles or, more typically, for melting a binder material with simultaneous impregnation with a relatively low-melting metal or alloy, such as bronze. Naturally, the finished product will not differ in the strength of cast analogues, and the process itself requires the use of special pottery kilns, which leads to an increase in the cost of technology.
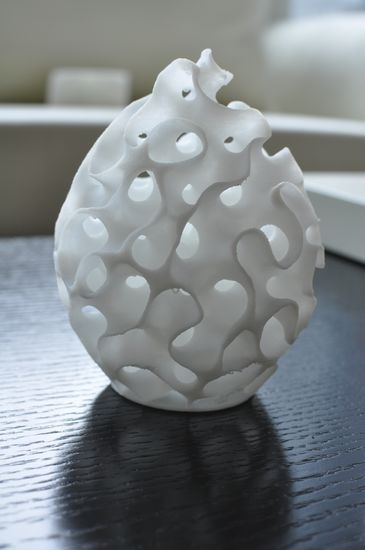
Metal model example,
In general, this method is well suited for creating models that are not designed for high mechanical loads and do not require high wear resistance - for example, jewelry. The demand for such metal 3D printers is quite high, with several promising metal clay printers currently under development, including the Mini Metal and Newton 3D. A real breakthrough would be the ability to 3D print finished metal products using FDM technology alone. However, the capabilities of existing extrusion devices are quite limited.
Problems are constructive. To begin with, the temperature of the extruder rarely exceeds 300°C, and the extruders themselves are often made of aluminum with a melting point of about 650°C. Of course, this excludes the possibility of printing with steel, titanium or any other refractory metals and alloys. On the other hand, extruders, in turn, can be made of refractory materials in order to increase the operating temperature range. Among enthusiasts, even the possibility of ceramic printheads is being considered.
The second problem is the background temperature. Although, in general, an increased temperature in the build chamber is welcome, the heat radiation near the extruder when trying to print with refractory metals can be high enough to damage plastic parts and wiring in the printer itself.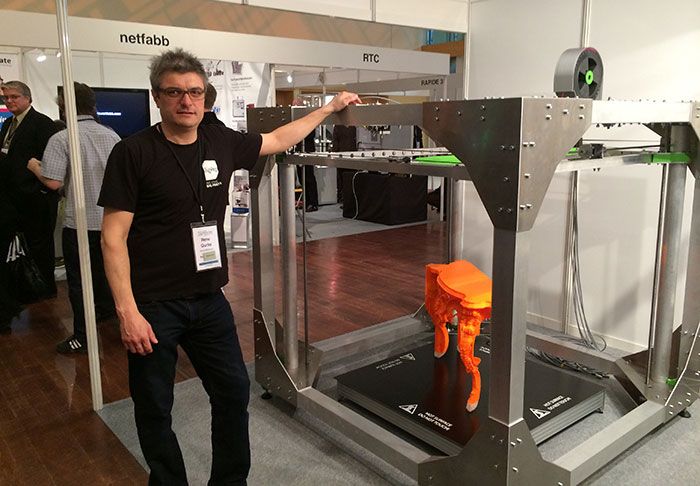
The third challenge is to ensure that the consumable heats up fast enough to extrude on time.
Finally, the use of metal as a consumable can lead to heavy clogging of the extruder. If cleaning the print head from hardened plastic is a headache, then cleaning from hardened aluminum or steel can be overwhelming.
Until now, attempts to print with homogeneous metal or alloys have been limited to low-melting materials such as solder or pure tin. The results can hardly be called successful. Even such fusible materials quickly clogged the nozzle and also caused increased wear: according to the testers, the diameter of the aluminum nozzle increased from 1 mm to 2 mm after passing 500 grams of solder used during the experiment. Nevertheless, some progress at minimal cost is evident.
An illustration of an amateur tin extrusion experiment
Not so long ago, a development called Vader was presented at the Maker Faire in New York. According to the developers, Scott and Zack Vader, their device is capable of extrusion printing with aluminum. Only one simple fact is alarming - the developers did not provide a single sample of printed models, and later admitted that the device does not yet have a suitable extruder. At the same time, the designers make bold statements: the maximum resolution will be 50 microns, and it will be possible to buy a 3D metal printer for “only” $10,000. Well, let's wait and see.
Metal printer available. There is no extruder.
As it turns out, everything is not so simple
However, the development of metal printing methods continues on an industrial scale. Developers at the University of Texas at El Paso have received over $2 million in funding to build the world's first closed-loop 3D printing production line. The goal of the project is to create a device capable of creating high-tech devices, including unmanned aerial vehicles. One of the features of the system will be the possibility of automatic mechanized installation of finished electronic components and the manufacture of electrical wiring.
Hybrid Fab - prototype 3D printed production line
Of course, wiring printing involves 3D printing with metal, and even in combination with plastic and ceramics. Even the most advanced industrial laser sintering systems are not capable of producing heterogeneous objects due to the nature of the technology. You can print with metal, you can print with plastic, but not at the same time. NASA is currently working on EBFȝ technology, which combines elements of electron beam melting and extrusion printing, which may allow practical printing of composite structures, but this technology promises to remain inaccessible to the layman due to its high complexity and cost. On the other hand, if the developers at the University of Texas at El Paso achieve positive results, then a real revolution could happen in the world of 3D printing: the combination of plastic and metal printing could lead to affordable printers capable of printing electronic components.
The technology under development is based on a new consumable supply system optimized for the use of metals.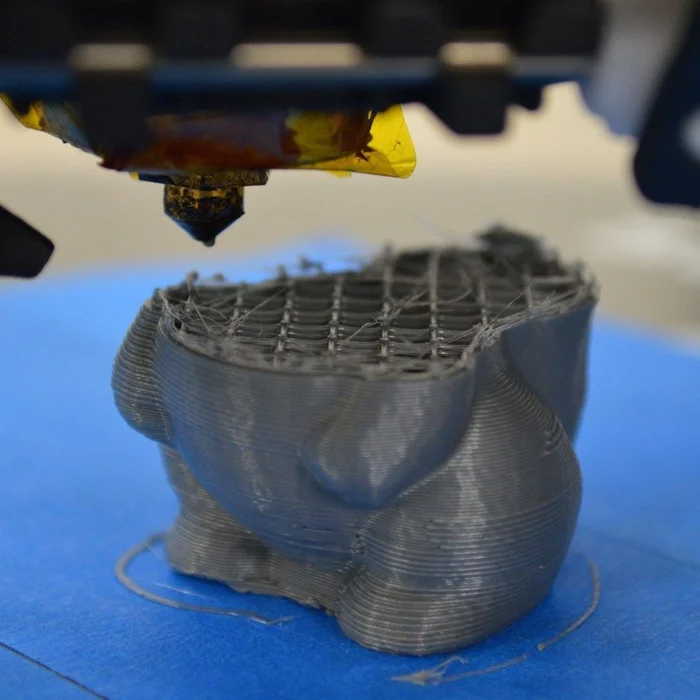 The extruder is equipped with a special heating element of a large length, which allows melting the metal before it is fed to the nozzle, and thermal insulation avoids damage to the structure of the device. And although printing with steel or titanium is likely to remain beyond the capabilities of this technology, stable printing with copper or aluminum can already be considered a breakthrough. In principle, even if the new metal printing technique does not justify itself, the project still has a chance of success, because the main goal is to create a production complex that obviously uses some ready-made components. Nevertheless, one would like to hope for the complete success of the development, including printing on metal.
Expectations are high as the developers have already provided concrete examples of their work. The results shown are still very far from the resolution required for microchip printing, but a start has been made. If the technology is successful, it will at least be possible to manufacture electromechanical components, such as the stepper motors used to drive extruders, work platforms and fans. In this case, it will be possible to create full-fledged RepRap devices - self-replicating 3D printers. Remarkably, the main partner of scientists in the development of the experimental production line is Stratasys, one of the pioneers and current leaders in the 3D printing market. An interesting point was the fact that Stratasys did not invest in the development or acquisition of laser or electron beam sintering technologies. It is possible that Stratasys sees the development of FDM-based metal 3D printers as more promising.
Parallel to the development of FDM 3D printing, an open project is being developed to adapt electron beam melting technology for domestic use, called MetalicaRap. For now, consumer and semi-professional metal 3D printing will remain limited to the creation of composite materials based on metal chips with the possibility of additional heat treatment to create all-metal models. And although such products are inferior in strength to cast products, enthusiasts still have a pleasant opportunity in the arsenal that is inaccessible to expensive industrial devices - the ability to print multi-colored metal-based models, because the color of polymer fillers is easy to change.