3D printing transparent materials
Guide to Transparent 3D Printing
Clear materials, such as glass or acrylic, have a wide variety of applications in consumer products, industrial uses, healthcare, and more. However, prototyping or producing low volumes of clear parts can be expensive and inefficient with traditional methods, which raises the question: can you 3D print transparent parts? The answer is yes, with the right technology and materials.
Stereolithography (SLA) 3D printing can create transparent objects that, with some post-processing, can be made optically clear. Formlabs' latest SLA 3D printers, the compact Form 3+ and the large format Form 3L, take clarity one step further by using a flexible resin tank that reduces peel forces, resulting in clearer parts with smooth surface finish.
There are multiple materials for producing translucent and transparent 3D printed parts:
- Clear Resin is a rigid material that polishes to near optical transparency, making it ideal for fluidics, moldmaking, optics, lighting, showcasing internal features, and any parts requiring translucency.
- BioMed Clear Resin is a rigid, transparent material for biocompatible applications requiring long-term skin or mucosal membrane contact.
- Elastic 50A Resin is a soft and stretchy material that is semi-translucent. It is ideal for prototyping parts normally produced with silicone.
- Flexible 80A Resin is a more stiff soft-touch material that is also semi-translucent. It is ideal for simulating the flexibility of rubber or TPU.
In this guide, we walk you through various finishing methods to create transparent 3D printed parts for a variety of applications, from optics to light pipes to fluidics. Methods range from quick solutions for adequate transparency, to niche techniques for creating optically clear parts.
Clear and transparent 3D prints are ideal for creating clear prototype parts, showing internal cavities and details, housing LEDs, creating windows, or printing see though anatomical models and medical devices. Formlabs and our customers have used Clear Resin to create a completely optically clear lens for a fully 3D printed camera, tiles for a Fresnel lens installation in Times Square, light pipes, prisms, millifluidic devices, and more.
Formlabs applications engineer Amos Dudley designed and 3D printed a lens for a fully 3D printed camera.
Sample part
Curious to see how transparent 3D prints SLA 3D printing is capable of? We’ll ship a free clear 3D printed part to your office.
Request a Free Sample Part
Yes, but with caveats. Polymethylmethacrylate (PMMA), commonly known as acrylic, is a transparent thermoplastic that is commonly used as a more durable alternative to glass. While 3D printing acrylic is possible with fused deposition modeling (FDM) 3D printers, it's not really user-friendly as the material itself is toxic and prone to warping, while the 3D printed parts are only semi-translucent due to the lower resolution of FDM printers.
For a 3D printing acrylic-like fully transparent parts, we recommend printing on an SLA 3D printer with Clear Resin and then post-processing the 3D printed parts for full transparency using one of the methods mentioned in this article. Using an acrylic spray is one of the methods to ensure clarity.
We’ve tested several techniques for post-processing parts 3D printed in Clear Resin. In this post, we’ll cover manual sanding, clear coating, and resin dipping. Each finishing option requires varying levels of effort, depending on the degree of transparency and surface finish your part requires.
Applications: Manual sanding and polishing can be effective for simple shapes with few details, but are less suited to finishing complex models. It is very difficult to reach total optical transparency with this method.
You’ll have to sand to extremely fine grits to manually finish a transparent part, but with some effort, you can sand and polish parts to be as clear as a magnifying glass. It is, however, very challenging to completely eliminate all layer lines via manual finishing—you may notice micro-scratches when holding the part at a shallow angle to the light.
Instructions: Use a range of incremental sandpaper grits to smooth your surface, then polish the part with acrylic cleaner and a microfiber cloth.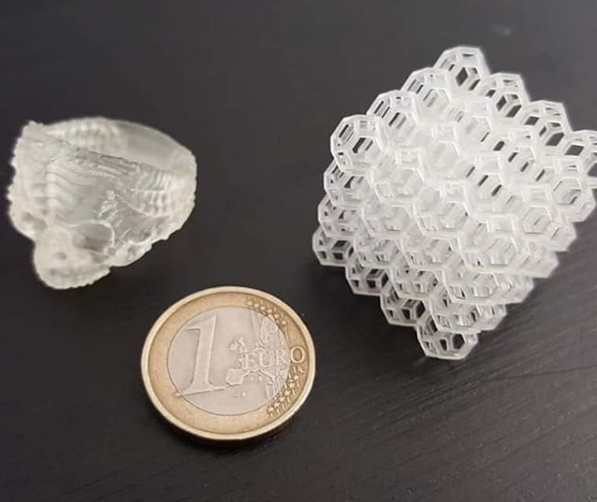
At around 3000 grit, transparent 3D printed parts become glossy and very smooth to the touch. By 12000 grit, they are reflective. Try using a range of sandpaper and micromesh pads with grits from 400 to 12000, in increments of 200, slowly and carefully to clean the parts between grit levels and to eliminate scratches from the previous level before moving on to the next.
Our support site offers a simple visual step-by-step guide for manual sanding, including an optional finish with acrylic spray.
Tip: If you only need semi-transparency, simply use mineral oil to create an even finish and hide any light spots on your part.
We’ve tested a variety of methods of polishing clear 3D prints, from hand sanding and spray coating to resin dipping.
Applications: Spray coating is an easy, fast way to improve the clarity of parts without much reduction in detail. This method is effective for all kinds of models, as it's able to coat complex details that may be hard to reach with regular sanding and polishing.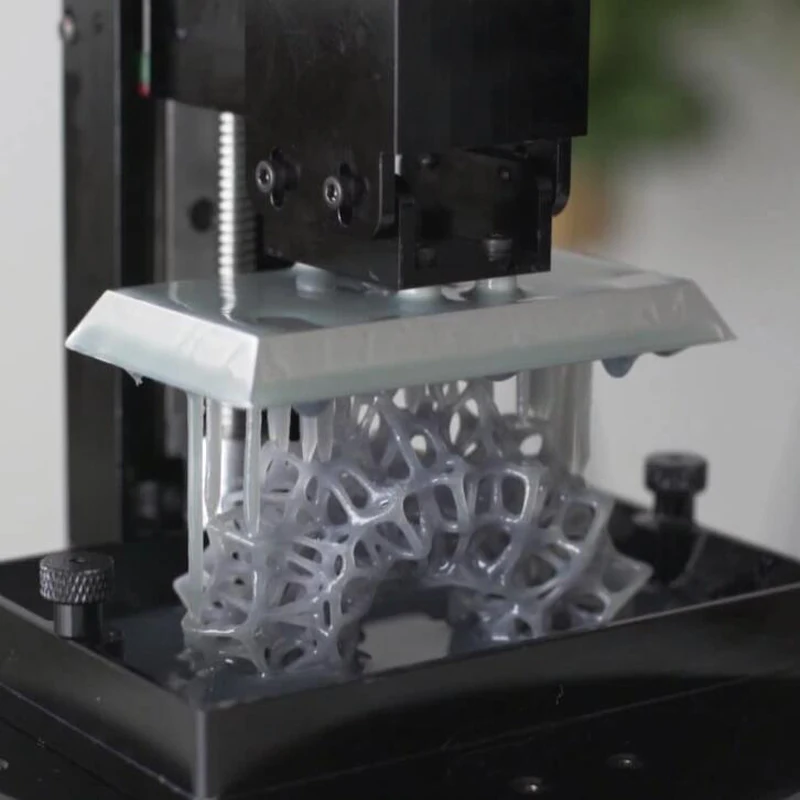
Clear coating alone helps to conceal layer lines and protect parts from UV exposure, which can cause yellowing and unintended post-curing. If you’re looking for a smooth, glass-like surface finish, perform the manual sanding and polishing technique prior to coating; the more sanding that comes before clear coating, the better the clarity. This additional step is great for post-processing prototypes that look like fully transparent plastic, e.g., packaging, bottles, and microfluidics.
Instructions: There are several options for clear coating 3D prints, from inexpensive sprays to products that require a dedicated room and tools.
- General purpose clear coat spray paints: There is a wide variety of high quality and affordable sprays. We recommend using a 2K clear coat.
- Automotive sprays: High-solids acrylic urethane clearcoats offer very high gloss and are designed for air-dry and baking conditions, but require a spray gun and dedicated space for spraying, as well as a base coat.

For spray coating, start with a clean, dry part already washed in isopropyl alcohol (IPA). Do not post-cure the part ahead of spraying, as this can cause yellowing. Let the part air dry. Once it’s completely dry, apply two to three spray coats in a dust-free environment.
Tip: For a fee, auto body shops may do the coating for you with a spray like Lesonal Universal Clear. In most cases, these shops will use a light solvent, like naptha to clean and prepare the part’s surface prior to painting.
For an installation in Times Square, Window to the Heart, the Formlabs and Aranda/Lasch teams worked with an auto body shop to spray coat each tile in Lesonal Universal Clear.
Applications: This method is best for when you need very transparent parts, and only works on flat or near-flat surfaces, such as a lens or a window into the interior of a part.
Resin dipping results in parts that are extremely smooth, with clear and sharp surface reflections.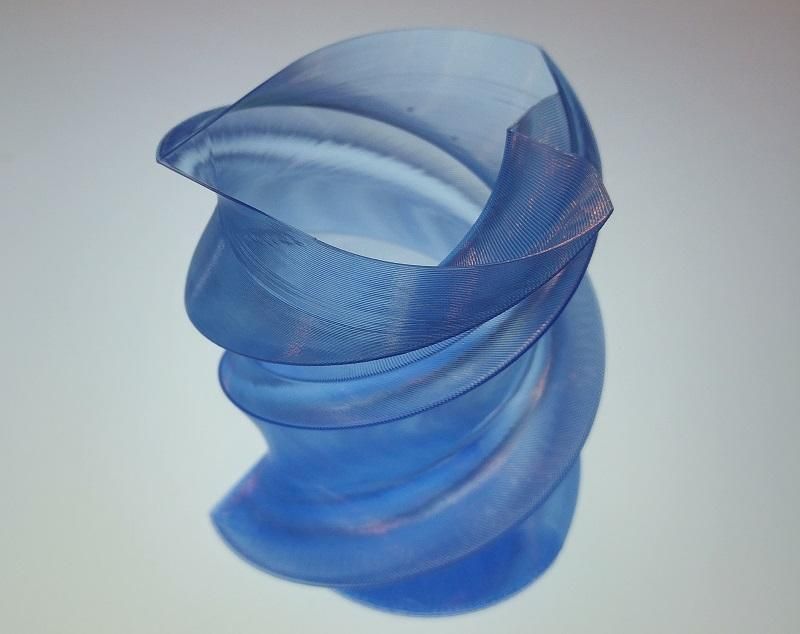
This technique can be used to create an even smoother finish for parts printed in other SLA materials, although it can reduce detail.
Instructions: Apply Clear Resin to the part with drops from a syringe, or by dipping the part as as desired. The viscous resin will fill layers and scratches on the part, forming a completely smooth surface.
The layer of resin should be as thin as possible, while still eliminating layer lines. Pull off any bubbles with a syringe. Completely post-cure the part using the appropriate settings, then repeat the process for the other side, both dipping and post-curing.
Three stages of resin-dipped lenses, with the final lens on the left.
Note: The dipping process alters focal length slightly for lenses. For our 3D printed camera lens, Formlabs applications engineer Amos Dudley designed and printed a lens testing device.
With the Form 3+ SLA 3D printer, you can create clear and fully transparent 3D prints affordably and with minimal post-processing.![]()
Download our white paper for a detailed overview of SLA ecosystems and the step-by-step 3D printing workflow.
Curious to see the quality and clarity firsthand? Request a free transparent 3D printed sample part.
Request a Sample Printed in Clear Resin
How to 3D Print Clear Plastic & Transparent Objects – 3D Printerly
Many people wonder whether you can actually 3D print clear/transparent objects that you can see through. I decided to write an article about this to answer this in a little detail, so you have a better understanding.
Keep on reading through this article for useful information about this topic, as well as other tips you can make use of.
Can You 3D Print a Clear Object?
Yes, you can 3D print clear objects with FDM filament printing and resin SLA printing. There are clear filaments such as PETG or natural PLA, as well as clear and transparent resins that can create see-through 3D prints. You need to post-process the exterior of the print so it is very smooth, without scratches.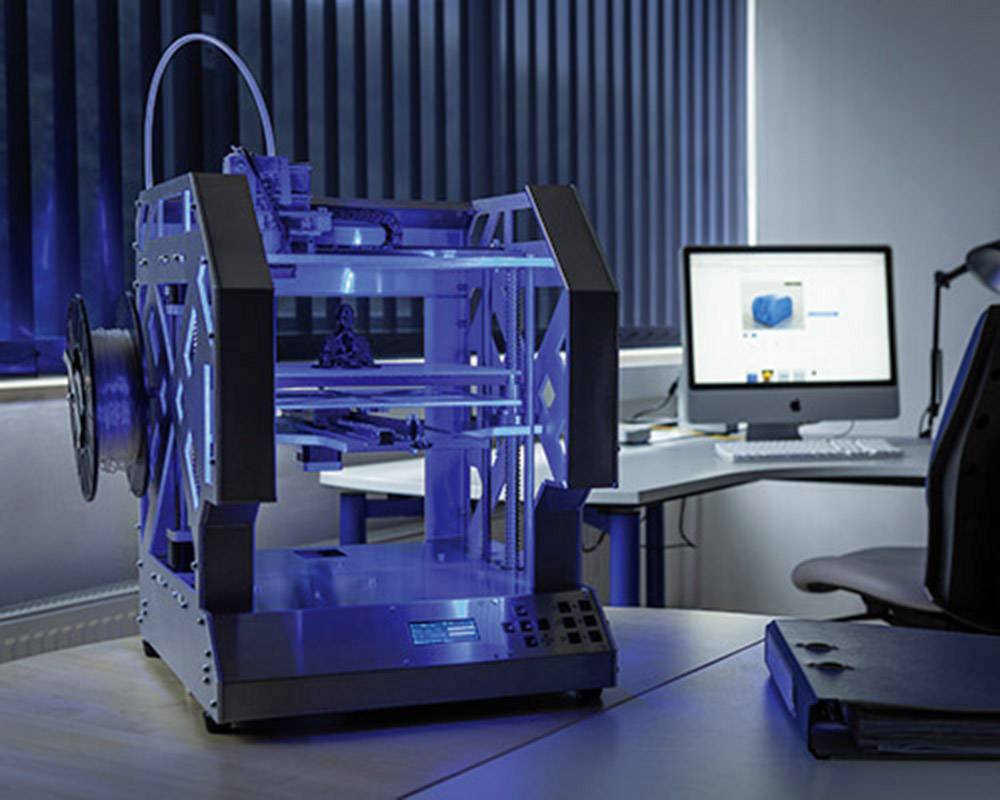
There are different levels of transparency that you can achieve, with most people only settling for translucent, or semi-transparent 3D prints.
With the right technique and amount of work, you can produce 3D prints that are very see-through, mainly through post-processing such as sanding, polishing, or resin dipping.
Many people are okay with clear 3D prints that are somewhat see-through which still looks cool, but you can achieve a great degree of transparency or semi-transparency with the help of sanding and coating.
There are different reasons why someone might want to 3D print a transparent object, such as a decorative piece for your home like a vase for flowers, or even a phone case that shows the mobile off.
Transparency and the ability to see through the objects is controlled by the way light passes through them. If light can easily pass through the object without any disturbance or being redirected, the object will be seen as transparent.
Basically, the way the light is reflected needs to be as straight as possible, so if there are scratches and bumps, the light will change directions, meaning it will be translucent (semi-transparent) rather than transparent as you want it.
Well, the first thing you’ll need 3D print a clear object is of course some good quality clear filament.
Then you’ll want to optimize your print settings to account for getting the best results in seeing through the filament.
Finally, you want to do some serious post-processing to get the most smooth and clear outer surface finish that you can get.
Let’s get into how the process looks with both filament 3D printing and resin 3D printing.
How Do You Make a Filament (FDM) 3D Print Clear or Transparent?
There are a few different methods that users have produced transparent and clear 3D prints using a filament 3D printer.
To make filament 3D prints clear and transparent, you can use a filament which can be smoothed with a solvent such as ABS and acetone, or PolySmooth filament with isopropyl alcohol. Using a large layer height is important, as well as doing post-processing like sanding and spraying a clear coat.
Using PolySmooth Filament with Isopropyl Alcohol
One method to do this is by using a specialized filament called the PolySmooth by PolyMaker, then use a high strength of isopropyl alcohol to gradually smooth and dissolve the outer surface, leading to a very clear 3D print.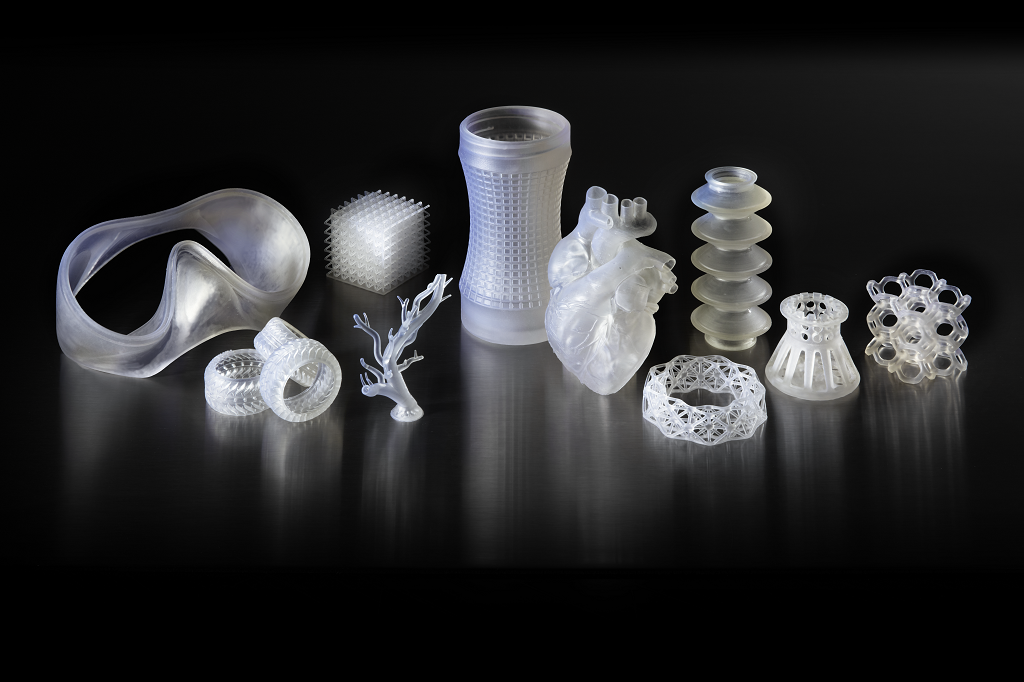
The 3D Print General made a great video on the process of how he found one 3D printer user do this method successfully, which he then tried himself and got great results.
You can see how clear and transparent he got the 3D prints, though the method does take some time to get it to a good level.
He mentions that using a larger layer height works best for producing these transparent 3D prints, where 0.5mm was a great balance of being able to print at relatively steep angles while still being a good-sized layer height.
The 0.5mm layer height was coupled with a 0.8mm nozzle.
He makes sure to use vase mode so that there is only 1 wall that gets 3D printed, leading to less possible imperfections that can negatively affect the light passing through straight and direct, which is needed for that transparency.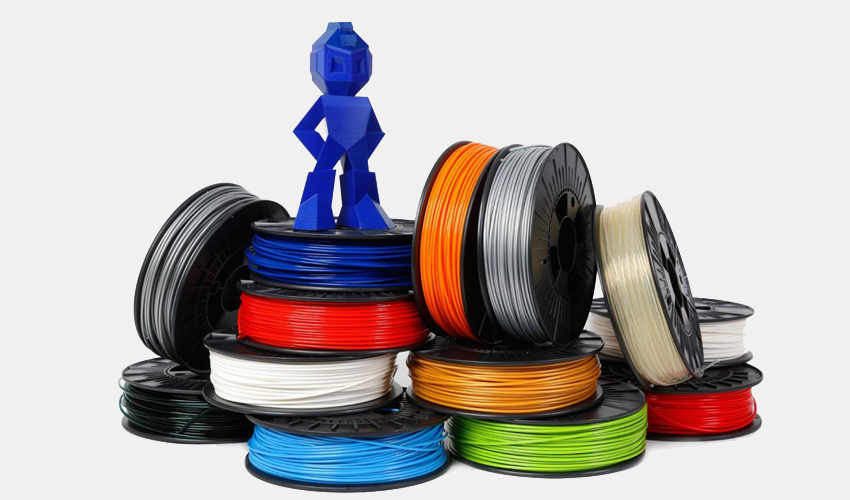
You may also choose to do some sanding with some fine grit sandpaper, around the 300 grit mark to smoothen out those layer lines, but it’s not necessary since the alcohol is acting as a solvent anyway.
A mixture of the PolySmooth filament, and spraying isopropyl alcohol is likely to produce some really clear and transparent 3D prints.
3D Printing With Good Settings & Post Processing
3D printing transparent objects is easiest to do with flat objects because they are much easier to post-process. With curved objects or 3D prints with more details, it’s hard to sand and smooth those crevices.
If you want to 3D print a clear object, you’ll be better off with a flat block shape.
FennecLabs have a great article which details their tried and tested method of creating transparent 3D prints, ranging from clear lenses to “glass block” looking objects where you can see another model within.
They recommend that you use the following settings:
- 100% infill
- Maximize the temperature in the filament manufacturer’s range
- Keep your flow rate above 100%, somewhere around the 110% mark
- Disable your cooling fans
- Reduce your printing speed by around half of what your normal speed is – around 25mm/s
On top of getting the 3D print right in terms of settings, you also want to post-process the print to the best ability.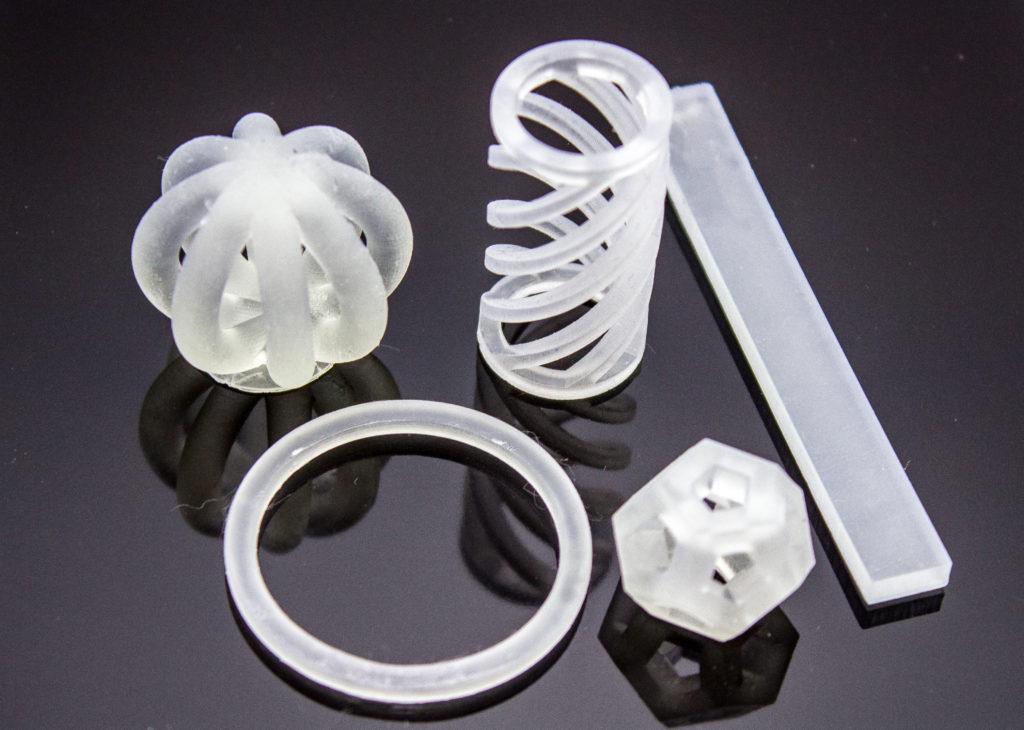 If you want to 3D print transparent objects rather than translucent, using a range of low and high sandpaper grits is important.
I’d recommend getting a set such as the Miady 120 to 3,000 Assorted Grit Sandpaper from Amazon which provides 36 9″ x 3.6″ sheets.
You want to start off with the low grit sandpaper to get rid of the deeper scratches, then slow work your way up to higher grits as the surfaces get smoother.
It’s a good idea to dry, as well as wet sand as you do this to get the best results, so you can really get that clean, polished look on the outer model. This gives you a better opportunity to see through the 3D print clearer.
Once you have used a variety of sandpapers for your print, you can polish your model with a small soft piece of cloth along with polishing paste. Another option is to spray your clear model with a clear coating.
Do keep this fact in mind that the surface can easily be damaged if sprayed, so make sure that the coat of spray has been dried up completely before moving forward.![]()
How Do You Make a Resin 3D Print Clear or Transparent?
To make a clear resin 3D print, you can use the resin dipping technique after your 3D print comes off the build plate. Rather than wash & cure your 3D print, you want to have a thin, smooth coat of clear resin on the outer surface. After curing, it provides a smooth surface with little scratches or layer lines.
When you 3D print normal transparent resin, although the layer lines are really small (10-100 microns), the outer surface is still rough enough to not provide a direct light to the other side. This leads to a translucent resin 3D print rather than a transparent one.
We want to get rid of all the layer lines and scratches on the 3D print to be able to see through.
Using the resin dipping technique is really effective to do this, as we can carefully apply a thin coat of resin and cure it as normal.
Some people choose to use the sanding post-processing method, similar to filament printing which can work really well, although not for complex shapes.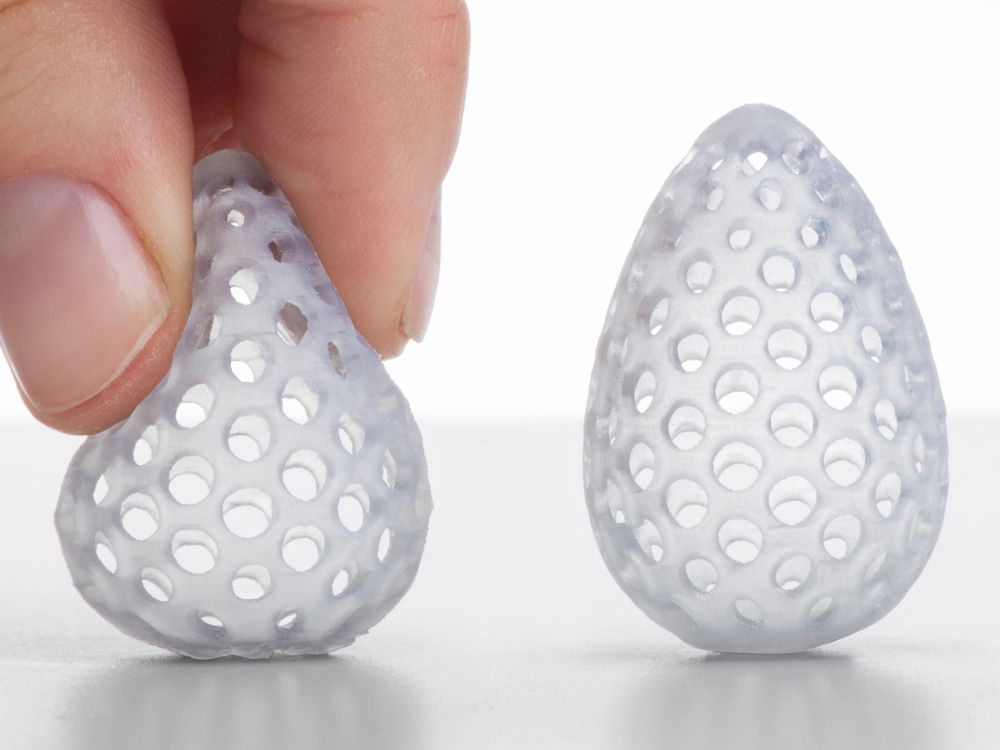 If you have a flat shape or one that can be sanded fairly easily, this should be okay.
Another method as previously mentioned is by spraying a clear coat after 3D printing the object.
The Rust-Oleum Clear Painter’s Touch 2X Ultra Cover Can from Amazon is a product that many 3D printers use as a base for their 3D prints. Many users have used it as a way to provide a smooth surface without having to sand.
This smooth surface is what works well for creating that improved transparency. It’s quick-drying, even-spraying, and perfect for giving your 3D prints a more professional finish.
It’s said that you avoid washing clear resin 3D prints with isopropyl alcohol because it is known to lead to slightly cloudy translucent 3D prints, though as long as your post-processing is done well, it should be okay.
An ultrasonic cleaner is a great solution for cleaning clear resin 3D prints, along with a good detergent. Check out my article – 6 Best Ultrasonic Cleaner for Your Resin 3D Prints for cleaning your prints like a pro.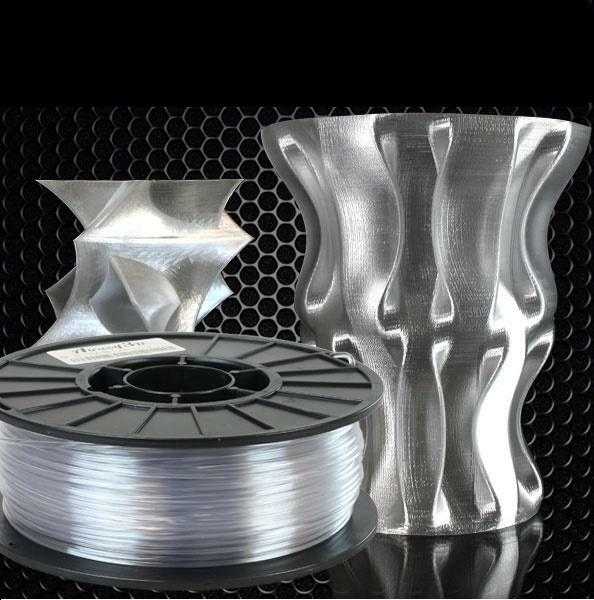
You shouldn’t over cure/over exposure your clear resin 3D prints because it can lead to yellowing, as well as curing it for too long after washing it.
Some people have recommended submerging the clear 3D print in a clear glass of water, then curing it after you have cleaned and dried it. You can check out my article on How to Cure Resin 3D Prints in Water.
Another user recommends using Rust-Oleum Polyurethane Gloss Finish Spray from Amazon. It’s described as a crystal clear finish that never yellows.
You also want to remember to either hollow your resin 3D print or have 100% infill because anything that doesn’t provide a clear direction of light through the object is going to contribute to less transparency.
Best Transparent Filament for 3D Printing Clear Objects
You can find transparent filament for 3D printing in almost all types of printing materials. PLA, PETG, and ABS are the most common printing material but when it comes to printing transparent models you need to choose the best one.
Users’ feedback and experiences say that ABS and PETG can get better and almost the same results in terms of transparency while PLA usually results in foggy prints and may be hard to print as well if you are not much experienced.
It may be difficult for beginners to print clear objects with ABS but you can get the job done using PLA & PETG. Some of the best transparent filament for 3D printing clear objects includes:
GEEETECH Clear PLA Filament
This is a really popular filament which have many users praising its quality and features. You’re getting an easy-to-use, clog-free and bubble-free filament that works with all your standard 1.75mm FDM 3D printers.
You have a 100% satisfaction guarantee as well. Many users mention how much they like the level of transparency they get in their 3D prints even without post-processing, but to get that high level, you’ll need to follow the right steps.
You can find a spool of GEEETECH Clear PLA Filament from Amazon today.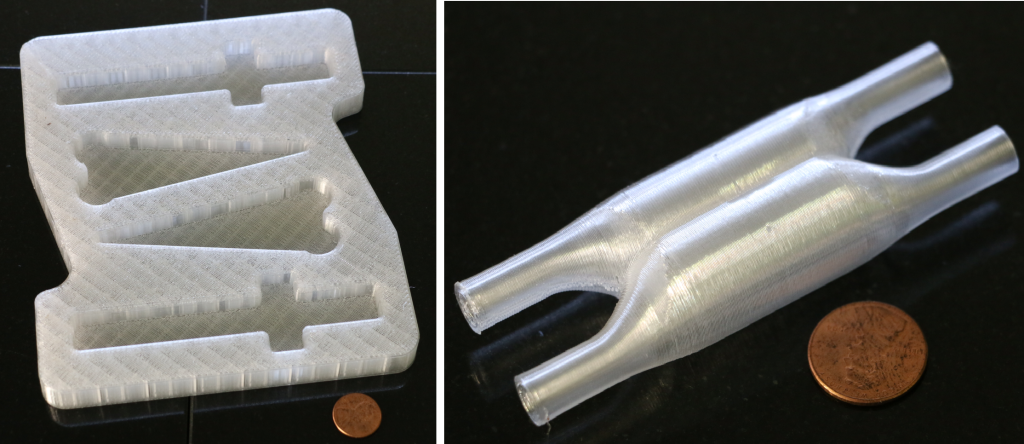
Octave Transparent ABS Filament
This is a lesser known brand of filament, but still looks like it performs really well in terms of producing transparent 3D prints. It’s a clear ABS filament of high quality that users mention produce amazing 3D printing results.
The tolerances are pretty tight and it has a fairly wide printing temperature range. Some users said how it doesn’t have the typical smell of ABS compared to filaments like HATCHBOX ABS, which is great.
It is known to have a pretty nice flow through the nozzle, as well as having great layer adhesion.
A user of this filament said it was his first time 3D printing with ABS, and a 30-hour 3D print later, described it as the best quality they have achieved so far. They also have a heated build chamber at a temperature of around 55°C.
You can get some Octave Transparent ABS Filament from Amazon.
OVERTURE Clear PETG Filament with Build Surface
OVERTURE is a very popular brand of filament that many thousands of users have grown to love, especially their transparent PETG.
They guarantee a bubble-free and clog-free experience.
It’s important for your filament to be dry so they give each filament a 24-hour drying process before they package it up in their vacuum aluminum foil packaging along with desiccants to absorb moisture.
With the proper print settings and post-processing, you’ll be able to get some pretty great transparent 3D prints with this filament.
Get yourself a spool of OVERTURE Clear PETG from Amazon.
Best Transparent Resin for 3D Printing Clear Objects
Anycubic Clear Plant-Based Resin
Anycubic Plant-Based Resin is one of my favorite resins out there, and their clear color works great. It has a rating of 4.6/5.0 on Amazon at time of writing and has countless positive reviews of just how well it produces high quality resin 3D prints.
You don’t get that high level of shrinkage in this resin. There is a shorter curing time compared to other resins, as well as great precision and smoothness.
It’s environmentally-friendly since it uses soybean oil as the raw material, also leading to a low odor.
Many users have created flawless 3D prints without needing to do all sorts of tweaking a trial and error with the settings. This one works really well right out of the box.
With the resin dipping method, as well as the post-processing method with sanding, you can get some awesome transparent 3D prints.
Elegoo ABS-Like Translucent Resin
This Elegoo ABS-Like Resin is probably the most popular brand of resin out there, having around 2,000 customer reviews and a rating of 4.7/5.0 at time of writing.
Similar to the Anycubic resin, this one has a shorter curing time than usual so you can save time on your 3D prints. It has high precision, low shrinkage, fast curing and great stability.
There are many features that you’ll love when you get a bottle of this resin for yourself for your transparent 3D prints.
Siraya Tech Simple Clear Resin
Siraya Tech Simply Clear Resin is a great product for you to create transparent resin 3D prints. One of the main highlights of this is how easy it is to clean and handle after printing.
Usually, resin manufacturers recommend cleaning with high strength alcohol like 70%+, but this one can be easily cleaned with 15% alcohol. You also get a resin that is fast to print and has a low smell.
On top of this, it has high strength so it can hold up to more force than other resin out there.
As many users have described, once you use a coat of clear gloss varnish after you cure it, you can create some lovely crystal clear parts.
Another user mentioned how he’s tried four different brands of clear resin and none of them were as easy to handle as this one.
Transparent 3D Printing Guide
Stereolithography (SLA) 3D printing can produce transparent objects that, after some post-processing, become optically transparent.
Formlabs' latest stereolithographic 3D printer, the Form 3, improves model transparency by using an elastic resin reservoir that reduces forces on the model, resulting in smoother, more transparent parts.![]() 3D printing on a Form 3 in Clear Resin is a great way to produce parts that require light transmission and, with the right post-processing techniques, transparency.
3D printing on a Form 3 in Clear Resin is a great way to produce parts that require light transmission and, with the right post-processing techniques, transparency.
The following processing methods can be used to 3D print transparent parts for a variety of purposes, from optical devices to light guides and liquid elements. Techniques range from quick solutions to obtain sufficient transparency to specialized techniques for creating optically transparent parts.
Clear and transparent 3D models are ideal for creating transparent prototyping elements, showing internal cavities and details, making LED housings or windows. Formlabs and our customers have used Clear Resin to create an optically clear 100% 3D printed camera lens, Times Square Fresnel lens tiles, light guides, prisms, millifluidic devices, and more.
Formlabs application engineer Amos Dudley designed and 3D printed a lens for a fully 3D printed camera.
Curious to see with your own eyes what a transparent SLA 3D printed part looks like? We will send a free transparent 3D printing sample directly to your office.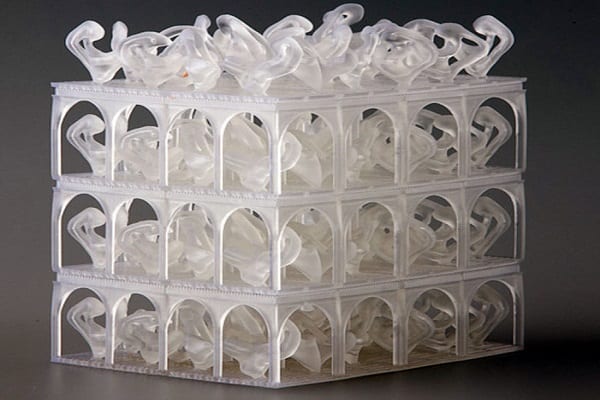
Request a Free Sample
We have tested several post-processing methods for 3D printed Clear Resin parts. In this article, we will cover hand sanding, spray clear coating and resin impregnation. Each treatment option requires a different amount of effort, depending on the required degree of transparency and surface quality.
Application of : Hand sanding and polishing can be effective on simple shaped models with few fine details, but is not suitable for complex shaped models. With this method, it is very difficult to achieve complete optical transparency.
Hand sanding will require you to sand with very fine grit sandpaper, but with some effort you can sand and polish the parts to the transparency level of a magnifying glass. However, it is very difficult to completely remove all the layer lines with manual processing - if you turn the part at a slight angle to the light, you can notice micro-scratches.
Instruction : Use sandpaper to smooth the surface, then polish the part with acrylic cleaner and a microfiber cloth.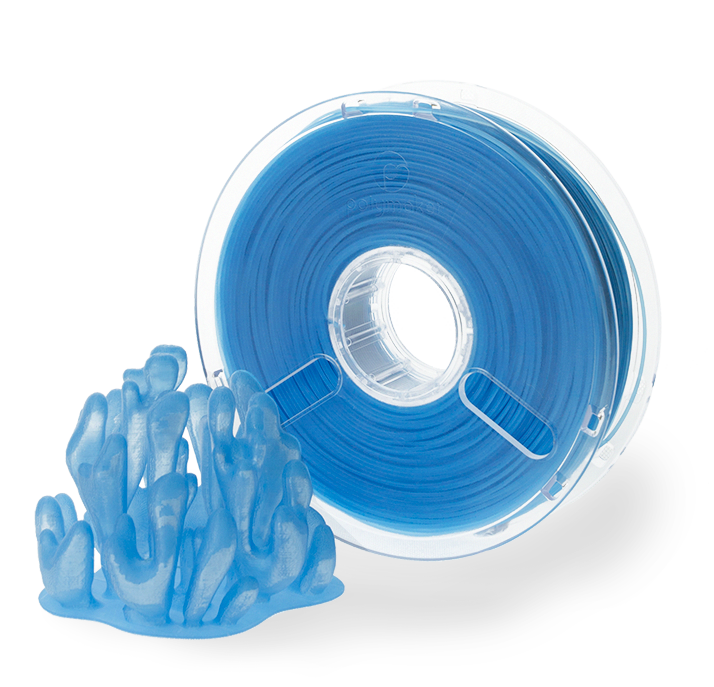
With approximately 3000 grit sandpaper, transparent SLA 3D printed parts become glossy and very smooth to the touch. After sanding with 12.000 grit, they reflect light. Try different sandpapers and abrasive sheets from 400 to 12,000 grit in 200 increments. Before moving on to the next grit step, slowly and carefully clean the lens and remove scratches from the previous level of sanding.
Our support site offers a simple step-by-step manual sanding guide that includes an acrylic spray finish.
If all you need is translucency, mineral oil will suffice to create a smooth surface and hide light spots.
We have tested various polishing methods for transparent 3D models, from hand sanding and spray coating to resin impregnation.
Application of : Spray coating is a quick and easy way to improve the transparency of parts without significantly reducing detail. The method is effective for all types of models, since it is possible to spray the coating on complex-shaped parts, which can be difficult to grind and polish.
Clearcoat application helps to hide layer lines and protect parts from UV exposure which can cause yellowing and unintended final cure. If you require a smooth, glass-like surface, hand sand and polish before coating; the more thorough the sanding before applying the clear coat, the better the clearness. This extra step is great for post-processed prototypes that look like completely transparent plastic, such as packaging, bottles, and microfluidic devices.
Instruction : A variety of aerosols can be used to apply a clear coat, from inexpensive sprays to products that require a separate room and tools.
- General purpose clear aerosol paints: : The selection ranges from good, very inexpensive options like Rustoleum Painter's Touch 2X to affordable high quality aerosols like Spray Max 2k Clear Glamor.
- Automotive sprays : Products such as Lesonal Universal Clear, a high solids acrylic urethane clear coat, give a very good glossy effect.
 They are designed for air drying and stoving and require a spray gun and free space to spray. A base coat must be applied before applying Lesonal Universal Clear and similar aerosols.
Coat a clean, dry model already rinsed in isopropyl alcohol (IPA). Do not finalize the model before spraying as this may cause yellowing. Air dry the model. Once it is completely dry, apply two to three coats of spray in a dust-free environment.
For a fee, a coating such as Lesonal Universal Clear can be applied at a workshop. In most cases, bodyshops use a volatile solvent such as naphtha to clean and prepare the surface of the model prior to spraying.
For the Times Square installation, Window to the Heart, Formlabs and Aranda/Lasch spray-coated the tiles with Lesonal Universal Clear in an auto body shop.
Application of : This method is best suited for cases where very high transparency of parts is required and can only be applied to flat or nearly flat surfaces such as lenses or "windows" into the interior of the part.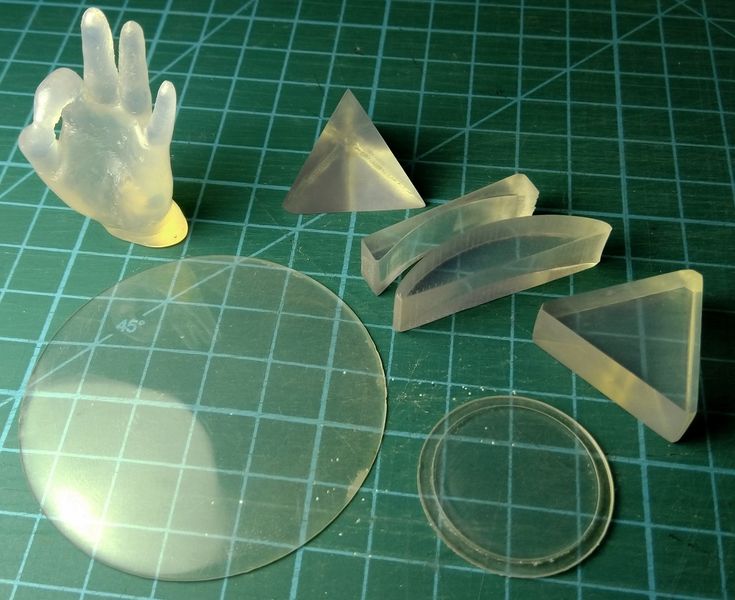
Resin immersion produces very smooth details with crisp and sharp surface reflections.
The method can be used to increase the smoothness of parts printed with other SLA materials, although it may reduce detail.
Instruction : Apply Clear Resin to the part using a syringe or by dipping the part into the resin, as desired. The viscous polymer will fill in the delaminations and scratches present on the part, forming a completely smooth surface.
The resin layer should be as thin as possible while still eliminating layer lines. Remove all bubbles with a syringe. Completely cure the part using the appropriate parameters, then repeat the process on the other side, both dipping and final curing.
Lens subjected to a 3-step polymer immersion procedure, final result on the left.
The polymer immersion process slightly changes the focal length of the lenses. Formlabs Applications Engineer Amos Dudley designed and 3D printed a lens tester to create a fully 3D printed camera.
With the Form 3 Stereolithographic 3D Printer, you can create crisp and fully transparent 3D models at an affordable price with minimal post-processing.
Check out our white paper, , for a detailed overview of SLA ecosystems and a step-by-step 3D printing workflow.
Would you like to see the resulting quality with your own eyes? Request a free transparent model sample.
Request a Sample Printed in Clear Resin
Objet RGD720 Clear Materials , Objet VeroClear RGD810 3D Printing Resins PolyJet Objet
Objet RGD720 Clear Material
| Mechanical properties | Test method | Meaning |
|---|---|---|
| Tensile strength | ASTM D638-03 | 50-65 MPa |
| Elongation at Break | ASTM D638-05 | 15-25% |
| Modulus of elasticity | ASTM D638-04 | 2000-3000 MPa |
| Flexural strength | ASTM D790-03 | 80-110 MPa |
| Flexural modulus | ASTM D790-04 | 2700-3300 MPa |
| Izod Impact Strength | ASTM D256-06 | 20-30 J/m |
| Shore (D) | Scale D | 87-88 |
| Rockwell hardness | Scale M | 73-76 |
| Thermal properties | Test method | Meaning |
HDT @ 0. 45MPa 45MPa | ASTM D648-06 | 45-50 0 C |
| HDT @ 1.82MPa, | ASTM D648-06 | 45-50 0 C |
| Glass transition temperature Tg, | DMA, E | 48-50 0 C |
| Other | Test method | Meaning |
| Density | ASTM D792 | 1.18-1.19 g/cm 3 |
| Water absorption | D-570-98 24 hours | 1.5-2.2% |
| Residual ash content | USP281 | 0.01-0.02% |
| Compatible with 3D systems | Connex Family, Eden, Objet30 Pro | |
| Possible layer thickness | 0. 016 mm; 0.030 mm 016 mm; 0.030 mm | |
| Available colors | Transparent | |
Objet VeroClear RGD810
| Mechanical properties | Test method | Meaning |
|---|---|---|
| Tensile strength | ASTM D638-03 | 50-65 MPa |
| Elongation at Break | ASTM D638-05 | 10-25% |
| Modulus of elasticity | ASTM D638-04 | 2000-3000 MPa |
| Flexural strength | ASTM D790-03 | 75-110 MPa |
| Flexural modulus | ASTM D790-04 | 2200-3200 MPa |
| Izod Impact Strength | ASTM D256-06 | 20-30 J/m |
| Shore (D) | Scale D | 83-86 |
| Rockwell hardness | Scale M | 73-76 |
| Thermal properties | Test method | Meaning |
| HDT @ 0. |