3D printer nozzle camera
3D Printer Nozzle Camera — CNC Kitchen
I often catch myself watching a 3D print for several minutes just because the process itself is so interesting. I like taking a closer look at things, so after seeing “chilicoke’s” nozzle camera, that he made for his Voron printer, I had to make one for myself.
My setup is not yet finished but I’d still like to give a bit of insight to give me feedback or to get you started to build your own. Keep in mind, that these small cameras are quite fragile and fiddly, so be prepared to break one or the other. I’d also recommend using a USB-Hub for plugging in the camera because if you soldered a short-circuit, you’ll probably only fry the hub and not the USB port on your PC.
Camera
Finding a suitable camera was the first challenge. Since we really want to get a close shot of the nozzle, I had to find something with a short focus distance but still requiring little space. I first took apart an old USB microscope but noticed that it’s not suitable for this application due to the sensor on a big PCB and a separate lense.
USB Microscope lens and PCB with sensor
Next, I bought a couple of USB endoscopes I thought might be suitable for the application. Unfortunately, most of them have a focus distance between 5 to 10cm which makes them in that state basically unusable for the application. Nowadays, most of them also feature a semi-flex cable which is really stiff.
Cheap USB endoscope off Amazon
USB endoscopes on Amazon (affiliate link) : https://geni.us/BswFX
I ended up choosing a cheap 17€ one from Amazon and thought I just opened it up to see if it’s usable. Opening the housing seemed difficult in the beginning. I ended up using my lathe to cut off the back of the metal housing after which the camera simply slit out. You don’t need a lathe for that, a metal saw or a Dremel should do the job as well.
Endoscope housing new (above) and cut open (below)
I snipped-off the old cable and simply soldered a new, flexible USB cable on.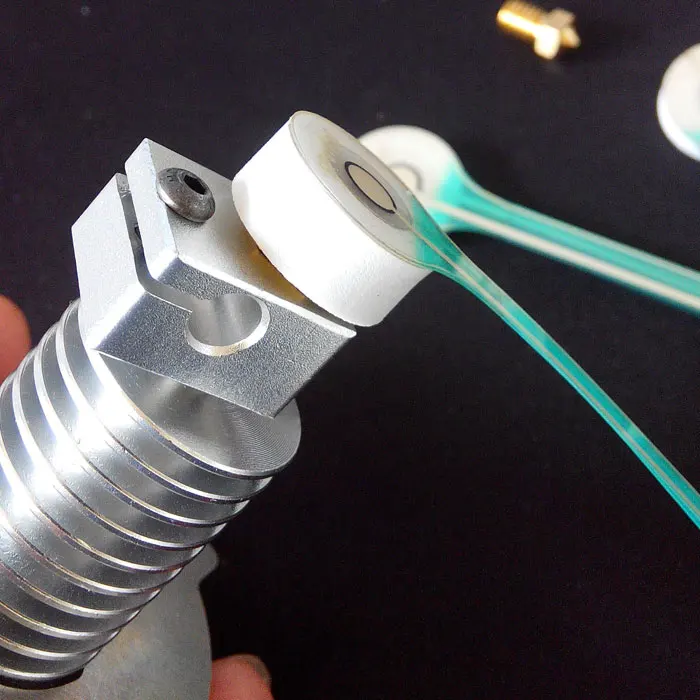 Simply don’t connect the two wires for the integrated lighting and the remote switch. Only black, red, green and white are necessary. When buying a new USB cable, rather go with a cheap one because you want thin wires for flexibility. My premium one had really thick gauge wires that were a pain to route.
Camera PCB
Focusing
Camera Lens with marking
The initial focus position of the endoscopes is usually too far away to get a nice, and crisp image. Chilicoke uses a plastic lense for that though I simply re-focused the endoscope. The sensor consists out of a sensor housing and a screwed in lense that is usually locked by some glue. I held the housing in a vice, slightly heated up the assembly, and was then able to rotate and therefore re-focus the camera. A line-marking helps to check your progress.
Lighting
I didn’t use the included tiny ring light of the camera and opted for bigger LEDs all around the hotend.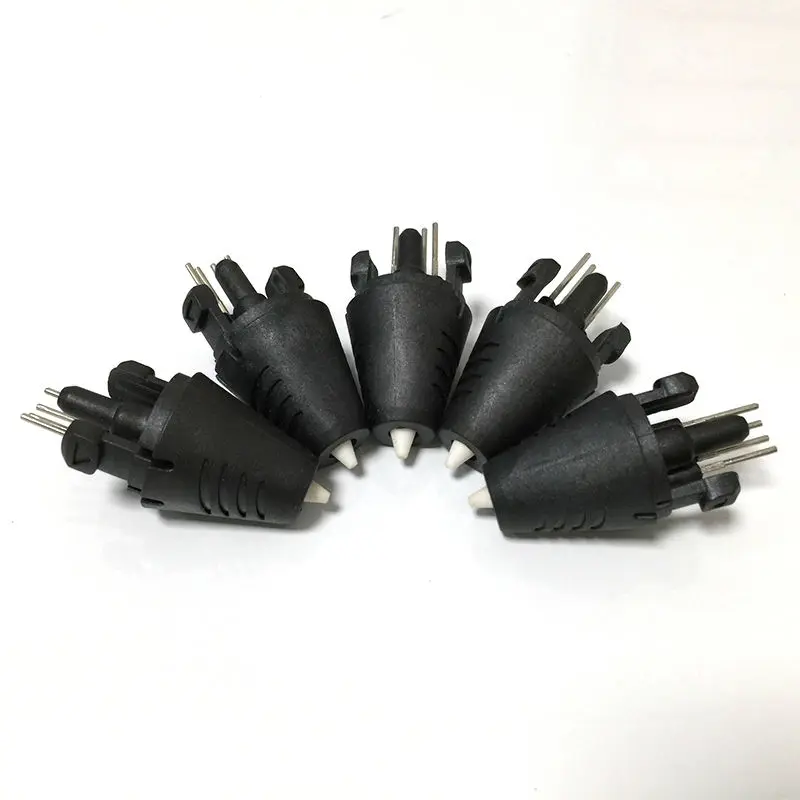 I salvaged some white LEDs from a light strip to which I simply soldered wires. For my current setup, I connected all 4 of them in series and power them using 24V from the hotend fan line using a 470 ohms resistor to limit the current to ~30 mA.
Salvaging LEDs from an LED strip
I tried to space the LED as evenly as possible and at quite a low angle to illuminate the nozzle and not only the heater block.
Lighting
Mount
I mounted the camera on the part cooling fan shroud of my Hemera extruder. The current design is more than quick and dirty but so far seems to work. The camera is covered in foam held in place by 2 zip-ties.
Hemera with modified fan-shroud
The challenge is to not melt away the camera, so I currently activate the part cooling fan, as soon as the heater turns on so that the cold stream of air constantly cools the camera. I also added a silicone sock to reduce heat radiation. So far, the camera has been working for a good 2h of printing.
Challenges
I’m not yet totally happy with the setup. For once, it’s a bit too close and I need to see if I can re-arrange the parts a little to get at least a bit away from the heater block. That would also reduce the risk of melting the camera.
Then there is the camera itself. It’s advertised as an HD 1080p camera. Even though it can take pictures in Full HD, I was only able to get a 640x480 video stream from it, which doesn’t look too great. I think I need to order some more cameras to find one, that might be even better suitable.
I also need to find out how to set up the camera better because it currently changes the exposure of the shot all of the time, the scene is different which is really annoying to watch. I need to find a way how to adjust exposure, white balance etc. manually.
Stefan Hermann
0 Likes3D Printer Nozzle Camera :: apalrd's adventures
After buying some cheap USB boroscope cameras to use as an actual boroscope for home renovation projects, I decided to buy one with a flexible cable to mount near the nozzle of my Prusa i3 MK3s to get a time-lapse of the nozzle during the printing process.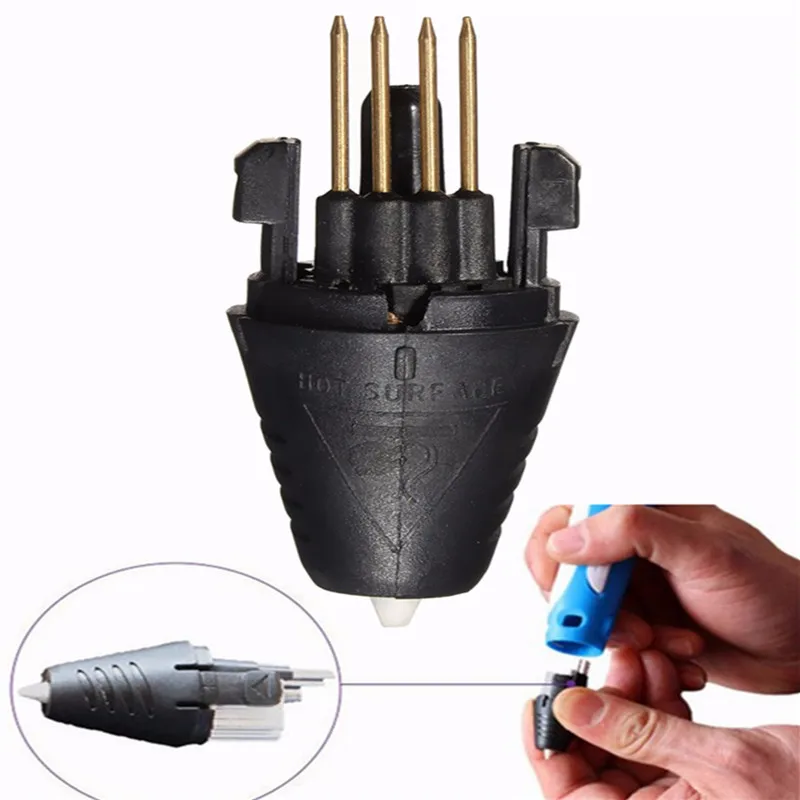 Watching the first layer closely during a print can show failures early, since most failures are due to bed adhesion or other first-layer problems. Keeping the camera out of the print volume while still getting a good view of the nozzle and print was challenging, but I ended up with a cool solution that I’m really proud of, and the view is fantastic.
Camera Mounting⌗
I started by holding the camera up to the printer and measuring where I wanted to mount it. The Prusa i3 MK3S has a bracket which goes off the back of the extruder assembly which anchors the flexible cables to the extruder. The cables from the extruder motor, PINDA probe, filament sensor, and fans run over the top of the anchor, and the cables from the hotend heater and thermistor run over the bottom of the anchor. I decided to make a wedge to sit against the bottom of the anchor, allowing me to use the well designed zip tie holes to securely mount the camera. The hotend wires can move along the side of the anchor, leaving space for the camera. I held up the camera in place with the camera view open on my laptop and decided the slope I want (1/4" over the length of the camera), then measured the dimensions of the camera with calipers to make a mount with a half circle for the camera to sit in.
Bracket model in PrusaSlicer
After running the tiny part on the printer, I decided to tape the camera to the bracket, since the camera has a smooth metal finish and zip ties would not securely hold it against rotation. To align the camera, I set the bracket on the table (upside-down), placed a square object in front of it, and rotated the camera around by its cable until the square object was aligned to the image upside-down (since the bracket will be flipped when mounted on the printer). I then wrapped the camera and bracket in masking tape, careful to maintain alignment.
Camera and Bracket zip-tied to Prusa's cable anchor
Hotend cables out of the way
View port of camera (you have to read further for the camera's view)
Using OctoLapse to record two cameras⌗
Since I now have two cameras, I’d like to use Octolapse to record both of them. I installed OctoLapse through the OctoPrint plugin manager. I’m starting from the config I’ve been building up in the OctoPi Project and 3D Printer Power Project.
Once it was installed, I setup two new cameras for the Ethernet camera and the built-in OctoPi camera, which is now the nozzle camera. I renamed the default camera to NozzleCam, and created an entirely new camera for the Ethernet Cam. I didn’t bother setting the stream address, it’s only used in the web UI and I usually use Home Assistant to watch the camera anyways.
OctoLapse doesn’t use the default timelapse temp folder to store its temporary files, which leads to temporary files being stored on the SD card of the Pi. This is not ideal, so we need to add another autofs mount for the folder /home/pi/.octoprint/data/octolapse so it can keep its stuff on the network. The temp data doesn’t really need to be on the network, but the NAS can handle write wear much better than the SD card of the Pi. OctoLapse was very angry mounting the entire octolapse folder on the network, since it seems to try to chmod files after creating them (even though this is unnecessary, it doesn’t have permissions to chmod a folder it doesn’t own), so I ended up mounting the /mnt/printer (the existing printer mount) with noperm (so Octolapse can chmod files it doesn’t own and the permissions will be ignored) and created a symbolic link from the octolapse temp folder to a folder in /mnt/printer. I also forwarded the timelapse folder with a similar method. Overall, Octoprint is not happy with the autofs mounts, and keeps trying to revert to default folder paths, so maybe it’s a better approach to symlink them anyway instead of using the settings file to change them to the paths I want.
ln -s /mnt/printer/octolapse/tmp ~/.octoprint/data/octolapse/tmp ln -s /mnt/printer/timelapse ~/.octoprint/timelapse
Other Quirks⌗
The camera has built-in lighting, and there’s a small box midline in the cable with a knob to adjust the LED intensity. However, there’s no way to turn it off, or control it from the Pi. My solution to this is to disable USB power when the printer is turned off, which opens a whole can of worms. I wrote a short blog post about my solution here.
Essentially, uhubctl works great to turn on/off the power to the LEDs, but it also turns off power to the camera itself, so the webcamd streamer needs to be restarted when the camera returns. It also cuts power to the printer, which isn’t powered over USB, but powers its USB isolation from the USB side, so the printer serial port drops out as well.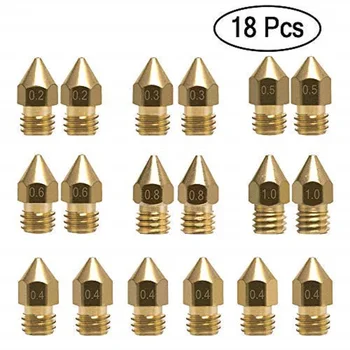 When I re-enable power, it takes a few seconds for the USB UART for the printer to return as well, so I extended the connection delay (from when the power is turned on the printer and USB to when the printer connection is attempted) to 15 seconds, and this seems to work adequately.
Result⌗
Click on the thumbnail to view the full video on Youtube
The Project Files and Parts List⌗
Here are all of the files and parts required to replicate this project. All of my design files are licensed Creative Commons CC-BY-SA. As this project uses files created by other authors as examples, please read their licenses as well.
- Camera I Used
- Wedge Mount Design Files (AMF Format)
- Wedge Mount Design Files (FreeCAD Originals)
- 3DBenchy Test Print
- Flexy Rex Test Print
- Low Poly Fox Test Print Some links to products may be affiliate links, which may earn a commission for me.
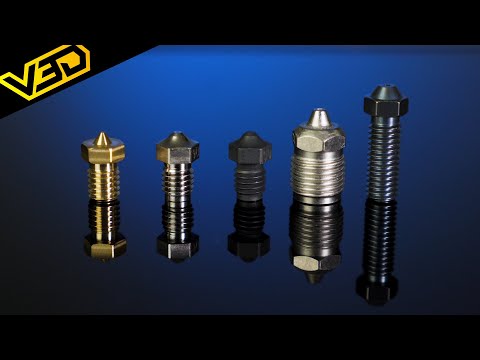
Nozzles for 3D printers - types, differences.
 Nozzle type
 Nozzle is an integral part of any 3D printer, and there are many varieties of this part. Brass products are considered standard nozzles. This type is suitable for printing with conventional types of plastics, but for those that include an abrasive, such as NylonX, is not suitable. Printing with these materials requires higher performance nozzles made from stronger materials. There are also copper nozzles, Clean Tip nozzles - such nozzles are distinguished by the fact that the thread does not stick to them, and they remain clean. nine0003
3D printing allows you to replace nozzles. This allows you to achieve different results and use different materials for printing.
3D printer nozzle: what is it?
The 3D printer nozzle is a special nozzle located in the extruder heater block. It is screwed into place by means of a thread. There is a small chamber inside the nozzle where molten plastic accumulates and is squeezed out through the hole. Moreover, the key parameters of the nozzle will be: the material from which the nozzle is made and the diameter of the hole. nine0003
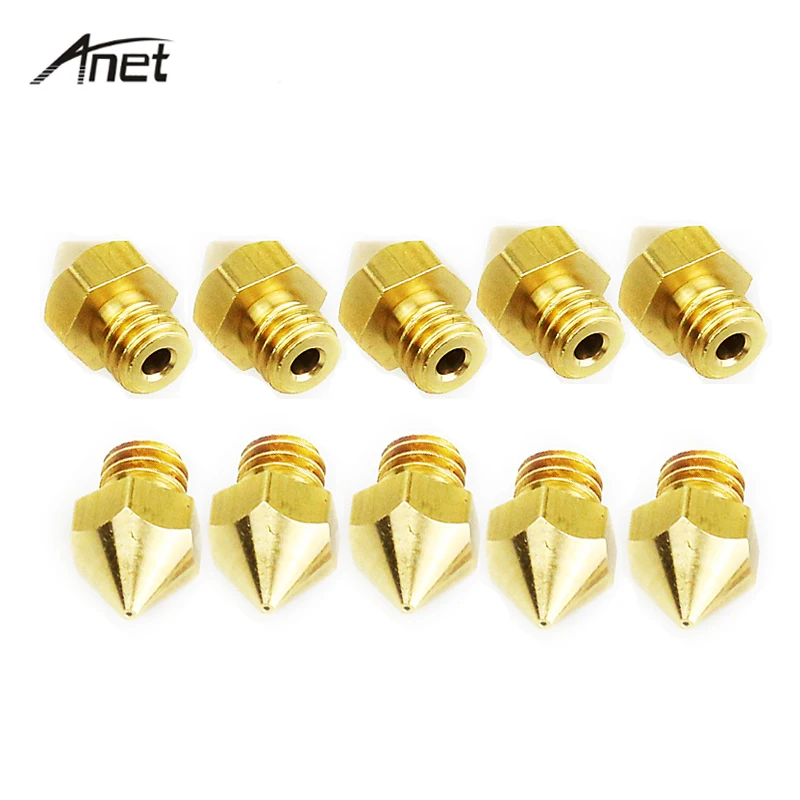
Nozzle material
A standard desktop 3D printer is equipped with a 0.4mm brass nozzle. This is the best option for printing with ABS and PLA plastics. However, such nozzles are not at all suitable for printing with luminescent PLA, carbon fiber and metal enriched filaments. The fact is that plastics, which include solid particles, destroy the nozzle. The internal dimensions of the nozzle are distorted, and this affects the uniformity of the extruded material, which will inevitably affect the quality of 3D printing. For this reason, there are nozzles that are made from harder materials. Consider further the types of nozzles that can be found on the market. nine0003
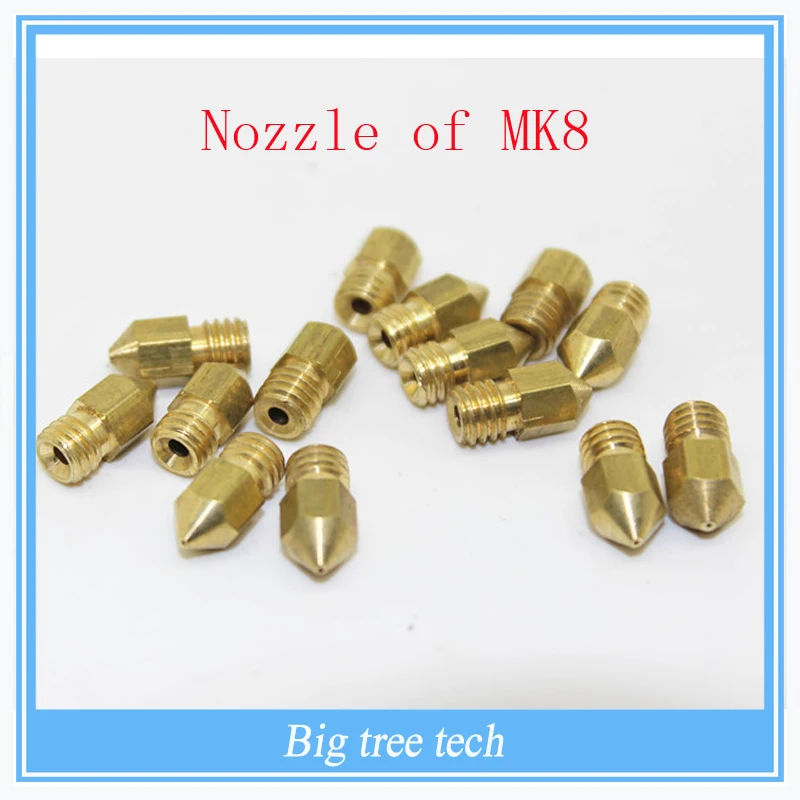
Brass 3D Printer Nozzle
Brass Nozzle is the most popular option used in most desktop 3D printers. Of all the materials used to make nozzles, this one is the softest. But brass nozzles are easy to process, cheap and affordable. Therefore, they are easy and simple to replace.
Main characteristics of brass nozzles:
- corrosion resistance;
- high thermal conductivity; nine0026
- relative softness;
- abrasion.
Application: Ideal for printing with "soft" plastics - standard ABS, PLA, PETG, and other plastic filaments that do not contain carbon fiber and metal additives.
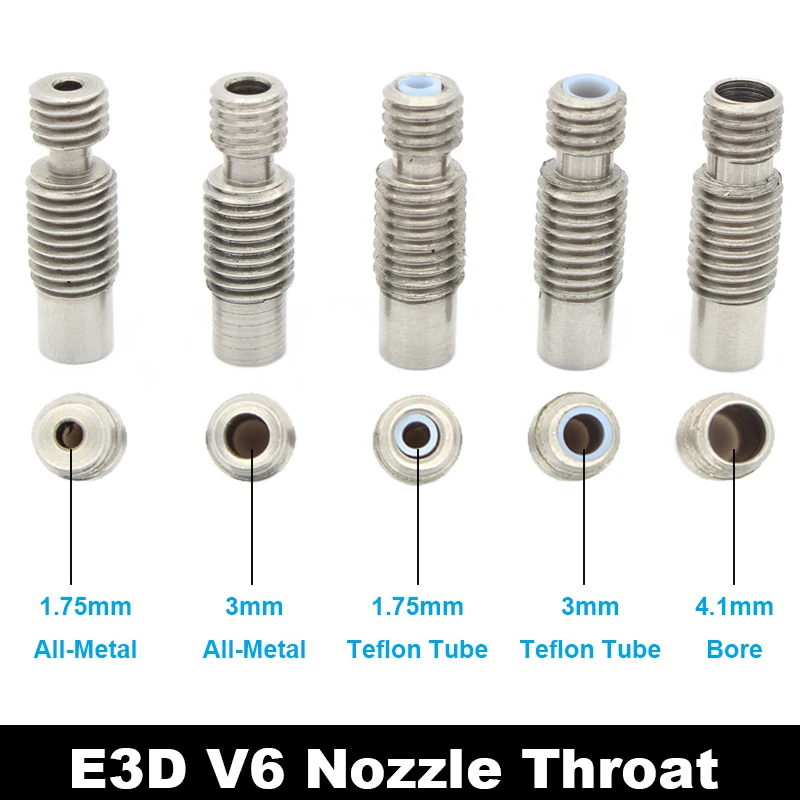
Stainless steel or hardened steel nozzle
Steel nozzles are also used for 3D printing. They provide long-term printing with materials that contain solid particles, such as metal, carbon fiber. At the same time, such nozzles are not prone to abrasion and destruction, like softer brass nozzles. That is, you can print for a long time without reducing productivity. nine0003
But steel nozzles are not without drawbacks: lower thermal conductivity compared to brass nozzles. This can change the flow, especially when using large nozzles.
Main characteristics of steel nozzles:
- corrosion resistance;
- low thermal conductivity;
- relatively large weight;
- abrasion resistance.
Application: 3D printing with additives (carbon fiber, metal, glass, etc.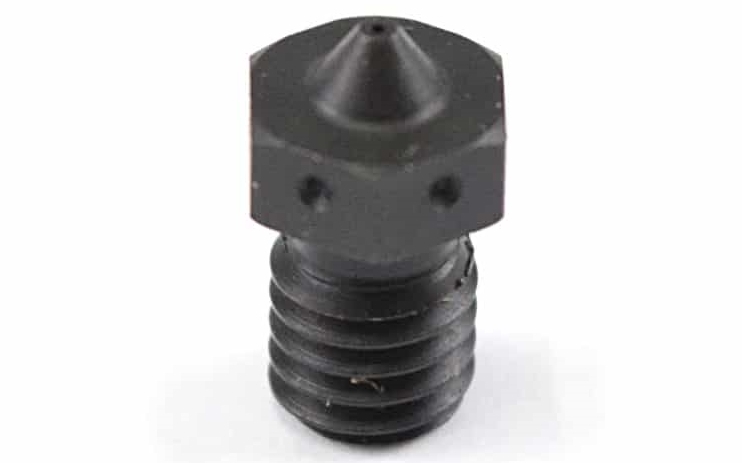 )
)
Ruby nozzle
Anders Olsson developed the Olders Ruby nozzle. This is a brass nozzle equipped with a tip made of aluminum oxide, that is, an artificial ruby. This nozzle was originally created for 3D printing by the third heaviest material in the world. The nozzle was the result of an experiment conducted at Uppsala University in Sweden.
Initially standard nozzles made of steel and brass after printing 1kg of plastic wear out and are no longer usable. However, the nozzles have a number of disadvantages. Olson Ruby nozzles combine the high thermal conductivity of brass with the abrasion resistance of ruby. Of course, there are experts who say that the ruby tip has a low thermal conductivity, which negatively affects the printing result, but there is no evidence for this. At least for now. nine0003
The main characteristics of Olsson Ruby nozzles are:
- corrosion resistance;
- low thermal conductivity;
- abrasion resistance.
Application: Can be used for highly abrasive threads.
Tungsten Carbide Nozzles
Dyze Design Tungsten Carbide Nozzles are something of a newcomer to the market as they only started production at the end of 2018. Tungsten carbide is hard, wear resistant. It is used for drilling, cutting ceramics and metals. Such nozzles also have disadvantages, but it is too early to talk about them. nine0003
Main characteristics of tungsten carbide nozzles:
- abrasion resistance, very high;
- hardness;
- high thermal conductivity;
- corrosion resistance.
Application: This is a universal nozzle that can be added to your nozzle set, and the nozzle is also suitable for printing with highly abrasive filaments.
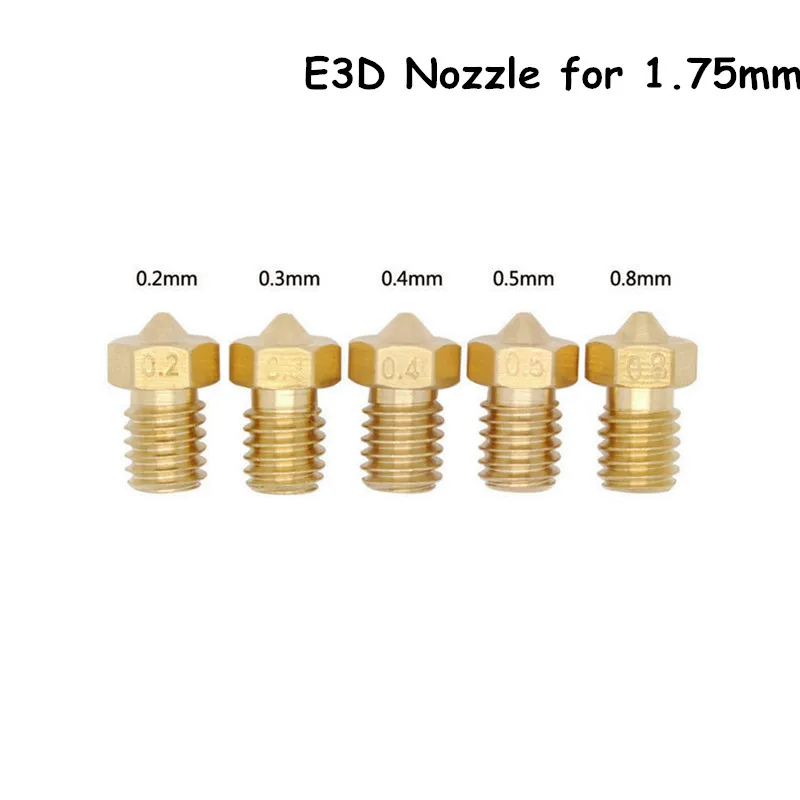
Nozzle sizes for 3D printer
Nozzles are characterized by the hole diameter. This characteristic will affect the degree of print detail. In this case, the influence will be exerted not only on the width of the lines, but also on the height of the layer.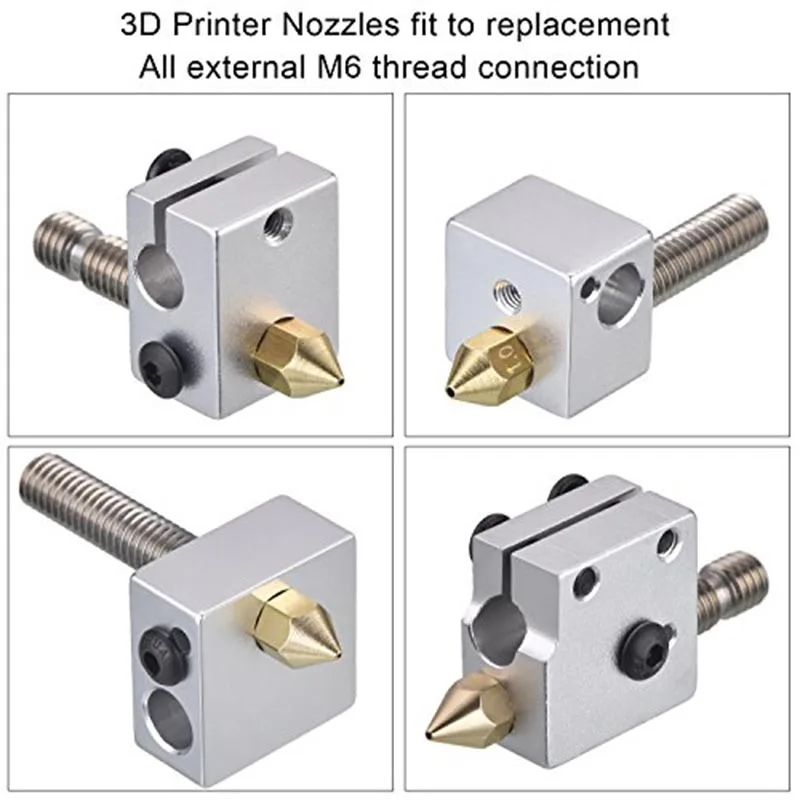 nine0003
Beginners are advised to use a nozzle with a diameter of 0.15mm. Compared to a standard 0.4mm nozzle, this nozzle allows you to get a higher resolution in the OX and OY axes. Thanks to thin lines, sharper corners can be obtained, but this will only be possible in that case. If your 3D printer is well set up and serviced regularly.
The choice of nozzle diameter should be determined by the layer height you require. It is necessary to choose a nozzle so that the size of the layer during printing is 25-50% of the nozzle size. nine0003
If the device is calibrated correctly, optimum adhesion can be achieved between coats. For example, a standard 0.4mm nozzle allows you to print layers of 0.1-0.2mm. If you want to successfully print ultra-thin layers that are less than 0.05mm high, we recommend using the 0.2mm nozzle.
Small nozzles have one significant drawback. They are more prone to clogging and therefore need to be cleaned regularly. In addition, smaller nozzles significantly increase print time as the print head requires more passes to coat.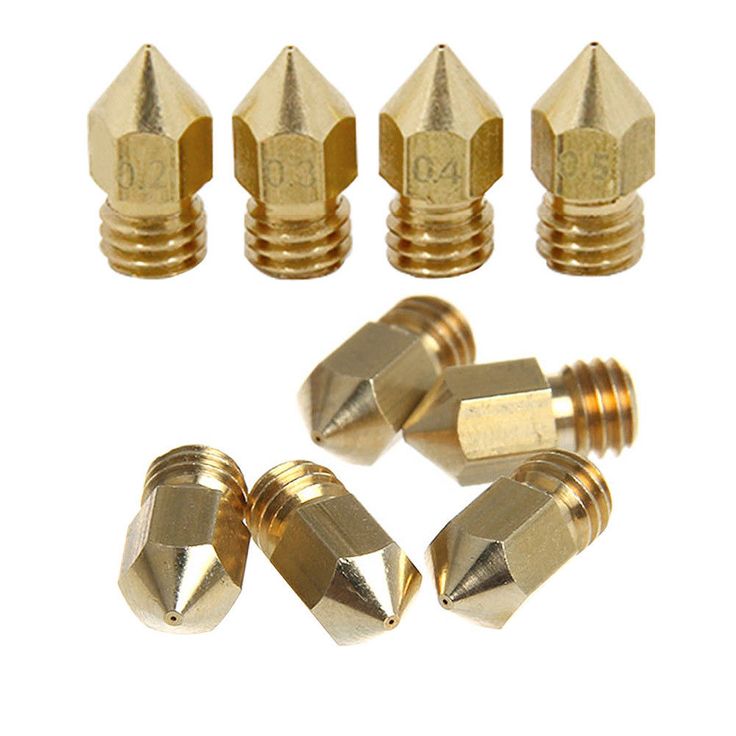 the larger the nozzle, the less time it will take to print, and the time will be reduced exponentially. For example, a 0.8mm wall will take half as long to print as a 0.4mm wall. Also, large extrusion lines have greater adhesion, and therefore the finished prints have greater strength. If you are not printing fine details, then you are better off using large nozzles, which will allow you to print faster. nine0003
Smaller nozzles are more commonly used for hobby, precision models with fine details, such as jewelry.
And in order to have your own opinion on this matter, it is best to experiment!
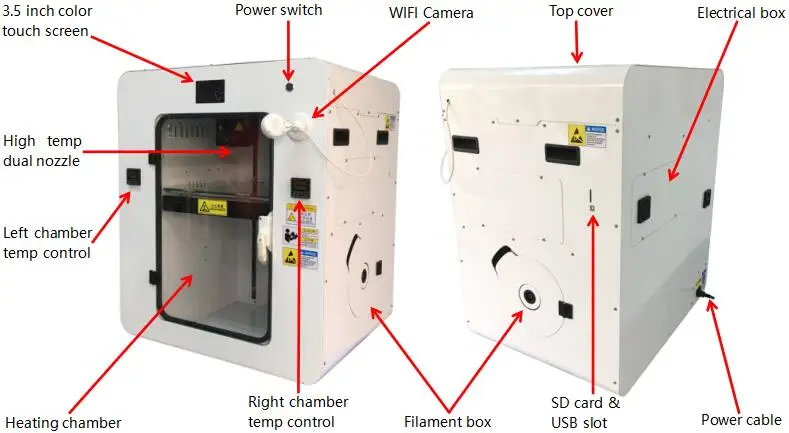
Overview of high-temperature 3D printers with Formnext 2017 / Sudo Null IT News Today, we note the significantly increased number of 3D printers since last year for working with high-temperature engineering plastics, starting with polycarbonate and further to polyamides, Ultem, PEEK, PPSU and composites based on them. nine0129
These materials are used in the aerospace industry, the chemical industry, and medicine, where properties such as low weight, high temperature resistance, mechanical strength, chemical inertness, and biocompatibility are in demand.
 We wrote more about engineering filaments and their application here.
 Differences of industrial 3D printers
To work with engineering plastics, the printer must have a high-temperature extruder. There are two classes of equipment here. Junior - up to 300 ° C, this is enough for modifications of ABS, polycarbonate and polyamides. Senior - above 300 ° C. For PEEK or Ultem you need about 400.
The extruder isn't everything. A heated platform or vacuum table is a must to keep the part in place. And printing should take place in a working chamber isolated from the outside world, maintaining a predetermined temperature. Failure to comply with the mode leads to deformation or violation of the integrity of the printed object.
So, let's look at the samples we've seen.
Intamsys
The Chinese manufacturer offers four models of 3D printers. The basic Funmat and Funmat Pro work with common plastics, from PLA to nylon, and composites.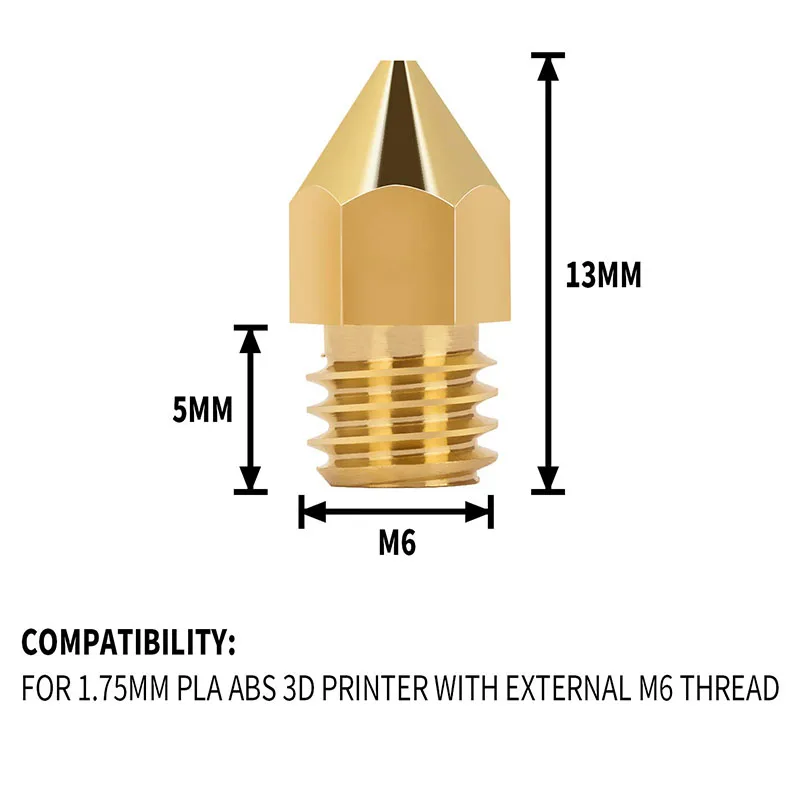 Funmat HT and Funmat Pro HT are already capable of printing in PEEK, Ultem and PPSU. nine0003
Intamsys FUNMAT, FUNMAT HT
- Working chamber: 260 x 260 x 260 mm;
- layer thickness: from 50 microns;
- nozzle diameter: 0.4mm;
- FUNMAT: extruder up to 280°C, bed up to 150°C;
- FUNMAT HT: extruder up to 450°C, bed up to 160°C.
Compact printers with a closed working chamber, in the HT version it is equipped with heating, maximum temperature 90°C.
Intamsys FUNMAT PRO, FUNMAT PRO HT
- Working chamber: 450 x 450 x 600 mm;
- layer thickness: from 50 microns;
- nozzle diameter: 0.4mm;
- FUNMAT PRO: extruder up to 280°C, bed up to 150°C, chamber up to 60°C;
- FUNMAT PRO HT: extruder up to 450°C, bed up to 160°C, chamber up to 120°C.
Industrial printers for printing large parts with high-temperature plastics, equipped with a heated working chamber.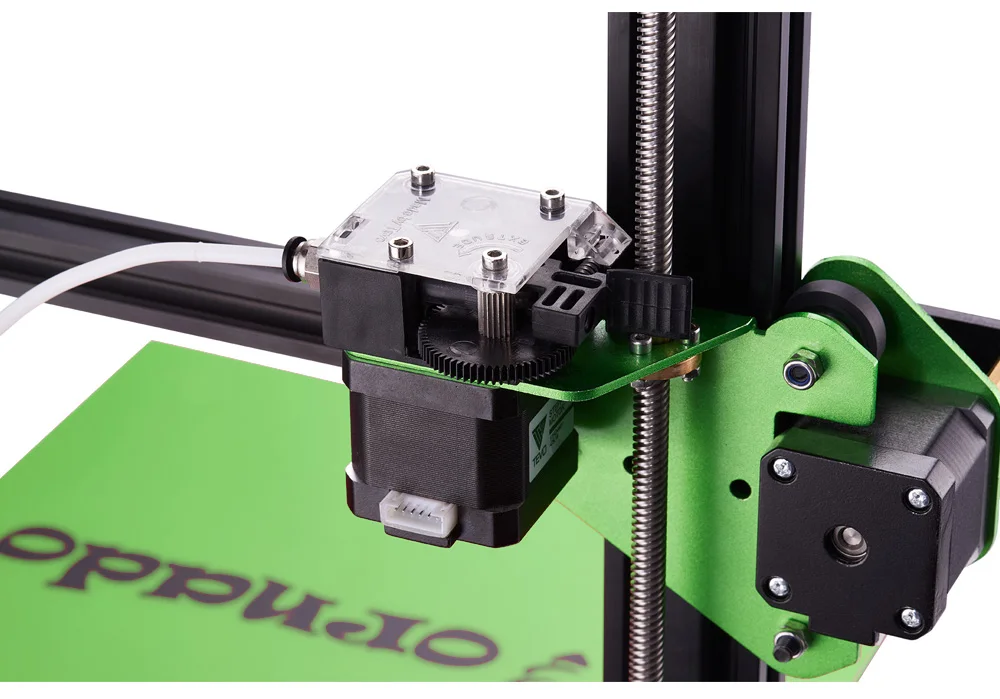 nine0003
ROBOZE
One of the leading companies producing high-temperature 3D printers, we wrote more about it here. Offers three printers for engineering filaments. Roboze One is the basic model for common plastics - from PLA to polyamide inclusive. Roboze One +400 - with a high-temperature extruder, Roboze Argo 500 - a large installation, with a working chamber of 500 x 500 x 500 mm. Roboze printers are interesting in the rejection of drive belts and the use of a rack-and-pinion transmission to move the print head. nine0003
Roboze One +400
- Working chamber: 200 x 200 x 200 mm;
- extruder temperature: up to 400 °C;
- layer thickness: from 50 microns.
The printer is designed with an emphasis on reliability, all parts of the extruder are made of metal.
Roboze Argo 500
- Working chamber: 500 x 500 x 500 mm;
- layer thickness: from 50 microns;
- extruder temperature: up to 550 °C; nine0026
- chamber temperature: up to 180 °C.
The older Roboze model has a vacuum table to hold the part. Compartments for filament are equipped with heating. When one coil runs out, the machine automatically switches to the next one.
VSHAPER
A Polish manufacturer whose product range includes high-temperature printers for medical applications and five-axis 3D printing machines.
VSHAPER 270 Med
- Working chamber: 270 x 270 x 200 mm;
- extruder temperature: up to 450 °C;
- layer thickness: from 50 microns.
A medical-grade printer with an anti-microbial chamber coating and a built-in UV sterilizer that sterilizes every layer as it prints. The main purpose is the printing of implants and additional equipment for surgical operations.
VSHAPER 5-Axis Machine
- Working area: cylinder 300 mm in diameter and 300 mm high;
- automatic change of hotends;
- heated working chamber;
- the ability to print one model with several materials.
The five-axis design allows complex shapes to be printed without supports. The ability to print one model with several materials with different properties allows you to create parts with complex composition, for example, with an inner core made of a stronger material, or with a coating or inserts made of flexible. For the convenience of printing with different materials, the platform is also optimized - it is divided into cells that can be set to different heating temperatures. nine0003
The printer is already available for pre-order, and shipments will begin, according to the manufacturer, from January 2019.
3DGENCE INDUSTRY F340
- Working chamber: 260 x 340 x 340 mm;
- layer thickness: from 150 microns;
- chamber temperature: up to 85 ˚C;
- extruder temperature: up to 500 ˚C.
The printer can be equipped with one of three printing modules. Standard - up to 265 ˚C, medium - up to 350 ˚C, high temperature - up to 500 ˚C. Printed modules - with two hotends, for the main and auxiliary materials. Among other interesting features, we note the preheating of the plastic and the coil mass sensor. nine0129 Apium
Apium Additive Technologies GmbH is a German manufacturer of small printers for high temperature PEEK, Ultem and PPSU filaments and composites. Apium is translated from Latin as "celery". For products, support for printing with metal-filled filaments is declared for further baking.
Apium P155
- Working chamber: 155 x 155 x 155 mm;
- extruder temperature: up to 520 °C; nine0026
- table temperature: up to 160 °C;
- layer thickness: from 100 microns.
Desktop high temperature printer with a small printable area. It is the successor to the Indmatec HPP 155. Apium also offers a slightly larger model - P220, with a print area of 200 x 160 x 160 mm.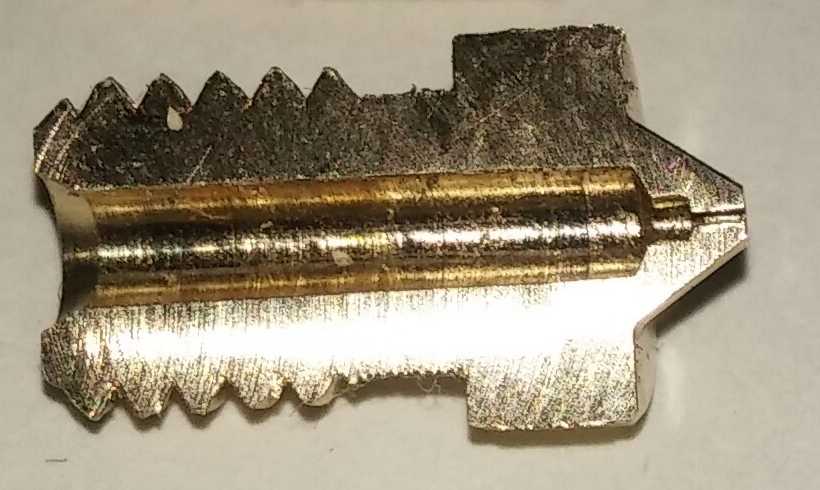
GEWO 3D
The German manufacturer offers one high-temperature printer, with a very serious margin for the heating temperature of the printing platform and the working chamber. nine0003
GEWO HTP 260
- Working chamber: 350 x 150 x 165 mm;
- layer thickness: from 20 microns;
- extruder temperature: up to 450 °C;
- table temperature: up to 270 °C;
- chamber temperature: up to 260 °C.
Prints with all common engineering plastics, equipped with two extruders. Possibility of installation of a spindle for machining of a detail is provided.
MiniFactory Innovator 2
- Working chamber: 300 x 160 x 160 mm;
- layer thickness: from 30 µm.
Finnish dual extruder printer, the manufacturer focuses on PEEK printing. Other engineering plastics such as ABS, polycarbonate or Ultem are also supported.
Omni3D Factory 2.0
- Working chamber: 500 x 500 x 500 mm;
- layer thickness: from 140 microns; nine0026
- extruder temperature: up to 360 °C;
- table temperature: up to 130 °C;
- chamber temperature: up to 70 °C.
An industrial printer from Poland is equipped with two extruders and can print large parts from ABS, polycarbonate, polyamide and composites based on them.
DynamicalTools DT600
- Working chamber: 600 x 450 x 450 mm;
- layer thickness: from 140 microns; nine0025 extruder temperature: up to 500 °C;
- table temperature: up to 150 °C.
The Spanish printer with two independent printheads, in addition to normal printing, supports printing modes for two identical or mirror parts at the same time. Works with all high temperature filaments up to PEEK, Ultem, PPSU.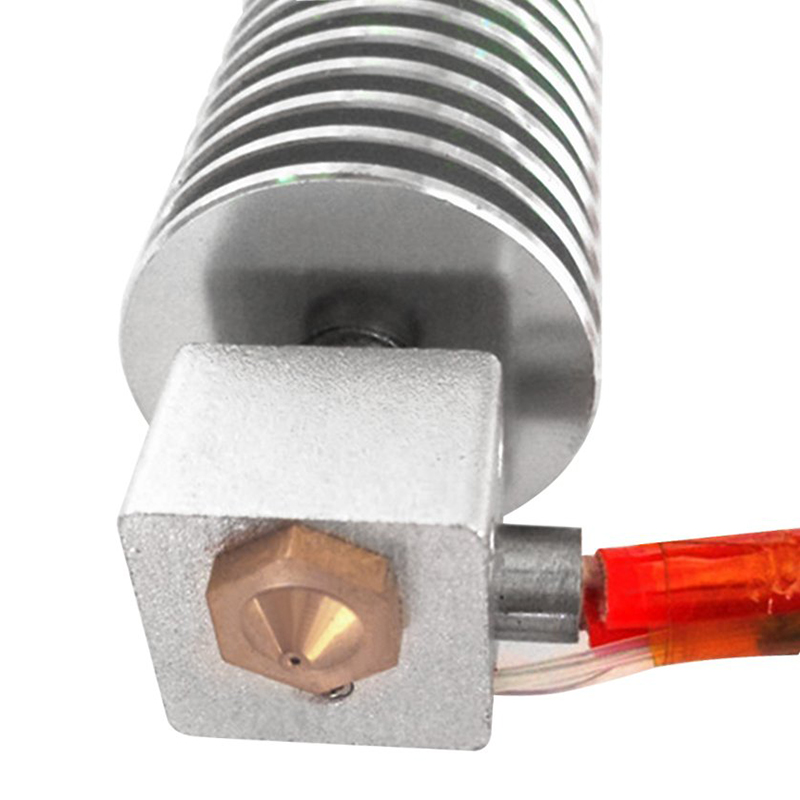 Equipped with systems for heating plastic and automatic change of coils.
HAGE3D 140L
- Working chamber: 700 x 500 x 400 mm; nine0026
- layer thickness: from 50 microns;
- extruder temperature: up to 450 °C;
- chamber temperature: up to 85 °C.
Austrian industrial machine that supports most engineering filaments and composites. Heated working chamber, three-zone heating table.
AIM3D
The company offers a complex of equipment for the manufacture of metal objects. At the first stage, the part is printed on a 3D printer, at the second stage it is placed in an oven, where the binder plastic burns out and the metal filler is sintered. nine0003
AIM3D ExAM 255
- Working chamber: 255 x 255 x 255 mm;
- layer thickness from: 20 µm;
- table temperature: up to 120 °C.
The printer does not work with filament, but with granules.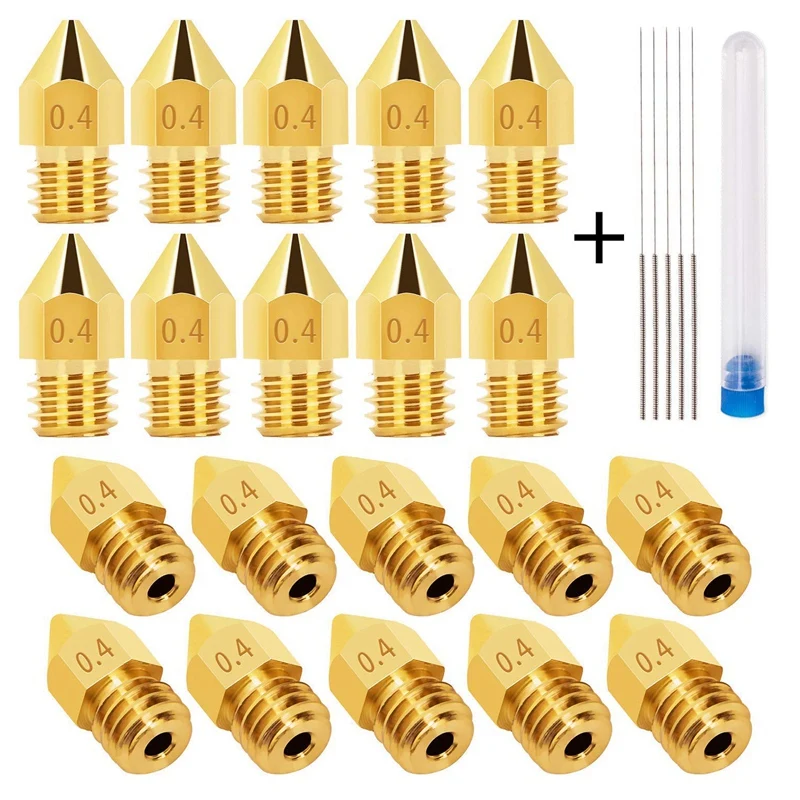 This allows the use of raw materials for FDM printing, which are usually used in MIM installations, Metal Injection Molding. You can also print with plastic pellets, which is usually cheaper than using filament.
AIM3D ExSO 90
- workpiece diameter, up to: 90 mm;
- 6-sided heated;
- isolation and collection of fumes generated during sintering;
- temperature: up to 1350 °C.
Furnace for high-temperature sintering of parts printed on AIM3D ExAM 255 in an inert gas atmosphere.
How to purchase an industrial 3D printer
Looking for an industrial 3D printer? Top 3D Shop is the official representative of most of the manufacturers mentioned in the review, we are ready to supply equipment, commissioning, training and maintenance. nine0003
We have made a comparison table for these machines, with technical nuances - print and camera temperatures, materials used, number of extruders and estimated cost.