3D printer open
Build a reprap - RepRap
This page has been flagged as containing duplicate material that PartsSupplies also attempts to cover.
These pages should be merged such that both pages do not attempt to cover the duplicate topics.
This page has been flagged as containing duplicate material that Darwin/Buyers Guide also attempts to cover.
These pages should be merged such that both pages do not attempt to cover the duplicate topics.
This page has been flagged as containing duplicate material that What Tooling Do You Have also attempts to cover.
These pages should be merged such that both pages do not attempt to cover the duplicate topics.
This page is out of date --Sebastien Bailard 04:34, 31 October 2010 (UTC)
This page is not only out of date, but contains in part simply nonsense - especially the "Software installation" section. For the lack of editors, this page should be removed. --Traumflug 21:18, 13 April 2011 (UTC)
Contents
- 1 Build a RepRap
- 2 Overview
- 2.
1 Object Creation Software
- 2.2 System control Software
- 2.3 Installing the Software (experimental)
- 2.4 Thermoplast extruder
- 2.5 Positioning system
- 2.6 Shopping list
- 2.
There are multiple ways to build a RepRap or RepStrap; the method selected for these instructions has been chosen to minimize skills and tools needed. If you wish to explore other options click Alternative Build Documentation.
The Classic RepRap Design is "Darwin" pictured on the right. There are very full and accurate building instructions in Make Your Own RepRap.
The RepRap was carefully designed to use only parts that can be made on a RepRap and other cheap parts that you can get anywhere. It was also designed to require few skills to assemble. The one snag is you have to find someone to supply you with the parts that must be made on a RepRap.
RepStrap Darwin Clones are RepRap designs which are fairly accurately copies of the Darwin design but the RepRapped parts are replaced by parts created some other way, Perhaps molded plastic or laser cut acrylic or plywood. Generally parts of one of these machines are interchangeable with RepRapped Darwin parts. Here are some Parts Suppliers.
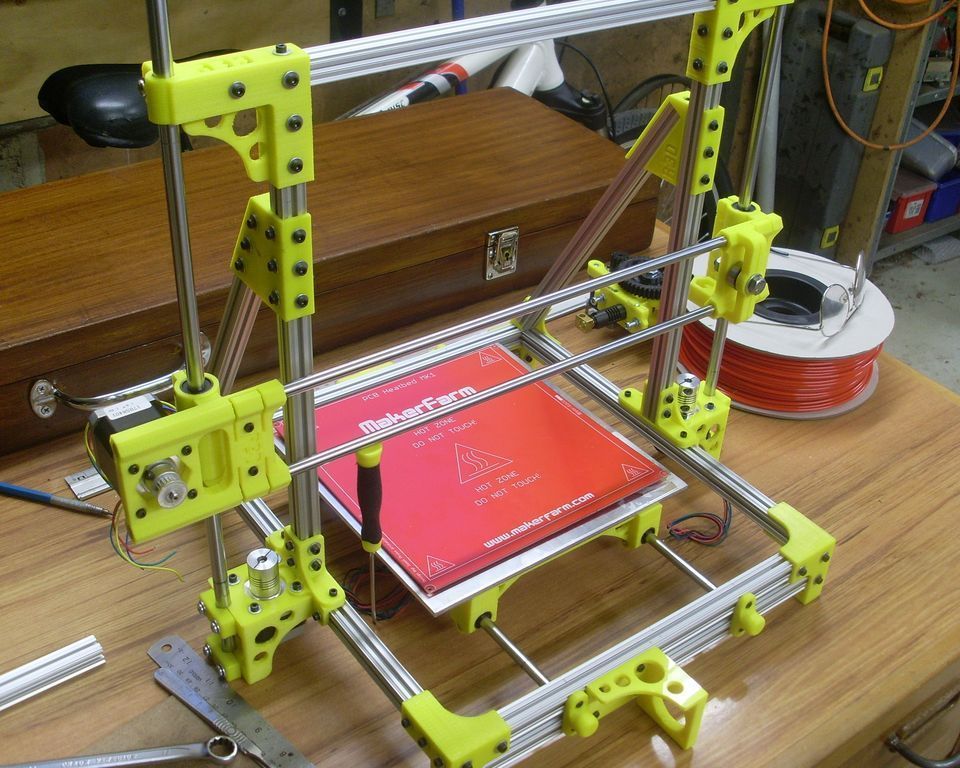
Other RepStraps, these are 3D printers capable of making RepRap (Darwin) parts but are not structurally similar to Darwin. These machines may vary a lot but may be separated into two kinds. Those like Darwin in which the extruder (print head) is moved in the x and y directions and the work is slowly lowered as the print progresses and others where the work is moved in the x and y directions under a stationary head which gradually moves upwards as the print progresses. Here are some references to various RepStrap Machines.
If this is your first RepRap that you are building, here is a basic guide of which build option you should choose:
- If you have a friend nearby that can print out the RepRap part on their RepRap or some other 3D printer. Choose the Classic Darwin
- If you don't have access to a 3d printer then you have 3 options.
- You can build a Classic Darwin, but this means you will have to use a commercial service to print out parts for you; it can easily cost over $1000 for just those parts depending on what deals you can get. This option is probably the most expensive option.
- You can build a RepStrap Darwin Clone. This means you can either buy a lasercut acrylic kit from Bits from Bytes or make some part yourself by machining them. This option is becoming the more common option especially because soon you will be able to buy a lasercut kit from Ponoko which has offices in the US. This is also usually cheaper than the first option.
- The third option is to build non-clone RepStrap that does not have the same frame as a Darwin, such as McWire which uses pipes for the frame. This option is usually the cheapest, but each RepStrap has it own weaknesses. The good thing is that when complete they can print out parts so that you can build a Classic Darwin. The electronics are compatible with Darwin so you only have to buy them once.
A RepRap or RepStrap (A RepRap can build itself, a RepStrap can build something that can build itself) can be divided into several key areas:
- Object creation Software
- System control Software
- Thermoplastic extruder
- Positioning system (the Cartesian Bot)
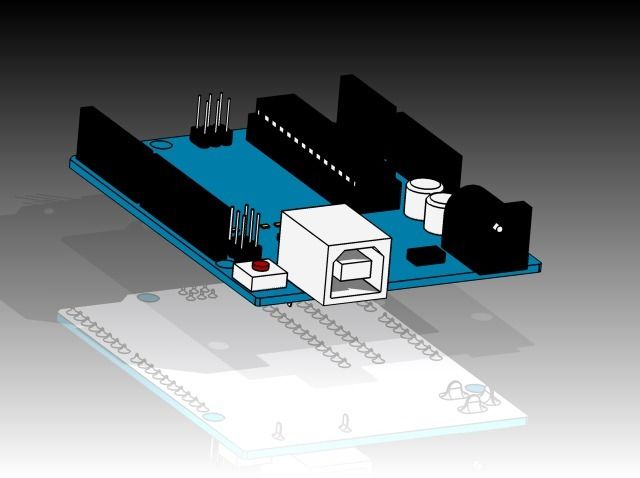
- The electronics to control the positioning system
Object Creation Software
Art of Illusion is currently the software most recommended for designing objects to be printed. It's not a CAD package but it is easy to use. The software allows you to create and manipulate 3D shapes. You can store these shapes in STL file format. STL files are object files that are used in Rapid Prototyping. These STL files can be printed off into real 3D objects using your 3D printer (RepRap).
The software is free (GNU GPL version 2) and it is available for Mac OS X, Windows and Linux. If you want to try it out without installing it's available bundled in the Linux distribution liveCD with the rest of the hosted software for the RepRap project.
System control Software
RepRap is controlled via USB or an RS232 interface. You may find a description or download from RepRap Host Software.
There is a RepRap variant which allows you to print an object from a file saved onto a SD card.
Installing the Software (experimental)
This set of instructions tells you how to set up all the software you need for a Reprap in one big blow under Linux Debian.
It involves 5 steps that anyone should be able to complete in a few hours of his/her spare time.
It's easy.
Really.
Warning: Proceed at your own risk. The instructions are not double checked yet.
Prerequisites
You'll need
- a PC (not too old)
- broadband internet access
- some time
Step 1: If you have Windows, go to [Here], get your copy of the Debian installer with one click and start it.
If you already have Linux: Install Debian Lenny some way or the other (you know how to do that ;-)) and continue with Step 3.
Step 2: Follow the instructions. I suggest installing on a 4GB USB stick - but you can also install it all on your hard disk. Be careful to select "testing" instead of stable - this installs Lenny instead of etch. Otherwise the standard settings should be ok in most cases. Don't say "yes" to things you might regret. After a while, a standard system should be installed. Don't forget to install the GRUB boot loader.
Step 3: Log in and say
sudo apt-get install firefox
on the command line.
Step 4: Start firefox and download this Media:Reprap_setup.sh script.
Step 5: Run the script from the shell with
sudo ./Reprap_setup.sh"
Now all the software specific to Reprap is retrieved and installed.
This includes the AVR-Tools, Subversion, Java3d, the Reprap-source tree etc. Installing all that will take some time.
Having successfully reached this point you should try to start the software in reprap-host with:
ant run
If you now see the main window of the host software, you're done.
Congrats! You have made it!
You still have to learn how to use it - but that is another story and another tutorial.
Thermoplast extruder
There are three different extruders all of which, in the end, perform the same function. There is the "official" extruder that can be made by another RepRap. Then there are the kits which are mass produced so it is easier to start printing your first parts. Both kits are designed to be interchangeable with the official extruder.
- RepRapable Thermoplast Extuder
Can be made by another RepRap or commercial rapid prototyper. These are not the only ways the parts can be made but are the easiest. Some builders have made them from machining aluminum or plastic. Others by making molds and casting from resin. This is only for the main pieces of the extruder. The drive screw and other mechanics must be bought or machined. - Kit from Bits from Bytes (laser cut acrylic)
There is an extruder kit currently available from Bits from Bytes who are based in the UK. The kit is part of the silver or gold kits and doesn't need ordering separately unless you want a spare. Assembly instructions are available on the Bits from Bytes website in the 'Assembly Instructions' area:
Bits from Bytes Extruder Assembly instructions
Bits from Bytes Extruder 3d Model - the model requires a recent copy of Adobe Acrobat.
There are videos of the construction process, in the 'Tutorials' section of the website.
Bits from Bytes Heater Barrel Assembly
Bits from Bytes Extruder Drive Assembly
- Kit from Ponoko (laser cut plywood)
A kit will soon be available via Ponoko which has offices in the US.
Positioning system
The positioning system is the greatest part of the size of a RepRap. It is what moves the extruder head from place to place. Kits are available from Bits from Bytes, either the FULL Mechanical Kit - Silver or Gold contain all the components necessary to build a positioning system and extruder. Assembly instructions are available on the bits from bytes website in the 'Assembly Instructions' area:
Bits from Bytes Assembly Instructions
Shopping list
The following list contains all the components necessary to build a RepStrap and enough plastic to print a RepRap. Some handtools are required for assembly, but the only power tool used is a soldering iron.
Extruder and Positioning System
Bits from Bytes - FULL Mechanical Kit - Silver or Gold
Ponoko - coming soon
(only one required)
Electronics
Plastic
The extruders all use 3mm diameter plastic filament/wire. ABS is the recommended plastic for its combination of strength, availability and dimensional stability. Suitable plastic is available from RRRF in 5lb reels. It is also available by request from plasticweldingrod.com.
Total
Shipping and tax vary by country of order but $1000 total is a reasonable approximation.
About - RepRap
From RepRap
Jump to: navigation, search
About | Development | Community | RepRap Machines | Resources | Policy
an exhibition of repraped parts
Look at your computer setup and imagine that you hooked up a 3D printer. Instead of printing on bits of paper this 3D printer makes real, robust, mechanical parts. To give you an idea of how robust, think Lego bricks and you're in the right area. You could make lots of useful stuff, but interestingly you could also make most of the parts to make another 3D printer. That would be a machine that could copy itself.
Contents
- 1 The Realization
- 2 Machine Self-Replication
- 3 Scholarship and History
- 4 Spread the Word
- 5 Glossary
- 6 Also See
- 7 Longer Video
The Realization
RepRap was invented by Adrian Bowyer and the idea first appeared online in February 2004.
The word RepRap is short for Replicating Rapid-prototyper. It is the practical self-copying 3D printer introduced in the video on the left - a self-replicating machine. This 3D printer builds the parts up in layers of plastic.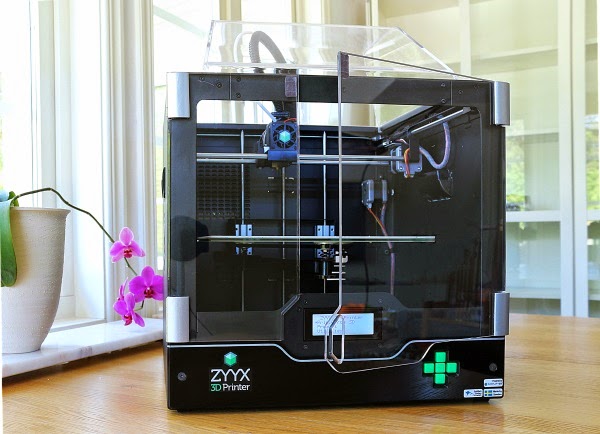 This technology existed before RepRap, but the cheapest commercial machine then would have cost you about €30,000. And it wasn't even designed so that it could make itself. So what the RepRap team are doing is to develop and to give away the designs for a much cheaper machine with the novel capability of being able to self-copy (material costs are about €350). That way it's accessible to small communities in the developing world as well as individuals in the developed world. Following the principles of the Free Software Movement we are distributing the RepRap machine at no cost to everyone under an open source license (the GNU General Public License). So, if you have a RepRap machine, you can use it to make another and give that one to a friend...
The RepRap project became widely known after a large press coverage in March 2005.
Machine Self-Replication
Not counting nuts and bolts the latest RepRap can make 70% of its parts; the other parts are designed to be cheaply available everywhere.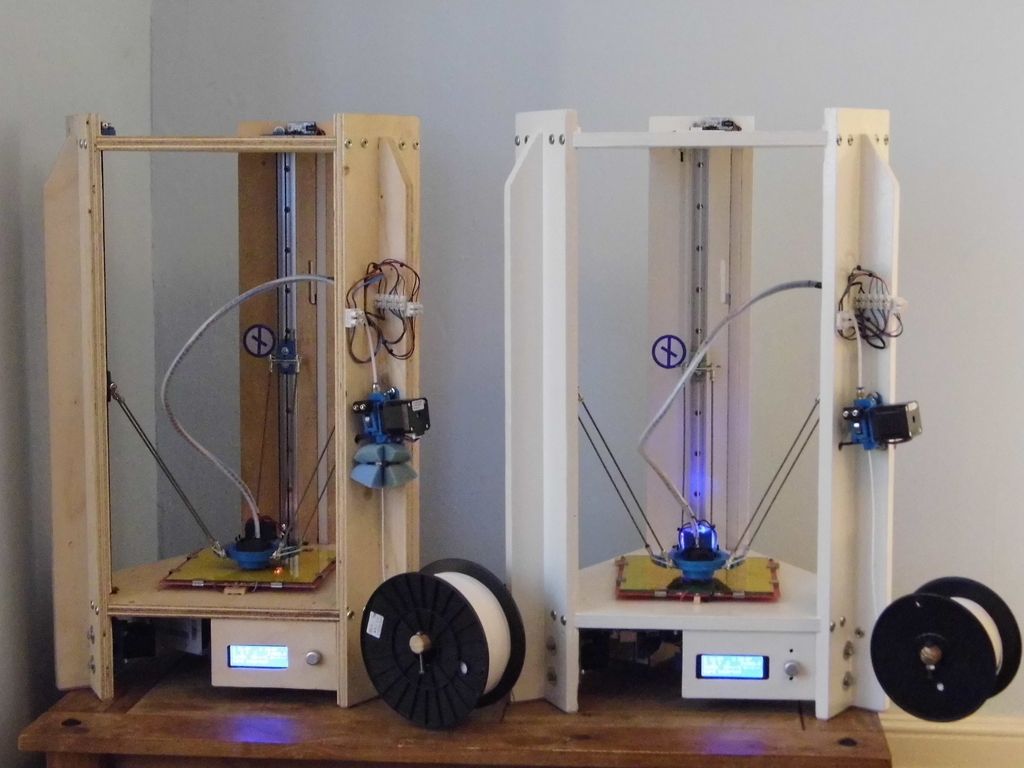 The primary goal of the RepRap project is to create and to give away a makes-useful-stuff machine that, among other things, allows its owner cheaply and easily to make another such machine for someone else.
To increase that 70%, future versions of RepRap will be able to make their own electric circuitry - a technology we have already proved experimentally - though not their electronic chips. After that we'll look to doing transistors with it, and so on...
Adrian Bowyer (left) and Vik Olliver (right) with a parent RepRap machine, made on a conventional rapid prototyper, and the first complete working child RepRap machine, made by the RepRap on the left. The child machine made its first successful grandchild part at 14:00 hours UTC on 29 May 2008 at Bath University in the UK, a few minutes after it was assembled.
Scholarship and History
Academics and others seeking peer-reviewed journal articles on RepRap may care to start with this paper in Robotica. The citation and link are:
- Jones, R., Haufe, P., Sells, E., Iravani, P., Olliver, V., Palmer, C., and Bowyer, A.,: RepRap - The Replicating Rapid Prototyper, Robotica (2011) volume 29, pp. 177–191. Cambridge University Press.
For great insight to RepRap as a self replictor see:
- Bowyer, A., 2014. 3D printing and humanity's first imperfect replicator. 3D Printing and Additive Manufacturing, 1(1), pp.4-5. https://www.liebertpub.com/doi/abs/10.1089/3dp.2013.0003
If you are interested in the legal aspects of this technology, then you may care to read this paper:
- Bradshaw, S., Bowyer, A. and Haufe, P.: The Intellectual Property Implications Of Low-Cost 3D Printing, ScriptEd, April 2010 pp.5-31. Also available here.
If you are interested in how the RepRap can be used to assist in sustainable development see:
- J. M. Pearce, C.M. Blair, K.J. Laciak, R. Andrews, A. Nosrat, and I. Zelenika-Zovko, 3-D Printing of Open Source Appropriate Technologies for Self-Directed Sustainable Development, Journal of Sustainable Development', 3(4), 17-29, 2010.
 '
'
If you are interested in the economics of RepRap see:
- B.T. Wittbrodt, A.G. Glover, J. Laureto, G.C. Anzalone, D. Oppliger, J.L. Irwin, J.M. Pearce (2013), Life-cycle economic analysis of distributed manufacturing with open-source 3-D printers, Mechatronics, 23 (2013), pp. 713-726. http://dx.doi.org/10.1016/j.mechatronics.2013.06.002 open access (self built Mendel)
- Emily E. Petersen and Joshua Pearce. Emergence of Home Manufacturing in the Developed World: Return on Investment for Open-Source 3-D Printers. Technologies 2017, 5(1), 7; doi:10.3390/technologies5010007 open access (commercial Lulzbot RepRap)
- Emily E. Petersen, Romain W. Kidd, Joshua M. Pearce, Impact of DIY Home Manufacturing with 3-D Printing on the Toy and Game Market. Technologies 2017, 5(3), 45; doi: 10.3390/technologies5030045 open access
- Aubrey L. Woern and Joshua M. Pearce. Distributed Manufacturing of Flexible Products: Technical Feasibility and Economic Viability, Technologies 2017, 5(4), 71; doi:10.
 3390/technologies5040071 open access
 - André O. Laplume, Bent Petersen, Joshua M. Pearce, Global value chains from a 3D printing perspective, Journal of International Business Studies 47(5), 595–609 (2016). doi:10.1057/jibs.2015.47 open access
If you are interested in the environmental benefits of RepRap see:
- Megan Kreiger and Joshua M. Pearce (2013). Environmental Life Cycle Analysis of Distributed 3-D Printing and Conventional Manufacturing of Polymer Products, ACS Sustainable Chemistry & Engineering, Engineering, 1 (12), (2013) pp. 1511–1519DOI: 10.1021/sc400093k Open access
- Megan Kreiger and Joshua M. Pearce (2013). Environmental Impacts of Distributed Manufacturing from 3-D Printing of Polymer Components and Products. MRS Online Proceedings Library, 1492, mrsf12-1492-g01-02 open access
There is also a study on the spread of RepRap and its population:
- Erik de Bruijn: On the viability of the open source development model for the design of physical objects, November 8th 2010, University of Tilburg, The Netherlands.

For a reasonably up-to-date literature review of RepRap technology see:
- RepRap Lit Review
To get a copy of the entire RepRap Blog from its very start as a single PDF file download this (41MB; thanks to Gary Hodgson). The images in the early posts of the online blog are broken, but they are all in that file.
There are many reports, student RepRap projects and theses that are available as PDF files from this site. They are all linked from relevant pages but in addition we should, perhaps, index them as well. In the mean time you can get a complete list of all of them by following this link.
The very first RepRap - the RepRap Darwin made by Adrian Bowyer and Ed Sells at Bath University - is now in the collection of the London Science Museum.
Spread the Word
You can freely use the RepRap Logo (see the licence terms on the left) and QR code:
Glossary
- RepRap - n. any free rapid prototyping machine that can manufacture a significant fraction of its own parts; v.
 t. (in lower case: to reprap) to make something in a RepRap machine.
 - RepStrap - n. any free rapid prototyping machine that doesn't make its own parts, but is intended to make parts for a RepRap.
- reprapper - n. a person engaged in making or using RepRaps or RepStraps.
- reprapable - adj. capable of being made in a RepRap machine.
Also See
- Adrian Bowyer's One sheet Description of the RepRap Project
- Background
Longer Video
Here is a recent talk and Q&A by Adrian Bowyer about RepRap and self-replicating manufacturing machines.
8 Best Enclosed 3D Printers of 2022 (All Price Ranges)
Enclosed 3D Printers prevent cold air from entering the print, causing warping or other problems. For basic materials like PLA, 3D printer cases don't matter much, but for more complex materials like ABS and Nylon, they will save you time and time again.
Most cheap 3D printers are open 3D printers - they don't have a frame or casing (sometimes you can buy them separately) and print outdoors. Almost all 3D printer kits like the Ender 3 and CR-10 are open source 3D printers.
However, this can cause problems. ABS, a widely used material for 3D printers, warps if it is not cooled slowly. In addition, closed 3D printers allow you to keep hot and dangerous parts of the 3D printer away from your hands and others. This is especially important for kids, which is why indoor 3D printers are some of the best 3D printers for kids.
Contents
- Best Closed 3D Printers Under $1,000
- Flashforge Adventurer 3 Lite - cheapest indoor 3D printer
- Monoprice Voxel - budget indoor 3D printer
- QIDI Tech X-Pro - great 3D printer with 0 case
- Flashforge Creator Pro 2 - best inexpensive IDEX printer
- BIBO 2
- Best Enclosed 3D Printers for Consumers
- Dremel 3D45
- Raise3D E2
- Best High End 3D Printers with Housings
- Raise3D Pro2
- Ultimaker S5 (with housing kit)
- Buyer's Guide - What to look for
- Benefits of Enclosed 3D Printers
- Frequently Asked Questions
Best Enclosed 3D Printers Under $1,000
Flashforge Adventurer 3 - Cheapest indoor 3D printer
- Price: about $339
- Assembly volume: 150 x 150 x 150 mm
Flashforge Adventurer 3 Lite is a compact and quiet, fully enclosed beginner printer that provides friction-free printing. Printer setup is minimal other than a well-managed five-point calibration process, making it the best choice for beginners or students looking to start printing without the hassle.
It is almost identical to the Adventurer 3, except for the built-in camera and thread runout sensor. These minor features do not detract from the simple typing experience.
In addition to a sleek, closed design, the Flashforge Adventurer 3 Lite has everything you need to handle tough materials like ABS: a flexible heated bed with a maximum temperature of 100°C and a maximum nozzle temperature of 240°C. With these features, you can also work with more exotic heat-sensitive materials such as metal, wood, and more.
It also has a wide range of connectivity options, including Wi-Fi and remote print monitoring thanks to FlashForge's 3D Cloud Print technology. The build volume of 150 x 150 x 150mm results in a narrow printable area, which is one of the few gripes I had when evaluating the Flashforge Adventurer 3 Lite. You won't have much luck printing bulky and tall parts, but this is easy to fix by printing in batches.
It is also worth noting that the filament compartment located on the side of the printer, although practical, is not intended for all types and brands of filament. You may need an external holder if your chosen third party filament is not suitable.
Key points:
- Closed chamber
- Rugged, beginner-friendly printer
- Wi-Fi connectivity
- Materials: PLA, ABS, Heavy Duty PLA, PLA Color Change, Metal Filled, Wood and High Speed PLA
Monoprice Voxel - Budget Enclosed 3D Printer
- Price: $449
- Assembly volume: 150 x 150 x 150 mm
The cheapest indoor 3D printer we recommend, the Monoprice Voxel is one of the best 3D printers for beginners. It's very easy to set up (within 10 minutes!), easy to operate with a touch screen, can print over WiFi, and comes with 8GB of onboard storage for 3D printer files.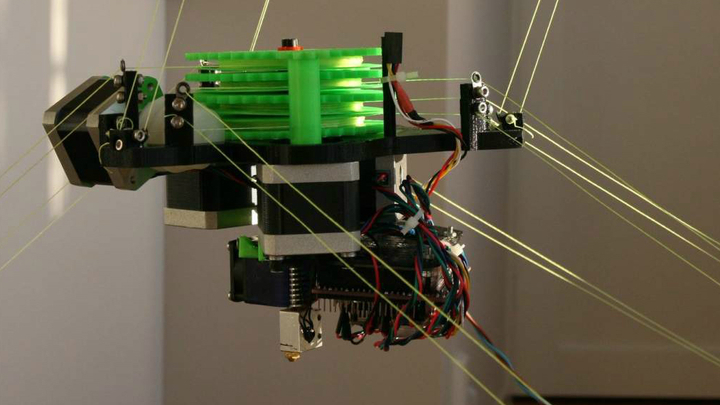 It comes with several 3D models in files, as well as some materials to get you started, so you can go from unboxing to printing in minutes.
If you're new to 3D printing and aren't too tech-savvy, the assisted leveling system reduces the experience to a simple click. It also comes fully assembled, so you won't need any DIY skills, which is surprising considering most printers in this price range are 3D printing kits. It can also connect to Polar Cloud, allowing you to manage and control your printer remotely, and even do so for multiple printers at the same time.
Key Points:
- Cheap Indoor 3D Printer
- Beginner Friendly
- WiFi Printing and Touch Screen on an Inexpensive Device
- Materials: ABS, PLA, PETG, Flexibles
QIDI Tech X-Pro is a great 3D printer with a $500 case
- Price: $500
- Assembly volume: 230 x 150 x 150 mm
One of last year's most popular low-cost 3D printers, the Qidi Tech X-Pro offers reliability, precision, dual extrusion and an efficient closed area print, all for $500.
The layer thickness starts from 0.05 mm, the printer can print at speeds from 30 to 150 mm/s - although at such high speeds the print quality deteriorates noticeably. The printer is Mac and Windows compatible and can print over WiFi, USB or Ethernet.
Flexible, removable plate allows for easy removal of prints with minimal damage, and comes with Qidi Tech's own QidiPrint 3D Slicer. Overall, this is one of the best indoor 3D printers under $500.
Highlights:
- Large 4.5" touchscreen for ergonomic printing
- Flexible assembly plate
- WiFi printing and dual extrusion for $500
- Materials: ABS, PLA and PETG
Flashforge Creator Pro 2 - Best value IDEX printer
- Build volume: 200 x 148 x 150mm
A well-equipped update to the classic Creator Pro, the Flashforge Creator Pro 2 offers all the benefits of a case with features you don't expect to see in the $600-$700 range.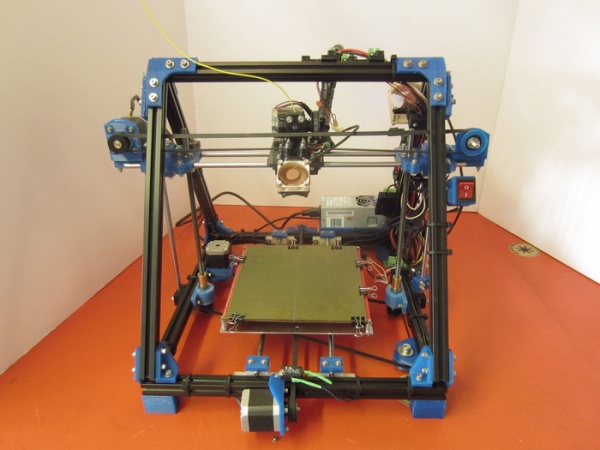 We see it as an ideal second printer for manufacturers who have already completed their initial training on a budget FDM kit and are now looking for something more versatile and feature rich.
While the Flashforge Creator Pro 2 has a solid, well-made enclosed print chamber suitable for both ABS and PLA thanks to its removable acrylic top cover, it's the independent dual extruder system that sets it apart from other best enclosed 3D printers.
The IDEX system is almost unheard of at this price point, giving manufacturers the flexibility to work with specular prints, duplicate prints, dissolvable support structures, and even print multiple materials or colors at the same time. It is suitable for complex prints with vertical overhangs or is the perfect tool to help the teacher to release as many student-designed prints as quickly as possible.
These two centerpieces aside, Flashforge Creator Pro 2 completes the offering with a touch interface, 200 x 148 x 150mm volume and compatibility with PLA, Pearl PLA, ABS, ABS Pro, PVA and HIPS materials.
It's worth noting that Flashforge made the wrong choice by tying the Creator Pro 2 to its own FlashPrint slicer. It does its job well enough, but doesn't have the versatility of an open source software suite like Cura. This isn't necessarily the deciding factor, especially for those new to 3D printing or educators who want simple software and pre-loaded settings specifically tuned to work with the Creator Pro 2 right from the start.
Highlights:
- Inexpensive independent system with two extruders
- Fully enclosed print chamber
- Materials: PLA, Pearl PLA, ABS, ABS Pro, PVA and HIPS
BIBO 2
- Price: $679
- Assembly volume: 216 x 187 x 160 mm
The Bibo 2 printer, with character and affordable for hobbyists, offers 50 micron accuracy, dual extrusion and WiFi printing, all for less than $1,000.
Although this closed 3D printer is not an IDEX printer, it still offers copy printing modes for printing two identical objects at the same time. It features an easy-to-use touch screen - which isn't a given in this price range - and has a low-filament detection feature to avoid spoiling prints.
In addition to the ABS and Nylon efficient 3D printing 3D printer body, Bibo is built in a stable and durable aluminum frame, minimizing unwanted vibrations that can slightly affect print performance and quality. Overall, this is a great indoor 3D printer for the price, and it can also come with a laser engraver kit.
Highlights:
- WiFi printing, dual extrusion and touchscreen, all for just over $500.
- Minimum layer height 50 microns
- Claims it can print polycarbonate but also says max temperature is 270C
- Materials: PLA, ABS, HIPS, flexible filaments, PETG, nylon, PC, carbon fiber
- Best Indoor 3D Printers for Consumers
Best Indoor 3D Printers for Consumers
Dremel 3D45
- Price: $1,599
- Assembly volume: 254 x 152 x 170 mm
Accurate, versatile and ideal for teaching 3D printing in schools, the Dremel 3D45 builds on nearly a century of Dremel manufacturing experience.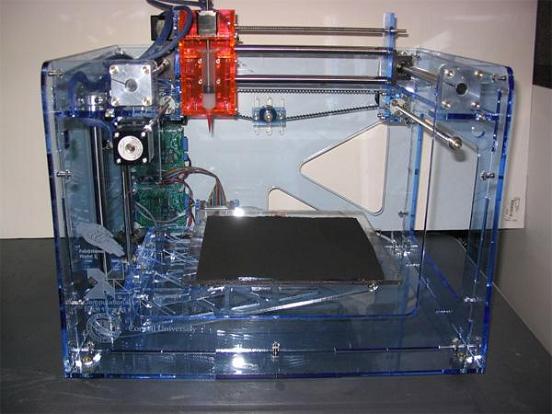 Accuracy down to 50 microns, WiFi, USB or Ethernet cable connectivity, Mac and Windows compatibility, and iPad compatibility make the Dremel Digilab 3D45 the perfect addition to any school or business prototyping environment.
The heated plate allows you to print on nylon and Eco-ABS, while the built-in HD camera provides convenient remote control of the print progress, which is easily done using cloud-based 3D printing software.
If you have any problems, the Dremel Customer Service in the USA is here to help you. Overall, this is a solid and accurate indoor 3D printer that offers good volume and results for the price.
Highlights:
- Powerful automatic leveling system
- Highly rated customer support
- Universal
- Materials: PLA, PETG, Eco-ABS, Nylon
- Price: $3,499
- Assembly volume: 330 x 240 x 240 mm
Raise3D Large Enclosed 3D Printer adds to IDEX's already impressive range of dual extruder 3D printers. The extruders of IDEX 3D printers can move independently of each other, which greatly increases the speed and efficiency of printing, especially when printing multiple identical or identical parts.
Raise3D E2
The E2 printer has two basic modes:
Mirror mode: 3D printing simultaneously prints inverted mirror versions of your model, such as the sole of a shoe for the left and right foot.
Duplicating mode: uses both extruders synchronously, printing two identical objects at the same time and doubling the printing efficiency.
The E2 3D printer case keeps heat inside and everything else outside. If the door is opened during printing, the process is immediately suspended so that no one is burned or injured by the extruder or the heated layer. The E2 is also equipped with an efficient air filtration system that removes melted plastic particles and odors, as well as filament end sensors and power-off recovery functions.
Highlights:
- Build volume is reduced to 295 x 240 x 240mm when using the dual extruder
- Useful "Mirror" and "Duplicate" modes
- Built-in security measures
- Materials: PLA, ABS, HIPS, PC, TPU and TPE, PETG, nylon, PP, ASA, PVA, glass-filled filaments, metal-filled, carbon-fiber and wood-filled.
- Price: $3,999 / $5,999
Build Volume: 305 x 305 x 300 (605) mm
Top of the line 3D printers in the upper price range with housings
Raise3D Pro2
A true workhorse full body 3D printer, the Raise3D Pro2 series offers incredible precision, material compatibility, great workflow and many other key features.
The standard Pro2 already has a very large build area, while the Pro2 Plus extends the z-axis range to parts up to 605mm high. The extruders can reach temperatures of 300C for even the toughest materials such as PC, and the dual extruders enable efficient printing with support for soluble materials as well as multi-color 3D printing.
With a minimum layer height of 0.01mm, Pro2 3D printers can print incredibly sharp and finely detailed details. Swap out the nozzle for a smaller nozzle and focus on the small details to get a fantastic finish. The built-in camera makes it easy to control prints, while the 7-inch touch screen provides data and an easy-to-use overall workflow.
Highlights:
- Dual extruder build volume: 280 x 305 x 300 mm
- A complete printer: accurate, reliable, closed, versatile.
- Materials: PLA, ABS, HIPS, PC, TPU, nylon, ASA, PETG, PVA, glass, carbon fiber, wood.
Ultimaker S5 (with housing kit)
- Price: $5,995
- Assembly volume: 330 x 240 x 300 mm
The Ultimaker S5 is capable of printing industrial grade parts with layer resolution down to 20 microns. An enclosed 3D printer that becomes even more efficient and safer with the S5 Pro kit, the S5 delivers reliable and repeatable dual extrusion with amazing precision, even with abrasive filaments such as glass and carbon fiber.
Although Ultimaker manufactures its own filaments, the S5 is open and can be used with any 2.85mm filament. It prints over WiFi as well as other methods and can be monitored remotely using the built-in camera.
When you purchase the S5 Pro Bundle, you get access to 24/7 automated material handling, air filtration and heat control for 6 filaments, as well as an Air Manager that further encloses the 3D printer.
Highlights:
- Excellent accuracy and print quality
- Reliable and efficient in many materials
- Pro Bundle makes it even more efficient indoor 3D printer
- Materials: PLA, CPE, NYLON, ABS, glass, carbon fiber, PC, PVA, PP, TPU
Ultimaker s5 with optional pro kit including housing, air filter and filament storage
Buyer's guide - what to look for
Fully or partially enclosed chamber
Partially enclosed chamber printers are a bit of an oddity because they don't provide ideal printing conditions with either of the two main filament types, ABS and PLA. However, they provide an extra layer of security, which is useful for educational institutions or those with children. We recommend a fully enclosed chamber if you plan to print with ABS, and an open chamber if you choose PLA as your media. If you are going to print with ABS and PLA, choose an enclosed printer with removable covers.
Stock Volume
Build Volume is the printable area available to you on a closed printer. In other words, it is a measure of the size and type of prints you can make. If you are planning on making large prints or multiple copies, we recommend high volume printers such as the Ultimaker S5.
Material Compatibility
By design, the enclosed 3D printer is designed to be compatible with a wider range of media types due to the ability to maintain higher temperatures around prints and keep cold air out. ABS is the most common type of material for sealed chambers, but you will also find printers that can work with nylon, PC, and other heat-sensitive materials. PLA can also be used if the printer covers are removable as this material requires cooler ambient temperatures for best results.
Heated bed
Given that the purpose of the closed chamber is to provide a stable thermal environment for printing with more complex materials such as ABS, a heated bed is a must. It helps provide an additional source of heat directly below the print, which promotes layer adhesion and slows down the cooling rate, thus avoiding unwanted defects such as warping and curling.
Connectivity
Connectivity determines how you interact with the printer, whether it's sending cut prints or fine-tuning settings. An SD card reader is more or less standard, as is USB in many cases, but for ease of use, there's nothing better than a Wi-Fi connection and thus cloud printing and monitoring.
Layer Resolution
Layer Resolution indicates the smallest layer height that can be printed.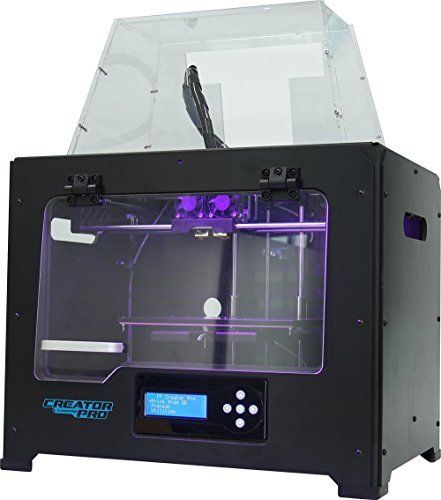 Choose a printer with a lower layer resolution for parts with more detail, such as 20 microns on the Ultimaker S5. On a closed FDM printer, 100 micron layer resolution is relatively standard and allows for a wide range of detail.
Filters
If you're buying a sealed chamber, your plan is most likely to include ABS printing. ABS not only has an unpleasant odor, but also emits potentially harmful fumes. A printer equipped with filters, carbon or HEPA, helps to extract the most toxic elements from the fumes. In addition, we also recommend working with ABS in a well-ventilated area.
Touch Screen
For convenience, we recommend an enclosed touch screen 3D printer. After all, we're all used to scrolling and swiping on our phones, so it makes sense to want the same functionality and familiar interface when working with a 3D printer. Most modern printers come with a touch screen as standard.
Price
Closed printers tend to increase in price as you pay for additional production and design. But thanks to the ever-increasing popularity of the budget category, enclosed camera printers are more affordable than ever before. You can easily buy a reliable indoor 3D printer for less than $400. Naturally, if you have the budget, new professional-grade printers that cost thousands of dollars also hit store shelves every year.
Benefits of Enclosed 3D Printers
Better ABS and Nylon 3D Printing
Housings can cool parts more slowly and maintain a more stable and higher temperature in the working chamber. This reduces buckling and splitting during the printing process.
Much safer
3D printer housings keep hot parts such as the nozzle and heated bed away from children if you have a family at home or if 3D printing is done in schools.
Quieter
The closed area keeps noise out, making them ideal quiet 3D printers. The enclosures keep out the buzz and hum of the printing process, which is a real boon if you're typing at home or in confined spaces with poor acoustics that can amplify noise levels.
Stronger and more durable
Enclosed 3D printers typically feature a sturdy four-walled cubic design that keeps vibrations and other factors from degrading print quality.
Noise Reduction
Enclosures help reduce noise by reducing hum and hum during printing, which is a real boon if you're printing at home or in confined spaces with poor acoustics that can amplify noise levels.
Drawbacks of Enclosed 3D Printers
More Expensive - 3D printers with enclosures are more expensive than open FDM printers. The logic here is obvious: manufacturers are forced to spend more money on raw materials and the assembly process, which invariably reflects on consumers.
Difficulty in maintenance and troubleshooting - Due to the enclosed design, maintenance of an enclosed 3D printer is much more difficult. Cleaning, replacing, troubleshooting or upgrading parts is much more of a hassle than an open design 3D printer.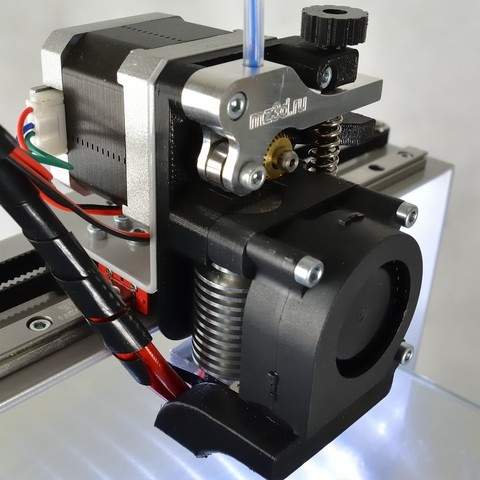
FAQ
What is the 3D printer case for?
Enclosures help improve print performance by keeping hot air in and cold air/draughts out. For heat sensitive materials such as ABS, a stable higher temperature environment is critical for proper layer adhesion and reduced chance of warping, curling and other problems. Likewise, the shroud helps prevent dust and dirt from getting on printer parts and the print itself; this is essential for successful printing as contamination can affect adhesion and print quality.
Are closed 3D printers safer? Why?
Yes. The housing shields hot and moving parts from prying fingers and hands, reducing the chance of injury compared to open design printers where all parts are exposed and easily accessible. Whether you live with children or work in an educational setting with younger students, an enclosed 3D printer will give you peace of mind. In addition, filters, often installed in enclosed printers, remove toxic elements from the fumes.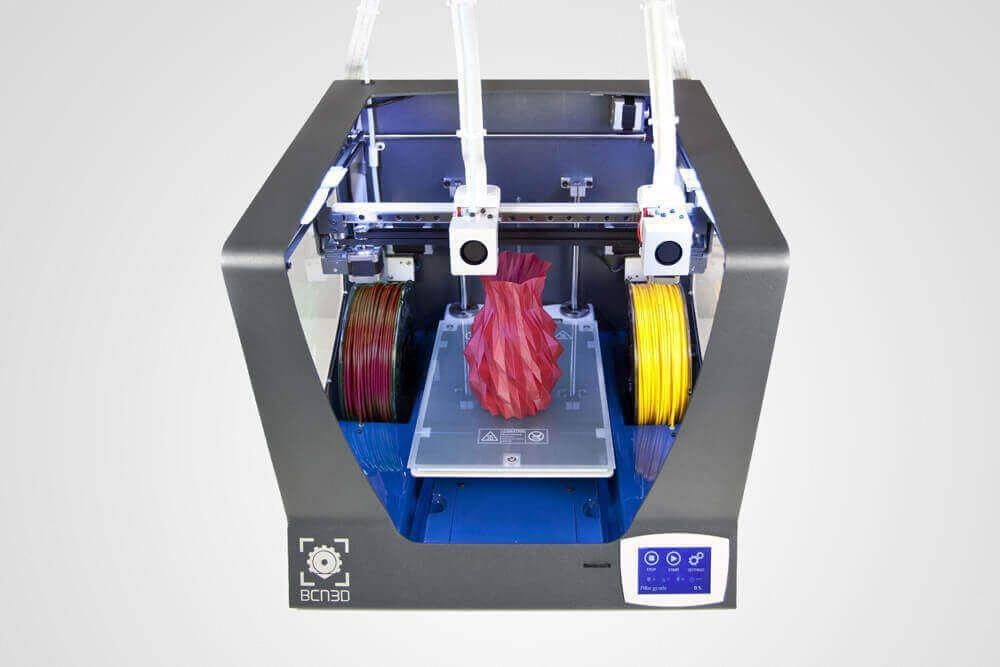
How to maintain a closed 3D printer?
Maintaining a closed 3D printer is identical to maintaining an open design printer: regular cleaning of the bed and nozzle, updating the firmware, regularly inspecting parts for wear, leveling/calibrating the bed at regular intervals.
Are closed 3D printers better?
If you want to print on ABS, yes. The housing provides the correct, stable ambient temperature for ABS to thrive. On the other hand, if you are planning to print to PLA, an open design printer would be the best option. PLA needs plenty of cold air and ventilation to thrive.
Which 3D printer to choose for home and hobby use
A few years ago, 3D printers were bulky industrial machines, but now 3D printing is becoming more accessible for home use. When buying their first printer, many are disappointed. This may be due to the unsatisfactory quality of the resulting models or the complex setup and maintenance of the 3D printer.
In the reviews that are found on the Internet, printers are often shown after a lot of upgrades or a long selection of settings for printing.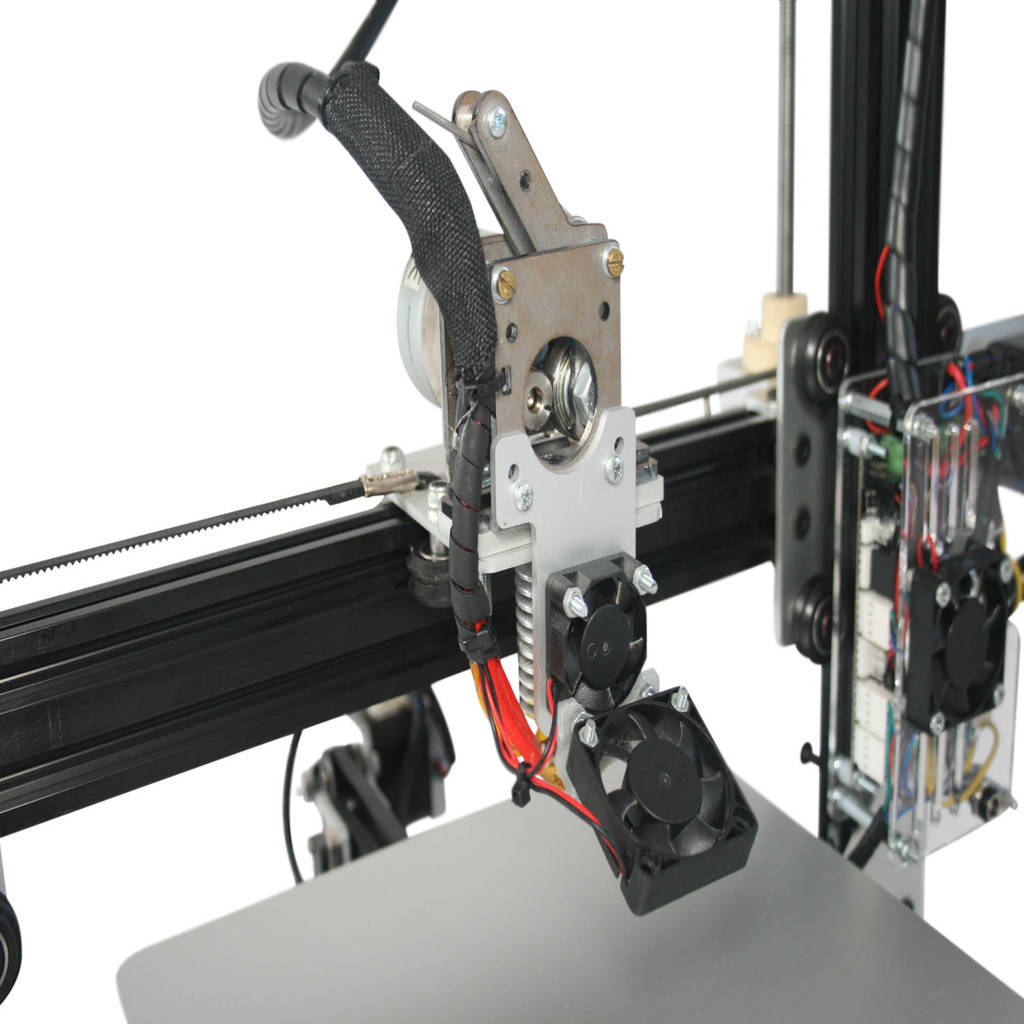 This is not at all the result that a beginner who first got acquainted with 3D printing will get.
In order not to be disappointed, before buying, you need to understand which model is suitable for your tasks. First of all, it is worth deciding what the printer will be used for. What is the main property that finished products should have? What is more important, the physical properties of the model or the ideal surface and detail? Not only the model depends on this, but also the technology by which the 3D printer will work.
Which technology to choose? FDM or LCD?
If you need to make a small detailed figurine with a perfectly smooth surface, you should pay attention to models that work on LCD technology (LCD works on a principle similar to DLP - Digital Light Processing or “digital light processing”).
LCD prints using a photopolymer resin that cures under UV light. This makes it possible to produce without deformation, even small and thin products that cannot be manufactured using FDM technology.
Resin model
Now on sale there are many photopolymer resins with different properties. A few years ago the choice was not great. Basically, finished products were not strong enough for use in functional models. Now engineering resins have begun to appear on sale. Products from them are not inferior in strength to models made using FDM technology from ABS or even nylon.
If it is necessary to produce large products with different properties, or the tasks will be very diverse, then the choice is with FDM technology. But it is important to understand that finished products will not have a perfectly smooth surface. Of course, you can polish the model, but this is additional time and labor costs.
FDM technology builds a model using molten plastic filament, which is fed from the print head. The print head (extruder) “grows” the model layer by layer on the printing table.
FDM Models
FDM technology became widespread much earlier than DLP.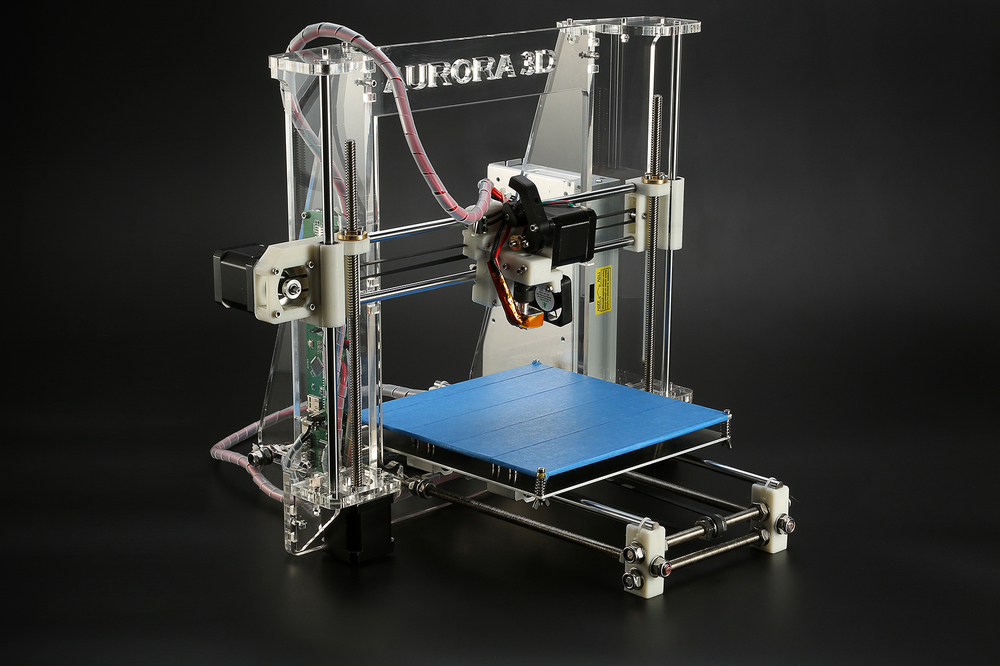 Thanks to this, a wide variety of 3D printers and consumables for them has appeared. You can find many decorative plastics that mimic various materials, or engineering plastics for making functional models or mock-ups.
Choosing an LCD printer
Photopolymer printers work on one of 3 technologies - DLP, LCD or SLA.
As home printers, devices based on LCD technology are usually used due to their availability and low price.
Printer design
SLA technology appeared the very first among photopolymer printers. With the help of a point-focused beam, the desired areas of the resin are gradually illuminated. This is repeated layer by layer.
How SLA 9 works0455
Since the surface of the model is perfectly smooth, SLA has become used in the jewelry and dental industries.
Pros:
Cons:
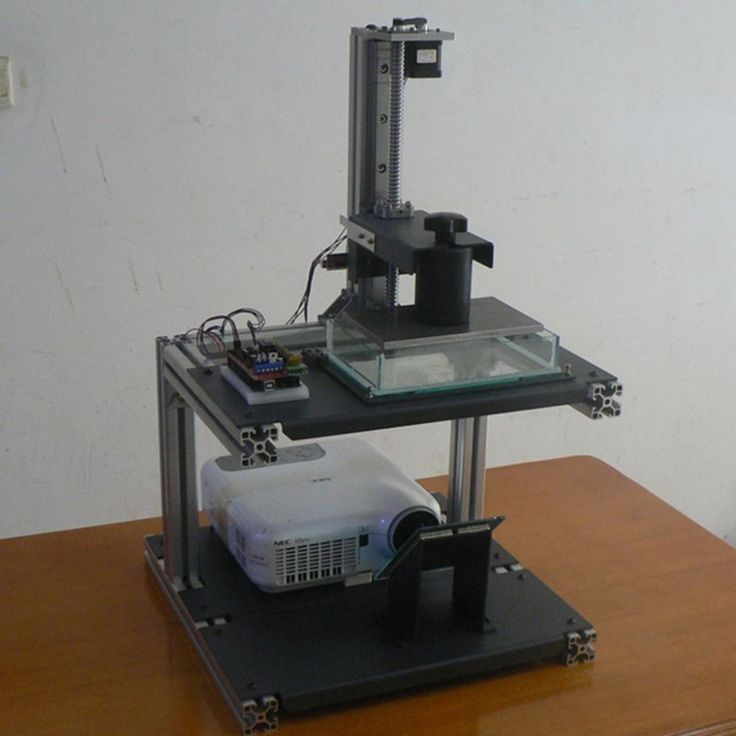
DLP technology appeared later than SLA, but it is very similar to it. The main difference is that the light source is not a focused beam, but a projector. This made it possible to illuminate the entire layer at once, which significantly accelerated the production of models. The quality of the surface was slightly inferior to SLA, but modern DLP printers, in terms of the quality of models, are almost as good as SLA technology.
How DLP works
Pros:
-
Faster production of models due to the illumination of the entire layer
-
Consumables are slightly cheaper than SLA
-
High surface quality (although may be inferior to SLA)
Cons:
LCD technology is the youngest of all. The DLP principle is taken as a basis, but an LCD display is used as a matrix or illumination pattern. LEDs are used as a source of UV light in LCD technology. Thanks to inexpensive components, we managed to get a simple, but high-quality and affordable photopolymer printer.
How the LCD printer works
Pros:
-
small cost
-
Cheap parts
Cons:
-
Low accuracy compared to SLA and DLP (for jewelers and dentists, the quality of LSD prints may not be enough, although more and more accurate models appear with the development of technology)
-
Possible stray light
-
The quality of models may decrease at the edges of the printable area (this can be corrected programmatically)
Resins that are used as a consumable for photopolymer printing can smell strongly and unpleasantly during operation. Try to use the printer in a well-ventilated area, or choose a printer with a sealed cabinet and filter.
When choosing an LCD printer, pay special attention to the rigidity and positioning accuracy of the platform along the Z axis.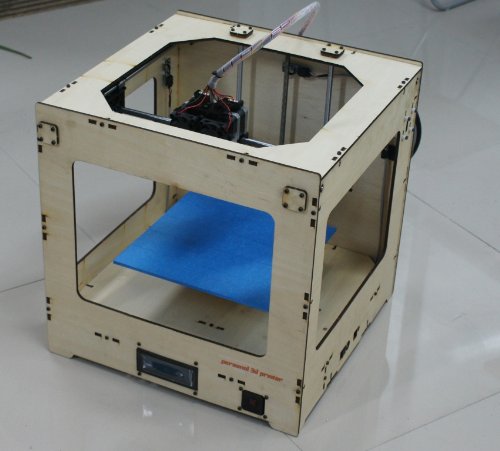 If there are poor quality guides along the Z axis or even a slight play, then the surface quality of the finished model may turn out to be sloppy or the model will turn out to be unevenly striped.
Rating of the best LCD 3D printers for home
Anycubic Photon Mono
This is an LCD printer with a matrix that allows you to increase the speed and accuracy of printing. Anycubic Photon Mono will be a good helper for hobbyists and modellers.
Anycubic Photon Mono SE
Anycubic Photon Mono SE has an unusual parallel light source. This minimizes distortion at the edges of the printable area. You can effectively use the entire working area of the machine and produce many small models at a time.
Phrozen Sonic Mini 4K
Model with high resolution LCD display and large print area. The monochrome display transmits UV rays better and allows you to print much faster than similar devices with a conventional display.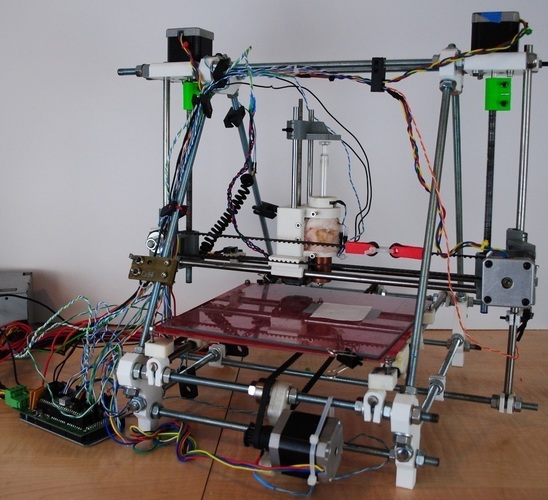 The manufacturer claims a screen life of more than 2000 hours. Phrozen Sonic mini 4k is suitable for almost any task.
Wanhao GR1
Wanhao GR1 has high precision and large print area (140x78x200mm). The manufacturer tried to reduce distortion at the edges of the display, this allows you to make the most of the entire work area. High precision and large print area make Wanhao GR1 not only for hobby use, but also for production.
Anycubic Photon Zero
Small and very budgetary LCD device. Its resolution and small working area (total 97x54x150 mm) is enough for printing small miniatures, figurines or small engineering models. Anycubic Photon Zero is a good choice for beginners who want to get into photopolymer printing without spending a lot of money.
Choosing an FDM printer
If you plan to produce large and diverse functional models or experiment, a 3D printer that prints using FDM technology is an excellent choice.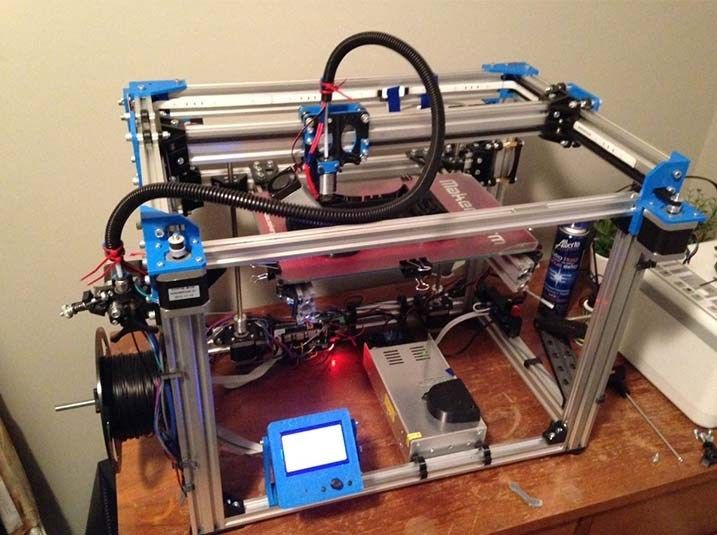
First, decide on the size of the printable area and the properties that the finished model should have. After all, some materials require a closed chamber or good airflow to work.
Some printer models can be “upgraded” in the future. For example, if necessary, purchase spare parts for a closed case, put a nozzle of a different diameter, or change the thermal barrier to an all-metal one. But not all manufacturers provide for the possibility of such upgrades.
Printer design
Despite the same principle of operation, there are several different mechanics, which have their pros and cons.
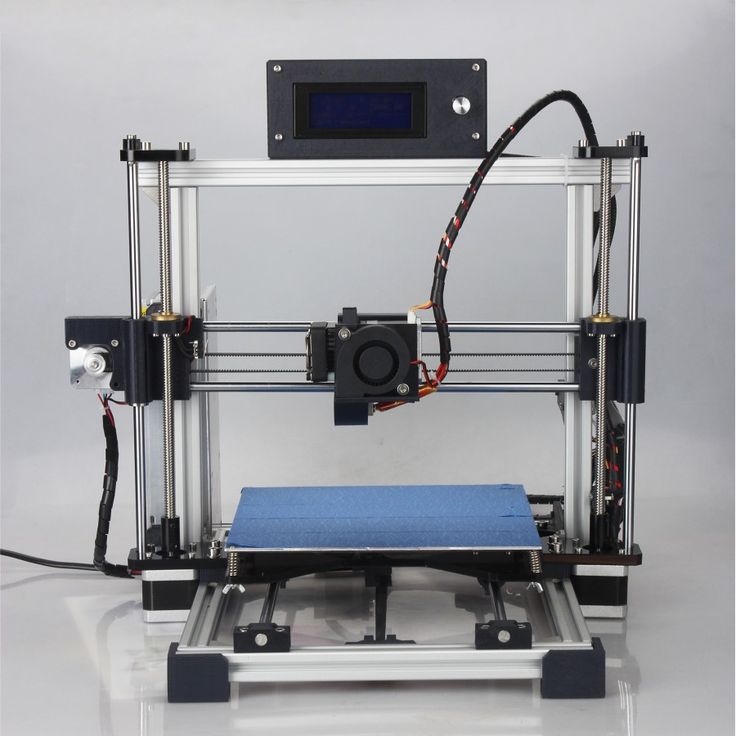
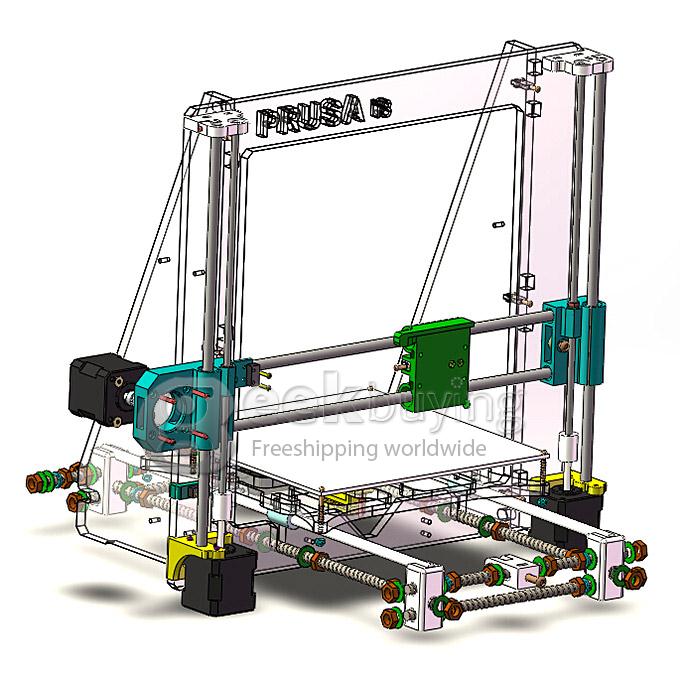
Kinematics “Prusa” (Prusa)
Perhaps the most popular kinematics among home FDM devices. Mainly due to its simplicity and low cost. The main feature is the table that moves along the Y axis, while the extruder moves along the rest of the axes. Because of this, such kinematics was nicknamed “dragstol”.
Prusa kinematics
Pros:
Cons:
-
Slow print speeds.
 A massive table with a model is forced to constantly move along the Y axis, because of this, print quality will be worse at high speeds.
 -
Some models have design flaws (for example, insufficient frame rigidity), they can be fixed, but for this you have to be a little inventor. Or find a ready-made solution on the Internet.
This category also includes 3D printers with console kinematics. The same prusa, only halved. Because of this, the frame is less rigid, but the printer itself is more compact.
Kinematics Ultimaker
The extruder moves along the X-Y axes, and the table only along the Z axis. All motors are trying to be fixed on the body to lighten the weight of the moving mechanisms, thanks to which it is possible to achieve high print quality at high speeds.
Ultimaker Kinematics
Pros:
Cons:
H-BOT or Core-XY
These are 2 similar but more complex kinematics - the table moves only along the Z axis, and the extruder along the X-Y.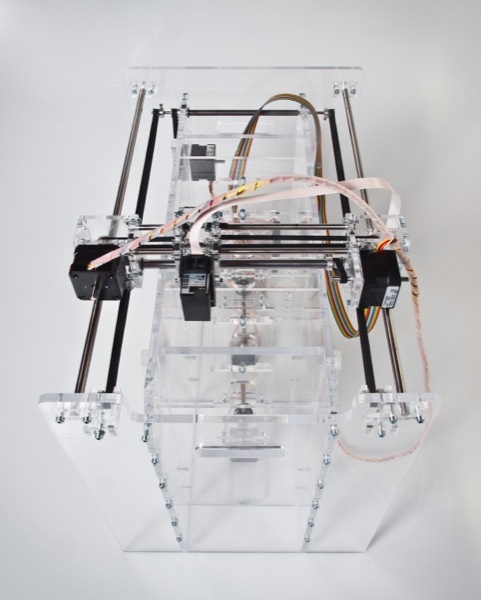 But to move the extruder, 1 or 2 long belts and 2 stepper motors work in concert.
Example Core-XY kinematics
Pros:
-
High print quality
-
High print speeds without loss of quality.
-
Can be easily closed completely
Cons:
MakerBot Kinematics
Similar to Ultimaker kinematics, but one of the motors is located on the Y or X axis carriage.
Pros:
Cons:
Delta
Deltas do not have the usual XYZ axes. There are 3 columns in the deltas, along which the carriages move, and the position of the extruder in space is calculated using a complex formula. The table is usually statically fixed to the body.
Delta printer example
Pros:
Cons:
Nuances of choosing an FDM 3D printer
In addition to kinematics, when choosing a printer, it is important to take into account some design features.
One or two extruders?
Two extruders can be used for dual color printing, but most commonly the second extruder is used for solvent support printing. If you need to print complex parts with internal cavities, then you should choose a dual extruder printer.
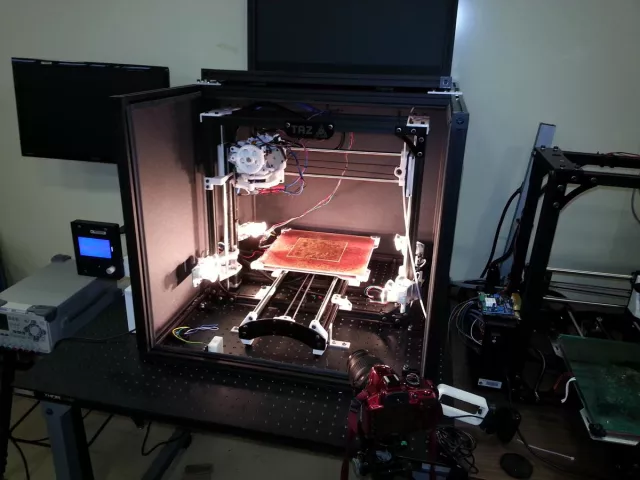
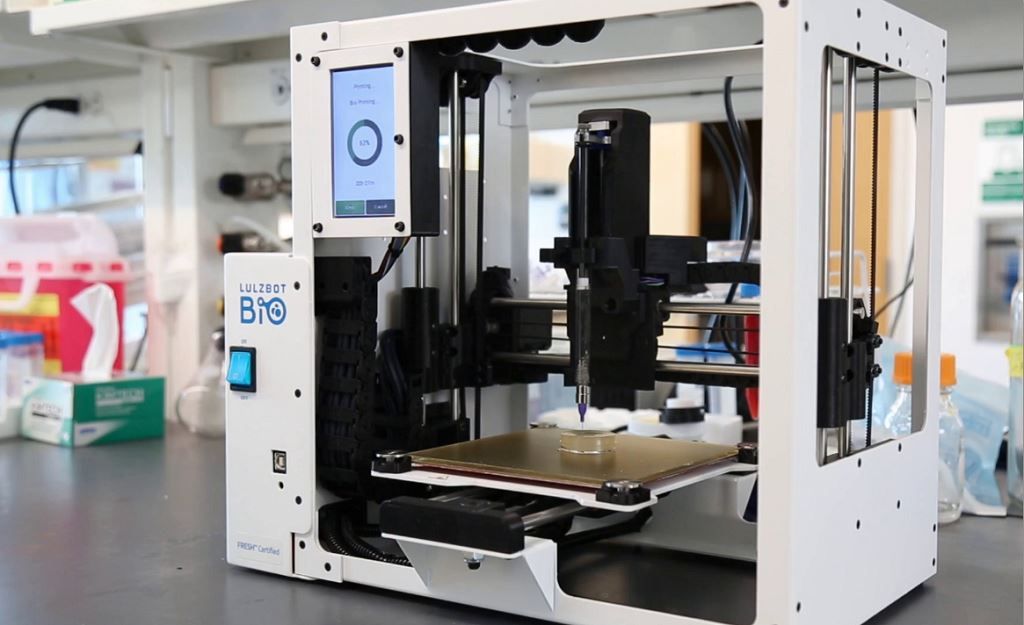
Closed or open printer?
Printing of functional models and parts uses plastic, which usually requires a closed chamber. If you plan to print functional prototypes or various models, you should look at printers with a closed chamber.
Bowden or direct?
There are 2 types of material supply to the print head of the printer - bowden and direct.
In a bowden, the feed mechanism motor is located on the printer body. This allows you to reduce the weight of the extruder and print at higher speeds without losing quality. But because of the long tube, printing with very soft plastics can be problematic.
Bowden feed pattern
In direct feeding, the motor and feed mechanism are located on the extruder. This increases the weight of the print head, but allows you to print with any kind of plastics.
Diagram of direct feed
Heated table or not?
The heating of the table improves the adhesion of the first layer of the model. And engineering plastics cannot be printed without a heated table.
Many manufacturers add useful additional features. They do not affect the quality of the print, but save time and nerves. The most useful additional functions are the filament presence sensor and remembering the print location after a power outage.
Filament sensor.
It will automatically pause printing if the plastic runs out. When there is a little plastic left on the spool, this feature will allow you not to stand over the guard printer until the old spool runs out in order to have time to push in a new bar “on the go”.
Power outage protection.
Remembering where to print when the power goes out can save you a lot of nerves when printing large models. You won't have to worry that after a power outage, you will have to run the model again for many hours or cut and reprint a piece of the model. It is especially disappointing to throw away a complex underprinted model with supports due to a one-minute outage.
There are also many extras. features that make using the printer more comfortable. For example, automatic calibration, touch screen, Wi-Fi and others.
Rating of the best FDM 3D printers for home
Anycubic Mega Zero 2.0
Inexpensive model with Pryusha kinematics. Good for getting started with 3D printing without a big investment. Despite the low cost, Anycubic Mega Zero 2.0 has a heated table and a resume function after a power outage. Thanks to direct feed, printing with soft materials should not be difficult.
Creality3D Ender 3 Pro
A very popular device due to its low price. But despite this, the Ender 3 Pro has a heated table and a decent print area.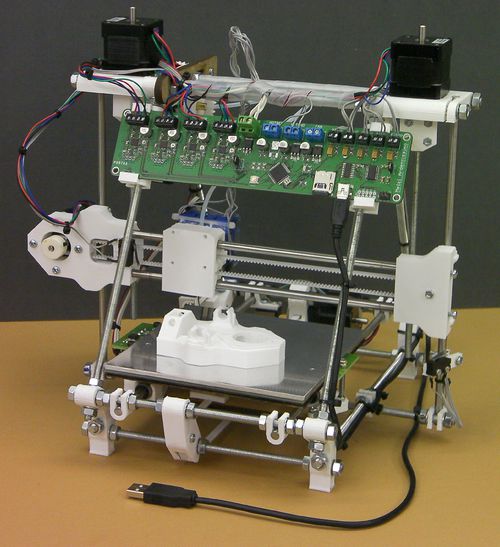 Can be sold assembled or as a DIY kit.
Flash Forge Finder
Small home appliance intended for children or educational institutions. The Finder doesn't have a heated table, but it does have a calibration assistant, a Wi-Fi module, and other extras that make getting to know it a lot easier. All moving and heated elements are hidden as much as possible in the case so that the child cannot get burned.
Wanhao Duplicator 6 Plus
Wanhao Duplicator 6 Plus was based on Ultimaker kinematics, but instead of bowden feed, they made direct. Because of this, it will not be possible to print super fast, without quality loss, but there will be no problems with printing with soft types of plastics. There are 2 trim levels - with a closed case and without.
Flashforge Dreamer
The Dreamer is a closed body dual extruder printer with MakerBot kinematics. Thanks to this, he can cope with printing models of any complexity. Using a second extruder for soluble support, models with complex geometries can be produced. A good choice for engineers and those who like to experiment with different materials.
Flying Bear Ghost 5
Most commonly sold as a kit (assembly kit). Assembly usually does not cause any great difficulties, even for people far from electronics or mechanics. Flying Bear is equipped with a filament sensor, a function to resume printing after a power outage and Wi-Fi connectivity.
The Flying Bear makes a great first printer for the novice user who is ready to build their own printer.
Totals
In order for the printer not to become a useless toy, you should clearly understand what it is for.
For a fan of miniatures or detailed figurines, a photopolymer printer is a good choice. A small work area is more than offset by the detail that cannot be obtained using other technologies.
For an engineer or a fan of experiments, an FDM machine with a closed chamber and two extruders is well suited.