3D printer filament local
11 Best Stores To Buy 3D Filament Locally – Printing It 3D
A 3D printing process can’t proceed without a filament, as it’s the input that produces the final product. Now, to make a high-quality print, you also need a top-notch material. So, what are the best stores to buy 3D filament locally?
Here are the 11 best stores to purchase 3D filament locally in the US:
- MatterHackers Hardware Store
- Walmart
- Staples
- iMakr Store New York
- Imagine That 3D
- Micro Center
- Lowe’s
- Ultimate 3D Printing Store
- 3DXTech
- Grainger
- Plug n Play 3D
Let’s have a closer look at these 3D filament sellers in detail. Read on to learn about their pricing, ordering, and delivery policies.
1. MatterHackers Hardware Store
Apart from being one of the most sought-after manufacturers of 3D products, MatterHackers also owns a popular hardware store.
The shop is in Lake Forest, California, and it is open from Monday to Friday (10 am to 5 pm). The Californian-based brand sells top-notch 3D appliances, including filaments, 3D printers, printer components, adhesives, resins, and laser cutters.
MatterHackers offers one of the largest 3D filament collections. So, you’ll find a variety of industry-proven filaments that include the MH Build and the professional-grade (Pro) series.
These filaments are made from different high-quality materials, including:
- PLA
- Nylon
- ABS
- PETG
- TPE
- TPU
- Polycarbonates
- Flexibles
Apart from their own 3D printing filaments, MatterHackers sells 3D filaments from other reputable manufacturers. These brands include Ultimaker, Proto-pasta, ColorFabb, and eSun. However, the filaments are cheaper than those from MatterHackers.
MatterHackers offers curbside pickup and delivery for customers who can’t make it to the store. Moreover, the manufacturer houses a team of experts who test all their items before sale. Hence, their showroom in Valencia, California, is open for visits following appointments during weekdays, from 10 am to 5 pm.
2. Walmart
Walmart is the perfect destination if you’re looking for a local retailer that will serve all your 3D printing needs.
The multinational corporation has thousands of hypermarkets, departmental warehouses, and grocery stores that offer a wide range of items, including 3D printing essentials such as printers, filaments, scanners, and resins.
So, you can visit the nearest Walmart branch for in-store shopping or order your preferred 3D filament online and then pick it up later.
Since Walmart isn’t a manufacturer, it sources its products from reputable local and international brands. Despite importing some items, the retailer sells the items at reasonable prices. Moreover, the staff in every store is always ready to assist and meet the customers’ needs.
Walmart has strived to improve customer experience in every branch. Hence, their stores stock a vast array of 3D filaments and accessories. Moreover, buyers can navigate their e-store beforehand to view the available products and prices. Hence, it becomes convenient, as they’ll already know what they’re looking for when they visit the stores physically.
3. Staples
Staples, a US-based chain retailer, is renowned for offering brand-name electronics and printing services and distributing office tools and furniture.
Staples branches stock high-end 3D filaments, printers, printing resins, and other accessories from premium brands, such as MakerBot. Their great 3D filaments come in several materials, including PETG, PLA, PVA, ASA, and TPU.
Staples guarantees that they only sell high-precision 3D filaments that have passed through quality checks. Moreover, these filaments are available in multiple diameters and a wide variety of colors. Also, you can get assorted colors in 9-packs to suit your needs.
Staples has customer-friendly pricing, so you’re sure to find a bargain here. However, the in-store prices may differ from those displayed on their e-store. So, find out how much your preferred 3D filament costs at your nearest Staples branch.
Staples stores offer free delivery for enrolled members. Moreover, members can enjoy up to 5% back in rewards, among other benefits. Staples also allows the return and exchange of goods bought in-store, as long as they’re in their original condition.
4. iMakr Store New York
Located in Manhattan, New York, iMakr Store is one of the largest retailers for 3D printers, scanners, and filaments.
The retailer also comprises a dedicated team of experts who offer 3D printing (on-demand) services and classes. iMakr Store also provides consulting and advising services and hosts 3D printing demos and events.
iMakr Store offers various 3D printing filaments from renowned brands, including MakerBot, NinjaTek, PolyMaker, and 3DXTech. What’s more, the filaments are available in a wide array of materials such as ABS, PLA, PETG, ASA, Carbon fiber, and nylon.
Potential customers can also visit iMakr Store’s website to check out discounted products and deals. Moreover, the store sells ex-demo and used products that its engineers have reconditioned. So, if you’re planning to buy a 3D filament from this retailer, you can also try out one of these reconstructed appliances.
5. Imagine That 3D
Located in Murray, Utah, Imagine That 3D is a local store that sells 3D printers and consumables from well-known and less popular brands.
The retailer offers customers and visitors an opportunity to try out their printers and 3D printing materials, including filaments and resins. Additionally, the passionate in-house experts offer live demonstrations during interactive sessions.
Imagine That 3D stocks various 3D Printing filaments, allowing customers to choose their preferred types and sizes. Moreover, they display models made from these filaments, enabling potential buyers to test and see how the filaments turn out. The prices are also customer-friendly.
Apart from selling 3D printing products, Imagine That 3D allows customers and visitors to access their computer labs. Here, they teach customers about various 3D printing software. Additionally, customers can view the latest design tools and 3D scanners.
Imagine That 3D’s customer service is top-notch, and they offer 24hr customer support. Moreover, the store provides maintenance and repair for their products. Customers can visit the store between Monday and Saturday from 10 am to 6 pm.
6. Micro Center
If you’re a seasoned expert in 3D printing, you might be familiar with Micro Center. The US-based Computer and Electronic Device retailer has its headquarters in Hilliard, Ohio. Micro Center has 25 stores in 16 states, enabling customers from all over the USA to access products and services conveniently.
Micro Center’s stores have expanded their departments to include a vast selection of goods. Also, they offer quick one-stop shopping and customer assistance. All their shops are easily accessible and have ample parking.
Micro Center stores are renowned for selling premium and high-performance 3D printing products, including printers, filaments, and resins. So, you’ll find a generous selection of 3D printing filaments, from the most popular ones to the most pocket-friendly. Additionally, Micro Center accepts several payment methods, including credit cards.
Micro Center offers customers the Micro Center Insider Credit Card for only in-store purchases. So, customers can obtain the card after approval by Wells Fargo bank. Moreover, they can enjoy promotional offers using the card if they bring their original cards to the stores.
Micro Center also allows customers to make pre-orders on the retailer’s website and then pick the items in-store. Hence, buyers have the advantage of checking the latest arrivals, highly rated 3D filaments, and the most affordable brands. Once they make their orders, the filaments are packed, and a buyer can pick them up in a couple of minutes.
7. Lowe’s
Initially a little hardware store in North Carolina, Lowe’s is one of the leading home improvement retailers. The mega-store has partnered with over 300,000 associates and serves more than 20 million customers per week. Moreover, Lowe’s has over nine store support centers in the US and Canada.
Lowe’s offers a wide selection of 3D printing products, including filaments. The retailer sells 3D printing filaments from two highly sought-after brands Dremel and Made in Space. These high-quality 3D filaments can help you turn your wildest dreams and designs into reality by creating appealing products.
Apart from selling 3D printing consumables, Lowe’s offers many home improvement services and ideas. Hence, you can find interesting DIY projects to try out on their website. Moreover, the retailer has numerous deals for its customers and unlimited rewards for enrolled members.
8. Ultimate 3D Printing Store
Ultimate 3D Printing Store (U3DPS) is a family-owned company based in the US. You can find it in Odessa, Florida, and its warehouse is open during weekdays from 9 am to 5 pm.
U3DPS allows showroom visits and live demonstrations on 3D printing on designated days.
The brand takes pride in creating opportunities for hobbyists, public corporations, and customers who want to advance their enthusiasm for 3D printing and technology. Hence, it provides all 3D printing tools and supplies, including filaments, resins, printers, laser cutters, printer components (nozzles, hot ends, and extruders), and accessories.
U3DPS is a one-stop shop for all your 3D filament needs. The distributor has partnered with other reputable manufacturers and has a wide selection of high-quality filaments. These 3D filaments are made from different materials, including ABS, PLA, carbon fiber, copolyester, and fiberglass, to serve home-based and industrial 3D printers.
If you’re wondering about their pricing, U3DPS has options for all types of customers. Hence, it provides products in a wide price bracket ranging from the most inexpensive to high-end filaments. Moreover, the leading seller has frequent deals and discounted offers for all customers.
U3DPS has a Rewards Program where all sellers benefit from redeemable reward points to boost their sales and improve customer loyalty.
It’s super easy to join this program, as you only have to register by entering your details. Hence, you’ll be earning some points when you buy goods from this platform, share information about the brand on social media, or refer people to make purchases from the site.
9. 3DXTech
3DXTech is an American-based Company located in Grand Rapids, Minnesota.
The brand takes pride in manufacturing and distributing high-quality filaments. So, 3DXTech utilizes state-of-the-art equipment and well-thought-of processes to produce professional-grade filaments.
3DXTech serves the needs of 3D printing hobbyists and experts by offering a wide array of filaments for creating industrial-grade objects and complex engineered products. They’re available in different materials, including carbon fiber, PLA, HIPS, and Nylons, to mention a few.
The brand’s factory store is open from Monday to Friday, from 9 am to 4 pm. Apart from serving the local community at Grand Rapids and Michigan, 3DXTech delivers 3D printing filaments to customers in other parts of the country. Moreover, free shipping is available for orders exceeding $50.
10. Grainger
Are you looking for unique 3D filaments to actualize your creative designs? Grainger has your back.
The renowned distributor has served customers for over 90 years by delivering MRO and industrial products. Therefore, it also retails 3D filaments to meet your 3D printing needs.
The 3D printing filaments available come in various colors and materials, including PLA, PETG, HTPLA, and carbon fiber. They also exhibit attractive qualities such as abrasive, ultra-rigid, metal-filled, glossy, or matte materials. Moreover, they’re from sought-after manufacturers, including LulzBot, Dremel, and Creality.
Grainger has numerous branches that offer over-the-counter services in over 200 locations. So, you might easily find a Grainger store in your locality. Moreover, these stores accept all forms of payment, including credit cards and cash.
Customers can choose their preferred filaments from their website in different categories. So, you can use filter options, including collection, color, material, or finish, to get your ideal filament. Then, you can make your order and have the filament ready for pick up at your nearest store.
Most Grainger stores are open during weekdays, but the opening hours may vary. However, a customer can make an order even past working hours and pick it up later for a small fee. Moreover, the retailer’s staff members offer round-the-clock customer support and answer all queries.
11. Plug N Play 3D
Plug n Play 3D is another US-based distributor of high-tech 3D products.
The distributor stocks a wide selection of 3D filaments from famous brands like Protoplast. Therefore, it meets the needs of 3D printing customers in commercial, industrial, and professional sectors.
Plug n Play 3D’s store is in Sacramento, California. It is open from Tuesday to Sunday from 10 am to 5 pm (4 pm during the weekend). Apart from sales, the distributor offers service assistance even during the off-hours.
Now, you’ll find a vast array of 3D printing filaments at the Plug n Play 3D store. The high-quality filaments are made from different materials, including PLA, PET CF, PPS CF, Nylon, PETG, and TPU. Moreover, the retailer offers customer resources on 3D printing on its website.
Plug n Play 3D is committed to strengthening customer relations and improving their shopping experience. So, it has a reasonable pricing mechanism and offers prompt customer support. Moreover, educator coupons for teachers and gift cards are available from the store.
RS PRO 1.75mm Black PLA 3D Printer Filament, 300g
View all 3D Printing Materials
14 In stock - FREE next working day delivery available
25 available from Europe for delivery within 1 working day(s).
tickAdded
View Basket
Price Each
£11.98
(exc. VAT)
£14.38
(inc. VAT)
| Units | Per unit |
| 1 - 2 | £11.98 |
| 3 + | £11.38 |
- RS Stock No.:
- 832-0406
- Brand:
- RS PRO
- COO (Country of Origin):
- NL
Technical Reference
- docPdfRS Filament and 3D Printer Guide
- docPdfRS Pro Datasheet
Legislation and Compliance
- COO (Country of Origin):
- NL
Product Details
RS PRO 1.
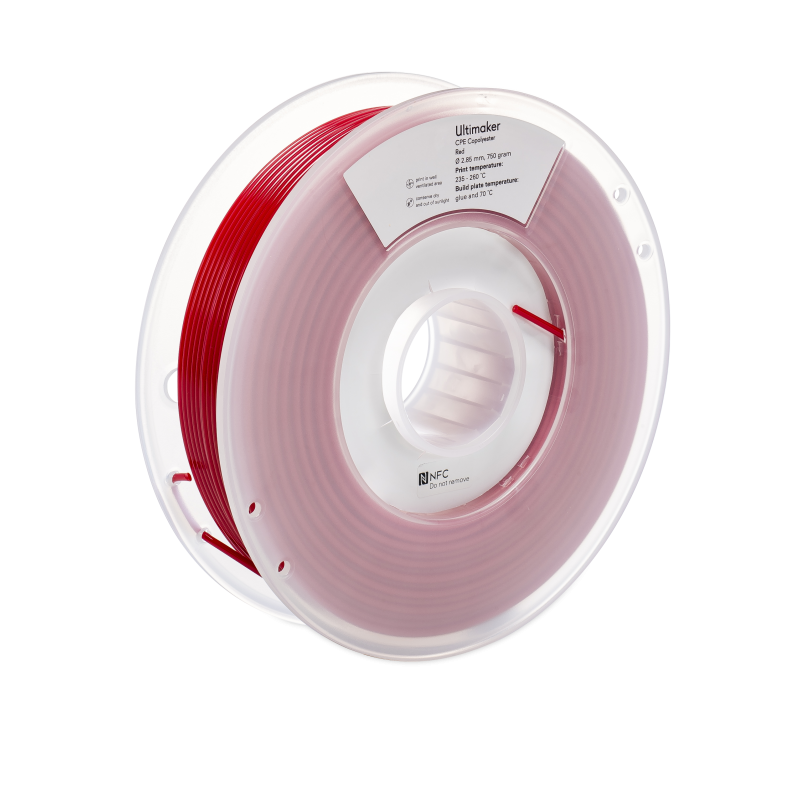 75 mm Black PLA 3D Printer Filament, 300 g
Use this RS PRO black filament to create high-quality 3D printed objects. Its polylactic acid (PLA) material gives your printed objects a high-quality surface finish. It's also ideal for beginners as it's easy to use.
The structure of PLA makes it useful for creating intricate parts, so it's a good choice for prototypes and architectural modelling. It has low shrinkage properties, meaning it doesn't become misshapen after cooling and also hardens rapidly without deforming for accurate prints. This makes it particularly useful in educational settings where you need results quickly.
The product doesn't need a heated bed but will work at temperatures as high as +60˚C if you have one. This PLA filament is biodegradable as it's made from plant-derived sugars, which makes it an environmentally sustainable option.
Features and Benefits
- Black colour
- Diameter of 1.
 75 mm
75 mm - For use with common desktop 3D printers
- Not machine specific
- Polylactic acid (PLA) printing material
- Fused deposition modelling (FDM) print technology
- Weight of 300 g
Specifications
| Attribute | Value |
| Material Type | PLA |
| Printing Technology | FDM |
| Machine Specific | No |
| Colour | Black |
| For Use With | Common Desktop 3D Printers |
| Weight | 300g |
| Diameter | 1.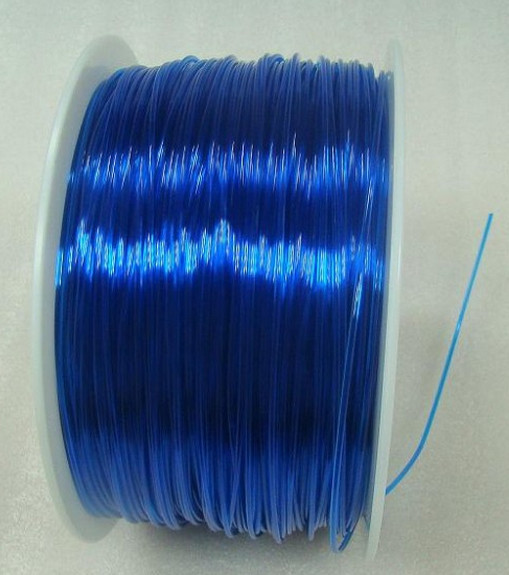 75mm 75mm |
| Printing Material | PLA |
What is Raise3D Cloud and how to manage a 3D printer farm remotely?
Contents:
- 1. What is Raise3D Cloud?
- 2. How to connect Raise3D Cloud to Raise3D 3D printer?
- 2.1 Registration in service
- 2.2 Available functions of the interface
- 2.3 Connecting a Printer to Raise3D Cloud via Tablet
- 3. Raise3D Cloud printer menu interface
- 4. Working with 3D model and .gcode files via Raise3D Cloud
- 5. Mobile version of Raise3D Cloud
- 6. Output
Hello friends, 3DTool is with you!
One of the key advantages of the Raise3D Pro2 line of devices is the ability to remotely work with a 3D printer via remote control via the interface Idea maker - " native " slicer Raise3D , or using the web interface - Raise3D Cloud . And it’s worth dwelling on this tool in more detail, because with it you can organize the work of entire 3D printing farms completely remotely, which becomes extremely relevant in the current situation with the pandemic, which, alas, is only increasing momentum in some regions of our vast world.
So, what is Raise3D Cloud , what is its use for owners of Raise3D Pro2 and Raise3D Pro2 Plus printers, and what can be done with it?
1. What is Raise3D Cloud?
With the presentation of a new line of devices Raise3D Pro 2 , the company announced the possibility of remote work with them using various interfaces, for example, already familiar to the owners of the previous line - the N 9 series0034 "remote mode built into the proprietary slicer program Idea Maker . Using the connection via Wi-Fi , if the printer and the computer from which the slicer is being worked on were in the same local network, the program made it possible to display an interactive control window with the ability to fully control the process, the only thing missing in the basic version was the Web camera , however, this nuance has been corrected in the Pro2 series.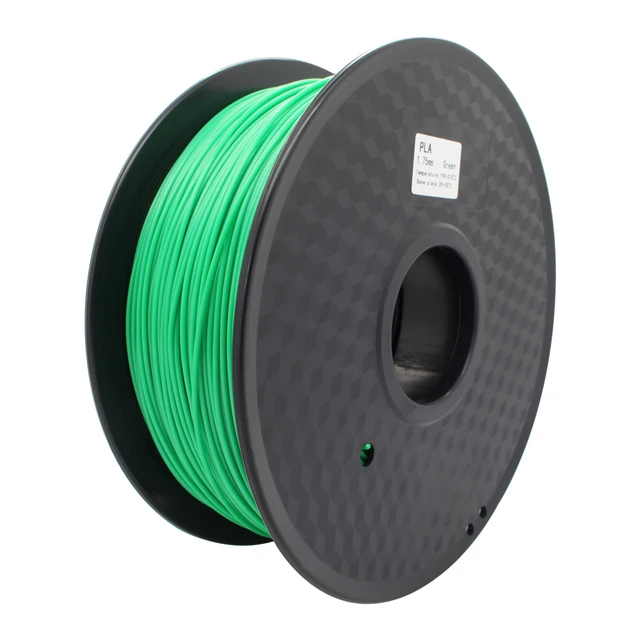
A logical continuation of the development of the remote control idea was to offer users a cloud service, moreover, many of them connected Raise 's to third-party systems such as the OctoPrint and even faster spurred the company Raise3D - to their own development of a turnkey solution.
Which, as it turned out, was not so long to wait. Already in September 2018 , the company announced a set of beta testers to work on a new cloud system. The obligatory conditions for obtaining beta access were that a potential tester had at least 3D printers Raise3D . Which well illustrates the seriousness of the developer's intentions and approach to testing. And in summer 2019 , Raise Cloud has already appeared in the firmware of the on-board P.K. new line of printers. However, the refinement of its functionality continues to this day, one of the latest versions was released just the other day.
So, we've dealt with the story.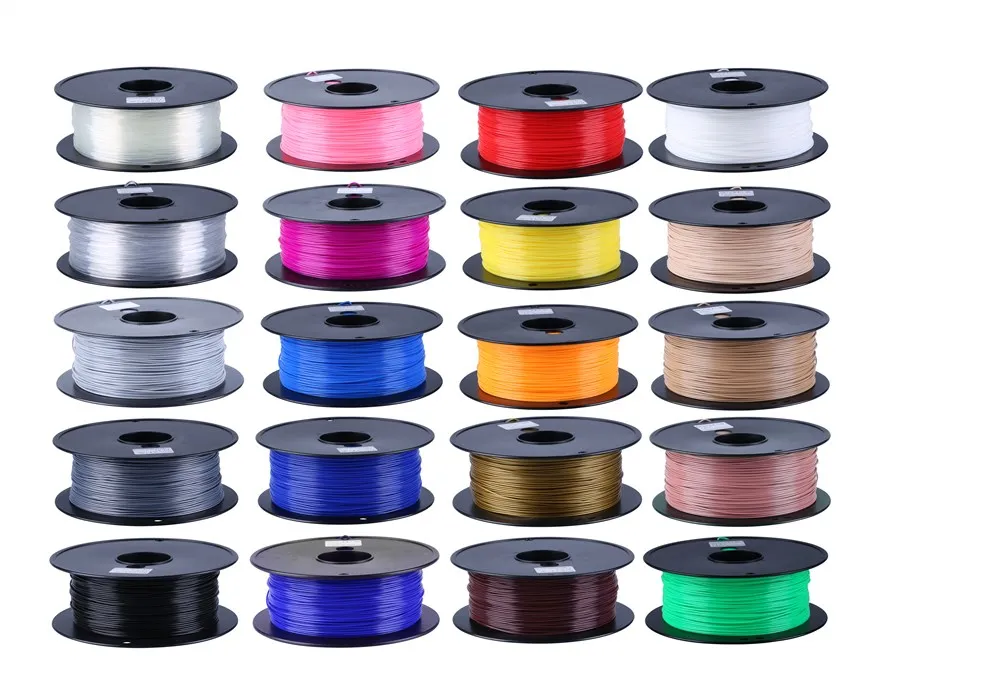 What is Raise3D Cloud in essence?
Raise 3D Cloud is a cloud-based system for remote control of one or more clustered (farm) Raise3D 3D printers, allowing full control over devices and all parameters, starting and stopping print tasks, real-time monitoring of the process itself using Web cameras and statistics of operations via the Internet without direct access to the device.
And now we will analyze in detail how to work with it?
2. How to connect Raise Cloud to Raise3D 3D printer?
2.1 Service registration
To use Raise Cloud on your equipment, first you need to go through a simple registration on the manufacturer's website at: https://cloud.raise3D.com/
After you have gone to the site, you must click " sign in " in the upper right corner of the screen and select " create an account "
Here you will be asked to indicate the mail to which you want to register, it will receive notifications about the operation of devices, alerts, portal news and other information.
Choose a password and enter your personal details. Name, desired display nickname and country of residence.
Next, you will need to verify your email address.
After that, you will have access to the main interface and Raise3D Cloud will ask you to add some more personal information.
The next step is to create a printer group if you manage multiple remote farms, or for some reason don't want to mix different devices. At the initial stage, it is enough to simply create a group " default " and go to the next step. Here you will also need to verify the printer connected to the system, but we will talk about this a little later. For now, let's take a look at the interface.
2.2 Available interface functions
So, finally, the management interface itself opens up to us. Let's take a closer look at what's here and why.
The first window shows the total number of printers available for connection and their status.
This is convenient in the first place because you can monitor the process of the device without direct control. Even errors related to the lack of filament in the traction mechanism, for example, are displayed in the Error menu, and printers ready for printing in the menu Standby .
However, to set the printer to this status, you must manually press the ready button on the device's tablet or through the printer's interface if it is connected to the Internet.
The next section is a section of information on your « command » printers. Here you can see its name, the type of team, such as individual or part of the farm, the date of creation and other information.
Next is the statistics section of the use of the material, the miscalculation is made from running tasks. As you can see, we printed on this printer with materials PLA and Filamentarno Ceramo . Interestingly, even if the printer is not connected to Cloud in the current session, after it returns online, information about the prints made and, accordingly, the material used will be updated.
The last section displays the number and status of currently running jobs.
We offer a little distraction from the cloud interface and return to the device's tablet, having figured out how to properly connect the printer to Raise3D Cloud from there.
2.3 Connecting the printer to Raise3D Cloud via tablet
First, let's open the settings menu. Here we need to make sure that the printer is connected to the Internet using Ethernet cable, or Wi-Fi .
In our case, this will be Wi-Fi connection. Set the WLAN slider to ON and select the appropriate network by configuring it. For the sake of experiment, we use the “ hotspot ” function on the phone, sharing the 4G signal, instead of connecting to the fixed Wi-Fi . This is a fairly relevant technique if there are interruptions in network access in the room where the printers are installed.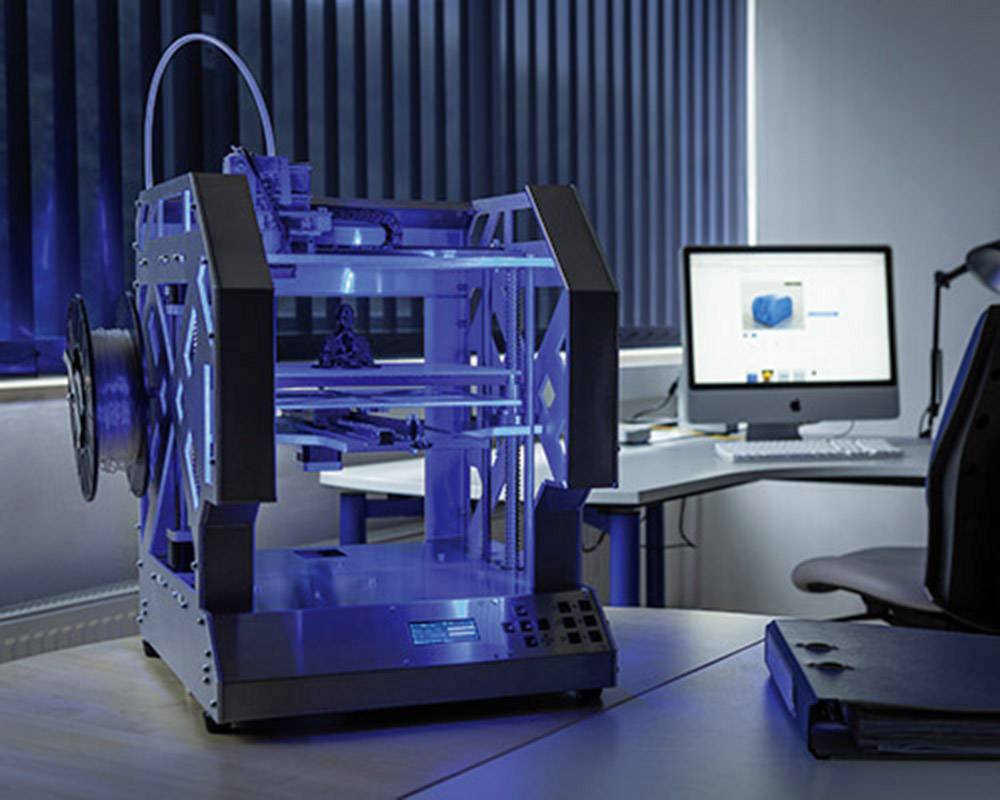 At any time, you can raise the access point from your mobile device and connect the printer to complete the print remotely, or make quick edits.
Now, you need to log in with your own account Raise3D Cloud which we created earlier in the advanced printer settings menu.
After that, a binding key will be issued to the printer, and you can activate it in the interface Cloud .
Next, turn on the Webcam in the corresponding section and check if everything is in order. We will need it in the future to manage the printer remotely and control the printing process. Yes, of course, it will not be possible to discern the slightest flaws on the surface, but it is quite possible to assess the overall progress of the task, possible bends in the material and critical situations.
If all the steps are done correctly, the connected Cloud icon will appear in the upper left corner, and the printer will enter the status of Standby in the “ cloud ” interface.
3. Raise3D Cloud printer menu interface
After we have performed all the necessary actions, the tab of the printer itself becomes available to us in the interface Raise3D Cloud . It can be accessed via menu printers at the top middle point of the screen, after which a box will open with a brief description of the printer's status, current print settings, and other information.
If you click on the red icon of an open door in the upper right corner, a full control console for a specific printer will unfold in front of us. Here we can perform many different operations, monitor the progress of the 3D printing process, set and change print settings, track service information and view the broadcast from the 9 device installed in the bowels.0033 Web - Cameras.
The first section contains an icon for notifications of ongoing events ( bell ), Cloud can send them to the mail specified during registration, like industrial solutions from Stratasys and 3D Systems .
Keys for controlling the printing process - Play, Pause, Stop . As well as the ability to share the readings of the section and the status of the printer.
The next subsection is the camera. When you click on the refresh icon, it is activated, after which it shows the image frame by frame. If the printer is connected to the same local network as a computer running Cloud , the video is streamed in better quality.
The next frame is the frame of the current status of the process, with the ability to change the temperature " on the fly " and control the process in detail.
To begin with, so that the printer can work remotely and receive a print job from " clouds ", you need to move the slider Receive Job to the position" On "after which you can influence the device you are looking for.
As you can see, we have access to the temperatures of both nozzles, the table, the ability to turn on preheating and change the settings for the feed rate, and others.
Below is the media profile that is currently loaded on the printer. The list of profiles is created on the device itself when selecting the menu " load material ". The weight of the coil is also indicated there, which is calculated automatically when the task is completed.
At the very bottom is service information - the service number of the device, the version of the hardware firmware and firmware of the tablet, as well as the amount of free memory on board the device. Which, by the way, we can also access remotely.
The next tab contains a graph showing temperature fluctuations on all 3 heating elements. This is useful for monitoring the progress of a process, to prevent or prevent unwanted temperature drops, and generally to monitor the development of a temperature gradient during printing.
By the way, in the upper right corner, the bell icon contains all messages received from the service about the progress and completion of printing processes.
The next tab is Local Files , it allows you to view the printer's memory and open a particular job from the remote interface, how to either modify it if STL is available, or restart printing.
Tab Record contains timelapses of processes recorded during printing, in our case they are absent, so let's move on to the next item that is similar in meaning - Photo . Raise 3D Cloud The can be set up so that the printer saves photos of the work area at regular intervals and stores them in the device's memory in order to later review and compare the results. As you can see, most of the time our device was in idle mode, but the camera recorded the process of one of the prints, the removed table and the final of one of the last tasks. It is convenient if the execution of tasks is put on stream.
The last tab in this window is logging of all processes. Here we can track what happened with a particular printer, what operations were performed in this Cloud group and other information.
4. Working with 3D model and .gcode files via Raise3D Cloud
The cloud system Raise3D allows not only and not so much to simply manage the printing process, but also to set up files, send print jobs and view existing ones via the Internet. In this case, the miscalculation ( slicing ) of the model takes place either on your local computer using Idea Maker , or through Raise3D servers . Let's take a closer look at the functionality.
You can find it in menu Files of the main list of functions on the main page.
By clicking on the file gcode in the list of files on the printer itself, or in memory Cloud , we can view the task by layers and evaluate certain moments of it. The only inconvenient nuance is that it is impossible to change the display colors and add shadows so that the layers can be seen more clearly. Graphics settings are set by default and cannot be changed.
In addition to the files themselves, there are so-called " Jobs " ( Jobs ). The task contains not only the file gcode but also the original stl model, if the slicing took place in the program. Thus, you can create entire cascades of tasks and repeat them with one click.
We can add a file or a task by pressing the New+ key.
While uploading a file, we see its name, weight and can change the displayed size parameters in mm or cm.
After loading the stl model into the interface, we can open the built-in slicer and prepare the part for printing, or calculate it using idea maker . The choice of basic tools is similar both there and there, although the PC version is, of course, more flexible.
After rendering, we can save the model here, and it will be available from the printer's internal memory, from the cloud, or from a flash drive.
5. Mobile version of Raise3D Cloud
By the way, there is also a mobile version, slightly truncated relative to its browser counterpart, but still having the basic, most necessary functions.
Basically, it copies the original, being, in fact, its abbreviated version, so we will not dwell on it in detail. Let's just say that the application is available for both IOS and Android and requires an active internet connection.
6. Terminal
As you can see, Raise3D Cloud is a powerful tool for remote control of one or more 3D printers in a cluster.
Those who plan to remotely use a group of these devices can safely consider purchasing the Raise3D Pro2 series printers. The fact that with the help of Cloud you can slice the model even on weak computers, due to the fact that it runs on the company's server, makes it an indispensable tool for use in schools, as a rule, computer classes are not equipped with sufficiently powerful computers , and in case Raise Cloud will fit even a low-powered netbook.
Also, Raise3D Cloud will become an excellent core of your 3D printer farm, or will connect the design department and the production workshop of your research institute or manufacturing enterprise.
To purchase Raise3D 3D printers, ask a question, or make an offer, you can contact us:
-
By email: [email protected]
-
Phone: 8(800)775-86-69
-
Or on our website: https://3dtool.ru
Don't forget to subscribe to our YouTube channel:
Don't forget to join our groups in social networks:
In contact with
PICASO3D Club
3d printer defects: errors, main problems
Causes of Defects in 3D Printing and How to Eliminate Them
Buying a 3D printer is only half the battle. A beginner printer has a lot to go through. First, he will learn how to set up the device, calibrate the print head, set the necessary parameters, and test different types of filaments. But that's not all. The most unpleasant thing that can appear during operation is printing defects. And they need to be eliminated.
- What are 3D printing defects?
- Classification of defects
What are 3D printing defects?
After the printing process is completed, various defects can be found on the finished model. Most often they are associated with improper distribution of plastic. Defects appear for various reasons. But the main result is always the same - the model is damaged, you need to do the project on a new one. Printing defects cause downtime. Lost time and meters of filament.
Important! Within the framework of this article, defects that occur on FDM printers will be described. These are models of printing devices operating on the technology of hot deposition of plastic.
![]()
Sometimes mistakes can be seen right from the start. For example, when printing the first layer of a model. In these and other cases, it is necessary to prevent the defect in time. However, the press all the same should be stopped. But this way you can save material and time. This article will discuss the most common defects, as well as ways to eliminate them. At the end of the article, a comparative classification of faults will be given.
Layer displacement
The second name of this defect is skew. There are several options for the development of events at once. The skew can be slightly noticeable, with a slight deviation along the Z axis. The second option is a strong offset, the model is printed in pieces. In all these cases, the reason lies in the mechanical part of the printer.
Solutions:
- Check tension belts. They should be clearly in the grooves. It is not allowed to fray or stretch the belt. Sometimes it is easier to replace the entire set of belts with a new one.
- Sometimes small misalignments are caused by an incorrectly set pulley. Make a mark with a black marker before printing, after the end of the process, check the result. Calculate the difference. Tighten the problem area if necessary.
- The printer's Y and X axes are not properly aligned. They are not perpendicular to each other. They need to be put under 90°.
Attention! In rare cases, the problem is electrical. This option must be disassembled separately, armed with a multimeter.
First layer does not stick
The initial layer acts as a foundation. If it "floats", then the whole model will get the wrong geometry. The second and subsequent layers may slightly shift the entire workpiece. The most unpleasant thing is that this defect can be found at the very end of the print.
Solving methods:
- Platform calibration.
If the print bed is skewed, there is a good chance that the first layer will not stick. It is best to check platform calibration before starting printing. Many 3D printing programs help to go through this setting in a semi-automatic mode.
- Incorrect print jet height. Another point worth considering. Most often, the extruder height setting is set through the printer parameters: Edit Process Settings → G-Code. They are located in the main menu of the device.
- The first layer was printed too quickly. The plastic just didn't cure. This setting must be found in the menu of the printing device. Approximate location: Settings → First Layer Speed. It is worth setting the print speed of the first layer 50% lower than the rest.
- Plastic cooling temperature. This option can be found on printers with a cold platform. The filament hits a cold surface, quickly hardens and rebounds. Here you need to experiment with the settings for the melting temperature of the filament or initially take a printer with a heated surface.
Important! Poor adhesion can be caused by covering material placed over the platform. Different glue, tape, adhesive tape - all this can repel plastic.
Pimples on the model
This also includes such defects as “snot”, swells, sagging. All these faults are of approximately the same nature. They are related to the operation of the extruder. As it moves, it should stop, then start working again. Not all devices can lay even layers without defects. This is how the irregularities described above appear.
Solving methods:
- Retract and coast setting. The first parameter is responsible for starting the extruder. In this case, you need to configure the retraction through the device menu: Edit Process Settings → Extruders. Here you need to find the parameter Extra Restart Distance. Try reducing the fill length.
When unevenness occurs when the nozzle stops, you need to tighten the roll-on stroke (roll-up movement). This setting is referred to as Coasting. It is in the same section where the retraction is set.
- It is better to avoid retraction and coasting altogether. That is, the filament must be flush with the edge of the nozzle. This parameter is especially critical for Bowden printheads. Another option is to set up retraction. You need to find the Advanced tab. It contains the Ooze Control Behavior setting. This option controls filament leakage and retraction start time.
If minor defects are still present, it is worth pointing out the entry points to the printer. This setting is found in the Edit Process Settings menu on the Layer tab. For example, you can leave small flaws inside the shape, starting printing from the inner layers.
3D printer won't print
This is one of the scariest things for a beginner 3D maker. The device appears to be broken. However, in most cases this is not the case. The printer turned on, but did not start to push through the plastic? There are four reasons for this.
Solutions:
- Plastic does not come out of the extruder due to leakage. This can often be seen in some cheap Chinese models. The filament is preheated in the extruder, it can seep through the hot end. The same effect can be observed after the end of the work. In this case, printing starts 3–4 seconds after the start. Automatic broken geometry of the first layer. To avoid this defect, experienced printers make the so-called skirt. This is a thin circle of filament around the future model. It is printed to bring the printer to life and fill the nozzle with plastic.
- The extruder is too close to the platform. The plastic just gets stuck inside the nozzle. The situation continues on the second layer. Only by the 3rd or 4th layer does the plastic begin to come out. The solution is to adjust the Z-axis height through the G-Code command.
- Sometimes the filament is simply chewed off by the drive gear. This is the part that pushes the thread forward. If a small amount of filament shavings is visible near the printer, it is likely that the gear has worn off the filament. You need to calibrate this node.
- Clogged extruder. There may be several reasons: ordinary dirt or rubbish, plastic coked inside the extruder, poor cooling of the filament. Mechanical cleaning of the nozzle with special needles or drills will help. They are sold in specialized stores.
Important! Just do not need to clean the nozzle with a screwdriver or other improvised tools. You can completely ruin the extruder.
Prints in the air
Various users are experiencing the same problem. The reasons for printing by air are related to setting new plastic settings in the slicer. Sometimes a defect appears due to incorrect setting of the Z axis.
All solutions come down to the fact that the user needs to carefully study the G-code of the printer. Sometimes the reason lies in the lowered Z-axis height settings. You can also see the print step here, perhaps it exceeds the required parameter. In the slicer, you need to check the plastic installation parameters. View the heating temperature of the nozzle and platform. All settings must be checked manually. When importing a profile, the left parameters can be picked up.
Prints in reverse: how to fix
A rare defect that is not always visible at the start of printing. That is, the model comes out normal, but mirrored. Such malfunctions are often found in Chinese kits or noname devices. There are two solutions. One is simple, the other is more difficult.
Methods of solution:
- It is necessary to invert one of the axes: X or Y - it does not matter. But only one. This can be done by flipping the contacts on the power board or on the motor itself.
- Invert axis via device firmware. This method is suitable for advanced users who are familiar with programming skills.
In any case, it's better to first check all the settings in the slicer again, only then go into the electronics of the device.
Layers skipped
The finished model shows that one or more layers have been skipped. This is eloquently evidenced by the gaps in the finished model. In rare cases, this defect is associated with insufficient extrusion. Perhaps there are problems with the capture and supply of the filament. Sometimes the reason lies in the wedging of the Z axis.
Solution methods:
- Check the mechanical part of the printer. If gaps began to appear frequently, you need to arrange an unscheduled maintenance of the device. Examine all shafts. Check that they are level and not misaligned. Power off the printer, try moving the head with your fingers. If resistance is felt, then one of the shafts is not installed correctly.
- Bearing wear. This element may simply wear out. You can see that the printer vibrates slightly. There is an unusual sound when printing.
Diagnose a breakdown in the same way as the shaft. Turn off the power and move the extruder with your hands to find the problem part.
Attention! Remember to maintain your printer regularly. Lubricate the shafts with special oil. For example, for sewing machines. Before lubricating, clean the moving parts from dirt and plastic residues. Just don't overdo the oil. A large amount of lubricant can lead to the opposite effect.
Doesn't print in the center of the bed
Some users are having trouble printing on one side of the bed instead of the center. At the same time, in the slicer, the model is clearly in the center. There may be several solutions here.
Methods of solution:
- Slicer settings are down or incorrectly set. It is necessary to change the characteristics of the kinematics. Set the Delta robot parameter instead of the Cartesian robot. You also need to set the size of the table, equal to the square inscribed in the specified print area.
In this case, set the Origin Offset parameter to half the side of the square.
- Try to adjust the position of the X-axis limit switch. In some cases, it is moved a little to the right.
What are the problems with the 3D printer test cube?
This figure is used to check the print quality. Naturally, during the test, she can clearly demonstrate where there are problems. It can be completely different defects. Most often, the test shows bulges and dents on the model.
These defects are caused by overheating and shrinkage. To find out for sure the cause and eliminate these factors, you need to print four cubes in different angles. For some ABS plastics, you need to reduce the temperature, as well as turn on the blower by 5-10%.
3D printing echo
This problem can be described as thin stripes that form when printing layer by layer. That is, the final model does not have a formed and even surface. There is waviness (echo) on the edges. This defect is also called ringing on the walls. Typically, two factors are the cause: print speed and vibration.
Solutions:
- Reduce vibration. Make sure the printer is on a level and stable surface. Assess the condition of the bearings. Replace them if necessary.
- Inspect the shafts. Clean them of dirt and dust, lubricate with oil.
- Reduce the print speed through the printer settings.
Try changing the typing speed first, then check the mechanics.
Interesting! Even a single loose bolt can cause strong vibrations. Check all fasteners. Pull the bolts.
Salmon leather
This defect is somewhat similar to the previous one. Only there are no obvious waves or ripples. The defect manifests itself in the form of a pattern. It is similar to the representation of heights on topographic maps or the structure of salmon skin that is drawn on the walls of the model. In English resources it is called salmon skin. The defect appears due to two reasons: vibrations and incorrect characteristics of the current coming to the motors.
Solutions:
- Remove any vibrations that may occur in the device. Tighten the bolts and check the frame geometry. You can also slightly reduce the print speed.
- Installation of a special impulse reducer (TL-Smoother) in the circuit between the driver and the axle motor. This solution balances the current indicators. The edges are more even.
Salmon skin defect is common on DRV8825 stepper motor drivers.
Ripple
In this case, we are talking about the partial impact of waves on some parts of the model. The ripples are often of the same nature as the echo. It is also tied to vibrations and the speed of the extruder. However, unlike waves, ripples are especially pronounced at sharp corners, when the nozzle abruptly changes direction.
Methods of solution:
- Reduce the print speed.
You need to find the Edit Process Settings menu in the printer settings, and then open the Other tab. Change two settings: Default Printing Speed and X/Y Axis Movement Speed. The first is responsible for the speed of all movements of the nozzle, the second - the speed in the absence of plastic supply. Sometimes the reason lies in the factory firmware. It initially indicates increased extruder acceleration.
- We remove vibrations. Check the geometry of the device, stretch all the bolts, assess the condition of the shafts and bearings. Lubricate the device if necessary.
We recommend checking the print speed settings first.
Poor filling
If the figure is not filled enough, it means that it will not receive sufficient strength. The model may simply break or crack. Usually the causes of poor coverage lie in the slicer settings or print speed settings.
Solutions:
- Try changing the fill pattern. It is indicated by the Internal Fill Pattern parameter. There are presets in the settings with complicated filling options that give more strength to the finished model: Grid, Triangular and Solid Honeycomb. The printing time will increase, but the strength will also increase.
- Reduce print speed. The fast movement of the print head results in less infill. You need to tweak this parameter through the settings of the device itself or through the slicer parameters.
- Change extrusion width parameter. Some 3D printing programs allow you to set different infill values for individual elements. For example, for the outer layers, set the size to 0.4 mm, for the inner layers - 0.8 mm. These settings can be viewed in the menu Edit Process Settings → Infill. In it you need to find the parameter Infill Extrusion Width. It is shown as a percentage. The higher the number, the thicker the layer.
Attention! When setting the Infill Extrusion Width parameter, make sure that the set value (in percent) is supported by the printing program (slicer).
![]()
Plastic is leaking from the extruder threads
This problem can be attributed to local printer failures, although they can create a number of defects in the form of "snot" on the model. Plastic oozes through various slots, flows down the extruder thread, exits the opening of the heating element. There may be several options for solving the problem.
Solutions:
- Check all screw connections. Sometimes a caked piece of plastic gets stuck between them. It creates a gap, the filament flows out.
- Clean and polish the surfaces of the thermal barrier tube and nozzle. Installing a fluoroplastic washer or winding a fum tape can also help.
- Reinforced cold drawing of threaded connections.
Attention! Sometimes the reason lies in the factory marriage. Nothing can be done here. Just completely change the extruder.
Plastic does not come out of the nozzle
For some reason, the printer has stopped feeding filament. The device continues to make noise with the engines, but the plastic does not come out of the nozzle. There may be several reasons and solutions for this.
Solution methods:
- The plastic is out. For some printers, the filament spool is covered with a casing. Therefore, it is impossible to immediately understand that the thread is over. Check for material in the spool.
- The thread has broken. There was a gap between the hot end and the extruder. A common cause is with Bowden printheads. Perhaps the problem is with the filament itself. You need to try other material.
- Low plastic melting point set. The thick filament cannot pass through the narrow nozzle opening. Recommended temperature parameters for different types of plastic: PLA - heating t 180 °C, table heating t 60–80 °C; ABS - heating t 240 °C, table heating t 110 °C.
Interesting! Sometimes a clogged nozzle is the cause of interrupted printing.
This can happen even during work.
Model delamination
Visually, this defect looks like an accordion. In some places, the layers move away from each other. At the same time, it is clear that this is not a pass, but the absence of sticking of plastic. Layer separation occurs due to incorrect setting of the filament thickness or its melting temperature.
Solving methods:
- Reduce layer thickness (height). Here you need to follow the rule: the maximum layer thickness should be no more than 80% of the nozzle diameter. Otherwise, the layers will not stick to each other.
- Raise the melting point of plastic. If the height parameter is in order, then you need to look at the temperature settings. For example, the optimum melting temperature of ABS plastic is 220–240 °C, but some users set it to only 190 °C. You can increase the melting temperature in the slicer settings: Edit Process Settings → Temperature.
If standard temperatures are not suitable, try raising the setting by 10 °C. See if the adhesion of the layers improves or not.
3D printer extruder does not heat up
At the same time, the device shows 100% heating power, the set temperature is on the display, but the extruder is cold. In most cases, the cause lies in a break in the wires or in the heating element itself. Ring all circuit elements after the controller. To cut off problems on the heating element, apply 12 V to it. It should start to heat up.
Attention! Newer printers may encounter factory extruder defects. This element needs to be changed. There is no point in repairing the item.
Plastic falls in waves
Another name for this defect is “elephant foot”. In this case, the upper layers of the model are pushing against the lower parts, causing a wave effect. It sort of descends from top to bottom, forming a thick layer at the base of the model. This problem is especially common on models of printers with a heated bed.
Methods of solution:
- Find the optimal temperature regime between heating the table and blowing the model. Lower the heating temperature in steps of 5 °C. It is important to find a balance here, when the lower layers have already gained strength, but still retain adhesive properties for the following layers.
- Calibrate the table. Try applying the default settings. If the problem persists, slightly change the Z-axis height settings. Calibrate the new settings on the test cube. This is the base shape that clearly shows how the layers are laid down.
- Chamfer the base. The option is suitable for homemade devices. You need to start with a bevel of 5 mm and 45 °, after which you can make small adjustments.
Wall gaps
Such defects can be found when printing rather thin walls in the model. For example, when the extruder nozzle prints strips up to 0.4 mm thick, and the user needs to make a 1 mm edge. In such places, cracks may appear at the joints of the two layers. Typically, the defect is eliminated through the adjustment of the slicer.
Solution methods:
- We need to find the setting that is responsible for the wall thickness. Usually they are in the menu: Edit Process Settings → Advanced. Here you need to find the Gap Fil parameter. He is just responsible for overlapping areas and filling the gaps between thin walls. Check the box next to Allow gap fill when necessary. There is also an alternative. Go to the Infill tab and tweak the Outline Overlap parameter.
- Simply adjust the extrusion width. Increase the parameter value if possible. The strip width can be set on the Extruders tab via the Edit Process Settings menu.
Try and experiment to get the best fit.
Web
A special case of filament leakage, when sloppy plastic threads remain between the parts. This happens for the same reasons as influxes. The solution methods are exactly the same:
- Changing the speed and distance of thread retraction.
Full instructions are listed above.
- Lower print temperature. Try tweaking this setting to reduce the fluidity of the plastic. Here you need to be careful. Excessive decrease in temperature can lead to a delamination defect.
- A separate solution is to set a parameter in the slicer that launches the print head in a long and winding path over empty space. The web falls near the model without sticking to its walls. No bridge is formed between the layers. To enable this option, go to the advanced settings of the slicer (Advanced). Check the box next to the Avoid crossing outline for travel movement option.
Interesting! Some 3D makers don't consider a web defect as something serious. They simply cut off the excess filament with a knife after the print is finished.
Extruder does not feed plastic
This problem is in the filament feed mechanism. Or the nozzle is too close to the table.
Solution methods:
- Check the plastic filament.
It may have burrs on it. The feed gear has slipped. Check the condition of the thread, you may need to tweak the gear settings a little. Or change the plastic.
- Calibrate the table position. Raise the Z-axis slightly.
Sometimes the extruder will not feed plastic due to a clogged nozzle. It needs to be cleaned up.
Classification of defects
Almost all defects are one way or another related to two reasons: a malfunction of the mechanical part of the printer or incorrect software settings. Based on these parameters, it is possible to make a classification based on the most common problems in printing:
- Deterioration of nodes and the lack of a normal fastener feed. This parameter affects vibrations, nozzle movement trajectories.
- Poor extruder maintenance. The print head needs to be cleaned from time to time, to remove the sintered filament.
- Inaccurate (wrong) calibration of the platen and nozzle height. Another common mistake that causes a lot of print defects.
- Problems with printer settings. Most often solved through manual setting of parameters or adjustment of the G-code.
- Lost settings in the slicer. This includes: changed parameters, errors or inaccuracies in the firmware.
- Poor quality filament. The problem may lie in the quality of the plastic. It is necessary to monitor its condition, quantity. If necessary, try to replace the manufacturer, or even switch to another type of filament.
- Electrical problems. To find such a malfunction, you need to arm yourself with a multimeter and ring all the circuits after the controller.
- Factory defect. The problem is solved by replacing a low-quality part.
These are the main printer malfunctions that in one way or another affect its operation, which leads to printing defects. The printer may have several problems at once. They will lead to the appearance of a group of defects. You need to be able to recognize the first signs of breakdown in time and eliminate them.