3D printer dissolvable support material
3D Printing - Truths and Myths of 3D Printing with Support Material
Our knowledge of FDM additive manufacturing is mostly derived from the past 25+ years of industrial-style 3D printing. Over this time period, we’ve tended to print small (less than 8”x8”) parts and it’s become commonplace to create “dissolvable” support structures from a second extrusion head.
Before and after: HydroFill provides support for a wider range of materials, making it easy to 3D print parts with steep angles and overhangs.The support structures are designed to hold up “overhangs” so that the part does not collapse as it is being layered. Afterward, the support material is dissolved, usually in a caustic sodium-hydroxide mixture in a circulating heated tank, leaving the main material forming the desired part.
Today, we are tending to print larger parts (up to 12”x12”x 22.75” in the case of the EVO) for not only prototyping purposes, but also for applications such as jigs and fixtures. In other words, these parts must not only look good, they should also be large and functional. As large prints can take significantly more time, machine reliability and print repeatability is coming into sharp focus in the next cycle of additive manufacturing.
While we still use support structures for overhanging model geometry, support generation has matured significantly. It is now possible to use one material for both print and support material. Today’s same-material supports, such as those generated in Apex software, are easily removable from the main part and leave little to clean up after the print. This tends to play a significant role in the generation of larger models where fine details (less than .5mm) are not as critical as overall appearance, print time, and functionality
Dissolvable support has also matured with the advent of materials such as Hydrofill. This type of support dissolves in warm water rather than by using chemicals. As with traditional additive manufacturing, these dissolvable supports are extruded from a secondary nozzle. The advantage over less user-friendly support materials of the past is that Hydrofill is safe to work with, environmentally friendly, and compatible with most printers.
Cases where soluble support material like Hydrofill really shine are with prints that feature internal geometry or extremely delicate features. Since single-head support material must be taken out by hand (usually using a set of pliers, etc.), there may be internal features that are completely inaccessible with a hand tool, and thus unsuitable for single-head support.
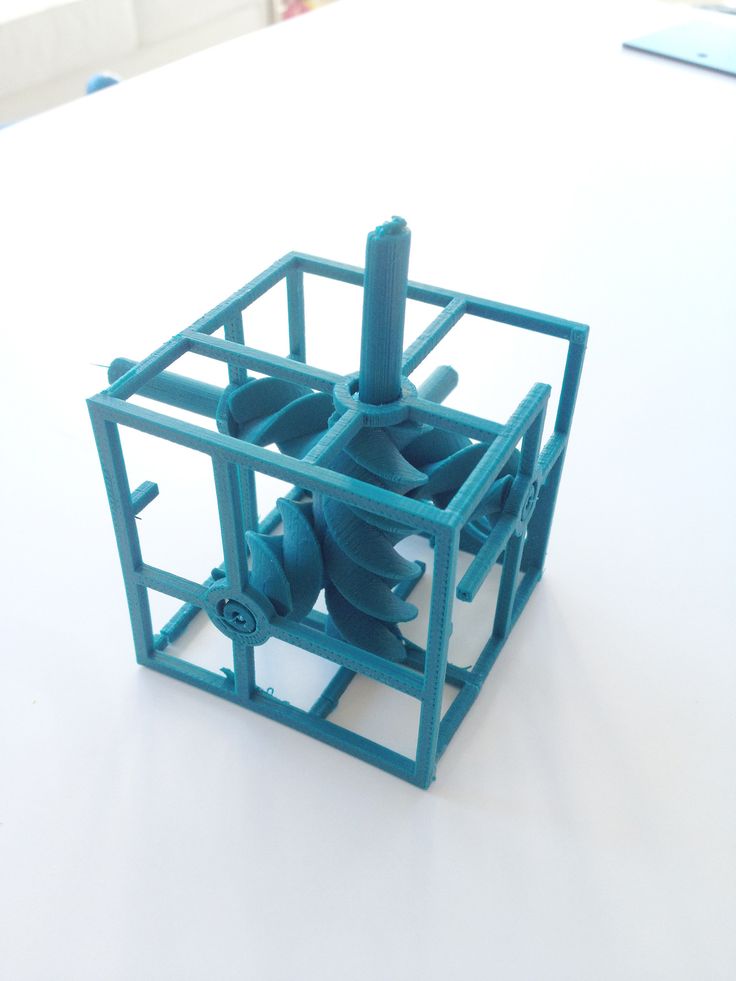
The HydroFill Gearbox features rotating elements thanks to real, working gears enclosed inside the box – a design that is impossible to 3D print without effective soluble support material.Conversely, as long as there is an entry point for water, soluble support may be dissolved out, without the use of hand tools. For delicate models (ie characters, architectural, etc), you may have features — such as fingers — that are extremely gentle and can be easily broken if too much force is used with a hand tool. Models that are suspended within each other, have internal threading, and moving models can also be more easily printed with a soluble support structure, and some models can only be printed this way.
With the introduction of this water-soluble support material, the process of creating soluble support has become easier than ever before. The cost of the extra equipment needed to dissolve the material is eliminated, and the safety is no longer a factor as these materials (like Hydrofill), are usually completely non-toxic and safe for the environment.
However, keep in mind that soluble support is usually more costly than printing with a single material. The cost of dedicated support materials is usually 1-2 times that of the main printed material (i.e., ABS). Those of us familiar with 3D printing understand that models are frequently iterated at least 2-3 times and as such, consideration must be given to the cost of using this more expensive material in your workflow, at least during the initial stages.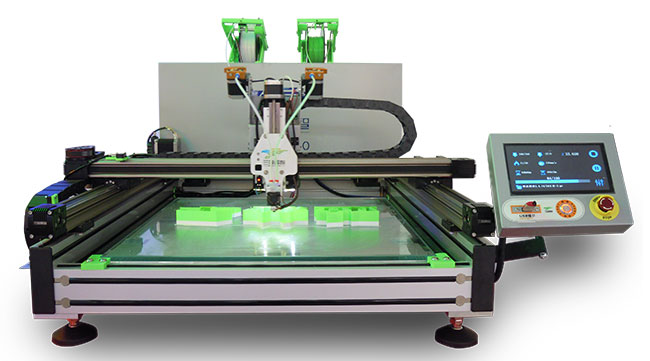 Accordingly, it is wise to make sure your print will benefit from using soluble support material.
While a few desktop 3D printers, such as the EVO and Axiom, utilize soluble support material well, adding a second material of any type to a 3D printer introduces another layer of complexity to the print. With more complexity comes more possibility of error. Specifically, two heads now have to work together to build the part correctly (vs. a single-head print). If either head jams, it can cause the entire print to fail. Failures in dual-head prints are frequently more costly than single-head failures because of the added cost of the secondary support material. In addition, by using two heads most of the time, a prime or wipe tower will be used to create a purge for one head when the other is printing. Creating the prime tower adds complexity and significant time to the print.
TimeA job that may take only 3 hours in single-head printing mode, may take twice as long using primary and secondary extruders. In addition to adding prime towers as set forth above, soluble support material is generally more delicate than conventional materials and therefore tends to be printed at a slower speed. Also, it will frequently be printed at thicker infill rates requiring further time. Build time will also increase because the dual print heads will need to switch for most every layer, such switching including prime cycles for both nozzles. Conversely, harder and more easily workable base materials such as ABS can usually be printed with single-head support quickly because the settings for Airwolf printers are optimized to print ABS as fast as possible in a reliable fashion.
If the objective is a final prototype for a presentation to potential investors or upper management, soluble support may be beneficial, at least for the final iteration, as you will have a cleaner surface where the primary material is mated with the support structures. However, when using materials such as ABS, a bit of light support sanding could make nearly as nice of a part in far less time. Further, it must be remembered that the dual-head print will still need at least a small bit of post-processing to optimize the clean mating surfaces.
Soluble support material such as Hydrofill, usually dissolves by soaking the part in hot water for several hours. Agitation and heat will generally speed up the process. Since these materials are developed to work this way, they are susceptible to moisture from the surrounding air and can degrade if not properly re-packaged after use. This can be a costly mistake with a $100+ roll of material. Proper handling and storage techniques are needed when using these materials. However, with single-head printing, no extra material is needed. This eliminates the issues that can arise during storage, the cost of storing filament correctly, and the space it takes up in the workplace. Generally with either material, if it kept inside an enclosed printer like the EVO, the filament will tend to stay dry as the chamber is heated.
While dual-head prints have reached a level of quality that is accepted in the industry, a single-head print, using intelligent single-head support structures, such as those generated in Apex, can also achieve very high quality. Things like chamber temperature and bed temperature can be optimized for that one material, rather than possibly compromised for two different types of materials. Any time a second head is introduced, it is usually using a different material and will need different, or slightly different settings to work properly. This complexity can lead to poor quality prints if settings are not correct.
Many machines have complex dual-head systems that tilt or close up an inactive nozzle to prevent it from dripping filament. While these methods try to prevent the two print heads from contaminating each other, they also add more complexity to the hardware, and in most cases can cause reliability issues. The best way to prevent material contamination within a dual print is to work with the correct settings, especially if the manufacturer provides software with presets for their machine (Airwolf 3D has many dual-head presets written into APEX).
As a general rule, single-head support structures come with more benefits than drawbacks. Our experience is that most users who purchase a dual-head printer don’t often use the second head for support. However, dual-head printers are very useful for optimizing workflow by printing with different settings for primary and secondary nozzles. For example, with the EVO and Axiom Dual Direct, users can place different size nozzles on different print heads and use optimized settings for each. Apex allows users to select nozzle sizes and thus allows one printer to print a part in two completely different ways from primary and secondary heads (i.e., fast with a 1.0mm nozzle on one head, and slower and more precise with a .35mm nozzle on the other).
Single-head support structures have also greatly improved over the past few years, mostly due to software development. For these supports to be broken off easily, but also have the ability to leave somewhat clean surfaces, the software has to be able to not only create the support where needed but also set the spacing correctly for it to be broken off with little effort.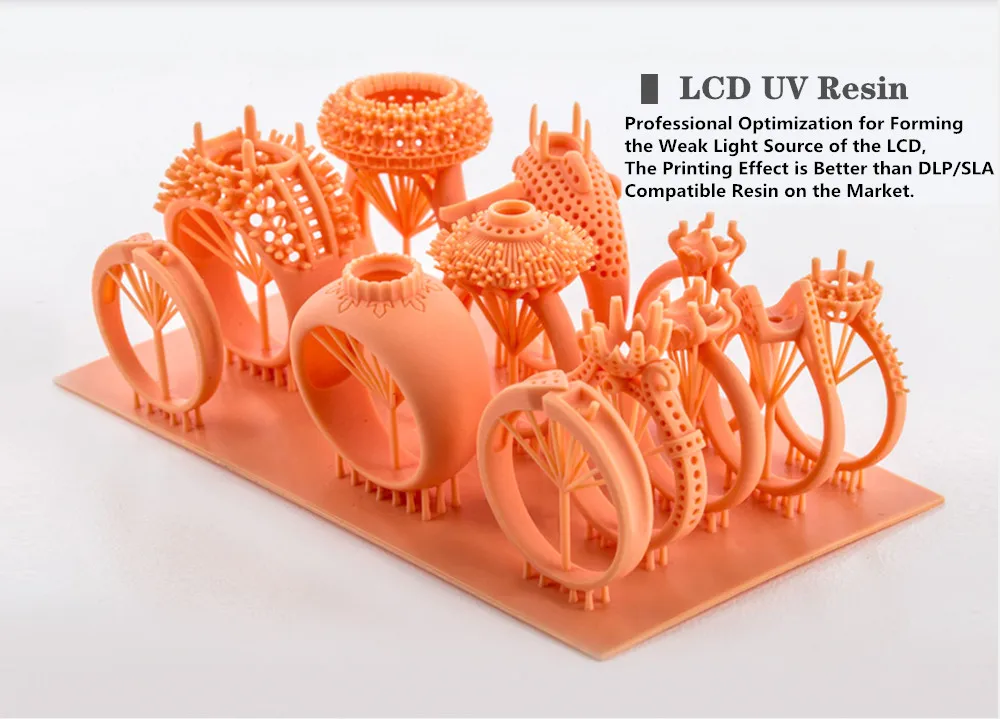 When printing large models, single material support tends to work well as most imperfections arising from support material tend to be overshadowed by overall part appearance.
Having the ability to use different support patterns is also becoming common practice. In this case, for example, the single-head support structures utilized in APEX printing software use the “line” pattern. This only lays support structures down in one direction — enabling the user to more easily remove the structure. For soluble printing, the “Grid” pattern is used in order to provide more support for the print (since it will not be removed by hand).
ConclusionThe ability to use a secondary head for creating soluble support structures remains a powerful tool in the belt of the creator. Featuring the ability to support inaccessible part geometry and to minimize post-processing time, dual soluble support will continue to be a staple of FDM additive manufacturing. However, single-head support needs to be factored into more purchasing, design, and manufacturing considerations.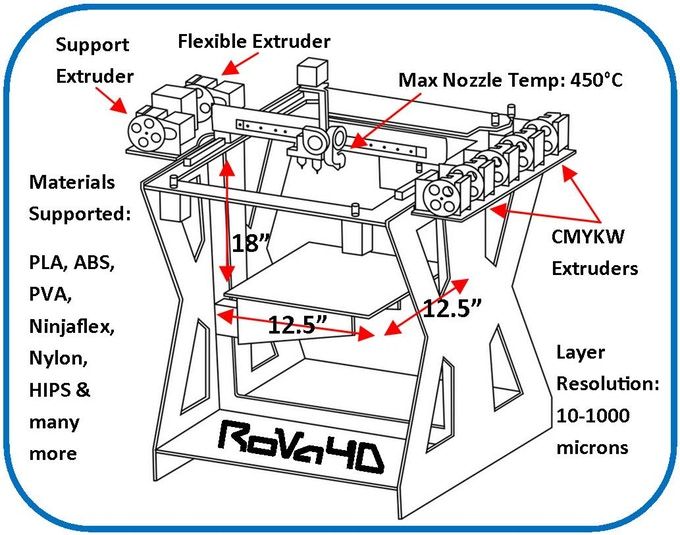 When it comes to repetitive iteration, experimentation, and large part making, the cost and time efficiencies associated with same-material support are worthy of consideration.
This white paper discusses the options and process involved in the use of support material in FDM additive manufacturing. Read this white paper to learn:
- When and where to use soluble support material
- The pros and cons of same material support
- The pros and cons of soluble support
Reading time: 15 minutes
Related Video: HydroFill Water Soluble Filament
Related Equipment: EVO 22 PRINTER
Related Materials: HYDROFILL SOLUBLE SUPPORT
Original Article: 3D PRINTING WITH SUPPORT MATERIAL
Which 3D Printer Under $1,000 Works Best With Soluble Supports?
Comprehensive guide to 5 low-cost dual-material FFF printing technologies in 2021/2022This story was originally published on www.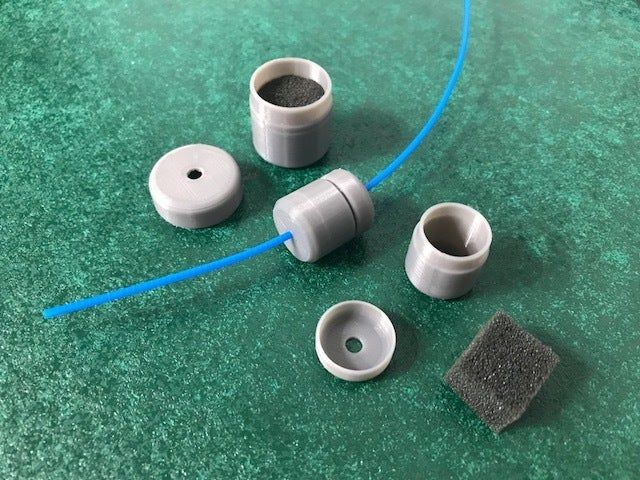 fabbaloo.com (see Part 1 and Part 2).
“I don’t care about multi-color, I just want soluble supports,” writes a 3D printer user in a forum on dual-material 3D printing.
Sure, a model of a four-colored amazon rainforest frog would look great in your 3D printed collection. But enough users would agree that the true potential of dual-head printers lies in their ability to print soluble supports rather than a palette of colors.
A quick search on Google reveals dozens of soluble support filaments on the market. Most of them are based on well-known water-soluble polymers PVA and BVOH. But there are also new contestants coming out such as VXL from Xioneer that provide superior performance to PVA.
But printing a support-material combination is not the same as printing two colors of the same filament. So, which dual extrusion 3D printer is up to the task?
In general, multi-material FFF technologies can be classified into five categories – each with its own pros and contras when it comes to printing soluble supports.
Depending on how often you print, what support material you use, and how much you are willing to invest, you might even find the perfect match for your needs.
The good news: you can get a decent 3D printer in any of these categories for under $ 1,000. So read on.
1. Mixer 3D Printers: Lowest Price-Tag But Probably Not the Best Choice for PVA
Mixer Hotend (Illustration by Xioneer)In 2014, the legendary 3D printer component manufacturer E3D came out with its “Cyclops” hot-end. The name says it all: It is a hot-end with two inlets, but only one outlet: the “eye.”
This mystical creature takes two filaments in, melts them inside, and extrudes a single strand of mixed material. It’s great for mixing colors and creating stunning color gradients in your parts using just two filaments.
But can it also print supports?
The mixer hot-end acts as a Y-splitter – letting you extrude either support or model material from a single nozzle – without mixing them together.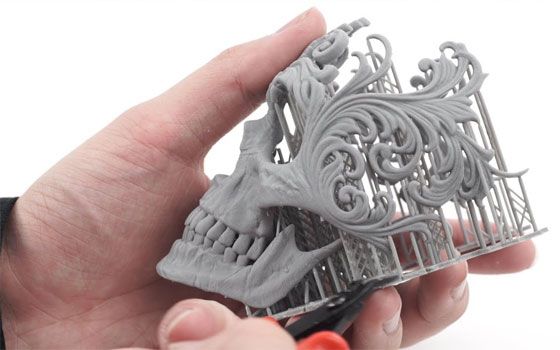 So yes, it can print supports too.
3D printers with a mixer hot-end like the Geeetech A10M sell from USD 230. This price tag is really hard to beat when it comes to something as sophisticated as dual-material 3D printing.
Nozzle calibration on these machines is straightforward because they use only one nozzle. No need to fiddle with extruder offsets, which are notorious in systems with two separate nozzles. So with a device like A10M you could start churning your complex models with supports soon after unboxing.
But before you grab your credit card to order an A10M, you might want to keep learning about some of the drawbacks.
Mixer hot-ends require you to print a purge tower with every print job. It is a way to clean the nozzle before switching materials and avoid material bleed in your parts.
But getting the right amount to purge can be tricky. Purge too much and you needlessly waste precious filament. Purge too little, and the residues of support filament will contaminate your model affecting part stability and surface quality in the end.
But one way or another: mixer hot-ends will always produce waste.
Besides, using PVA with a mixer hot-end is a challenge on its own.
PVA and similar water-soluble materials are very sensitive to heat. If you leave them lingering for too long in a hot nozzle, they will degrade and turn into a crusty mess – clogging your extruder.
So, with mixer hot-ends, you want to keep PVA flowing through your nozzle as much as possible. This means shorten time window to print model materials. In practice, you will print only smaller models to avoid a clogged nozzle when using a mixer hot-end.
One trick is to use more temperature-stable support material such as VXL from Xioneer. But if you absolutely need to stick to PVA, the only remedy seems to use two separate nozzles – each with its own temperature control.
2. Traditional Dual-Extruders: Work With PVA But Are a Challenge to Calibrate
Traditional Dual Extruders (Illustration by Xioneer)What’s the benefit of using two nozzles (for model and support materials respectively) versus a single alá “Cyclops” nozzle?
Using two nozzles lets you cool PVA inside your support nozzle while you print your model material with another nozzle.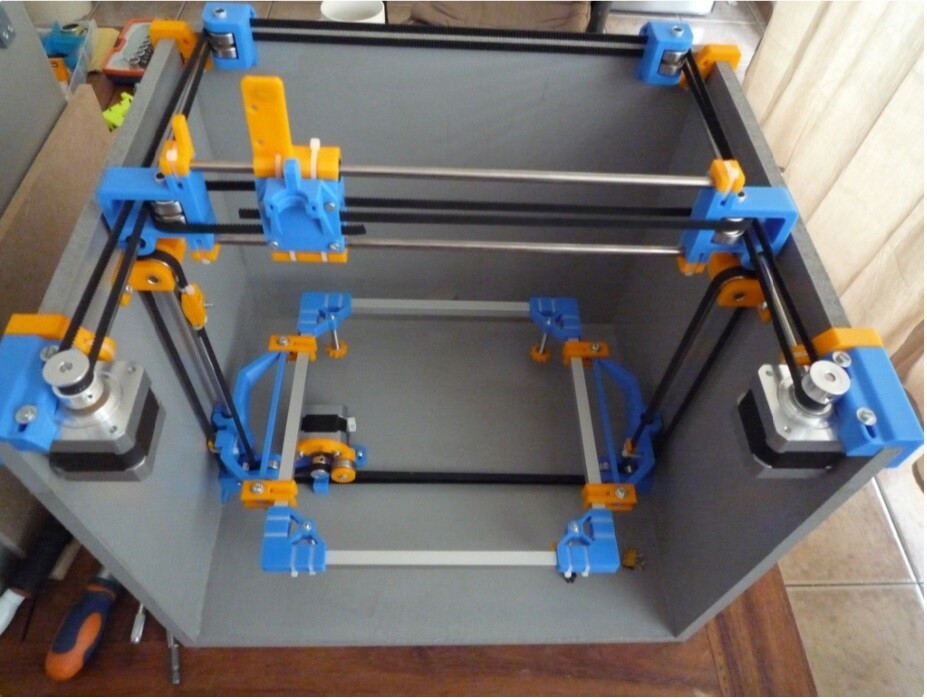 This helps prevent PVA from overheating and eventually clogging your extruder.
But this requires some tweaking to get it right.
However, PVA will need at least a 20°C-50°C temperature drop to keep the material from degrading too quickly. This leads to long heat-up times for every layer, adding to hours of unproductive time throughout the entire print job.
One solution is to use a temperature-stable support material such as VXL instead. The material does not degrade as quickly as PVA inside a hot-end saving you the need to cool down your support nozzles.
The two low-cost dual-printhead 3d printer models often found in reviews are the X-Pro from Qidi Technology and the Bibo Dual Extruder 3D Printer. These printers seem to be popular due to their low prices of $482 and $650 respectively.
A decent 3D printer model comes from Prusa with its I3 MK3S+ together with the dual head upgrade. This kit would burden your wallet with around 890 euros. However, the reputation of Prusa and its supportive community, this investment may pay itself off quickly.
But despite their advantages over mixer hot-ends, dual-printhead models do not always sell well. I once asked one of our resellers why.
The problem wasn’t the higher price. It was the complexity of getting these systems calibrated. This reseller required its users to undergo rigorous mandatory training to learn how to use dual-head machines (probably to save hours of support calls later on).
Imagine holding two pens in your hand and trying to write something with both of them at the same time. One of them will always try to lift up, while the other will be pushing too hard against the paper. It’s really tricky.
The same problem happens when printing with two nozzles mounted on a single print-head. If one is too low, it may kick your part off the build plate. If it is too far, the layers will not bond well.
So calibrating the height of two nozzles in a sub-millimeter range will take time and experience to get it right before every print job.
Actually, this problem was one of the reasons 3d printing companies came up with another solution: place both nozzles on separate print-heads: each with its own temperature and motion control.
3. IDEX: Most Likely Your Top Choice For Support Materials
IDEX Multi-material 3D printing (Illustration by Xioneer)IDEX stands for an independent extruder 3d printer. These systems use two extruders that alternate in the printing process.
So instead of trying to hold two pens in one hand, you take one pen in each hand – and write with each of them individually. Now, most of us aren’t ambidextrous (able to write with left and right hand equally well) – the machines do a great job printing with a pair of independent print-heads.
The first benefit of two independent nozzles: they are typically easier to calibrate than two nozzles mounted on a single print-head.
Another benefit of IDEX systems: they park unused nozzles outside of the build area, where they can leak material without oozing over your part.
Oozing is indeed a big issue not only in multicolor 3D printing but in printing model-support combinations. The smeared support may leave blemishes and holes inside your model undermining its aesthetics and surface finish.
So using IDEX 3D printers typically results in more reliable printing, prevents scraping of nozzles over the parts, and creates smoother surfaces. Such systems come very close to being the top choice for printing with support materials.
One of the lowest cost IDEX machines is the Tenlog Hands 2 Pro which retails at $430. The machine encompasses an impressive build volume of 235 x 235 x 250 mm. If you need to print larger parts, Tenlog offers its TL-D3 Pro with 310 x 310 x 350 mm build volume with a price tag of $ 560.
Another popular IDEX model appearing in 2021 reviews is the Creator Pro 2 from FlashForge. It is available for USD 700 and comes with a number of useful features such as an enclosed build-area to reduce the warping of parts. The Creator Pro 2 has a build space of 200 x 148 x 150 mm.
When it comes to printing support materials (VXL or PVA), machines with independent extruders offer the best price-performance ratio in my opinion.
4. Tool Changers: Smooth Parts But Comes With a High Price-Tag
Tool changer (Illustration by Xioneer)Tool changers are nothing new in the world of CNC machining. But in 3D printing, they are considered an exotic species. Although priced above a thousand dollars, it would be unfair to leave them out of this review.
In our pen and paper example, tool changing is the equivalent of picking a pen from a cup whenever you need it. When you are done writing with one pen, drop it back into a cup, and simply pick another one. In fact, this is what we (humans) naturally do when we want to use two pens.
For a machine, this approach has a few benefits.
A machine with a tool-changer only needs a single set of motors. So overall, these systems typically exhibit fewer moving masses, letting you reach smoother surfaces on your parts. This is clearly an advantage when printing intricate models with lots of supports.
But this solution is generally the most expensive choice. This is bad news if you are looking for a 3d printer with a tool-changer under one thousand bucks: we didn’t find any as of this day.
The option that comes to mind is to build a tool-changing dual extruder 3D printer yourself.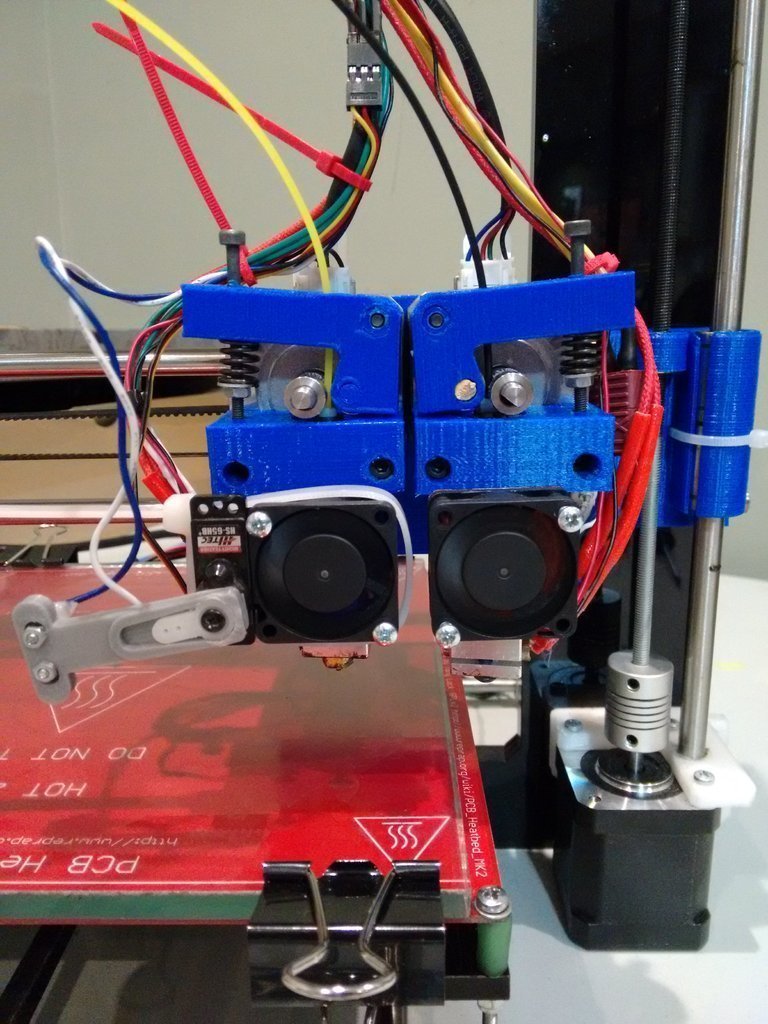 You can get a head-start with a $ 2,105 (excl. VAT) Tool Changer & Motion System Bundle from E3D that provides all the mechanics you need to create such a beast.
5. Filament Switchers: Great for PVA But Produce Waste
Filament Switcher (Illustration by Xioneer)The Canadian company Mosaic Manufacturing came up with a multi-material 3D printing solution that is truly out of the box.
Mosaic Palette 3 is a device that cuts different filaments and welds them together in a single multi-material filament strand. Depending on the amount of model and support material for each layer, the device will precisely chop the filaments in lengths as needed – and deliver a welded strand to your 3D printer.
The device is an add-on. This means a great deal if you already own a single-extruder 3d printer. No need to buy a new dual-extruder machine and calibrate its two nozzles. You can keep using your single-extruder 3D printer and fit the Palette post factum.
Agreed, a price tag of $599 is more than double what you pay for a Geeetech A10M, but the Palette 3 seems to offer a unique benefit when it comes to printing with support materials.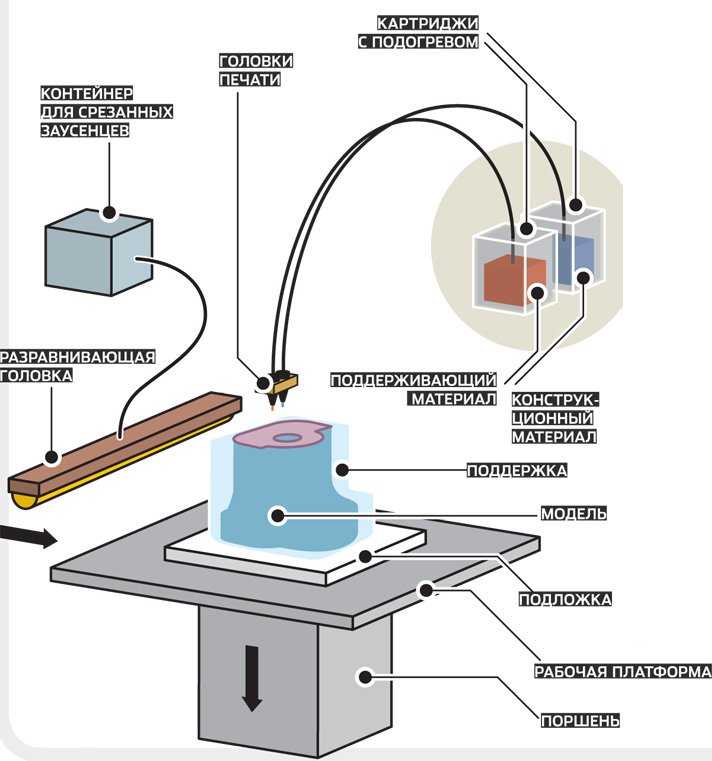
Switching filament before the melt-zone on Palette makes sure that PVA is delivered to the nozzle only when it is needed. So PVA does not have a chance to linger in a hot nozzle eventually clogging it. This should drastically improve printing reliability.
Another – less expensive option – is the Prusa’s MMU2S Upgrade that retails for USD 300, but it was designed specifically for upgrading Prusa printers in mind.
However, both products seem to have a major drawback: they produce lots of waste when switching from one material to another.
On the mosaic website, the manufacturer states: “In order to create clean, high-quality multi-color/material prints, Palette uses a Transition Tower. This allows your extruder to purge the filament in between transitions, creating precise breaks in your model. Without these towers, the quality of the print would be reduced due to filament bleed and other print issues.”
They recommend purging 130mm of filament for its transition tower on each layer.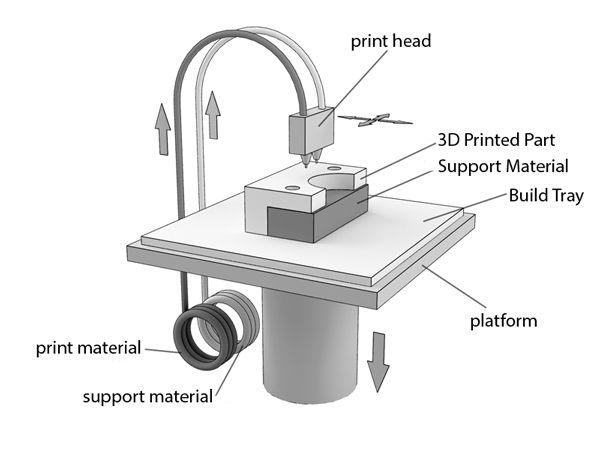 Now, for a 1000-layer object, this amounts to 130 meters of wasted material or about a half of a 750g spool! This may not seem like a big deal when using cheap PLA or ABS. But you may consider accounting for so much waste when using expensive support materials such as PVA and VXL.
Mosaic and Prusa do provide tips and tricks on how to reduce material waste. For example, printing multiple objects at once, or using your model infill as a purge/transition area. But clearly, the material waste remains one of the key issues of filament switchers.
SummaryPrinting model and support is no longer a luxury of high-end expensive FFF machines. You can get a decent dual-material system well under $1,000.
The table below gives a summary of the low-cost options available on the market today.
If you are aiming for the lowest price and plan to use VXL instead of PVA as your support material, then you may seriously consider getting the Geeetech A10M. The device comes with the added benefit of simpler calibration due to a single-nozzle setup.
But if you look for a more reliable printing experience with PVA and less material waste, you should be looking into an IDEX machine like the TenLog Hands 2 Pro or the Creator Pro 2 from FlashForge. The nozzle calibration is a bit trickier than on A10M, but not as challenging as on traditional dual-nozzle machines.
For the highest reliability when printing with PVA, and if you don’t mind the notable material waste, you might find a filament switcher like the Mosaic Palette 3 or Prusa’s MMU2S as an attractive option. The system gives PVA the least chances to burn and clog in your nozzle. The device is an add-on you can fit onto an existing single-head 3d printer.
Summary: 5 dual-material technologies for printing soluble supports.Choosing a liquid photopolymer for a 3D printer. Classification of materials for SLA/DLP 3D printing.
Contents:
- Introduction
- SLA Overview
- SLA Standard Resins
- Standard photopolymer resin - Standard
- Clear Photopolymer Resin - Clear
- Engineering photopolymer resins
- Rigid photopolymer resin - Tough (like ABS)
- Durable photopolymer resin - Durable (PP-like)
- Heat resistant photopolymer resin - Heat resistant
- Rubber-like photopolymer resin - Rubber-like (Elastic)
- Ceramic photopolymer resin - Ceramic filled (Hard)
- How to choose the right resin for your application
- Dental and medical SLA resins
- Medical Device Photopolymer Resin - Custom Medical Appliances (Class I Biocompatibility)
- Dental Long Term Biocompatible Resin (Class IIa Biocompatible)
- Biocompatibility class I vs biocompatibility class IIa
- Cast SLA resins
- Cast resin for jewelry making
- Generalized rules
Hello everyone, Friends! With you 3DTool!
This article compares photopolymer resins using Formlabs SLA 3D printing products –
Catalog of photopolymer 3D printers
Photopolymers from FormLabs
Detailed review of the Formlabs Form 3 3D printer
Introduction
The stereolithography prints plastic parts with high resolution, good fine detail and smooth surface. Due to the variety of photopolymer resins available for SLA, this technology is used in many different industries: nine0053
-
"Standard" photopolymers are used for prototyping
-
Engineering photopolymers have certain mechanical and thermal properties
-
Dental and medical photopolymers have biocompatibility certificates.
-
Cast photopolymers have a zero ash content after burning. nine0053
SLA 3D Printing Resin Overview
SLA uses a laser to cure a liquid photopolymer resin. This process is called photopolymerization. Various combinations of polymers and other additives that are part of the resin allow you to get different material properties.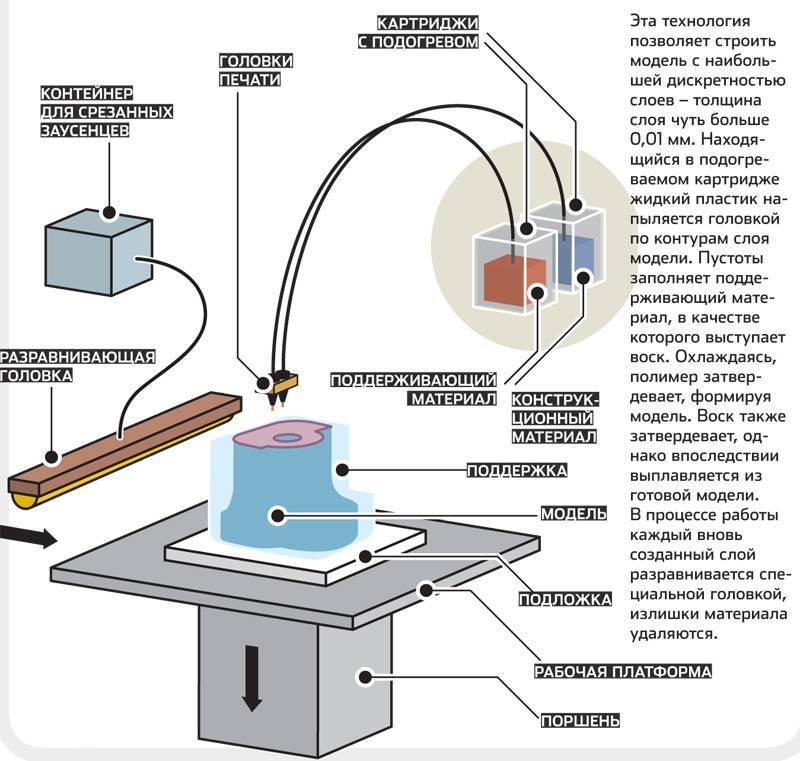
The main advantages and limitations that are common to all resins in SLA 3D printing are:
Benefits:
Weaknesses:
Base Resins for SLA
Post-Processing SLA/DLP 3D Printing Article
Standard photopolymer resin - Standard
Standard resins produce parts with high stiffness, detail and a smooth surface. The low cost of resins, from $250 per liter, makes them ideal for prototypes.
The color of the resin also affects its properties. For example, in FormLabs products, gray resin is suitable for models with fine details, and white resin for parts that require the smoothest possible surface. nine0053
Benefits of using Standard grade resins:
Cons Standard:
Also included in the class of "Standard" photopolymer resins from FormLabs is the Color KIT - a set of special dyes and "Color Base" photopolymer resin for mixing and obtaining a variety of color solutions. This eliminates the need for painting parts after 3D printing.
FormLabs Engineering Photopolymer Resins
Engineering resins have a range of properties for injection molded plastics.
All engineering resins require additional UV curing, such as using the Form Cure, to achieve their maximum properties.
Tough photopolymer resin - Tough (ABS equivalent)
Tough resin was developed for models that need to withstand high loads and be durable. nine0053
This material produces strong, shatter-resistant parts and functional prototypes such as snap-on housings.
Pros:
Cons:
Ideal for: functional prototypes, mechanical parts
Durable photopolymer resin - Durable
Durable resin is a wear-resistant and flexible material with mechanical properties similar to polypropylene.
Durable photopolymer produces models with a smooth glossy surface and high resistance to deformation.
Durable Resin is ideal for:
- Bushings and bearings;
- Various functional compounds
Pros:
Cons:
-
Not suitable for thin wall parts (recommended minimum wall thickness 1mm)
-
Low heat distortion temperature
-
Low flexural strength (lower than hard resin)
Ideal for: functional prototypes. nine0053
Refractory Photopolymer Resin - Formlabs High Temp Resin
The heat resistant resin is ideal for parts that require high temperature resistance and operate at high temperatures.
Formlabs High Temp Resin provides the highest melting point (HDT): 238°C at 0.45 MPa.
The resin should be used to print detailed, accurate prototypes with high heat resistance. nine0053
Pros:
Cons:
Flexible Resin
Rubber-like resin allows flexible parts to be made. This material has a low tensile strength and high elongation at break and is well suited for parts that will be bent or compressed.
It can also be used to add ergonomic features to multi-material assemblies such as: dies, wearable prototypes, handles, pads and grips. nine0053
Pros:
-
High flexibility (high elongation at break)
-
Low hardness (simulates 80A durometer rubber)
-
High impact resistance
Cons:
-
Doesn't have all the properties of real rubber nine0053
-
Requires extensive support structures
-
Material properties deteriorate over time as the part is exposed to ultraviolet radiation (sunlight)
-
Not suitable for thin wall parts (recommended minimum wall thickness 1mm)
Ideal for flexible prototyping. nine0053
Ceramic photopolymer resin - Rigid Resin
This resin is reinforced with glass, which provides very high rigidity and a polished surface. The polymer is very resistant to deformation and is excellent for 3D printing thin elements.
Ideal for: molds and tooling, jigs, manifolds, retainers, electrical and automotive fixture housings
nine0053
Thermal management components printed with SLA ceramic (hard) resin. Image credit: Formlabs
How to choose the right resin for your application
The table below shows the main mechanical properties of photopolymers for SLA:
Source: Formlabs
Standard resin ( standart ) has high tensile strength but is very brittle (very low elongation at break) so it is not suitable for functional parts. The ability to create a good part surface makes it ideal for visual prototypes and art models. nine0053
Durable ( durable ) resin has the highest impact strength and elongation at break of any other SLA material. Best suited for prototyping parts with moving parts and latches. It lacks, however, the strength of thermoplastic 3D printing materials such as SLA nylon.
tough tough resin is a compromise between the material properties of tough and standard resin. It has a high tensile strength, so it is best suited for rigid parts that require high hardness. nine0053
heat resistant resin ( heat resistant ) can withstand temperatures above 200 o C, but has poor impact strength and is even more brittle than standard resin.
ceramic ( ceramic reinforce ) resin has the highest tensile strength and flexural modulus, but is brittle (poor elongation at break and toughness). This resin is preferred for thin wall parts that require increased rigidity. nine0053
The graphs below compare the mechanical properties of the most common SLA materials visually:
Comparison chart for elongation at break and toughness for common SLA printing specifications and standard media. Image courtesy of Formlabs.
Stress-strain curves for conventional SLA technologies and standard materials. Image credit: Formlabs nine0053
Pros:
Cons:
- Moderate wear and tear resistance
Ideal for: Surgical aids and appliances
Dental Long Term Biocompatible Resin - Dental Long Term (Class 2A biocompatible)
0114
These resins are specially formulated for long term dental fixtures. Class 2A biocompatible resins can come into contact with the human body for up to a year.
High resistance to breakage and wear make this resin ideal for making rigid cotter pins or retainers.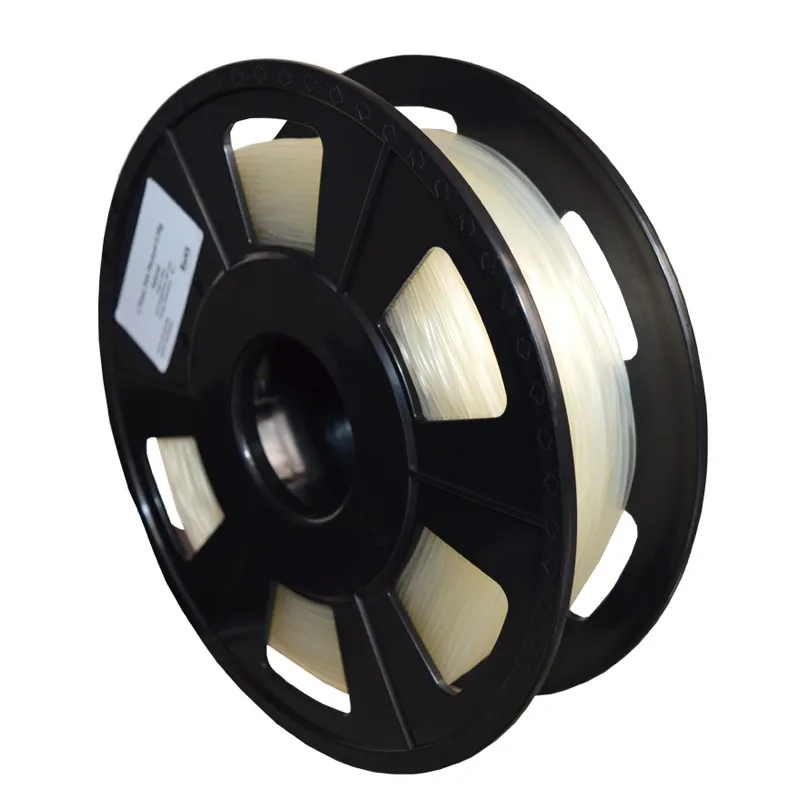
Pros:
Cons:
-
High price nine0053
Ideal for: durable dental instruments, fracture and wear resistant medical parts, rigid cotter pins, retainers
What is the difference between class 1 and class 2a biocompatibility?
Class 1 biocompatibility rules apply to materials that are allowed to be used for:
-
non-invasive devices that come into contact with intact skin nine0053
-
devices for temporary use or short-term use in the mouth or ear canal or in the nasal cavity
-
reusable surgical instruments
Class 2a biocompatibility rules apply to materials that are allowed to be used for:
-
devices that come into contact with bodily fluids or open wounds nine0053
-
devices used to introduce substances into or remove substances from the human body
-
invasive short-term devices such as invasive surgical items
-
long-term implantable devices placed in the teeth
Photopolymer resins in SLA 3D printing for jewelers
Jewelry resins
This material allows you to print models with fine details and a smooth surface without leaving ash or residue after burning.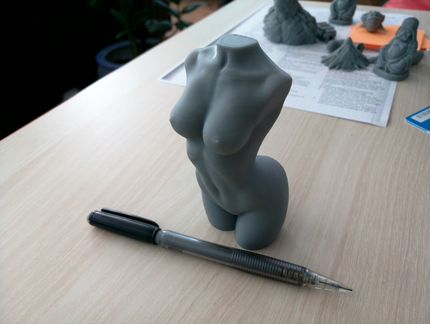
Cast resin allows you to get the finished product directly from design to precision casting with just one 3D printed part. It is suitable for making jewelry and other small and complex components.
nine0113 Pros:
Cons:
Ideal for: investment casting, jewelry making
SLA/DLP 3D printer catalog
Photopolymers from FormLabs
Post-Processing SLA/DLP 3D Printing Article
Well, that's all we have! We hope this article was useful for you! nine0053
You can order Formlabs SLA 3D printers or ask your questions and find out the status of your order, you can
- Email: [email protected]
- By phone: 8(800)775-86-69
- Or on our website: http://3dtool.ru
-
Don't forget to subscribe to our YouTube channel:
Subscribe to our groups in social networks:
INSTAGRAM nine0053
In contact with
Using Soluble Filament to Create Supports
Using Soluble 3D Printer Filament is an easy and effective way to create support structures for your 3D printed part. In this article, we'll take a look at the different types of dissolvable filaments on offer, the benefits of using them over insoluble filaments, and tips and tricks for the smoothest possible printing process. nine0053
FDM 3D printing is a manufacturing technology that allows you to create parts with complex geometries that are usually impossible to obtain using traditional methods. However, when using this technology, each layer of the part requires supports, either on the structure of the part itself or on an additional support structure.
With a single extruder 3D printer, you are limited to using the base material of the printed part to create the support structure. Things are different with dual-extruder printers, since dissolvable filaments can be used to create support structures. nine0053
Soluble 3D Printing Filament Types
Water Soluble 3D Printing Filaments
These materials are known for their solubility in ordinary water without any aggregates. This makes them an excellent option, as their dissolution does not pose any danger, and also does not cause any reaction to the base material of the product.
One of these materials is PVA, which is the most commonly used support material in 3D printing. BVOH is another widely used material with better material compatibility than PVA as well as faster dissolution time. nine0053
Water Soluble Chemical 3D Printer Filaments
Some industrial grade materials are not compatible with filaments such as PVA or BVO due to their chemical properties and/or heat resistance. For this reason, materials like BVOH or PVA have been designed with additional properties to make them compatible with high temperature materials such as PEEK, PEKK, PPSU, PP and others.
To dissolve these supports, the pH of the water must be acidic in order to break down the sugar that this type of material normally contains, as this is less dangerous than the use of solvents. nine0053
Soluble filaments for 3D printer with organic solvents
These are the least used materials due to the difficulty of using organic solvents with polymers most used in 3D printing, since the solvent can react with the print material and damage it.
The advantage of using these materials is their high compatibility with the construction material. The most common example is HIPS as a support material for ABS. nine0053
Insoluble and dissolvable filaments for 3D printers
Soluble filaments for support structures have advantages and disadvantages compared to using insoluble filaments:
- Easy to remove supports appropriate solvent and wait until the supports are gone. This is very useful for parts with a very complex structure.
- Improved contact surface quality
- This benefit is related to the first point; since the material is easily removed, a strong base can be created in the area where supports are required, resulting in a smooth surface without filament residue.
- Less need for post-processing of the model
- The ability to print complex 3D models with high surface quality, thanks to the use of dissolvable filaments, also reduces the need for post-processing tasks such as polishing, grinding, gluing, etc.

- Longer print times
- The problem with using dissolvable filaments is that 3D printing takes longer, as materials need to be changed during the process. However, there are techniques for optimizing the support structure to reduce this problem.
Tips for creating supports with dissolvable filaments
By changing a few settings in your slicer, you can get solid supports to improve the quality of your 3D model. nine0053
Strengthening the Supports
It is quite common to create thin supports for very thin parts of a model, however they are not strong and tend to break during the printing process. To increase their strength, the following support configuration parameters can be adjusted:
Horizontal Support Extension: Increases the overall thickness of the support, allowing the tower to be thicker and stronger.
Avoid breakage of supports during printing
Supports are as thick as the diameter of the hot end, so they are usually quite fragile and can break during printing. By changing the pattern and other parameters, the strength can be increased:
- Support pattern: Patterns such as grid and triangle are quite resistant to tearing during printing. It is recommended to print such patterns only on soluble material, as they are quite difficult to remove.
- Support print speed: If supports are printed too fast, there is a risk of breaking the structure. Reducing the speed avoids vibration or damage to the structure as the head passes. nine0006
Improving the surface quality of the model
The quality of the contact surface depends on the distance Z from the support pattern, the direction of the upper and lower perimeter lines and the amount of material holding the base of the model. Changing these parameters can improve the quality of the surface, but will complicate the process of extracting supports.
- Density of supports: The higher the density, the better the model will hold and therefore the surface finish will improve.

Learn more


