3D printer belt system
Belt 3D printers explained: Technology, best machines, advantages
There are many remarkable things about FDM 3D printers, but build volume isn’t one of them. Although there is a market for dedicated large-format additive manufacturing systems, the typical build volume for a desktop extrusion printer is around 200 x 200 x 200 mm.
While that build volume may suffice for most small parts and prototypes, it presents an obvious limit on what you can do with a printer. A small build area restricts printer users to small-size parts and small batches of parts: larger parts need to be assembled from multiple smaller components, while large batches require a sequence of several builds with an operator removing parts from the print bed between each build.
But what if 3D printing wasn’t subject to such restrictions? What if an otherwise standard FDM printer could print extra-large parts and huge batches of individual small parts? With a conveyor belt 3D printer, both of those scenarios become possible.
This article goes over the basics of belt 3D printers, looking at how they work, their advantages and disadvantages, and the leading belt 3D printer models.
How does a belt 3D printer work?
A traditional FDM (fused deposition modeling) 3D printer has a solid print bed covered with a build surface, above which a printhead deposits filament onto the build surface. Movement of the printhead and/or print bed allows for motion along the X-axis, Y-axis, and Z-axis.
A belt 3D printer replaces the conventional print bed and build surface setup with a conveyor belt, so the surface onto which the hotend extrudes material is constantly moving. Instead of moving the printhead or print bed by one step to proceed to the next layer, the belt moves fractionally along the Z-axis.
Additionally, the printhead is mounted at a 45° angle, and the combination of the moving belt and the angled nozzle enables printing of parts with theoretically infinite length along the Z-axis or a theoretically endless batch of parts.
Of course, while continuous printing allows for theoretically endless printing along the Z-axis, there are two physical constraints: the ability to support a long part as it stretches off the edge of the belt (usually achieved via runners or another type of support) and a limited supply of filament on a spool.
Key features of a belt 3D printer
Belt
Needless to say, the most distinctive element of a belt 3D printer is the conveyor belt itself. The belt varies by printer: for example, the popular Blackbelt 3D printer uses a carbon fiber composite belt, while the Creality CR-30 uses nylon. The belt must be flexible enough to function as a conveyor belt while also being able to adhere to 3D printing materials. Some belts, such as those from Powerbelt3D, have a thin plastic coating specifically to help with part adhesion.
Angled printheadThe next most important feature of a belt printer is the angled printhead, which allows for continuous printing along the Z-axis.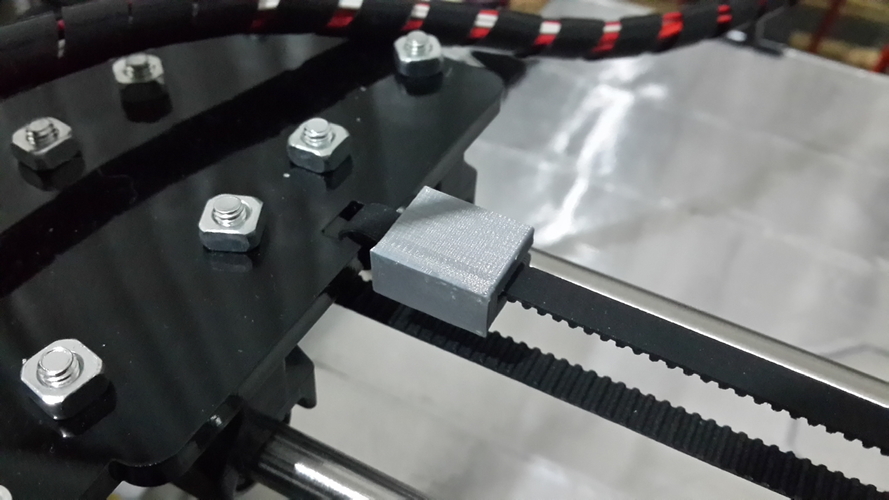 Other benefits of the tilted nozzle include a reduced need for overhangs and support structures.[1]
The most common motion system on a belt 3D printer is a Cartesian XY head, with the motion of the belt replacing the Z-rod movement of the print bed. As we will see in a later section, the 45° angle of the nozzle must be accounted for while slicing.
Container or roller table
The third key feature of a belt 3D printer is some kind of system for preventing parts simply falling off the edge of the belt when they reach the end. For batch printing, a user may put a container under the edge for parts to fall into. For printing of extra-long parts, a roller system may be used to support the length of the part once it leaves the belt. Otherwise, the weight of the section of the part sticking off the edge may cause the entire print to tip up. Category leader Blackbelt sells a version of its printer that comes with a dedicated roller table for accommodating long prints.
Differences between belt and traditional printers
In terms of printing capabilities, the main difference between belt 3D printers and regular FDM printers is the idea of infinite Z or continuous 3D printing. If enough filament is fed into it, a belt 3D printer can print endlessly without reaching the limit of a standard build envelope. But what belt printers offer in terms of continuity, they lack in quality: the inferior surface and stability of a belt printer can have a negative impact on part quality. The range of usable materials for belt printers is also very narrow.
There are also differences between belt and traditional printers in terms of adoption and usage. Clearly, belt printing is still a niche technological category, with few options available on the market, which limits its mass appeal. As such, its current user base is — despite the technology’s suitability for batch part production — dominated by hobbyists, tinkerers, and 3D printing experts, rather than professional or industrial end-users looking to implement a turnkey solution.
Popular belt 3D printers
Mass produced belt 3D printers have only been on the market since 2017, when the Blackbelt printer was launched. However, hobbyists had made DIY belt printers before then, and the hobbyist community has been a constant driving force behind the wave of popularity for belt 3D printers. Research on the feasibility of continuous printing using a conveyor belt goes back to 2014 and possibly beyond.[2]
Some of the most widely sold belt 3D printers are discussed here.
Blackbelt (Blackbelt 3D)
Dutch company Blackbelt 3D launched the groundbreaking Blackbelt 3D printer in 2017. At more than $10,000, it is on the more expensive side, but it produces high-quality prints and remains the benchmark for belt 3D printing.
The Blackbelt 3D printer is available as a standalone or roller table version (for supporting extra-long prints), and can be equipped with a standard Bowden extruder or a VarioDrive extruder for printing flexible materials. It has a semi-heated bed and a large frame.
CR-30 3DPrintMill (Creality)
Creality 3D, the Chinese developer of the popular Ender 3 printer, makes a belt 3D printer called the CR-30 or 3DPrintMill. It demonstrates the importance of the DIY printing community to belt 3D printing, as it was co-developed by the YouTube-famous engineer Naomi Wu. That being said, it is not open source like some other belt printers.
Equipped with features like a heated bed and filament runout detector, the Creality CR-30 has a low price of around $1,000.
Recommended reading: The best Ender 3 retraction settings
The White Knight (NAK3DDesigns)
Another belt 3D printer born of the DIY community, the White Knight is a rugged printer which shares features with the CR-30, as it was developed by some of the engineers behind the Creality machine.
The White Knight is not sold as a ready-to-use printer, but parts for it can be sourced for about $2,000.
iFactory One Pro (iFactory 3D)
Brought to life via Kickstarter, the iFactory One Pro has a price tag of around $2,000. It is sold as a printer but requires extensive assembly before use. Features include an onboard camera for print monitoring, an intelligent error detection system, and a Wi-Fi-enabled Raspberry Pi 4 motherboard.
IdeaFormer IR3 (IdeaFormer)
The IdeaFormer belt 3D printer has received some attention due to its very low price ($550 at the time of publication) and prominence on platforms like Amazon. Manufactured by the Zhuhai Bell Technology Co in China, the IdeaFormer has its fair share of fans and critics, with specs comparable to those of the CR-30. It may be a suitable machine for beginners due to its low price, but support options are limited.
Printrbelt (Printrbot, defunct)
Popular 3D printer company Printrbot shut down in 2018, but before doing so it launched its own belt 3D printer, the Printrbelt. Buyers may be wary of purchasing a machine without any support from the manufacturer, but the $1,500 printer produced good quality prints via its Kapton-coated steel belt and Raspberry Pi board.
Slicer support for belt 3D printers
Because of their moving build surface and angled printhead, belt 3D printers require different g-code to standard FDM printers. Consequently, not all slicer software supports belt printing.
Fortunately, Ultimaker Cura does support belt printing. Blackbelt Cura, a patched version of Cura that accommodates printers with a slanted gantry, is available to download from the Blackbelt website. Although the software is designed for the Blackbelt printer, it works with comparable systems such as the CR-30, White Knight, PrintrBelt, and Powerbelt3D Zero.
Another slicer that supports belt printing is Raise3D’s ideaMaker software, which has parameters such as belt raft offset and belt raft thickness.
Alternatively, users can implement a g-code script that adds some key belt printing instructions onto the conventional printing g-code (for example, offsetting each layer to accommodate the 45° tilt of the gantry). Bill Steele has written a script for this purpose, allowing users of other slicers like Slic3r and PrusaSlicer to use belt printers.
Advantages
The benefits of belt 3D printing include:
Ability to print very long parts as single components
Ability to print large batches of small parts without interruption
Automatic removal of parts from belt as they reach edge of bed
Compatible with Cura
Disadvantages
The limitations of belt 3D printing include:
Limited print quality
Limited print speeds
Belt material not ideal for adhesion
Only suitable for certain materials like PLA and PETG (not ABS)
Niche technology with limited developer and community support
Incompatible with standard heated beds
Alternatives
The ability to print extra-long parts or large batches of parts is a desirable characteristic of belt 3D printing. However, belt 3D printers cost upwards of $1,000, and some FDM users might not wish to invest in a whole new system to carry out continuous printing.
An alternative is to use a DIY modification for an existing FDM printer. One example is Paul Chase’s PrintShift, a system for turning a Prusa Mini into a belt printer. Although Chase doesn’t sell the mod in kit form, he provides a bill of materials and instructions for building it. Similarly, Powerbelt3D runs a project called Ender EZ Belt, which focuses on converting an Ender 3 into a belt printer. The company sells its own belts and provides downloadable files, a bill of materials, and instructions for the rest of the modification.
Another alternative to belt 3D printing — albeit a much more expensive one — is large-format additive manufacturing via machines from companies like BigRep and Thermwood. These machines do not have infinite Z-axis printing but have large build areas across all three axes, in addition to compatibility with a wider range of high-strength materials.
Recommended reading: Infrared cameras for large-format additive manufacturing
Key takeaways
The recent advent of belt printers has opened up new possibilities in FDM 3D printing. Although first developed and championed in the hobbyist/DIY space, machines like the Blackbelt show that there are reliable, professional-grade solutions available for this niche technology.
Those considering investing in a belt 3D printer should, however, familiarize themselves with both the benefits and the limitations of the technology. Although many belt printers are capable of producing impressive “infinite-length” parts or large batches of smaller parts, they cannot match the quality of material versatility of traditional FDM printers. For parts that require extremely fine details or close tolerances, the technology may not yet provide an adequate solution.
Another important thing to note is that the learning curve for belt printing is, perhaps surprisingly, not all that steep.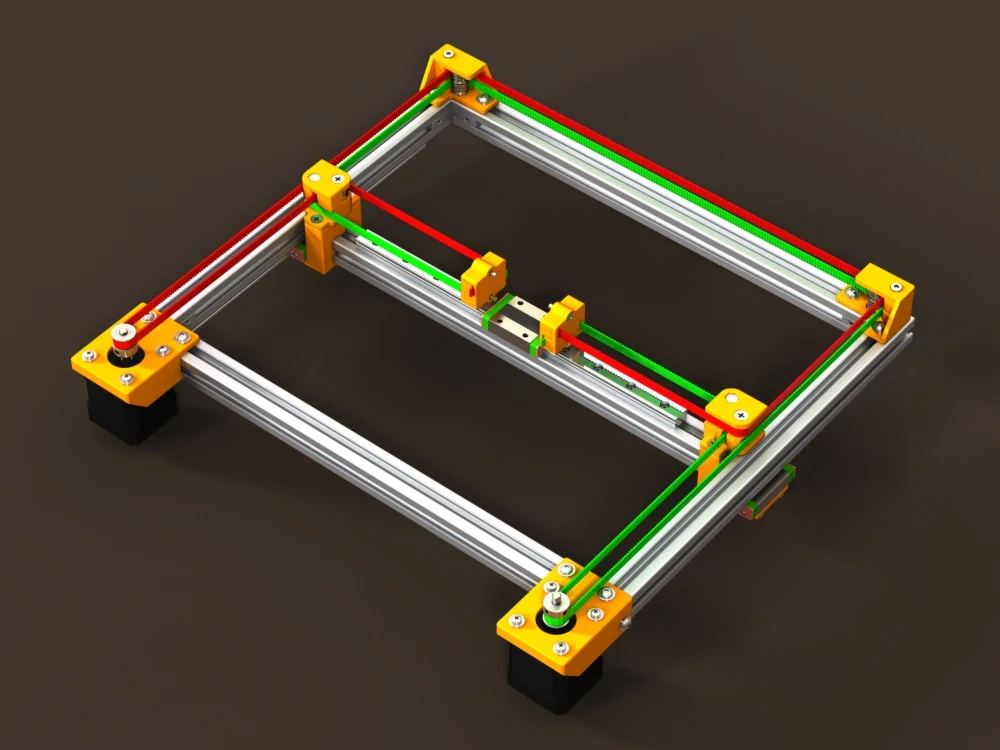 Those familiar with Cura will be able to migrate to Blackbelt Cura without issue, and those who run g-code commands directly will have no problem implementing post-process scripts which accommodate the unorthodox 45° angle of the belt printer’s printhead.
Overall, belt 3D printing provides a novel solution to the problem of limited build size on the Z-axis. Whether it is better or more cost-effective than large-format additive manufacturing (or simply running multiple print jobs on a traditional FDM printer) depends on the user and the project at hand.
[1] Dam DH, Le HN, Bui DT, Nguyen NL. A research on conveyor belt 3D printer in industrial applications.
[2] Günther D, Heymel B, Günther JF, Ederer I. Continuous 3D-printing for additive manufacturing. Rapid Prototyping Journal. 2014 Jun 10.
Which Belt 3D Printer is best for you? – SainSmart.com
Creality CR-30 vs SainSmart INFI-20
What are Belt 3D Printers?
Standard FDM extrusion (left) vs. belt 3D printer extrusion (right) (Source: Powerbelt3D)
Unlike traditional 3D Printers that work with a rigid print bed, Belt 3D printers use a belt just like their name implies. Using a belt vs a bed means you can print continuously and mass-produce small parts or print large, very long ones.
Another key difference between the two 3D printer platforms is the angle of the Printer Nozzle. Standard 3D Printers are vertical whereas Belt Nozzles are tilted 45 degrees. The reason for this is because; after each layer of material is extruded the belt moves forward for the next layer. This process allows you to print “Infinitely”.
Belt 3D printing can allow for continuous and potentially "infinite" 3D printing (Source: Powerbelt3D)
Why choose a Belt 3D Printer?
Here are some reasons why a Belt 3D Printer might be perfect for you:
- -Continuous batch printing
- -Print very long/large objects
- -Excels at printing model overhangs without support due to the tilted design, saving filament.

Quick Look
Now that we have provided a basic explanation of the key differences between the 2 print platforms, let's take a look at the differences between a popular brand and the new SainSmart INFI-20 Belt 3D Printer.
Upfront the INFI-20 delivers a $200 savings, comes fully assembled, and provides a few more goodies than the CR-30 like built-in WIFI/Octoprint Support, EZ Belt Adjustment, and Aligners for fewer failed prints.
| SainSmart INFI-20 | Creality CR-30 | |
| Sales Price | $1049 (Early Bird $749) | $1099 (Now $1049) |
| Assembly | Fully Assembled | Requires Assembly |
| Belt System | Belt + Aligner System | Belt |
| Build volume | 200 * 180 * ∞ mm | 200 * 170 * ∞ mm |
| Feeder system | Bowden | Bowden |
| Filament Break Sensor | Y | Y |
| Power Outage - Resume print | Y | Y |
| Mainboard | 32 Bit | 32 Bit |
| Stepper Drivers | TMC2208 | TMC2208 |
| Additional Features
| WIFI Control | Extension Rollers |
| Integrated OctoPrint | ||
| Web control machine | ||
| Extension Rollers |
Unboxing
Both printers are approximately the same size. The Sainsmart INFI-20 is slightly taller than the Creality CR-30 by about 10mm.
Expect to be printing the test file within 5 minutes of unboxing, powering up, and loading your filament.
No Joke! The INFI-20 only requires you to plug everything in. This includes the stepper motors and LCD Control Head Unit.
In comparison, the Creality CR-30 requires some assembly. The printer will arrive with the XY Axis laying on top of the Z-Axis “Printmill” base. After unpacking the machine and making sure we had all the parts and accessories, assembly took us about 25 minutes.
The First Print - Bed Leveling
Before we got to printing we had to double-check each of the printer's belts and make sure the “bed” was level after shipping.
A level bed is critical in 3D Printing and even more so with a belt printer. Here are some key differences between the 2 Belt Printers and the leveling process.
INFI-20
The process was pretty straightforward.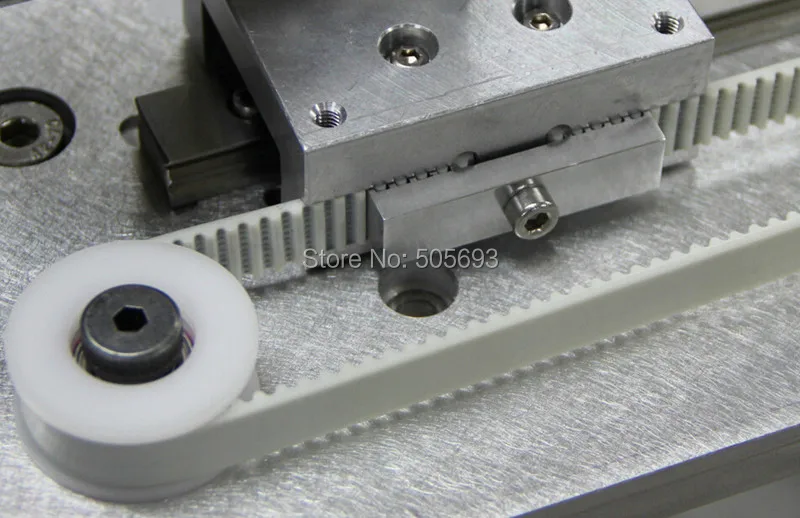 Included with the printer is a layer test feature that you can select in menu, print and then begin the process of bed leveling based on the output of the print which is a line printed in a zigzag pattern helping you evaluate the bed level and alignment of the belt.
I was able to use the 4 Bed Level Adjustment nuts to fine-tune the bed and start on my first benchmark print in no time. If your machine shows up with a bed that's a little out of whack there is an adjustable bracket that allows you to manually loosen and adjust the height of the sensor.
CR-30
Just like the INFI-20, the process is also pretty straightforward. However there are definitely some key differences, for example; To start, you home the machine and then you can see the distance between the nozzle and the belt. You then adjust the Z-height sensor bracket to fine-tune your nozzle height. It's not very difficult, but that is your only option for adjusting your belt.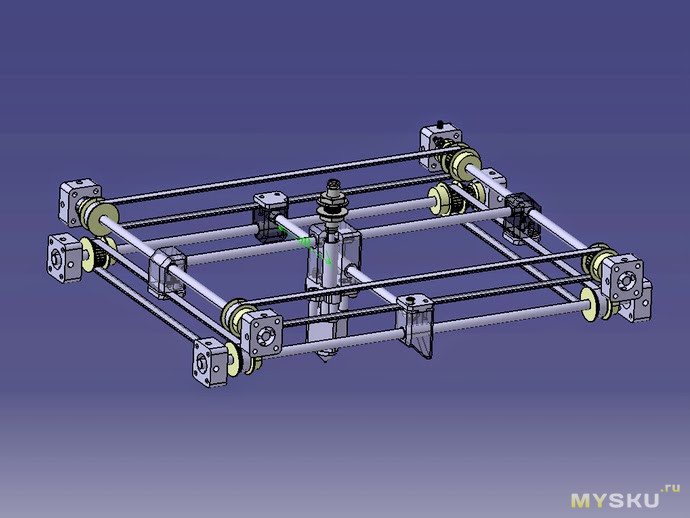 So if you do encounter any issues that are not resolved by adjusting the sensor height, you might run into issues with getting good quality prints or excessive failures.
Print Quality
During testing we found the print quality to be similar on both machines. For continuity, we used the same slicer we use with the INFI-20, a custom version of IdeaMaker. It's just easier to use, the Cura build provided with the CR-30 has been inconsistent and a bit of a headache. The biggest difference came down to the ease of use as we could easily fine-tune the bed and make adjustments when switching between materials like TPU or PETG for example.
We did tend to experience more print anomalies with the CR-30 over time, with one of the most common problems being a belt “shift” that would cause visible artifacts on the printed object.
Overview
For the ability to produce infinite print batches to save time and fulfill large orders or help expedite your project workflows, both machines are up to the task.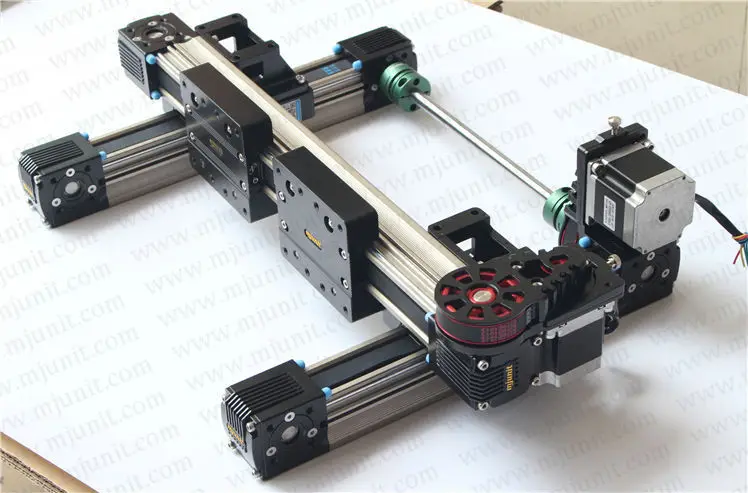
The INFI-20 delivers more value for the dollar overall with easier maintenance, quality of life features such as WIFI printing, control, and integrated OCTOPrint support, and the slightly taller Z-Height.
Tags: 3D Printing
Older Post Newer Post
In Same Category
- SainSmart X Fab Foundation's Bali Fab Fest
- Don't Miss Out! Top 5 Best Deals in SainSmart Black Friday
- Top 5 Laser Cut Christmas gifts to make this holiday
- My First Project with Jinsoku Z4 Galvo Laser Machine
- 5 Stars Review of 4040-PRO! Good Price & Large Cutting Area
Related by Tags
- The 3D Printing Journey of a Military Engineer in the Development of FPV Drone Parts
- Which Belt 3D Printer is best for you?
- Which is better? Comparing the CR-10 Pro to the CR-10 Smart
- Which is better? Comparing the Ender-3 V2 to the BIQU B1
0 comments
Techno Print 3D Company
This is our first review of the most popular and inexpensive 3D printers for 2020. The list will include the best-selling devices in two price ranges (up to 30 tr and up to 60 tr). Printers working with both plastic filament (FDM) and photopolymers (LCD/DLP) will be presented. This list will always be up to date, as it is periodically updated and supplemented. Read more→
The Chinese company Dazz3D announces the launch of the project on KickStarter and accepts pre-orders for Dazz3D Basic and Dazz3D Pro 3D printers. These revolutionary new devices are aimed at both the professional and amateur markets. Read more→
We all know that precise calibration of the 3D printer desktop is the foundation and the key to successful printing on any FDM printer. In this article we will talk about the main and most popular ways to level the "bed". So, as mentioned above, 3D printing without desktop calibration is impossible. We face this process Read more→
It's hard to go through a day today without hearing about 3D printing technology, which is bursting into our lives at an incredible speed. More and more people around the world are becoming addicted to 3D printing technology as it becomes more accessible and cheaper every day. Now almost anyone can afford to buy a 3D printer, and with the help of Read more→
The FormLabs Form 2 and Ultimaker 3 are perhaps the most popular 3D printers today, capable of high quality printing with incredible surface detail. Moreover, these two devices use completely different technologies, and therefore, there are a lot of differences between them. Many will say that it is wrong to compare them or Read more→
XYZprinting, best known for its daVinci line of desktop 3D printers, is bringing five new devices to the professional and industrial environment. One will use laser sintering technology, the second full color inkjet printing and three DLP machines. First of all, the novelties will be of interest to dentists and jewelers. Read more→
Cleaning the nozzle of a 3D printer is a fairly common process that any user of such a device has to deal with. This is not at all a complicated procedure that anyone can handle. You can complete this task in 15 minutes, using only handy tools and accessories. Read more→
Acetone steam polishing of ABS plastic is a process for smoothing the surface of 3D printed models. The result of this treatment makes your printed products look as if they were made by a professional mold casting method. If you want to understand how this is done correctly, then read this article. Aceto Read more→
3D printer head kinematics
In the production of various functional products such as machine parts and structural elements, quality assurance issues are of particular importance. So, due to the layer-by-layer formation of a printed product, stripes form on its surface.
The stepped look is best seen on curved and curved surfaces. It becomes more pronounced as the layer thickness increases. Stepping may not affect the strength of the printed product in any way, it most often only increases its roughness. However, if the product requires not a low level of roughness in itself, but only an appearance (for example, when it comes to instrument cases), you can resort to a simple finishing of the outer surfaces. Significant dimensional errors and distortion of the shape of products that can be tolerated during printing are a much bigger problem. In the most common 3D printers using layer-by-layer fusing technology (FFF, Fused Filament Fabrication), two main factors are of decisive importance: temperature shrinkage of the material and positioning error. nine0003
The shrinkage of the printed object is determined by the physics of the process: the molten material is squeezed onto the platform layer by layer and solidifies in the form of the final product, and in the process of cooling from the melting temperature to room temperature, it seems to shrink. Different materials can shrink more or less, but this process is always uncontrollable. In some cases, it can be assumed that shrinkage occurs uniformly in all directions by a certain percentage.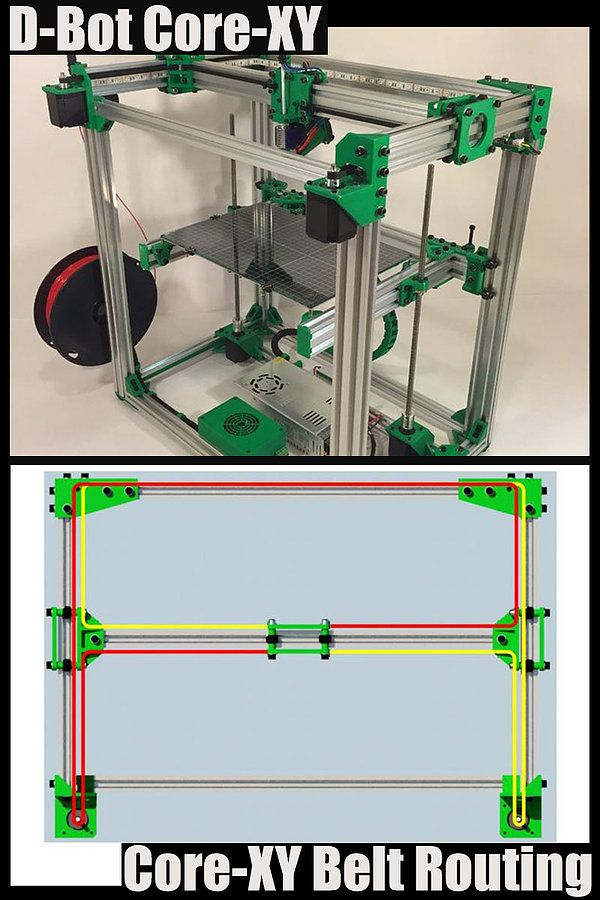 Based on this assumption, amendments can be made to the control program (G-code) that can partially compensate for the shrinkage error. nine0003
An equally important role in ensuring accuracy is played by the positioning accuracy of the working body of the equipment, i.e. the print head of the printer.
To date, many options have been proposed for building a system for moving the print heads of 3D printers, however, systems based on belt drives are most widely used. This is due to the fact that the load acting on the print head during operation is relatively small (unlike metal-cutting machines, printers do not have such a powerful disturbing factor as cutting forces), so such kinematic schemes provide sufficient rigidity. At the same time, they are characterized by simplicity, economy and high speed of movement, which positively affects productivity. However, at the moment, the factors that affect the positioning accuracy of the print head in such systems remain poorly understood. There are no practical recommendations on choosing the configuration of the kinematic scheme and the dependence of positioning errors on the operating parameters (mass of the print head, dimensions of the construction area, belt pretensioning, gaps in movable joints, etc.) of the 3D printer. nine0003
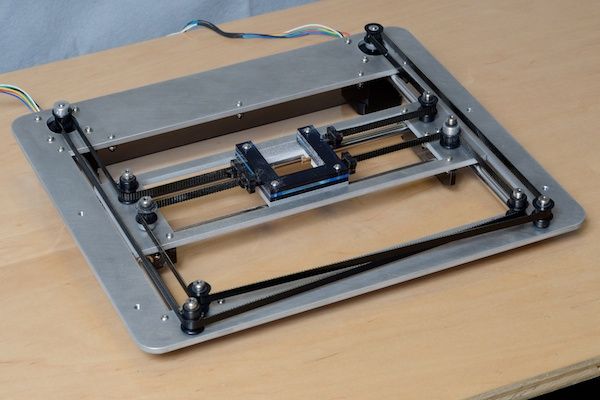
Among the known variations of kinematic systems based on belt drives, one of the most common is the single-loop H‑Bot. In it, the only belt is located in the form of the letter “H” and is driven by two motors ( fig. 1 ). A small number of moving elements in this scheme reduces inertia, which has a positive effect on positioning accuracy. It also increases due to the fact that when turning the motors by 1 step, the print head travels a linear distance equal to half a step. However, in this system, the unidirectional rotation of the motors required to move the print head along the X-axis results in multidirectional forces that cause the transverse guide to skew relative to the longitudinal ones.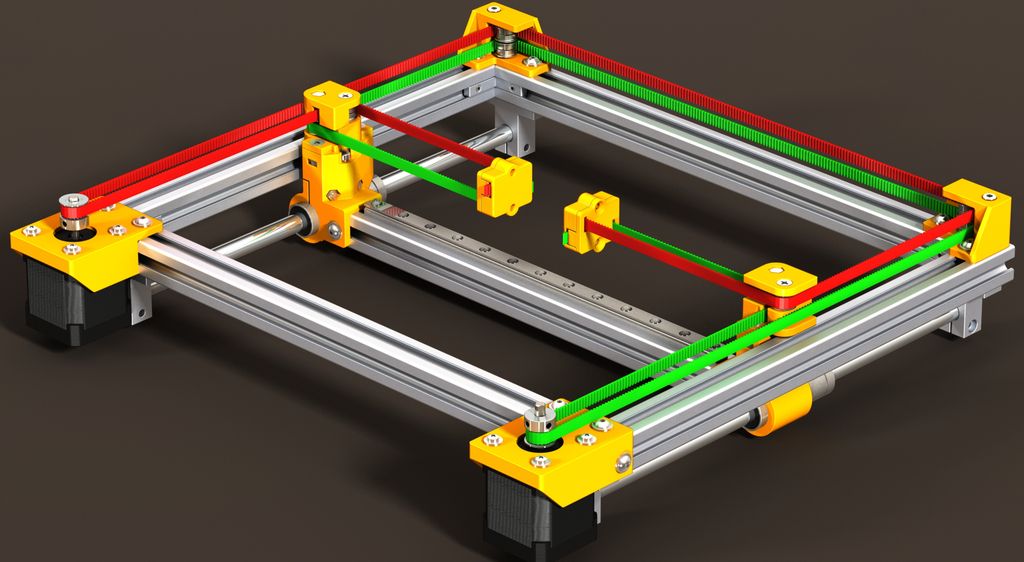 The non-perpendicularity of the guides leads to the appearance of a gross error in the shape of the final product - for example, an object with a rectangular section will take the form of a parallelogram. In addition, the fastenings of the transverse guide to the longitudinal ones suffer from the repeated cycle of skew rectification, and the system resource is reduced. nine0003
Fig. 1. H‑Bot kinematic movement system
The geometric perpendicularity of the guides is ensured by a two-loop kinematic scheme, such as the CoreXY scheme ( fig. 2 ). In it, the use of two drive belts balances the impact on moving elements, due to which their correct geometric arrangement is maintained. The system uses more bypass rollers than the H‑Bot system (2 more). However, in this scheme, it becomes necessary to ensure equal pre-tensioning of both circuits. In the event that one belt is tightened more than the other, with the unidirectional rotation of the motors, just as in the H-Bot scheme, a pair of forces appears on the transverse guide. The resulting moment of forces rotates the movable unit in the XY plane, which causes a violation of the perpendicularity of the guides and also leads to a positioning error and accumulated deformation of the elements of the movement system. To avoid cases of belt intersections, their contours are located in different planes - this leads to additional bending moments on the print head carriage. nine0003
Fig. 2. CoreXY Kinematic Movement System
Compared to H-Bot, the dual-loop movement system has less dynamic error caused by stretching of the belts during acceleration and deceleration of the print head: the presence of two parallel belt branches doubles the rigidity of this oscillatory system.
Another variant of the fixed engine kinematics is the Markforged kinematics ( fig. 3 ). This moving device has two belt circuits. The primary circuit belt is fixed on both sides of the carriage with a single bypass roller and performs the function of moving the head along the X axis.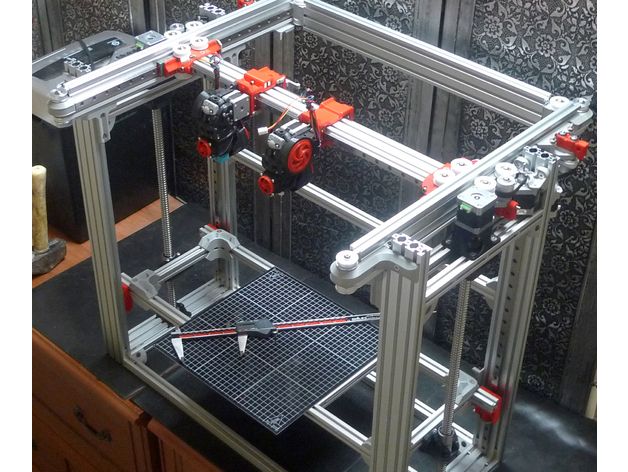
Fig. 3. Kinematic movement system Markforged
The same circuit is set in motion when moving along the Y axis, but in this case, the belt of the second circuit, fixed on the movable unit, is also driven. Despite its simplicity, the scheme combines the disadvantages of both previous schemes - it requires equal belt tension and, at the same time, regardless of the tension, it tends to rotate the movable unit during unidirectional rotation of the motors. This scheme is not widely used among manufacturers of additive plants. nine0003
Another kinematic system in which each motor is responsible for moving along its own axis is the Ultimaker system. In it, the print head is driven by a cross rail, which is fixed in the transverse blocks, and slides along the central longitudinal rail, fixed in the longitudinal blocks. This kinematic scheme has high structural rigidity and low inertia of the print head. The system also includes closed-type ring belts, which in theory should provide equal belt tension. These characteristics have a positive effect on positioning accuracy. Nevertheless, the scheme is sensitive to the initial mutual installation of the guides, the error of their relative position is reflected in the shape of the printed products, similar to the skew of the movable unit in previous systems. The disadvantages of the Ultimaker circuit include a complex implementation and high quality requirements for linear motion components. nine0003
Fig. 4. Ultimaker Kinematic Handling System
There are other belt driven motion systems that have become less common due to their greater complexity or more disadvantages.
In the production of its own 3D and 5D printers (Stereotech 320 and Stereotech 520 ( fig. 5, 6 ) Stereotech uses its own patented STE HeadMotion print head movement system ( fig. 6, 7 ).
Fig. 5. Stereotech 3D printers: Stereotech 520, Stereotech 320
Fig. 6. General view of the Stereotech 320 3D printer in a case without a top cover with a kinematic system STE HeadMotion
The print head movement system includes one transverse and two longitudinal rail guides.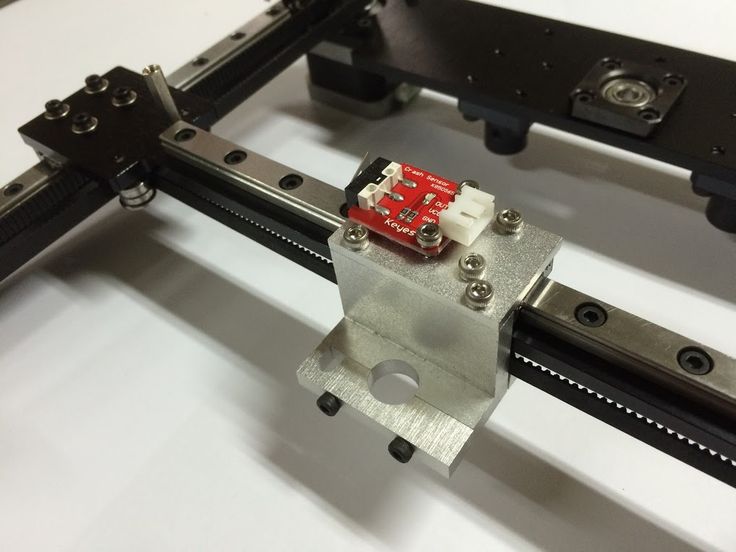 The longitudinal guides are rigidly fixed on the base in the direction of the Y axis, the transverse guide is located along the X axis and is connected to the longitudinal ones through the carriages. The print head moves with two drive belts, as in the CoreXY scheme, to increase the rigidity of the drive system and reduce the inertial error. The ends of the belts are fixed with the formation of two connected contours on the print head carriage. The symmetrical arrangement of the contours compensates for bending moments on the bearings and guides of the moving parts of the system. nine0003
To solve the problem of ensuring equal belt tension in the circuits, a tension equalization unit is included in the device. It is a lever with two rollers at the ends (each of which is part of a separate circuit), hinged on the base with the ability to rotate in the XY plane, and works on the principle of a swing. When a difference in tension forces appears in the circuits, the lever turns, the rollers move, and both circuits return to equilibrium. To dampen vibrations, dampers are installed at the ends of the lever ( fig. 7, 8 ).
Fig. Fig. 7. STE HeadMotion kinematic movement system with tension force equalization unit
Fig. 8. Calculation diagram of the tension force equalization unit
Two connected belt contours allow maintaining the perpendicularity of the transverse and longitudinal guides - and thus maintaining the correct trajectories of movement of the working body of the printer. At the same time, the movable unit with a transverse guide is made in the form of a single portal to increase the rigidity of the device, which also has a positive effect on positioning accuracy. nine0003
The motors are mounted on the base of the printer to reduce the mass of moving parts and reduce inertial moment. Their unidirectional or multidirectional movement causes the print head to move along the X or Y axis, respectively; turning each motor individually moves the head diagonally.