3D printer acetone bath
How To Easily Cold Acetone Vapor Smooth & Finish 3D Prints [Step by Step]
Acetone Polishing (Smoothing) of ABS and ASA – a step-by-step guide
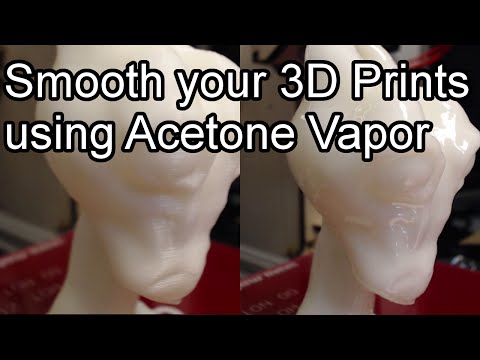
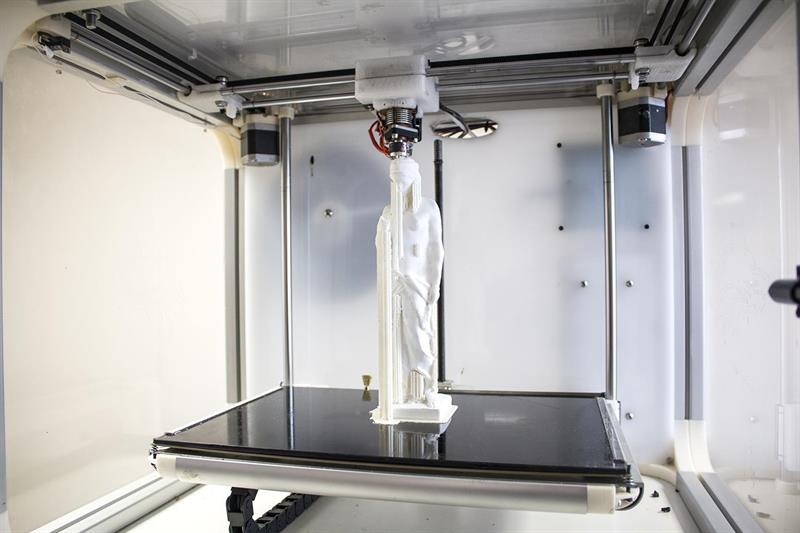
FDM (FFF) 3D printers often produce a final object that while being mechanically sound, tends not to have that ‘professional look’ that you or a customer want to see. You need a reliable, easy method of 3D print finishing.
That’s where the Cold Acetone Vapor Bath process steps in. Finishing 3D printed parts the easy (safe) way. Yes, this was actually 3D printed…
Can I acetone vapor bath my 3D prints?
All ABS 3D prints can be acetone smoothed. Filaments that can be polished using this process are: ABS, ASA, PMMA, HIPS and Polycarbonate.
Other filament types are either unaffected by acetone or are damaged by it. If you’re looking for other 3D printing post-processing techniques, check out our PLA polishing article for details on smoothing out 3D prints that can’t be acetone smoothed.
The following photograph is of a shower tray system consisting of a frame and different color removable trays before ABS Acetone Vapour Smoothing. The frame is made of Black ABS, and all trays are made in ABS of varying colors.
The following photograph show the same system after the ABS Vapour smoothing process.
Not only do the finished parts look better, they now have a higher resistance to water ingress, and they can often be stronger than their non-polished earlier selves once fully hardened.
This is definitely our preferred method when we’re asked how to finish 3D prints – there’s just no better way to easily smooth ABS prints.
SAFETY WARNING!
Before continuing further, please make sure you acquaint yourself with the safety regulations pertaining to acetone (propan-2-one) and its use. It is your responsibility to use this solvent safely.
Obvious things to note for safety are:
- Only use in a well-ventilated area
- NO NAKED IGNITION SOURCES – acetone is extremely volatile and the vapors are Highly Flammable
- *NEVER EVER* heat the acetone!! [See above]
- Avoid breathing the fumes
- Avoid skin contact
- Keep away from animals and children
- Be careful that you do not spill any liquid onto surfaces that might be damaged by acetone – most common household plastics are susceptible to some kind of damage from liquid acetone
The principle behind Vapor Polishing
You can acetone smooth ABS filament & ASA filament, both with acetone liquid or as vapor.
They dissolve readily in the liquid, and a concentrated atmosphere of the vapor will eventually have the same effect. It’s that ‘eventually’ part we are interested in (and not the acetone 3D print mess you’ll be left with if you leave it too long).
We want to melt the surface of the object just enough that the surface tension of the molten plastic smooths out any surface inconsistencies and then halt the process at that point before any structural damage occurs.
In some cases, it is possible to quickly dip an object into acetone liquid to get a polished surface, but this can be very messy and gives inconsistent results.
If you use the vapors instead you have much more control over the ABS smoothing and the final results. As the vapors can get to all exposed surfaces equally, there are fewer areas of uneven melting. There are also no run-off channels or drip marks induced into the surface of the object that direct exposure to acetone liquid may cause.
This is our clear ABS filament, acetone smoothed.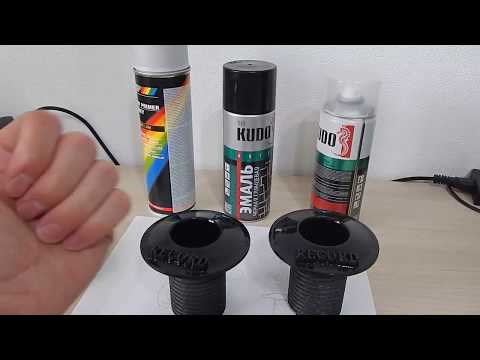
What you will need –
- A well-ventilated area to work that has no exposed ignition sources.
- Wear the appropriate PPE – Safety glasses/goggles, mask, gloves, etc…
- An acetone-proof container (a large glass vase or a tin) big enough to hold the parts you wish to polish – preferably with at least 30mm clearance in ALL directions around the object to be polished – top, bottom, and sides.
- A loose-fitting lid, also acetone-proof. If your lower container is not transparent, you may wish to use a sheet of glass as a lid – this removes the need to keep removing the lid in order to see how the polishing is progressing (and not letting the vapours escape or dust get in).
- A flat, non-porous plate such as glass or metal, to raise the object being polished above any liquid acetone in the bottom of the container – This really needs to be at least 10mm above the surface of any liquid acetone in the container and much larger than the object to be polished as this reduces the chances of liquid acetone creeping up the sides and onto the object itself.
- Some sheets of plastic-free kitchen roll to use as a ‘wick’ for the liquid acetone.
- Somewhere dust-free to allow the surface of the polished object(s) to harden.
- A TIMER! Seriously.
You will walk away, forget it, only to return later to find that amazing print that you were once so proud of has now turned into a hideous misshapen lump of plastic, or at worst some kind of acetone ABS mess.
It might not happen this time or the next, but it will.
Getting started
Make sure your container is free from contaminants (this will be your acetone bath), then place a few sheets of the kitchen roll up the side and along the bottom of the container. This will allow the liquid acetone to wick up the kitchen roll, helping to produce a strong concentration of vapor at all levels within the container.
Find somewhere to work that has surfaces and materials that will not be damaged by acetone or the fumes.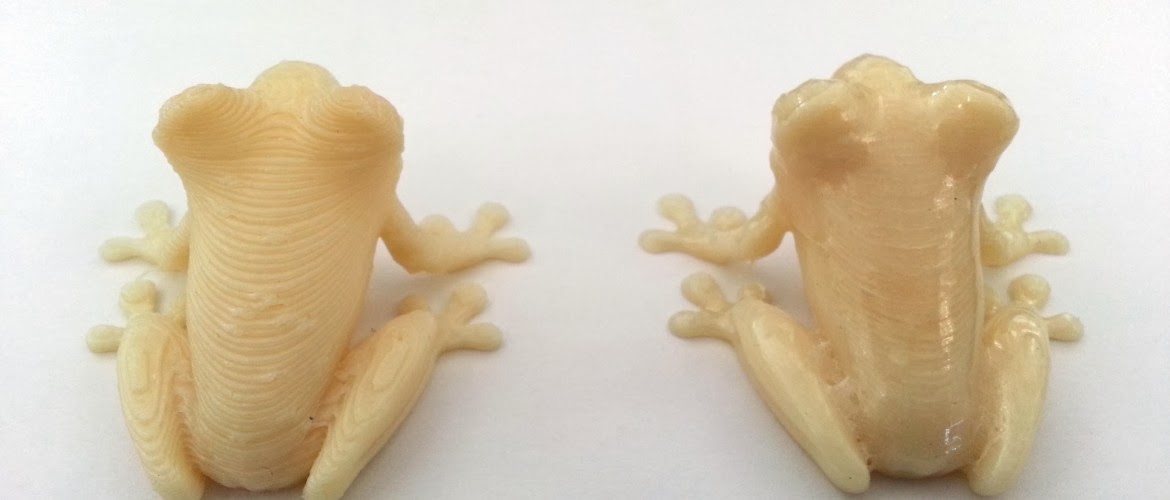 Acetone is a superbly-powerful solvent – you don’t want it dissolving things that you’d rather keep. It is a low-density liquid that has very little surface tension, so it splashes and ‘wets’ surfaces very easily.
To hold the kitchen roll sheets in position, place your metal support (plinth) onto them. Make sure that you arrange the kitchen roll in such a way that when it gets wet with liquid acetone it cannot fall down onto your printed objects, as that will destroy any chances of achieving an acceptable finish.
The following photograph shows the setup used in the acetone bath ABS of the soap trays seen above.
The soap dish is sitting on top of a plinth made from a small piece of glass stood on three 22mm diameter copper plumbing joints – an arrangement that stops any chance of liquid acetone reaching the dish via capillary action (or surface-wetting).
Things to consider about the process of 3D printing acetone finishing itself
Not all filaments are the same, even from the same supplier.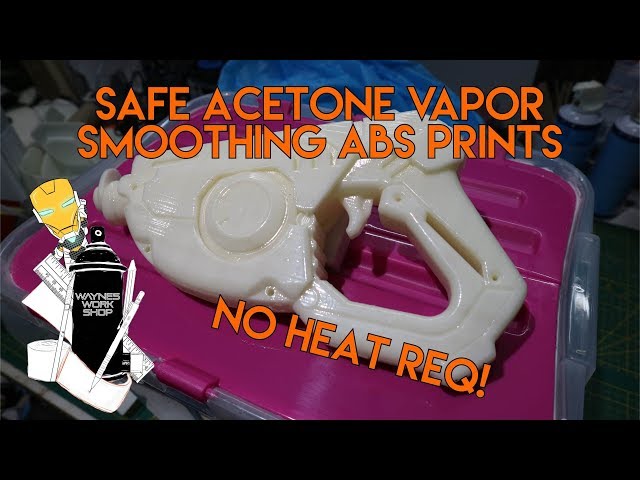 For instance, due to secondary effects from the pigments that go to make up the colors of ABS filaments, different colors polish at different rates. This means you will need to monitor the polishing of different colored objects so that you can remove them at the correct time.
The polishing process not only softens the surface of the object, the fumes also penetrate into the body of the object. Depending on the period of exposure, you will need to ‘air’ the object for a period of time that is commensurate with the time that the object was exposed to acetone vapour.
Usually, this takes a few days. However, in some cases, the full mechanical strength of the object may not be realized until a significant time has passed – for high-density objects, this can take weeks, or even longer!
The polishing process continues for a while after you remove the object from the container – usually for about ten minutes. So don’t be tempted to leave it in too long.
The following photograph shows what happens to a part when exposed to the fumes for an extended period.
The hole in the center at the bottom is supposed to be round, and the lower edges are all supposed to be straight.
The ambient temperature affects the speed of the process – you are evaporating a volatile liquid after all.
- Too cold and it can take ages.
- Too warm, and the process goes too fast.
- Too hot, and you may be looking for a new place to work/eyebrows, so NEVER apply heat.
Finally – you need to have somewhere totally dust-free to place the polished object while the surface hardens. If you don’t, any dust that falls onto the surface will become embedded in it. Permanently.
Polishing
This is the really easy part.
- Without getting any on your plinth, pour the acetone over the kitchen roll sheets you placed up the side of the container. You need to have enough acetone to cover the bottom of the polishing container to a depth of a millimeter or two.
- Ensure that there is no liquid acetone present on your plinth.
- Make sure that you have a fool-proof way of removing the object from the container after polishing without the need to touch it, or you will leave marks all over the surface where you make contact.
- Quickly place the object in the center of the plinth – try not to touch it again – you have just a few seconds to adjust the final position. The polishing process has already started – it is that quick! You don’t really want to leave fingerprint impressions on your work, do you?
- Place the lid on the container and start your countdown timer. I personally set the timer to 15-minute intervals for finely-detailed objects, and 30 for large solid objects.
Depending on how rough the surfaces of the object are, and how polished you want the object to be, the process can take from around 15 minutes to several hours.
There is ALWAYS a trade-off between the required surface finish and the loss of fine details. Only you can decide what is acceptable.
Once you are satisfied that the polishing is almost complete, carefully remove the object to a totally dust-free environment that has good ventilation.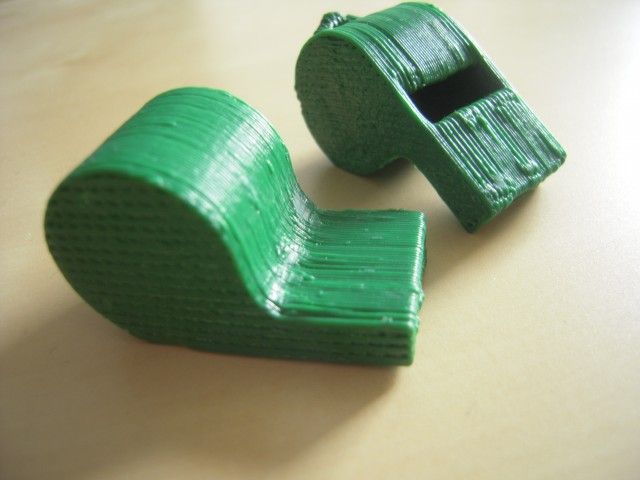 This stops most of the ever-present dust particles that are suspended in the air from falling onto the semi-molten surface of the object.
Note: The reason you remove the object from the container at the point just before you get the surface finish you require as the polishing process continues for a short while even after the object has been exposed to fresh air.
You can always put it back in the chamber later if you are not satisfied, but once the process has gone too far, the damage is irreversible.
After about 30 minutes, a ‘skin’ will have formed on the polished object that will stop dust particles from becoming embedded in the surface of the object.
Remove the object from your dust-free chamber without touching it, and put it somewhere that has good ventilation to allow the acetone to further leach out of the object. The object at this point has little to no structural integrity so be careful how you do this.
Depending on the solidity and size of the object, the process of removing the acetone can take from a few hours to many weeks before the full strength of the object has been regained.
Once you are certain that a good skin has formed on the object, you can speed up this process of solvent evaporation considerably by using a fan continuously blow air across the surface of the object – smoothing 3D printed parts effortlessly.
Summary
To recap, the filaments that can be polished using this process are: ABS, ASA, PMMA, HIPS and Polycarbonate.
Other filament types are either unaffected by acetone or are damaged by it.
Acetone vapor baths & other ways to remove layer lines
As a low-cost 3D printing material, ABS is one of the most popular filaments among FDM 3D printer users, beginners and experts alike. Although it has its disadvantages — such as a strong smell when printing and a dependence on heated print beds — it creates durable parts that are resistant to fairly high temperatures.
For many casual 3D printing users, the decision often comes down to PLA, PETG, or ABS filament. PLA has a low melting point and environmental credentials, while PETG is highly impact-resistant. But ABS has one unique advantage over its low-cost competitors: it can be easily dissolved with acetone, which means printed objects can be post-processed to give them an exceptionally smooth surface. While other thermoplastics can be dissolved with other solvents, no combination is quite as effective as acetone on ABS.
That being said, smoothing 3D printed parts made of ABS requires a certain level of skill. Acetone is highly flammable and an irritant to the skin and eyes, so it must be handled with extreme caution. Fortunately, this guide explains exactly how you can safely carry out ABS acetone smoothing, as well as part smoothing via other post-processing methods like sanding and polishing.
One of the major disadvantages of FDM 3D printing is that it produces visible layer lines — ridges on the surface of a part — as a result of moving from one layer to the next along the Z axis.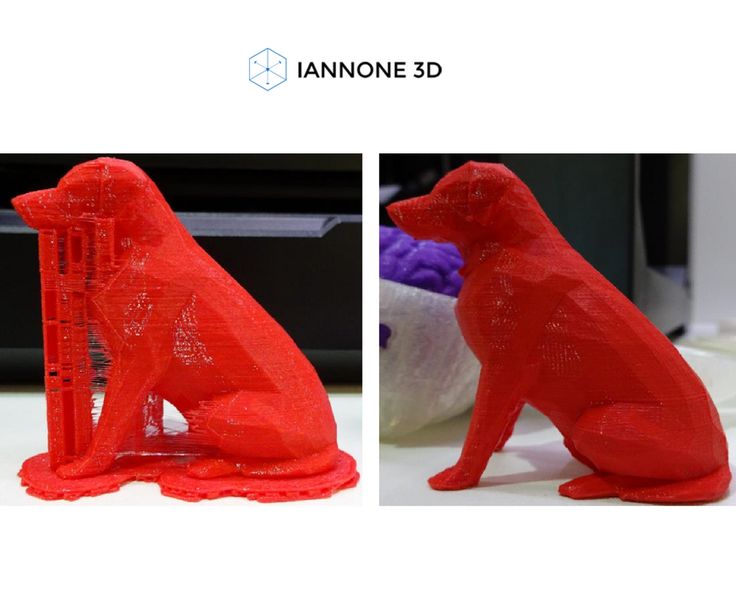 Layer lines are especially pronounced when using a greater layer height (lower Z-axis resolution) and when printing curved parts.
Smoothing your ABS parts is a way to eliminate the appearance of visible layer lines and change the surface texture of the part from matte to glossy. The process is generally carried out for cosmetic reasons, but it can also have functional benefits: smooth, frictionless parts may be required for mechanical reasons or to facilitate the assembly of multiple components.
You should smooth your ABS prints if you want to maximize the aesthetic quality. However, you should exercise caution when smoothing if the part needs to meet strict dimensional tolerances; this is because smoothing takes away a small amount of surface material and consequently alters the dimensions of the part.
Recommended reading: ABS print temperature considerations: Nozzle, bed, enclosure
If you’re looking to eliminate the appearance of layer lines on your ABS parts, your best bet is to invest in some acetone. This section explains how acetone smoothing works and examines four common methods of applying the solvent to printed parts.
Acetone is a solvent found in nail polish remover
How does smoothing with acetone work?
Acrylonitrile butadiene styrene (ABS) is a thermoplastic polymer made by polymerizing styrene and acrylonitrile in the presence of polybutadiene. As with all polymers, ABS is resistant to certain substances and vulnerable to others.
When it comes to smoothing, the most relevant fact about the chemical makeup of ABS is its solubility in esters, chloroform, ethylene dichloride, and various ketones, of which acetone is one. Substances like chloroform and ethylene dichloride are toxic and require extensive safety precautions, but acetone is milder and much easier to handle in non-controlled environments. It is an active ingredient in nail polish remover, for instance.
So, chemically speaking, why does acetone dissolve ABS? The short answer is that because ABS is soluble in ketones, the presence of acetone causes the ABS (the solute) to dissolve into the acetone (the solvent), forming a sort of soup or slurry (the solution) on the surface of the plastic.
This means that when you apply a small amount of acetone to a 3D printed ABS part, the surface of the part will dissolve. When this is done in a controlled manner, it is possible to dissolve just enough ABS to eliminate imperfections like layer lines, leaving behind a smoother (and fractionally smaller) version of the part. Some researchers have even suggested that acetone smoothing can improve the strength of ABS parts by increasing interlayer adhesion.[1]
So what is the best way to smooth ABS with acetone? There are different methods for applying acetone to ABS parts in a controlled manner, and we will explore four of them here, noting which ones we recommend and which we don’t.
Safety measures
Acetone is a highly flammable substance that can irritate the skin and eyes, so it must be handled with extreme care. The following safety precautions should be followed with all acetone application methods:
Always store acetone in a cool, well-ventilated area away from direct light, fire, and any other potential ignition sources
Only open your acetone container in a well-ventilated area, wearing a protective mask to avoid inhalation of fumes
It is recommended to wear eye protection and non-nitrile gloves to prevent potential eye and skin irritation
Method 1: Brush application
The simplest way to achieve a fairly smooth finish on ABS parts is to apply liquid acetone to a 3D printed part with a brush. Deposit a small amount of liquid acetone into a shallow container, then dip the brush into it and apply a very thin coating over the surface of the part.
This method is not highly recommended as it uses a large amount of acetone and produces uneven results: the surface may appear streaked or unevenly smoothed. By applying acetone with a brush, it is also easy to apply too much of the solvent, potentially causing permanent deformation to the part or fully dissolving thin walls.
Method 2: Acetone bath
Another way to achieve a smooth surface finish on ABS parts is to create an acetone bath. This method involves fully submerging the part in a polypropylene (PP) container of liquid acetone for a short period of time, allowing the entire surface of the ABS part to come into contact with the solvent.
This method is not recommended as it requires a very large amount of acetone and can excessively dissolve the ABS part or cause it to warp and twist.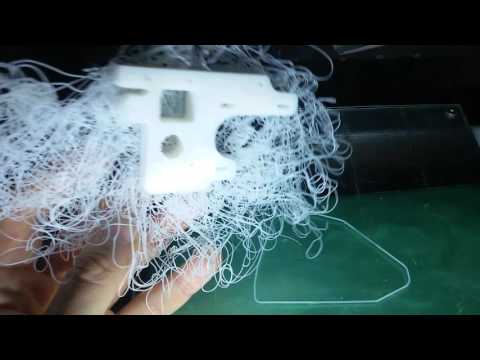 Furthermore, removing the part from the acetone requires one of two difficult procedures: either removing the part from the bath (and therefore touching it, potentially causing surface deformations) or draining the liquid into a container underneath (requiring a more complex, multi-container setup).
Method 3: Acetone vapor smoothing
A much more effective means of ABS smoothing is the creation of an acetone steam bath or vapor bath. This method does not involve the direct application of liquid acetone to the ABS part, but instead allows acetone fumes to slowly penetrate the surface of the part. This can be achieved by keeping the part and the acetone within a container.
This is the most highly recommended method, both for its safety and effectiveness, and we will explain how to do it with step-by-step instructions.
Create a smoothing box
The vapor smoothing method requires a partially enclosed container to keep the acetone fumes close to the printed part and prevent them from escaping into the room (though the container should not be airtight).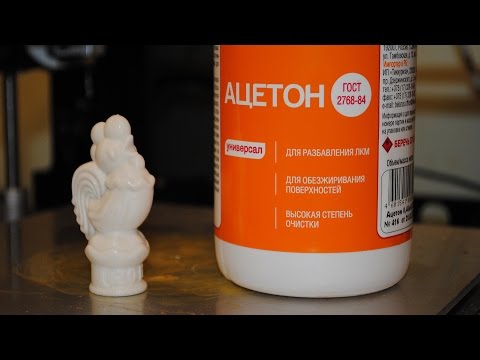
For small ABS parts, you could use a glass container such as a glass jar. For larger parts, or to smooth several parts at once, it is better to use a transparent polypropylene (PP) storage container; these are cheap, available in various sizes, and will not dissolve upon contact with the acetone.
A PP container can function as a smoothing box for vapor smoothing
Place a raised platform in the box
Your ABS parts should not touch the bottom of the smoothing box. You will therefore need a small raised platform on which to place your ABS parts. This platform should not be made from a material that is soluble in acetone, or it will dissolve. Metal works best, and a regular plate coated in aluminum foil is one option.
Soak tissue paper in acetone
Instead of pouring liquid acetone directly into the smoothing box, you need only soak some tissue or paper towels in the solvent before adding the paper to the edges of the smoothing box, either by pressing them firmly against the walls of the container or attaching them with magnets (one inside and one outside the box).
Leave at least a small window of uncovered wall surface so you can see the part while it is being smoothed.
Close up the smoothing box
The vapor smoothing will only work if the smoothing box is closed off, as this prevents the acetone fumes from escaping. If you are using a jar or a storage container with a snap-on lid, lay the lid gently on top of the container without sealing it, and make a few small holes in the lid.
It is critical that the smoothing box is not fully sealed, as this can cause a dangerous amount of pressure buildup.
Let the vapor smoothing take place
The ideal amount of vapor smoothing could take between 10 minutes and an hour. We therefore recommend observing the process through the transparent smoothing box, at least until you have an idea of how long you will need for future prints.
Once the desired smoothness has been attained, you can remove the lid from the box and safely dispose of the acetone-soaked paper. Leave the parts untouched for as long as possible, as their surface will still be soft from the acetone.
Add heat and air circulation (optional)
Once you are comfortable with the basic vapor smoothing process, you can improve its efficacy in two ways: by placing the smoothing box on a warm (not hot) surface or by putting a small fan within the box. However, be careful with electronics, as an errant spark could ignite the acetone and cause a fire.
Method 4: Automated acetone vapor smoothing
A much safer and more consistent method of vapor smoothing can be carried out when using a dedicated post-processing machine such as the Zortrax Apoller. Such machines distribute the solvent fumes evenly while maintaining constant air circulation and gentle heat, resulting in the best possible surface finish and meeting strict safety requirements.
Unfortunately, these machines are much more expensive than the DIY method outlined above.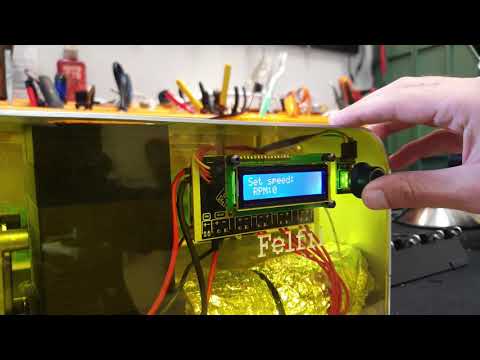 Also note that the popular Polymaker Polysher device will not work with ABS and acetone, as it is only compatible with the company’s proprietary smoothable filaments and solvents.
Advantages | Disadvantages | |
Brushing | Requires minimal equipment | Uneven application Uses more acetone than necessary Easy to damage printed parts |
Bath | Even application | Uses more acetone than necessary |
Vapor smoothing | Even application | Hard to maintain even smoothing with larger parts |
Auto vapor smoothing | Most even application | Expensive |
Sanding
The most common method for smoothing 3D printed parts, sanding, does not require the use of chemicals.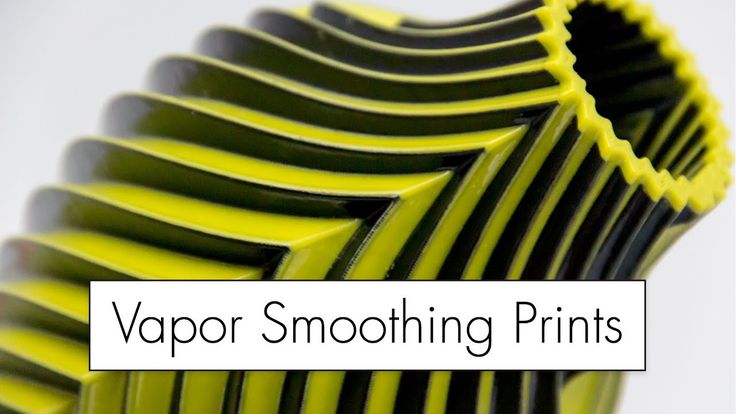 Sandpaper is applied manually to the part, and its rough surface removes a small amount of material from the part surface.
When sanding ABS parts, start with coarse sandpaper (80-grit, for example), then gradually move to finer grit (120 and 240). Finally, use a very fine-grit sandpaper (1000) with water to make the parts as smooth as possible. Try to apply even coverage right across the surface of the part. Note that while powered sanders can rapidly speed up the sanding process, the heat generated by these machines can adversely affect printed parts. If you have time, we recommend manually sanding ABS parts.
Sanding is safe and easy to do, but it can be difficult to reach deep crevices in the part and to apply an even amount of pressure over the entire surface.
Sandpaper is a safe and simple alternative to acetone smoothing
Polishing
If you don’t want to deal with a strong solvent like acetone, it is possible to create a high-shine finish for your ABS parts by applying a liquid polish (Brasso, for example) with a piece of cloth.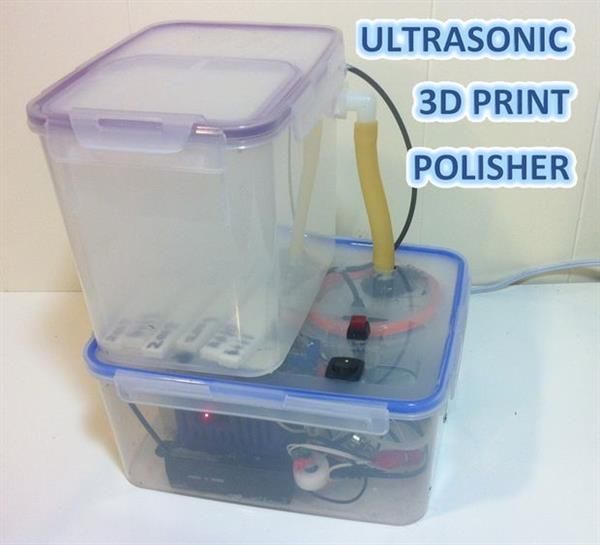 This should be done after sanding, when the surface of the parts is already fairly smooth.
Apply the polish-soaked cloth firmly, making circular motions over the surface of the part until it is fully glossy.
Methods to avoid
Some smoothing methods that work for other thermoplastic filaments won’t work with ABS. For example, isopropyl alcohol (IPA) works just like acetone when printing PVB, but won’t cut through the surface of your ABS parts. Another common smoothing agent is d-lemonene, but this only works for HIPS 3D printed parts. We would also advise against using very strong chemicals like chloroform as a solvent, since acetone is less toxic and just as effective.[2]
Recommended reading: Smoothing PLA 3D prints with sandpaper, solvents, and more
After support removal, smoothing is possibly the most important post-processing technique for FDM 3D printed parts. Smoothing removes unsightly layer lines, giving printed parts the appearance of high-quality injection moldings, and the process can be carried out on a small budget.
Of all common 3D printing materials, ABS is perhaps the best suited to smoothing. Its solubility in acetone provides printer users with an easy route to smooth and glossy parts, making it a highly suitable filament for cosmetic parts such as display prototypes, models, and figurines. In fact, smoothed ABS parts more closely resemble molded or stereolithography parts than as-printed FDM parts.
However, as we have mentioned, acetone smoothing should be carried out with caution. Although less dangerous than other smoothing agents like chloroform, acetone poses risks to human safety, the most significant of which are its flammability and its potential to irritate the skin and eyes. Newcomers to the acetone smoothing process should familiarize themselves with the necessary precautions, investing in a mask and gloves and only carrying out the process in a well-ventilated area.
If these safety precautions are followed, printer users will find acetone smoothing to be a highly effective means of improving the visual quality of their ABS parts.
[1] Gao H, Kaweesa DV, Moore J, Meisel NA. Investigating the impact of acetone vapor smoothing on the strength and elongation of printed ABS parts. Jom. 2017 Mar;69(3):580-5.
[2] Joshi DR, Adhikari N. An overview on common organic solvents and their toxicity. J. Pharm. Res. Int. 2019 Jun;28(3):1-8.
Cold acetone bath, simple example (lots of photos)
Miscellaneous
Everyone knows the property of acetone to dissolve acrylonitrile butadiene styrene, in other words, ABS. Many of the people who print use acetone every day - use ABS juice as an adhesive or glue to smooth out printed pieces. In this regard, the idea came up to write an article about such a well-known thing as an acetone bath, since such a process has a lot of nuances. At the same time, I perfectly understand that there is no person who would know them all. nine0003
In this article I will tell you how I make an acetone bath, perhaps my experience will be useful to someone. Or maybe in the comments there will be valuable advice and comments from 3D Today users.
We have two types of acetone baths in our office - one is softer, the other is nastier. We will talk about the one that is softer, since the “evil” one was bought from a kickstarter, and all the nuances of using it corny rest on the layout of this device.
"Soft" - homemade cold acetone bath made from a large container - 40 cm long, 30 cm wide and 20 cm high. Container material - PET, inert to acetone. nine0003
A newly printed elven dagger from The Hobbit was chosen as a test subject (which was worn by Tauriel, the one “that was not in the book” :)
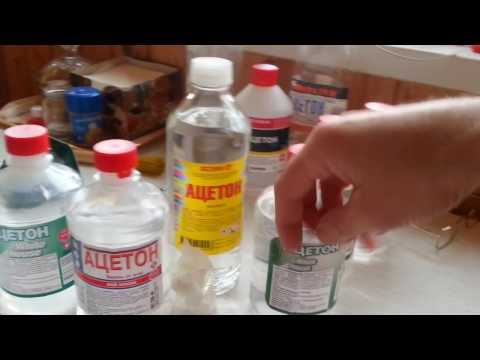
To smooth this magnificent blade we will of course need acetone, paper towels, any stands and box lid.
Printed in brown REC ABS, cut into 4 pieces. They were printed on Picaso 3D Designer and MZ3D-256. Subsequently, the parts are glued together with ABS juise.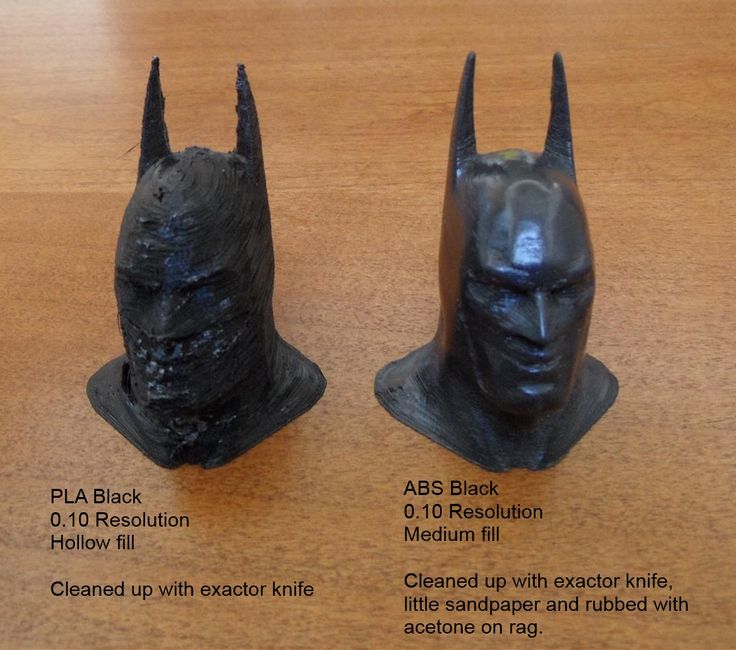 nine0003
First of all, without any imagination, we put paper towels on the bottom of the container, put stands, and place the object to be processed on them.
The next step: pour acetone in such a way as to pour as much area of paper towels as possible, then it will evaporate faster, which means it will be more efficient to process the part.
Close the lid and wait about 30 minutes.
Carefully, over the edge, take out the blade and hang it to dry (drying will take about a day).
There is an important nuance here: you need to hang the part so that it does not bend. nine0003
Acetone penetrates the very structure of the product, making it soft. Be careful and, most importantly, do not overexpose the object in pairs. It is better to place the ABS plastic product in the bath several times than to overdo it once.
Also note that after the first treatment, the product may seem unfinished to you - give it time, the acetone remaining in the plastic can still bring the model to the state you need when evaporating.
After the second acetone bath, the dagger was ready for filling. It must be understood that the bath is often the beginning of processing, and not its completion. nine0003
Perhaps that's all with a cold acetone bath, then other tools helped me.
Small things I smoothed with a latex putty, which was fixed on the dagger with a solution of ABS in acetone.
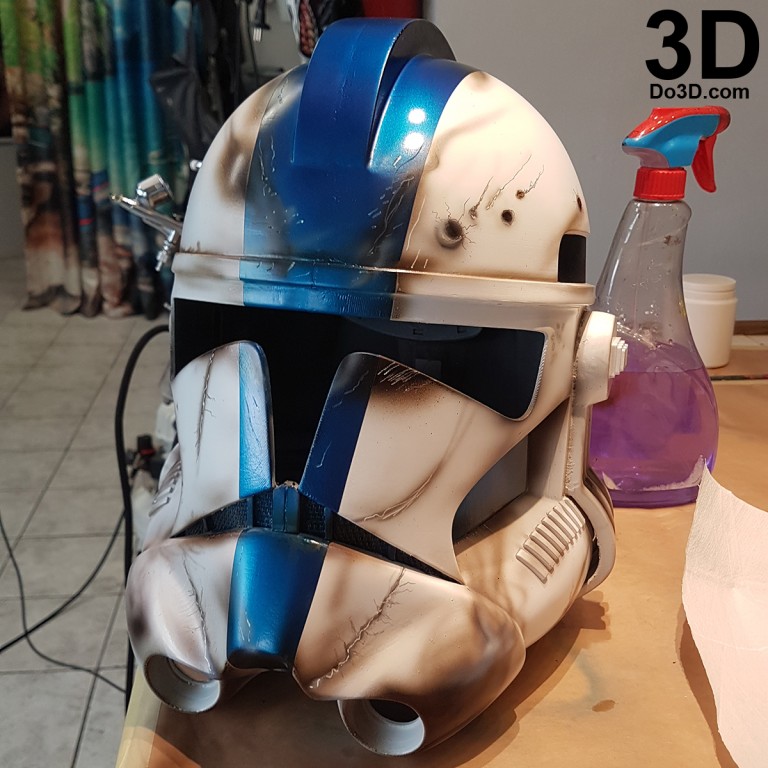
Next - painting, but this is a topic for a separate post and, in my opinion, even for another resource. In short, in this case, MTN 94 and Molotow paints were used, from the technique - simple spraying and working with masking tape, as well as the dry brush technique.
As a result of my mini-tutorial, I will say that a cold acetone bath must be used very carefully, and sometimes it is better to completely replace it with sanding and brushing with a solution of ABS, acetone or dichloromethane. It is better to use large containers with convenient lids and run the part several times.
Thank you for your attention. Happy New Year and Happy Printing!
Subscribe to the author
Subscribe
Don't want
57
Acetone bath V-1.0
3D printing
UP mini 2
Many people involved in #3d-printing are concerned about post-processing. If you already have a 3d printer but haven't yet mastered the techniques to bring a piece or sculpture to 'finish', then this post is for you. Today, the method of steaming #ABS plastic with acetone vapor seems to be the most efficient and fastest. Therefore, I decided to write a post dedicated to the creation of 'Acetone Bath-v1.0'. nine0003
We will need:
1. sealed container (polypropylene)
2. electric motor
3. four small bolts with washers and nuts.
4. silicone sealant.
5. Several parts printed on a 3D printer with plastic (PLA) inert to acetone.
6. old adapter for whatever to supply power to the fan.
7. 3D printer:) we have #3dup mini 2 purchased thanks to Alexander Kornveits and Evgeny Krivosheev Assembly: We drill holes in the container according to the size of the printed mount. nine0003
Using bolts and sealant, attach the printed motor housing to the side of the container.
We insert the motor and solder the adapter wire to the plus and minus of the motor, inside we put a fan on the limit switch.
#Acetone bath is ready! (SEE DESCRIPTIONS TO PHOTOGRAPHS!)
Processing: Put the container on a thermal pad or on a pad #3dprinter preheated to 80 degrees. We place the workpiece in the container (preferably on a metal surface). We put a small cloth in a container and pour a small amount of acetone (5-10g) on it. We plug the adapter into a power outlet, and the fan starts to disperse the vapors through the container. We set the timer for 40-60 minutes (Depending on the size). If after 20 minutes perspiration forms on the walls and lid of the container, then everything is fine. After 40 minutes, carefully remove the metal surface together with the part from the container. It is best to do this outside or in a very well ventilated area, because. Acetone is incredibly volatile when heated! I only open the container outside and don't breathe for the first 10 seconds. Acetone evaporates very quickly. Next, the parts must be allowed to dry. Do not touch the part with your hands for the first 2 hours, otherwise traces will remain, because. the surface will be very soft. And voila, the magic happened. If everything is done correctly, you get a glossy, perfectly smooth surface. The part also acquires additional strength and presentation. nine0003
Good luck and may the magic be with you!
P.S. Who needs ready-made #3d-models of the case and fan, write in a personal message and I will send it in #STL format.
Subscribe to the author
Subscribe
Don't want
37
Article comments
More interesting articles
21
Follow author
Follow
Don't want to
The use of 3D printers in construction is becoming commonplace.