3D printed robot vacuum
STL file robot vacuum cleaner・Design to download and 3D print・Cults
moulinex lm233 mixer pinion
€0.50
soporte llaves
€0.62
motopercha
€0.62
hunting key hanger
€0.50
penis weights
€0.50
pigeon and cats skewers
€0.50
6mm fitting
€0.50
horse watch
€0.90
Best 3D printer files of the Gadget category
Interchangeable Iphone X Case
€1.22
Bigtendo
Free
COASTER DESIGN OLYMPIC PARIS 2024
€0. 50
Audi RS6 2003
€14.92
Micro Quad fpv Racer 100mm Brushless 1S 0703 20.000kv
Free
Single hand Joy-Con adapter
Free
The "Is this battery dead?" box
€2.36
GoPro cameras
Free
Best sellers of the category Gadget
Italian hand
€1
Brush rinse cleaner
€2.27
G17- DD17 Rails Frame
€7.50
TROY'S 3D PRINTED RC DC-6/DC-7 AIRLINER
€61.27
ELEPHANT PIGGY BANK - NO PAINTING REQUIRED
€5
F18 SUPER HORNET - 50 MM EDF JET [RC PLANE]
€11. 78
78
Mechanical Spinning Top Dice Box
€3.72
App to create switchable business cards
€3.50
Program to Create Christmas balls and other lithophany
€3.50
JEEP WRANGLER PEN HOLDER - 3-IN-1
€1.81
Bambu AMS Colour 2 Tier Stand (for 2 AMS Units 1 Above 1 Below)
€2.29
Pringles drawer
€1.50 -50% €0.75
App for Cookie Cutters
€3.50
G26 frame DD26 - Super enforced
€7
App to create dual text illusion
€3. 50
50
ENGINE CYLINDER BLOCK - WALL KEY HANGER
€1.81
Would you like to support Cults?
You like Cults and you want to help us continue the adventure independently? Please note that we are a small team of 3 people, therefore it is very simple to support us to maintain the activity and create future developments. Here are 4 solutions accessible to all:
ADVERTISING: Disable your AdBlock banner blocker and click on our banner ads.
AFFILIATION: Make your purchases online by clicking on our affiliate links here Amazon.
DONATE: If you want, you can make a donation via PayPal.
WORD OF MOUTH: Invite your friends to come, discover the platform and the magnificent 3D files shared by the community!
Build Yourself a Sophisticated, 3D Printed Robot Vacuum - 3DPrint.
 com
comHigh on the list of thankless household tasks like mowing the lawn, doing the dishes, and taking care of laundry chores is vacuuming floors. The monotonous and time-consuming activity of sucking up all the nasty detritus that collects on floors has inspired products like the Roomba, a not-very-inexpensive solution to the problem.
Jake Lee
Enter Jake Lee.
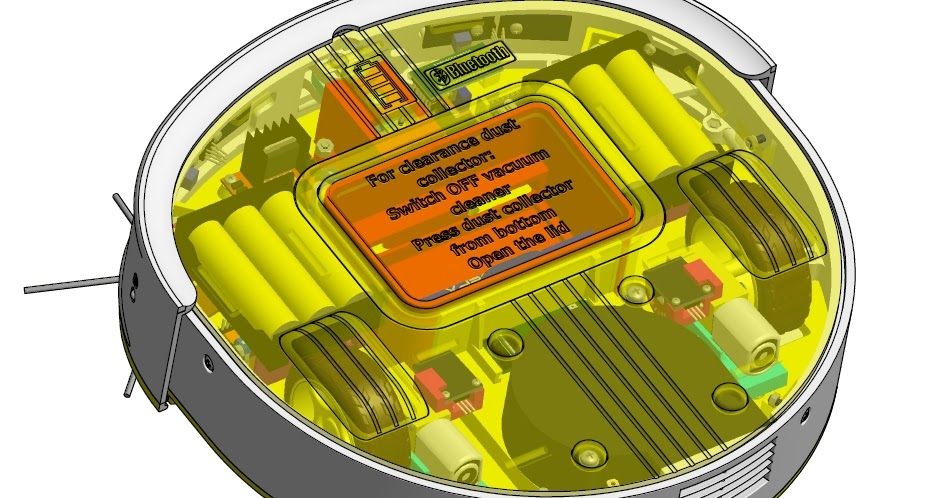
Lee is a product and industrial designer from Taiwan, and at age 36, he’s about to welcome the birth of a son, hence the name of his cleaning robot project. Lee says his son’s nickname, “Panda,” provided him a ready name for this interesting, 3D printed vacuum project, Panda – The Ultimate Cleaning Robot.
He says it’s an an improved version of a previous attempt he made at designing and building a cleaning robot, and this one features more robust construction, air suction, a sweeper, and roller brush.
The robot is able to randomly select a direction to move, and then it’s capable of detecting obstacles and sudden dropoffs. And don’t think taking on this project is a weekend chore as it required Lee nearly a full month to draft the mechanical layout, plan the electrical system, and square away the software.
A previous version of the Panda
A couple of years ago, Lee had built a previous attempt, but due to its very small footprint and the requirement to have a connected power source such as PC to make it run, he wanted to take another shot at building something more autonomous.
This latest version features a list of 3D printed parts such as a top and bottom housing, a mid housing, a pair of battery covers, a gear box cover, and a dust chamber. Add in a couple of 135 RPM gear motors to drive the wheels, a 1000 RPM motor to drive the roller and sweeper, a DC 3V motor for the vacuuming tasks and driving the fan blade, and an UNO board and eight batteries, and you have a rather complex device indeed.
Lee says he designed the robot to fit within the dimensions of his MakerBot’s build area and used PRO_E to take on the 3D modeling tasks.
He says that it took “an enormous amount of time to complete this project” but adds that he was pleased with the result. You can check out his highly detailed Instructable here.
Will you try building your own 3D printed robot vacuum cleaning following Jake Lee’s design? Let us know in the 3D Printed Robot Vacuum forum thread on 3DPB.com.
Stay up-to-date on all the latest news from the 3D printing industry and receive information and offers from third party vendors.
Tagged with: 3d printed products • 3d printed vacuum • 3d printed vacuum cleaner • instructables • vacuum cleaner
Please enable JavaScript to view the comments powered by Disqus.
Do-it-yourself robot vacuum cleaner / Sudo Null IT News
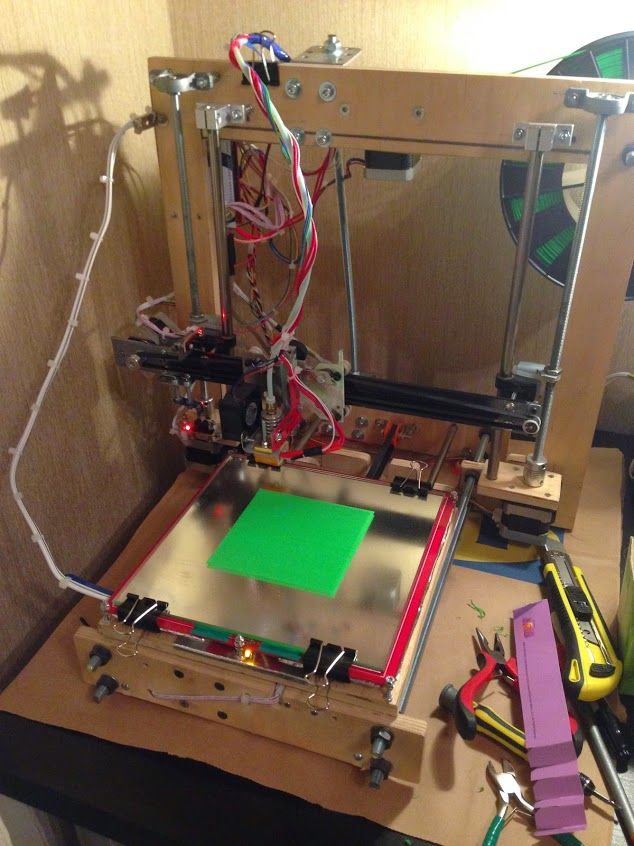
Just as the appetite wakes up while eating, the desire to create grows with the number of implemented projects. And the consistent use of learned technologies increases interest and quality. This story began with the fact that I assembled a 3D printer 3D MC3 Master v1.1 and made movable ears with a reaction to sound.
But then I wanted to not only create something entertaining, but also useful. Therefore, I began work on creating my own vacuum cleaner robot and I call on the entire Habra community to connect and help somewhere with advice, and somewhere with logic and experience. nine0004
Well, since I already have a 3D printer, I will print as many parts as possible myself. And I successfully found the Arduino Mega 2560 controller and actuators on the MASTER KIT website. But we will return to the iron later, but first we need to deal with the logic of the movement and actions of the vacuum cleaner robot.
Empirically (not mine), the rules for creating robotic vacuum cleaners were established:
1. The robot must be round, low cylinder.
2. The wheels must be in diameter so that it can turn on the spot. nine0003 3. Steering wheel does not need
motor 4. The main thing is that the robot can collect garbage inside itself
5. It is impossible without a contact bumper, it must cover at least half of the perimeter of the robot
6. The center of gravity of the robot should be near the wheels, ideally coincide with them - for better traction.
7. The robot must be charged from the charging station without removing the batteries
8. The bin should be easy to remove.
Movement algorithm
There are two main ways to move robotic vacuum cleaners, and so far none of the methods has proven to be completely superior. The first is to move in an unwinding spiral. The second method is to move in zigzags.
This does not take into account the construction of a map of the premises from images, and all movement occurs solely on the basis of sensor readings. The next thing to consider is overcoming and bypassing obstacles. For this, it is best to use bumpers and contact sensors. Because if there is a thin leg of a chair along the route, then the rays of several sensors can pass by. In a collision with a large bumper, the controller understands which side the obstacle is on and goes around it. nine0004
Cleaning
If an ordinary vacuum cleaner takes its toll due to a powerful pump and strong suction power, then it is impossible to achieve the same power on a small self-powered vacuum cleaner. Experience has shown that the combination of a small brush and a suction turbine is most effective. In addition, since the device is a washer, in order to pick up debris from the corners, two rotating brushes are placed in front of the device, throwing debris to the main large brush. nine0004
Driving force
The best speed of movement will be 25-35 cm per second. It's not too fast to put everything together and not too slow to give the battery enough space to get anywhere. The most commonly used are spring-loaded gearboxes with motors. This is done in order to stop the movement if the vacuum cleaner falls, hangs or is lifted. I believe that it would be correct to use stepper motors, as this will allow you to set the speed of movement programmatically, without using gearboxes that take power. The transmission to the wheels will be direct or belt. There will be only 5 motors in the vacuum cleaner: 2 for wheels, one for the main brush, one for two rotating brushes on the sides, one for the retractor turbine. nine0004
Power supply
It is planned to power the entire system from a gel battery with a voltage of 12V and a capacity of 7 Ah. That is a standard UPS battery. It has the advantage that it has enough capacity to get the job done, it is cheap and available, and it has enough weight to press the vacuum cleaner to the floor. There are two main charging methods: induction and direct contact. Despite all the advantages of direct contact, I decided to play in favor of wireless charging: partly because it is safer (and I have curious cats), partly because I do not want to deal with the problem of oxidized or loose contacts later.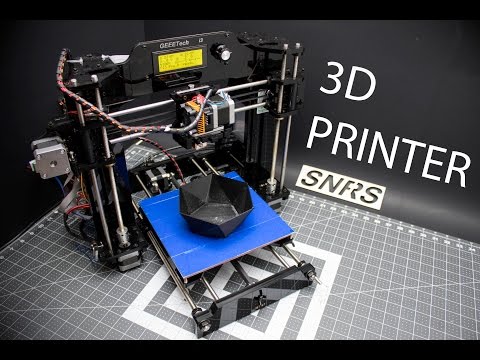 Luckily, I found a great 12 Volt PW-WL-12 wireless charger kit. A current of 350 mA will charge the battery when fully discharged in 10 hours, which is a bit much, and the battery cannot be planted like that. Therefore, I decided to get two of these chargers and install them on the bottom and top of the case, providing a double charge current of 700 mA. nine0004
Sensors
In order for the robot to be able to navigate in space, not fall off the stairs and not rest against the walls, feedback is required. This will be implemented with a large number of sensors. For example, infrared distance sensors will not allow you to get close to the wall and scratch it. In the event that some small object that does not fall into the field of view of the sensors comes across on the way, contact sensors in the bumpers are triggered. In addition, infrared sensors on the bottom edge will prevent the robot from falling if there is an empty space under the front edge. Also, a pair of sensors will need to be put on the wheels so that the device stops working when it is lifted off the floor. nine0003 The sensors will be used as follows: IR - for measuring distance, contact - for bumpers and wheels.
Return to base
One of the most difficult tasks that all robot creators try to implement is returning to their own charging base. And it's good when the room is strictly square or rectangular. In this case, it is enough to install the base in a corner or move it to the wall, and the mechanism for returning to the base becomes extremely simple: go along the wall with one side until the robot hits the base. But it is worth adding furniture or having several openings to other rooms and the task immediately becomes more complicated. I decided to use a radio beacon to determine the distance to the base. When moving away, the signal fades, and when approached, it becomes louder. This will be the basis of my base search method. nine0004
Programming and soldering
Initially, I did not want to deal with soldering and self-assembly of the controller harness.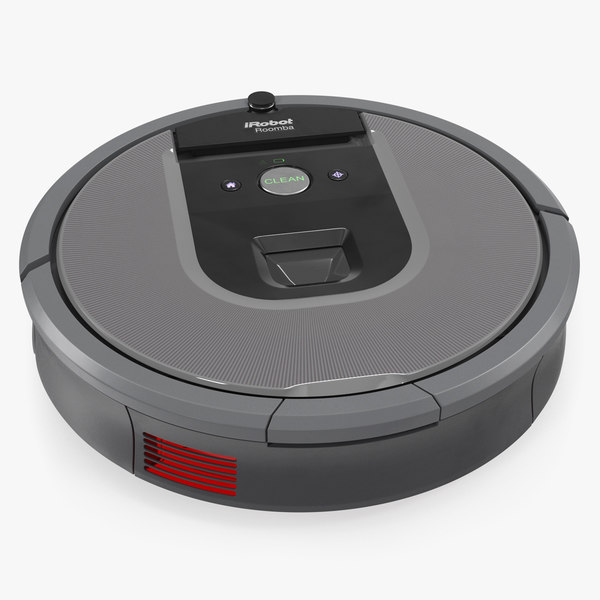 Since the Arduino platform already has a lot of standard shields for connecting sensors and actuators, I will use them and try to make the project as simple and accessible as possible for repetition. Only sensor contacts will be soldered if they do not have standard connection wires. I will program in the standard version for Arduino, because it is: 1 - simple, 2 - easy to repeat. Even I, who is familiar with the basics of programming, was able to cope with learning the language and program the controller to automate the heating and ventilation system. Therefore, the calculation is precisely on the simplicity of repetition and execution. nine0004
Stages
All work on the robot vacuum cleaner will be divided into several stages:
1. Building the body, chassis, dust collection unit and building a normal dust collector with turbine
2. Distribution of sensors along the contour of the body and coordination of their work
3. Programming of the simplest functions of movement and cleaning
4. Obstacle avoidance and movement logic when harvesting
5. Finding the base and the right approach to it for a full charge
Standard and follower
As in any experiment, there should be an experimental group and a reference group in order to compare the results. As a reference, it was decided to take iClebo Arte. During the construction process, I will rely on ready-made engineering solutions of the factory robot vacuum cleaner and try to simplify / reduce the cost of the existing model. As a result, a comparative test of two vacuum cleaners must pass: homemade and factory.
Invitation
Anyone who wants to participate in such a project can safely write in the comments and join the development. All advice and wishes will be taken into account and, I am sure, the work on creating your own robot vacuum cleaner will noticeably accelerate.
What kind of robots urgently need to be printed on a 3D printer
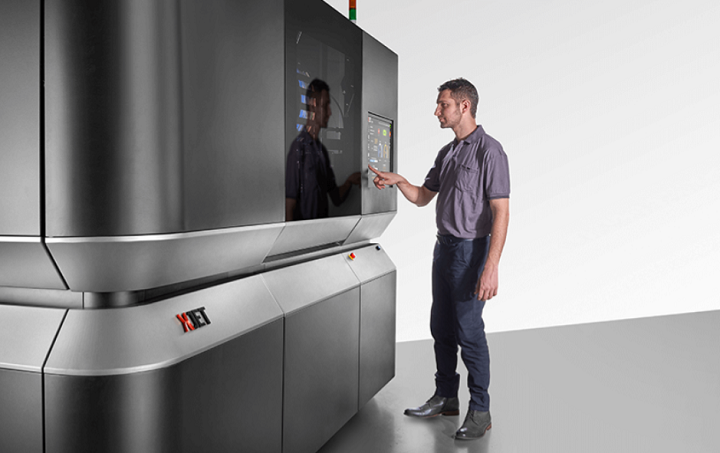
We want to turn to 3D printing again, as this industry is developing very quickly and offers us a lot of new interesting opportunities.
Despite all this, many people have questions: "What is all this for?", "What can be printed on a 3D printer?", "Where can I download ready-made models for 3D printing?" And we hope that after reading this article, most of your questions will disappear. So let's get started. nine0004
In this review, we will focus on 3D printed kits for building and programming simple robots from BQ, Poppy and ROFI.
Entertaining 3D robots from BQ
The Spanish company BQ provides excellent kits for beginner robotics. Consider Evolution, RHINO and Zowi. All kits are open source and available for around 100 euros.
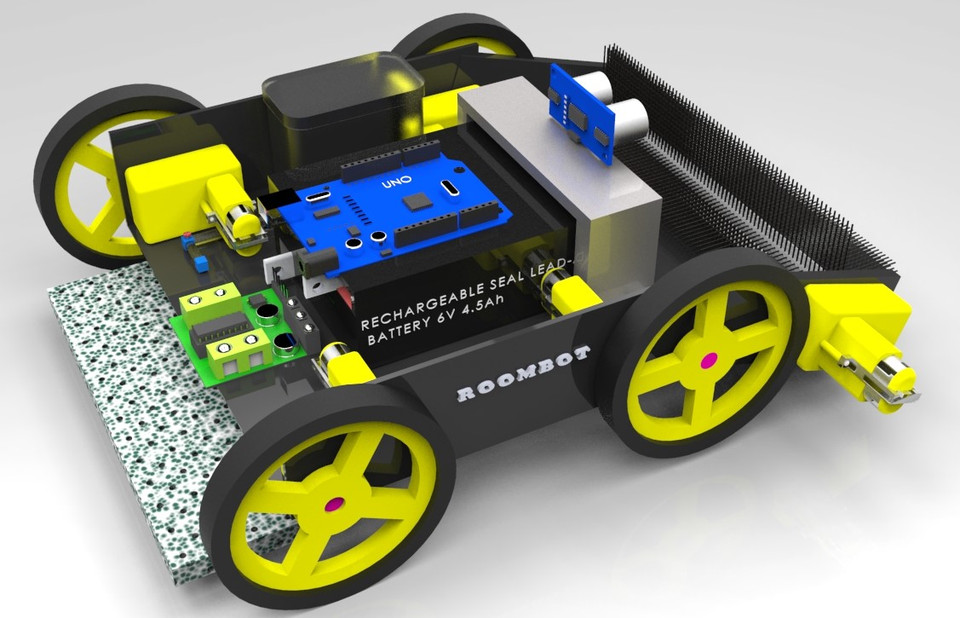
Evolution Robot
This is a simple educational kit that allows you to assemble a small robot on wheels and add any skin from 3D printed parts. nine0004
The Evolution Kit helps young explorers develop creativity, teamwork, critical thinking, motor skills and 3D design.
The robot is controlled via the Robopad app for smartphones and tablets. The assembled kit itself measures 269 x 195 x 73 mm and weighs 703 g. The central part is made using 3D printing. Electronics components include battery pack, continuous rotation servos, ZUMbloq light sensor, USB cable, ZUM BT-328 circuit board, ZUMbloq buzzer, infrared and ultrasonic sensors. nine0004
By putting everything together and programming the resulting robot, you will be able to control it when it moves, avoids obstacles, makes turns and other maneuvers.
RHINO Robot
This is an educational rhino robot kit that is easy to build and program just like Evolution. He is able to act as a mini-bulldozer, pushing objects, and also take part in sumo robo-fights.
To assemble the robot, just connect all the components together: servos, wheels, LEDs, electronics, Freduino UNO board, buzzer and other components that come in the box. nine0004
The RHINO can be controlled via Bluetooth via an Android app, or it can work standalone.
Zowi Robot
Miniature two-legged robot designed to teach children programming and robotics. It can be controlled from a smartphone via Bluetooth, set commands, connect to a computer via USB. The robot can walk and even dance.
The device consists of 3D printed parts for the body and legs, a BQ ZUM BT328 control board (Arduino is also suitable), Futaba 3003 servos for adjusting the feet and legs, a microphone, a speaker and an LED light for expressing emotions. nine0004
This video shows how Zowi dances to Michael Jackson, repeating almost all of his signature moves:
Poppy 3D kits
The French Poppy kit is an open source platform for building, using and interacting with 3D printed robots. The kit is suitable for beginners and experts in robotics, scientists, educators, developers and designers. Let's take a closer look at the main creations from Poppy - Humanoid and Torso. nine0004
The first is a bipedal robot made from 3D printed parts.
The device is 85 cm tall and weighs 3.5 kg. The apparatus also has 25 degrees of freedom with a multi-articulated torso (with 5 degrees of freedom). The robot is powered by Robotis servo motors, which allows it to respond to the reactions of external forces. So, the device is able to move its head, arms and walk on two legs.
The head of the robot contains the ODROID U3 board, which allows you to run programs and communicate via WiFi and Ethernet. Alternatively, you can replace this board with a RaspberryPi 2.
Other components include the USB wide-angle camera (120° FOV) located in the head for artificial vision, as well as all the sensors built into the Robotis motors.
Of course, such a complex set has a rather high cost, although the main costs are servo drives that can be ordered from us.
This video shows the main design features and capabilities of Humanoid:
Torso 9009 Robot4
This is a variation of the Humanoid, but without the legs. The robot is more accessible than the Humanoid, making it especially suitable for robotics engineers as well as STEM students. The device has a height of 38 cm, weight 1.8 kg and 13 servos for the movement of the arms and head.
The robot is also made from 3D printed parts and powered by Dynamixel servo motors, renowned for their reliability. Instead of legs, Torso has a suction cup base, which guarantees it high stability and stability. nine0004
The robot is programmed using IPython and Jupyter, although it can also be programmed using web-based visual programming tools such as Snap! The system will allow beginners to learn the program, or a group of scientists to perform a scenario of interactive behavior.
Video from Torso:
Official website of the project: https://www. poppy-project.org The device was designed to encourage more people to learn about robotics. Therefore, the kit is quite cheap ($350) and comes with open source. The robot can walk using a feedback accelerometer, 12 degrees of freedom and an ultrasonic sensor that allows it to bypass obstacles. A small Android tablet in the head provides ROFI with the brains, and an Arduino Mega circuit board provides the hardware interface. The device can be programmed to perform the simplest actions, such as walking, moving hands, dancing. nine0004
The robot measures 17.75 cm x 11.45 cm x 30.5 cm and weighs 227 grams.
Video from ROFI:
Official website of the project: http://www.projectbiped.com/
These were the next kits for training and development of robotic projects. Of course, they differ in their level of complexity, but what they have in common is open source programming and 3D printing.