3D print silicone filament
Is 3D Printing with Silicone possible? – Beamler
One of the greatest breakthroughs in the field of 3D printing materials in recent years was the launch of a process that makes 3D printing with silicone possible. Learn more about this exciting development.
Throughout history, inventions and breakthroughs in the field of material science have influenced the development of societies. And it is not very different nowadays. The likelihood of these breakthroughs having a significant impact on our technological future is extremely high.
Take 3D printing as an example. New material discoveries allow us to produce tools, mechanical parts or even functional prototypes in a completely new way.But not only that, it also unlocks a new level of freedom for the manufacturing industry to design and innovate.
In the end, having a wide range of 3D printing materials available makes the product development easier than ever before. Especially when these materials mimic their traditional counterparts but have had certain properties adjusted to fit new applications.
3D Printing Silicone is now possible
One of the most recent developments in additive manufacturing was the emergence of a new technology that enables the use of silicone as a 3D printing material.
The announcement brought excitement to the industrial 3D printing community.
After all, 3D printing with silicone, and by that we mean real silicone, is a game changer.
It serves so many markets: medical, automotive, consumer products. We can safely say that it is one of those breakthroughs that will truly impact our technological future.
ACEO 3D Models in Silicone
Before that, producing silicone parts was only possible through injection molding, casting and compression molding. An extremely expensive process due to the high cost of molds.
Clearly not suitable for the creation of prototypes, bio-models or small batches of products.
Ironically, the reason why silicone was so attractive as a 3D printing material was also what made it not a viable option.
It is not possible to melt silicone by exposing it to heat and then print a 3D object layer by layer like it is with plastics or metals.
For those reasons, several companies have attempted to develop materials that would simulate silicone although it was never truly the same.
The new technology, developed by ACEO ®- the brand for 3D printing with Silicones from the German chemical giant WACKER – have made it possible to create 3D objects from silicone materials without thermal changes.
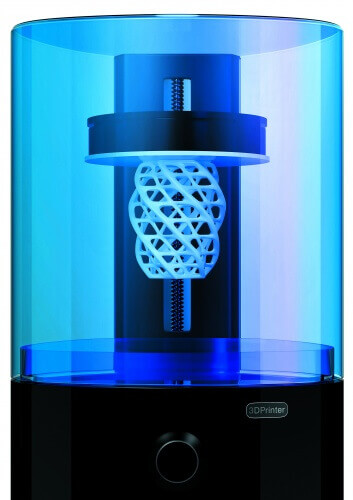
The technology is a variation of the Material Jetting process based on a “Drop-on-Demand” principle. Basically, the print head deposits single silicone voxels on the build platform.
How does ACEO®'s 3D printer for Silicone work?
According to WACKER, their 3D printer for silicone functions just like an inkjet printer. The workspace and a robot are within a glass case.
One by one, tiny droplets are rapidly extruded from the nozzle onto to the printing area until a fine line is created.
A computer gives the exact coordinates in order to form the desired shape. The area is then exposed to UV Light which causes the silicone to immediately vulcanise.
The process is repeated until the object is formed.
Once solidified silicone does not come back to its liquid state, so the final objects are – just like traditionally produced silicone parts – heat resistant.
Important to mention is the impressive precision with which the robot lays down the droplets to form extremely fine structures.
We have seen structures where the width of the silicone strip was just 0.6mm and half the thickness.
ACEO®'s Silicone material properties
Silicones manifold properties make it suitable for the most diverse applications:
- Temperature and radiation stability, allows it to be exposed to temperatures that vary from -55 to +180 degrees
- It has impressive elastomer properties, with a high variation of hardness being suitable for applications where a low compression set or high flexibility are required.
- ACEO®’s silicones have been tested for biocompatibility, making it a good option for several applications in the medical field.
- It is an insulating material that can be used for sealings in the automotive industry and other hydraulic applications where flow of fluids needs to be secured.
- ACEO® also offers a special grade of silicones that is electrically conductive and can be used in multi-material prints to provide conductivity and resistance for electrical components such as heat pads.
- Available in different colours but also translucent.
Can I buy Silicone filaments and resins?
At the moment, Silicone filaments and resins are not available for the market as most 3D printers for Silicone have been developed by companies that are not machine manufacturers.
On the other hand, silicone filaments and resins that can be found online are not the real deal – so be very careful.
The best way to 3D print in silicone is still through a silicone 3D printing service.
How to start 3D Printing in Silicone?
If you are looking for a silicone 3D printing service, you have come to the right place.
The first step to start 3D printing in silicone is to have a STL or OBJ file of the object you want to print. We prepared this silicone design guideline to help you make sure your part is 3D printable without further modifications.
You can upload your file to Beamler’s platform and our team will provide you with a quote as soon as possible. Don’t worry, all uploads are secure.
3D Printing in Silicone | SLA | 3D Print Service
3D printing in Silicone Silicone is an elastic material with outstanding mechanical, chemical and thermal properties. A higher degree of customisation and precision is achievable
Read More »
how it works, benefits, and applications
What is silicone and why 3D print it?
With excellent thermal stability, water resistance, and biocompatibility, silicone has long been a desirable material in additive manufacturing (AM). Coupled with the affordability and flexibility of 3D printing, silicone offers exciting possibilities in healthcare, electronics, and other fields.
Until recently, however, silicone had been almost impossible to print. Unlike extrusion-friendly thermoplastics, pure silicone cannot be melted into a liquid and then be re-solidified, which means it cannot be fed through an ordinary FFF 3D printer. The material had therefore been restricted to traditional manufacturing processes like injection molding.
All of that has changed in the last five years, during which a number of companies have developed novel systems for 3D printing silicone. Some use print head deposition, while others use vat photopolymerization, producing parts comparable to injection molded parts.
Silicone 3D prints by ERPro for MyFit, ACEO, and Carbon.Silicone material properties
Silicones are polymers containing siloxane. They come in several forms, including oil, grease, resin, and rubber.
In 3D printing, manufacturers are mostly interested in liquid silicone rubber (LSR), a highly stable elastomer resistant to extreme temperatures and environments.
Material properties of silicone include:
- Excellent thermal stability
- Available in different hardnesses
- Water resistance and suitability as sealant
- UV resistance
- Oxidation resistance
- Compression and shear resistance
- Flame retardancy
- Electrical insulation
- Biocompatibility
- Food safe
- Can be sterilized
- Color and translucency options
It is, however, crucial to mention two important matters. First, most 3D printable LSRs (and corresponding support materials) are still in the R&D phase and aren’t commercially available yet. Second, many silicone 3D printing processes require the LSR to include UV curing agents, which weaken the silicone itself and alter its properties.
Hence, unless you are 3D printing pure silicone, you won’t be able to benefit from all of the properties listed above.
Advantages of silicone 3D printing
Many of the material properties of silicone can be considered advantages in and of themselves. However, the 3D printing of silicone also provides specific benefits.
Rapid prototyping
Making silicone parts with a 3D printer allows designers to quickly iterate silicone prototypes in an unprecedented manner. During R&D, designers can also make adjustments to their CAD design and re-print the prototype with minimal costs.
Low-volume production
3D printing enables the production of silicone parts in low volumes without high tooling costs. Since previous silicone production was often limited to injection molding, it was rarely feasible to produce in low quantities — i.e. tens or hundreds of units — because the cost of making a metal mold was too high (although that’s changing too with metal 3D printing).
New levels of customization
3D printing opens up new possibilities for customized silicone items. LSR was already widely used in the healthcare industry, but 3D printing allows for the fabrication of custom items like patient-specific implants. It also allows for the fabrication of parts like custom-fit gaskets in construction or consumer goods.
New geometrical possibilities
When designing silicone parts for injection molding, engineers must work under the constraints of parting lines, flues, clamping holes, etc. 3D printers afford greater design freedom (even when taking DfAM into account) and can create silicone parts with complex internal geometries. In microfluidics, for example, it is possible to 3D print a silicone structure containing tiny interconnected channels — a feat that would not be possible with injection molding.
Range of silicone 3D prints by ACEO. Source: ACEOLimits of 3D printed silicone
Hardware and material availability
The main limitation of 3D printed silicone is access. Only a handful of companies offer true silicone 3D printing, which means costs are high and choices of material are limited.
Need for UV curing agents
Following up on the previous point, barely any of those companies are able to 3D print pure silicone; most of them 3D print LSR with additives such as UV curing agents, which can weaken the material or reduce the quality and lifespan of the final part.
That said, these modified silicones still offer many positive properties and are suitable for a wide range of applications. Unwanted particles can also partly be removed via post-processing techniques.
Structural limitations
Leading silicone 3D printing companies have made significant advances in recent years, but the material is still by no means additive-friendly. Even the best silicone 3D printers have small build areas and aren’t necessarily able to print support structures for the silicone.
With only one print head, a silicone 3D printer will only be able to create simple, flat-sided objects with little detail or limited geometries. Stereolithography-based silicone printing technologies solve part of that problem, but the resins include UV curing agents.
Silicone 3D printing: How it works
The high viscosity and temperature resistance of silicone have made it impractical for existing additive manufacturing technologies, leading companies to develop novel solutions.
Leading providers of silicone 3D printing technology use different approaches, but most follow a two-step or three-step sequence involving deposition, curing or vulcanizing, and post-processing.
1. Deposition
Common 3D printing technologies like FFF and Material Jetting use print heads to selectively deposit material in 2D shapes, layer by layer. And although silicone cannot be melted and extruded like FFF filament, some silicone printing processes utilize deposition too.
Printers from segment leader ACEO, for example, deploy a print head that deposits individual silicone droplets which merge together into a smooth surface.
Note: Wacker’s ACEO silicone 3D printing service was shut down in late 2021.
Lynxter print head depositing silicone. Source: Silinnov2. Curing or vulcanizing
Uncured silicone rubber takes the form of a liquid or gel, which is easy to manipulate but not very useful for building solid 3D objects. Printed silicone rubber therefore needs to be cured, vulcanized, or catalyzed — chemical processes that form cross-links in the polymer chain — after each layer.
Some printers use UV light or heat for this stage of the process, while others use room-temperature vulcanizing (RTV) silicone, which hardens in reaction to a catalyst or another substance.
In vat photopolymerization processes like Carbon’s CLIP technology, curing effectively replaces the deposition stage, since the UV light is precisely and selectively beamed in order to create a 2D shape for each layer.
3. Post-processing
Layer-by-layer curing, vulcanizing, or catalyzing solidifies the printed silicone enough to allow the next layer to be printed, but it does fully strengthen the part.
After the silicone print has been removed from the printer, it is usually subject to a longer post-curing process, for example in an oven, which causes further chemical reactions within the silicone part and removes unwanted particles.
Parts may also need to be washed to remove support material or subjected to other post-processing techniques.
Types of silicone 3D printers
Deposition
LSR can be deposited in drops via an extruder and then cured after each deposited layer. This was the technique perfected by German company ACEO, the Wacker Chemie brand that kickstarted the current generation of silicone 3D printing technologies in 2016.
ACEO’s drop-on-demand process “deposits single silicone voxels on a building platform” which “merge smoothly into a homogeneous surface” and are platinum-cured with UV light. Support structures maintain part stability, and the finished print is washed and then post-cured with heat to “remove volatiles and achieve the final mechanical properties. ”
”
Others use an extrusion-type print head to deposit one-component (RTV-1) or two-component (RTV-2) silicones without the need for UV curing. RTV-1 silicones require a catalyst and humidity to vulcanize, while RTV-2 silicones vulcanize when their two separate components are mixed together — achievable with dual print heads.
3D printing pure silicone is possible, though there are very few of those machines on the market.
Some low-cost silicone printers use a deposition technique that drops liquid silicone into spaces within a solid matrix, similar to 3D bioprinting technology.
Vat photopolymerization
Until recently, most developers of DLP and SLA 3D printing hardware overlooked silicone due to its challenging material properties, instead favoring silicone-like elastomeric resins with greater printability.
The CLIP process from Carbon resembles DLP 3D printing, curing parts in a vat of liquid material using UV light, but its “continuous liquid interface” creates a non-curable zone between the part and an oxygen-permeable window, ensuring that cured layers of its silicone urethane material do not stick to the window.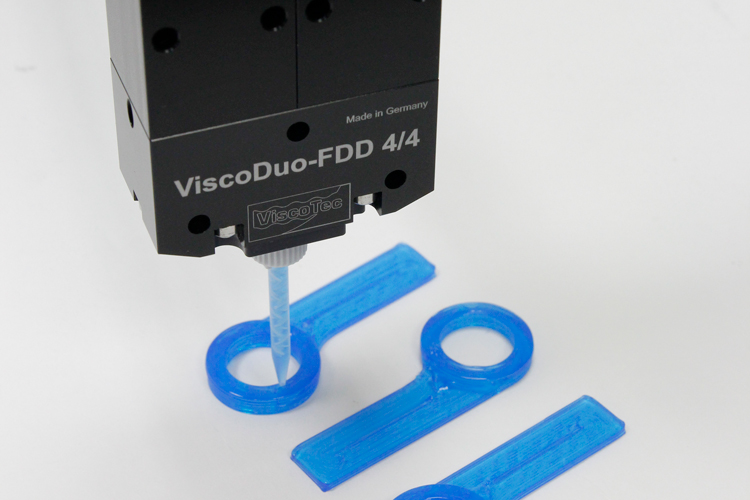 Because layers do not need to be peeled off a build plate, CLIP can process very soft materials like silicone.
Spectroplast, a Swiss provider of silicone 3D printing services, describes its Silicone Additive Manufacturing (SAM) technology as “similar to SLA and DLP.”
Silicone parts 3D printed with vat photopolymerization are washed and post-cured to form cross-links and increase strength.
Other
French startup 3Deus Dynamics is working on a whole new type of silicone 3D printing process called Dynamic Molding Technology. Put simply, this method consists in depositing pure silicone into a static volume of powder.
The print head dives into the powder, injecting silicone — or any other material that’s compatible with injection molding techniques — as it moves around to “draw” the object’s layers. The object being printed is entirely surrounded by powder at all times, and no support structures are required (as is the case with SLS 3D printers).
Industries and applications for silicone 3D printing
Silicone 3D printing may be new, but its uses are already apparent across a number of industries, from healthcare to robotics.
Healthcare
Medical-grade silicones are a staple of the healthcare industry, being used to make items like implants, feeding tubes, catheters, respiratory masks, hearing aids, and containers. 3D printing in the medical industry provides further possibilities, particularly with regard to patient customization.
After obtaining a patient’s anatomical details, medical professionals can fabricate one-off items like silicone implants that are tailored to a patient’s body, ensuring a correct fit. One-off customization of this sort would not be feasible with injection molding due to high tooling costs.
Printed silicone is particularly useful for soft prostheses, such as ears and noses, which can be designed to fit a patient’s face.
Silicone may also be used for items like 3D printed medical tubing — for food delivery or respiratory systems, for example — with complex internal channels, or for breathable 3D printed wound dressings.
Dentistry
3D printing is widely used in the dental industry, with the most common technology being Stereolithography or DLP used with liquid resin, which offers a high printing resolution useful for items like surgical guides, casts, and even directly manufactured dental prostheses.
Silicone introduces new possibilities in dental 3D printing. Whereas most photosensitive resins produce hard parts (Formlabs offers a flexible resin but does not recommend the material for fine features), silicones can create useful soft parts like gum models, providing dental technicians with a far more realistic recreation of a patient’s mouth and allowing them to create more accurate dental devices.
3D printed silicone gum model. Source: ACEOElectronics
Due to its insulating properties, silicone is often used to create casings for electronic products. The material can reduce vibration in order to protect delicate components, and is preferable to cheaper plastics when the product will be subject to significant temperature variations.
3D printing opens up new design possibilities, such as the creation of overlapping channels for circuitry that could not be made with a two-part mold.
Soft robotics
The field of soft robotics focuses on the creation of robotic components that mimic living organisms, adding flexible components suitable for, e.g. medical robots or industrial grippers that will not damage the objects they grip.
Developers of soft robotics can use 3D printed silicone in a number of ways, either for on-demand prototypes or end-use parts. Silicones are good electrical insulators and have thermal stability, making them suitable for tough industrial use, while they can also be biocompatible — ideal for medical robots.
Soft robotic devices are often developed in a research setting, and 3D printers cater to the need to fabricate one-off experimental items.
Industrial
Silicone 3D printing has several applications in industry, such as the creation of seals and gaskets for preventing fluid leakage.
Although seals and gaskets are often manufactured in high volumes via injection molding, 3D printing allows manufacturers to prototype and test different iterations of these items to ensure good performance. 3D printed silicone seals and gaskets can be made quickly and cheaply, accelerating time-to-market for the manufacturer.
Silicone seals and gaskets are important for other industries too, including automotive, marine, and healthcare.
Silicone 3D printing service
Silicone 3D printing hardware costs tens of thousands of dollars or more, and is therefore limited to developers, researchers, and large companies — if available for purchase at all.
However, individuals and small businesses can upload their CAD designs and order printed silicone parts through a silicone 3D printing service.
Providers of silicone 3D printing services include:
- ACEO, based in Germany, is a Wacker Chemie brand and developer of the market-leading silicone 3D printing process.
 It responds to Requests for Quotation within 48 hours and will complete production within 10 days. Parts can be up to 200 cubic centimeters in size.
 - Spectroplast, based in Switzerland, offers a vat photopolymerization silicone 3D printing process with a focus on biocompatible medical parts. It will complete production within seven days for the first part.
- Silinnov, based in France, offers a deposition-style silicone 3D printing service using Lynxter 3D printers. It can fabricate larger parts than comparable services — up to ⌀390 mm x 600 mm.
Indirect silicone 3D printing: Silicone molding
Before direct silicone 3D printing technology gained traction, it was still possible to fabricate high-quality silicone parts using a 3D printer: by 3D printing molds and filling or injecting them with liquid silicone.
This approach is more accessible than direct silicone 3D printing, albeit slower, since it requires several steps.
To create a 3D printed mold suitable for silicone molding, the CAD design for the part must be inverted and adjusted, forming a container into which liquid silicone can flow. A mold generally requires a parting line, injection ports, locators, and clamping holes.
A heat-resistant 3D printing material like ABS makes a good mold, since it needs to withstand the curing process at around 70°C. Once the mold is printed and ready, mold release spray is applied to the inside and liquid silicone can then be poured into the mold. Curing takes around an hour and a half.
Alternatively, silicone can be used as a material for the mold itself. By 3D printing a master of a part (from any material) and then immersing it in liquid silicone, one can make a silicone mold suitable for duplicating the printed master. The flexibility of silicone makes it easy to release solid molded parts from within the mold.
Making a silicone mold with a 3D printed master. Source: MakerbotFAQ
How much do silicone 3D printers cost?
Most dedicated silicone 3D printers cost upwards of $30,000, with some as much as $150,000. Printers developed by segment leader ACEO are not available for general purchase.
Why not use cheap flexible filament instead of silicone?
3D printing thermoplastics like TPE and TPU offer desirable properties like good impact strength, tear resistance, and shock absorption. They are suitable for many applications, but silicone has greater elastomeric properties.
Is silicone 3D printing cheaper than silicone injection molding?
Spectroplast, a 3D printed silicone service bureau, estimates that silicone 3D printing is cheaper than injection molding in quantities of up to around 6,000 units, after which injection molding becomes cheaper.
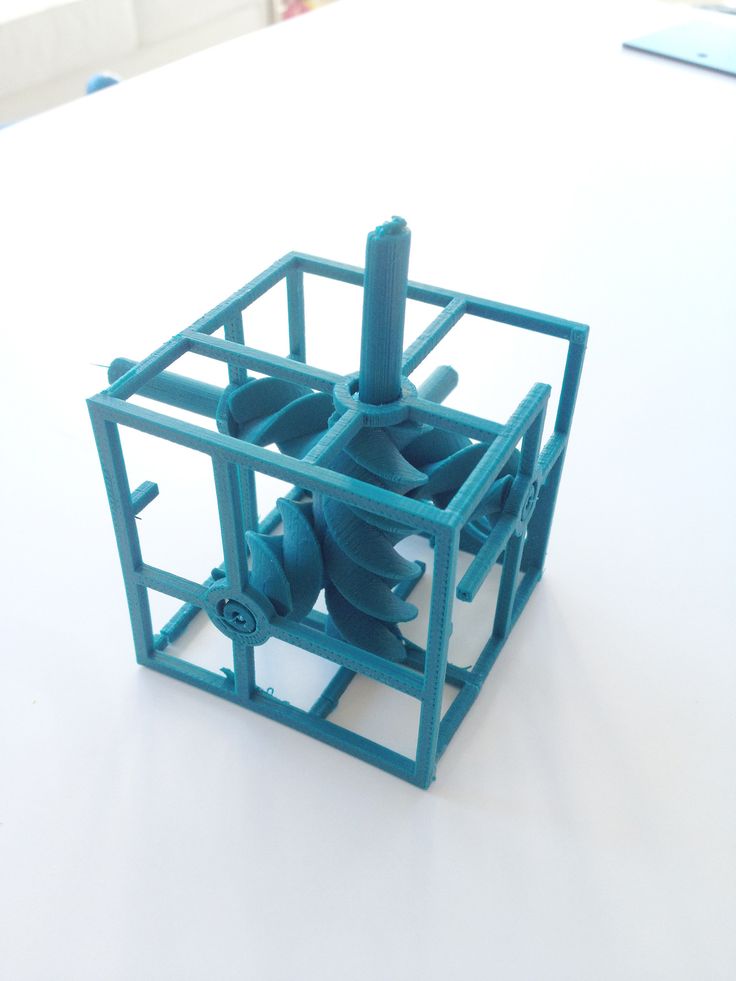
A cost comparison between silicone 3D printing and silicone injection molding. Source: Spectroplast3d printer for silicone molds and products
With a 3D printer, you can create many complex and unusual products from various materials. In recent years, silicone 3D printing has become increasingly popular, which allows you to create implants, organ prototypes, and other useful products. Let's take a closer look at silicone printing, products that can be created with its help, the necessary equipment and the prospects for the development of new technology.
What is 3D printing silicone?
Silicone is a polymer that consists of chains of alternating silicon and oxygen atoms. This material is resistant to various temperature ranges and various chemicals.
In 2016, Wacker Chemie found the most efficient way to 3D print silicone products. Based on this technology, Fripp Design, Envisiontec, Carbon 3D developed and produced equipment and materials that made it possible to work with silicone on a 3D printer.
Silicone is most often used in the medical industry to create objects that are resistant to changing environmental conditions. Until 2016, it was possible to create medical objects from silicone only with the help of injection molding of thermoplastics (injection molding). However, the new technology of additive 3D printing allows you to create smaller parts at an acceptable cost compared to injection molded products.
3D silicone printing technology
3D printer, which can print silicone products, has the same principle of operation as an inkjet printer. Liquid molten silicone is fed through the extruder in small droplets that are superimposed on each other, forming layers. The printer software is responsible for the correct formation of lines and shapes as a whole.
The curing process is required for the silicone to cure. It is performed using ultraviolet radiation, which forms cross-links between sections of the polymer chain. Due to this, the silicone is strengthened and becomes heat resistant.
3D printed silicone inside a microgel
Silicone 3D printed inside a microgel was developed at the University of Florida. This technology makes it possible to create more durable, but at the same time flexible and comfortable implants. At the same time, the cost of their production will be significantly lower, as well as the final cost for buyers. In the future, silicone printing inside the microgel will allow the creation of various therapeutic devices and very complex structures, such as human organs and tissues.
This 3D printing method allows you to create individual products of various shapes. The printing nozzle moves along a predetermined path and extrudes liquid silicone drop by drop onto the microorganic gel substrate. Depending on the complexity of the finished product, the printing process can take from several hours to several days.
Application of silicone mold printer
3D silicone mold printer is applicable to the following industries:
- Medicine. Silicone is biologically compatible with the human body, does not have a toxic effect on it and is resistant to the influence of an aggressive environment. Thanks to this, the material is used for the production of:
- individual implants;
- respiratory masks;
- hearing aids;
- ear prostheses;
- training preoperative organ models;
- spectacle nose pads;
- contact lenses.
- Automotive industry. Due to the resistance of silicone to extreme temperatures and solar radiation, it is used for the production of automotive plugs, hose. The presence of waterproofing properties also allow the use of silicone for the manufacture of seals in hydraulic systems and materials for sealing automotive joints.
- Manufacture of everyday or sports articles. The elasticity of silicone and the safety of its use makes it possible to produce insoles for running shoes, ear plugs for headphones, and wristbands.
- Manufacture of souvenirs and jewelry.
Which 3D printer is suitable for silicone products?
What to look for when choosing?
When choosing a 3D printer for printing silicone products, you should pay attention to three main parameters of the device:
- Extruder. It must be inkjet, as liquid silicone is used for printing.
- Integrated heater and pump.
 To prevent liquid silicone from cooling down during printing and not clumping, the printer must have a heater that will constantly maintain the same temperature. It is also important to have a pump. It will help to evenly supply liquid filament to the work surface from the extruder.
 - Closed print area. It is necessary for the vulcanization of the printed blank. An ultraviolet emitter is located in the printed area, and the area itself is closed with a darkened glass dome.
German RepRap LAM PRE-SERIES 3D printer
Ideal for printing silicone products. It adopts FDM technology, in which two-component liquid silicone rubber (LSR) is mixed by a pneumatic piston and extruded by an extruder. Then each layer of material is thermally cured under the action of an infrared rod.
The FDM technology used by the printer has increased print speed, reduced waste during production, completely eliminated post-processing of the product and accelerated its time to market.
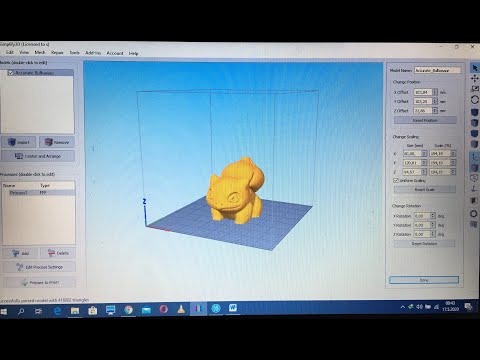
The operation of the device is controlled using the touch screen. The printer uses Simplify3D software to process 3D models.
3D printer German RepRap LAM PRE-SERIES
- Base platform heated
- The weight 80
- Material LC-3335
- Seal FDM
- Working chamber area 390 x 400 x 330 mm
- Speed 6000 mm/m or 100 mm/s
- Number of print heads 1
- Layer thickness from 100 µm
- Nozzle diameter, mm 0.
 4
4
Go to product
Top 9 Silicone 3D Printers0021
The following professional silicone 3D printers have proven themselves in the market:
- EnvisionTEC - printing medical and dental parts (Perfactory Micro, Vida HD CROWN & BRIDGE and Xede 3SP Ortho lines).
- Structo - creation of dental products (OrthoForm, DentaForm series).
- Total Z - printing of advertising, souvenir, layout and educational products (Anyform line).
- Stratasys - creation of parts for the automotive, aerospace, defense industries (Connex Objet series), printing of dental products (J720 Dental line).
- 3D Systems - printing of souvenirs, models, promotional items and educational products (sPro series).
- Sinterit Lisa Set is a system for creating advertising, souvenir, mock-up and educational products.
- Intamsys FUNMAT PRO 610 HT is an industrial printer for printing large items and testing functional parts under critical conditions.
3D printer Intamsys FUNMAT PRO 610 HT
- Software IntamSuit, Simplify 3D, Cura
- Control connection interfaces WiFi, Internet, USB
- Material PEEK, PEKK, PEI, PPSU, PC, Nylon, ABS, PLA, PVA, TPU, Carbonfiber Reinforcement
- Seal FDM
- Supported file formats STL, OBJ
- Z-axis resolution 0.0016 mm
- Resolution X and Y 0.016 mm
- Platen Temperature 300°C
- Extruder temperature 500°C
- Working chamber area 610 x 508 x 508 mm
- Number of print heads 2
- Layer thickness from 50 µm
- Thread diameter 1.
 75
75 - Nozzle diameter, mm 0.4 (0.25, 0.5, 0.6, 0.8, 1.2 mm)
- Display 7" color touch screen
Go to product
Sinterit Lisa Set
- Control connection interfaces WiFi
- Laser IR 5W
- Maximum Layer Height 0.15 mm
- Maximum consumer power 24 W
- Maximum build chamber temperature 105 °C
- Maximum platform temperature for printing 190 °C
- Max extruder temperature 275 °C
- Material PA12 smooth, flexa Black
- Minimum Layer Height 0.
 06 mm
06 mm - Seal SLS
- Food 110/120 V or 220/230 V
- Supported Software Sinterit Studio 2016
- Dimensions (mm) Sinterit Lisa - 650x550x450; Sinterit Sieve - 600x340x330; Sinterit Sandblaster - 480x370x360
- Accuracy along X, Y axes, mm 0.1
- Speed 15 mm / hour
- Layer thickness from 75 µm
- Weight, kg Sinterit Lisa - 35;Sinterit Sieve - 22.
 5;Sinterit Sandblaster-15
- Data output format STL, OBJ, 3DS, FBX, DAE, 3MF
- Max workpiece size PA12: 90x110x130 mm, flexa Black: 110x130x150 mm
- Print area Sinterit Lisa - 150x200x150 mm; Sinterit Sandblaster - 410x310x200 mm
- Operating system Microsoft Windows
Go to product
The future of silicone 3D printing
Silicone printing was originally developed for medical applications. Therefore, the most promising goal is the development and creation of silicone tissues and human organs that imitate real ones with great accuracy.
Help.
The first attempts to create a human organ from a silicone filament were made at the Federal Institute of Technology Zurich. The artificial heart in design and movement completely imitated the real one. However, the silicone model takes only 3,000 strokes to wear out, which is equivalent to a lifespan of less than one hour.
In 2021, only training and demonstration organs are printed from silicone, which help to study human physiology during training in medical specialties. The first experimental implants and prostheses also began to be developed.
Silicone 3D printing with silicone is a new, emerging technology. It is considered very promising due to the ease of use of the material, its high elasticity, wear resistance, resistance to radiation and aggressive chemical environments.
- March 14, 2021
- 7178
Get expert advice
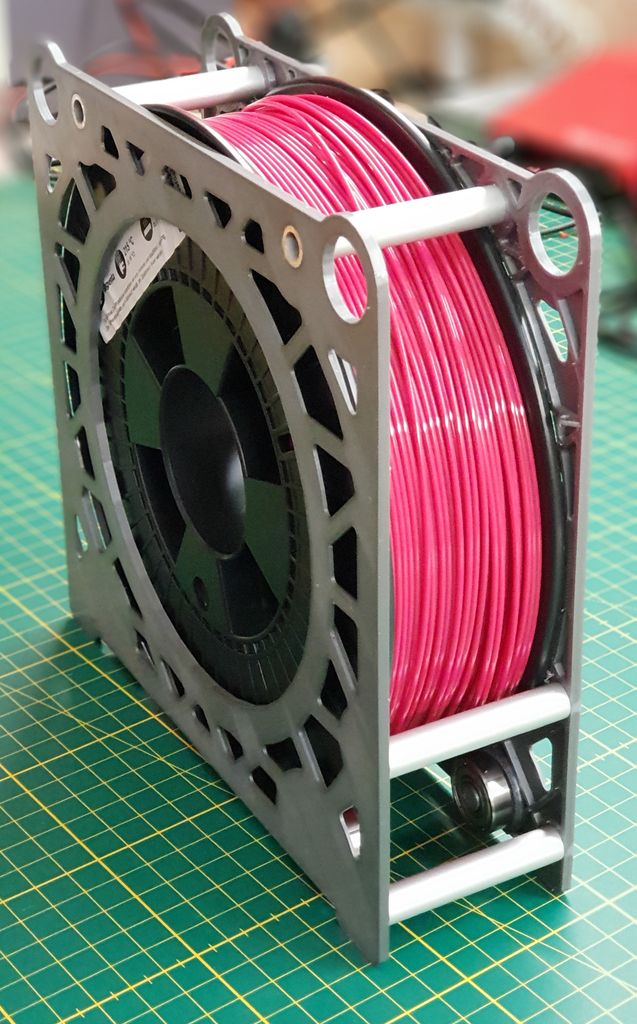
3D printing filaments
Dear friends, welcome!
This article would like to highlight the appearance of threads in printing. I will try to note the main factors influencing the appearance of threads.
1) Idling speed and acceleration. The idle run consists of the following stages - first there is a retract, then the movement of the extruder, then again a retract. The plastic is spontaneously squeezed out precisely during the idle time, forming various kinds of defects. Now imagine an example if the idling takes zero seconds. Under this condition, the plastic will not have time to spontaneously extrude. Therefore, the higher the speed and acceleration, the less time the idling lasts, which means there will be fewer threads. But speed and acceleration are limited by the motor driver, the motors themselves, and the rigidity of the printer frame.
Therefore, you can try to slightly increase the speed and acceleration with each print, but at the same time make sure that the motors do not overheat, otherwise microsteps may be skipped, which will lead to print rejects.
2) Idling path. Different slicers process parts according to different algorithms, which means that the idling trajectory may differ. Some slicers build more rational extruder motion than others. Therefore, you can try to prepare the same part in several slicers and stop at the option that will be more rational.
3) Feeder dependent, i.e. from the plastic supply system. Printers most often have one of two options: "bowden", i.e. far-distance or "direct", this is when the "feeder" is located near the extruder. Under the same printing conditions with direct, there will always be fewer threads than with bowden. But this does not mean that you can always switch from Bowden to Direct. It may also be that your printer will not be able to work with "direct" for one reason or another. The transition to "direct" must be considered with each printer individually.
4) Retract setting, i.e. plastic rollback - its task is to remove the residual pressure in the extruder during idling. Without retract, the threads will appear more intensely. For most printers, the values are as follows - for direct, the range is from 1 to 6mm, and for bowden, from 4 to 12mm. (the amount of retract also depends on the diameter of the nozzle).
5) Plastic quality. If you are constantly printing only budget plastics and are unhappy with the result, then try to buy plastic in a higher price category, and more importantly, with good reviews. And then compare the print quality. But the main thing - from different manufacturers, compare the same types of plastic - you should not compare, for example, ABS from one manufacturer, and PLA from another.
6) Plastic drying. By the way, this applies to almost all plastics, not just nylon. If you have unnamed or cheap plastic in your hands, it is recommended to dry it after opening it, because. it is not known whether the plastic was dried before packaging.
7) Nozzle diameter. The larger the diameter, the more plastic will spontaneously squeeze out during idling. There is nothing you can do about it, it just needs to be taken into account when choosing a nozzle diameter.
8) Extruder temperature. If you heat the extruder to the upper limit of the recommended range (indicated on the plastic that is being printed), then the fluidity of the plastic will be higher, and it will be more easily extruded from the nozzle. Plastic manufacturers give a temperature range for a reason. If you set the print speed to high, then the extruder temperature should be in the upper limit of the range. But if the print speed is low, then there is no need to heat up the extruder much, otherwise filaments may appear due to overheating of the plastic.
Therefore, you can try to reduce the temperature of the extruder as follows - during printing, every couple of minutes, reduce the temperature by 5 degrees over and over and watch the print closely. If the threads disappear, remember the temperature and stick to it. But if the temperature is greatly lowered, then the plastic will not be able to extrude at all.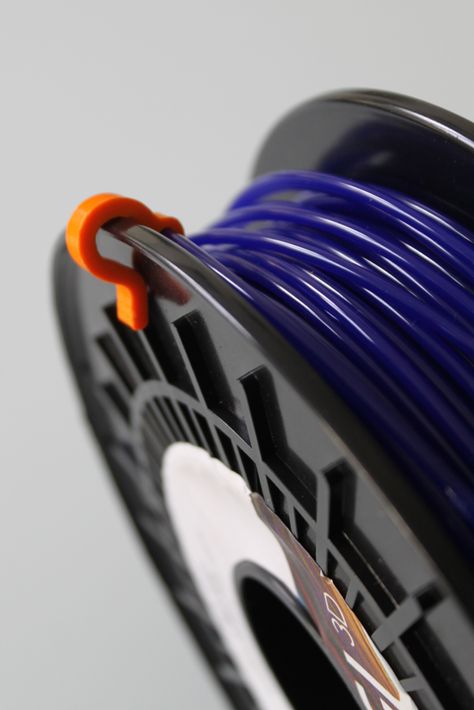 Don't overdo it.
9) Dependence of temperature on the type of extruder. There are many different models of extruders. For example, consider the E3D V6 and E3D V6 Volcano extruder. The E3D V6 Volcano has an extended nozzle and an extended aluminum block. And this means that the zone where the plastic is in the molten state is larger, so it can push through a larger volume of plastic per unit of time. As a result, this extruder will be able to print at higher speeds than the regular E3D V6. But here you need to understand the following - if you have a "powerful" extruder, and you print at low speeds, then the plastic will overheat, which will lead to the appearance of threads. Therefore, for powerful extruders, it is better to set the temperature in the lower limit of the recommended range. And on the contrary - for an extruder that cannot heat up a large amount of plastic, the temperature should be kept in the middle or at the upper limit of the recommended one.
The conclusion here is the following - for different models of extruders, different printing temperatures are needed.
10) Free travel distance. If you are printing multiple parts at once, try to space them closely to reduce the dry travel distance. Well, if a solid part is printed, with individual elements at a great distance from each other, in this case, you can try to change the location of the part in space so that there are fewer idle moves.
11) File analysis before printing. When your G-code is ready, do not be lazy and meticulously analyze it before printing, because. at the verification stage, you can detect unwanted elements that can create various kinds of defects, including the appearance of threads. By the way, in whatever slicer I prepare the file, I almost always check the finished code with the help of “Repetier-Host”, because it shows all the movements that can lead to certain defects.
12) Plastic type. All plastics have both strengths and weaknesses. For example, PETG plastic has a high tendency to filament. ABS, on the other hand, has a low predisposition to threads, but it will have to concentrate on the problem of shrinkage and a low degree of sintering of the layers.
Therefore, before printing, familiarize yourself with the pros and cons of the plastic with which you plan to print.
13) Using the "Lift Z" function. When enabled, a gap will be created between the extruder and the printed part. It is needed so that during idle the extruder does not cling to the outer walls of the part. This feature can significantly reduce the number of threads. But it should be used if the printer has a powerful driver and a motor along the Z axis, as well as a screw with a thread pitch of at least 8mm. This is necessary to achieve high speed and acceleration on the Z axis. Well, if you try to use this function at low speeds, the problem will only get worse and there will be more threads, because. idle time, taking into account "Lift Z", will increase greatly. The idling time with the "Lift Z" function consists of: movement along the Z axis + retraction + idling + retract + movement along the Z axis.
Therefore, you can try to experiment with this function and see the result.
14) Problems with the extruder. Imagine a situation where you put a large retract, but a large plug of melted plastic formed in the thermal barrier between the nozzle and the Teflon tube. In such a situation, no matter how big you put the retract, this plug will not disappear, but will remain in its place. And, therefore, the retract will not be able to completely relieve the pressure in the system. Therefore, keep your extruder clean and in good working order.
15) Problem with the driver on the motor in the feed system (motor on the feeder). It's a rare phenomenon, but it's still there. I've run into a problem where the driver only spins the motor in one direction, regardless of the command, whether it's spinning one way or the other -- the motor only spins in one direction.
And in practice, it looks like this: the motor advances the plastic during printing, and at the moment of idling, when a retract should occur, the motor sharply squeezes out additional plastic (because the driver rotates the motor in only one direction).