3D print for dummies
The Free Beginner's Guide - 3D Printing Industry
Welcome to 3DPI”s Beginner’s Guide to 3D Printing. Whether you are new to 3D printing technology or just looking to close a few knowledge gaps, we’re glad you stopped by. By now, most of us have heard, at some level, about the potential of 3D printing. But with this guide we are offering insights into the history and the reality of 3D printing — the processes, materials and applications — as well as measured thoughts on where it might be heading. We hope you’ll find this to be one of the most comprehensive 3D printing resources available, and that no matter what your skill level is, there will be plenty in here to meet your needs.
Are you ready? Let’s get started !
01 - Basics
3D Printing — also known as additive manufacturing — has been quoted in the Financial Times and by other sources as potentially being larger than the Internet. Some believe this is true. Many others urge that this is part of the extraordinary hype that exists around this very exciting technology area. So what really is 3D printing, who generally uses 3D printers and what for ?
Overview
The term 3D printing covers a host of processes and technologies that offer a full spectrum of capabilities for the production of parts and products in different materials. Essentially, what all of the processes and technologies have in common is the manner in which production is carried out layer by layer in an additive process which is in contrast to traditional methods of production involving subtractive methods or moulding/casting processes. Applications of 3D printing are emerging almost by the day, and, as this technology continues to penetrate more widely and deeply across industrial, maker and consumer sectors, this is only set to increase. Most reputable commentators on this technology sector agree that, as of today, we are only just beginning to see the true potential of 3D printing. 3DPI, a reliable media source for 3D printing, brings you all of the latest news, views, process developments and applications as they emerge in this exciting field. This overview article aims to provide the 3DPI audience with a reliable backgrounder on 3D printing in terms of what it is (technologies, processes and materials), its history, application areas and benefits
Introduction – What is 3D printing ?
3D Printing is a process for making a physical object from a three-dimensional digital model, typically by laying down many successive thin layers of a material. It brings a digital object (its CAD representation) into its physical form by adding layer by layer of materials.
There are several different techniques to 3D Print an object. We will go in further details later in the Guide. 3D Printing brings two fundamental innovations: the manipulation of objects in their digital format and the manufacturing of new shapes by addition of material.
Digital
+
Additive Manufacturing
Technology has affected recent human history probably more than any other field. Think of a light bulb, steam engine or, more latterly, cars and aeroplanes, not to mention the rise and rise of the world wide web. These technologies have made our lives better in many ways, opened up new avenues and possibilities, but usually it takes time, sometimes even decades, before the truly disruptive nature of the technology becomes apparent.
It is widely believed that 3D printing or additive manufacturing (AM) has the vast potential to become one of these technologies. 3D printing has now been covered across many television channels, in mainstream newspapers and across online resources. What really is this 3D printing that some have claimed will put an end to traditional manufacturing as we know it, revolutionize design and impose geopolitical, economic, social, demographic, environmental and security implications to our every day lives?
The most basic, differentiating principle behind 3D printing is that it is an additive manufacturing process.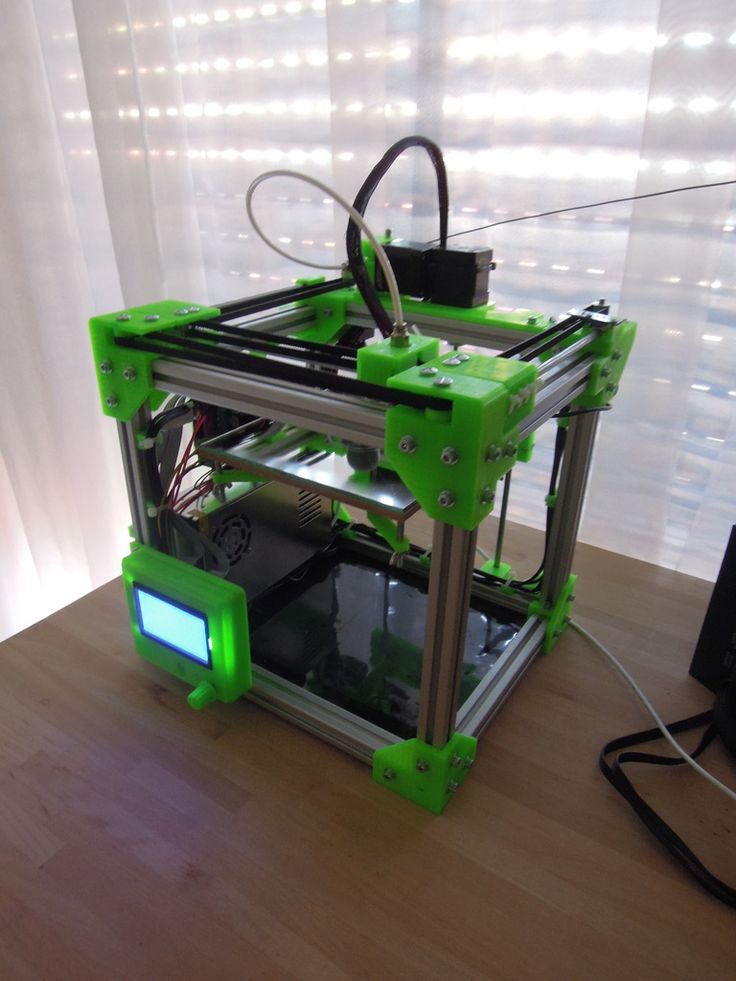 And this is indeed the key because 3D printing is a radically different manufacturing method based on advanced technology that builds up parts, additively, in layers at the sub mm scale. This is fundamentally different from any other existing traditional manufacturing techniques.
There are a number of limitations to traditional manufacturing, which has widely been based on human labour and made by hand ideology rooting back to the etymological origins of the French word for manufacturing itself. However, the world of manufacturing has changed, and automated processes such as machining, casting, forming and moulding are all (relatively) new, complex processes that require machines, computers and robot technology.
However, these technologies all demand subtracting material from a larger block whether to achieve the end product itself or to produce a tool for casting or moulding processes and this is a serious limitation within the overall manufacturing process.
For many applications traditional design and production processes impose a number of unacceptable constraints, including the expensive tooling as mentioned above, fixtures, and the need for assembly for complex parts. In addition, the subtractive manufacturing processes, such as machining, can result in up to 90% of the original block of material being wasted. In contrast, 3D printing is a process for creating objects directly, by adding material layer by layer in a variety of ways, depending on the technology used. Simplifying the ideology behind 3D printing, for anyone that is still trying to understand the concept (and there are many), it could be likened to the process of building something with Lego blocks automatically.
3D printing is an enabling technology that encourages and drives innovation with unprecedented design freedom while being a tool-less process that reduces prohibitive costs and lead times. Components can be designed specifically to avoid assembly requirements with intricate geometry and complex features created at no extra cost. 3D printing is also emerging as an energy-efficient technology that can provide environmental efficiencies in terms of both the manufacturing process itself, utilising up to 90% of standard materials, and throughout the products operating life, through lighter and stronger design.
In recent years, 3D printing has gone beyond being an industrial prototyping and manufacturing process as the technology has become more accessible to small companies and even individuals. Once the domain of huge, multi-national corporations due to the scale and economics of owning a 3D printer, smaller (less capable) 3D printers can now be acquired for under $1000.
This has opened up the technology to a much wider audience, and as the exponential adoption rate continues apace on all fronts, more and more systems, materials, applications, services and ancillaries are emerging.
02 - History
The earliest 3D printing technologies first became visible in the late 1980’s, at which time they were called Rapid Prototyping (RP) technologies. This is because the processes were originally conceived as a fast and more cost-effective method for creating prototypes for product development within industry. As an interesting aside, the very first patent application for RP technology was filed by a Dr Kodama, in Japan, in May 1980. Unfortunately for Dr Kodama, the full patent specification was subsequently not filed before the one year deadline after the application, which is particularly disastrous considering that he was a patent lawyer! In real terms, however, the origins of 3D printing can be traced back to 1986, when the first patent was issued for stereolithography apparatus (SLA). This patent belonged to one Charles (Chuck) Hull, who first invented his SLA machine in 1983. Hull went on to co-found 3D Systems Corporation — one of the largest and most prolific organizations operating in the 3D printing sector today.
3D Systems’ first commercial RP system, the SLA-1, was introduced in 1987 and following rigorous testing the first of these system was sold in 1988. As is fairly typical with new technology, while SLA can claim to be the first past the starting post, it was not the only RP technology in development at this time, for, in 1987, Carl Deckard, who was working at the University of Texas, filed a patent in the US for the Selective Laser Sintering (SLS) RP process. This patent was issued in 1989 and SLS was later licensed to DTM Inc, which was later acquired by 3D Systems. 1989 was also the year that Scott Crump, a co-founder of Stratasys Inc. filed a patent for Fused Deposition Modelling (FDM) — the proprietary technology that is still held by the company today, but is also the process used by many of the entry-level machines, based on the open source RepRap model, that are prolific today. The FDM patent was issued to Stratasys in 1992. In Europe, 1989 also saw the formation of EOS GmbH in Germany, founded by Hans Langer. After a dalliance with SL processes, EOS’ R&D focus was placed heavily on the laser sintering (LS) process, which has continued to go from strength to strength. Today, the EOS systems are recognized around the world for their quality output for industrial prototyping and production applications of 3D printing. EOS sold its first ‘Stereos’ system in 1990. The company’s direct metal laser sintering (DMLS) process resulted from an initial project with a division of Electrolux Finland, which was later acquired by EOS.
Other 3D printing technologies and processes were also emerging during these years, namely Ballistic Particle Manufacturing (BPM) originally patented by William Masters, Laminated Object Manufacturing (LOM) originally patented by Michael Feygin, Solid Ground Curing (SGC) originally patented by Itzchak Pomerantz et al and ‘three dimensional printing’ (3DP) originally patented by Emanuel Sachs et al. And so the early nineties witnessed a growing number of competing companies in the RP market but only three of the originals remain today — 3D Systems, EOS and Stratasys.
Throughout the 1990’s and early 2000’s a host of new technologies continued to be introduced, still focused wholly on industrial applications and while they were still largely processes for prototyping applications, R&D was also being conducted by the more advanced technology providers for specific tooling, casting and direct manufacturing applications. This saw the emergence of new terminology, namely Rapid Tooling (RT), Rapid Casting and Rapid Manufacturing (RM) respectively.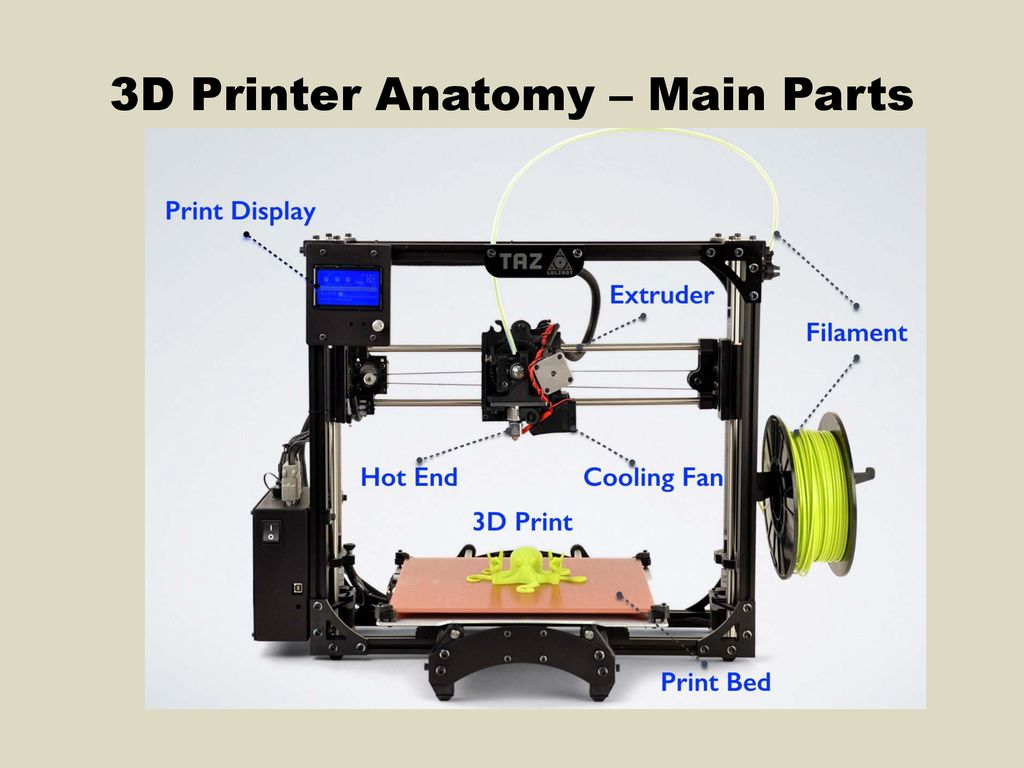
In terms of commercial operations, Sanders Prototype (later Solidscape) and ZCorporation were set up in 1996, Arcam was established in 1997, Objet Geometries launched in 1998, MCP Technologies (an established vacuum casting OEM) introduced the SLM technology in 2000, EnvisionTec was founded in 2002, ExOne was established in 2005 as a spin-off from the Extrude Hone Corporation and Sciaky Inc was pioneering its own additive process based on its proprietary electron beam welding technology. These companies all served to swell the ranks of Western companies operating across a global market. The terminology had also evolved with a proliferation of manufacturing applications and the accepted umbrella term for all of the processes was Additive Manufacturing (AM). Notably, there were many parallel developments taking place in the Eastern hemisphere. However, these technologies, while significant in themselves and enjoying some local success, did not really impact the global market at that time.
During the mid noughties, the sector started to show signs of distinct diversification with two specific areas of emphasis that are much more clearly defined today. First, there was the high end of 3D printing, still very expensive systems, which were geared towards part production for high value, highly engineered, complex parts. This is still ongoing — and growing — but the results are only now really starting to become visible in production applications across the aerospace, automotive, medical and fine jewellery sectors, as years of R&D and qualification are now paying off. A great deal still remains behind closed doors and/or under non-disclosure agreements (NDA). At the other end of the spectrum, some of the 3D printing system manufacturers were developing and advancing ‘concept modellers’, as they were called at the time. Specifically, these were 3D printers that kept the focus on improving concept development and functional prototyping, that were being developed specifically as office- and user-friendly, cost-effective systems.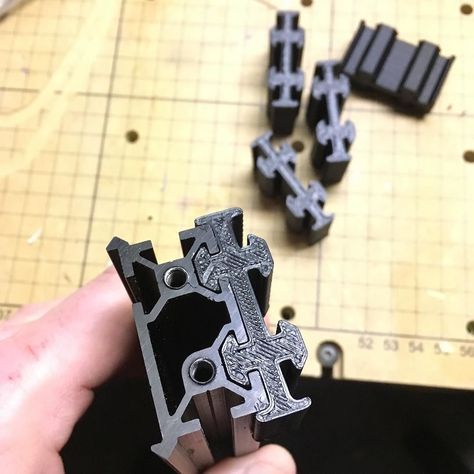 The prelude to today’s desktop machines. However, these systems were all still very much for industrial applications.
Looking back, this was really the calm before the storm.
At the lower end of the market — the 3D printers that today are seen as being in the mid range — a price war emerged together with incremental improvements in printing accuracy, speed and materials.
In 2007, the market saw the first system under $10,000 from 3D Systems, but this never quite hit the mark that it was supposed to. This was partly due to the system itself, but also other market influences. The holy grail at that time was to get a 3D printer under $5000 — this was seen by many industry insiders, users and commentators as the key to opening up 3D printing technology to a much wider audience. For much of that year, the arrival of the highly-anticipated Desktop Factory — which many predicted would be the fulfillment of that holy grail — was heralded as the one to watch. It came to nothing as the organization faltered in the run up to production. Desktop Factory and its leader, Cathy Lewis, were acquired, along with the IP, by 3D Systems in 2008 and all but vanished. As it turned out though, 2007 was actually the year that did mark the turning point for accessible 3D printing technology — even though few realized it at the time — as the RepRap phenomenon took root. Dr Bowyer conceived the RepRap concept of an open source, self-replicating 3D printer as early as 2004, and the seed was germinated in the following years with some heavy slog from his team at Bath, most notably Vik Oliver and Rhys Jones, who developed the concept through to working prototypes of a 3D printer using the deposition process. 2007 was the year the shoots started to show through and this embryonic, open source 3D printing movement started to gain visibility.
But it wasn’t until January 2009 that the first commercially available 3D printer – in kit form and based on the RepRap concept – was offered for sale. This was the BfB RapMan 3D printer. Closely followed by Makerbot Industries in April the same year, the founders of which were heavily involved in the development of RepRap until they departed from the Open Source philosophy following extensive investment. Since 2009, a host of similar deposition printers have emerged with marginal unique selling points (USPs) and they continue to do so. The interesting dichotomy here is that, while the RepRap phenomenon has given rise to a whole new sector of commercial, entry-level 3D printers, the ethos of the RepRap community is all about Open Source developments for 3D printing and keeping commercialization at bay.
2012 was the year that alternative 3D printing processes were introduced at the entry level of the market. The B9Creator (utilising DLP technology) came first in June, followed by the Form 1 (utilising stereolithography) in December. Both were launched via the funding site Kickstarter — and both enjoyed huge success.
As a result of the market divergence, significant advances at the industrial level with capabilities and applications, dramatic increase in awareness and uptake across a growing maker movement, 2012 was also the year that many different mainstream media channels picked up on the technology. 2013 was a year of significant growth and consolidation. One of the most notable moves was the acquisition of Makerbot by Stratasys.
Heralded as the 2nd, 3rd and, sometimes even, 4th Industrial Revolution by some, what cannot be denied is the impact that 3D printing is having on the industrial sector and the huge potential that 3D printing is demonstrating for the future of consumers. What shape that potential will take is still unfolding before us.
03 - Technology
The starting point for any 3D printing process is a 3D digital model, which can be created using a variety of 3D software programmes — in industry this is 3D CAD, for Makers and Consumers there are simpler, more accessible programmes available — or scanned with a 3D scanner. The model is then ‘sliced’ into layers, thereby converting the design into a file readable by the 3D printer. The material processed by the 3D printer is then layered according to the design and the process. As stated, there are a number of different types of 3D printing technologies, which process different materials in different ways to create the final object.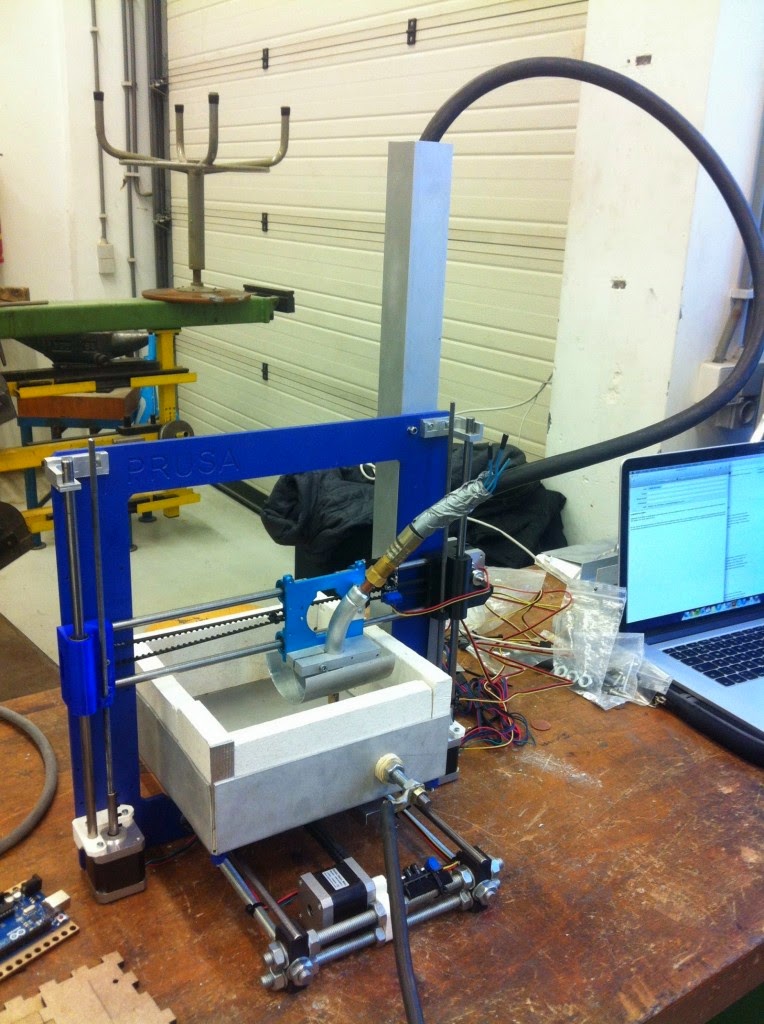 Functional plastics, metals, ceramics and sand are, now, all routinely used for industrial prototyping and production applications. Research is also being conducted for 3D printing bio materials and different types of food. Generally speaking though, at the entry level of the market, materials are much more limited. Plastic is currently the only widely used material — usually ABS or PLA, but there are a growing number of alternatives, including Nylon. There is also a growing number of entry level machines that have been adapted for foodstuffs, such as sugar and chocolate.
How it Works
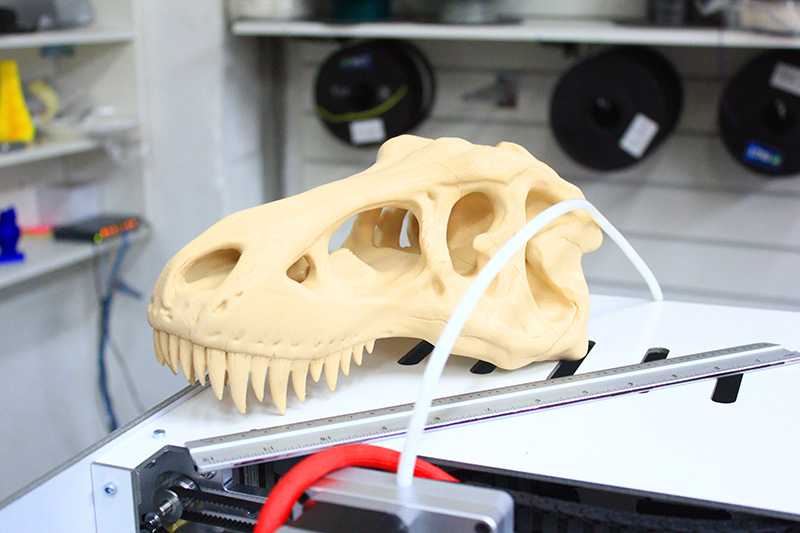
The different types of 3D printers each employ a different technology that processes different materials in different ways. It is important to understand that one of the most basic limitations of 3D printing — in terms of materials and applications — is that there is no ‘one solution fits all’. For example some 3D printers process powdered materials (nylon, plastic, ceramic, metal), which utilize a light/heat source to sinter/melt/fuse layers of the powder together in the defined shape. Others process polymer resin materials and again utilize a light/laser to solidify the resin in ultra thin layers. Jetting of fine droplets is another 3D printing process, reminiscent of 2D inkjet printing, but with superior materials to ink and a binder to fix the layers. Perhaps the most common and easily recognized process is deposition, and this is the process employed by the majority of entry-level 3D printers. This process extrudes plastics, commonly PLA or ABS, in filament form through a heated extruder to form layers and create the predetermined shape.
Because parts can be printed directly, it is possible to produce very detailed and intricate objects, often with functionality built in and negating the need for assembly.
However, another important point to stress is that none of the 3D printing processes come as plug and play options as of today. There are many steps prior to pressing print and more once the part comes off the printer — these are often overlooked. Apart from the realities of designing for 3D printing, which can be demanding, file preparation and conversion can also prove time-consuming and complicated, particularly for parts that demand intricate supports during the build process.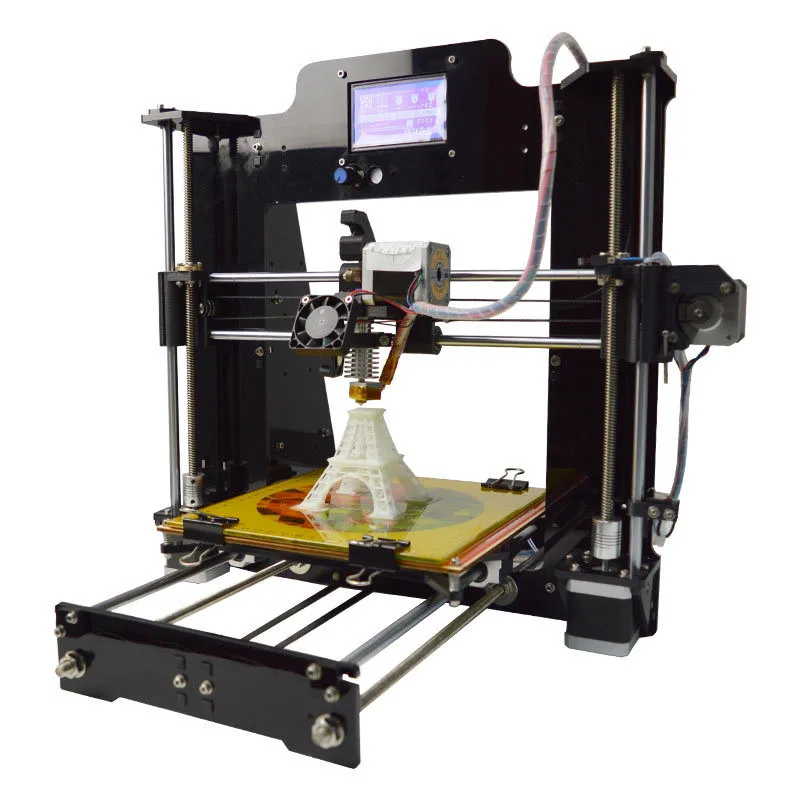 However there are continual updates and upgrades of software for these functions and the situation is improving. Furthermore, once off the printer, many parts will need to undergo finishing operations. Support removal is an obvious one for processes that demand support, but others include sanding, lacquer, paint or other types of traditional finishing touches, which all typically need to be done by hand and require skill and/or time and patience.
04 - Processes
Stereolithography
Stereolithography (SL) is widely recognized as the first 3D printing process; it was certainly the first to be commercialised. SL is a laser-based process that works with photopolymer resins, that react with the laser and cure to form a solid in a very precise way to produce very accurate parts. It is a complex process, but simply put, the photopolymer resin is held in a vat with a movable platform inside. A laser beam is directed in the X-Y axes across the surface of the resin according to the 3D data supplied to the machine (the .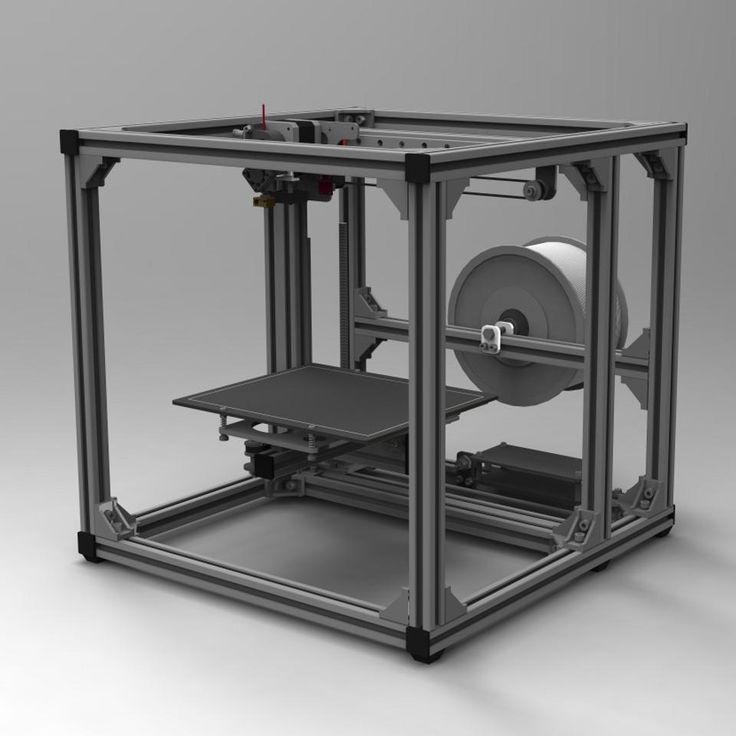 stl file), whereby the resin hardens precisely where the laser hits the surface. Once the layer is completed, the platform within the vat drops down by a fraction (in the Z axis) and the subsequent layer is traced out by the laser. This continues until the entire object is completed and the platform can be raised out of the vat for removal.
Because of the nature of the SL process, it requires support structures for some parts, specifically those with overhangs or undercuts. These structures need to be manually removed.
In terms of other post processing steps, many objects 3D printed using SL need to be cleaned and cured. Curing involves subjecting the part to intense light in an oven-like machine to fully harden the resin.
Stereolithography is generally accepted as being one of the most accurate 3D printing processes with excellent surface finish. However limiting factors include the post-processing steps required and the stability of the materials over time, which can become more brittle.
DLP — or digital light processing — is a similar process to stereolithography in that it is a 3D printing process that works with photopolymers. The major difference is the light source. DLP uses a more conventional light source, such as an arc lamp, with a liquid crystal display panel or a deformable mirror device (DMD), which is applied to the entire surface of the vat of photopolymer resin in a single pass, generally making it faster than SL.
Also like SL, DLP produces highly accurate parts with excellent resolution, but its similarities also include the same requirements for support structures and post-curing. However, one advantage of DLP over SL is that only a shallow vat of resin is required to facilitate the process, which generally results in less waste and lower running costs.
Laser Sintering / Laser Melting
Laser sintering and laser melting are interchangeable terms that refer to a laser based 3D printing process that works with powdered materials. The laser is traced across a powder bed of tightly compacted powdered material, according to the 3D data fed to the machine, in the X-Y axes. As the laser interacts with the surface of the powdered material it sinters, or fuses, the particles to each other forming a solid. As each layer is completed the powder bed drops incrementally and a roller smoothes the powder over the surface of the bed prior to the next pass of the laser for the subsequent layer to be formed and fused with the previous layer.
The build chamber is completely sealed as it is necessary to maintain a precise temperature during the process specific to the melting point of the powdered material of choice. Once finished, the entire powder bed is removed from the machine and the excess powder can be removed to leave the ‘printed’ parts. One of the key advantages of this process is that the powder bed serves as an in-process support structure for overhangs and undercuts, and therefore complex shapes that could not be manufactured in any other way are possible with this process.
However, on the downside, because of the high temperatures required for laser sintering, cooling times can be considerable. Furthermore, porosity has been an historical issue with this process, and while there have been significant improvements towards fully dense parts, some applications still necessitate infiltration with another material to improve mechanical characteristics.
Laser sintering can process plastic and metal materials, although metal sintering does require a much higher powered laser and higher in-process temperatures. Parts produced with this process are much stronger than with SL or DLP, although generally the surface finish and accuracy is not as good.
Extrusion / FDM / FFF
3D printing utilizing the extrusion of thermoplastic material is easily the most common — and recognizable — 3DP process. The most popular name for the process is Fused Deposition Modelling (FDM), due to its longevity, however this is a trade name, registered by Stratasys, the company that originally developed it. Stratasys’ FDM technology has been around since the early 1990’s and today is an industrial grade 3D printing process. However, the proliferation of entry-level 3D printers that have emerged since 2009 largely utilize a similar process, generally referred to as Freeform Fabrication (FFF), but in a more basic form due to patents still held by Stratasys. The earliest RepRap machines and all subsequent evolutions — open source and commercial — employ extrusion methodology. However, following Stratasys’ patent infringement filing against Afiniathere is a question mark over how the entry-level end of the market will develop now, with all of the machines potentially in Stratasys’ firing line for patent infringements.
The process works by melting plastic filament that is deposited, via a heated extruder, a layer at a time, onto a build platform according to the 3D data supplied to the printer. Each layer hardens as it is deposited and bonds to the previous layer.
Stratasys has developed a range of proprietary industrial grade materials for its FDM process that are suitable for some production applications. At the entry-level end of the market, materials are more limited, but the range is growing. The most common materials for entry-level FFF 3D printers are ABS and PLA.
The FDM/FFF processes require support structures for any applications with overhanging geometries. For FDM, this entails a second, water-soluble material, which allows support structures to be relatively easily washed away, once the print is complete. Alternatively, breakaway support materials are also possible, which can be removed by manually snapping them off the part. Support structures, or lack thereof, have generally been a limitation of the entry level FFF 3D printers. However, as the systems have evolved and improved to incorporate dual extrusion heads, it has become less of an issue.
In terms of models produced, the FDM process from Stratasys is an accurate and reliable process that is relatively office/studio-friendly, although extensive post-processing can be required. At the entry-level, as would be expected, the FFF process produces much less accurate models, but things are constantly improving.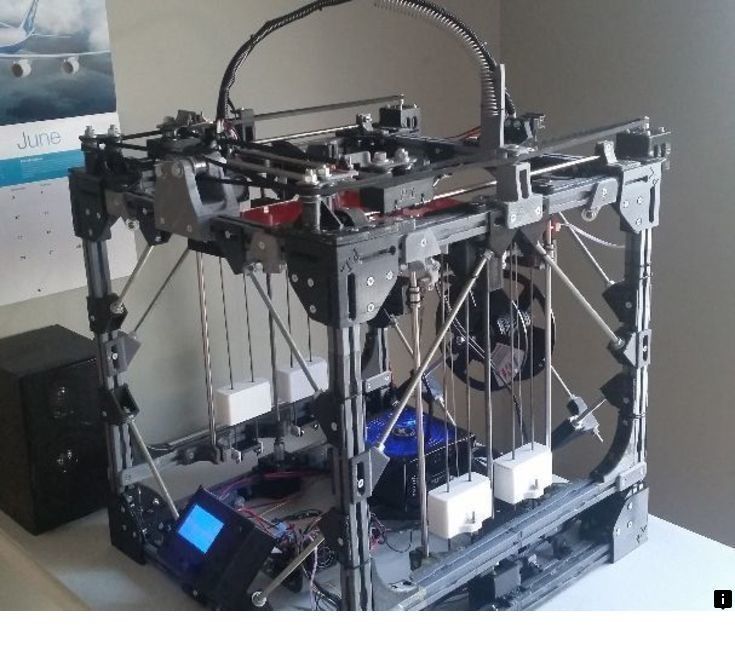
The process can be slow for some part geometries and layer-to-layer adhesion can be a problem, resulting in parts that are not watertight. Again, post-processing using Acetone can resolve these issues.
Inkjet
There are two 3D printing process that utilize a jetting technique.
Binder jetting: where the material being jetted is a binder, and is selectively sprayed into a powder bed of the part material to fuse it a layer at a time to create/print the required part. As is the case with other powder bed systems, once a layer is completed, the powder bed drops incrementally and a roller or blade smoothes the powder over the surface of the bed, prior to the next pass of the jet heads, with the binder for the subsequent layer to be formed and fused with the previous layer.
Advantages of this process, like with SLS, include the fact that the need for supports is negated because the powder bed itself provides this functionality. Furthermore, a range of different materials can be used, including ceramics and food. A further distinctive advantage of the process is the ability to easily add a full colour palette which can be added to the binder.
The parts resulting directly from the machine, however, are not as strong as with the sintering process and require post-processing to ensure durability.
Material jetting: a 3D printing process whereby the actual build materials (in liquid or molten state) are selectively jetted through multiple jet heads (with others simultaneously jetting support materials). However, the materials tend to be liquid photopolymers, which are cured with a pass of UV light as each layer is deposited.
The nature of this product allows for the simultaneous deposition of a range of materials, which means that a single part can be produced from multiple materials with different characteristics and properties. Material jetting is a very precise 3D printing method, producing accurate parts with a very smooth finish.
Selective Deposition Lamination (SDL)
SDL is a proprietary 3D printing process developed and manufactured by Mcor Technologies. There is a temptation to compare this process with the Laminated Object Manufacturing (LOM) process developed by Helisys in the 1990’s due to similarities in layering and shaping paper to form the final part. However, that is where any similarity ends.
The SDL 3D printing process builds parts layer by layer using standard copier paper. Each new layer is fixed to the previous layer using an adhesive, which is applied selectively according to the 3D data supplied to the machine. This means that a much higher density of adhesive is deposited in the area that will become the part, and a much lower density of adhesive is applied in the surrounding area that will serve as the support, ensuring relatively easy “weeding,” or support removal.
After a new sheet of paper is fed into the 3D printer from the paper feed mechanism and placed on top of the selectively applied adhesive on the previous layer, the build plate is moved up to a heat plate and pressure is applied. This pressure ensures a positive bond between the two sheets of paper.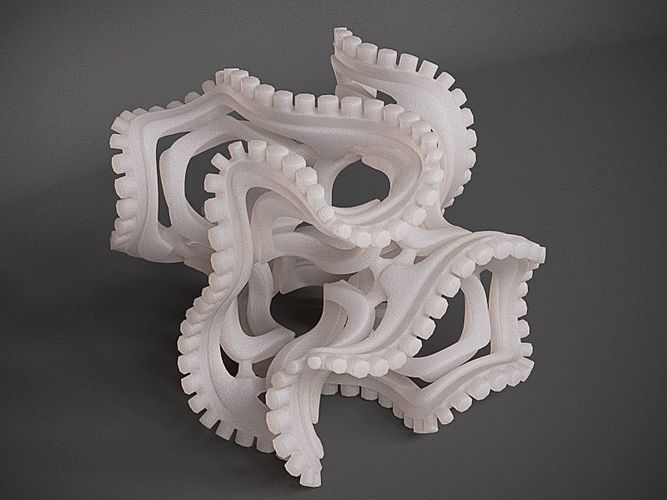 The build plate then returns to the build height where an adjustable Tungsten carbide blade cuts one sheet of paper at a time, tracing the object outline to create the edges of the part. When this cutting sequence is complete, the 3D printer deposits the next layer of adhesive and so on until the part is complete.
SDL is one of the very few 3D printing processes that can produce full colour 3D printed parts, using a CYMK colour palette. And because the parts are standard paper, which require no post-processing, they are wholly safe and eco-friendly. Where the process is not able to compete favourably with other 3D printing processes is in the production of complex geometries and the build size is limited to the size of the feedstock.
EBM
The Electron Beam Melting 3D printing technique is a proprietary process developed by Swedish company Arcam. This metal printing method is very similar to the Direct Metal Laser Sintering (DMLS) process in terms of the formation of parts from metal powder.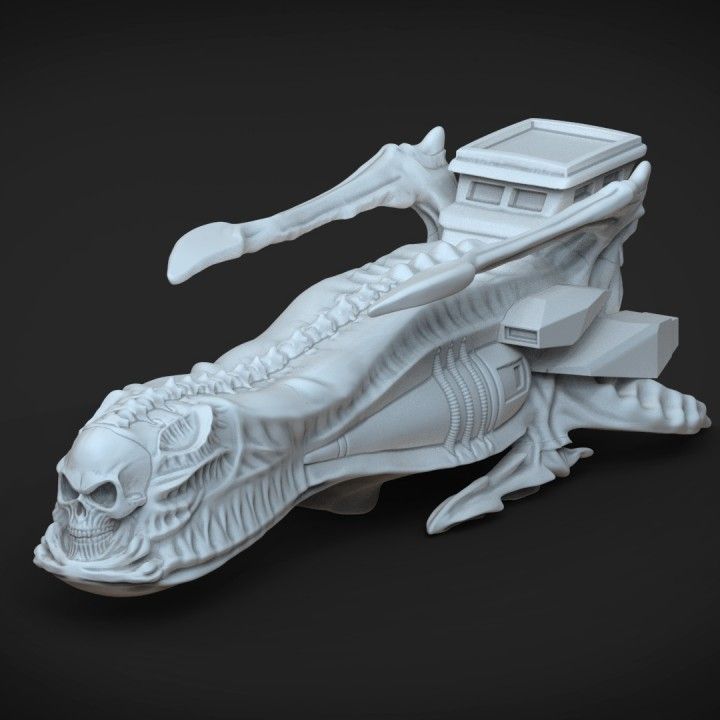 The key difference is the heat source, which, as the name suggests is an electron beam, rather than a laser, which necessitates that the procedure is carried out under vacuum conditions.
EBM has the capability of creating fully-dense parts in a variety of metal alloys, even to medical grade, and as a result the technique has been particularly successful for a range of production applications in the medical industry, particularly for implants. However, other hi-tech sectors such as aerospace and automotive have also looked to EBM technology for manufacturing fulfillment.
05 - Materials
The materials available for 3D printing have come a long way since the early days of the technology. There is now a wide variety of different material types, that are supplied in different states (powder, filament, pellets, granules, resin etc).
Specific materials are now generally developed for specific platforms performing dedicated applications (an example would be the dental sector) with material properties that more precisely suit the application.
However, there are now way too many proprietary materials from the many different 3D printer vendors to cover them all here. Instead, this article will look at the most popular types of material in a more generic way. And also a couple of materials that stand out.
Plastics
Nylon, or Polyamide, is commonly used in powder form with the sintering process or in filament form with the FDM process. It is a strong, flexible and durable plastic material that has proved reliable for 3D printing. It is naturally white in colour but it can be coloured — pre- or post printing. This material can also be combined (in powder format) with powdered aluminium to produce another common 3D printing material for sintering — Alumide.
ABS is another common plastic used for 3D printing, and is widely used on the entry-level FDM 3D printers in filament form. It is a particularly strong plastic and comes in a wide range of colours. ABS can be bought in filament form from a number of non-propreitary sources, which is another reason why it is so popular.
PLA is a bio-degradable plastic material that has gained traction with 3D printing for this very reason. It can be utilized in resin format for DLP/SL processes as well as in filament form for the FDM process. It is offered in a variety of colours, including transparent, which has proven to be a useful option for some applications of 3D printing. However it is not as durable or as flexible as ABS.
LayWood is a specially developed 3D printing material for entry-level extrusion 3D printers. It comes in filament form and is a wood/polymer composite (also referred to as WPC).
Metals
A growing number of metals and metal composites are used for industrial grade 3D printing. Two of the most common are aluminium and cobalt derivatives.
One of the strongest and therefore most commonly used metals for 3D printing is Stainless Steel in powder form for the sintering/melting/EBM processes. It is naturally silver, but can be plated with other materials to give a gold or bronze effect.
In the last couple of years Gold and Silver have been added to the range of metal materials that can be 3D printed directly, with obvious applications across the jewellery sector. These are both very strong materials and are processed in powder form.
Titanium is one of the strongest possible metal materials and has been used for 3D printing industrial applications for some time. Supplied in powder form, it can be used for the sintering/melting/EBM processes.
Ceramics
Ceramics are a relatively new group of materials that can be used for 3D printing with various levels of success. The particular thing to note with these materials is that, post printing, the ceramic parts need to undergo the same processes as any ceramic part made using traditional methods of production — namely firing and glazing.
Paper
Standard A4 copier paper is a 3D printing material employed by the proprietary SDL process supplied by Mcor Technologies. The company operates a notably different business model to other 3D printing vendors, whereby the capital outlay for the machine is in the mid-range, but the emphasis is very much on an easily obtainable, cost-effective material supply, that can be bought locally. 3D printed models made with paper are safe, environmentally friendly, easily recyclable and require no post-processing.
Bio Materials
There is a huge amount of research being conducted into the potential of 3D printing bio materials for a host of medical (and other) applications. Living tissue is being investigated at a number of leading institutions with a view to developing applications that include printing human organs for transplant, as well as external tissues for replacement body parts. Other research in this area is focused on developing food stuffs — meat being the prime example.
Food
Experiments with extruders for 3D printing food substances has increased dramatically over the last couple of years.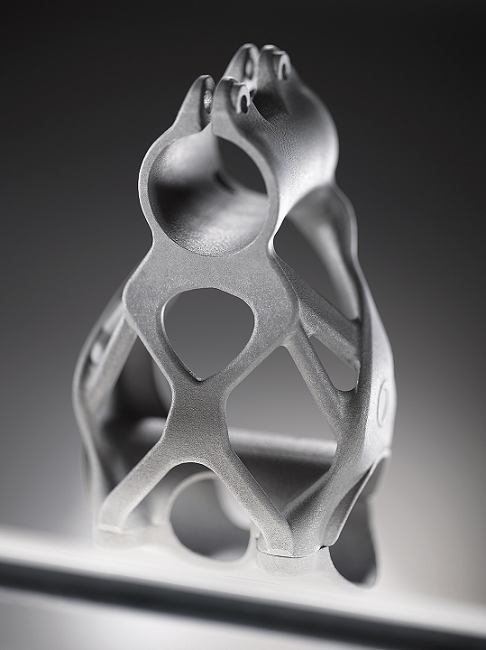 Chocolate is the most common (and desirable). There are also printers that work with sugar and some experiments with pasta and meat. Looking to the future, research is being undertaken, to utilize 3D printing technology to produce finely balanced whole meals.
And finally, one company that does have a unique (proprietary) material offering is Stratasys, with its digital materials for the Objet Connex 3D printing platform. This offering means that standard Objet 3D printing materials can be combined during the printing process — in various and specified concentrations — to form new materials with the required properties. Up to 140 different Digital Materials can be realized from combining the existing primary materials in different ways.
06 - Global Effects
Global Effects on Manufacturing
3D printing is already having an effect on the way that products are manufactured – the nature of the technology permits new ways of thinking in terms of the social, economic,environmental and security implications of the manufacturing process with universally favourable results.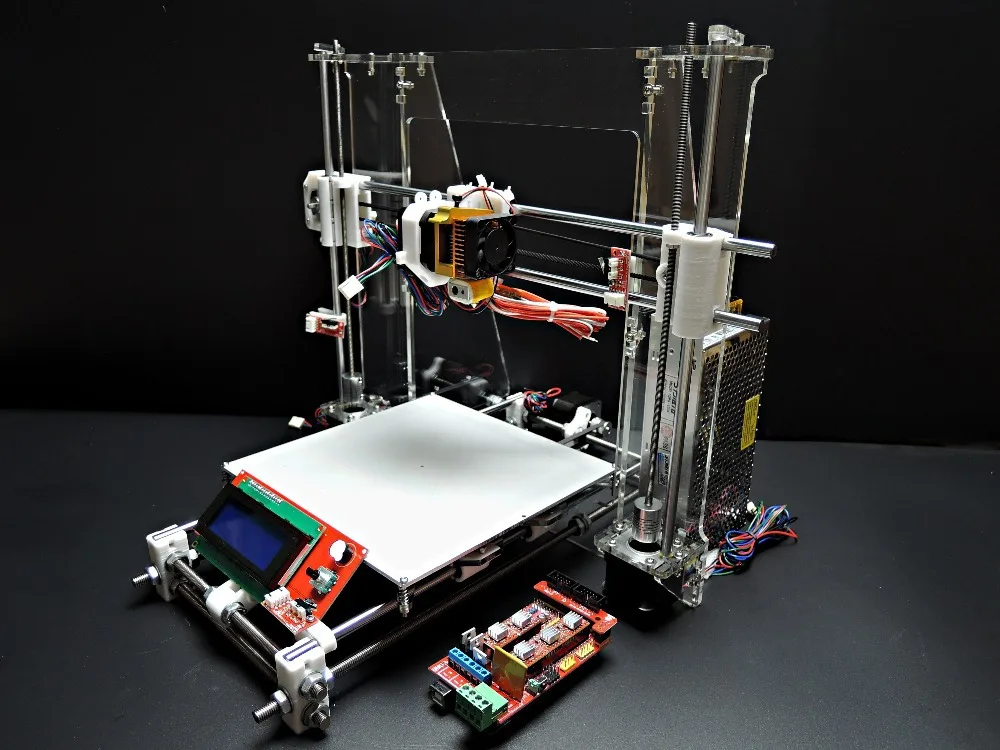
One of the key factors behind this statement is that 3D printing has the potential to bring production closer to the end user and/or the consumer, thereby reducing the current supply chain restrictions. The customisation value of 3D printing and the ability to produce small production batches on demand is a sure way to engage consumers AND reduce or negate inventories and stock piling — something similar to how Amazon operates its business.
Shipping spare parts and products from one part of the world to the other could potentially become obsolete, as the spare parts might possibly be 3D printed on site. This could have a major impact on how businesses large and small, the military and consumers operate and interact on a global scale in the future. The ultimate aim for many is for consumers to operate their own 3D printer at home, or within their community, whereby digital designs of any (customizable) product are available for download via the internet, and can be sent to the printer, which is loaded with the correct material(s). Currently, there is some debate about whether this will ever come to pass, and even more rigorous debate about the time frame in which it may occur.
The wider adoption of 3D printing would likely cause re-invention of a number of already invented products, and, of course, an even bigger number of completely new products. Today previously impossible shapes and geometries can be created with a 3D printer, but the journey has really only just begun. 3D printing is believed by many to have very great potential to inject growth into innovation and bring back local manufacturing.
Potential Effects to the Global Economy
The use of 3D printing technology has potential effects on the global economy, if adopted world wide. The shift of production and distribution from the current model to a localized production based on-demand, on site, customized production model could potentially reduce the imbalance between export and import countries.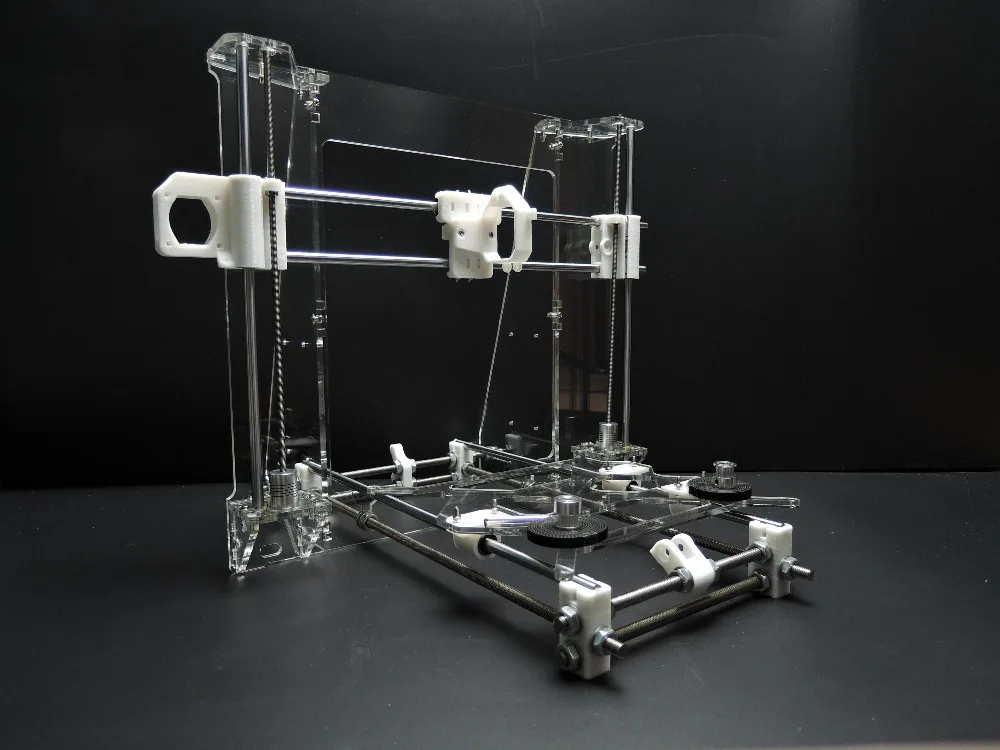
3D printing would have the potential to create new industries and completely new professions, such as those related to the production of 3D printers. There is an opportunity for professional services around 3D printing, ranging from new forms of product designers, printer operators, material suppliers all the way to intellectual property legal disputes and settlements. Piracy is a current concern related to 3D printing for many IP holders.
The effect of 3D printing on the developing world is a double-edged sword. One example of the positive effect is lowered manufacturing cost through recycled and other local materials, but the loss of manufacturing jobs could hit many developing countries severely, which would take time to overcome.
The developed world, would benefit perhaps the most from 3D printing, where the growing aged society and shift of age demographics has been a concern related to production and work force. Also the health benefits of the medical use of 3D printing would cater well for an aging western society.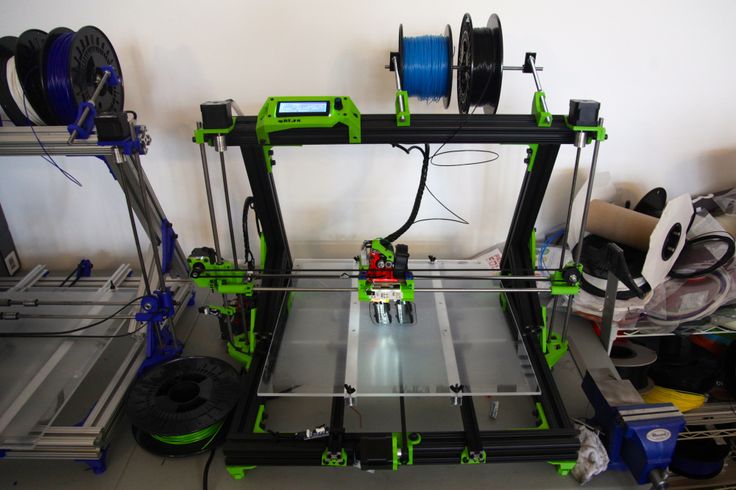
07 - Benefits & Value
3D printing, whether at an industrial, local or personal level, brings a host of benefits that traditional methods of manufacture (or prototyping) simply cannot.
Customisation
3D printing processes allow for mass customisation — the ability to personalize products according to individual needs and requirements. Even within the same build chamber, the nature of 3D printing means that numerous products can be manufactured at the same time according to the end-users requirements at no additional process cost.
Complexity
The advent of 3D printing has seen a proliferation of products (designed in digital environments), which involve levels of complexity that simply could not be produced physically in any other way. While this advantage has been taken up by designers and artists to impressive visual effect, it has also made a significant impact on industrial applications, whereby applications are being developed to materialize complex components that are proving to be both lighter and stronger than their predecessors.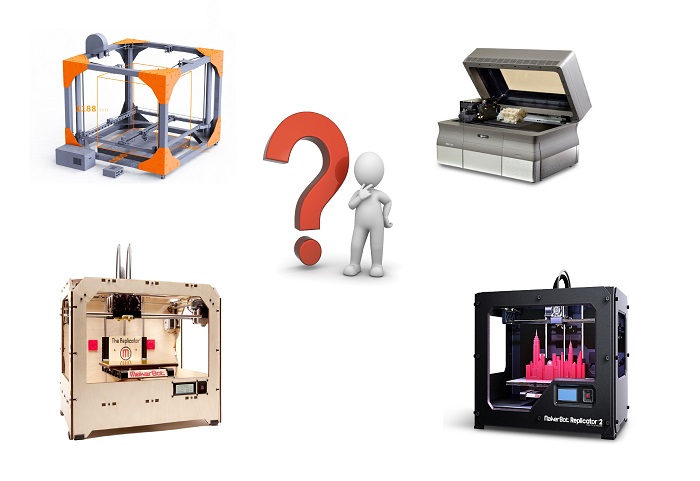 Notable uses are emerging in the aerospace sector where these issues are of primary importance.
Tool-less
For industrial manufacturing, one of the most cost-, time- and labour-intensive stages of the product development process is the production of the tools. For low to medium volume applications, industrial 3D printing — or additive manufacturing — can eliminate the need for tool production and, therefore, the costs, lead times and labour associated with it. This is an extremely attractive proposition, that an increasing number or manufacturers are taking advantage of. Furthermore, because of the complexity advantages stated above, products and components can be designed specifically to avoid assembly requirements with intricate geometry and complex features further eliminating the labour and costs associated with assembly processes.
Sustainable / Environmentally Friendly
3D printing is also emerging as an energy-efficient technology that can provide environmental efficiencies in terms of both the manufacturing process itself, utilising up to 90% of standard materials, and, therefore, creating less waste, but also throughout an additively manufactured product’s operating life, by way of lighter and stronger design that imposes a reduced carbon footprint compared with traditionally manufactured products.
Furthermore, 3D printing is showing great promise in terms of fulfilling a local manufacturing model, whereby products are produced on demand in the place where they are needed — eliminating huge inventories and unsustainable logistics for shipping high volumes of products around the world.
08 - Applications
The origins of 3D printing in ‘Rapid Prototyping’ were founded on the principles of industrial prototyping as a means of speeding up the earliest stages of product development with a quick and straightforward way of producing prototypes that allows for multiple iterations of a product to arrive more quickly and efficiently at an optimum solution. This saves time and money at the outset of the entire product development process and ensures confidence ahead of production tooling.
Prototyping is still probably the largest, even though sometimes overlooked, application of 3D printing today.
The developments and improvements of the process and the materials, since the emergence of 3D printing for prototyping, saw the processes being taken up for applications further down the product development process chain.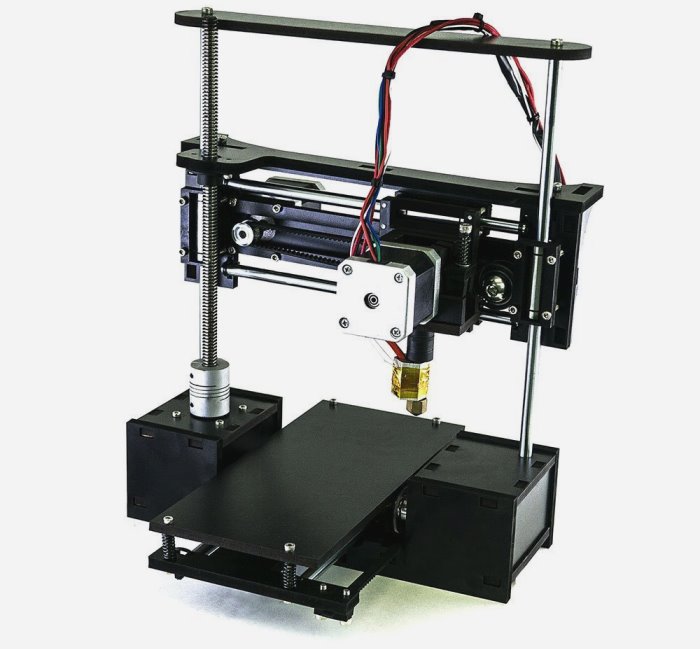 Tooling and casting applications were developed utilizing the advantages of the different processes. Again, these applications are increasingly being used and adopted across industrial sectors.
Similarly for final manufacturing operations, the improvements are continuing to facilitate uptake.
In terms of the industrial vertical markets that are benefitting greatly from industrial 3D printing across all of these broad spectrum applications, the following is a basic breakdown:
Medical and Dental
The medical sector is viewed as being one that was an early adopter of 3D printing, but also a sector with huge potential for growth, due to the customization and personalization capabilities of the technologies and the ability to improve people’s lives as the processes improve and materials are developed that meet medical grade standards.
3D printing technologies are being used for a host of different applications. In addition to making prototypes to support new product development for the medical and dental industries, the technologies are also utilized to make patterns for the downstream metal casting of dental crowns and in the manufacture of tools over which plastic is being vacuum formed to make dental aligners. The technology is also taken advantage of directly to manufacture both stock items, such as hip and knee implants, and bespoke patient-specific products, such as hearing aids, orthotic insoles for shoes, personalised prosthetics and one-off implants for patients suffering from diseases such as osteoarthritis, osteoporosis and cancer, along with accident and trauma victims. 3D printed surgical guides for specific operations are also an emerging application that is aiding surgeons in their work and patients in their recovery. Technology is also being developed for the 3D printing of skin, bone, tissue, pharmaceuticals and even human organs. However, these technologies remain largely decades away from commercialisation.
Aerospace
Like the medical sector, the aerospace sector was an early adopter of 3D printing technologies in their earliest forms for product development and prototyping. These companies, typically working in partnership with academic and research institutes, have been at the sharp end in terms or pushing the boundaries of the technologies for manufacturing applications.
Because of the critical nature of aircraft development, the R&D is demanding and strenuous, standards are critical and industrial grade 3D printing systems are put through their paces. Process and materials development have seen a number of key applications developed for the aerospace sector — and some non-critical parts are all-ready flying on aircraft.
High profile users include GE / Morris Technologies, Airbus / EADS, Rolls-Royce, BAE Systems and Boeing. While most of these companies do take a realistic approach in terms of what they are doing now with the technologies, and most of it is R&D, some do get quite bullish about the future.
Automotive
Another general early adopter of Rapid Prototying technologies — the earliest incarnation of 3D printing — was the automotive sector. Many automotive companies — particularly at the cutting edge of motor sport and F1 — have followed a similar trajectory to the aerospace companies.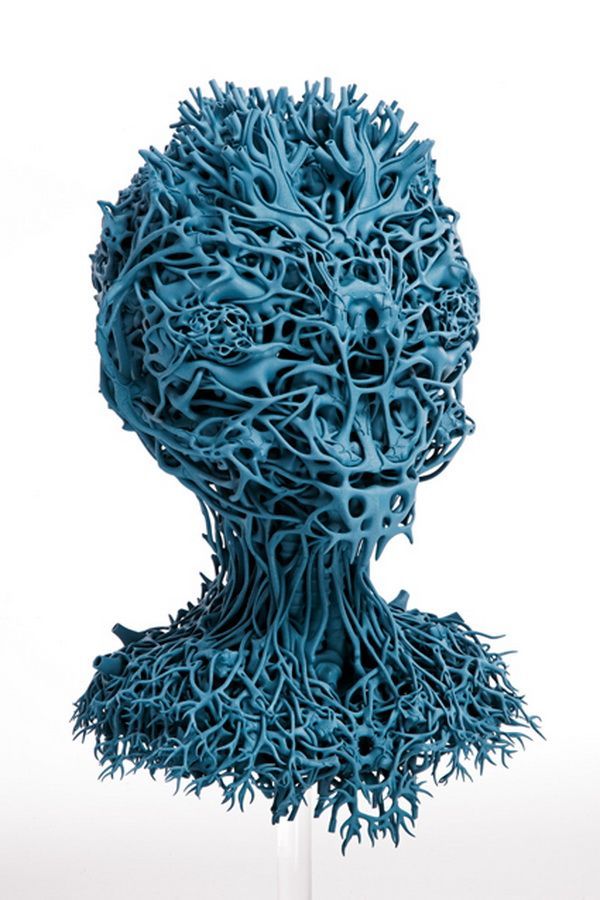 First (and still) using the technologies for prototyping applications, but developing and adapting their manufacturing processes to incorporate the benefits of improved materials and end results for automotive parts.
Many automotive companies are now also looking at the potential of 3D printing to fulfill after sales functions in terms of production of spare/replacement parts, on demand, rather than holding huge inventories.
Jewellery
Traditionally, the design and manufacturing process for jewellery has always required high levels of expertise and knowledge involving specific disciplines that include fabrication, mould-making, casting, electroplating, forging, silver/gold smithing, stone-cutting, engraving and polishing. Each of these disciplines has evolved over many years and each requires technical knowledge when applied to jewellery manufacture. Just one example is investment casting — the origins of which can be traced back more than 4000 years.
For the jewellery sector, 3D printing has proved to be particularly disruptive.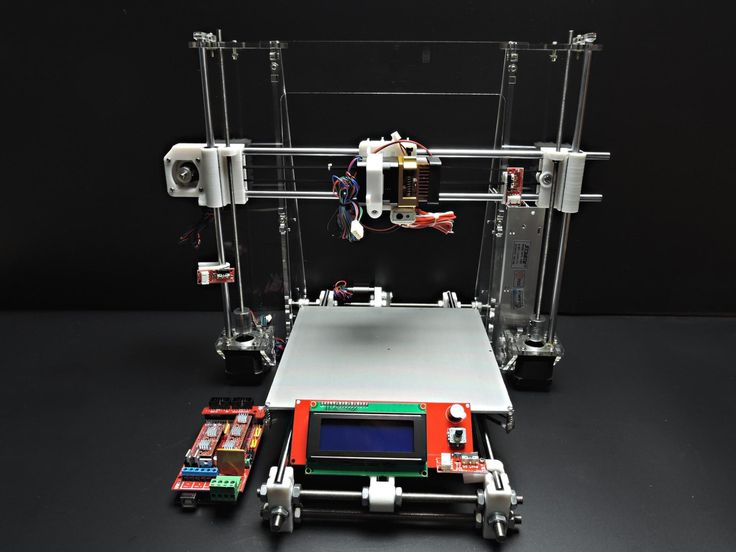 There is a great deal of interest — and uptake — based on how 3D printing can, and will, contribute to the further development of this industry. From new design freedoms enabled by 3D CAD and 3D printing, through improving traditional processes for jewellery production all the way to direct 3D printed production eliminating many of the traditional steps, 3D printing has had — and continues to have — a tremendous impact in this sector.
Art / Design / Sculpture
Artists and Sculptors are engaging with 3D printing in myriad of different ways to explore form and function in ways previously impossible. Whether purely to find new original expression or to learn from old masters this is a highly charged sector that is increasingly finding new ways of working with 3D printing and introducing the results to the world. There are numerous artists that have now made a name for themselves by working specifically with 3D modelling, 3D scanning and 3D printing technologies.
- Joshua Harker
- Dizingof
- Jessica Rosenkrantz at Nervous System
- Pia Hinze
- Nick Ervinck
- Lionel Dean
- And many others.

The discipline of 3D scanning in conjunction with 3D printing also brings a new dimension to the art world, however, in that artists and students now have a proven methodology of reproducing the work of past masters and creating exact replicas of ancient (and more recent) sculptures for close study – works of art that they would otherwise never have been able to interact with in person. The work of Cosmo Wenman is particularly enlightening in this field.
Architecture
Architectural models have long been a staple application of 3D printing processes, for producing accurate demonstration models of an architect’s vision. 3D printing offers a relatively fast, easy and economically viable method of producing detailed models directly from 3D CAD, BIM or other digital data that architects use. Many successful architectural firms, now commonly use 3D printing (in house or as a service) as a critical part of their workflow for increased innovation and improved communication.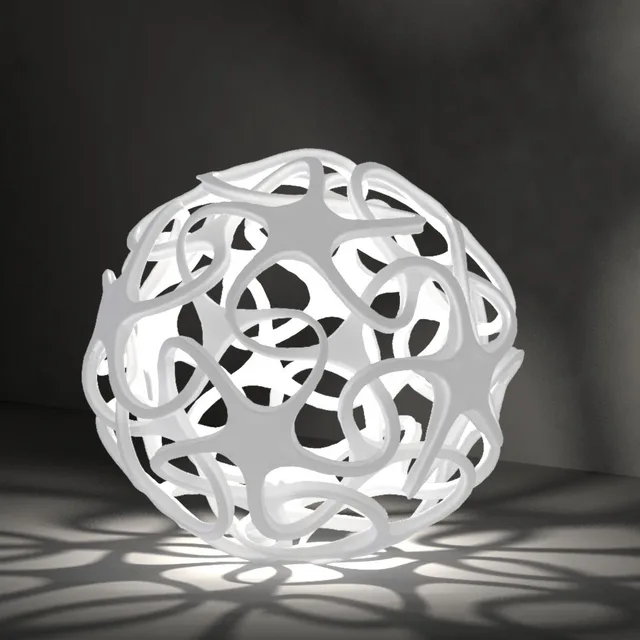
More recently some visionary architects are looking to 3D printing as a direct construction method. Research is being conducted at a number of organizations on this front, most notably Loughborough University, Contour Crafting and Universe Architecture.
Fashion
As 3D printing processes have improved in terms of resolution and more flexible materials, one industry, renowned for experimentation and outrageous statements, has come to the fore. We are of course talking about fashion!
3D printed accessories including shoes, head-pieces, hats and bags have all made their way on to global catwalks. And some even more visionary fashion designers have demonstrated the capabilities of the tech for haute couture — dresses, capes, full-length gowns and even some under wear have debuted at different fashion venues around the world.
Iris van Herpen should get a special mention as the leading pioneer in this vein. She has produced a number of collections — modelled on the catwalks of Paris and Milan — that incorporate 3D printing to blow up the ‘normal rules’ that no longer apply to fashion design. Many have followed, and continue to follow, in her footsteps, often with wholly original results.
Although a late-comer to the 3D printing party, food is one emerging application (and/or 3D printing material) that is getting people very excited and has the potential to truly take the technology into the mainstream. After all, we will all, always, need to eat! 3D printing is emerging as a new way of preparing and presenting food.
Initial forays into 3D printing food were with chocolate and sugar, and these developments have continued apace with specific 3D printers hitting the market. Some other early experiments with food including the 3D printing of “meat” at the cellular protein level. More recently pasta is another food group that is being researched for 3D printing food.
Looking to the future 3D printing is also being considered as a complete food preparation method and a way of balancing nutrients in a comprehensive and healthy way.
Consumers
The holy grail for 3D printing vendors is consumer 3D printing.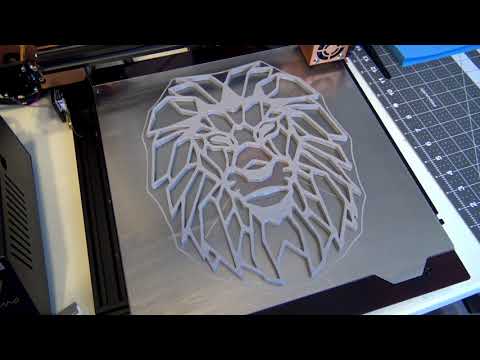 There is a widespread debate as to whether this is a feasible future. Currently, consumer uptake is low due to the accessibility issues that exist with entry level (consumer machines). There is headway being made in this direction by the larger 3D printing companies such as 3D Systems and Makerbot, as a subsidiary of Stratasys as they try to make the 3D printing process and the ancillary components (software, digital content etc) more accessible and user-friendly. There are currently three main ways that the person on the street can interact with 3D printing tech for consumer products:
- design + print
- choose + print
- choose + 3D printing service fulfillment
09 - Glossary
3DP 3D Printing
ABS Acrylonitrile Butadiene Styrene
AM Additive Manufacturing
CAD / CAM Computer-aided design / Computer-aided manufacturing
CAE Computer-aided engineering
DLP Digital Light Processing
DMD Direct Metal Deposition
DMLS Direct Metal Laser Sintering
EBM Electron Beam Melting
EVA Ethylene Vinyl Acetate
FDM Fused Deposition Modelling (Trademark of Stratasys)
FFF Freeform Fabrication
LENS Laser Engineering Net-Shaping (Trademark of SNL, licensed to Optomec)
LS Laser Sintering
PLA Polylactic Acid
RE Reverse Engineering
RM Rapid Manufacturing
RP Rapid Prototyping
RT Rapid Tooling
SL Stereolithography
SLA Stereolithography Apparatus (Registered Trademark of 3D Systems)
SLM Selective Laser Melting
SLS Selective Laser Sintering (Registered Trademark of 3D Systems)
STL / . stl Stereo Lithograpic
3D Printing For Dummies Cheat Sheet
By: Kalani Kirk Hausman and Richard Horne and
Updated: 03-08-2022
From The Book: 3D Printing For Dummies
3D Printing For Dummies
Explore Book Buy On Amazon
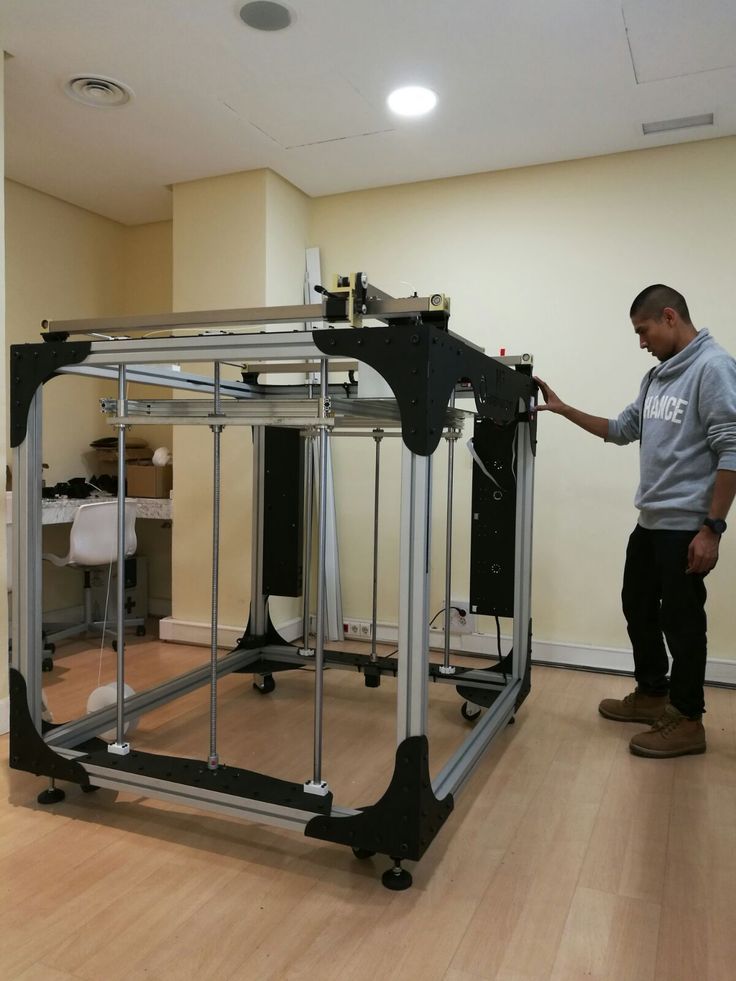
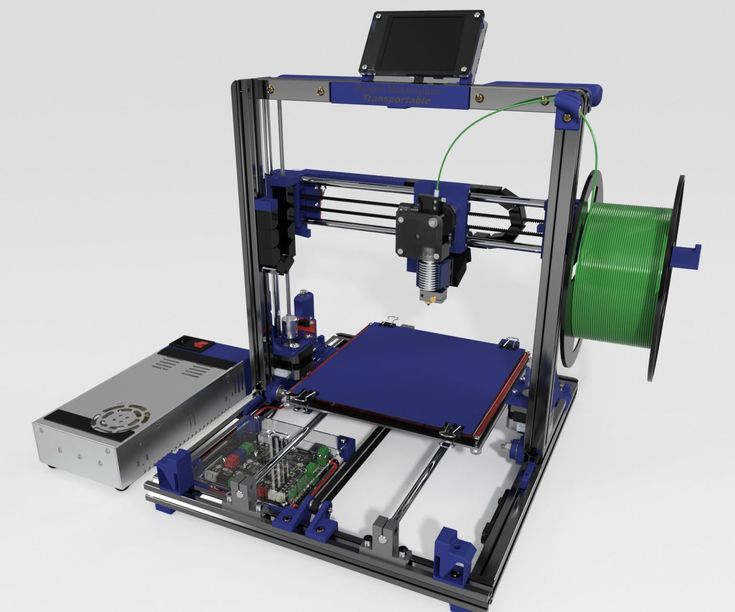
Unlike traditional manufacturing, which involves injecting material into a pre-formed mold or removing material from base material objects, 3D printing starts with a virtual 3D model that is transformed into solid form one layer at a time. Each layer is built on top of the layer before, creating a solid form representing the virtual 3D model in all of its complexity and detail without requiring additional forms of machining and treatment necessary in traditional forms of manufacturing.You can build your own 3D printer using the open-source self-REPlicating RAPid-prototyper (RepRap) family of designs.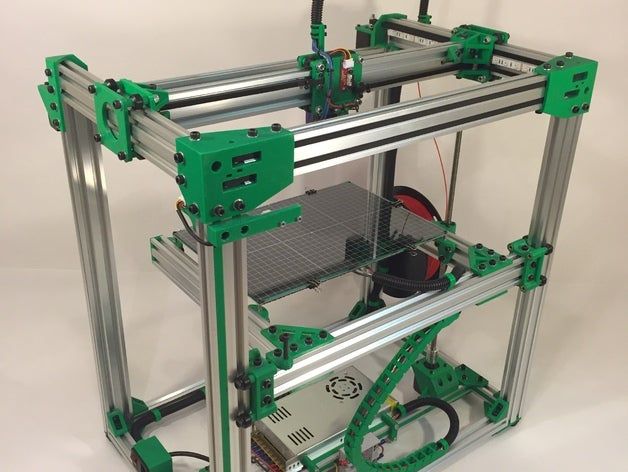 Check out these helpful articles to guide you toward selecting the right RepRap design for you.
Deciding on a RepRap of your own for 3D printing
When it comes to 3D printing, selecting a RepRap printer for personal use begins with an analysis of your particular need in terms of the type, size and other qualities such as turnkey off-the-shelf or build-it-yourself creation. Total cost is also a factor, along with source licensing preference such as the determination of open vs. closed source technologies.
Some of the RepRap designs include:
-
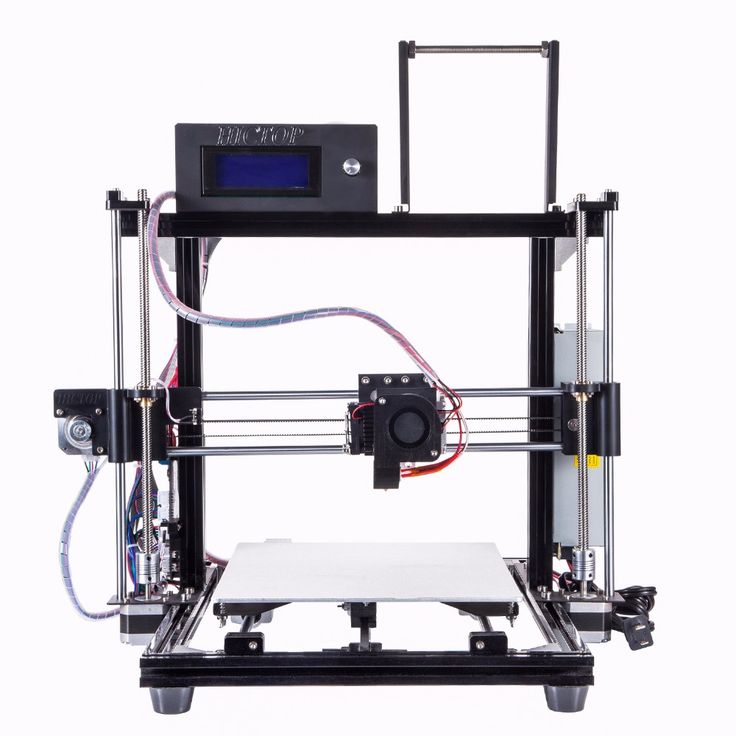
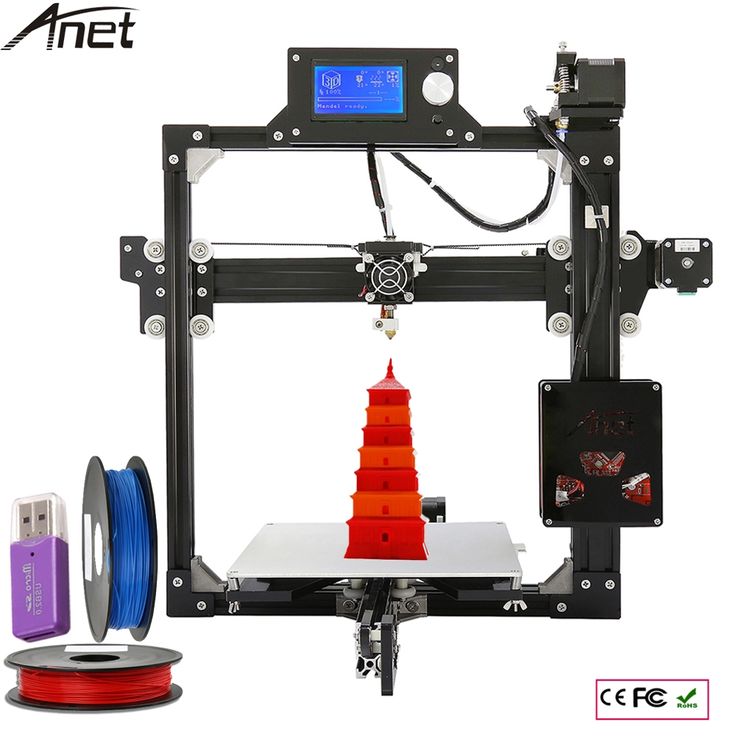
Mendel, Prusa Mendel, Mendel90, Prusa i3: One of the more common branches of Cartesian design, this printer has spawned many variations including the miniaturized Huxley.
-
Wallace and Printrbot: Common educational-sector alternatives for kit construction.
-
MendelMax: This is the derivative of the Prusa Mendel that’s an example of Cartesian RepRaps.

-
Ultimaker: A box-frame RepRap using Cartesian movement.
-
Tantillus: A miniature box-frame RepRap which has the most 3D printable parts of current RepRap variations.
Several RepRap options exist beyond the standard Cartesian format, including:
-
Rostock, RostockMax: A Delta-format RepRap printer that provides a tall build volume. The RostockMax is a laser-cut kit form that we will build here as an example of Delta RepRaps.
-
3DR: An alternative delta-style RepRap designed by Richard Horne, based on the Rostock format with inspiration from the Tantillus for self-replication.
After identifying the type of printer, you will need to select the proper type of plastic filament you wish to print with and the components that will be used in building the printer itself, including the framework, extruder, build plate, control electronics and software that will be used.
Understanding RepRap 3D printer control electronics
A RepRap 3D printer is an example of a purpose-built robot, using the popular open-source Arduino microcontroller at its heart together with stepper motor controllers, motors, and sensors to control its movements. Some custom 3D printer boards have been created to integrate an Arduino’s functions and the related items typically found on a 3D printing “shield” that attaches to the basic format. Some of these options include:
-
RAMPS: The original Arduino shield designed for multiple stepper motor control and management of the extruder and built plate heaters.
-
RAMBo: A modular all-in-one combination of the Arduino board and RAMPS shield.
-
Sanguinololu: A popular build-it-yourself all-in-one board integrating both microcontroller and stepper motor controllers
-
Minitronics: A reduced size variation of the Sanguinololu.
-
RUMBA: A modular integrated board with modules supporting LCD panels, external memory cards and other add-on capabilities.
-
ELEFU-RA: A developer integrated electronics set that can plug in standard ATX computer power supplies
-
Megatronics: The “big brother” of the Minitronics board, which allows the use of higher-temperature thermocouple thermal sensors in place of the more common thermistor type sensors.
Many components have multiple options such as the selection of contact switches or magnetic hall-type sensors for the end-stops or the use of different fans to meet the type of plastic you are using. Even the type of motor controllers and wire connections (soldered vs. crimped) will affect options available upon completion of your RepRap.
Assembling the RepRap extruder and RepRap upgrades on a 3D printer
Once the framework for a 3D printer has been assembled and the electronics selected, the final component needed is the extruder and hot-end that melt and deposit plastic to create your object. The extruder slides the plastic filament incrementally into the heated hot-end, where it pushes a small amount of the molten plastic out with each step. The extruder can be made in many ways, including:
-
Geared: Some extruders include additional gears to slow the advance of filament with each step to gain greater control, and to increase the force with which the filament can be advanced into the hot-end.
-
Hobbed: Smooth plastic filament can be held by the extruder using interlocking gears or a hobbed bolt (one with teeth cut along the axis around the bolt’s girth) to hold the filament against an idler wheel so its advance and retraction can be carefully controlled.
-
Bowden: This type of extruder forces the filament through a tube connecting the extruder and hot-end rather than forcing the filament directly into the hot-end, separating the two and allowing the hot-end to be lighter without the directly attached extruder motor for non-Cartesian formats.

-
Syringe: For designs like the [email protected] printer or RepRaps equipped with Richard’s Universal Paste Extruder, a syringe can be used with a constrained strap to incrementally extrude paste or gel materials instead of the usual melted plastic.
-
Multi-color: Advanced extruders include multiple gearboxes and motors to advance multiple filaments into the hot end at the same time. By varying the rate of each color using additional electronics, the end result is a multi-colored print that varies throughout.
-
Dual: A common variation with more limited color mixing involves a dual extruder, which is simply two extruders side by side. This is useful for prints that include PVA (polyvinyl alcohol) or other soluble support material integrated into the same print as the object filament material.
Identifying 3D printer software and machine calibration
The software chain for a RepRap 3D printer begins with the products used to create and prepare the virtual 3D model for printing. However, once an object model has been created or obtained, the model must be processed through several steps before the solid object is created by the RepRap printer:
-
Support: Unlike granular binding systems, fused plastic extruders cannot deposit plastic in mid-air and have it remain there. For overhangs and wide spans, support material must be added to the design and later removed after printing.
-
Raft: Depending on the type of material and build plate used, it may be useful to add a raft or flat printed layer that forms a base on the build plate for your model. As in the case of support, the raft is later removed in finishing the object.
-
Fill: Because additive systems like the RepRap are unaffected by complexity, it is possible to define any solid object as a solid outer shell and an interior space that can be completely solid (100% fill), empty (0% fill) or some midway point in which a regular pattern of thin walls provide support with voids interspersed.
 The amount of volume that includes plastic is defined as its “Fill” and allows you to produce the same object printout using far less plastic than solid equivalents.
 -
Slicing: The virtual model is calculated as a series of layers, with each slice then translated into codes that will direct the printer to move a particular distance while extruding or not and then again, until that layer is done and the z-axis can be moved to the next layer with the process begun again. This code is called “g-code” and many slicers can add support and raft elements automatically, along with an automatic “fill” pattern to reduce the amount of plastic needed for each print.
Once your model has been prepared and sliced, a few final details are handled by the printer control software. Settings for the hot-end and heated build plate will control the melted plastic viscosity and layer adhesion, while the movement rate of the extruder will control the thickness of the extruded material and the rate of the printer’s movement. Additional factors can be adjusted for finer control of each feature.
About This Article
This article is from the book:
- 3D Printing For Dummies ,
About the book authors:
Richard Horne (RichRap) has worked as an engineer, marketer, and product designer. He blogs and shares ideas on making 3D printing easier for everyone. Kalani Kirk Hausman has experience as an IT consultant, enterprise architect, auditor, and ISO. He conducts research on integrating 3D-printed materials into educational curricula.
This article can be found in the category:
- 3D Printing ,
3D printing for "dummies" or "what is a 3D printer?"
- 1 3D printing term
- 2 3D printing methods
- 2.
 1 Extrusion printing
 - 2.2 Melting, sintering or gluing
- 2.3 Stereolithography
- 2.4 Lamination
- 3 Fused Deposition Printing (FDM)
- 3.1 Consumables
- 3.2 Extruder
- 3.3 Working platform
- 3.4 Positioners
- 3.5 Control
- 3.6 Varieties of FDM printers
- 4 Laser stereolithography (SLA)
- 4.1 Lasers and projectors
- 4.2 Cuvette and resin
- 4.3 Types of stereolithographic printers
3D printing term
The term 3D printing has several synonyms, one of which quite briefly and accurately characterizes the essence of the process - "additive manufacturing", that is, production by adding material. The term was not coined by chance, because this is the main difference between multiple 3D printing technologies and the usual methods of industrial production, which in turn received the name "subtractive technologies", that is, "subtractive". If during milling, grinding, cutting and other similar procedures, excess material is removed from the workpiece, then in the case of additive manufacturing, material is gradually added until a solid model is obtained.
Soon 3D printing will even be tested on the International Space Station
Strictly speaking, many traditional methods could be classified as "additive" in the broad sense of the word - for example, casting or riveting. However, it should be borne in mind that in these cases, either the consumption of materials is required for the manufacture of specific tools used in the production of specific parts (as in the case of casting), or the whole process is reduced to joining ready-made parts (welding, riveting, etc.). In order for the technology to be classified as “3D printing”, the final product must be built from raw materials, not blanks, and the formation of objects must be arbitrary - that is, without the use of forms. The latter means that additive manufacturing requires a software component. Roughly speaking, additive manufacturing requires computer control so that the shape of final products can be determined by building digital models. It was this factor that delayed the widespread adoption of 3D printing until the moment when numerical control and 3D design became widely available and highly productive.
3D printing techniques
3D printing technologies are numerous, and there are even more names for them due to patent restrictions. However, you can try to divide technologies into main areas:
Extrusion printing
This includes methods such as deposition deposition (FDM) and multi-jet printing (MJM). This method is based on the extrusion (extrusion) of consumables with the sequential formation of the finished product. As a rule, consumables consist of thermoplastics or composite materials based on them.
Melting, sintering or bonding
This approach is based on bonding powdered material together. Formation is done in different ways. The simplest is gluing, as is the case with 3D inkjet printing (3DP). Such printers deposit thin layers of powder onto the build platform, which are then selectively bonded with a binder. Powders can be made up of virtually any material that can be ground to a powder—plastic, wood, metal.
This model of James Bond's Aston Martin was successfully printed on Voxeljet's SLS printer and blown up just as successfully during the filming of Skyfall instead of the expensive original
sintering (SLS and DMLS) and smelting (SLM), which allow you to create all-metal parts. As with 3D inkjet printing, these devices apply thin layers of powder, but the material is not glued together, but sintered or melted using a laser. Laser sintering (SLS) is used to work with both plastic and metal powders, although metal pellets usually have a more fusible shell, and after printing they are additionally sintered in special ovens. DMLS is a variant of SLS installations with more powerful lasers that allow sintering metal powders directly without additives.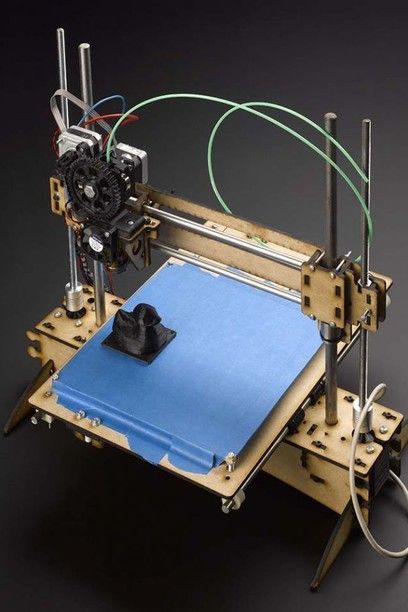 SLM printers provide not just sintering of particles, but their complete melting, which allows you to create monolithic models that do not suffer from the relative fragility caused by the porosity of the structure. As a rule, printers for working with metal powders are equipped with vacuum working chambers, or they replace air with inert gases. Such a complication of the design is caused by the need to work with metals and alloys subject to oxidation - for example, with titanium.
Stereolithography
How an SLA printer works
Stereolithography printers use special liquid materials called "photopolymer resins". The term "photopolymerization" refers to the ability of a material to harden when exposed to light. As a rule, such materials react to ultraviolet irradiation.
Resin is poured into a special container with a movable platform, which is installed in a position near the surface of the liquid. The layer of resin covering the platform corresponds to one layer of the digital model. Then a thin layer of resin is processed by a laser beam, hardening at the points of contact. At the end of illumination, the platform together with the finished layer is immersed to the thickness of the next layer, and illumination is performed again.
Lamination
Laminating (LOM) 3D printers workflow
Some 3D printers build models using sheet materials - paper, foil, plastic film.
Layers of material are glued on top of each other and cut to the contours of the digital model using a laser or a blade.
These machines are well suited for prototyping and can use very cheap consumables, including regular office paper. However, the complexity and noise of these printers, coupled with the limitations of the models they produce, limit their popularity.
Fused Deposition Modeling (FDM) and Laser Stereolithography (SLA) are the most popular 3D printing methods used in the home and office.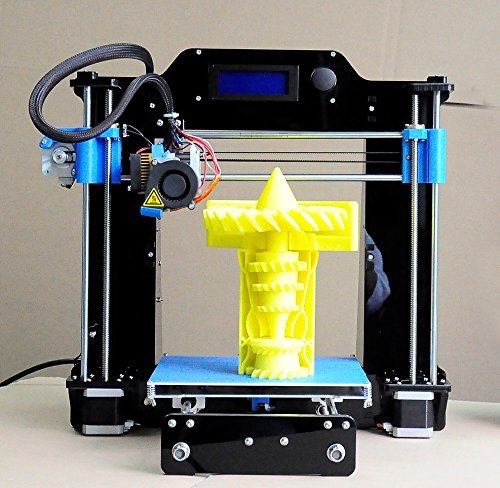
Let's take a closer look at these technologies.
Fused Deposition Printing (FDM)
FDM is perhaps the simplest and most affordable 3D construction method, which makes it very popular.
High demand for FDM printers is driving device and consumable prices down rapidly, along with technology advances towards ease of use and improved reliability.
Consumables
ABS filament spool and finished model
FDM printers are designed to print with thermoplastics, which are usually supplied as thin filaments wound on spools. The range of "clean" plastics is very wide. One of the most popular materials is polylactide or "PLA plastic". This material is made from corn or sugar cane, which makes it non-toxic and environmentally friendly, but makes it relatively short-lived. ABS plastic, on the other hand, is very durable and wear-resistant, although it is susceptible to direct sunlight and can release small amounts of harmful fumes when heated. Many plastic items that we use on a daily basis are made from this material: housings for household appliances, plumbing fixtures, plastic cards, toys, etc.
In addition to PLA and ABS, printing is possible with nylon, polycarbonate, polyethylene and many other thermoplastics that are widely used in modern industry. More exotic materials are also possible, such as polyvinyl alcohol, known as "PVA plastic". This material dissolves in water, which makes it very useful for printing complex geometric patterns. But more on that below.
Model made from Laywoo-D3. Changing the extrusion temperature allows you to achieve different shades and simulate annual rings
It is not necessary to print with homogeneous plastics. It is also possible to use composite materials imitating wood, metals, stone. Such materials use all the same thermoplastics, but with impurities of non-plastic materials.
So, Laywoo-D3 consists partly of natural wood dust, which allows you to print "wooden" products, including furniture.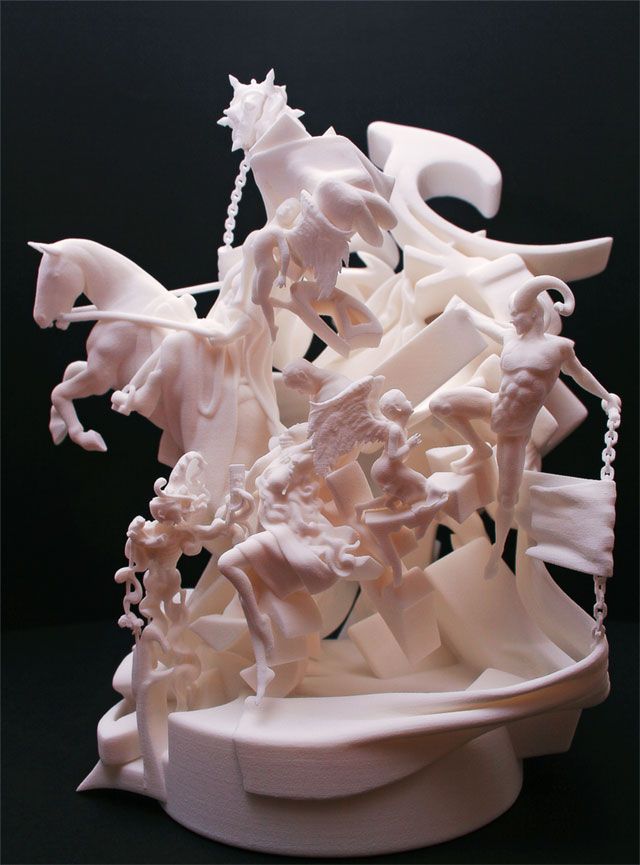
The material called BronzeFill is filled with real bronze, and models made from it can be ground and polished, achieving a high similarity to products made from pure bronze.
One has only to remember that thermoplastics serve as a binding element in composite materials - they determine the thresholds of strength, thermal stability and other physical and chemical properties of finished models.
Extruder
Extruder - FDM print head. Strictly speaking, this is not entirely true, because the head consists of several parts, of which only the feed mechanism is directly "extruder". However, by tradition, the term "extruder" is commonly used as a synonym for the entire print assembly.
FDM extruder general design
The extruder is designed for melting and applying thermoplastic thread. The first component is the thread feed mechanism, which consists of rollers and gears driven by an electric motor.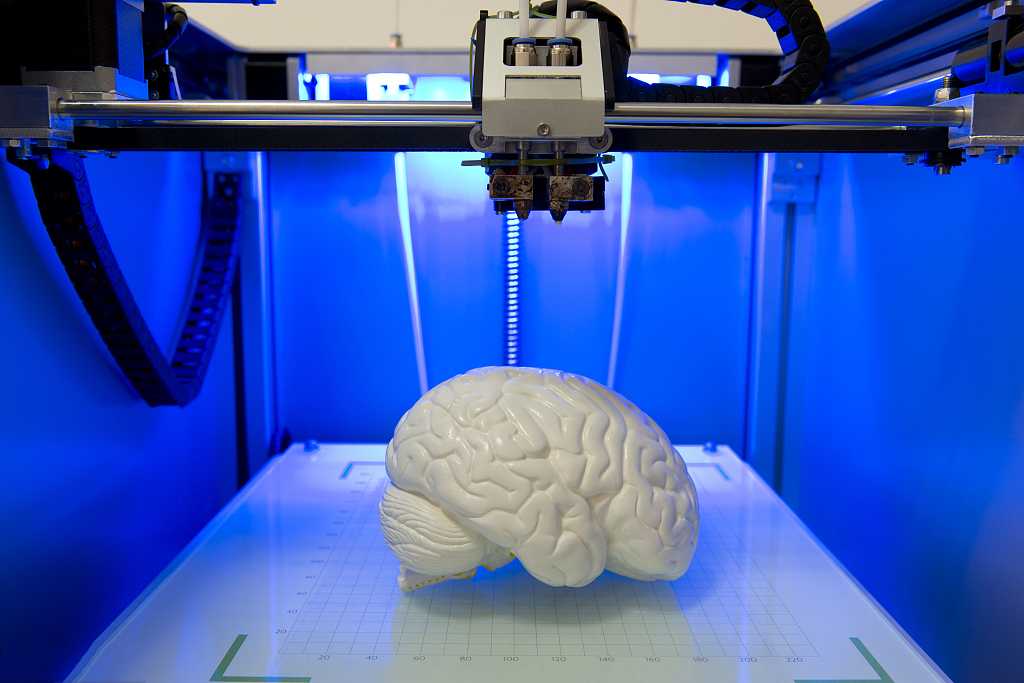 The mechanism feeds the thread into a special heated metal tube with a small diameter nozzle, called a "hot end" or simply a "nozzle". The same mechanism is used to remove the thread if a change of material is needed.
The hot end is used to heat and melt the thread fed by the puller. As a rule, nozzles are made from brass or aluminum, although more heat-resistant, but also more expensive materials can be used. For printing with the most popular plastics, a brass nozzle is quite enough. The “nozzle” itself is attached to the end of the tube with a threaded connection and can be replaced with a new one in case of wear or if a change in diameter is necessary. The nozzle diameter determines the thickness of the molten filament and, as a result, affects the print resolution. The heating of the hot end is controlled by a thermistor. Temperature control is very important, because when the material is overheated, pyrolysis can occur, that is, the decomposition of plastic, which contributes both to the loss of the properties of the material itself and to clogging of the nozzle.
PrintBox3D One FDM Printer Extruder
To prevent the filament from melting too early, the top of the hot end is cooled by heatsinks and fans. This point is of great importance, since thermoplastics that pass the glass transition temperature significantly expand in volume and increase the friction of the material with the walls of the hot end. If the length of such a section is too long, the pulling mechanism may not have enough strength to push the thread.
The number of extruders may vary depending on the purpose of the 3D printer. The simplest options use a single print head. The dual extruder greatly expands the capabilities of the device, allowing you to print one model in two different colors, as well as using different materials. The last point is important when building complex models with overhanging structural elements: FDM printers cannot print “over the air”, since the applied layers require support. In the case of hinged elements, temporary support structures have to be printed, which are removed after printing is completed.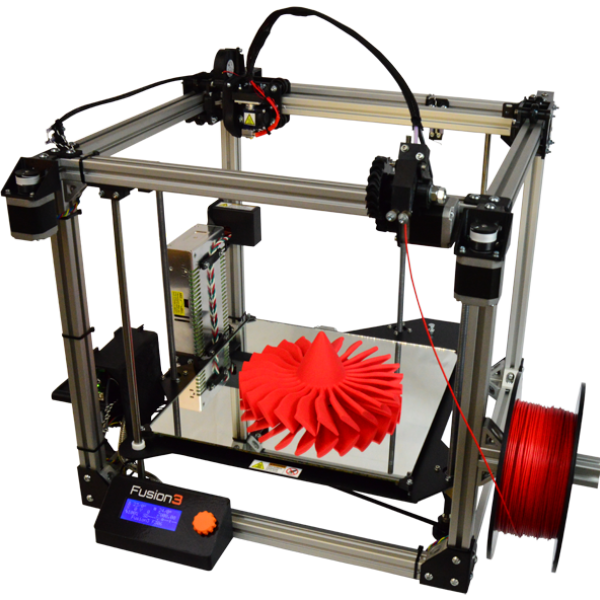 The removal process is fraught with damage to the model itself and requires accuracy. In addition, if the model has a complex structure with internal cavities that are difficult to access, building conventional supports may not be practical due to the difficulty in removing excess material.
Finished model with PVA supports (white) before and after washing
In such cases, the same water-soluble polyvinyl alcohol (PVA) comes in handy. Using a dual extruder, you can build a model from waterproof thermoplastic using PVA to create supports.
After printing, PVA can be simply dissolved in water and a complex product of perfect quality can be obtained.
Some FDM printers can use three or even four extruders.
Working platform
Heated platform covered with removable glass work table
Models are built on a special platform, often equipped with heating elements. Preheating is required for a wide range of plastics, including the popular ABS, which are subject to a high degree of shrinkage when cooled.![]() The rapid loss of volume by cold coats compared to freshly applied material can lead to model distortion or delamination. The heating of the platform makes it possible to significantly equalize the temperature gradient between the upper and lower layers.
The rapid loss of volume by cold coats compared to freshly applied material can lead to model distortion or delamination. The heating of the platform makes it possible to significantly equalize the temperature gradient between the upper and lower layers.
Heating is not recommended for some materials. A typical example is PLA plastic, which requires a fairly long time to harden. Heating PLA can lead to deformation of the lower layers under the weight of the upper ones. When working with PLA, measures are usually taken not to heat up, but to cool the model. Such printers have characteristic open cases and additional fans blowing fresh layers of the model.
Calibration screw for work platform covered with blue masking tape
The platform needs to be calibrated before printing to ensure that the nozzle does not hit the applied layers and move too far causing air-to-air printing resulting in plastic vermicelli. The calibration process can be either manual or automatic.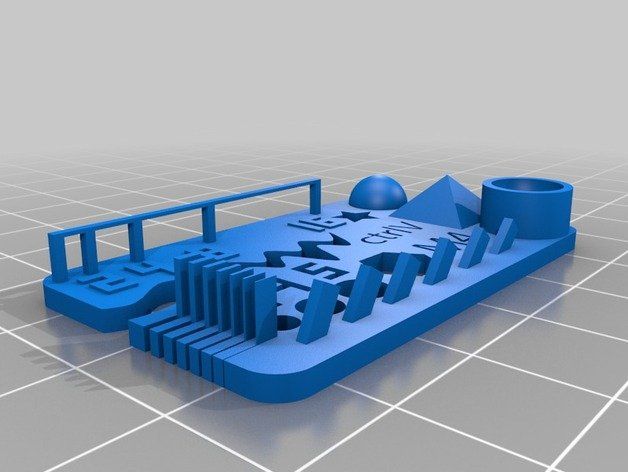 In manual mode, calibration is performed by positioning the nozzle at different points on the platform and adjusting the platform inclination using the support screws to achieve the optimal distance between the surface and the nozzle.
As a rule, platforms are equipped with an additional element - a removable table. This design simplifies the cleaning of the working surface and facilitates the removal of the finished model. Stages are made from various materials, including aluminum, acrylic, glass, etc. The choice of material for the manufacture of the stage depends on the presence of heating and consumables for which the printer is optimized.
For a better adhesion of the first layer of the model to the surface of the table, additional tools are often used, including polyimide film, glue and even hairspray! But the most popular tool is inexpensive, but effective masking tape. Some manufacturers make perforated tables that hold the model well but are difficult to clean.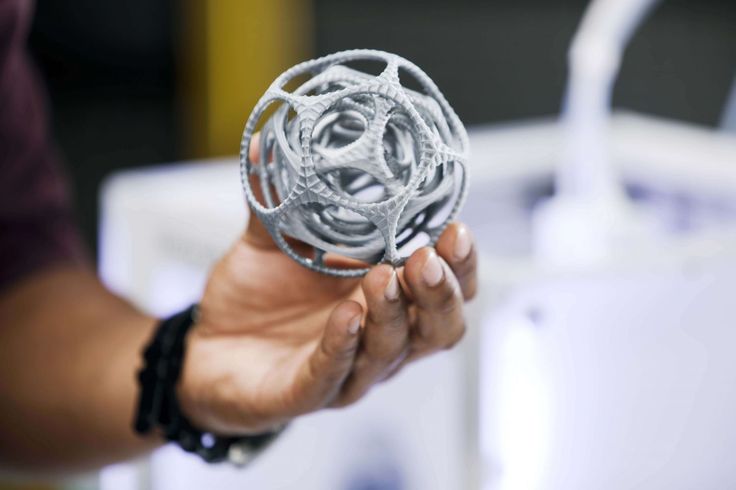 In general, the expediency of applying additional funds to the table depends on the consumable material and the material of the table itself.
Positioning mechanisms
Scheme of operation of positioning mechanisms
Of course, the print head must move relative to the working platform, and unlike conventional office printers, positioning must be carried out not in two, but in three planes, including height adjustment.
Positioning pattern may vary. The simplest and most common option involves mounting the print head on perpendicular guides driven by stepper motors and providing positioning along the X and Y axes.
Vertical positioning is carried out by moving the working platform.
On the other hand, it is possible to move the extruder in one plane and the platforms in two.
SeemeCNC ORION Delta Printer
One option that is gaining popularity is the delta coordinate system.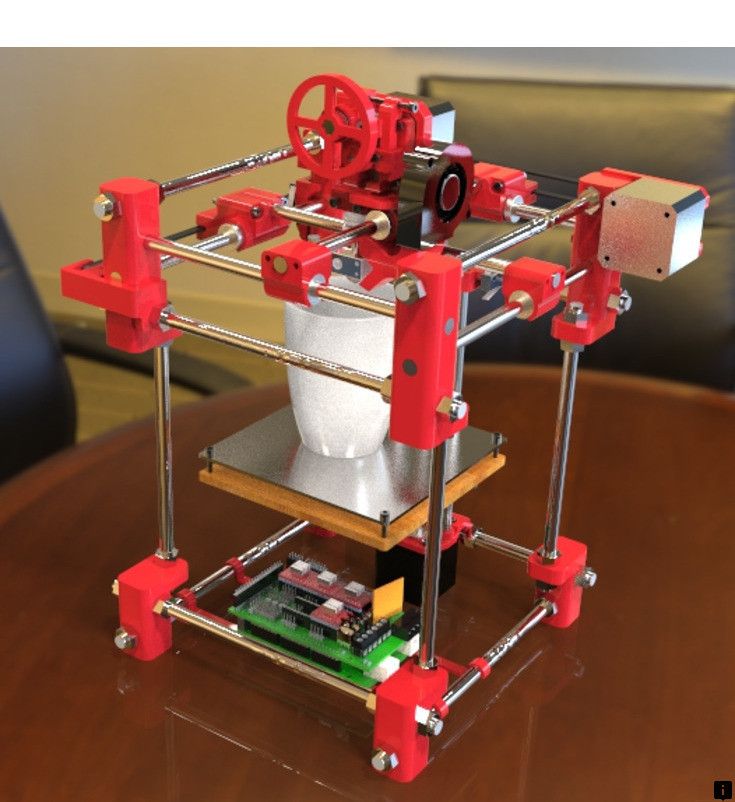
Such devices are called "delta robots" in the industry.
In delta printers, the print head is suspended on three manipulators, each of which moves along a vertical rail.
The synchronous symmetrical movement of the manipulators allows you to change the height of the extruder above the platform, and the asymmetric movement causes the head to move in the horizontal plane.
A variant of this system is the reverse delta design, where the extruder is fixed to the ceiling of the working chamber, and the platform moves on three support arms.
Delta printers have a cylindrical build area, and their design makes it easy to increase the height of the working area with minimal design changes by extending the rails.
In the end, everything depends on the decision of the designers, but the fundamental principle does not change.
Control
Typical Arduino-based controller with add-on modules
The operation of the FDM printer, including nozzle and platform temperature, filament feed rate, and stepper motors for positioning the extruder, is controlled by fairly simple electronic controllers.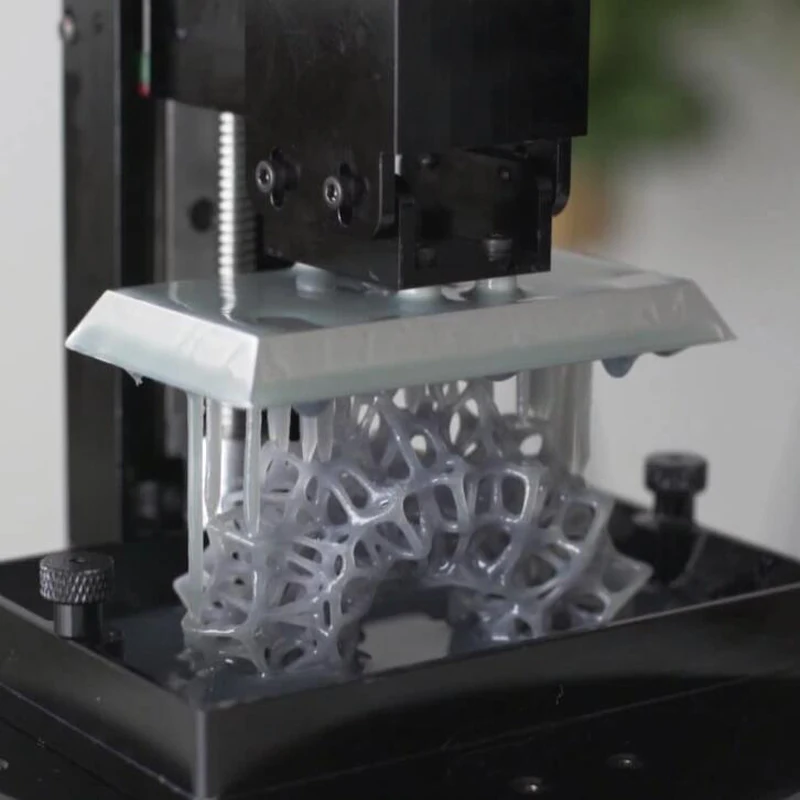 Most controllers are based on the Arduino platform, which has an open architecture.
The programming language used by the printers is called G-code (G-Code) and consists of a list of commands executed in turn by the 3D printer systems. G-code is compiled by programs called "slicers" - standard 3D printer software that combines some of the features of graphics editors with the ability to set print options through a graphical interface. The choice of slicer depends on the printer model. RepRap printers use open source slicers such as Skeinforge, Replicator G and Repetier-Host. Some companies make printers that require proprietary software.
Program code for printing is generated using slicers
As an example, we can mention Cube printers from 3D Systems. There are companies that offer proprietary software but allow third-party software, as is the case with the latest generation of MakerBot 3D printers.
Slicers are not intended for 3D design per se. This task is done with CAD editors and requires some 3D design skills. Although beginners should not despair: digital models of a wide variety of designs are offered on many sites, often even for free. Finally, some companies and individuals offer 3D design services for custom printing.
Finally, 3D printers can be used in conjunction with 3D scanners to automate the process of digitizing objects. Many of these devices are designed specifically to work with 3D printers. Notable examples include the 3D Systems Sense handheld scanner and the MakerBot Digitizer handheld desktop scanner.
MakerBot Replicator 5th Generation FDM Printer with built-in control module on the top of the frame
The user interface of a 3D printer can consist of a simple USB port for connecting to a personal computer. In such cases, the device is actually controlled by the slicer.
The disadvantage of this simplification is a rather high probability of printing failure when the computer freezes or slows down.
A more advanced option includes an internal memory or memory card interface to make the process standalone.
These models are equipped with control modules that allow you to adjust many print parameters (such as print speed or extrusion temperature). The module may include a small LCD display or even a mini-tablet.
Varieties of FDM printers
Professional Stratasys Fortus 360mc FDM printer that allows printing with nylon
FDM printers are very, very diverse, ranging from the simplest home-made RepRap printers to industrial installations capable of printing large-sized objects.
Stratasys, founded by Scott Crump, the inventor of FDM technology, is a leader in the production of industrial installations.
You can build the simplest FDM printers yourself. Such devices are called RepRap, where "Rep" indicates the possibility of "replication", that is, self-reproduction.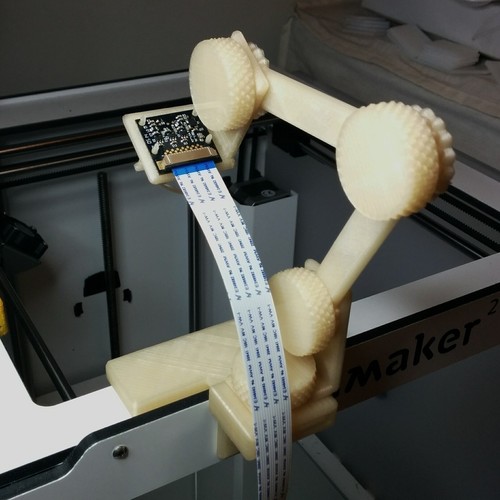
RepRap printers can be used to print custom made plastic parts.
Controller, rails, belts, motors and other components can be easily purchased separately.
Of course, assembling such a device on your own requires serious technical and even engineering skills.
Some manufacturers make it easy by selling DIY kits, but these kits still require a good understanding of the technology. RepRap Printers
And, despite their "homemade nature", RepRap printers are quite capable of producing models with quality at the level of expensive branded counterparts.
Ordinary users who do not want to delve into the intricacies of the process, but require only a convenient device for household use, can purchase a ready-made FDM printer.
Many companies are focusing on the development of the consumer market segment, offering 3D printers for sale that are ready to print “right out of the box” and do not require serious computer skills.
3D Systems Cube consumer 3D printer
The most famous example of a consumer 3D printer is the 3D Systems Cube.
While it doesn't boast a huge build area, ultra-fast print speeds, or superb build quality, it's easy to use, affordable, and safe: This printer has received the necessary certification to be used even by children.
Mankati FDM printer demonstration: http://youtu.be/51rypJIK4y0
Laser Stereolithography (SLA)
Stereolithographic 3D printers are widely used in dental prosthetics
Stereolithographic printers are the second most popular and widespread after FDM printers.
These units deliver exceptional print quality.
The resolution of some SLA printers is measured in a matter of microns - it is not surprising that these devices quickly won the love of jewelers and dentists.
The software side of laser stereolithography is almost identical to FDM printing, so we will not repeat ourselves and will only touch on the distinctive features of the technology.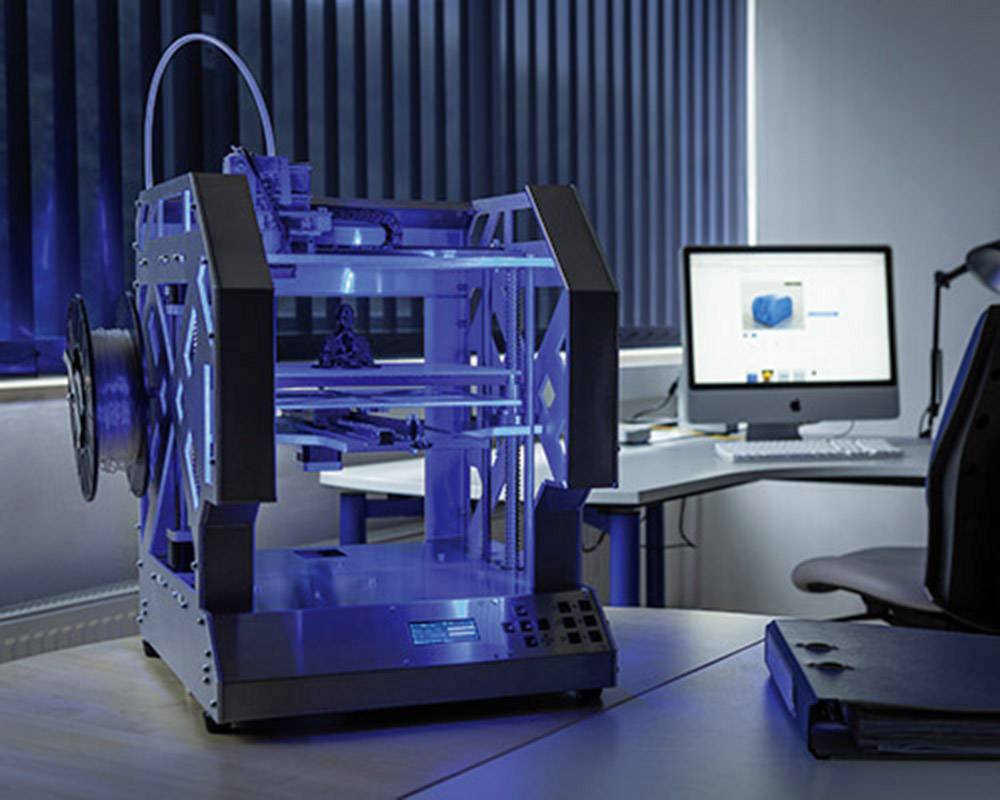
Lasers and projectors
Projector illumination of a photopolymer model using Kudo3D Titan DLP printer as an example
The cost of stereolithography printers is rapidly declining due to growing competition due to high demand and the use of new technologies that reduce the cost of construction.
Although the technology is generically referred to as "laser" stereolithography, most recent developments use UV LED projectors for the most part.
Projectors are cheaper and more reliable than lasers, do not require the use of delicate mirrors to deflect the laser beam, and have higher performance. The latter is explained by the fact that the contour of the whole layer is illuminated as a whole, and not sequentially, point by point, as is the case with laser options. This variant of the technology is called projection stereolithography, "DLP-SLA" or simply "DLP". However, both options are currently common - both laser and projector versions.
Cuvette and resin
Photopolymer resin is poured into a cuvette
A photopolymer resin that looks like epoxy is used as consumables for stereolithography printers. Resins can have a variety of characteristics, but they all share one key feature for 3D printing applications: these materials harden when exposed to ultraviolet light. Hence, in fact, the name "photopolymer".
When polymerized, resins can have a wide variety of physical characteristics. Some resins are like rubber, others are hard plastics like ABS. You can choose different colors and degrees of transparency. The main disadvantage of resins and SLA printing in general is the cost of consumables, which significantly exceeds the cost of thermoplastics.
On the other hand, stereolithographic printers are mainly used by jewelers and dentists who do not need to build large parts but appreciate the savings from fast and accurate prototyping. Thus, SLA printers and consumables pay for themselves very quickly.
Example of a model printed on a laser stereolithographic 3D printer
Resin is poured into a cuvette, which can be equipped with a lowering platform. In this case, the printer uses a leveling device to flatten the thin layer of resin covering the platform just prior to irradiation. As the model is being made, the platform, together with the finished layers, is “embedded” in the resin. Upon completion of printing, the model is removed from the cuvette, treated with a special solution to remove liquid resin residues and placed in an ultraviolet oven, where the final illumination of the model is performed.
Some SLA and DLP printers work in an "inverted" scheme: the model is not immersed in the consumable, but "pulled" out of it, while the laser or projector is placed under the cuvette, and not above it. This approach eliminates the need to level the surface after each exposure, but requires the use of a cuvette made of a material transparent to ultraviolet light, such as quartz glass.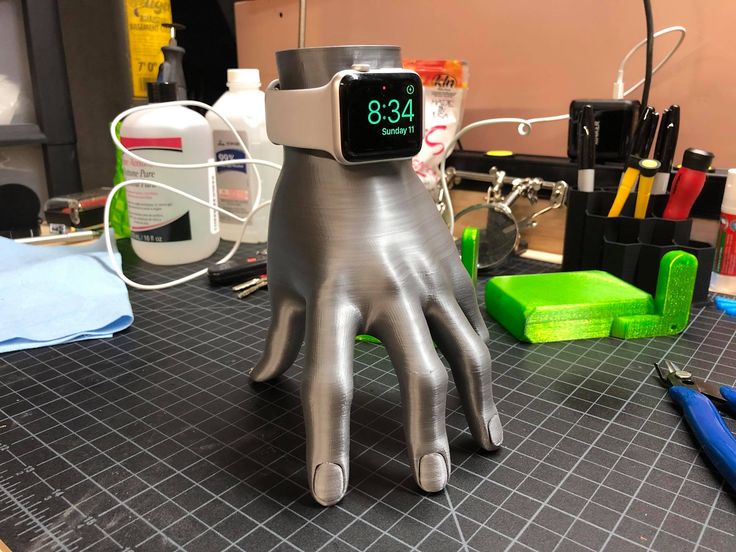
The accuracy of stereolithographic printers is extremely high. For comparison, the standard for vertical resolution for FDM printers is considered to be 100 microns, and some variants of SLA printers allow you to apply layers as thin as 15 microns. But this is not the limit. The problem, rather, is not so much in the accuracy of lasers, but in the speed of the process: the higher the resolution, the lower the print speed. The use of digital projectors allows you to significantly speed up the process, because each layer is illuminated entirely. As a result, some DLP printer manufacturers claim to be able to print with a vertical resolution of one micron!
Video from CES 2013 showing Formlabs Form1 stereolithography 3D printer in action: http://youtu.be/IjaUasw64VE
Stereolithography Printer Options
Formlabs Form1 Desktop Stereolithography Printer
As with FDM printers, SLA printers come in a wide range in terms of size, features and cost.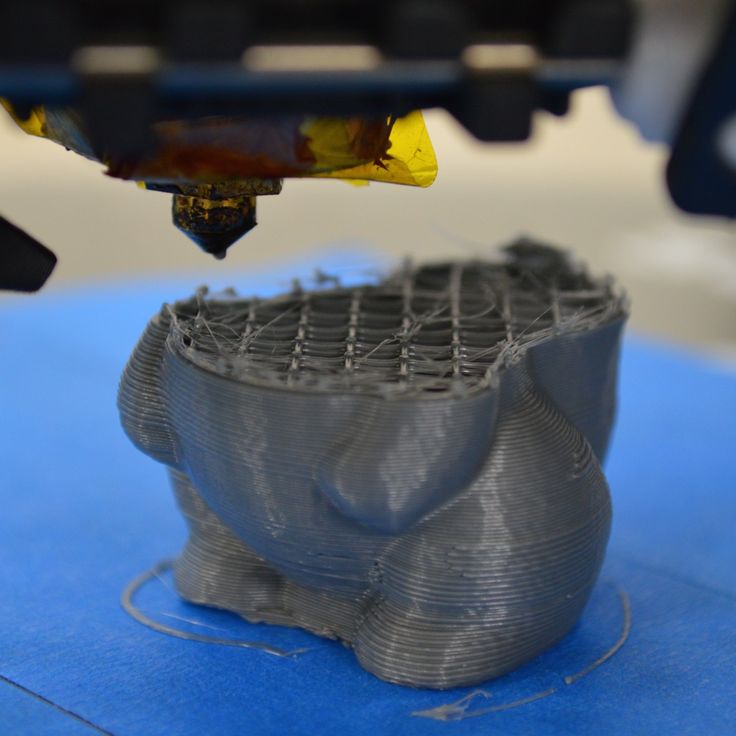 Professional installations can cost tens if not hundreds of thousands of dollars and weigh a couple of tons, but the rapid development of desktop SLA and DLP printers is gradually reducing the cost of equipment without compromising print quality.
Models such as the Titan 1 promise to make stereolithographic 3D printing affordable for small businesses and even home use at around $1,000. Formlabs' Form 1 is available now for a factory selling price of $3,299.
The developer of the DLP printer Peachy generally intends to overcome the lower price barrier of $100.
At the same time, the cost of photopolymer resins remains quite high, although the average price has fallen from $150 to $50 per liter over the past couple of years.
Of course, the growing demand for stereolithographic printers will stimulate the growth in the production of consumables, which will lead to further price reductions.
Go to the main page of the Encyclopedia of 3D printing
3D printing for "dummies" from the "teapot" - Personal experience on vc.
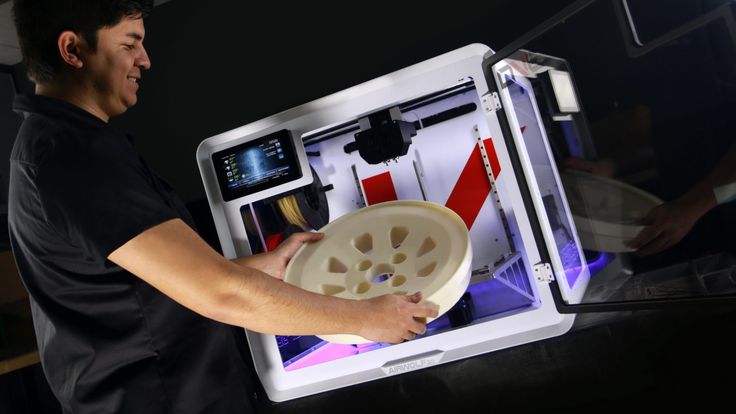 ru
ru 714 views
I recently became the owner of a 3D printer, before that I knew almost nothing about 3D printing, so I decided to share my experience with the same "dummies", people who are far from this technology. My article is intended precisely and only for such people. The advice of “3D printers” with experience for beginners may turn out to be useless, due to their complexity or certain specifics. I think that my post, based on personal experience (and personal mistakes), not overloaded with technical details, will be very useful to a wide audience. Also, my description is based on personal experience with the Creality Ender 3 Pro 3D printer. The information below may not be useful for models from other companies. Unfortunately, I am not aware of the current Russian realities, and therefore everything described below applies to 3D printer models that are popular in the United States. I also apologize in advance for some words and terms in English (I honestly tried, but could not always find an adequate term in Russian).
First, I will give a few “maxims” and refuted stereotypes, perhaps only mine:
- “3D printing is a complex, expensive, and requires special knowledge” - it is absolutely not true! Perhaps this was once the case, but at the moment a 3D printer is a consumer device that is no more complicated (but rather, even much simpler!) TV, smartphone, computer. In addition, it is quite cheap, by modern standards, a hobby - one of the cheapest, probably. Special knowledge for 3D printing at home is not required, or rather, no more, which can be gleaned in a short time from the FAQ on the official website, as well as in user forms.
- “The 3D printer needs a special room because it stinks and makes a lot of noise” - this is also not true (or, more precisely, not quite true). There are plastics such as PLA and PETG that emit virtually no odor when printed, as well as printer models equipped with near-silent fans. However, the noise from the entry level models is not “fatal”, but, say, like from a gaming desktop / laptop in a “fancy” 3D game.
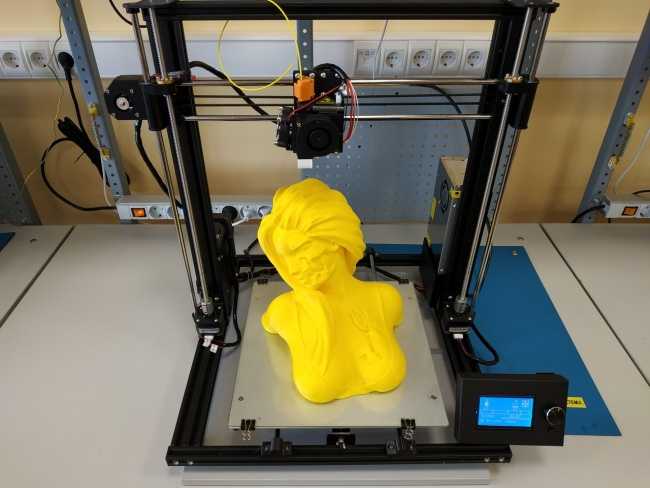
- “You can make good money in 3D printing by printing at home and selling fun crafts on eBay, well, or save a lot of money by printing things you need for the home, such as auto parts, etc.” – unfortunately, this is also not true. Yes, there are a lot of 3D prints for sale on eBay, but as you can imagine, the competition is up to par. The simplicity and affordability of this technology has now brought 3D printers to millions of homes; it is clear that a lot of people have made a "brilliant discovery" about the possibility of earning money by selling what they print. Consider 3D printing only as an interesting and low-cost hobby (set yourself an initial budget, for example, no higher than $200-250) that can please you, your family, as well as friends and acquaintances with original crafts and gifts.
- “For 3D printing, you need to know a 3D modeling program or a CAD system - not at all necessary! There are a huge number of sites that offer all kinds of 3D models for printing: scans of famous and not so famous sculptures, and busts of historical figures, and all kinds of figures of cartoon characters, films and computer games, and original witty crafts, like a sundial that shows time in digital form, and most of the models can be downloaded for free - at most, you will be asked to register for downloading! However, owning a CAD program is a very good skill (and, in particular, for a DIYer - it was one of the “points” for buying a printer for me), but I haven’t gotten to that yet - but once I master it, I’ll definitely I will describe my experience0004
So, as I wrote above, I got an Ender 3 Pro printer from Creality.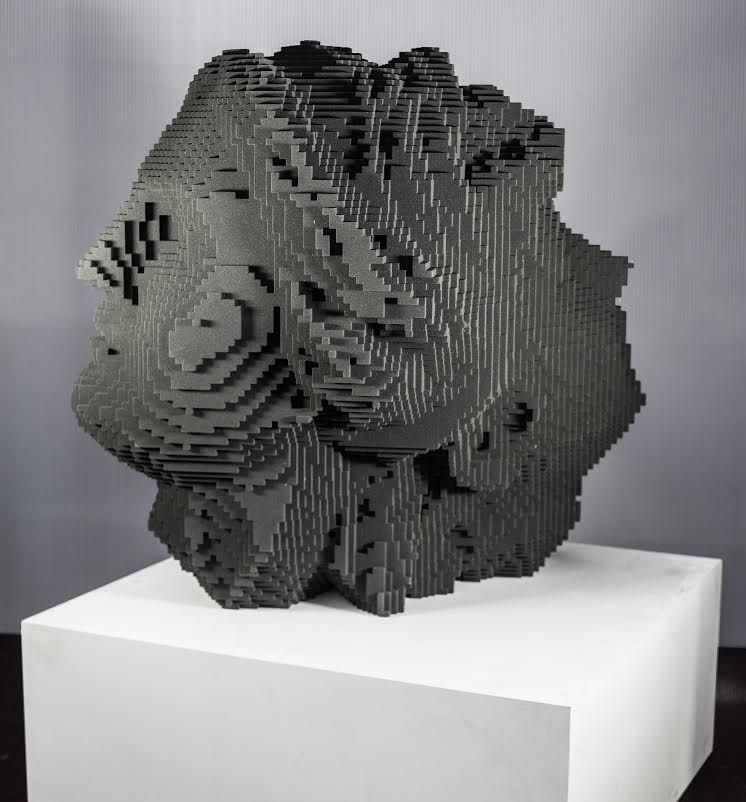 Entry level printers from this company are among the most popular in the United States, due to good quality, both manufacturing and printing, low prices, and wide community support. Well, and I will not hide it, a great "deal" in our local Microcenter-e (this is a computer store located in Cambridge, MA) played a significant role: they were sold for $99 at a promotion, plus a $10 off coupon for filament (a plastic thread for print), which I managed to use as many as three times 😊. For the printer itself, I also had to ride a couple of times to the store: they diverged, in the words of the classic, “like meat pies at a vegetarian lunch”!
The printer comes neatly packaged as a DIY kit.
However, assembly, greatly facilitated by the video (paper instructions are also useful, but the video is much more visual), attached to the micro SD-card that comes with the printer, will take you no more than an hour or two maximum, after which the printer is literally ready to work ! What you should pay attention to when assembling: this is the location of the "limit switch" of the vertical axis (Z) - he strives to stand in, as it were, the place allotted for him, but everything is not so simple.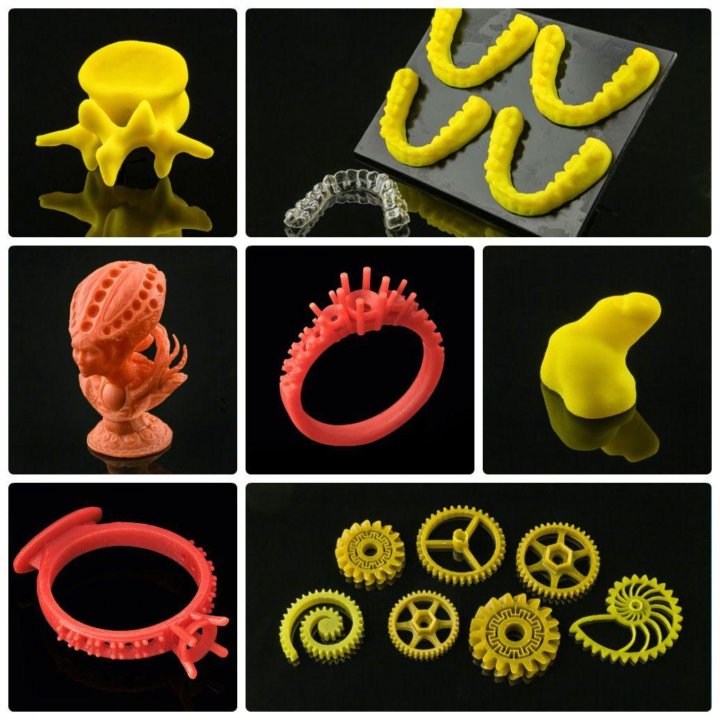 This sensor is very important (however, they are all important, so it is important to follow the assembly instructions punctually, and understanding what exactly you are doing), because it determines the distance of the print head nozzle (hot end) from the print bed (heated / print bed).
The main elements of the 3D printer
And this distance is very important: if it is large, you will not be able to correctly calibrate the position of the print head, and if it is too small, then the print head may damage the surface of the printing plate. As I did (however, this can be found in a bunch of online manuals, and, probably, on the official website in the FAQ - but I did not look): after assembling the printer, I set all four calibration "lambs" under the printing table to a "relaxed" state , and the “endstop switch” of the Z axis was fixed at a deliberately greater distance so that the print head (hot end) was guaranteed to be at a distance from the printing table. Then I turned on the printer, and chose the command from the “Auto Home” menu. After the printer set the head to the “home” position, I turned it off, and rotating the motor (stepper motor) of the Z axis by hand, as well as carefully moving the “limit switch”, I ensured that the “click” of the “limit switch” (and this means the sensor is triggered) was heard by touching the head of the table surface, after which he fixed the “limit switch” tightly with a key. Then, taking a sheet of ordinary paper, and rotating the “lambs” of the calibration screws, as well as moving the print head across the entire surface of the desktop, he ensured that it moved, slightly “scratching” the sheet. But, unfortunately, such a “cold” calibration will not be enough for a successful print, so I will recommend the “hot calibration” or “battle check” method. Here in this video you can see how the calibration process takes place, as well as download the necessary files (the link is in the video description). There is also a link to print profiles for Ender 3 Pro - I also recommend downloading them (and what they are for, I'll tell you later).
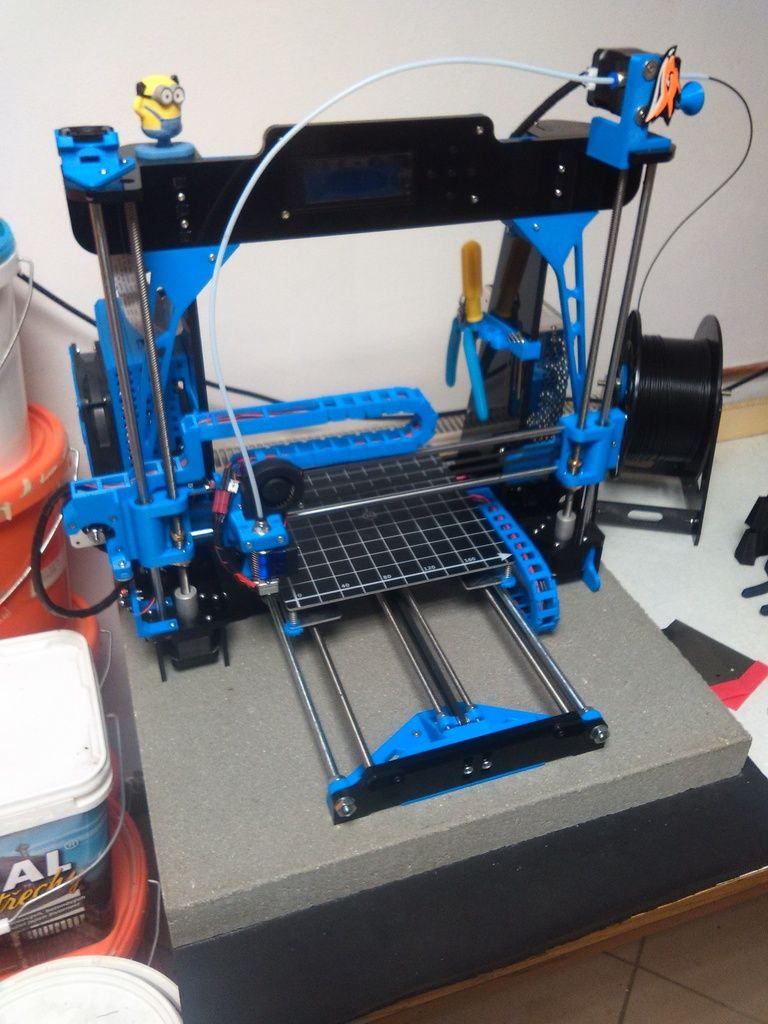
Once assembly and calibration is complete, your 3D printer is ready to go! If you stocked up with a kilogram coil with PLA plastic in advance (PLA filament, more about the plastics used for printing will be in the next part), then you can safely install it, and if not, then a small skein of plastic filament comes with the printer (but it’s better to buy a coil right away, because filament is also required for calibration!). On the micro SD card that came with the printer, there are several models ready for printing - these are files with the extension .gcode (G-code is a programming language for CNC devices, understood by most 3D printers. Don't worry, you won't need to learn features of this language - special programs called "slicers" (slicer) will take care of this for you, so that you load the filament (plastic thread from the spool) through the extruder (extruder, filament feeder into the print head) through a small hole in the extruder ( pressing the clamp with your hand and directing the thread through the feed tube, move the thread all the way into the print head), insert the micro SD card into the printer, and select the model in the form of a . gcode file, you can safely start printing!
Models in gcode bundled with Ender 3D Pro
You can print anywhere - in the office, in the dining room, in the living room, in general, where you assembled the device. Later I will tell you where it is better to place the printer on a permanent basis, but any place is suitable for test printing - there will be no unpleasant smell or much noise.
But here's one thing you need to consider beforehand: 3D printing takes a hell of a lot of time! Even a small model can be printed for several hours (and a large one for several days!), Depending on the selected slicer settings, speed and printer settings. So, when starting to print, take this into account - the printing process, of course, can be paused (and then resumed), but for a start, I would recommend bringing the process without interruptions - well, to see a real good result, and feel confident in on their own, as well as the capabilities of the printer.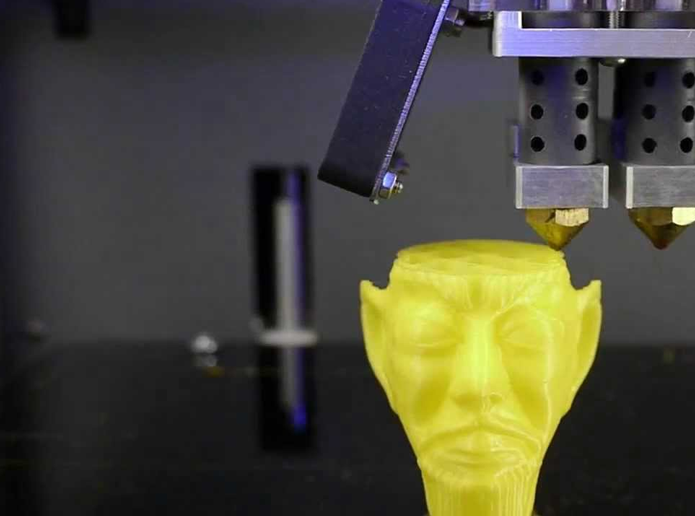
It should be noted that Creality uses the open source Marlin software as the firmware for its entry level 3D printers, but unfortunately pre-installs a very outdated version. If you are a programmer, or just “on you” with a computer for a long time, then it will not be difficult for you to assemble the latest version of Marlin yourself, for example, through VSCode, and then “flash” it via an SD-card (you just need to clear the card, and copy the release file with the .bin extension there). Otherwise, you can use my build - download, unzip, copy to a blank SD-card, turn off the printer, insert the card, turn on the printer. After a short time, the new firmware will be installed on your Ender 3 Pro (other printer models may require different builds). However, you can postpone this option for later - the printer is ready to work right out of the box.
Here I want to mention a few more useful printer improvements that will be useful for a beginner (however, these improvements are optional).
First, I recommend that you install and connect the open source OctoPrint software to your printer - you will need a Raspberry Pi with a camera for this. I used a cheap Raspberry Pi Zero W (with built-in WiFi) which, while not officially supported, works great. OctoPrint will add to your entry level printer far from entry level "features" - the ability to remotely control and manage the printer via a web interface, as well as from a great smartphone application.
This application is actively developed and well supported, has a very large and friendly community; many useful features are implemented either directly out of the box or using plugins; the documentation is also extensive and comprehensive. Installation, as well as connection to the printer, are extremely simple: download the sd-card image, edit the configuration file (specify the credentials of your WiFi access point), copy it to the card, connect it using a micro USB ↔ micro USB OTG cable to the printer - and profit!
My RPi Zero W with camera and temperature sensor connected to Ender 3D Pro
Secondly, I recommend that you immediately get spare surfaces for printing (build surface plate, this is a removable surface that is installed on a heated bed (heated bed), and on which, in fact, printing takes place).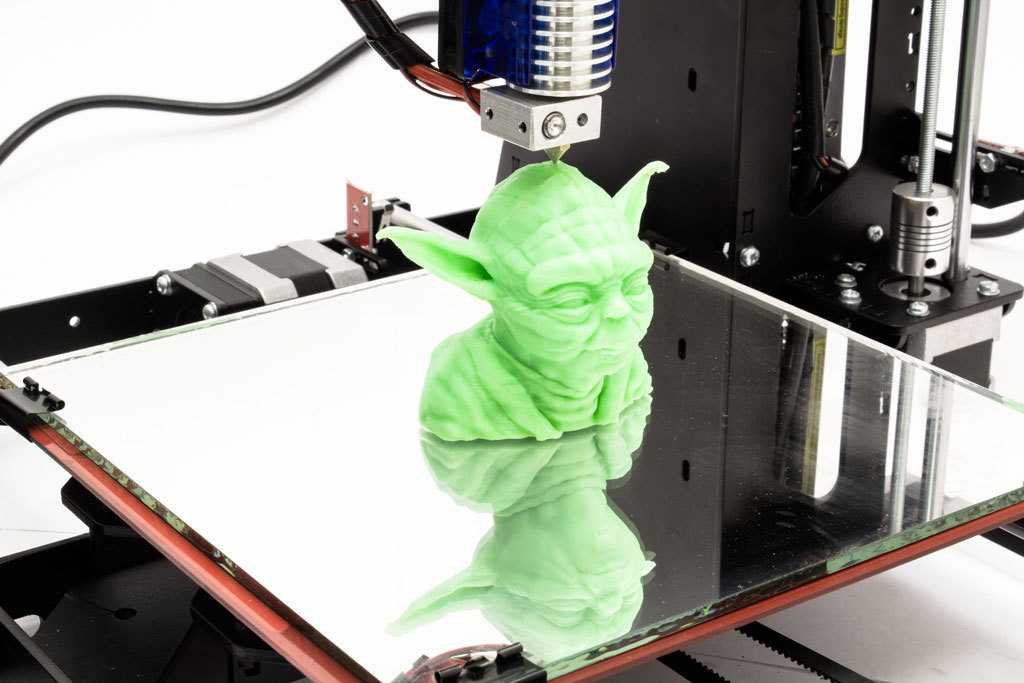 The printer comes with a "standard" flexible magnetic surface, and I assure you: you'll have to get a new one soon enough! So, it's better to take care in advance, because their cost is low, on Amazon they ask for $9.99 for a pack of two. You can also “upgrade” to a glass plate (it costs a little more), it has both its advantages and certain disadvantages, I will list them briefly. Advantages of the stock flexible magnetic plate: thanks to the magnet, it is easy to attach and remove from the heating bed for cleaning, thanks to the flexibility, it is very easy to remove finished models. Disadvantages: the plastic coating, on which, in fact, the printing takes place, is quite easily damaged and deformed both by the “regular” printing process itself and by the print head, in case of incorrect calibration, as well as by excessive heating of the heated plate - in general, a short-lived part. But, due to its low cost, it may well (and should!) be considered as a “consumable”. The advantages of glass plate include greater durability, cleanliness and "adhesive" properties of this surface.
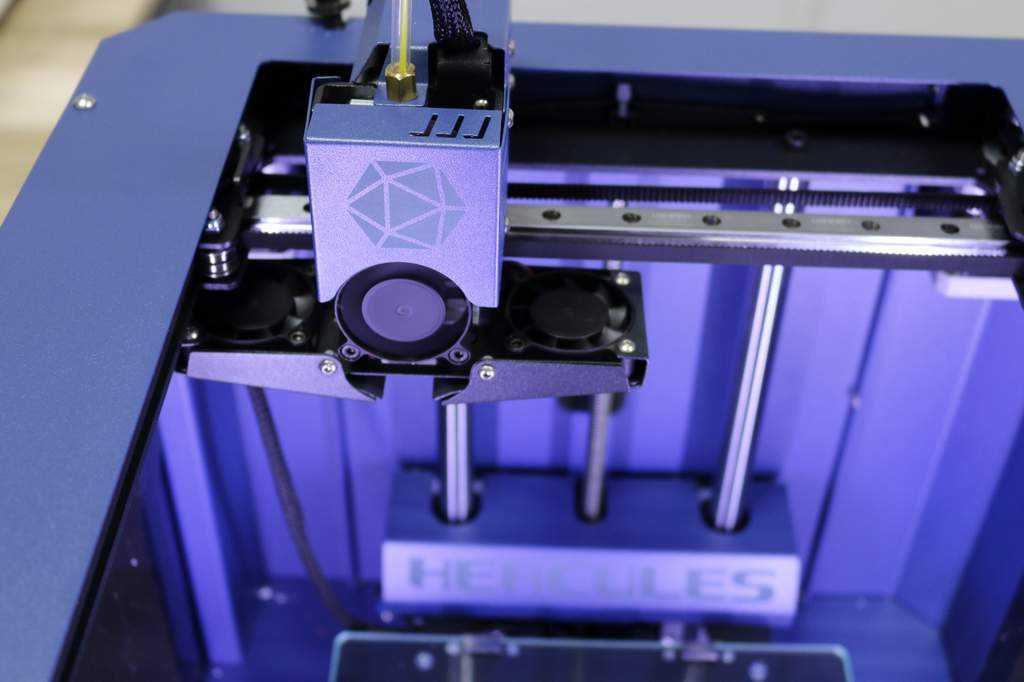 Disadvantages: slightly more difficult to attach to a heated bed (usually it is recommended to use ordinary office clamps for this, but personally I don’t recommend it because of their size; it’s much easier to buy special small clamps, they cost a penny on Amazon), and the difficulty of detaching printed models - you can't bend a glass plate. By the way, glass plates are also very inexpensive;
Thirdly (albeit looking ahead a bit), I would like to recommend this little "update", namely the glue for "sticking" models. Such glue is cheap (for 6 "sticks" they ask for $ 13), it is completely environmentally friendly, unlike popular home-grown products (there will be a story about them later), it is washed off with ordinary water, it does not smell. When using it, there are also a couple of “nuances”: you should not apply it to a cold surface, and you should not apply too little, because it will lose its adhesive properties when heated, and requires some practice in determining the optimal amount, but the ease of use of glue more than covers everything this is.
Now I want to share my thoughts on where is the best place to place your new 3D printer you just bought. 3D printing is actually a “heat-loving” process, so it is highly desirable to place the printer in a heated room with room temperature (at least 20 ° C - 3D printing traditionally uses temperatures in degrees Celsius - well, or 70 Fahrenheit). As I already wrote, at the very beginning, when printing with some types of filament, for example, PLA, there are no unpleasant odors, and the noise from the fans is comparable to the noise of the fans of a gaming desktop or laptop during a fancy 3D game. Those. in the absence of a special room (workshop in the basement or garage), it is quite possible to install a printer in the office, or even a children's playroom, or family room. What's more, there is a way, by purchasing a printer enclosure, to reduce or even eliminate both possible odors and likely noise. I will talk about this in more detail later.
I personally installed the printer in my "workshop" in the basement.