3D print a logo
How to 3D Print Your 2D Logo
(Image credit: Tom's Hardware)Converting an image into a file your 3D printer understands is simple. Here’s how to do it using free software.
Would you like to display your logo on a desk or shelf? If you have a 3D printer, you’re no longer limited to flat paper – you can make it pop in 3D. A 3D printed logo makes a great photo prop for an Esty shop, a craft fair table display, or even a subtle bit of branding in the background of a video.
Simple line drawings are the easiest to use, but anything that can be converted into a bold black and white image will work.
Prusa Slicer can’t open image files while Cura will attempt to turn them into a lithophane style print. For the best results, you need to convert your logo from a PNG, GIF or JPG into an SVG file first, then run it through CAD software like Tinkercad. Then you’ll tweak it a little so it will hold together after printing and convert it to an STL file for slicing.
For this tutorial I’ll show you how I turned the two-color Tom’s Hardware logo into 3D printed boxes. However, you can use this technique for any logo you want.
What You’ll Need
- Image File of your logo (JPG or PNG)
- Tinkercad account (free)
- Internet access
Convert Your Files
1. Select an image file of your logo, preferably a JPG or PNG. I’m using the Tom’s Hardware logo as a primary example.
(Image credit: Tom's Hardware)2. Navigate to Convertio.co’s image converter tool. Convertio.co is a popular file converting website. It can turn just about any file type into any other file type. You’re allowed to convert 10 files a day for free.
3. Click the red “Choose Files” button and select your file.
(Image credit: Tom's Hardware)4. Select SVG as the output file format.
(Image credit: Tom's Hardware)5. Click Convert.
(Image credit: Tom's Hardware)6. Click the Download button.
Convert to an SVG in Tinkercad
Now that you have an SVG file you’ll need to convert it into an STL file. Tinkercad was developed to introduce students to modeling software, so this is not only a free option but an easy program for beginners.
Tinkercad is also cloud based so you won’t need to download anything. You only need to sign up for a free account.
You can get creative with this part of the tutorial, but for now let’s stick to placing our logo in a simple box.
For the next step we’re going to assume you know the basics of Tinkercad. If you’ve never used Tinkercad, Matterhackers has a great 10 minute introduction to this simple modeling software.
1. Open a new design in Tinkercad, then import your SVG file. If you’re told the image is too big, reduce the largest dimension to 100mm, which fits comfortably in the 200x200mm default workplane.![]()
2. Examine your logo. It most likely converted into several loose parts that you’ll need to tie together with a box or baseplate Remember, if you don’t put your logo on a base you’ll end up with alphabet soup.
(Image credit: Tom's Hardware)3. Drag a basic box from the Shape Menu on the right. Use the handles to make the box larger than your logo, but not as tall. Don’t worry about the size just yet.
(Image credit: Tom's Hardware)4. Select all the parts and click the align tool. Center the objects horizontally and vertically.
(Image credit: Tom's Hardware)At this point, you have a working model that can be printed. Ungroup the objects if you want to adjust the size.
Make the Logo Two Color
You probably noticed our Tom’s Hardware logo is red and black. I’ll be printing this on an Ender 3 Pro without the help of an Multi Material attachment, so we will need to set up the files for easy two color printing using filament swaps in the slicer. We’ll explain this below, but for more details, see our article on how to make multicolor 3D prints on an FDM printer.
I could print the logo all at once with three color swaps, but that would create a messy three layer model. Instead I’ll break the logo into two blocks and print them separately.
1. Duplicate the logo and block by hitting CRTL +C and CTRL + V. You will edit one to be red and black, and the other to be black and red.
2. Cover part of the logo you don’t need with a “hole” block and press “group” to delete what it’s covering.
(Image credit: Tom's Hardware)In this case, I need the words Tom’s and Hardware separated.
3. Resize the rectangles to suit your needs and center each of the words on its own block. Double check that both blocks match in height and width.
(Image credit: Tom's Hardware)4. Export the logo as two files.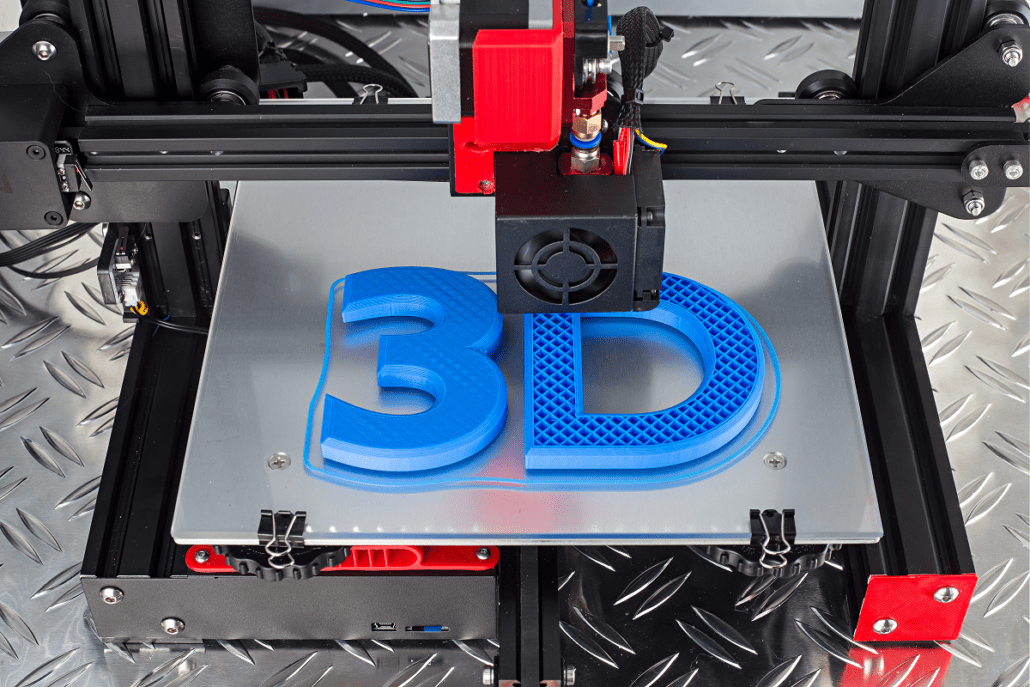 In this case, I need Tom’s as one file, and Hardware as a second file. To do this, select the part of the model you want to export (like the word Tom’s and the red rectangle) and click Export. Repeat for the other half.
How to 3D Print a Two Color Model
Now we’ll bring the model into Cura for slicing. I’ll show you how to add a filament change to the gcode.
1. Open one of your logo files in Cura. It’s back to a single, one color model.
2. Slice the file as you like. I’ll use a standard .2 mm layer height.
3. Click preview and zoom in close to the text.
4. Grab the slider on the right and scroll through the layers until you get to the first layer where text appears. In this case, it’s layer 40.
(Image credit: Tom's Hardware)5. Select Modify G-Code from the Extensions->Post Processing menu.
(Image credit: Tom's Hardware)6. Select Add a Script and click Filament Change from the drop down menu. Enter 40 (or the correct layer number in your case) in the box for Layer.
7. Slice the model again and send it to your printer.
8. Load the printer with the color of the first layer. In this case, we’re using red. When the printer reaches Layer 40 (or whatever number you put in), it will pause and move the hotend aside so you can change the filament to your second color.
9. Repeat for the second part of the model.
What if My Logo has More Colors?
This is a very basic tutorial and, if your logo is more complex, you may need the help of a designer. However, I have one more trick up my sleeve to show you. I created a fake four color logo for a food truck we’ll call the Hot Spot. Now let’s convert it for 3D printing.
(Image credit: Tom's Hardware)1. Open the image in any photo editing software. We’ll use the built in Photos app that comes with Windows.
2. Convert the image to black and white. The Photos app is very basic. To make something black and white, we’ll use the Mercury filter, and then adjust the light settings to their brightest. The result is muddy, but it will work.
(Image credit: Tom's Hardware)3. Convert the JPG to an SVG in Convertio like before and import this new file to Tinkercad.
4. Place a square behind the logo and center it. Now you have a basic logo in a box that you can print. With a little creativity, you can break this logo into more colors or shapes.
(Image credit: Tom's Hardware)Denise Bertacchi is a Contributing Writer for Tom’s Hardware US, covering 3D printing.
Topics
3D Printing
How to 3D Print a Logo Easily – Cura, TinkerCAD, Meshmixer & More – 3D Printerly
3D printing a logo seems like a very difficult task, but once you learn the basics and use the right software, it’s not too difficult. After going through this article, you’ll learn how to 3D print a logo like the pros do.
To 3D print a logo, you can easily import a .png or .jpg file into Cura, adjust a few settings and create a 3D model that can be 3D printed. You can also choose to use CAD software like TinkerCAD or Fusion 360 to create a logo that can be 3D printed. Many people create .svg files to create 3D printed logos.
This is the basic answer on how to 3D print a logo, so keep on reading for the more detailed information, along with some cool tips and tricks.
Can You 3D Print a Logo?
Yes, you can 3D print a logo by using the relevant software such as Fusion 360, Meshmixer, or even Photoshop. There are different ways to 3D print a logo. One popular method is to convert the logo into a vector image and create an STL file based on that vector image. You can directly import it into your slicer.
It’s even possible to add your logo to existing 3D prints, even if they have curved surfaces and complex geometries.![]() You can emboss or deboss your logo into models with the right software.
You can emboss or deboss your logo into models with the right software.
Microsoft’s 3D Builder is a popular software that is free and easy to use.
For example, you can easily embed your logo into something like a phone case and get that 3D printed.
Many people use FDM 3D printing with filament to create 3D printed plastic logos, but you can also use SLA 3D printing to get a higher level of detail with smooth surfaces.
You can find many examples of 3D logos directly from Thingiverse for example, which you can download directly and 3D print yourself.
Here’s a Nike Logo that someone designed which you can get from Thingiverse. It has two files, one with just the Nike Logo & one with the baseplate behind it.
Another example is the Apple Logo. Some people even made it multicolored by inserting pause scripts in the G-Code in the slicer, then changing filament.
One last example I’ll show it the Star Wars Logo, with an option to download split versions and stick them together.![]()
It’s possible to create your own 3D logos from scratch on software like OpenSCAD, FreeCAD, Blender, or Fusion 360.
How to Create a 3D Printed Logo
There are various image processing software and design software that you can use to create a 3D logo. You can simply work with a .png or .jpg image for a 3D logo since these image formats can handle transparency, allowing users to remove the background from a logo for a clean 3D print.
Here are some examples that I’ll take you through below:
- TinkerCAD
- Inkscape
- Cura
- Adobe Illustrator
- Photoshop
How to Create a 3D Printed Logo Using Vectors & TinkerCAD
The first thing you want to do is get your image and convert it into a vector or a workable file with a black and white image palette.
I figured out that you can first use VectorMagic which is a paid software, but you can basically convert the vector for free, screenshot the converted file, then convert the screenshot into a vector image using Convertio (free software).
When you directly convert your logo with the free convertor, a lot of details get lost, but doing it this way creates a better vector. It does depend on how simple or complex your logo is.
Here is the screenshot of the logo from VectorMagic.
You then use a conversion software like PNGtoSVG or Convertio to convert the image to a vector file using 2 colors so you can get a nice outline of the model.
Here is the final vector SVG file which you can download.
Now that you have the SVG file, you can import this into a CAD software like TinkerCAD to make any edits to the logo if you want, then export the file as a .stl file.
Make sure to select Center on “Art” then import your model. You can adjust the dimensions before putting it on the build plate.
I forgot to adjust the dimensions but simply did that afterwards!
I added a baseplate underneath the logo because there were some gaps that would 3D print separately, so this way, it will be attached. You simply add in a cube from the “Basic Shapes” area and scale the dimensions to fit under the logo.
The logo was extruded up by 10mm so I extruded the baseplate up by 7mm so it’s attached nicely, but you can reduce this so there is more of a contrast between the heights which would be down to preference. You can group the two models and scale it as well.
Here is the file in Cura which you can scale to your desire. It could be a better idea to 3D print it vertically since 3D printers give the best accuracy in the Z direction. Doing it with a raft would make sense to give it good stability, especially if the baseplate is thin.
You could actually adjust the raft to make it a stand, reducing the Raft Air Gap so the model is better attached to it.
Now you can simply slice the model with your usual settings or with a higher quality if desired, then transfer it to your 3D printer to create the logo.
Here’s the result. It looks like there are some imperfections in some of the walls maybe from slight under extrusion or wall line width settings.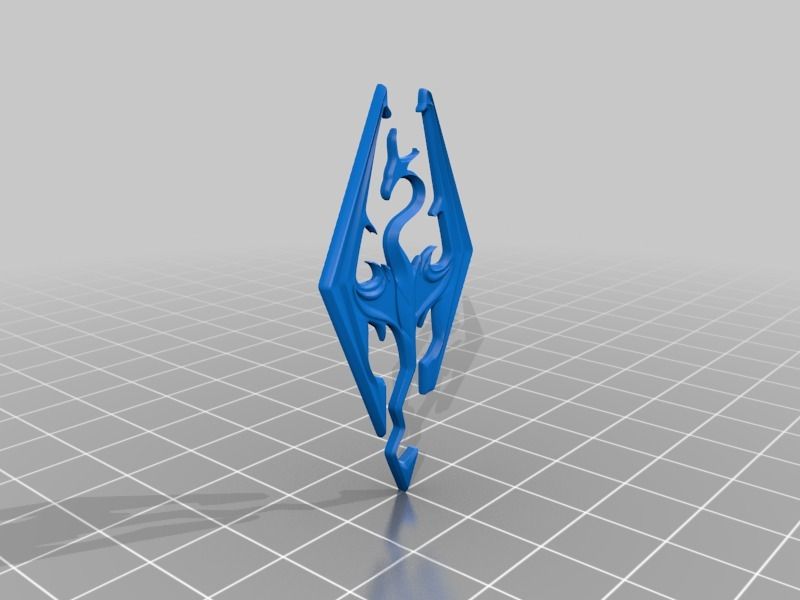 With a vertical orientation, it would probably come out better.
Check out the video below for a great example of working with an SVG file in TinkerCAD.
Alternatively, 3D logos can also be created by importing a .JPG logo file to TinkerCAD then converting it to a .svg file, creating a 3D logo.
- Scale the 2D logo to a workable size
- Add a depth of about 10mm (which is adjustable to get a good-looking 3D logo).
Here is a 3D hot dog logo created using TinkerCAD.
How to Create a 3D Printed Logo Using Cura
Creating a 3D printed logo in Cura is very simple.
- Simply drag and drop the 2D file into Cura
- You can choose to adjust some of the settings such as height, base, width, to see if you can get better quality.
- Use the smoothing scale to change the accuracy for a detailed 3D print.
This is how the model looks at first without changing any of the settings.
I scaled up the model simply using the Cura scaling tool. I made sure to uncheck “Uniform Scaling” and scale the Z-axis measurement to increase the baseplate size.
The higher I scaled the Z-axis (up to 13mm), the more I saw the logo raise up which made it look pretty detailed.
This method captures a lot more detail than converting the file into an SVG since it gets all the grooves and curves from the model based on the color depth.
I’d recommend printing something like this vertically to try and capture more of those details, but you can try both orientations and compare.
I tried adding some Support Blockers to specific sections since it would be hard to remove supports there.![]() My 3D printer should be able to handle the bridging and overhangs in those areas. I also changed my Raft Air Gap to 0.1mm so it can be used as a stand for the logo.
My 3D printer should be able to handle the bridging and overhangs in those areas. I also changed my Raft Air Gap to 0.1mm so it can be used as a stand for the logo.
I increased the Wall Thickness to 1.6mm with 4 walls to strengthen those thinner areas, so they are more durable, especially when removing the supports. Looking at the Preview, I noticed the infill was quite lacking, so I boosted it up to 50% for even more strength.
The sliced time with a 0.12mm layer height is 11 hours, using 60g of PLA filament which is around $2. A standard 0.2mm layer height would take around 7 and a half hours.
Here is the full Preview of the model. The light blue areas are the supports and you can see they aren’t in the holes in the logo due to the Support Blockers.
Here’s the result. This one captures a lot more detail since it isn’t lost in the vector conversion. I had to do some cleanup of the supports between the gaps in the middle. The raft still ended up coming off as I removed the print so I superglued it back on.
There was some layer separation in the baseplate which could potentially be fixed by having a thicker baseplate, controlling drafts (use an enclosure or draft shield in Cura), or increasing the printing temperature.
I’d recommend using a thicker raft by adjusting your raft settings also.
Here’s a comparison of the vector 3D printed logo on the left and the image import 3D printed logo on the right.
How to Create a 3D Printed Logo Using Inkscape
Creating a 3D printed logo using Inkscape is fairly simple. It’s a CAD software where you can build 3D objects from scratch using various shapes, text and other useful features.
Depending on what logo you are using, you might have to import the logo into Inkscape then use a tool to outline it so you can use it for 3D printing. There are different ways of getting your logo traced and usable for 3D printing.
The video below imports a bitmap of the logo into Inkscape, then uses Edge Detection by going to Path > Trace Bitmap > Edge Detection. Once he has the trace, he saves the file as an SVG, then imports it into his chosen CAD software which is 123D Design.
You can clean up the logo with some basic edits, then you can choose to overlap the logo so it becomes once piece which can be 3D printed nicely.
Another example of creating logos in Inkscape is this really cool detailed visual of a user creating some Justice League Coasters. This method looks more complex with more steps, but it’s great if you want to create a logo with more details.
How to Create a 3D Printed Logo Using Adobe Illustrator & Photoshop
A 3D model of a logo can be created using Adobe Illustrator, but it is a paid software. They have a 7-day free trial then the full program is around $25 per month. Photoshop is also around $20 per month, so I’d recommend using them if you have them already.
Here is a video on how to create a 3D logo using Adobe Illustrator.
The 3D Print General also did a video on 3D printing a logo using just Photoshop which you can check out below. He said it took him around just 10 minutes to create the logo.
How to Add a Logo to a 3D Print or 3D Object
How to Add a Logo to a 3D Object Using TinkerCAD
To add a logo to a 3D object with TinkerCAD, you want to firstly have your logo as an STL file already so you can import it along with the file you want to put it on.
I chose to do an example with an Easter Island Head and the 3D Printerly Logo. The logo still had the baseplate on it so after importing both models, I had to scale and drag them both to put it where I desired.
Here is the resulting image.
It’s not the most professional, but it works. I’d probably recommend using a more precise CAD software like Meshmixer or Fusion 360. There’s quite a lot of dragging, scaling, and angling needed to do something like this. Ideally, you are working with a flat surface.
How to Add a Logo to a 3D Object Using Fusion 360
Fusion 360 is a useful program for adding a logo to 3D print.
Check out the video below to be shown how to create your 3D logo, then import it into Fusion 360 so it can be attached to an existing model. He also uses Convertio as mentioned previously to create the logo.
How to Emboss a Logo on a 3D Object – Meshmixer & 3D BuilderHow to Emboss a Logo on a 3D Object with 3D Builder
Many users consider 3D builder pretty useful and convenient for editing STL files. A logo can be embossed for 3D printing by following the video below.
You basically want to import your models, then select the emboss tool. Open your .png file, ideally with a transparent background. You can then use rotating tools to align the 3D logo to your desirable position.
After that, change the Z-axis setting to a negative number to emboss the text or logo inside the model, or using a positive number to emboss the text for an outward project of the text.
How to Emboss a Logo/Text on a 3D Object in Meshmixer
Meshmixer can also be used to emboss a logo with text or image. It is important to re-mesh the surface to increase the solid accuracy and mesh density when embossing text or images for 3D printing.
Here is a guide video on adding text/logo to a 3D ‘bunny’ model.
Here is another video on embossing a 3D model, using the example of adding to teeth for a dental company.
An easy way to 3D print a logo, image, text using only a Cura slicer / 3D printers, machines and accessories / iXBT Live
Recently, a guide was published here on how to print text, a logo, and I think this is not the easiest option. I show how to get a model for printing faster, without using additional programs, but this method has disadvantages.
We need a Cura slicer, along with 3D models and gcode, it can open *.bpm, *.png *.jpg *.jpeg images and convert them into a 3D model using the extrusion method (analogue of the boss tool in a 3D compass, solidworks, etc. .d.).
We open the image we like through Cura and we are greeted by the image conversion dialog:
Height is the future height of the logo / text, the base is the background, you can set it to 0, or you can make some “base” if there are small elements and they do not need to be separated , then I advise you to immediately do it with a base of at least 0.3 mm, then the trifle will not fly away during the printing process. If the elements need to be separated, then in the print settings it is better to select printing on the Raft substrate, it will then be easier to separate small elements from it and they will not fly off during the printing process.
Width and depth are X, Y dimensions, it is better not to touch. But smoothing is an interesting slider, in fact, it sets the conversion factor, and the higher it is, the closer the light areas will be to the dark ones, and the smaller the difference between them will be. For example, I'm using the ixbt.com logo
Top with minimal anti-aliasing, middle with standard (about 2-5%), and bottom with maximum. In this case, the specified height - 5 mm is not achieved, in the upper version it is 3.9 mm, and in the lower 2.7 mm.There are two extrusion patterns "dark above" and "light above".
The top one is “dark above”, the bottom one is “light above”. If we get closer, the minus of this method pops up, as a rule, not one color is used to create a beautiful picture, but a gradient, so the darkest areas rise to a given height, and those that are lighter linearly are lower, resulting in "corner extrusion" and uneven edges on the model. But after slicing, small irregularities will practically not be visible.
In paint, I added a contour, and when exporting the model, I made the base 1 mm thick
After printing, it remains to remove unnecessary elements and you will get a finished keychain. It was also possible to make the “Light above” option, and then fill the contour in the shape of the logo with melted plastic of a different color.Print settings: 0.6 nozzle, layer height 0.2, 150mm/s, ABS plastic. I print on an open printer, so I also added Raft. You can see over-extrusion on the upper layers and floating corners, this is more likely to be related to the printer settings.
In this way, for example, you can make cookie cutters, print key rings, make templates (patterns), etc. without using 3D modeling. And in order for the borders to be rigid, it is better to use one color, preferably black, to create an outline.
News
Publications
Having discussed the rather expensive wired full-size headphones, I suggest you immediately switch to a new wireless product from 1More called Sonoflow.![]() The stuffing here is top notch...
The stuffing here is top notch...
Lenovo does not lags behind competitors and along with them is fighting for the consumer in the segment budget SSD drives. Model ST600 volume 240 GB, although it does not have outstanding write speeds, ...
As you know, there are several types of car tires, the main of which are three: Summer; Winter; All season....
Greetings, dear reader! Congratulations on your purchase of your Oculus Quest 2. However, since you're reading this intro, you're probably having trouble updating your firmware right now...
Google Chrome is one of the most popular web browsers. Millions of users around the world use it every day. The functionality of this browser can be extended by installing...
According to the latest research by Indian scientists, it becomes clear that the created transparent wood can be completely environmentally friendly and in the future completely replace plastic and glass. ...
...
We print a color logo. Simplify3D
3D printing
I wanted to call it 'we print a three-color logo', but in fact there can be more colors. By logo I mean vector graphics, i.e. colors with hard contours. The idea came about when I came across such a vector tiger on a photo stock. And what happens if you print it in different colors in layers?
It would be possible to make each layer separately and glue it together, but there will be too many small islands of each color, it will be difficult to put them in their places. The task is to print in layers with the replacement of plastic without removing it from the printer table.
First of all, it decomposes our logo into colors, each separately, in order to later use them as masks for creating 3d objects. To do this, we use a suitable photo editor (there is a 'select by color' function in Photoshop), if the picture is in a vector, then it's even easier - for example, you can export the contours to * .![]() ai and, based on them, make a volume in a 3d editor. There are even online services that allow you to generate 3d based on the picture. There are a lot of options, whichever is more convenient for you.
ai and, based on them, make a volume in a 3d editor. There are even online services that allow you to generate 3d based on the picture. There are a lot of options, whichever is more convenient for you.
The base of the logo will be a white circle, otherwise the white color could also be separated into a separate mask. Next, I go to Zbrush (I'm so used to it) put the made mask on a high-poly plane (about 5 million polygons), then with the 'Extract' tool I turn the mask into a 3d object.
Because of the raster noise of the picture, we can get such parasitic 'columns':
You can clean up the mask itself or you can remove them already from the 3d object using the 'Polygroups' menu in Zbrush. If you're interested, write in the comments. We do the same with the second mask (red color). The base is a simple cylinder. As a result, we have three 'pancakes':
The height is not very important, it can be corrected in the slicer. The main thing is that the scale coincides, although this is fixable.
Go to Simplify3D. We import all three objects and position them relative to each other. In the scale menu, uncheck the 'Uniform Scaling' checkbox, this will give us the ability to change the height of objects without changing the horizontal dimensions. I set the height: 1mm for the base disc, 2mm for 'black', 3mm for 'red'.
Simplify3D has the ability to print from a selected height. Therefore, we print a round base from the table, black from a height of 1mm, red from a height of 2mm. To do this, we will generate three separate *.gcode files for each object (color). Simplify3D is also convenient in that when you close the window, the next time you open it, you will see the last loaded objects. You can also open multiple copies of the program. For convenience, I opened three copies of the window in each window, left only the desired object and set up print settings for each.
Set 'Retraction Vertical Lift' in the settings, and uncheck 'Only retract when crossing open spaces', so that during idle passes the nozzle does not scratch the flat surface of the model. For the same purpose, in the 'Script' > 'Ending Script' tab at the very top, you can write: G1 F200 E-10 (retract) and G28 Z0 ; home so that at the end of printing the first Z-axis goes to zero.
You will also have to conjure with the 'Thin Wall Behavior' settings block, since there are enough thin walls in the model.
For objects other than a round base, disable brim skirts, as they will be printed on top of the printed object below. And you can also remove the elevated temperature for the first layer and turn on the cooling already from the first layer of printing.
The printing process itself looked like this:
- 1. Start printing the round base with white plastic, wait for the end of printing. We get a white base with a thickness of 1mm.
 After the end of printing, leave the heating of the table (otherwise the base may bounce off the table). and meanwhile...
 - 2. change the plastic to black and start printing the second object, which will begin to be built from a height of 1mm, that is, on top of the existing base. We are waiting for the end of printing, we save the heating of the table.
- 3. Change the plastic to red and start printing the last object from a height of 2mm
As a result:
I also note that a perfect retract and the absence of 'snot' is very desirable. Perhaps it makes sense to use not a pointed nozzle, but one that has a small area around the hole where the plastic comes out. I think this will give a smoother surface.
It is very likely that all this has already been described and discussed somewhere. Let there be personal experience, maybe someone will come in handy.
Hercules NEW printer, nozzle 0.


