2023 prusa i3 diy 3d printer
Top 10 Affordable RepRap Prusa i3 kits for Sale Under $400 at 3D Printers Online Store - 3DPrint.com
The RepRap Project started as a British initiative to develop a 3D printer that can print most of its own components and be a low-cost 3D printer, but it is now made up of hundreds of collaborators worldwide. (RepRap is short for replicating rapid prototype.) RepRap is the first of the low-cost 3D printers, and the RepRap Project started the open-source 3D printer revolution. It has become the most widely-used 3D printer among the global members of the Maker Community.
In a market which is new and starting to be hyper competitive the race for affordable 3D printers is Olympic — making a choice can be extremely complex and tiring, hence we bring you Top 10 affordable RepRap 3D printers.
Note that these printers are ordered by price.
He3D- XI3 High Precision NEW Prusa I3 – $218
The new He3D- XI3 High Precision NEW Prusa I3 is the most affordable and easy to set up printer available with value for money. Loads of tutorials and videos available at your disposal to setup print and utilize this printer to its extreme core. It notably has improved features like MK8 Extruder, its full Acrylic frame and its MultiMaterial Support. It also supports a wide range of printing materials: PLA, Flexible PLA, CopperFill (Metal), Wood, Nylon, HIPS, Polycarbonate and ABS. Weighing not more than 8.8 kgs/19.4 lbs it is quite compact and portable. It uses DC 12v/250w power supply and supports USB or SD Card with a file print format in STL G-code.
Purchase link: https://www.3dprintersonlinestore.com/reprap-prusa-xi3
FLSUN 3D Metal Frame Prusa i3 DIY KIT – $219
The FLSUN 3D Metal Frame Prusa i3 DIY KIT is an easy to assemble kit. It has a solid Metal structure which is more stable and improves the printing accuracy. Its new Creative design, high precision Y-axis position plate and guaranteed Y-axis positioning accuracy. The printer controller has an integrated motherboard which is easy to connect and supports DIY spread. It is compatible with filaments like: PLA ABS, PETG, Wood, PVA and Flexible Filaments. You also receive 1KG(Roll) Filament (either ABS or PLA), MK2A Heated bed, 8 GB SD Card, LCD Control Panel, SD Card Reader, One Spare Nozzle and One Roll Masking Tape.
Purchase link: https://www.3dprintersonlinestore.com/flsun-3d-metal-frame-prusa-i3-diy-kit
Electron 3D Slimbot Single/Dual – $227
The Electron 3D Slimbot Single/Dual is the Newest 2016 Aluminum Frame 3D Printer Kit it is the Seventh generation model now available. The Slimbot has many features only known from much more expensive models. Full metal frame, heated bed and even a bowden-style extruder are all part of the base version. It uses all metal parts in its frame construction – extruded black anodized aluminum is used for the frame material with laser cut acrylic plates for the assemblies and ball bearing v-grove wheels for smooth, quite operation. The kit also includes a USB 2.0 Bundle, 2 Rolls of Filaments tip, an 8 GB SD Card and Assembly Tools.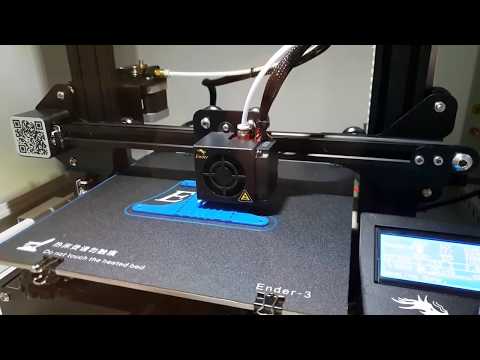
Purchase link: https://www.3dprintersonlinestore.com/slimbot-3d-printer-kit
Sunhokey Acrylic Reprap Prusa i3 DIY Kit – $229
Sunhokey Acrylic Reprap Prusa i3 DIY Kit is the new upgraded version which bundles with 2 Roll Filament 8GB SD card and an awesome LCD display, all as an easy to assemble kit. Using the E3D hotend which is made up of complete metal, classy and less costly than hotends which have been used in other 3D printers, it can melt the filament quickly prior to rapid cooling with the fans. The remote extruder decreases the heaviness on the X-axis in order to increase the print and speed and minimize the printing error due to inertia. Bowden style extruder is to reduce the weight of the moving components. With the heavy stepper motor off in a fixed position, the hotend can be moved with less force, generally allowing for faster speeds.
Purchase link: https://www.3dprintersonlinestore.com/full-acrylic-reprap-prusa-i3-kit
Electron 3D – Sixth Generation Prusa i3 – $239
The Electron 3D Prusa i3 (6th generation) features Automatic Platform Leveling along with Automatic Platform Height Detection at an additional cost of $50. Its unique Electron Frame is a full wrap-around frame to minimize X-axis shifting during printing. Comes bundled with 1 ea. 1.0 kg rolls filament (PLA or ABS), USB 2.0 Bundle, an 8 GB SD Card and standard assembly tools. Weighing at 15kgs this printer prints excellent quality output. If you are looking for a Larger Build Area (225 x 280 x 200 mm) you need to add +$60 USD to the cost. Some users have issues with overheating due to thin power supply wires.
Purchase link: https://www.3dprintersonlinestore.com/electron-3d-prusa-i3-kit
Geeetech Premium Prusa i3 Kit – $249
The Geeetech Acrylic pro Prusa i3 3d printer is planned and developed by Shenzhen Getech Co., Ltd. based on open source RepRap prusa i3. Geeetech i3 features easy assembly and high performance. The acrylic construction makes the printer minimal complex and simple operation. Simple assembly, easy debugging and more stable performance, compared with the i3 pro, i3 pro B features newly added potential for 3D prints—support 5 types of filament: ABS, PLA, Wood, Nylon and flexible PLA to create flexible hinges, joints, shaped parts; enable you to get the most out of your 3D Printer.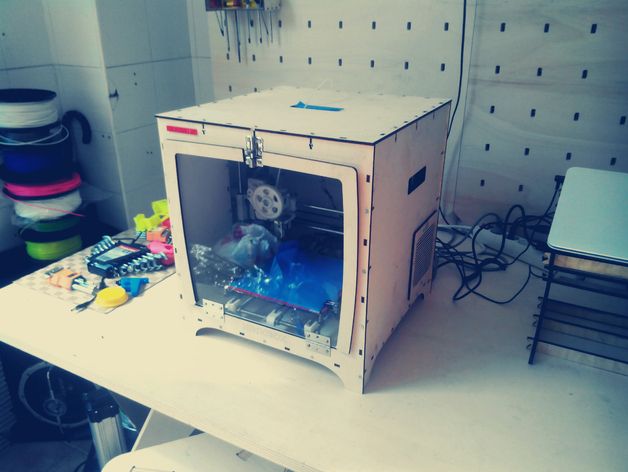 The power supply is pre-configured together with the printer, the re-arranged cables and wires make the assembling very clear and easy. Thanks to its Standalone Functionality like LCD control panel and SD card reader now you can print without PC.
Purchase link: https://www.3dprintersonlinestore.com/geeetech-prusa-i3-pro-b-diy-kit
Folger Tech RepRap Aluminum 3D Printer Kit – $284
The Folger Technologies 2020 Prusa i3 is a great beginner kit combining the simplicity of an erector set with the power of a much more expensive desktop printer. The kit comes with everything you need to assemble the 8 cubic inch print area machine (with the exception of an 8″x8″ glass surface). With the use of a few simple tools and a little bit of time you too can get started 3D printing the worlds next big idea. You can even add an LCD Panel and SD Card reader for an extra $12 USD. Has an impressive 203 x 203 x 152.4 mm Build Area which is able to print ABS & PLA Plastic (1.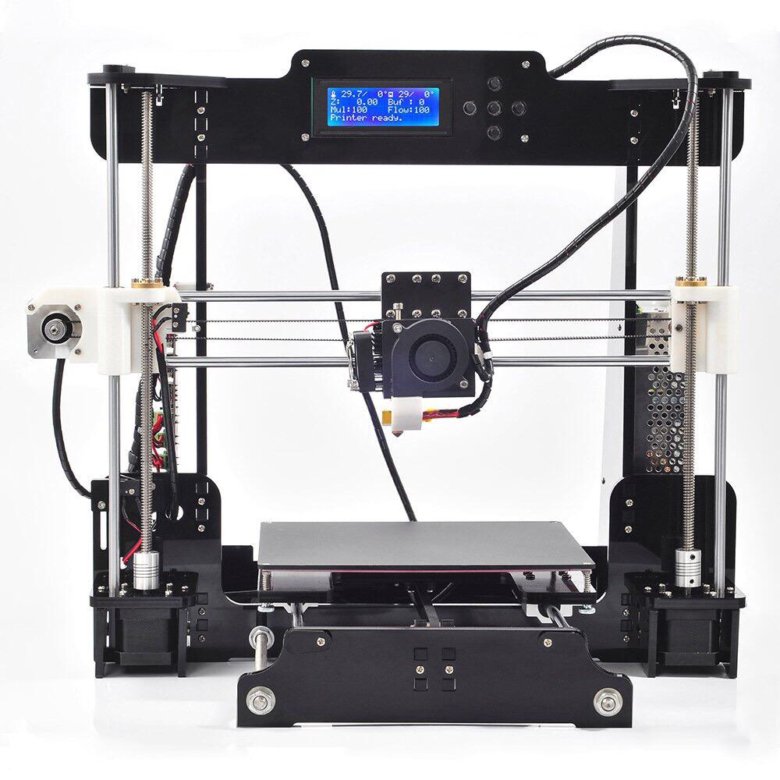 75mm). Unfortunately it only comes with a US Cord which can run 110V or 220 V. You don’t get any tools for assembly, and no filaments. You would need a lot of effort and technical knowhow to assemble this printer.
Purchase link: https://www.3dprintersonlinestore.com/folgertech-aluminum-prusa-i3
Folger Tech RepRap Acrylic 3D Printer Kit – $294
The Folger Tech RepRap Acrylic 3D Printer Kit prints are of great quality and with impressive 203 x 203 x 178 mm build area you can only expect outstanding performance. With its ability to print ABS, PLA, Wood, PVA and TPE filaments and an added advantage for upgrading and modification abilities. Connectivity via USB, SD Card (Optional). Weighing at merely 7 kgs/15 lbs, it is highly portable. LCD Panel and SD Card Reader available at an extra $12 USD). A standalone printer just like the Folger Tech RepRap Aluminum 3D Printer Kit you can now print without a PC.
Purchase link: https://www.3dprintersonlinestore.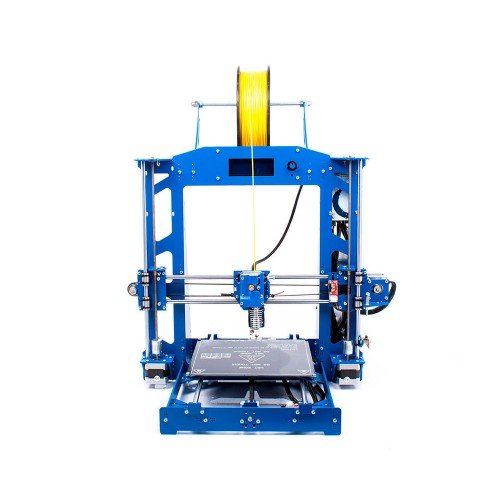 com/prusa-i3-complete-kit
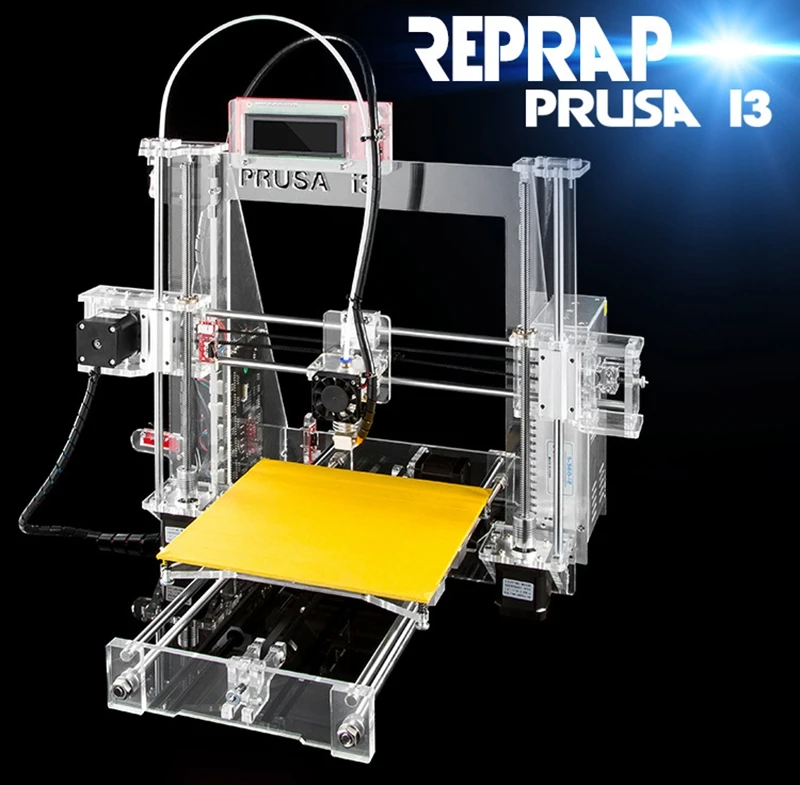
Geeetech Prusa i3 X – $302
The Geeetech Prusa i3 X is a new member of the prestigious Prusa i3 family; it was engineered to provide redefined usability, quality, performance and most important, best affordability in desktop 3D printer market. The Geeetech Prusa i3 X is completely made from piano-black laser-cut acrylic frame. To maintain the garage-built feel and the handmade charm. Geeetech Prusa i3 X is also a DIY kit, which provides you an unforgettable step-by-step learning experience of 3D printer from scratch. The printer supports printing with PLA, ABS, Nylon, Wood-Polymer, flexible PLA and PVA.
Purchase link: https://www.3dprintersonlinestore.com/high-speed-prusa-i3-kit
Sintron Super Smart Prusa i3 – $ 330
Last but not least, this is a smart and elegant looking 3D printer when assembled. This 3D printer comes with a huge bed size of 200 x 200 x 270 mm, a MK3 Heated 3mm Aluminum PCB Board and a robust MK8 extruder which allows printing with most commercially available printer filaments.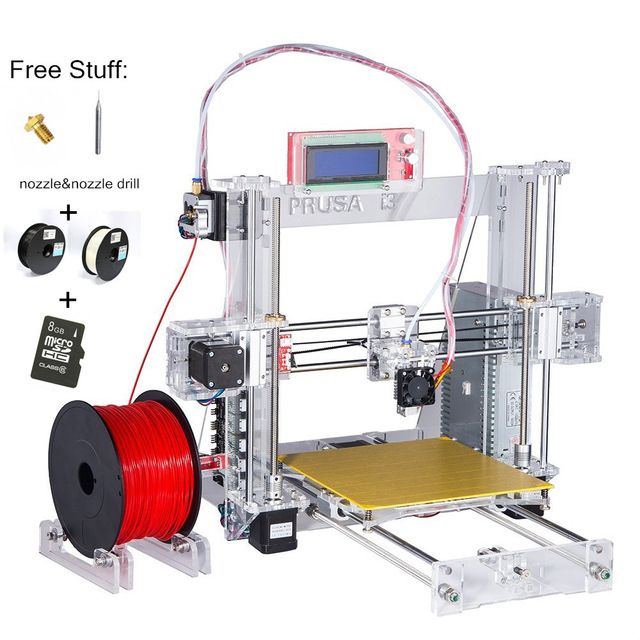 The company supplies standard LCD 2004 with the printer, I would personally suggest the LCD 12864 which is given as a free upgrade along with the printer but you need to inform the manufacturer for the same. The printer comes with pre-installed firmware which makes it easy to operate as soon as you get the jigsaw pieces of the hardware together. As there are no free filaments supplied make sure you have a range of them ready in stock as soon as the machine is assembled. Discuss this technology further over at 3DPB.com in the Top Ten RepRap Prusa i3 3D Printers forum thread.
Purchase link: https://www.3dprintersonlinestore.com/super-smart-prusa-i3
Mr. Peter Smith is Senior Sales Consultant of 3D Printers Online Retail Store Limited.
[sponsored]
Stay up-to-date on all the latest news from the 3D printing industry and receive information and offers from third party vendors.
Tagged with: 3d printer guide • 3D Printers Online Retail Store • 3d printers online store • budget 3D printing • electron 3d • FLSUN • folger tech • geeetech • he 3d • He3D • Prusa i3 • Prusa i3 3D printer • reprap • RepRap 3d printers • reprap prusa i3 • Sintron • Sunhokey
Please enable JavaScript to view the comments powered by Disqus.-kupit-v-soin-store.ru-7.png)
Original Prusa 3D printers directly from Josef Prusa
Our 3D Printers
New on e-shop
Prusament Resin Tough Classic Red 1kg
In stock
€69 with VAT
Official Printables.com T-shirt (L)
In stock
€24.99 with VAT
Prusament PETG Matte Black 1kg
In stock
€32.99 with VAT
- - 5 %
Original Prusa i3 MK3S+ Kit Enclosure Bundle
New orders have a lead time of 8-9 weeks. (delivery after holidays)
€1,159 with VAT
Prusament Resin BioBased60 Magma Red 1kg
In stock
€69 with VAT
Prusament Resin BioBased60 Natural Yellow 1kg
In stock
€69 with VAT
Price quote request
Are you considering Original Prusa 3D printers for your classroom, school, library, university or maker space?
Our specialists are here to assist you throughout the whole buying and information-gathering process.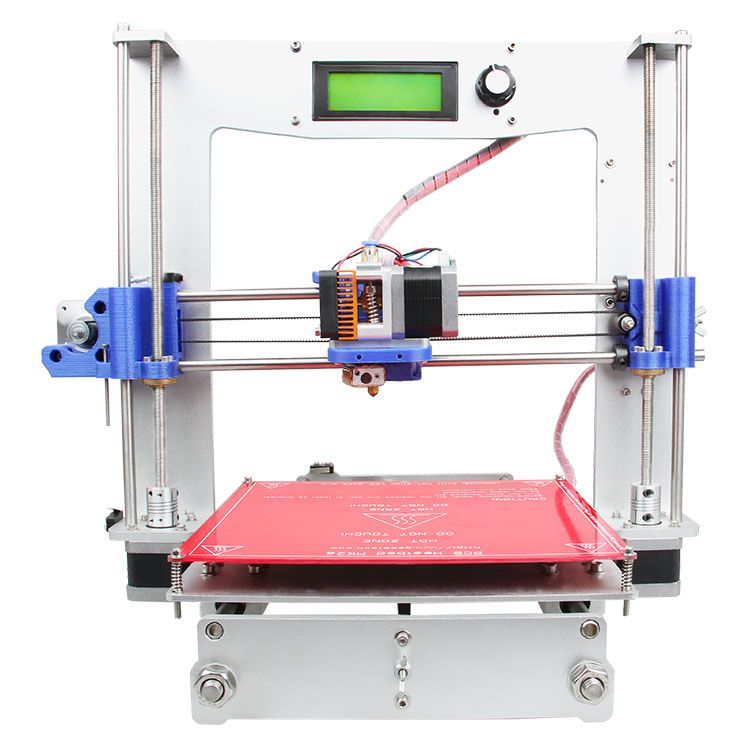 To get in touch with us, please fill out the form below and we will take it from there.
Contact us
Bestsellers
Original Prusa i3 MK3S+ kit
Leadtime 3–4 weeks (delivery after holidays)
€849 with VAT
Choose variant
Original Prusa i3 MK3S+ 3D printer
Leadtime 2–3 weeks (delivery after holidays)
€1,159 with VAT
Choose variant
Prusament PETG Prusa Galaxy Black 1kg
In stock
€29.99 with VAT
Double-sided Textured PEI Powder-coated Spring Steel Sheet
In stock
€39.99 with VAT
Original Prusa MINI+ Semi-assembled 3D Printer
Leadtime for MINI+ is 3–4 weeks. (delivery after holidays)
€489 with VAT
Choose variant
Prusament PLA Prusa Galaxy Black 1kg
In stock
€29.99 with VAT
Prusament PETG Prusa Orange 1kg
In stock
€29.
 99 with VAT
Original Prusa Enclosure
New orders have a lead time of 8-9 weeks. (delivery after holidays)
€369 with VAT
Choose variant
Spring Steel Sheet With Smooth Double-sided PEI
In stock
€34.99 with VAT
Prusament PETG Jet Black 1kg
In stock
€29.99 with VAT
Prusament Resin Tough Prusa Orange 1kg
In stock
€69 with VAT
Prusament PLA Galaxy Silver 1kg
In stock
€29.99 with VAT
Hello, we are Prusa Research!
And we make more than just amazing 3D printers!
Read our story
Prusa Services
Printables.com
Discover thousands of great printable 3D models
Downloads
Get the latest firmware and apps
Forum
Discuss 3D printing topics with the community
Prusament
Affordable filament for everyday printing in premium quality
Help
Assembly and troubleshooting guides, technical documentation
Blog
3D printing highlights, tips and interviews all in one place
E-Book: Basics of 3D Printing
This book will help you understand what kinds of 3D printing technologies are currently available and how they work. We will take you through the whole process of 3D printing.
I don’t agree with subscribing to newsletterand I want to buy the e-book for 5 USD / 5 EUR.
News from the blog
Our printers continue to collect great reviews and awards all around the world. Original Prusa i3 MK3/S is the best 3D Printer in the Ultimate Guide to Digital Fabrication by MAKE: Magazine and our printers also received several editor's choices and awards from respected media outlets like All3DP, PC Mag, Tom's Hardware, TechRadar, Forbes, WireCutter, Windows Central and many more!
When we weigh up the price, performance, reliability and overall product, it is highly recommended for most people to purchase because it does things so well.
– 3D Printerly ReviewThe preassembled version of the Original Prusa i3 MK3S is a cinch to get up and running, is easy to operate, and has a good slicing program. It produced consistently beautiful prints in our testing, with no misprints.
– PC Mag Review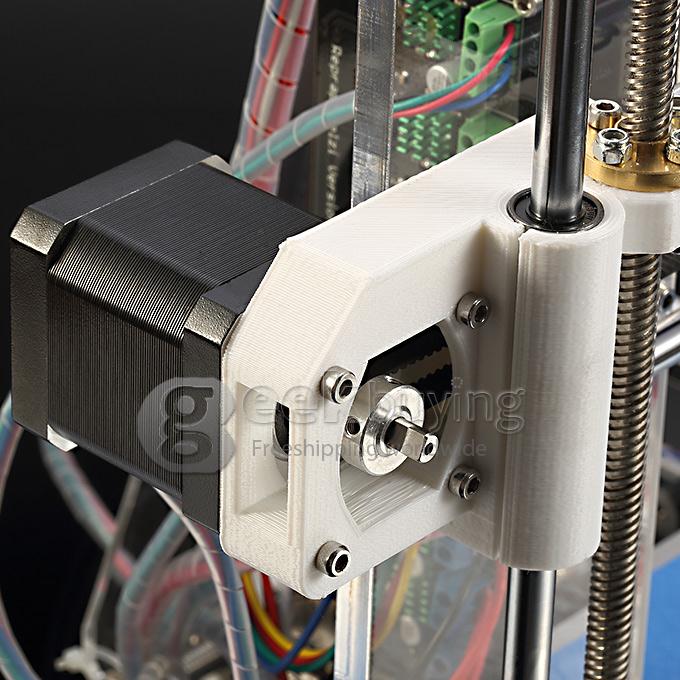
Of the 11 printers we have tested over the past five years, the Prusa i3 MK3S printer has produced the largest and best-looking prints.
– THE NEW YORK TIMES REVIEWWe tested it using its default settings and found it extremely capable. Its print quality is truly exceptional and it’s an easy-to-use, straightforward machine.
– All3DP MK3S ReviewThe team at Prusa Research have made something special with the MK3. If you only ever own one printer, make it this one. Of course, once you buy it you will want more of them, and that's ok too.
– Windows Central ReviewIt is the most well-made resin printer that I have and it objectively produces the best prints.
– The Prusa SL1S redefines SPEED!
I saw, I plan, I collect a 3d printer from trash and sticks / Sudo Null IT News
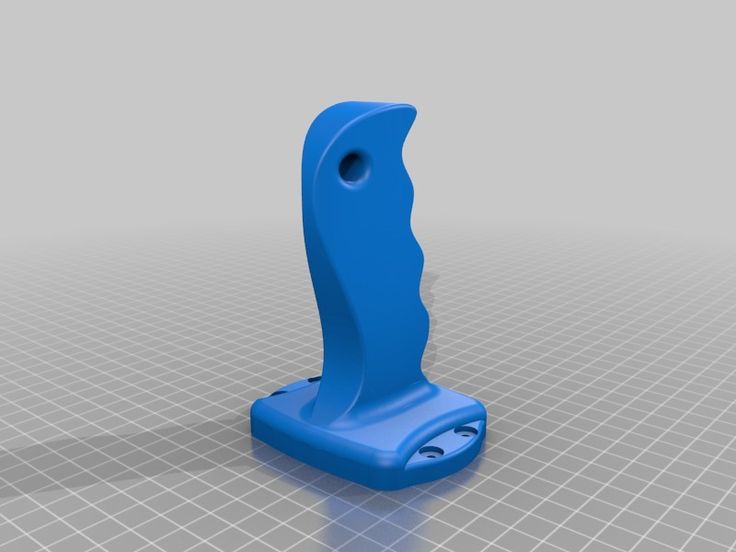
I have long wanted to have a 3d printer. A year and a half - exactly, maybe even more. I even learned how to model a little in DesignSpark Mechanical and occasionally drew all sorts of useful and not very things in it, for example, I redid the buttons on my Logitech G27 steering wheel to make it easier to press with gloves: G27 Button Plates. The flight of fancy in the manufacture of all sorts of different things was limited only by the lack of a printer, because printing somewhere else is long, inconvenient and not too cheap. Only one thing stopped me - I needed money for my printer, and for some reason they are always chronically lacking. After much deliberation, I decided to assemble the printer myself, and, given the above circumstance, to make the most of any rubbish lying around at work. nine0003
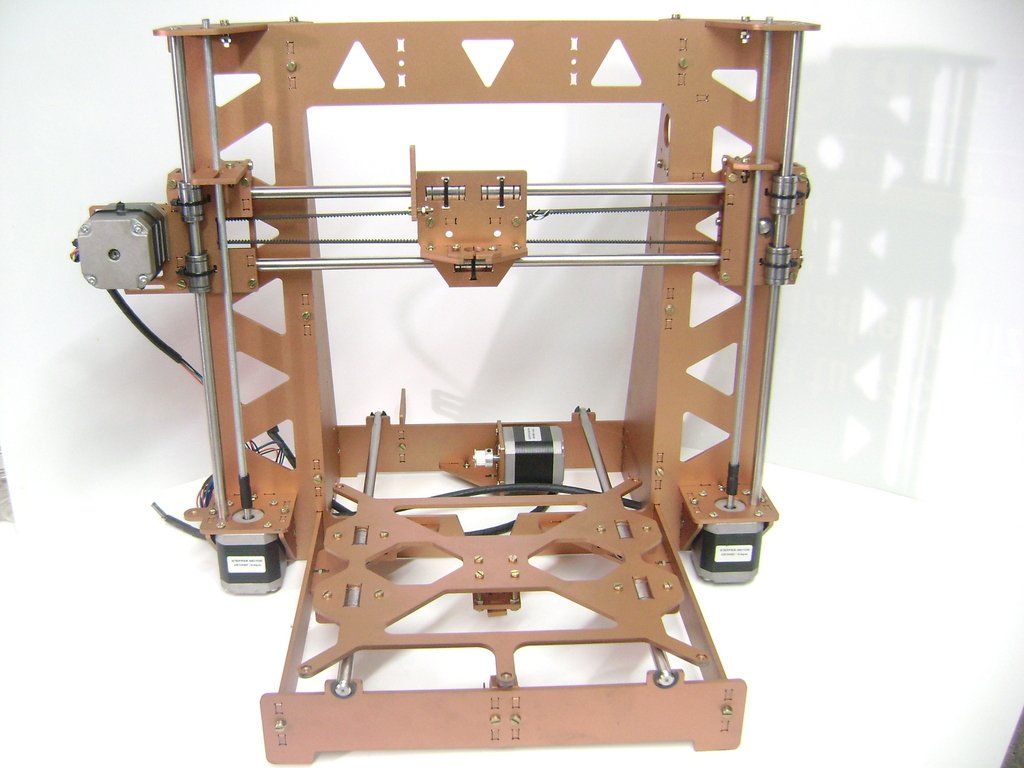
Since before that I had only seen 3D printers from afar and had a very rough idea about them, I began preparations by studying the forums, while the best one I found from Russian speakers on this topic is the section on 3D printing on roboforum. ru (http://roboforum. ru/forum107/). Local elders recommend assembling the first Mendel90 printer from dibond (aluminum composite sheets), by this time I had already begun to assemble Prusa i3 from 12 mm plywood. Looking ahead, I’ll say that this is not the best choice, it was necessary either to order a ready-made aluminum frame, or to do all the same Mendel90, it is much more rigid, which will increase print speed and reduce noise and vibration.
The first step I tried to imagine what exactly I will collect. DS Mechanical was fine for a quick first sketch:
A sample shopping list originally looked like this:
- 3D Printer Controller RAMPS 1.4 + Mega 2560 R3 + 5pcs A4988 For Arduino RepRap + 3 endstops goo.gl/trkdsM $ 40.00
- 12V 24V 3D Printer Heatbed MK2B RepRap PCB Hot Plate Heat Bed For Prusa & Mendel goo.gl/4nS4ry $ 12.00
- (2)8mm Bearing CNC Aluminum Rail Linear Motion Shaft Support Series Slide SK-8 goo.gl/Dzwxtr $ 4.00
- 12v Extruder for 3D Printer goo.
 gl/rOonr5 $ 60.00
 - SC8UU SCS8UU 8mm Linear Motion Ball Bearing Slide Bushing Linear Shaft — 4 pcs goo.gl/T36aYa $ 13.00
- 8x400mm Outer Diameter Shaft Optical Axis Cylinder Linear Rail Series - 1 goo.gl/XlLMtN $ 5.00
- 2 Meters Of GT2 Belt goo.gl/M2q7VH $7.00 nine0013 GT2 20 tooth Timing Pulley - 2 pcs goo.gl/M2q7VH $ 4.00
- 20T 5mm Bore 6mm GT2 Timing belt Idler Pulley 1 pcs goo.gl/gtNVeE $ 10.00
- 4pcs NEMA 17 1.8° 2.6 kg.cm flat shaft Stepper Motor goo.gl/8KBxcg $ 60.00
- Mounting Bracket for 42mm NEMA17 stepper motor 3 pcs goo.gl/G2eg7A $ 18.00
- 2pcs Coupler 5 x 8 mm for 3D Printer Z Axis NEMA17 Stepper Motor RepRap goo.gl/PJkouI $ 4.00
- 10pcs Spring for 3D Printer Extruder Heated Bed For Ultimaker Makerbot $ 2.00
- 2 Pcs 8mm Zinc Alloy Pillow Block Bore Inner Diameter Metal Ball Bearing goo.gl/tUYyZp $ 6.50
Printed parts were not supposed to be used at all, steppers should be hung on metal corners, vertical feed - on M8 construction studs, frame and table - from 12 mm plywood, guides - 8 mm with SC8UU plain bearings, clamp them into brackets SK-8 (all searched on eBay by name).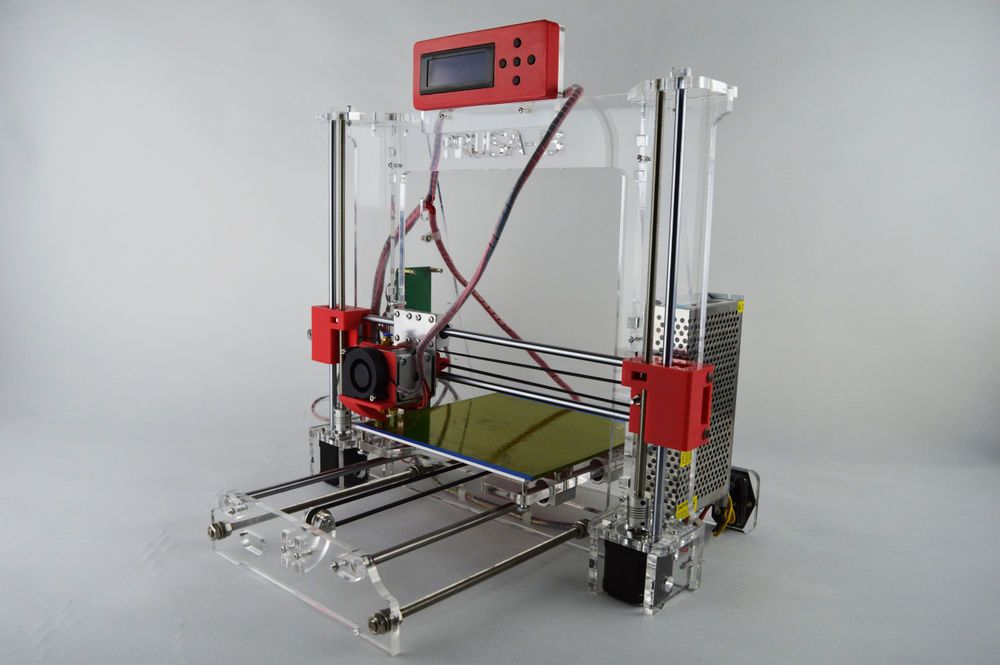 I made a preliminary list of parts and started looking on ebay for what you can buy at auctions cheaper. While choosing where to buy cheaper - I drew a sheet of plywood:
Sawed by hand, no laser cutting, only electric jigsaw, only hardcore!
While I was processing pieces of wood, I was picking up an old scanner at work, a couple of matrix printers, a card embosser, I managed to get hold of one long 8 mm shaft, two short 10 mm, a steep aluminum rail along which a steel plate with holes rode on wheels. From there, I broke out the fastenings of the print head of the matrix, they had bronze plain bearings. As a result, already at the frame assembly stage, small changes were made to the project and the frame already differed from the first picture:
I still had to order one of the 8 mm shafts, the hope of finding suitable steppers in the printers did not materialize, NEMA 17 still comes across in the matrix, but with insufficient torque and a tightly mounted gear, which I could not remove. Since I ditched the 8mm x guides in favor of the embosser rail, I drastically reduced the number of SC8UU bearings needed, in the final version, three were enough. By the way, the bearings are shit, when I put them on the shaft - balls flew from one to the floor, they slide badly too, they have no lubrication at all from the factory. I ordered extended LM8LUU to replace, I'll see how they behave. In general, the people of the carriage and on rolling bearings collect, they say that it turns out much better. nine0005
The plywood frame is not too rigid, so I decided to use a Bowden extruder to increase the print accuracy. The lighter the head, the less the frame will swing during acceleration, the higher the print accuracy. I managed to find a small and light hot end, with a very successful fastening at the bottom with a copper plate, and not with a collar at the top, like most:
frames. In general, it is better to immediately assemble a reinforced version of the frame, such as this one:
Separately, I want to mention the plywood hot table - never do that! I was tormented to put it evenly, 12 mm plywood easily bends when tightening the fastening of the heating element, on the third attempt I managed to achieve relief fluctuations on the printed surface within 1 mm over the entire area, but it was not easy.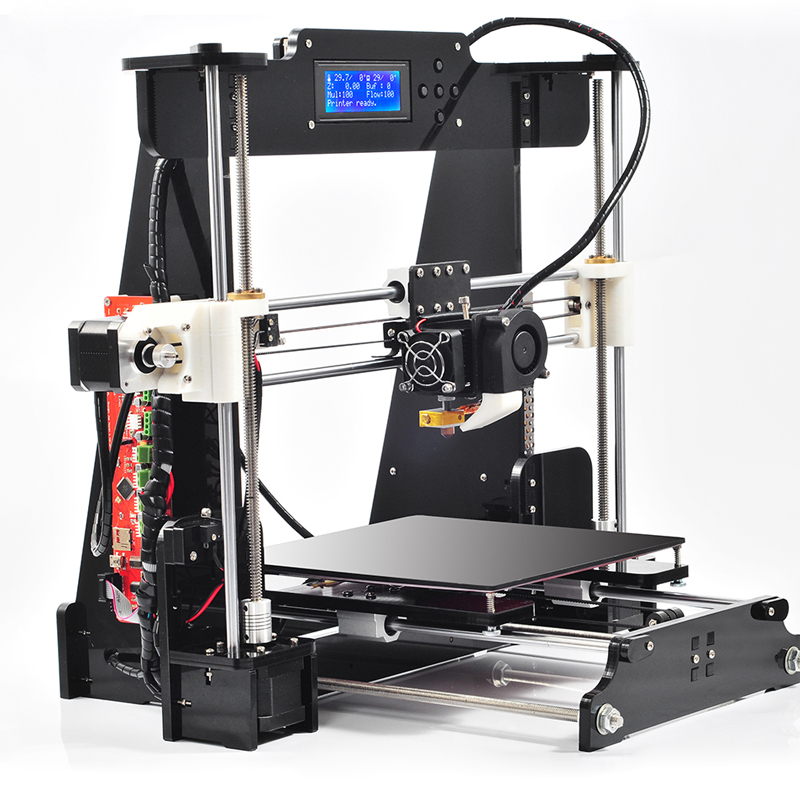 It’s better to take a ready-made aluminum one, on eBay in the region of $ 30, but how much nerves you will save is beyond words.
The second interesting point is that the parts from the children's iron constructor were very useful, while the printer itself cannot print yet - a lot can be assembled from it. Here, for example, the belt roller along the Y axis:
Another way to save money is the power supply. The savings, however, are so-so, the power supply for LED strips for 12 volts 30 amps on eBay costs not at all space $ 30. I decided to go my own way again and used a 500W power supply from an HP Proliant server, which delivers the same 30 amps on the 12 volt line, but at the same time it makes quite a noticeable noise. The power is enough, but I'd rather change it to something quieter.
I decided to use the cheapest electronics - RAMPS 1.4 + Mega R3, however, I took more powerful drivers - DRV8825. Radiators were included with them, they were of little use, they warmed up so that it hurt to hold your hand, I hung a 60 mm fan with a diameter of 0.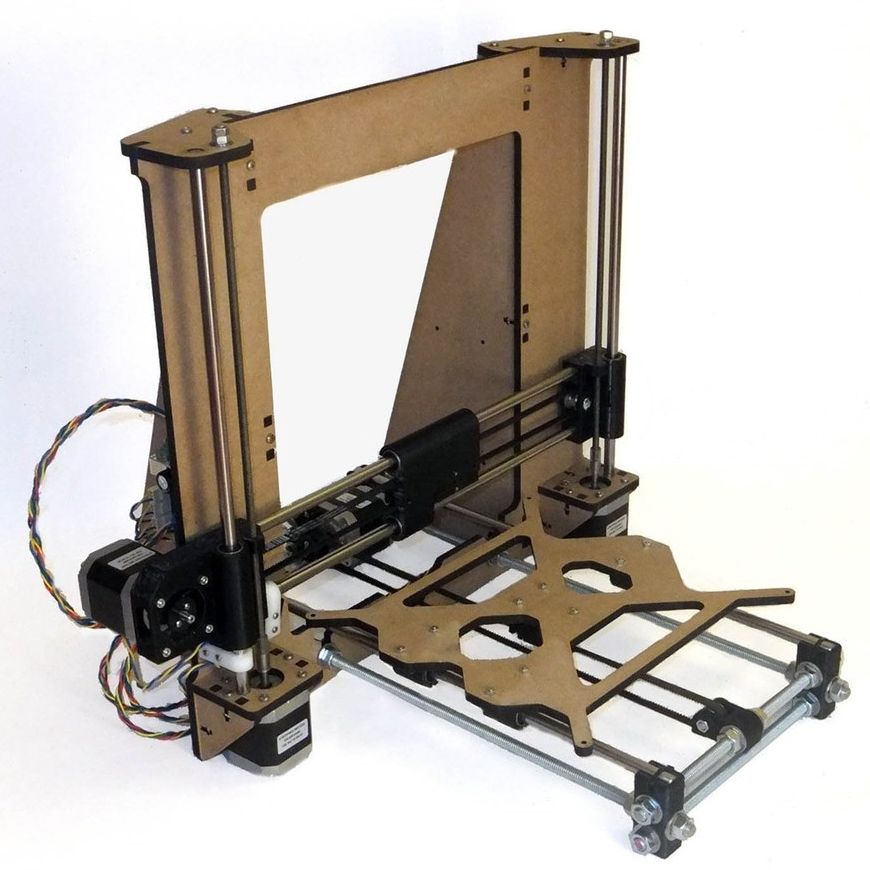 2 A opposite, now they almost do not heat up even without radiators. By the way, I am very surprised that many people advise using microstepping 1/16, I even had skipped steps at 1/8, everything was fine at 1/4. The direct drive extruder works without microstepping at all, it is noisy, but there are no feed problems. Carefully insert drivers into RAMPS !!! Insert it upside down or with an offset - the arduina will rise beautifully and go to the trash, I have both chips burned out :(((
As a result, after a couple of months of finishing with a hacksaw, jigsaw, needle files, soldering and twisting, the printer looked like this:
I am printing a raft…
There were no problems with the mechanics right away, a box with a thickness of 1 layer 0.2 mm was printed immediately evenly and with the correct dimensions, except that the upper layers settled due to lack of cooling. True, I almost immediately replaced the roller from the designer with a normal bearing with a self-printed mount:
Did I manage to save money? Yes, probably 30 percent of the cost of the Chinese Prusa i3 kit with shipping.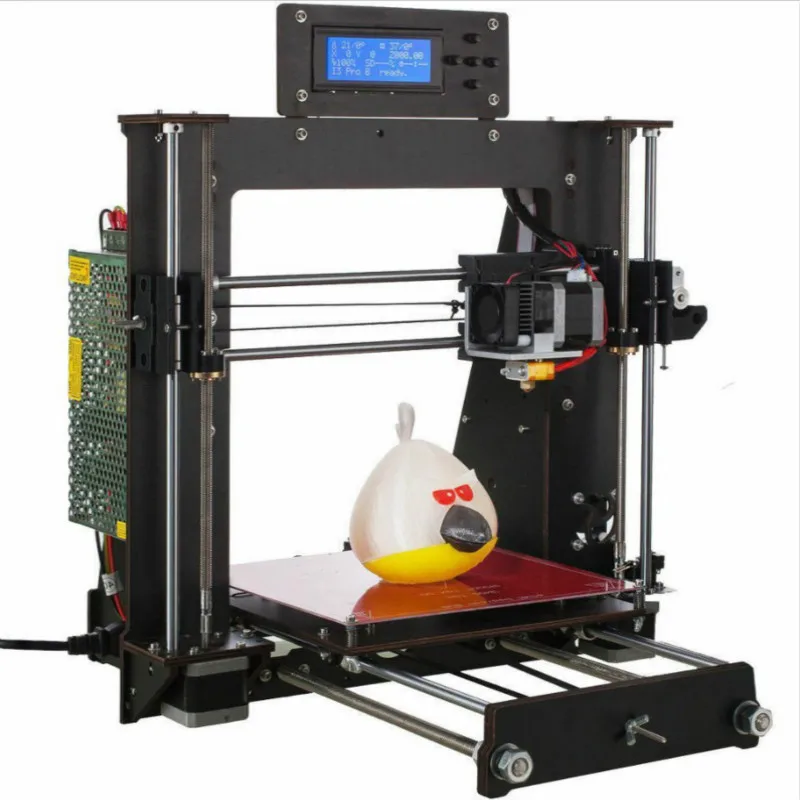 Everything works, I print with a layer of 0.2 with good quality, there is a slight wobble along the Z axis, I think it will be possible to remove it by changing the fastening of the studs, perhaps by switching to thinner studs. At least now the printer can print parts for itself, which opens up the possibility of further improvement at minimal cost. Here, for example, is a forced airflow printed on it:
What would I have done differently if I had known in advance what I would encounter during the assembly process? I would take a ready-made aluminum frame, it's worth it.
In the future, I plan to achieve printing without wobble in Z, and then, perhaps, I will try to assemble a printer with CoreXY kinematics in a cubic frame from an aluminum profile ...
“Faberant Cube 3D printer, made in Russia. Everything in detail." in the blog "Innovations"
The article is intended for those who are interested in additive technologies. The story will focus on the solutions on the basis of which 3D printers are created. The problems of most 3D printers and new solutions that are applied in the Faberant Cube 3D printer, developed in Russia, are analyzed in detail. nine0005
- © Public photo
Faberant Cube 3D printer with innovative FCoreXY high precision system and high temperature extruder.
The new Faberant Cube 3D printer is the second 3D printer model developed and produced by Kubekt Lab, Novosibirsk.
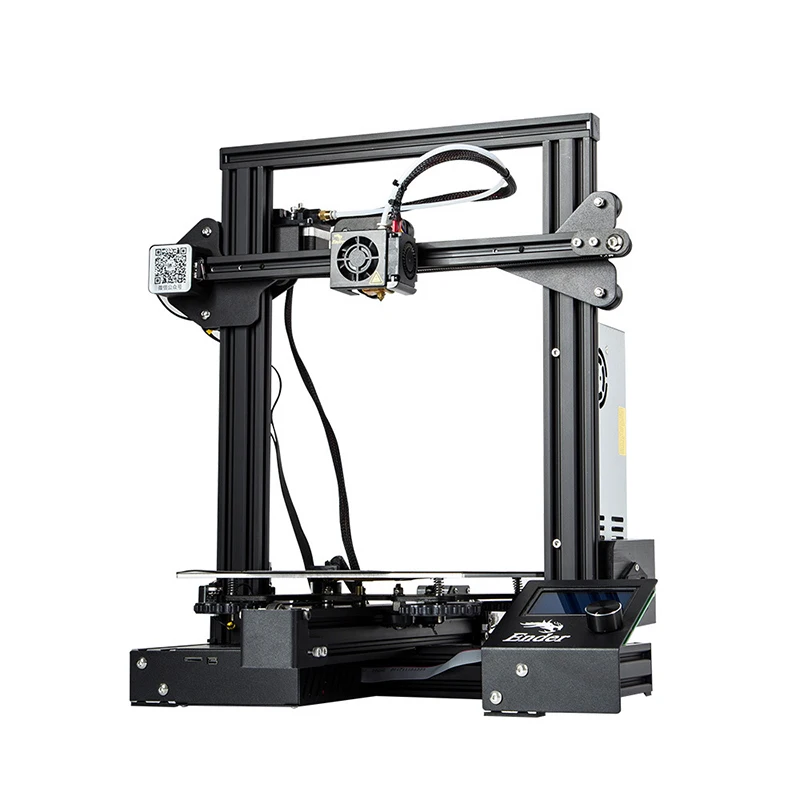
The first Faberant printer model produced in 2015-2017. was made according to the classic Prusa I3 scheme with an open body and a movable table. nine0005
The new Faberant Cube model uses a closed cubic body, an innovative FCoreXY motion system for high-precision 3D printers developed by Cubekt Lab, and a high-temperature all-metal extruder that allows printing on all types of plastics.
Closed chamber
A common problem when printing with shrinkable plastics such as ABS and nylon in conventional printers is that the material shrinks when it cools, causing the part to lift off the table and bend the edges of the product severely. . nine0005
In the Faberant Cube 3D printer, the working chamber is completely closed on all sides and keeps the heat around the printed part. Therefore, even when using various popular materials with shrinkage, you can get a good result.
It is worth noting that in the Faberant Cube 3D printer there are no wires and tubes protruding from the top, as on most printers, but there is a fully closed top cover that keeps heat in the working chamber. Therefore, the Faberant Cube 3D printer has a truly enclosed print chamber, which is a definite advantage when printing with shrink materials. nine0005
The body of the printer is made of 2 mm thick steel. Outside there is a colored decorative shell made of aluminum composite. Transparent doors on the top and front serve to seal the print chamber, but can be quickly removed without tools. Inside the printer there are 3 separate compartments - at the back, on the right and on the left, separating the hot working chamber from the outer walls of the printer.
When both doors are closed, hot air convection is turned on inside the chamber so that the temperature is the same throughout the chamber. This helps when printing large plastic items with shrinkage. nine0005
When printing with PLA plastics, which do not shrink, but which like to blow cold air, convection can be started with the doors open with a separate button on the body.
The printer has an internal illumination of the print area, which can also be turned on or off with a separate button on the body.
Media is fed into the printer from an external spool in the form of a standard 1.75 mm diameter filament through a heat-resistant tube.
The XY and Z motors in the Faberant Cube 3D printer are removed from the print chamber and hidden in a mechanical ventilation compartment. On the vast majority of other printers, these motors are in the print chamber and experience significant heat. In our printer, this problem is completely solved. nine0005
CoreXY Travel System
- © Photo from public sources
CoreXY motion system for 3D printers was introduced in 2011 by Ilan E.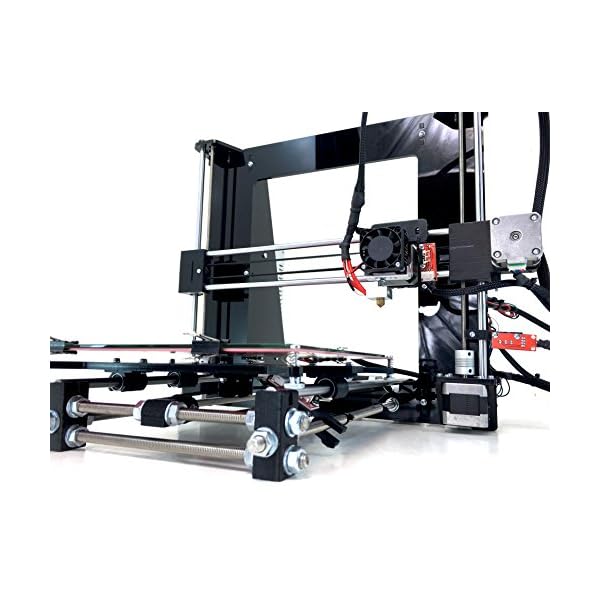 Moyer. Since then, several variations of it have appeared, and so far it is the most progressive movement system.
Advantages of CoreXY system:
1) Since the XY axis motors are located separately from the movement axes on the body, it can increase the speed of movement and printing. (On printers with other systems, the motor may be built into one of the axles, which increases its weight.)
2) Movements along the X axis, as well as along the Y axis, are performed by two motors at once, and not by one, as in the classic schemes. This makes it possible to position the extruder along the axes 2 times more accurately, and therefore increase the accuracy of printing.
3) CoreXY is load balanced. For this reason, CoreXY performs well on both shafts and linear rails. For example, the similar and simpler H-bot system that is used in many printers only works well on more expensive linear rails that can handle its uneven loads. . nine0005
4) The entire CoreXY 3D printer needs one less motor compared to the classic Prusa I3 circuit.
High Precision FCoreXY Advanced Motion System
The first Faberant printer produced in 2015-2017. was made according to the classic scheme Prusa I3. During printing, the extruder in this scheme is moved by one motor along the X axis, the entire X axis, together with the extruder, rises up along the Z axis by two motors on the left and right. And the table at this time moves back and forth along with the printed part along the Y axis by another motor. nine0005
For the first model of the Faberant 3D printer, Cubekt Lab developed an innovative improvement for classic motion systems - the XY precision doubling system (see diagram). It is a mechanism with double-sided blocks, where the belt transmits force to a movable structural element through a block with bearings. This allows for one minimum movement on the drive motor to get ½ movement on a movable structural element - a carriage with an extruder moving along X and a table moving along Y. It is worth noting that blocks have been known since the time of Archimedes, but were used to gain strength . In the new system, the blocks were used to win twice in accuracy. nine0005
For example: when the belt is moved by the motor ΔA by 10 cm, we get the movement of the printer's extruder ΔX by only 5 cm, i.e. 2 times less, and therefore more accurate.
For 2 years of operation of the first model 3D printers with this precision doubling system, it has proven itself only on the positive side. Therefore, when a new 3D printer was developed at Cubekt Lab, and the progressive CoreXY movement system was chosen for it, it was decided to try to combine it and our XY doubling system for even more accurate printing results. nine0005
- Motion system for the first Faberant 3D printer. ΔX=1/2*ΔA
- © Photo from open sources
After calculations on virtual models, it became clear that such a combination is possible while maintaining all the advantages of the connected systems, and the accuracy of the new hybrid system can theoretically be higher than the classical displacement systems by 4 times!
Next, a concrete implementation of a new and improved high-precision movement system was developed, which was named "FCoreXY", from the first letter of the Faberant printer name and the name of the core CoreXY system.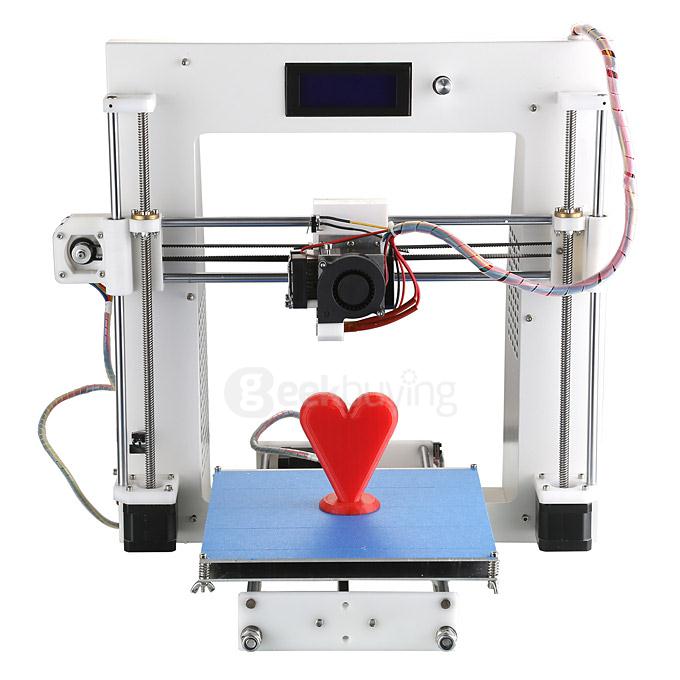 It is worth noting that no one has previously made such a system and this is our innovative development. nine0005
The complexity of implementing systems on the classic CoreXY is that, due to the design features, the two belts must cross. So that they do not touch each other during operation, different solutions are used.
- High precision FCoreXY motion system. Red and blue lines are belts.
- © Photo from open sources
Our FCoreXY system uses a two-level solution where the belts run parallel one above the other and do not intersect. Some pulleys in this design are also arranged in two levels on top of each other on the same axis and take up less space than in the classic CoreXY. nine0005
An important difference in FCoreXY is that we turned the motors with their axes into a horizontal plane, which improved the layout of the rest of the elements.
The XY motors in the Faberant Cube 3D printer are removed from the print chamber and hidden in a mechanical ventilation compartment.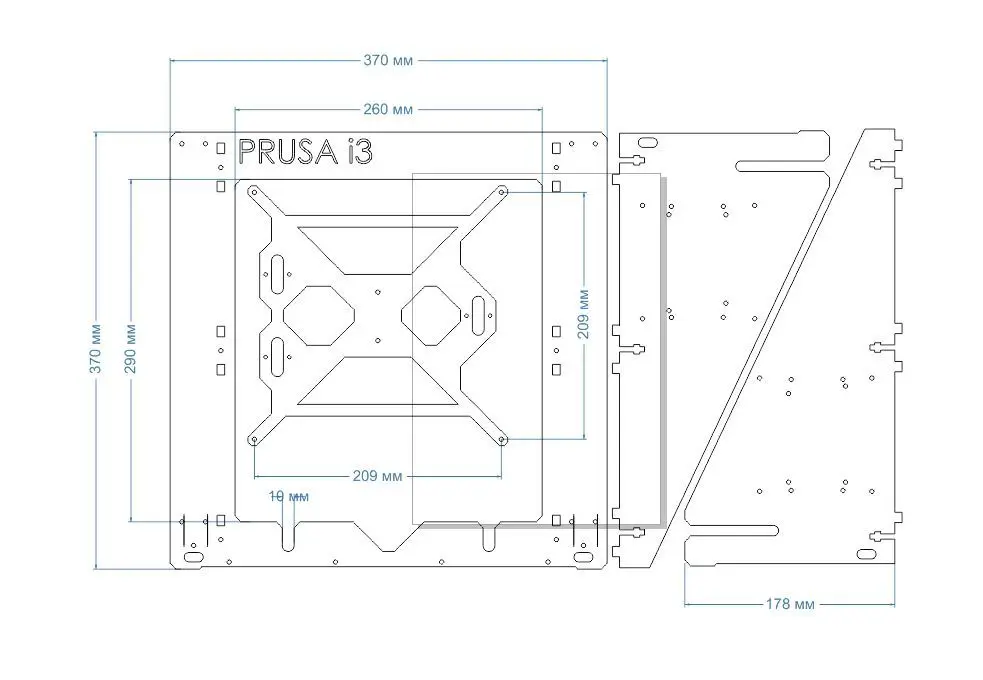 It is worth noting that many other printers have these motors in the print chamber and can overheat. This will not happen in our printer.
To improve accuracy, the FCoreXY system uses additional blocks that can be placed very compactly without significantly increasing the size of the entire structure. The displacement equations show that the accuracy of the FCoreXY system can be 4 times higher than classical systems (see the displacement equations in the diagram). nine0005
For example: when the belts are moved by motors ΔA and ΔB by 10 cm each, in total 20 cm, we get the movement of the printer's extruder ΔX by only 5 cm, i.e. 4 times less, and therefore more accurate.
While conventional printers print with an accuracy of 0.1 mm in the XY axes, a FCoreXY printer can print with an accuracy of 4 times higher - 0.025 mm in the XY axes.
 On the Y axis, thick guides with a diameter of 10 mm are used, on the X axis - thinner guides with a diameter of 8 mm
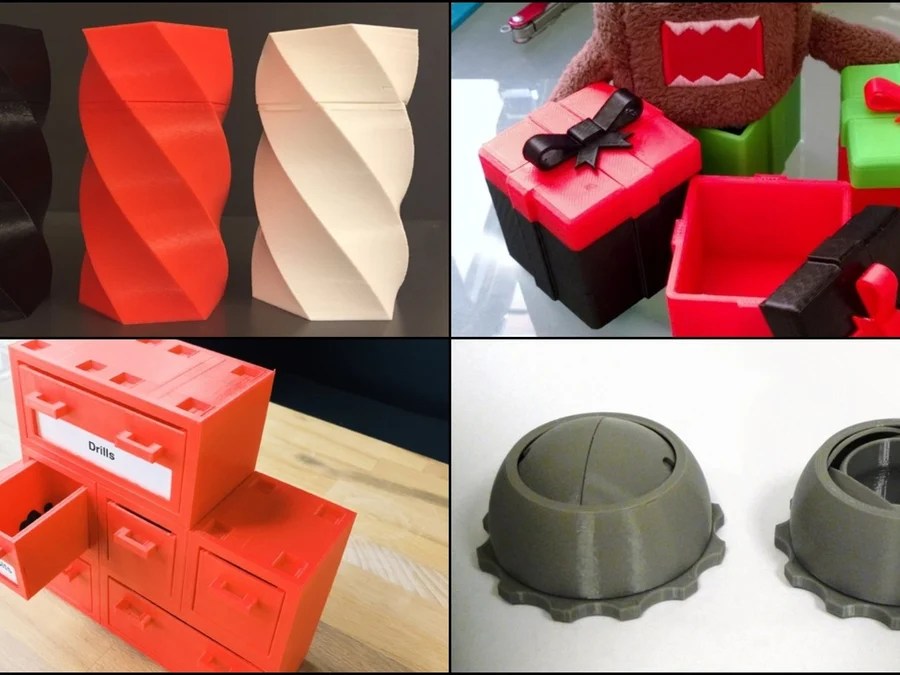
As a result of using the system on FCoreXY, the Faberant Cube 3D printer can print very accurately geometrically, and since the layers are stacked with high accuracy along XY the perimeters of the layers, it turns out to be visually very even, although printing is done in layers using FDM technology (see an example of printing a polyhedral vase).
- Printing of a polyhedral vase in one wall. Maximum layer height 0.3mm, perimeter printing speed 100mm/sec. Product diameter - 13 cm.
- © Photo from open sources
Vase model here
3D printing layer height
. The lower the height of an individual layer, the higher the quality of the lateral and inclined surfaces.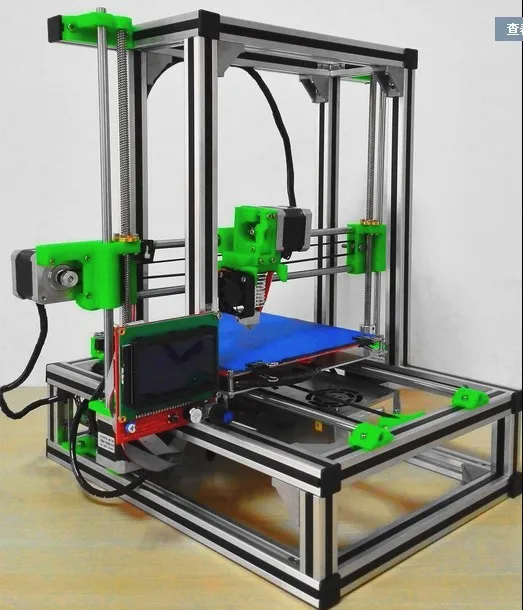
Most 3D printers use a direct connection of the Z motor to the lead screw for Z-axis movement. This can lead to an uneven height of each subsequent layer when printed, with a deterioration in the overall print result of the product. This point becomes very important when printing with ultra-thin layers, because. it is on them that errors can become most noticeable. nine0005
In order to achieve the most even layer heights and maximum print quality, a special gear for the Z axis with a ratio of 1 to 2.5 has been developed for the Faberant Cube 3D printer. This means that the layer heights when printed will be 2.5 times more accurate than on other printers without a gearbox.
The Z-axis motor, like the XY-axis, is removed from the print chamber and hidden in a technical compartment with forced ventilation, which is not found on most other printers.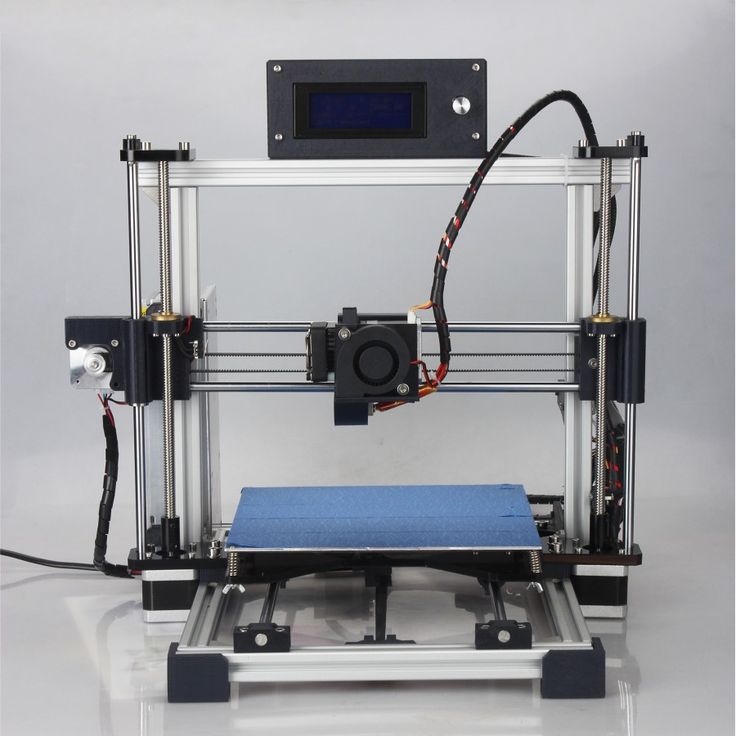
The minimum tested print height for the Faberant Cube 3D printer is 0.06 mm. With such a thin layer, it is almost impossible to see the layers and the surface of the product becomes shiny and smooth. If you compare printing with a similar layer on other printers, you can see that the results of their printing are worse than those of the Faberant Cube, which can be explained by the reasons indicated above. (See boot print example)
The Faberant Cube 3D printer is expected to be capable of quality printing at 0.04mm and 0.02mm, but this requires additional testing to confirm.
Electronics 32BIT
are used on the overwhelming number of 3D-printers with the overwhelming-ups of 3D-printers with the overwhelming number Arduino MEGA2560.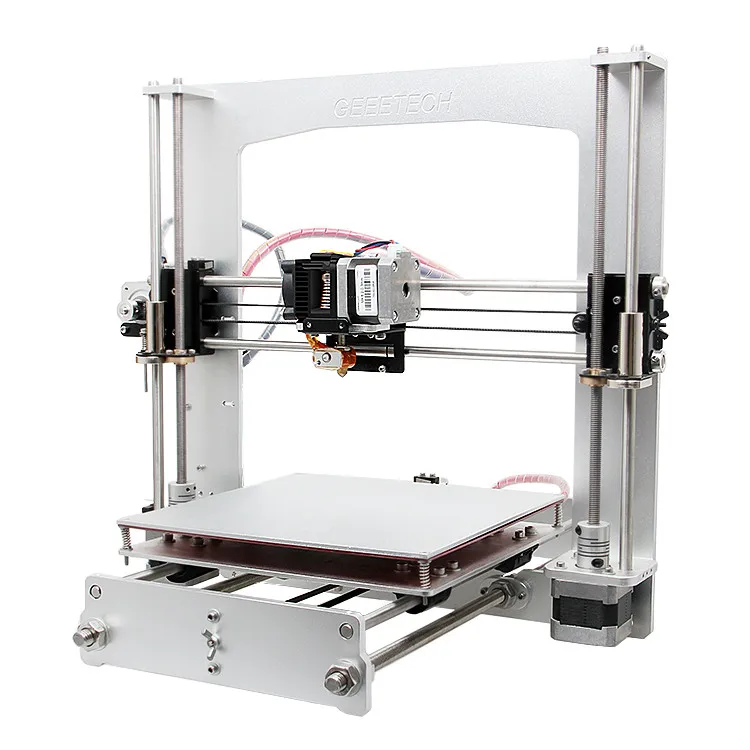 And it is enough. nine0005
However, when using more advanced motion systems with higher precision, such as FCoreXY, in which more complex calculations are performed, there is a problem with the lack of speed of 8bit electronics. This can be expressed in a low maximum print speed and artifacts when printing products.
Therefore, for the Faberant Cube 3D printer, faster electronics were chosen than in other 3D printers - this is a 32bit Arduino DUE. This board allows you to print quickly and accurately. nine0005
To solve these problems, the Faberant Cube 3D printer uses a more accurate non-contact optical end sensor in the Z axis. This results in a good first layer and less need to level the table height.
An important design feature of the Faberant Cube table is its triangular base, made of aluminum with curved edges.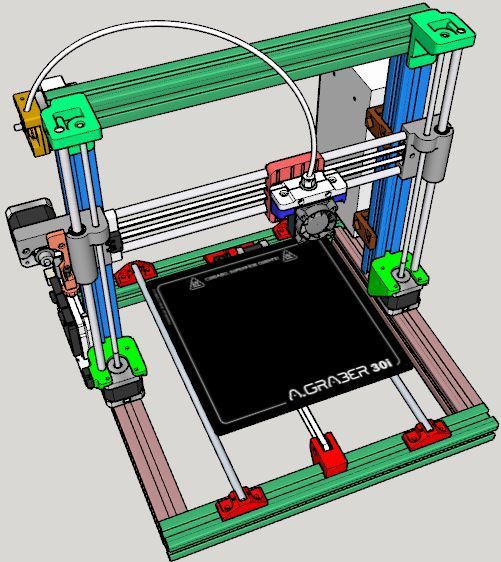 This allows the part to be very strong and the table not to bend, which is important when printing large, heavy products. It also allows the table not to vibrate, which has a very positive effect on the printing results.
The heating surface itself is covered with glass, which is held by four special clips, and there is thermal insulation at the bottom. The whole structure of the table is very light and stable. It moves vertically in Z on powerful axles with a diameter of 12 mm with four linear bearings - two at the top and two at the bottom.
The stage plane of the Faberant Cube 3D printer is aligned semi-automatically at three points using three handles under the stage. nine0005
The stage can be heated up to 120 °C, which is sufficient for most plastics.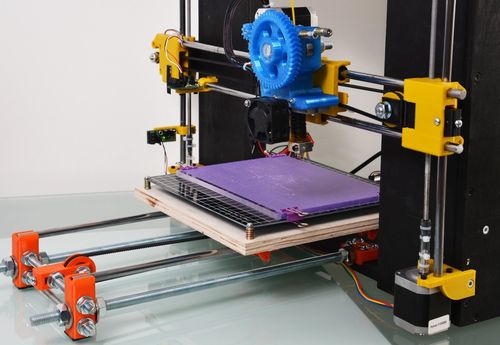
The stand can be moved vertically by as much as 245 mm. This means that products of such a high height can be printed. Most other similar 3D printers are limited to print heights of 200mm or less.
The entire printable volume of the Faberant Cube 3D printer is 200×200×245 mm (X|Y|Z), which is 9.8 liters.
All Metal Extrusion System
Long-term 3D printing with common plastics such as PLA is known to cause blockages on 3D printers with all-metal extruders that stop the printing process, as well as clog the extrusion system, which is not always easy to clean.
To solve this problem, many manufacturers have adopted the use of a slippery PTFE tube that runs inside the extruder channel and prevents the semi-molten plastic from getting stuck. nine0005
This solution works, but has a number of drawbacks.
So, the printing temperature should not be raised above 250 °C for a long time, otherwise the fluoroplastic will begin to decompose with the release of harmful fumes.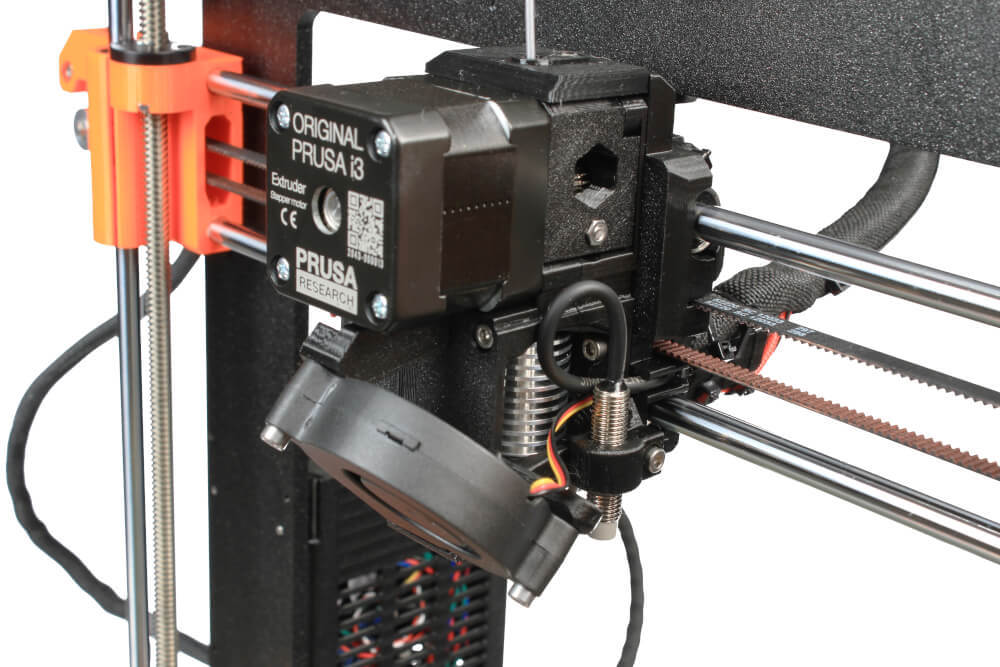 In addition, this limitation of the maximum temperature does not allow printing with durable refractory plastics.
For the Faberant Cube 3D printer, Cubekt Lab has developed an all-metal extruder that does not have these disadvantages.
- Faberant Cube 9 3D printer extruder0014
- © Photo from open sources
The new extruder works without fluoroplastic in the heated part, and at the same time, long-term printing with PLA plastic goes without jams and stops.
The maximum operating temperature of the Faberant Cube 3D printer extruder is as much as 340 °C! This is much higher than the vast majority of other printers.
High extrusion temperature allows printing of high strength plastics such as polycarbonate, nylon, and will also allow the use of new refractory plastics that are still being developed by manufacturers. nine0005
We have addressed an issue that other printers have when printing with soft materials such as rubber and polyurethane.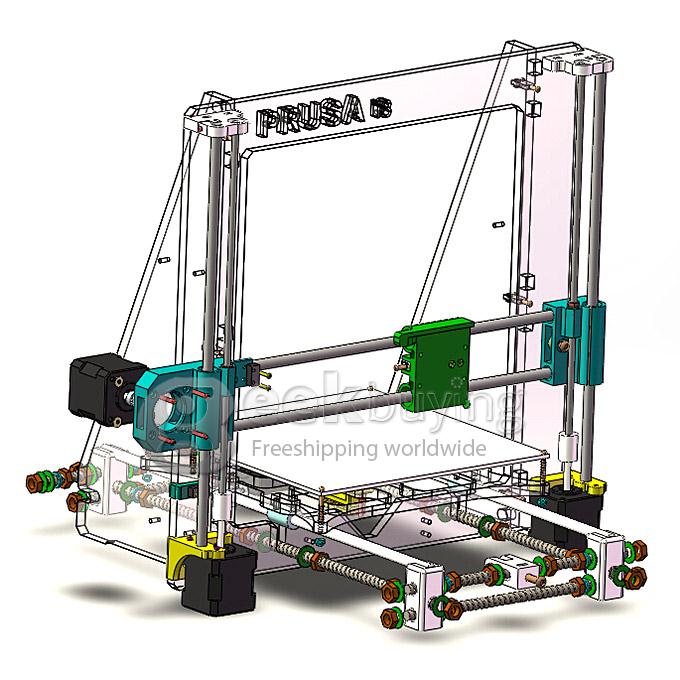 Due to the softness, the filament winds up on the feed gear, stops feeding into the extruder, and printing becomes impossible. For printing with soft filaments, we have developed a special durable aluminum bar guide that prevents the soft bar from bending and makes printing continuous.
The Faberant Cube 3D printer can currently print on the following materials: ABS, nylon, polycarbonate, PLA, FLEX, rubber, polyurethane, HIPS, PVA, SBS, PETG, POM, PP, etc.
Due to the special configuration of the extruder, it was possible to radically improve the print quality in all modes, minimize the formation of a plastic plug in the heated part, and also eliminate the possibility of plastic leakage at the junction of the thermal barrier and nozzle.
By default, the printer comes with a 0.5mm nozzle, which can be used in 90% of 3D printing tasks. This is the optimal diameter for fast and high-quality printing of large and medium-sized products. For the remaining 10% of tasks, the kit comes with a 0. 3 mm nozzle, for finer printing of small items up to a layer of 0.06 mm. nine0005
It is important that the thermal barrier of the Faberant Cube extruder is assembled with a cooling radiator without threads and the whole structure is easy to maintain, for example, align it in height with the nozzle or completely remove it from the printer if the nozzle needs to be replaced.
With two assembled heating units with different nozzle diameters, manual replacement time is only about 30 seconds. The whole block is unscrewed with one screw. This is very important for those users who often change nozzles from one diameter to another for different printing purposes. nine0005
Direct-extruder
Many printers use remote plastic feeding into the extruder (Bowden), i.e. the motor is not located on the extruder, but placed on the printer body. Because of this, the supplied plastic experiences significant deformations inside the supply tube along the path between the motor and the nozzle. This is especially noticeable for soft plastics. Part of the plastic springs in this segment, and when the motor has already stopped and printing is not required, and this happens many times during printing, the plastic continues to be pushed out under the action of elastic force and flows out of the nozzle uncontrollably, spoiling the printed part. Usually they fight with this using the plastic rollback function - Retraction. But it takes a long time on large parts, and increases the overall print time. nine0005
The Faberant Cube 3D printer uses a so-called Geared Direct Extruder. This means that the motor is located on the extruder itself and the length of the plastic channel between the motor and the nozzle is minimal. That is, all elastic deformations of plastic are reduced to a minimum, and high-quality printing becomes possible with any, even soft materials. The 1 to 2.3 ratio gearbox contributes to a more accurate plastic feed, which is very important when printing in ultra-thin layers, and also creates more force to push the plastic. nine0005
The plastic feed handle is an addition to the extruder. It can be useful if you need to push the plastic forward or backward without the participation of the motor, manually. This greatly simplifies the process of loading and removing plastic. nine0005
The plastic bar itself is clamped by the front pressure knob and held securely in position throughout the print.
Extruder Airflow System
The extruder airflow system consists of a radiator fan and a model airflow fan.
The radiator fan is needed to create a large temperature gradient between the cooling zone and the plastic melting zone. In most 3D printers, a small and noisy 30x30mm fan is installed for this purpose.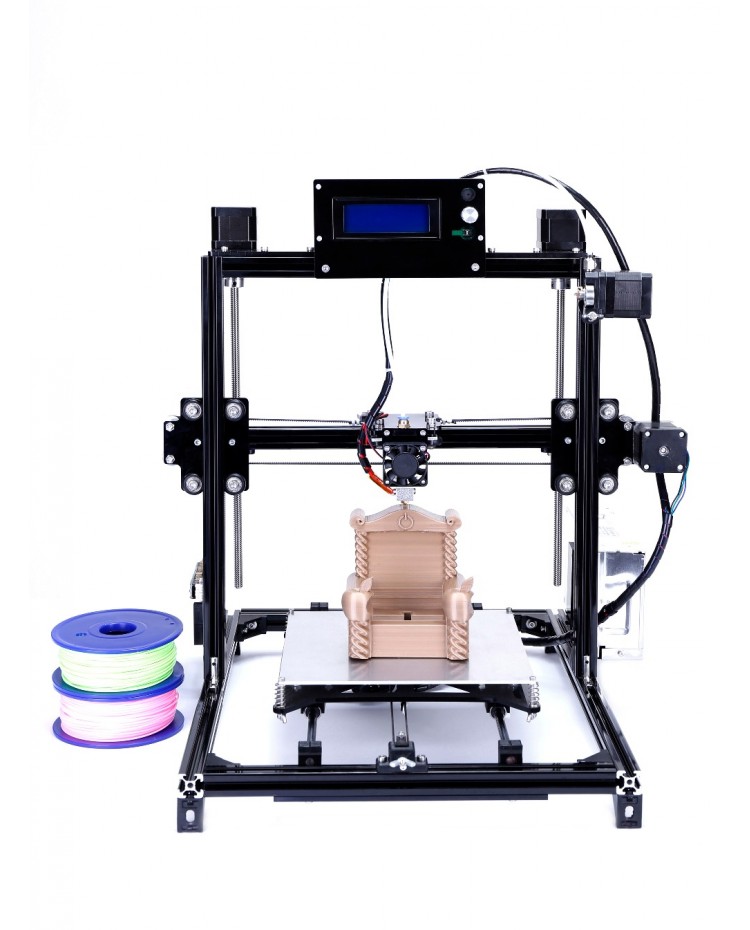 The Faberant Cube uses a more powerful and quieter 40x40mm fan to achieve better print results and also reduces the heat of the cold zone when printing at high temperatures in a closed chamber up to 340°C. nine0005
Model airflow required for printing with common PLA. Without blowing, the printing result can be sad. For such blowing in 3D printers, ordinary fans are usually used, the flow from which is directed into a narrow channel and blows onto the model under the nozzle. However, such fans do not cope well with this task and the air flow at the exit from the narrow channel turns out to be weak, which negatively affects the printing result.
In the Faberant Cube 3D printer, the airflow of the model is reinforced and is a 50x50 centrifugal turbine fan. A powerful air flow passing through a special channel reliably cools the printed part and the result of printing with PLA plastic, especially inclined areas, is very good. nine0005

The operating printer has a minimum noise level, which distinguishes it from many similar printers. nine0005
Since the first printer model was a success with entrepreneurs, and some had up to 8 printers, there was a problem of placing all the machines in the workspace. Therefore, for the new printer, we have developed a simple system for installing one device on another to create the so-called "print walls". In other words, you can stack printers on top of each other to save space.
Conclusion
The new 3D-printer Fabrant Cube shows the excellent performance of the seal and is recommended for commercial use.
The development of a 3D printer was carried out in "Cubject Lab" for 6 months.