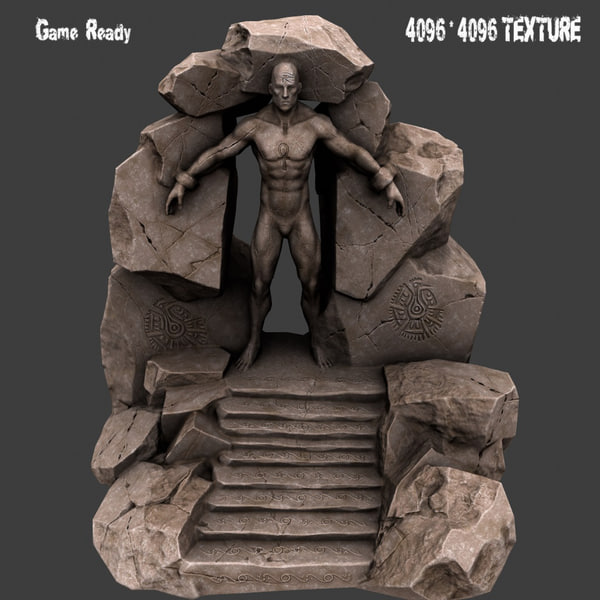
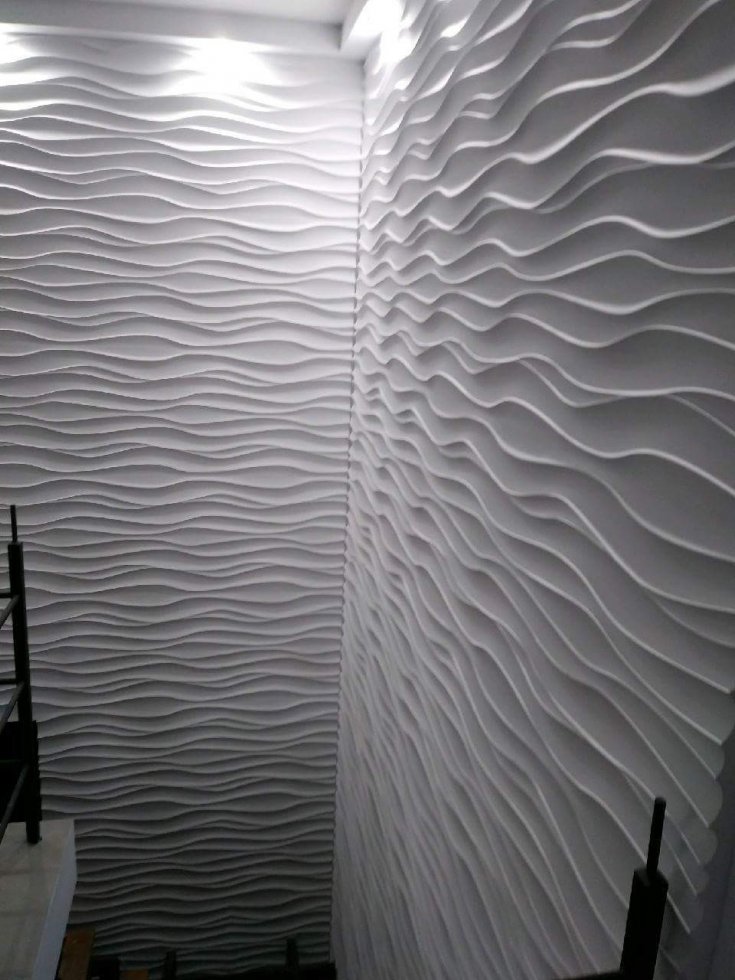
Wave echo cave 3d print
Wave Echo Cave Finale + Phandalin Election
Wave Echo Cave: Finale
This session occurred on 10/2/2019.
Recap Previous Session:
The players explored Wave Echo cave and dealt with most of the threats easily. Rupert the Spectator was dismissed, and the treasure was claimed. All that remained was the Black Spider...
This time on.....
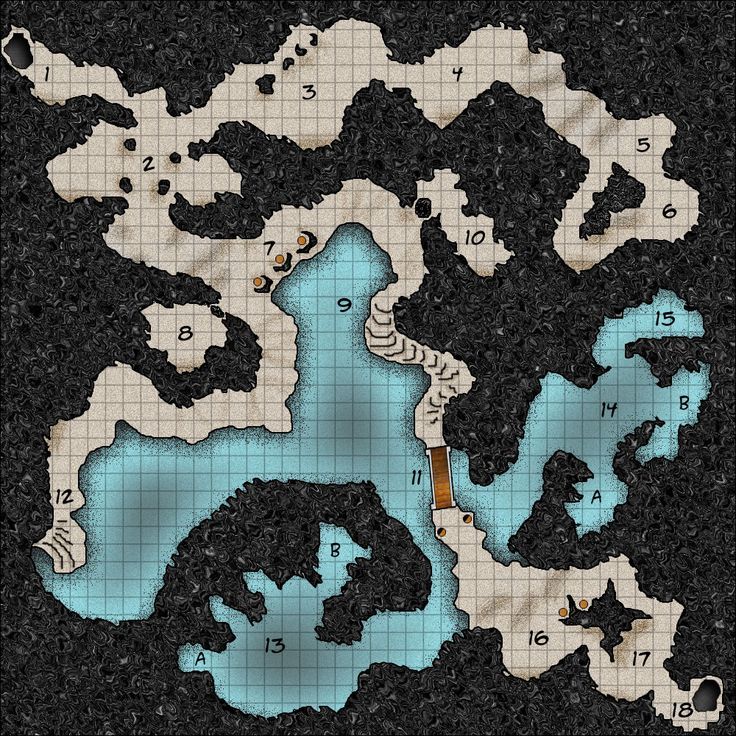
The session began a bit late, but I began by pointing out that everything had been explored except rooms 18 and 19. The players helped out with the recap of what exactly happened, and discussed the plan. They had detected a strong magical energy in room 18 previously, but though the Black Spider a bigger threat and investigated room 19 first.
They finally agreed on splitting the group, having the charismatic players come in the southern door, and the others sneaking around to the eastern door. The plan was to talk it out and see how they could rescue their Dwarven friend Nundro Rockseeker. The codeword was "Keruffle" (lol).
They began by knocking on the door. After a few moments and whispers heard through the door, the Black Spider's flamboyany voice came clear: "Who is it?! Oh do come in!" and the door was opened by a small, nervous goblin.
I asked the players for a marching order first, and the Paladin Brise was first in line. Nezznar (the Black Spider) had prepared his Faerie Fire spell to be cast on whoever came through the door. I explained the effect of the spell without naming it or its actual effect (advantage on attacks!), and after one failed arcana check, they had no clue and continued to chat with the Black Spider.
Inside the room, other than Nezznar and the goblin, a bugbear standing guard near the bound Nundro, as well as a Giant Spider named Brian (thank "The Adventure Zone" dnd podcast for this, as well a Nezznars voice.). Brian was Nezznars life partner, and together they have big plans. Nezznar introduced the party to Brian, and asked about how clear the dungeon was. Where were the bugbears he sent with the players?
The players tried to bluff that something went wrong; the bugbears died as well as some party members, but the place was cleared out now. The Black Spider cared little for the bugbears, but he knew something was up and attacked immediately.
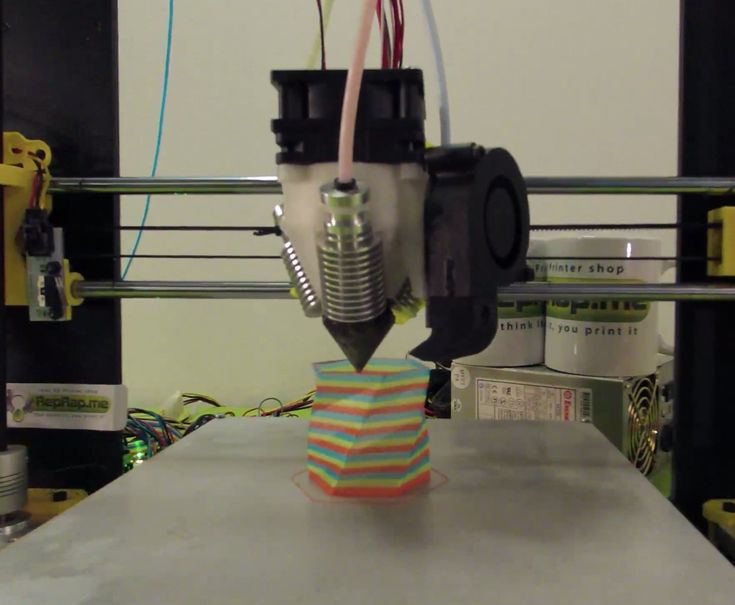
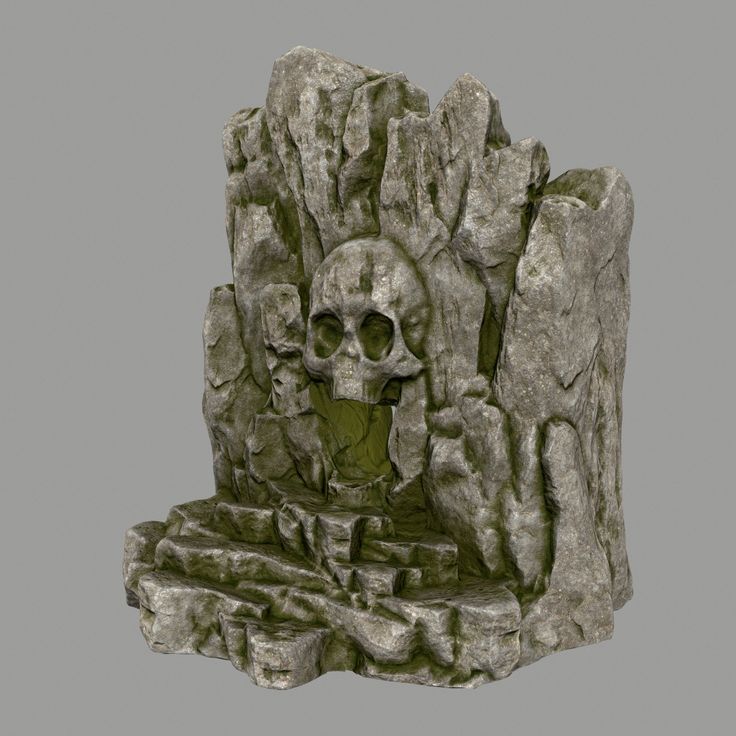
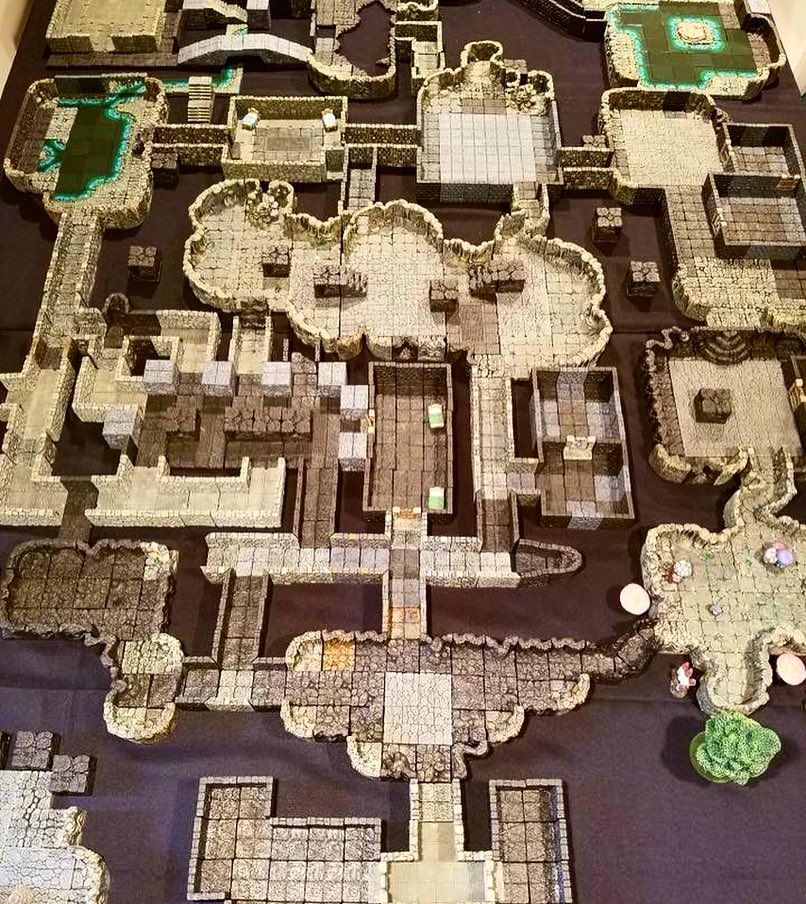
At this moment, I surprise most of my players by pulling out some really cool 3D printed dungeon tiles!
I tried to combine rooms 19 and 20 into one, with the cubby on the right acting as a cell where Nundo was stored. I also failed to print out enough tiles, so the place was a bit cramped. Regardless, the players were impressed!
Battle Go!
The battle began with Nezznar shouting to his bugbear: "KILL THE DWARF!"
The clear opponents were:
- The Black Spider (a low CR mage)
- Brian the spider (giant spider from the MM)
- The Bugbear who was trying to execute Nundro. (MM)
| Brian with an I, not magic Bryan |
The combat opened pretty quickly with some web spells, and the party Sorcerer expending two charges of a fireball necklace, causing 9d6 damage to everything.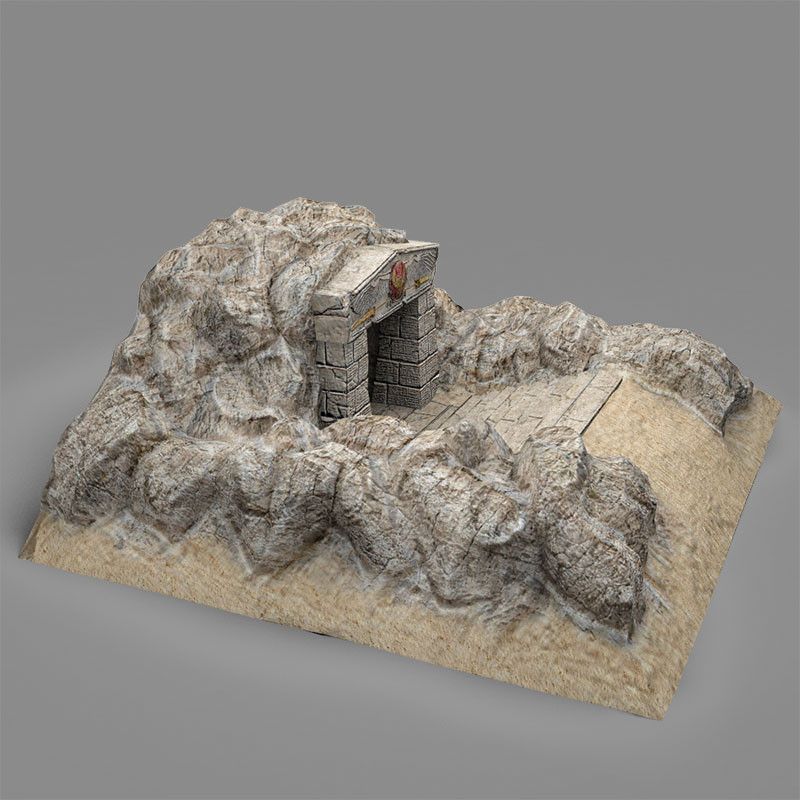
Luckily the roll was low (29 damage I think), but this was enough to kill Brian immediately, which caused Nezznar to fly into a howling dramatic rage.
"BRIAN NOOOOOOOOO! WE HAD SUCH A BRIGHT FUTURE TOGETHER BRIAN, OH NO OUR CHILDREN!!!!!!!!"
It was a great time to RP, hahah. This fireball also set the webs on fire, which was a cool terrain hazard.
The bugbears whole purpose in the fight was to rush to the restrained Nundro and beat him to death. I planned to roll death saves for him (using the rules of hit=death save), and I think my players initially thought him dead. But at the end of one round he ended up making a death save and I had him audibly choke on blood. This caused Aeras to immediately use Healing Word on him, bringing him up.
**~~Nundro Has Joined The Party!~~**
Nezznar, in a blind emotional rage, called out to his god Lolth, asking for power.
I've been reading the "Drizzt" novels (which are amazing stories set in the Forgotten Realms of dnd 5e, would recommend), and I learned a lot about how Drows work! Lolth responded to his calls in a very typically Lolth kind of way, sarcastically.
For a male drow to be turned into a Drider is a humiliation and one of the worst punishments that can be given. But it was the right place and the right time; just what Nezznar needed, and so with a gasp and some boiling legs, he sprouted more and became a spooky Drider.
| Note: Don't pronounce it "Dee-Rider", that means something else and your players will laugh. |
He pulled his scimitar from its holster and it dripped blood, signaling the next phase of the fight!
| check out that blood lol |
A Drider gets 3 attacks per round, 2 sword attacks and one bite. I also opted to give the monster full Drider HP as well as a Legendary action of another free sword attack at the end of one players turn per round.
| Talk about super cool shit! |
Annnnnd I immediately targeted the Paladin with the highest AC (19), but also with Faerie Fire still on him.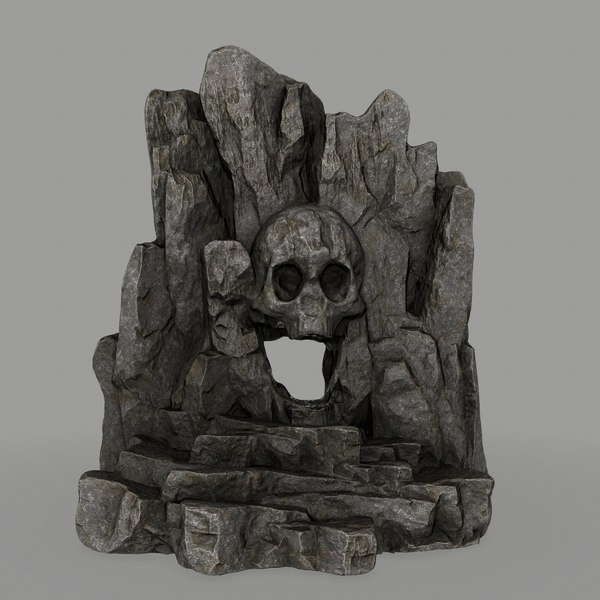 Many attacks were hit, and the Paladin ended up going down twice, but survived. Other players lost a lot of HP, but for the most part Nezznar was surrounded and it was clear who would be the victor of the fight.
I was a bit disappointed by the remainder of the fight as there was no more dramatic tension. I added a bit by having Brians corpse spawn some cute lil 2HP spider minions, but they were mostly a distraction. I really felt like I wanted one last surprise; some big AOE spell, or some backup monsters. But at this point, I had wrested my players of about 5 health potions, and many other resources were spent, so I felt they had earned it.
Phoenix Falconflight, the noble fighter, delivered the final blow, cleaving Nezznar in half to cheers. The players had a great reaction to his death, and the fighter's players physically ran to his car to get a plastic battleaxe and was rewarded with a point of inspiration!
For loot, I gave them the listed "Spider Staff" (which is kind of lame, charge-based spider climb + web spells) and I also threw in a hilarious "Ring of the Grammarian".
The players also remembered to check room 18 and found the Gauntlets of Ogre Power
Afterglow
After the big boss battle, the players chatted with Nundro and brought him to the cave entrance where Gundren awaited. They had a beautiful reunion, followed by a cry as they shared a moment about their departed brother Tharden. Gundren thanked the players, and inquired about any remaining monsters and the location of the Forge Of Spells! He again promised them 10% of the profits once the mine is up and running.
The Rockseekers suggested that everyone head back to town, to rest and bury the dead brother, as well as to sell the players' barrels of gold ore. The players agreed, and we were off! Back to Phandalin, victorious!
Handwave travel because of narrative reasons!
Back in Phandalin
They returned to town to find the place covered in fliers. Surprise, the election is tomorrow!
I spent about a half hour in Inkscape and whipped up some fliers and I think having physical printouts of them really got my players interested. I think they realized that this was a real election with some real mechanics once they saw the fliers!
They immediately were into it and had all kinds of plans. Their campaign manager (ex potato farmer) Edith gave them the rundown of the political situation and explained how the election would happen tomorrow.
Halia Thornton was definitely the front-runner as she was well known in town as the owner/proprietor of the miners exchange.
Daran Edermath was mostly campaigning for his own honor. A retired adventurer, he simply wants to find a bit more glory and recognition, but isn't very interested in politics or governing.
Pheonix (one of my players) was only recently known in town as a member of the adventuring group who drove off the redbrand. There were some rumors that he owned the in-construction manor, but overall Edith was not too sure how good of a chance he stood.
I am planning to write another article about the election and its mechanics, so I won't get too deep into that in these DM blogs.
Town Shenanigans
The players wanted to do two things now they were in town:
- Figure out where Halia is, and what she was hiding.
- Meet Daran Edermath and try to convince him to quit the election.
The players were very suspicious of Halia, as they had seen her disappear into a teleportation ring a few days before along with their bard friend Jelenath. They wanted more dirt and to find out what she was up in the ring, and so the Druid shapeshifted into a rat and scouted out Halias home. The rogue accompanied her, helping to pick the back door, and they found a tidy kitchen and quiet house.
CUT SCENE TO OTHER PLAYERS: KNOCKING ON DOOR
The Paladin and Noble Fight Phoenix knocked on Darans door to find a handsome, ornately dressed gentleman greeting them with a firm handshake. Daran is a total bro, he supports the players and thinks Phoenix would be a good mayor, but on his honor he ends up refusing the pleas to drop out. He agrees that Halia and the Zhentarim she belongs to are dangerous, but hes not willing to sacrifice his own pride.
Instead, he shows the players his spiked gauntlet, and invites them to join the "Order of the Gauntlet", one of the 5e factions. My paladin player was looking for a good story hook to sunset his character, so this was it, and I thought it a pretty good continuation of the conversation.
With not much earned other than learning Darans resistance to dropping out, they headed back into town to further discuss their plans, and I ended the session at 10PM, right on time.
Le Fin
I was pretty happy with how the session went overall; the boss battle kinda whimpered out at the end, but the election was super engaging for the players, and the 3d terrain was really cool.
Things to think about for next session:
- Jelenath + Halia double identity
- Election stuff
A DM's Guide to Wave Echo Cave
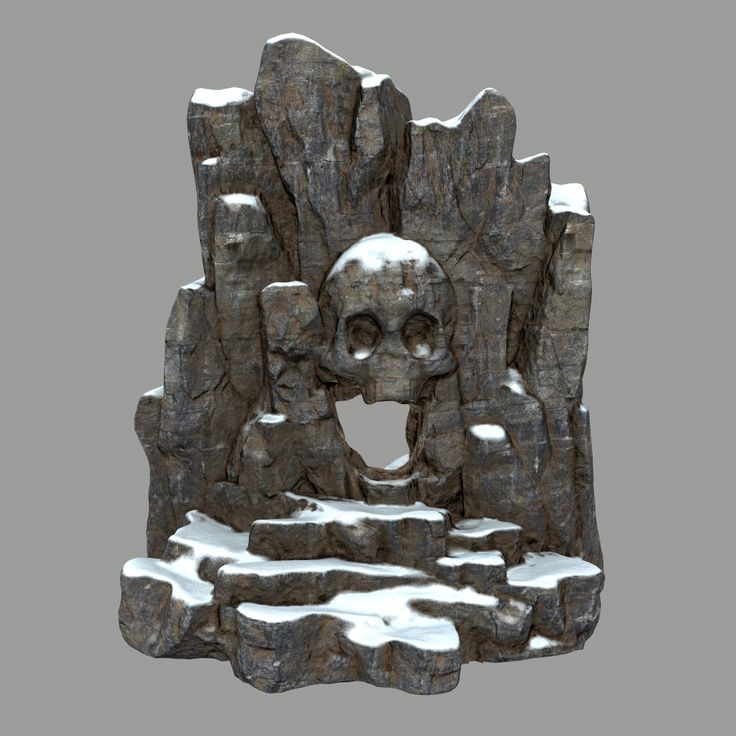
Image Source: “Crystal Caves” by JoshEitenAs a dungeon, Wave Echo Cave poses three challenges to GMs: The immense size of the dungeon’s map, the underwhelming nature of the Forge of Spells, and the lack of challenge that Nezznar the Black Spider presents to a 4th level party.
This post will focus exclusively on the first challenge, as I have already written separate articles about The Forge of Spells and Nezznar the Black Spider. In addition to that, I’ll add some encounters for the journey to Wave Echo Cave as well as suggestions for effectively running some of the areas of the dungeon.
Before Getting to Wave Echo Cave
Since Wave Echo Cave is deep in the Sword Mountains some fifteen miles East of Phandalin, we should probably make it feel like it’s a difficult place to reach. This way, arriving at the Cave feels more like an accomplishment. Here are some potential encounters to use as the party makes their way to the Cave:
Encounter: The Lake God
To set up this encounter, read the following flavor text:
“There are little more than deer and hunter’s trails leading into the foothills of the Sword Mountains, and it’s certainly slow going as you crest the first ridge and descend into a green valley with streams from the surrounding range filling into a silver lake. ”
”
The PCs can choose to avoid the lake if they wish (This is what the Rockseekers had done). If they get closer to it, however, they notice that there’s a rudimentary altar built by kobolds covered in spatters of blood. This is where kobolds would capture mountain goats and leave them as a sacrifice to what they think is the god of the lake, a giant plesiosaurus.
Should the PCs investigate the altar, the plesiosaurus will emerge from the lake, expecting an offering from the party. If the party offers no beast for the dinosaur to consume, it will attack the party and attempt to drag one PC into the water.
This creature might be a bit too easy for a party of level 4 PCs, so consider using this beefed up stat block:
Obstacle: The Broken Bridge
As the party emerges from the valley, they start to notice the remnants of a centuries old road, which, although it has deteriorated quite a bit, it’s far better than the deer trails they were following. Also, this should be an encouraging sign that they’re on the right track, as this is likely the road that once connected Phandalin to Wave Echo Cave.
As they crest the next peak, however, they find themselves facing a large ravine. A massive bridge built by talented Dwarven engineers used to span this gap. Almost all of it, however, has fallen to the depths below. All that’s left is a giant chain nearly 2 feet in width.
Gundren will mention this bridge, saying that his brother used a grappling hook gun to secure a lifeline. When the party arrives at the gap, however, the lifeline has been cut, most likely by servants of the Black Spider.
The DC for crossing the chain is normally a DC 10 dexterity check, but occasionally a fierce wind will rush through the ravine. Should that happen, everyone on the chain will need to make a DC 13 strength check.
Falling from the chain and hitting the ground is fatal. However, we don’t want to make a PCs life depend on a single skill check. Should a party member fail their check, they will fall, but they will also be “rescued” by a roper who manages to grapple the falling PC before they plummet to their death. This roper happens to be on a ledge on the other side of the ravine, some 30 feet below the bridge chain.
Give the Party a Long Rest
If you choose to use these encounters, we want to make sure the party enters the Cave fresh. After the party makes it past the broken bridge, it starts to get dark. They can take a long rest and arrive at the Cave first thing in the morning.
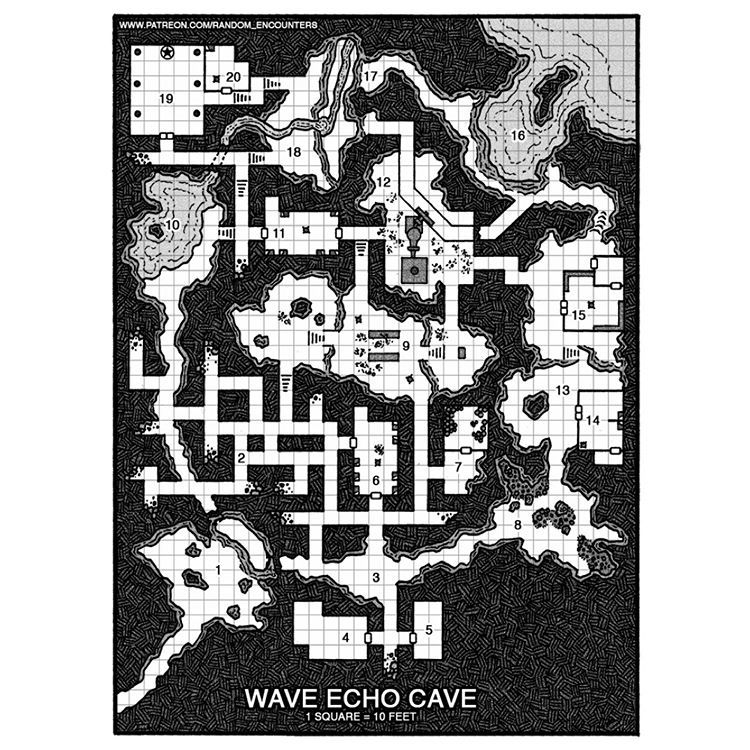
Managing the Size of the Dungeon
While you might have been able to purchase images of the previous dungeon maps, download them, and then print them to scale, you’ll find that for Wave Echo Cave it will be most likely be unmanageable. I did a little napkin math for printing Wave Echo Cave to scale and I got dimensions of roughly 9 x 8 feet, which means it would be larger than most dinner tables! For those who have been printing out their dungeons until this point, Wave Echo Cave forces you to consider other solutions.
Using a “mini-map”
One of the simplest ways to run wave echo cave is in theater of the mind. Really all you need to do is read the flavor text for each area and you’re done. When running the dungeon in theater of the mind, however, you do run the risk of having players losing track of where they are in the sprawling network of caverns. This problem can be mitigated by drawing a “mini-map” as the party progresses.
A “mini-map” is exactly what it sounds like: it’s a “miniature map”. This map doesn’t necessarily need to match the Wave Echo Cave map square by square. I’d probably go nuts trying to draw an accurate miniature version of all the twists and turns in the Mine Tunnels (Area 2). Instead, I’d probably go with a more abstract approach like this:
As you can see, the Mine Tunnels aren’t a 1-to-1 copy of the Mine tunnels from the book.In this example, the party has already encountered the stirges as well as unwisely opened the door to where the ghouls had been lying in wait in the South Barracks (Area 6). They decided not to move towards the green glow of the Fungi Cavern (Area 8) and having spied the ghouls in The Great Cavern (Area 9) with a familiar they decided to try their luck at the maze instead. After going through the winding maze (making a few survival checks along the way), they ended up at the large cavern again, the Ghouls pounced on them and after winning the battle they noticed another green glow (the FLAMESKULL!) to the north in the Smelter Cavern (Area 12).
As you can see, a mini-map can make dungeon navigation much easier for players by giving them a rough idea how all the areas they’ve been to in the dungeon are connected.
Optional: Give Map Making Duties to one of the Players
It should be mentioned that a GM doesn’t necessarily need to draw the minimap. Indeed, one of the party members could have a job drawing the map as they go and the rest of the party could consult that party member if they decide they want to double back and try one of the paths that they had previously ignored.
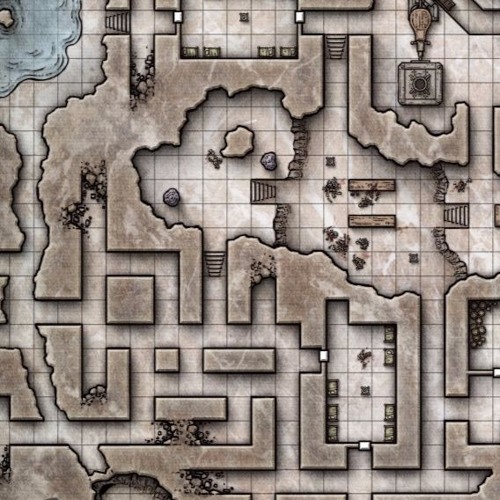
The Hybrid Approach: Only Print Areas Where Detail Matters
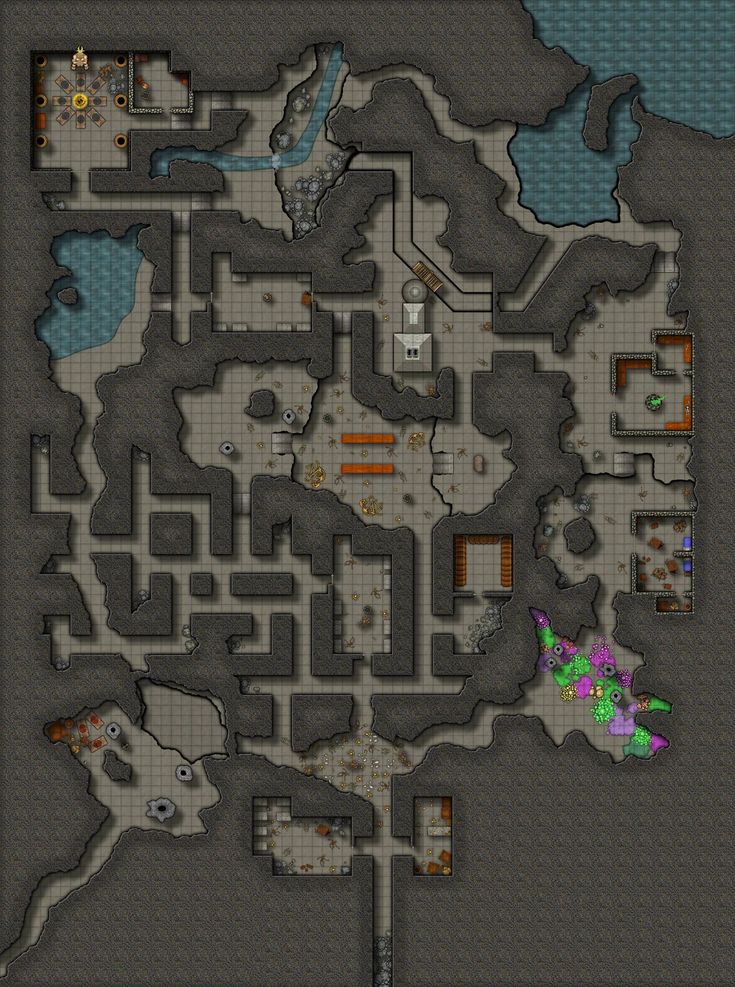
When I ran Wave Echo Cave, I decided that I would only print out a few areas:
- Area 9: The Great Cavern
- Area 12: Smelter Cavern
- Area 18: The Collapsed Cavern
The reason I chose to print these areas rather than other areas was for the following reasons:
- Combat is likely to happen in these areas.
- There are complex features that would take longer to draw on a dry erase battlemap like cliffsides and rivers.
- The original map has evocative details like skeletons and forge bellows.
While most of the rooms in the official Wave Echo Cave Map are pretty bare bones, there are many fan made maps (here’s a great one) that flesh out areas like the Temple of Dumathoin (Area 19) and the Forge of Spells (Area 15). If I was using a fan made map with more added detail. I’d probably print out these areas too.
For battle encounters in rooms that don’t have much detail, like the Ghouls in the South Barracks (Area 6) or the bugbears in the North Barracks (Area 11) it shouldn’t take you longer than a few minutes to draw the room on a battlemat. Most of the rooms are just rectangles, after all.
Wave Echo Cave: General Suggestions
Before going into the room-by-room suggestions for Wave Echo Cave, here are some general suggestions:
- To add more immersion, play the audio for this Youtube video in the background.
 This will provide both music and booming sounds at regular intervals.
 - Being aware of the strategies that monsters will use when encountering PCs will be very helpful to make your combat encounters feel more dynamic. I highly recommend reading articles about each of the monsters in Wave Echo Cave on Keith Amman’s site, The Monsters Know What They’re Doing. Just do a site search for the monster you’re looking for and you’ll be good to go.
Wave Echo Cave: Room by Room Suggestions
Many of the rooms in Wave Echo Cave really don’t require much tweaking. However, since many of the rooms are rather generic and don’t give us a real idea of what kind of place Wave Echo Cave happens to be, we should take this opportunity to inject some lore about the cave in these rooms (Thanks to Mathew Perkins’ video on Wave Echo Cave for this great idea!). I’ve provided some ideas for each room to get you started, but I highly recommend brainstorming some ideas on your own!
Area 1: Cave Entrance
When PCs make it down into the open pit to the northeast of the cave entrance, there’s really no reason for them to go towards area 2 or area 3. Because no details are provided, one choice is as good as the other. To make it feel more like a choice, you can add these details:
Peering around to the north you can see the beginnings of a maze of tunnels, most likely exploratory prospecting tunnels. The tunnel to the east seems to open up to a large natural cave with a much higher ceiling than the tunnel itself.
Area 2: Mine Tunnels
The Mine Tunnels is an area that’s much better to do in theater of the mind than on a battle map. As a GM you can narrate the twists and turns of this maze and ask for a DC 15 Survival check to see if the party gets lost. For every failed Survival check, the party needs to make a random encounter roll.
After the party succeeds on a single survival check, whoever made that successful check will notice two important details: an ammonia like smell (this is the ochre jelly) to the north, and a shuffling sound (these are the ghouls) to the northeast. A high DC18 nature check will tell party members that the smell is likely the leavings of a slime creature.
If the party decides to head towards the ochre jelly, characters with a high enough passive perception will notice that the ceiling is moving. This is the ochre jelly lying in wait for some tasty prey.
Area 3: Old Entrance
- Among the remains of the Orc bodies are wooden shields crudely painted with the crest of Uruth, a legendary Orc warrior who devastated the Sword Coast centuries ago. If the party visited Wyvern Tor, they will have noticed the crest looks very similar to that of the orcs they encountered there.
- The emblems of three major families: one Dwarven (Rockseeker), one Gnomish and one Human (Tresendar) appear on the mural to symbolize the Phandelver pact.
Area 4: Old Guardrooms
- Inside a tattered satchel carried by one of the skeletons is a letter from a relative from Waterdeep. This letter would mention the orc uprisings ravaging the Sword Coast and warn the guard that a small town like Phandalin just isn’t safe, no matter how powerful he believes the high Mage Mormesk might be.
- A box full of earplugs. How else could these guards get some sleep when the cave was booming all the time??
Area 5: Assayer’s Office
There’s a small shrine to Tymora in a recess in the north wall. This shrine looks like it may have been carved by the same individual who carved the Shrine of Luck in Phandalin. Any PC who leaves a gold coin or more upon the shrine gets the benefit of the bless spell for 1 hour. Any additional contributions will not result in a blessing.
Area 6: South Barracks
- Mining implements are found here, as this was the barracks where the miners lived.
- A Dwarven rune has been painted on the entrance to the south barracks to ward off evil. It has almost completely faded and since there were Ghouls in here, we can assume it no longer works.
- A small shrine to Dumathoin is at the end of the wall. If one is perceptive enough, one can notice the leavings of gemstones ground to dust. This makes sense as Clerics to Dumathoin would grind gemstones as a form of sacrifice.
- There is one set of Dwarven armor in this room. A dwarf in the party might recognize the armor design to be similar to that of Mirabar. Perhaps some Dwarven families managed to flee Phandalin and went north to Mirabar?
- There is also a box full of earplugs here, just like in Area 4.
Area 7: Ruined Storeroom
- Although there is no food left in the storeroom, there are many barrels labeled “Phandalin Cider”
- A book of recipes can be found on top of the barrel. It appears as though this book was written by several individuals; each of them contributing Dwarven, Gnomish, and Human recipes to the book. One of the recipes for shepherd’s pie seems awfully close to the shepherd’s pie served in taverns along the Sword Coast today.
- Inside the recipe book is a note about poisonous fungal spores in Wave Echo Cave. Instructions are given to minimize the exposure of food to these spores.
Area 8: Fungi Cavern
There are bodies left over from the battle of Wave Echo Cave here, but they have been subsumed in fungus. A high (DC18) perception check will reveal a skeletal hand reaching out from the fungus. On the skeletal hand is a ring of protection +1. The ring is of gnomish craftsmanship, and upon the inside of the ring are the words “Friend of Garl“. Whoever puts on this ring will also receive flashes of the former owner’s life, as a miner with family living in Phandalin.
Area 9: Great Cavern
If you have read the article I wrote on the Orcs of Wyvern Tor, and want to include the suggestions I added for the Orcs, Brughor Axe-Biter and his orcs would arrive at Wave Echo Cave slightly before the PCs if the orcs hadn’t been dealt with at Wyvern Tor. They would most likely be in the Great Cavern (Area 9) in search of the hand of Uruth.
Area 10: Dark Pool
In my article on the Forge of Spells, I suggested that the Forge may be connected to the Elemental Plane of Water or the Shadowfell. If this is the case, anyone who dives deeply enough into that pool could find themselves on that plane!
Area 11: North Barracks
- Since we already have barracks for the Human guards and the Dwarven miners, this is likely where the Gnomish goldsmiths and jewelers lived.
 Because of this, the beds are far too small for the poor Bugbears to sleep in.
 - In the corner of the room is a small shrine to Garl Glittergold, one of the main gods of the Gnomish pantheon.
- A careful inspection of the room will reveal the remnants of jewelers tools.
Area 12: Smelter Cavern
- Dwarven runes are engraved upon each brick that makes up the smelter. These runes ensure that the metal smelted from the ore can better absorb magic when taken to the Forge of Spells.
- The zombies under the command of the flameskull all have the Tresendar family crest embroidered on their tattered armor.
Area 13: Starry Cavern
- Anyone who makes a DC12 perception check will notice that tiny runes have been carved all along the cave walls to focus the ambient magic of the Cave on a particular point–this point being the Forge of Spells.
- Any cleric or paladin who inspects any corpses left behind from the ancient battle will have a flashback to the battle itself.
 In this flashback they will see Mormesk as he was in life fighting desperately to hold back the orcs.
Area 14: Wizard’s Quarters
As the Lost Mines book describes Mormesk the Wraith as a “powerful mage”, he was likely the wizard who created the Forge of Spells in the first place. While it’s tempting to have Mormesk attack the party as soon as they enter his quarters, Mormesk may play an important role in the future. For example, Mormesk may be the only one who knows how to properly operate the Forge of Spells and he’s only willing to give away that knowledge for a price.
It’s likely that the very process of harnessing the energies of Wave Echo Cave to create the Forge of Spells was a dangerous task, and an accident transformed one of the Wizards of the Pact into the Nothic who happens to now live beneath Tresendar Manor. It’s possible that the Nothic’s hoard contains clues to who Mormesk was and what the relationship between Mormesk and the Nothic might have been.
According to the Monster Manual, Nothics are usually wizards who, having devoted their lives to “unearthing arcane secrets, are reduced to creeping, tormented monsters by a dark curse left behind by Vecna” 1. This fits well into the idea that the power of the Forge of Spells originates from the Shadowfell, as Vecna happens to be a resident there. The connection between the Forge and the Shadowfell is an idea I explore in more depth in my article about the Forge of Spells.
For more ideas on connecting Mormesk to the Nothic, check out this excellent video about the Nothic by Lutes and Dice.
Area 15: The Forge of Spells
If you plan to use a printed or digital map for the Forge of Spells I highly recommend using this fan made map, as it makes the forge seem like the powerful MacGuffin that it’s hyped up to be. As understanding the properties and origins of the Forge are a crucial part to the campaign, I wrote a separate article about it.
Although the module hints at the fact that the monstrous spectator in the Forge is not hostile to the PCs, I think it’s fun to have it be downright friendly and cordial. It will still try to kill any PC that tries to steal magic items or use the forge, but it may also give a warning. It may say something like: “Uh, I wouldn’t try to do that if I were you, because then I would have to kill you. I wouldn’t want to have to do that. You seem nice.”
Area 16: Booming Cavern
As using the Booming Cavern path is a way of getting around the Flameskull, there should be some risk involved in it.
The text says that “The ledge that hugs the south wall is 15 feet above water level. However, when water surges into the cave every 2 minutes, it raises the water level by 10 feet.”2
Why not have the water surge up beyond the ledge to make it more interesting? Allow players to make DC15 Nature checks to realize that the surges are happening at regular 2 minute intervals. As the ledge is slick and narrow, each PC who traverses it must make a DC 10 Dexterity saving throw. Finally, should players get caught up in the surge, they need to make at DC15 Strength (athletics) saving throw in order to stay on the ledge. Finally, if you want to really crank up the tension, there may be a Giant Octopus lying in wait for any PC unfortunate enough to fall into the depths.
Areas 17-18: Old Streambed and Collapsed Cavern
As the PCs progress along the Old Streambed toward the Collapsed Cavern, they should hear the sounds of the bugbears laboring below on the rift floor.
Masquerading as a Drow, Vhalak will be supervising their work and none of them will be watching the PCs should they be approaching from the streambed. Although it’s tempting to use the doppelganger’s ability to read thoughts to spoil the party’s attempt at an ambush, the ability seems to only work if there’s a target the doppelganger is aware of.
Although the Bugbears will attack the PCs without any thought to strategy, Vhalak will be smarter than that. Immediately after the PCs arrive, Vhalak will try make his way to area 11 to summon more bugbear reinforcements. Although these bugbear reinforcements will want to charge into battle Vhalak will direct them to attack the party from above with their Javelins.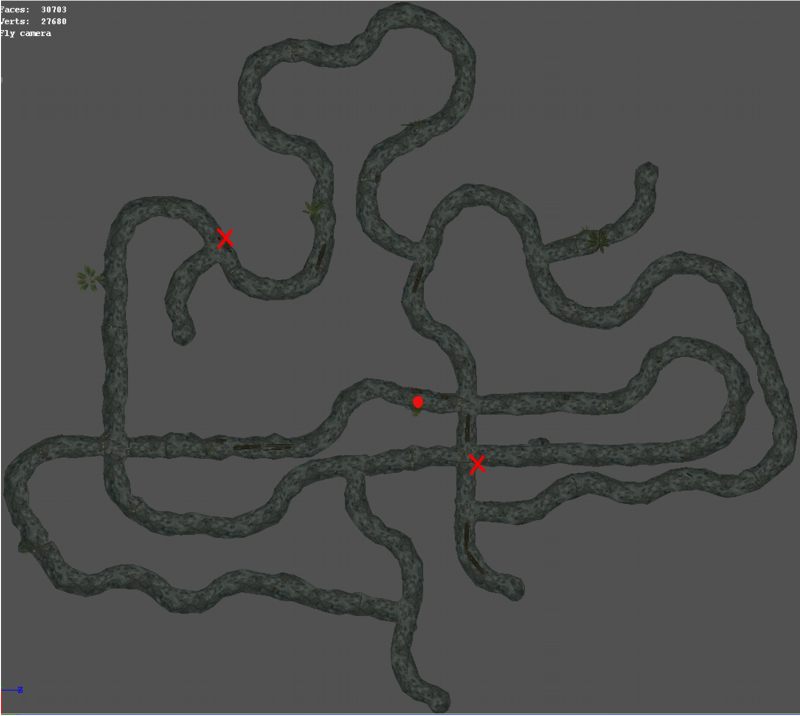
If you read my article about Vyerith and Vhalak, the doppelgangers, I suggest that Nezznar doesn’t know Vhalak is a doppelganger, and that Vhalak is really his own free agent. In this case, Vhalak has no sense of loyalty to the Black Spider. Once he sees that the battle is not going their way, Vhalak decides that his time serving the Black Spider is over and does his best to run from the battle, leaving Wave Echo Cave behind, perhaps to torment the PCs some other day.
Area 19: Temple of Dumathoin
This is it. The final epic showdown that your PCs have been waiting for. Unfortunately, four giant spiders and a Drow wizard is a bit underwhelming for a final encounter. As a GM, you can and should beef up this battle to make it the boss battle it deserves to be. For more on how to do that, skip to the third section of my article on Nezznar the Black Spider.
Roleplaying Nezznar
The Lost Mines module suggests that Nezznar should be curious about the PCs, and even suggest surrendering or cooperating with them in order to catch them off guard.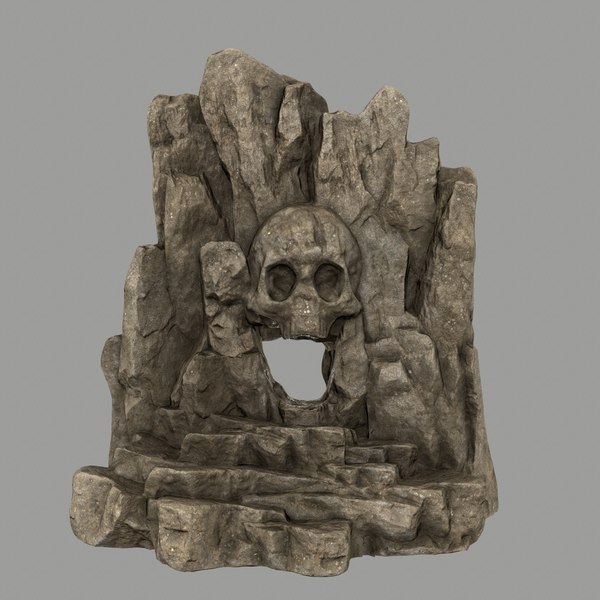 3 Nezznar could give the party a convincing reason for why the Forge of Spells is needed for good: like stopping a group of drow from summoning demons from the abyss (this is explained in more depth in my Nezznar article). We still want a boss battle with Nezznar though, so if the party does cooperate with him, he’d likely turn on them as soon as he gains control of the Forge of Spells.
When Nezznar reaches the Forge, he’ll begin the ritual needed to harvest its power. Have the party make intelligence or arcana checks here so that they know that it’s a good idea for them to interrupt Nezznar before the ritual completes. Otherwise, they’ll likely be facing a much more powerful foe, a drow empowered with the magic of the Forge.
If none of the PCs attack Nezznar before he completes the ritual, Nezznar will turn on them. Consider giving Nezznar additional spells from the Mage stat block double his HP. After Nezznar’s initial defeat, he can transform into a more terrifying monster (more on that here).
While the module’s suggestion for having Nezznar try to pretend to work with the party is interesting. I would personally choose to have Nezznar attack the party right away. At this point the PCs should be ready for a boss battle, and having Nezznar try to trick the party feels like it may drag the story on longer than it needs to.
After the party defeats the Black Spider, make sure to leave some clues behind in Nezznar’s possessions to give the PCs a better idea of who he is (or was) and what he wanted to do with Forge of Spells.
Area 20: Priest’s Quarters
By the time the players reach the room where Nundro has been held prisoner, they will have likely defeated the Black Spider. At this point, the adventure is nearly over. The party can return Nundro to Phandalin and a celebration can be held in their honor!
Wave Echo Cave: A Challenging Dungeon to Run for New GMs
Wave Echo Cave is a challenging dungeon to run for new GMs. The map is huge, and can either take up a ridiculous amount of physical space or be confusing for players going through the dungeon in theater of the mind. Mini-maps can provide a good solution for mitigating any potential confusion that would come from a theater of the mind approach.
Wave Echo Cave is also pretty light on lore, and the onus is on the GM to fill in details about the Phandelver Pact, the Forge of Spells, and Nezznar the Black Spider. Hopefully the this article, and the articles on the Forge and The Black Spider will be helpful for you to fill in the gaps.
What details have you added to your version of Wave Echo Cave? Please share them in the comments!
…
Liked this article? Check out more like it in the Lost Mines of Phandelver DM Guide!
- Monster Manual pg. 236
- Lost Mines of Phandelver, p. 49
- Lost Mines of Phandelver, p. 50
Two-color irradiation makes 3D printing continuous
German engineers have developed a 3D printer for 3D printing. It uses two light sources with different wavelengths, located perpendicular to each other: a flat source puts the molecules in the liquid polymer precursor layer into an active state, and the projector causes this layer to polymerize, and only in the right areas.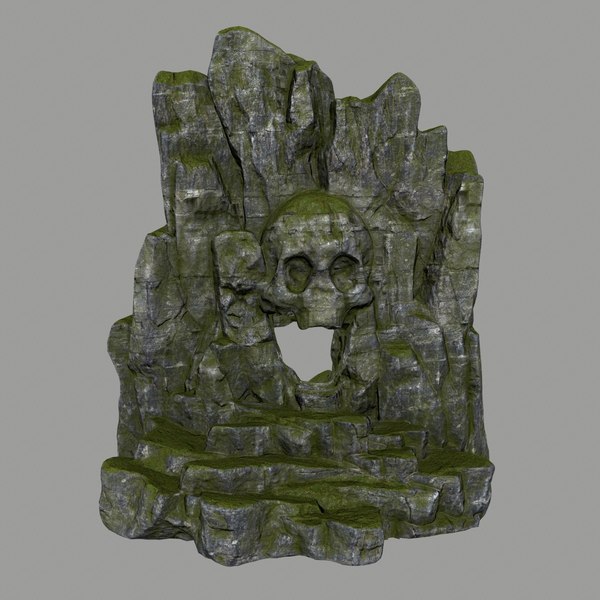 This greatly speeds up the printing process, and also allows you to print objects with separate internal inclusions, for example, a sphere with a ball inside. An article describing the method and prototype of the printer was published in Nature , and the description of the commercial printer is published on the website of the Xolo company, where some of the authors work.
Classic fused deposition or laser stereolithography 3D printers create objects in separate layers, while inside the layer the print head or laser beam slides along the surface and creates solid areas. This process takes a long time, so engineers have begun to improve methods to speed up work within a single layer, mainly in methods for working with liquid photocurable materials. The simplest method that speeds up the printing process is that the beam does not slide over the surface of the liquid, passing one line after another, but is immediately applied to the entire surface through a liquid crystal stencil.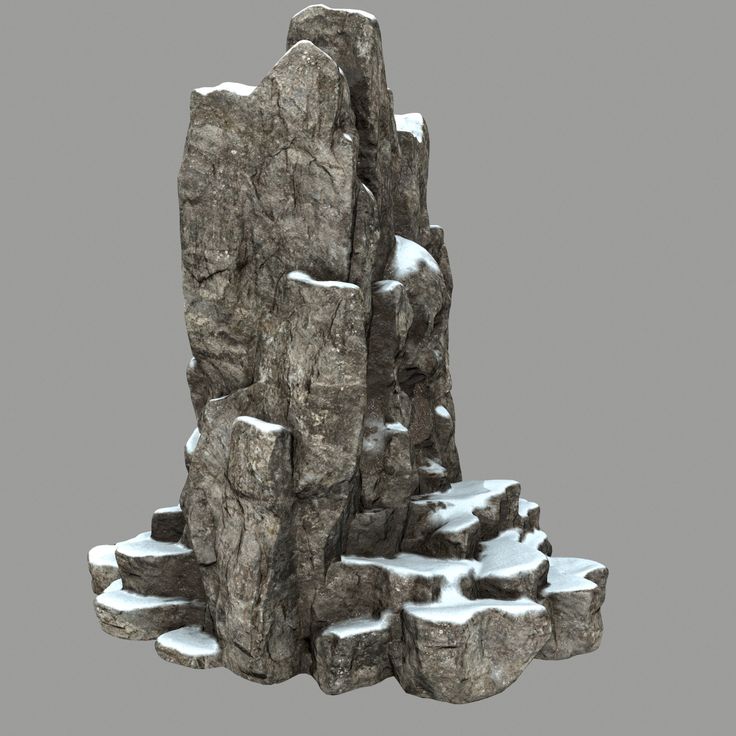 In recent years, methods have also begun to appear that allow printing over the entire volume at once. They can be divided into two types. In one, light is supplied from three sides at once, and solidification occurs at the intersection of the rays. Another uses the tomographic principle, which uses only one projector, and in front of it is a rotating cuvette with a liquid precursor. Superposition of projections allows you to create a given level of irradiation from the desired areas of the liquid and solidify them.
The tomographic method can print an entire centimeter-scale object in about a minute, but due to light fluctuations caused by rotation, the printing accuracy is hundreds of micrometers - less than other light-based 3D printing methods. German engineers led by Martin Regehly from the Brandenburg University of Applied Sciences and Stefan Hecht from the Humboldt University of Berlin have developed a method that allows you to quickly and continuously print volumetric objects using irradiation, but with a higher resolution - at the level of tens of micrometers.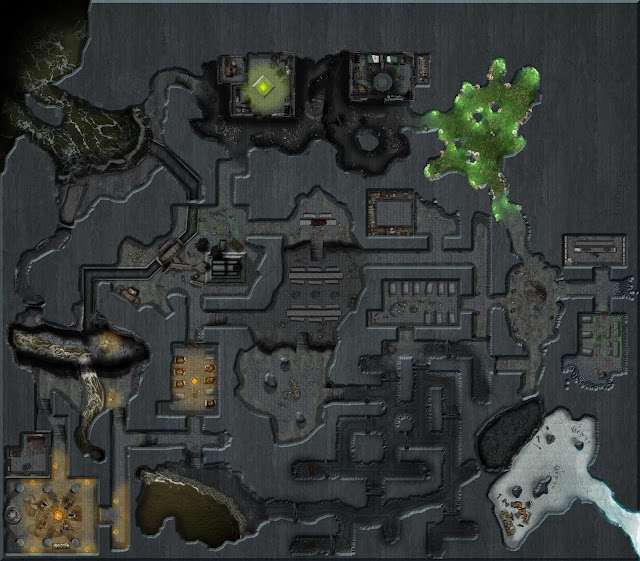
The new printing method is based on the earlier two-color photopolymerization method. It uses a photoinitiator that is sensitive to two wavelengths: when irradiated with light of one wavelength, it passes into a short-lived activated state, and when irradiated with a second wavelength, it initiates polymerization of the precursor. The design of the new printer uses its own source for each of the wavelengths. In order to activate the photoinitiator at each point of the liquid only once, the engineers used a laser source of ultraviolet radiation with a length of 375 nanometers, the light from which, using an optical circuit, is “stretched” to a line as high as the working area of the printer. During printing, a transparent cuvette with a precursor moves along this line in one direction, so activation for each photoinitiator molecule occurs only once.
A projector with a resolution of 3840 by 2160 pixels and a pixel size in the plane of the ultraviolet band from the laser of 21 by 21 micrometers is installed on the perpendicular side.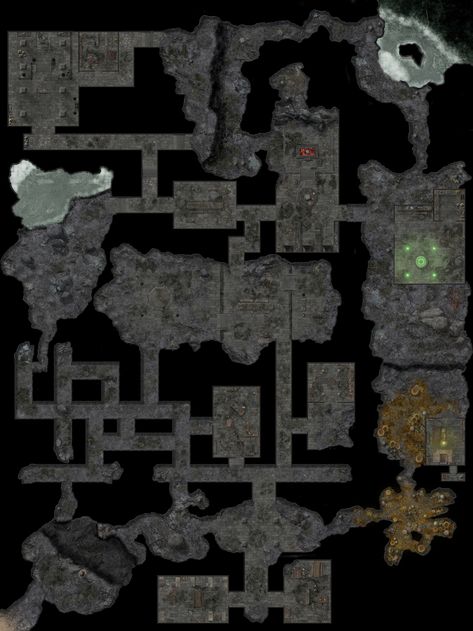 It studies light with a peak intensity at a wavelength of 550 nanometers, which coincides with the absorption peak of an activated photoinitiator.
During printing, the laser creates an ultraviolet irradiated plane that activates the photoinitializer, the projector focuses a layer of the 3D model in this plane, the cuvette gradually moves, and the projector displays new layers. After that, a liquid precursor and a solid 3D model remain in the cuvette.
Tests have shown print speeds of 55 cubic millimeters per second, or approximately one minute per centimeter-wide cuvette. The print resolution on the test samples was 25 micrometers in the UV plane and 50 micrometers in the perpendicular direction.
Along with an article about the printing method, some of the authors who founded the Xolo company presented a commercial printer that uses it in practice. Its working area is 50 by 70 by 90 millimeters, and the in-plane resolution has been reduced from 25 micrometers to 30.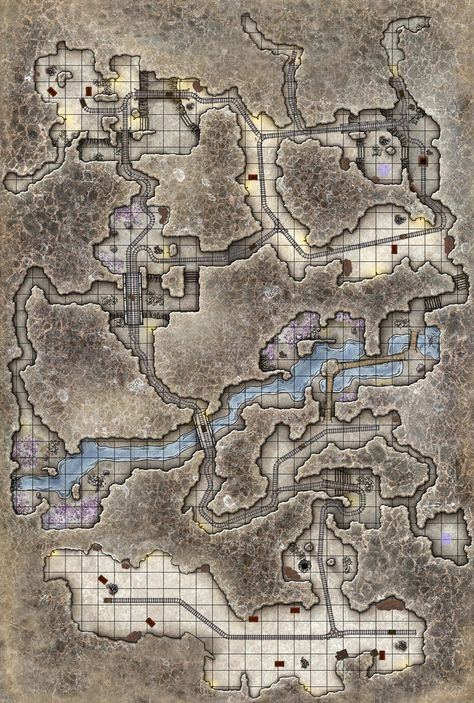 So far, the company is only accepting orders for the device, but does not announce a price or a start date for sales.
We also talk about the progress in conventional 3D printing methods and their applications. For example, recently one group of engineers learned how to print filaments of different colors with one print head, and another developed a method for printing tensegrity designs that would be difficult to assemble by hand.
Grigory Kopiev
Found a typo? Select the fragment and press Ctrl+Enter.
3d printer defects: errors, main problems
Causes of Defects in 3D Printing and How to Fix Them
Buying a 3D printer is only half the battle. A beginner printer has a lot to go through. First, he will learn how to set up the device, calibrate the print head, set the necessary parameters, and test different types of filaments. But that's not all. The most unpleasant thing that can appear during operation is printing defects. And they need to be eliminated.
- What are 3D printing defects?
- Classification of defects
What are 3D printing defects?
After the printing process is completed, various defects can be found on the finished model. Most often they are associated with improper distribution of plastic. Defects appear for various reasons. But the main result is always the same - the model is damaged, you need to do the project on a new one. Printing defects cause downtime. Lost time and meters of filament.
Important! Within the framework of this article, defects that occur on FDM printers will be described. These are models of printing devices operating on the technology of hot deposition of plastic.
Sometimes mistakes can be seen right from the start. For example, when printing the first layer of a model. In these and other cases, it is necessary to prevent the defect in time. However, the press all the same should be stopped. But this way you can save material and time. This article will discuss the most common defects, as well as ways to eliminate them. At the end of the article, a comparative classification of faults will be given.
Layer displacement
The second name of this defect is skew. There are several options for the development of events at once. The skew can be slightly noticeable, with a slight deviation along the Z axis. The second option is a strong offset, the model is printed in pieces. In all these cases, the reason lies in the mechanical part of the printer.
Solutions:
- Check tension belts. They should be clearly in the grooves. It is not allowed to fray or stretch the belt. Sometimes it is easier to replace the entire set of belts with a new one.
- Sometimes small misalignments are caused by an incorrectly set pulley. Make a mark with a black marker before printing, after the end of the process, check the result. Calculate the difference.
 Tighten the problem area if necessary.
 - The printer's Y and X axes are not properly aligned. They are not perpendicular to each other. They need to be set at 90°.
Attention! In rare cases, the problem is electrical. This option must be disassembled separately, armed with a multimeter.
The first layer does not stick
The initial layer acts as a foundation. If it "floats", then the whole model will get the wrong geometry. The second and subsequent layers may slightly shift the entire workpiece. The most unpleasant thing is that this defect can be found at the very end of the print.
Solution methods:
- Platform calibration. If the print bed is skewed, there is a good chance that the first layer will not stick. It is best to check platform calibration before starting printing. Many 3D printing programs help to go through this setting in a semi-automatic mode.

- Wrong print nozzle height. Another point worth considering. Most often, the extruder height setting is set through the printer parameters: Edit Process Settings → G-Code. They are located in the main menu of the device.
- The first layer was printed too quickly. The plastic just didn't cure. This setting must be found in the menu of the printing device. Approximate location: Settings → First Layer Speed. It is worth setting the print speed of the first layer 50% lower than the rest.
- Plastic cooling temperature. This option can be found on printers with a cold platform. The filament hits a cold surface, quickly hardens and rebounds. Here you need to experiment with the settings for the melting temperature of the filament or initially take a printer with a heated surface.
Important! Poor adhesion can be caused by covering material placed over the platform. Different glue, tape, adhesive tape - all this can repel plastic.
Pimples on the model
This also includes defects such as “snot”, swells, sagging. All these faults are of approximately the same nature. They are related to the operation of the extruder. As it moves, it should stop, then start working again. Not all devices can lay even layers without defects. This is how the irregularities described above appear.
Solving methods:
- Retract and coast setting. The first parameter is responsible for starting the extruder. In this case, you need to configure the retraction through the device menu: Edit Process Settings → Extruders. Here you need to find the parameter Extra Restart Distance. Try reducing the fill length. When unevenness occurs when the nozzle stops, you need to tighten the roll-on stroke (roll-up movement). This setting is referred to as Coasting. It is in the same section where the retraction is set.

- It is better to avoid retraction and coasting altogether. That is, the filament must be flush with the edge of the nozzle. This parameter is especially critical for Bowden printheads. Another option is to set up retraction. You need to find the Advanced tab. It contains the Ooze Control Behavior setting. This option controls filament leakage and retraction start time.
If minor defects are still present, it is worth pointing out the entry points to the printer. This setting is found in the Edit Process Settings menu on the Layer tab. For example, you can leave small flaws inside the shape, starting printing from the inner layers.
3D printer won't print
This is one of the scariest things for a beginner 3D maker. The device appears to be broken. However, in most cases this is not the case. The printer turned on, but did not start to push through the plastic? There are four reasons for this.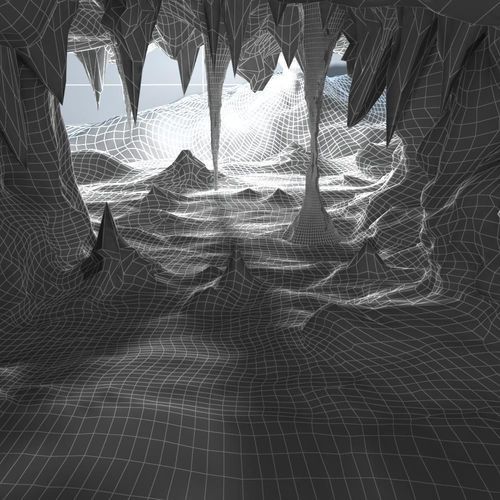
Solutions:
- Plastic does not come out of the extruder due to leakage. This can often be seen in some cheap Chinese models. The filament is preheated in the extruder, it can seep through the hot end. The same effect can be observed after the end of the work. In this case, printing starts 3–4 seconds after the start. Automatic broken geometry of the first layer. To avoid this defect, experienced printers make the so-called skirt. This is a thin circle of filament around the future model. It is printed to bring the printer to life and fill the nozzle with plastic.
- The extruder is too close to the platform. The plastic just gets stuck inside the nozzle. The situation continues on the second layer. Only by the 3rd or 4th layer does the plastic begin to come out. The solution is to adjust the Z-axis height through the G-Code command.
- Sometimes the filament is simply chewed off by the drive gear. This is the part that pushes the thread forward. If a small amount of filament shavings is visible near the printer, it is likely that the gear has worn off the filament.
 You need to calibrate this node.
 - Clogged extruder. There may be several reasons: ordinary dirt or rubbish, plastic coked inside the extruder, poor cooling of the filament. Mechanical cleaning of the nozzle with special needles or drills will help. They are sold in specialized stores.
Important! Just do not need to clean the nozzle with a screwdriver or other improvised tools. You can completely ruin the extruder.
Prints in the air
Various users are experiencing the same problem. The reasons for printing by air are related to setting new plastic settings in the slicer. Sometimes a defect appears due to incorrect setting of the Z axis.
All solutions come down to the fact that the user needs to carefully study the G-code of the printer. Sometimes the reason lies in the lowered Z-axis height settings. You can also see the print step here, perhaps it exceeds the required parameter. In the slicer, you need to check the plastic installation parameters. View the heating temperature of the nozzle and platform. All settings must be checked manually. When importing a profile, the left parameters can be picked up.
Prints in reverse: how to fix
A rare defect that is not always visible at the start of printing. That is, the model comes out normal, but mirrored. Such malfunctions are often found in Chinese kits or noname devices. There are two solutions. One is simple, the other is more difficult.
Methods of solution:
- It is necessary to invert one of the axes: X or Y - it does not matter. But only one. This can be done by flipping the contacts on the power board or on the motor itself.
- Invert axis via device firmware. This method is suitable for advanced users who are familiar with programming skills.
In any case, it's better to first check all the settings in the slicer again, only then go into the electronics of the device.
Layers skipped
The finished model shows that one or more layers have been skipped. This is eloquently evidenced by the gaps in the finished model. In rare cases, this defect is associated with insufficient extrusion. Perhaps there are problems with the capture and supply of the filament. Sometimes the reason lies in the wedging of the Z axis.
Solution methods:
- Check the mechanical part of the printer. If gaps began to appear frequently, you need to arrange an unscheduled maintenance of the device. Examine all shafts. Check that they are level and not misaligned. Power off the printer, try moving the head with your fingers. If resistance is felt, then one of the shafts is not installed correctly.
- Bearing wear. This element may simply wear out. You can see that the printer vibrates slightly. There is an unusual sound when printing. Diagnose a breakdown in the same way as the shaft. Turn off the power and move the extruder with your hands to find the problem part.
Attention! Remember to maintain your printer regularly.
Lubricate the shafts with special oil. For example, for sewing machines. Before lubricating, clean the moving parts from dirt and plastic residues. Just don't overdo the oil. A large amount of lubricant can lead to the opposite effect.
Doesn't print in the center of the bed
Some users are having trouble printing on one side of the bed instead of the center. At the same time, in the slicer, the model is clearly in the center. There may be several solutions here.
Methods of solution:
- Slicer settings are down or incorrectly set. It is necessary to change the characteristics of the kinematics. Set the Delta robot parameter instead of the Cartesian robot. You also need to set the size of the table, equal to the square inscribed in the specified print area. In this case, set the Origin Offset parameter to half the side of the square.
- Try to adjust the position of the X-axis limit switch. In some cases, it is moved a little to the right.

What are the problems with the 3D printer test cube?
This figure is used to check the print quality. Naturally, during the test, she can clearly demonstrate where there are problems. It can be completely different defects. Most often, the test shows bulges and dents on the model.
These defects are caused by overheating and shrinkage. To find out for sure the cause and eliminate these factors, you need to print four cubes in different angles. For some ABS plastics, you need to reduce the temperature, as well as turn on the blower by 5-10%.
3D Printing Echo
This problem can be described as thin streaks that form when printing layer by layer. That is, the final model does not have a formed and even surface. There is waviness (echo) on the edges. This defect is also called ringing on the walls. Typically, two factors are the cause: print speed and vibration.
Solutions:
- Reduce vibration. Make sure the printer is on a level and stable surface.
 Assess the condition of the bearings. Replace them if necessary.
 - Inspect the shafts. Clean them of dirt and dust, lubricate with oil.
- Reduce the print speed through the printer settings.
Try changing the typing speed first, then check the mechanics.
Interesting! Even a single loose bolt can cause strong vibrations. Check all fasteners. Pull the bolts.
Salmon leather
This defect is somewhat similar to the previous one. Only there are no obvious waves or ripples. The defect manifests itself in the form of a pattern. It is similar to the representation of heights on topographic maps or the structure of salmon skin that is drawn on the walls of the model. In English resources it is called salmon skin. The defect appears due to two reasons: vibrations and incorrect characteristics of the current coming to the motors.
Solutions:
- Remove any vibrations that may occur in the device.
 Tighten the bolts and check the frame geometry. You can also slightly reduce the print speed.
 - Installation of a special impulse reducer (TL-Smoother) in the circuit between the driver and the axle motor. This solution balances the current indicators. The edges are more even.
Salmon skin defect is common on DRV8825 stepper motor drivers.
Ripple
In this case, we are talking about the partial impact of waves on some parts of the model. The ripples are often of the same nature as the echo. It is also tied to vibrations and the speed of the extruder. However, unlike waves, ripples are especially pronounced at sharp corners, when the nozzle abruptly changes direction.
Methods of solution:
- Reduce the print speed. You need to find the Edit Process Settings menu in the printer settings, and then open the Other tab. Change two settings: Default Printing Speed and X/Y Axis Movement Speed. The first is responsible for the speed of all movements of the nozzle, the second - the speed in the absence of plastic supply.
 Sometimes the reason lies in the factory firmware. It initially indicates increased extruder acceleration.
 - We remove vibrations. Check the geometry of the device, stretch all the bolts, assess the condition of the shafts and bearings. Lubricate the device if necessary.
We recommend checking the print speed settings first.
Poor filling
If the figure is not filled enough, it means that it will not receive sufficient strength. The model may simply break or crack. Usually the causes of poor coverage lie in the slicer settings or print speed settings.
Solutions:
- Try changing the fill pattern. It is indicated by the Internal Fill Pattern parameter. There are presets in the settings with complicated filling options that give more strength to the finished model: Grid, Triangular and Solid Honeycomb. The printing time will increase, but the strength will also increase.
- Reduce print speed. The fast movement of the print head results in less infill. You need to tweak this parameter through the settings of the device itself or through the slicer parameters.
- Change extrusion width parameter. Some 3D printing programs allow you to set different infill values for individual elements. For example, for the outer layers, set the size to 0.4 mm, for the inner layers - 0.8 mm. These settings can be viewed in the menu Edit Process Settings → Infill. In it you need to find the parameter Infill Extrusion Width. It is shown as a percentage. The higher the number, the thicker the layer.
Attention! When setting the Infill Extrusion Width parameter, make sure that the set value (in percent) is supported by the printing program (slicer).
Plastic is leaking from the extruder threads
This fault can be attributed to local printer failures, although they can create a number of defects in the form of “snot” on the model. Plastic oozes through various slots, flows down the extruder thread, exits the opening of the heating element. There may be several options for solving the problem.
Solutions:
- Check all screw connections. Sometimes a caked piece of plastic gets stuck between them. It creates a gap, the filament flows out.
- Clean and polish the surfaces of the thermal barrier tube and nozzle. Installing a fluoroplastic washer or winding a fum tape can also help.
- Reinforced cold drawing of threaded connections.
Attention! Sometimes the reason lies in a manufacturing defect. Nothing can be done here. Just completely change the extruder.
Plastic does not come out of the nozzle
For some reason, the printer stopped feeding filament. The device continues to make noise with the engines, but the plastic does not come out of the nozzle. There may be several reasons and solutions for this.
Solution methods:
- The plastic is out. For some printers, the filament spool is covered with a casing. Therefore, it is impossible to immediately understand that the thread is over. Check for material in the spool.
- The thread has broken. There was a gap between the hot end and the extruder. A common cause is with Bowden printheads. Perhaps the problem is with the filament itself. You need to try other material.
- Low plastic melting point set. The thick filament cannot pass through the narrow nozzle opening. Recommended temperature parameters for different types of plastic: PLA - heating t 180 °C, table heating t 60–80 °C; ABS - heating t 240 °C, table heating t 110 °C.
Interesting! Sometimes a clogged nozzle is the cause of interrupted printing. This can happen even during work.
Model delamination
Visually, this defect looks like an accordion. In some places, the layers move away from each other. At the same time, it is clear that this is not a pass, but the absence of sticking of plastic. Layer separation occurs due to incorrect setting of the filament thickness or its melting temperature.
Solving methods:
- Reduce layer thickness (height). Here you need to follow the rule: the maximum layer thickness should be no more than 80% of the nozzle diameter. Otherwise, the layers will not stick to each other.
- Raise the melting point of plastic. If the height parameter is in order, then you need to look at the temperature settings. For example, the optimum melting temperature of ABS plastic is 220–240 °C, but some users set it to only 190 °C. You can increase the melting temperature in the slicer settings: Edit Process Settings → Temperature.
If standard temperatures are not suitable, try raising the setting by 10 °C. See if the adhesion of the layers improves or not.
3D printer extruder does not heat up
At the same time, the device shows 100% heating power, the set temperature is on the display, but the extruder is cold.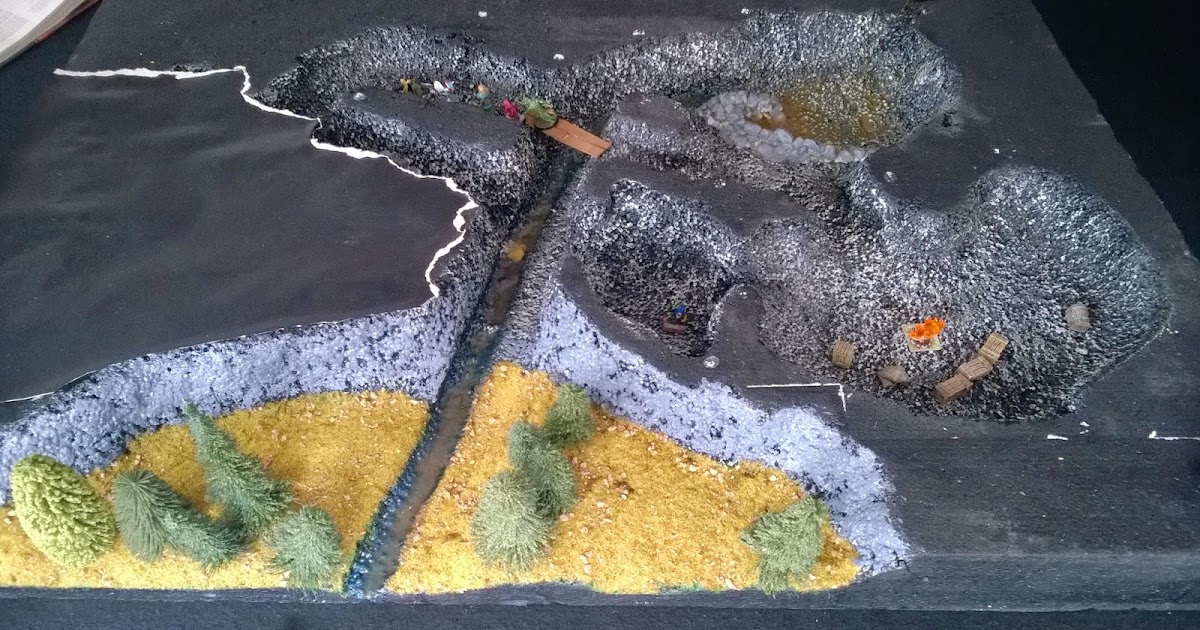 In most cases, the cause lies in a break in the wires or in the heating element itself. Ring all circuit elements after the controller. To cut off problems on the heating element, apply 12 V to it. It should start to heat up.
Attention! Newer printers may encounter factory extruder defects. This element needs to be changed. There is no point in repairing the item.
Plastic falls in waves
Another name for this defect is “elephant foot”. In this case, the upper layers of the model are pushing against the lower parts, causing a wave effect. It sort of descends from top to bottom, forming a thick layer at the base of the model. This problem is especially common on models of printers with a heated bed.
Methods of solution:
- Find the optimal temperature regime between heating the table and blowing the model. Lower the heating temperature in steps of 5 °C. It is important to find a balance here, when the lower layers have already gained strength, but still retain adhesive properties for the following layers.

- Calibrate the table. Try applying the default settings. If the problem persists, slightly change the Z-axis height settings. Calibrate the new settings on the test cube. This is the base shape that clearly shows how the layers are laid down.
- Chamfer the base. The option is suitable for homemade devices. You need to start with a bevel of 5 mm and 45 °, after which you can make small adjustments.
Wall gaps
Such defects can be found when printing rather thin walls in the model. For example, when the extruder nozzle prints strips up to 0.4 mm thick, and the user needs to make a 1 mm edge. In such places, cracks may appear at the joints of the two layers. Typically, the defect is eliminated through the adjustment of the slicer.
Solution methods:
- We need to find the setting that is responsible for the wall thickness. Usually they are in the menu: Edit Process Settings → Advanced. Here you need to find the Gap Fil parameter.
 He is just responsible for overlapping areas and filling the gaps between thin walls. Check the box next to Allow gap fill when necessary. There is also an alternative. Go to the Infill tab and tweak the Outline Overlap parameter.
 - Simply adjust the extrusion width. Increase the parameter value if possible. The strip width can be set on the Extruders tab via the Edit Process Settings menu.
Try and experiment to get the best fit.
Web
A special case of filament leakage, when sloppy plastic threads remain between the parts. This happens for the same reasons as influxes. The solution methods are exactly the same:
- Changing the speed and distance of thread retraction. Full instructions are listed above.
- Lower print temperature. Try tweaking this setting to reduce the fluidity of the plastic. Here you need to be careful. Excessive decrease in temperature can lead to a delamination defect.
- A separate solution is to set a parameter in the slicer that launches the print head in a long and winding path over empty space.
 The web falls near the model without sticking to its walls. No bridge is formed between the layers. To enable this option, go to the advanced settings of the slicer (Advanced). Check the box next to the Avoid crossing outline for travel movement option.
Interesting! Some 3D makers do not consider a web defect as something serious. They simply cut off the excess filament with a knife after the print is finished.
Extruder does not feed plastic
This problem is in the filament feed mechanism. Or the nozzle is too close to the table.
Solution methods:
- Check the plastic filament. It may have burrs on it. The feed gear has slipped. Check the condition of the thread, you may need to tweak the gear settings a little. Or change the plastic.
- Calibrate the table position. Raise the Z-axis slightly.
Sometimes the extruder will not feed plastic due to a clogged nozzle.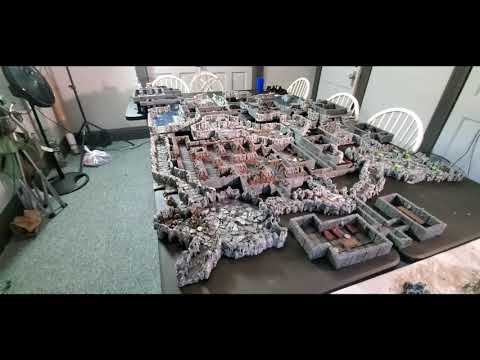 It needs to be cleaned up.
Classification of defects
Almost all defects are one way or another related to two reasons: a malfunction of the mechanical part of the printer or incorrect software settings. Based on these parameters, it is possible to make a classification based on the most common problems in printing:
- Wear of nodes and the absence of a normal fastener feed. This parameter affects vibrations, nozzle movement trajectories.
- Poor extruder maintenance. The print head needs to be cleaned from time to time, to remove the sintered filament.
- Inaccurate (wrong) calibration of the platen and nozzle height. Another common mistake that causes a lot of print defects.
- Problems with printer settings. Most often solved through manual setting of parameters or adjustment of the G-code.
- Broken settings in the slicer. This includes: changed parameters, errors or inaccuracies in the firmware.
- Poor quality filament.
 The problem may lie in the quality of the plastic. It is necessary to monitor its condition, quantity. If necessary, try to replace the manufacturer, or even switch to another type of filament.
 - Electrical problems. To find such a malfunction, you need to arm yourself with a multimeter and ring all the circuits after the controller.
- Factory defect. The problem is solved by replacing a low-quality part.
These are the main printer malfunctions that in one way or another affect its operation, which leads to printing defects. The printer may have several problems at once. They will lead to the appearance of a group of defects. You need to be able to recognize the first signs of breakdown in time and eliminate them.
Important! At least once every two weeks, pay attention to the mechanics of the printer, carry out maintenance on the device. Clean the nodes, lubricate the shafts with oil. Check the platen and extruder calibration.
Learn more