Strong 3d printed parts
5 Tips to Strengthen 3D Printed Parts
Structural integrity in 3D printing is important as 3D prints must not collapse while functioning. 3D printing is a popular manufacturing process with wide acceptance because of the quality it delivers. In terms of improving the strength of 3D printed parts, there are many things that come to play.
This article will provide details on how to make strong 3D prints and it is helpful for those either have a personal 3D printer or want to outsource to rapid prototyping services. If you have a personal 3D printer, you will learn how to tweak the settings to achieve the best results. If you want to outsource your projects, you will get information about different materials and recent post-processing technologies that will give you an idea of how to communicate to the prototyping service better. Go through a simplified version of how to make 3D printed parts strong.
Adjust Printer SettingsHaving a 3D printer for your personal works is more efficient and effective in personal product manufacture. However, unless you are deeply into 3D printing with knowledge surrounding its use, you might have a little trouble making a strong 3D print. There are many settings on your 3D printer that you can tweak for a high-quality and strong print. Below are how to make strong 3D prints using them.
One way of increasing the strength of a 3D print is by increasing the interior density. The interior density ranges from 0% to 100%, with zero means totally hollow while 100 means totally solid.
Theoretically, having a 100 infill density should make your 3D print very strong. However, practically most designers have noticed that anything beyond 70% has a lesser impact on strengthening the 3D print. Instead, there is a tremendous increase in filament use, printing time, cost, and burden on the 3D printer.
Note: Have at least a 20% infill density for strength and, if possible, tweak the wall thickness (explained below) before increasing the infill density.
The wall thickness of a 3D printed material is measured by “Wall Line Count” and “Outer Line Width.” It shows how thick the wall and increasing it is a critical way to make strong 3D prints. Increasing wall thickness will increase strength as 3D printed parts have more strain on the outside than the inside.
Not only does increasing the wall thickness strengthen the printed material, but it also improves overhangs (geometry shapes in 3D models that are difficult to print) and water tightness.
Note: For a regular product, at least have a wall thickness ≥ 1.2mm. You can then increase it for more strength.
Use Thinner LayersUsing a thin layer will lead to better adhesion and density between subsequent layers, which strengthens 3D printed parts. Designers have said that going as low as 0.1mm (100 microns) will maximize strength. However, there is also a complementary increase in printing time.
Another way of reinforcing 3D prints is by using the right infill pattern. Infill patterns work with infill density, and they serve as an internal support structure for 3D prints. They also add some stiffness to the part and prevent wall deformation. On how to make strong 3D prints using infill patterns, you should use a dense infill pattern ranging from 30-50%.
The type of infill pattern you use also determines how strong the 3D print will be. Three infills you can try are listed below:
· Triangular Infill PatternTriangular infill patterns are strong as they have a lesser chance of deforming, and they provide the best support structure. Most 3D enthusiasts attribute this to triangles being the strongest shape.
Using a triangular infill also improves print speed due to the straight-line movement of the printhead. Consequently, strength and speed make triangular infills the best choice among many 3D enthusiasts.
Rectangular infills can achieve 100% infill density due to their grid of parallel and perpendicular extrusions. Like the triangular infill, it also has a high print speed due to the print head’s straight-line movement.
· Hexagonal Infill PatternThey have tessellated hexagons and the highest strength to weight ratio. Unlike the previous two infill patterns, printing is slow due to the printhead constantly changing direction, but they are also effective in reinforcing 3D prints.
Adjust Flow RateAdjusting the flow rate can also be an ideal method to make 3D printed parts strong. However, using this method, you must be careful such that you do not cause under and over extrusion. Therefore, most designers make sure they only make small changes.
You can adjust the flow rate for the following:
- Wall Flow (Outer Wall Flow & Inner Wall Flow)
- Infill Flow
- Support Flow
You can adjust the flow rate to strengthen 3D prints. However, most people adjust the flow rate to fix other 3D printing issues such as the inability to achieve volumetric flow and to improve accuracy.
According to Cura, a popular slicer, you can strengthen your 3D prints by adjusting the line width to an even multiple of the layer height. However, you must be careful as this setting is directly related to extrusion, i.e., a massive change in line width can lead to over and under extrusion.
Reduce CoolingCooling is an important process in 3D printing which affects the adhesion of layers after setting. Quick cooling can reduce the adhesion due to a subsequent layer’s inability to bond with another. However, cooling also depends on the material you are using. For example, PLA works best under the action of a strong cooling fan. Therefore, you should reduce the cooling rate based on the material you are working with.
Select Strong Material to Make Strong 3D PrintsIn 3D printing, there are some materials that are known to be weak. Therefore, making a strong 3D print can be about using strong 3D printing materials. There are three major materials with properties synonymous with strength.
ABS is a great 3D printing material for making strong 3D prints that are not suitable for heavy use. It is a thermoplastic with tough and light properties, which makes it a top plastic polymer in 3D printing.
PLAPLA is an expensive 3D printing material suitable for prints with heavy use and high resolution. It has a tensile strength of 7250 psi but will degrade on exposure to light.
PETGThis is a new filament recently gaining popularity due to its strength. It has a tensile strength of about 4100-8500 psi which makes it stronger than PLA and weaker than ABS. However, it is less flexible than PLA and more than ABS.
Choosing the Right MaterialTo choose the right material of the three, you have to consider the resistive force, bonding between later, bending forces, rigidity, and ability to resist impacts. Below is a comparison of the three in terms of each:
- Resistive force: PETG > PLA > ABS
- Bonding between layers: PETG > ABS and PLA
- Bending force: ABS > PETG > PLA
- Impact resistance: ABS = PETG > PLA
To learn more about the differences between PLA vs ABS, check out the article on RapidDirect.
Determine Part OrientationAnother way of reinforcing 3D prints is using part orientation. Part orientation is the positioning of a part on the 3D printer. 3D printers work by depositing thin layers of melted materials at a gradually increasing height. The gradual increase in height is what forms the 3-dimensional parts. On the deposition of a layer, it bonds with the previous layer. However, the interface between the two layers is a weak point, and 3D prints break at these interfaces.
A good way to understand this is by making a bracket used for a shelf. The thing you will notice is that the largest force will act downward where the bracket attaches to the shelf. Therefore, it is better to print on a side with an interface that is opposite the force.
If the part orientation is challenging, you should use materials that have a better bonding tendency, for example, PETG. Also, note that part orientation will affect the smoothest of the print surface and the print cost due to the requirement for many materials.
Applying Epoxy Coating to 3D PrintsThis is not a direct way of making strong 3D prints as it occurs after printing. It involves using epoxy/polyepoxide to strengthen 3D prints. Epoxy coating is an insoluble surface coating made from a hardener and epoxy coating. It is solvent resistance, durable and tough, making it a suitable way to coat materials such as PLA, ABS, and SLA.
Applying an epoxy coating to 3D prints is an easy task. Follow the steps below on how you could go about it:
- 3D prints the product according to the product design
- Let it cool and clean the surface.
- Pour a little part in a cup and warm it to achieve a viscous fluid
- Using a brush, apply the epoxy coating using a brush on the model without allowing the coating to drip down its side.
 Also, use small brushes to get access to crevices and corners.
 - Allow the 3D print to dry.
You do not need to use much as a little of the hardener can coat and strengthen the print. Applying epoxy coating on the 3D print makes it stronger and provides it with a clear and shiny surface.
Other Considerations to Make 3D Printed Parts StrongTweaking the 3D printer settings is not the only way to make a 3D print strong. Aside from the epoxy coating, which is a post-processing method, there are other methods you can use. Below are two important methods popular recent.
Annealing 3D PrintsAnnealing is a method that subjects 3D prints to an increase in temperature for strengthening purposes. According to the test, annealing is said to cause about a 40% increase in strength after use. It is compatible with materials such as PLA, ABS, PETG, and ASA.
Annealing is important in strengthening 3D prints as the structure of plastic makes it prone to failure. Before 3D printing, plastics have an amorphous/unorganized microstructure. However, when you heat the 3D prints, the amorphous structure reorganizes itself to a crystalline form which makes such 3D prints prone to failure.
Annealing is essential here as it changes 3D prints’ crystalline structures from large to small crystals. You can anneal the plastic polymer or the finished 3D printed product. To anneal the plastic polymer or 3D printed parts, heat it at a temperature above its glass transition point and below its melting point.
Electroplating Plastic 3D printsElectroplating is a popular method due to it being practical and affordable. It involves putting the 3D print in an electrolyte and a plating metal (popular industrial metals are zinc, chrome, and nickel. On passing an electric current through the electrolyte, the metallic ion forms a coating around the 3D print. This leads to the formation of durable and long-lasting 3D prints.
While suitable for the purpose, its disadvantage is that it would need many layers for making better 3D parts with high strength.
A strong 3D print is one that does not collapse on use, which makes knowing how to make strong 3D prints. Very important. There are three ways of strengthening 3D prints. One is during the process itself (by tweaking the 3D printer’s Settings), using the right materials, and after-process treatments. Using any of the methods, you have a chance of making strong 3D prints or talking to or communicating with the prototyping service on how to strengthen 3D printed parts.
RapidDirect – Provide Custom 3D Printing Services3D printing is a popular method used for its quality, efficiency, and effectiveness, and its ability to make complex parts. However, improving strengthening a 3D print comes with advanced knowledge on how a 3D printer works, the right material to use, and post-processing techniques.
If you desire a 3D print with the right attributes in the form of strength, durability, aesthetics, and quality, partnering with RapidDirect, one of the best rapid prototyping services in China, is a great choice. We provide custom 3D printing services, and you can get an instant quote for custom machined parts and full-dimensional reports inspection reports. For anything related to 3D printing, contact us today.
Get an Instant Quote For 3D Printed Parts
FAQsHow do you reinforce PLA 3D prints?
PLA is one of the most frequently used materials in 3D printing. It has a huge tensile strength making it suitable for making structural parts. While strong, you can also reinforce PLA 3D prints using the methods highlighted above. Common methods of strengthening the 3D prints include applying epoxy, annealing, or electroplating.
What is the strongest 3D printable material?
Among all the printable materials used in 3D printing, polycarbonate is the strongest. It was dubbed the true king of desktop printing due to its strength (tensile strength of 9800 psi) and heat resistance. The heat resistance makes it require extraordinarily high temperature (bed should be at about 1450 while the head should be at about 2900. You will also need to enclose the material due to it warping in an open environment. Polycarbonate is suitable for making high-strength functional components.
How do I make prints stronger?
There are many ways you can use to make prints stronger. You can tweak your 3D printer’s setting, you can change the materials to stronger materials, and you can use after-processing methods such as coating with epoxy materials, annealing, and electroplating.
11 Ways How To Make 3D Printed Parts Stronger – A Simple Guide – 3D Printerly
3D prints have many functional uses which can require a good amount of strength to perform properly. Even if you have some aesthetic 3D prints, you’ll still want a certain level of strength so it can hold up well.
I decided to write an article detailing how you can make your 3D printed parts stronger, allowing you to have more confidence in the durability of objects you are making.
Keep on reading through to get some good tips on how to improve and strengthen your 3D prints.
Why Are Your 3D Prints Coming Out Soft, Weak & Brittle?The main cause of brittle or weak 3D prints is the accumulation of moisture in the filament. Some 3D filaments naturally tend to absorb moisture from the air due to overexposure. Trying to heat filament to a high temperature that has absorbed moisture can cause bubbles and popping, leading to weak extrusion.
What you want to do in this situation is dry your filament. There are a few ways to dry filament effective, the first method being to put your filament spool in an oven at low heat.
You first have to make sure your oven temperature is correctly calibrated with a thermometer because oven temperatures can be quite inaccurate, especially at lower temperatures.
Another more popular method is to use a specialized filament dryer like the SUNLU Filament Dryer from Amazon. Most people who use this are very happy with their results, being able to save filament they thought were no longer effective.
There have been a few mixed reviews though with people saying it doesn’t heat up enough, though these may be faulty units.
One user who 3D prints Nylon, which is notorious for absorbing moisture used the SUNLU Filament Dryer and said his prints are now coming out clean and beautiful.
I’d recommend that you use an extra layer of insulation like a large plastic bag or a cardboard box to retain the heat in.
Other factors that may contribute to a soft, weak, and brittle print is the infill density and wall thickness. I’ll take you through the idea methods to improve strength in your 3D prints below.
How Do You Reinforce & Make 3D Prints Stronger? PLA, ABS, PETG & More1. Use Stronger Materials
Instead of using materials that are known to be weak in some cases, you can choose to use materials that can hold up well with strong forces or impact.
I’d recommend going with something like Polycarbonate with Carbon Fiber Reinforcement from Amazon.
This filament is gaining plenty of traction in the 3D printing community for providing real strength in 3D prints. It has over 600 ratings and is currently at 4.4/5.0 at the time of writing.
The best thing about this is just how easy it is to print compared to ABS, which is another stronger material that people use.
Another widely used filament that people use for functional 3D prints or for strength in general is OVERTURE PETG 1.75mm Filament, known to be a little stronger than PLA, and still pretty easy to 3D print with.
2. Increase Wall Thickness
One of the best methods to strengthen and reinforce your 3D prints is to increase your wall thickness. The wall thickness is simply how thick the exterior wall of your 3D print is, measured by “Wall Line Count” and “Outer Line Width”.
You don’t want a wall thickness less than 1.2mm. I’d recommend having a minimum wall thickness of 1. 6mm, but for more strength, you can definitely go higher.
Increasing wall thickness also has the benefits of improving overhangs as well as making 3D prints more watertight.
3. Increase Infill Density
The infill pattern is the internal structure of the object being printed. The amount of infill you need depends mainly on the object you are creating, but generally speaking, you want an infill of at least 20% for good strength.
If you want to go the extra mile, you can raise it up to 40%+, but there are diminishing returns to increasing infill density.
The more you increase it, the less improvement in strength you’ll get in your 3D printed part. I’d recommend first increasing your wall thickness before increasing infill density so high.
Generally, 3D printer users don’t exceed 40% unless they need some real functionality and the print will be load-bearing.
In many cases, even 10% infill with a Cubic infill pattern works pretty well for strength.
4. Use a Strong Infill Pattern
Using an infill pattern built for strength is a good idea to reinforce your 3D prints and strengthen them. When it comes to strength, people tend to use Grid or the Cubic (Honeycomb) pattern.
The Triangle pattern is really good for strength too, but you will need to have a good top layer thickness to get an even top surface.
Infill patterns work closely with infill density, where some infill patterns at 10% infill density will be much stronger than others. Gyroid is known to perform well at low infill densities, but it isn’t a very strong infill pattern overall.
Gyroid is better for flexible filament and for when you might use dissolvable filament like HIPS.
While you slice your 3D print, you can check out how dense the infill actually is by checking the “Preview” tab.
5. Changing the Orientation (Extrusion Direction)
Simply placing the prints horizontally, diagonally, or vertically on your print bed can change the strength of the prints due to the direction that the 3D prints are created.
Some people have run tests on rectangular 3D prints that are oriented in different directions, and found significant changes in part strength.
It’s mainly to do with the build direction and how 3D prints are built through separate layers that bond together. When a 3D print breaks, it’s usually going to be from a separation of the layer lines.
What you can do is figure out which direction your 3D printed part is going to have the most weight and force behind it, then orient the part to not have layer lines in that same direction, but opposite.
A simple example would be for a shelf bracket, where the force is going to be pointing downwards. 3D-Pros showed how they 3D printed a shelf bracket in two orientations. One failed miserably, while the other stood up strong.
Instead of having the orientation flat on the build plate, you should 3D print the shelf bracket on it’s side, so its layers are built across rather than along the part which has force on it and is more likely to break.
This can be confusing to understand at first, but you can get a better understanding by seeing it visually.
Check the video below for guidance on orienting your 3D prints.
6. Adjust Flow Rate
Adjusting your flow rate slightly is another way to reinforce and strengthen your 3D prints. If you choose to adjust this though, you want to make fairly small changes because you can end up causing under extrusion and over extrusion.
You can adjust the flow for specific parts of your 3D print such as the “Wall Flow” which includes the “Outer Wall Flow” & “Inner Wall Flow”, “Infill Flow”, “Support Flow”, and more.
Though, in most cases, adjusting the flow is a temporary fix for another issue so you would be better to directly increase line width rather than adjust flow rates.
7. Line Width
Cura, which is a popular slicer mentions that adjusting your line width to an even multiple of the layer height of your print can actually make your 3D printed objects stronger.
Try not to adjust Line Width too much, similar to the Flow Rate because it can lead to over and under extrusion again. It’s a good idea to adjust print speed to indirectly adjust the flow and line width to a certain extent.
8. Decrease Print Speed
Using a lower print speed, as mentioned above can increase the strength of 3D prints because it can leave more material behind to fill in any gaps that would occur if the speed was too high.
If you increase your Line Width, you want to also increase Print Speed to keep a more constant Flow Rate. This can also improve print quality when balanced correctly.
If you do decrease your print speed, you may have to decrease your printing temperature to account for the increased period of time your filament will be under heat.
9. Reduce Cooling
Cooling parts too quickly can lead to bad layer adhesion since the heated filament doesn’t have enough time to properly bond with the previous layer.
Depending on what material you are 3D printing, you can try to reduce your cooling fan rate, so your parts can bond together strongly during the printing process.
PLA works best with a fairly strong cooling fan, but can try to balance this with printing temperature, print speed, and flow rate.
10.
 Use Thicker Layers (Increase Layer Height)
The use of thicker layers leads to better adhesion between layers. Thicker layers will present more gaps between the adjacent parts of the layers. Tests have show that larger layer heights have been observed to produce 3D prints that are stronger.
A layer height of 0.3mm has been shown to out-perform a layer height of 0.1mm in the strength category. Try using a larger layer height if print quality is not essential for the specific 3D print. It is also beneficial because it speeds up printing times.
Check the video below for more details about strength testing for different layer heights.
11. Increase Nozzle Size
Not only can you decrease the printing time of your 3D prints, but you can also increase the strength of your parts by using a larger nozzle diameter like 0. 6mm or 0.8mm.
The video below by ModBot goes through the process of just how much faster he could print, as well as the increased strength he got from the increase in layer height.
It’s related to the increased flow rate and increased layer width, leading to a more rigid part. It also improves how smoothly filament can extrude and create better layer adhesion.
Other Things to Try to Strengthen 3D PrintsAnnealing 3D Prints
Annealing 3D prints is a heat treatment process of putting 3D printed objects under an increased temperature to strengthen its integrity. With some testing, people have shown increases in strength of 40% according to Fargo 3D Printing’s testing.
You can check out Josef Prusa’s video on annealing, where he tests 4 different materials – PLA, ABS, PETG, ASA to see just what kind of differences occur by annealing.
Electroplating 3D Prints
This practice is becoming more popular because it is practical and affordable. This involves immersing the printing part in a water and metal salt solution. Electric current is then passed through it, thus causing metal cat-ions, like a thin coating, to form around it.
The result is durable and long-lasting 3D prints. The only downside is that many layers may be required if you want a stronger print. Some plating materials include Zinc, Chrome, and Nickel. These three have the most industrial applications.
What this does is simple, to orient the model such that the weakest point, which is the layer boundary is not so exposed. The result is stronger 3D prints.
For more on electroplating 3D prints, check out the video below.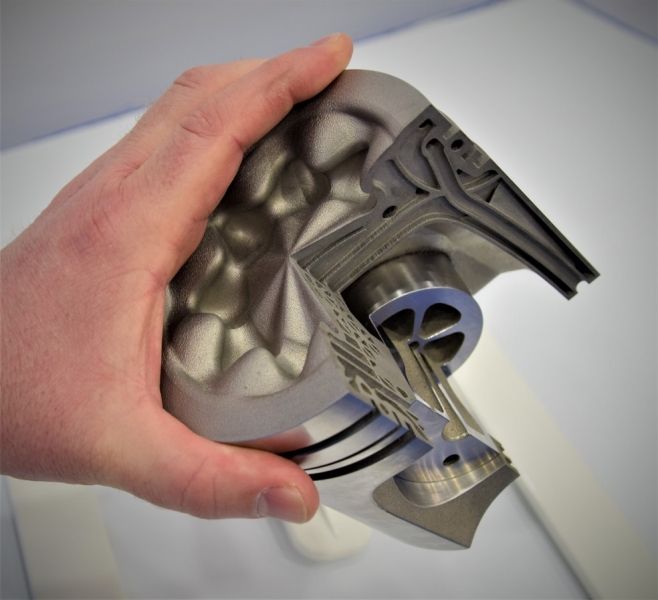
Check out another great video on electroplating, with simple instructions on how to get great finishes on your models.
How To Strengthen Finished 3D Prints: Use of Epoxy Coating
When you are done printing the model, an Epoxy can be applied correctly to strengthen the model after printing. Epoxy, also known as polyepoxide is a functional hardener, used to make your read-made model stronger.
With the aid of a brush, gently apply the epoxy coating to the 3D prints in a way that the epoxy will not drip down.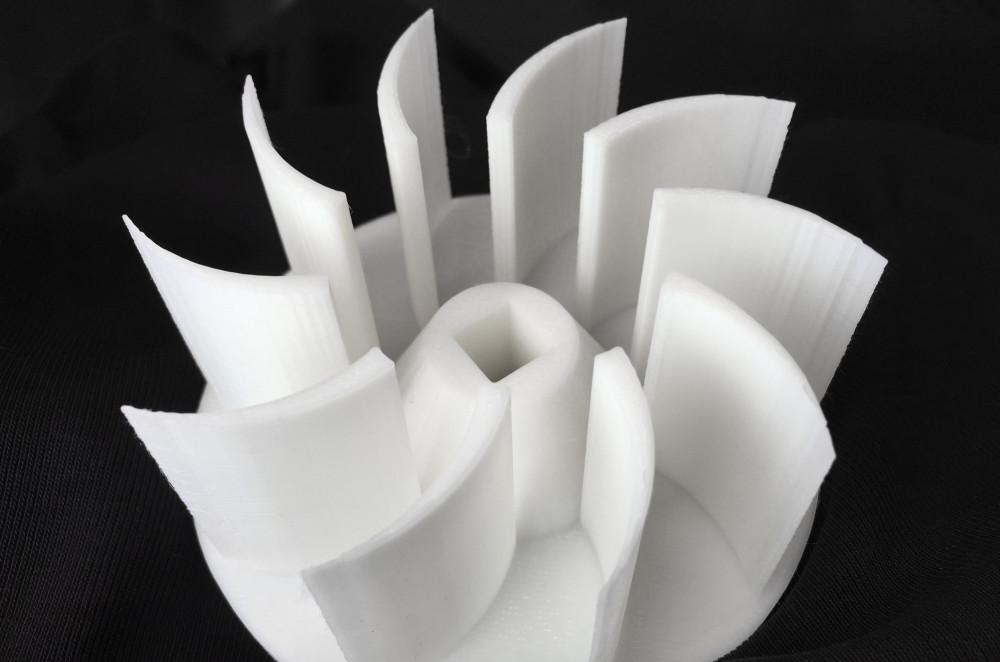 Use smaller brushes for crevices and hard to reach corners so that every part of the exterior is well covered.
A very popular 3D printing epoxy coating that tons of people have had success with is the XTC-3D High Performance Print Coating from Amazon.
It works with all sorts of 3D printed materials like PLA, ABS, SLA prints, as well as even wood, paper and other materials.
A kit of this epoxy is very long-lasting because you don’t need to use much at all to get good results.
Many people say “a little goes a long way”. After the epoxy cures, you get some extra strength and a lovely clear and shiny surface that looks great.
It is a simple thing to do, but if you would like to know more about applying an epoxy coating to 3D prints, check out the video by Matter Hackers.
How to Strengthen Resin 3D Prints
To strengthen resin 3D prints, increase the wall thickness of the model if it’s hollowed out to around 3mm. You can increase durability by adding around 25% flexible resin to the resin vat so it has some flexible strength. Make sure not to over cure the model which can make resin brittle.
What is the most durable material for 3D printing?
3DPrintStory 3D printing process What is the most durable material for 3D printing?
While the 3D printing process seems like a great alternative to traditional manufacturing methods, the parts produced can be fragile and unusable. As a rule, this is the result of using standard materials that are not designed for strength and durability. But there is a solution: use durable materials! Durable 3D printing materials can greatly enhance your options, as you can print parts and assemblies for small projects without fear of breakage.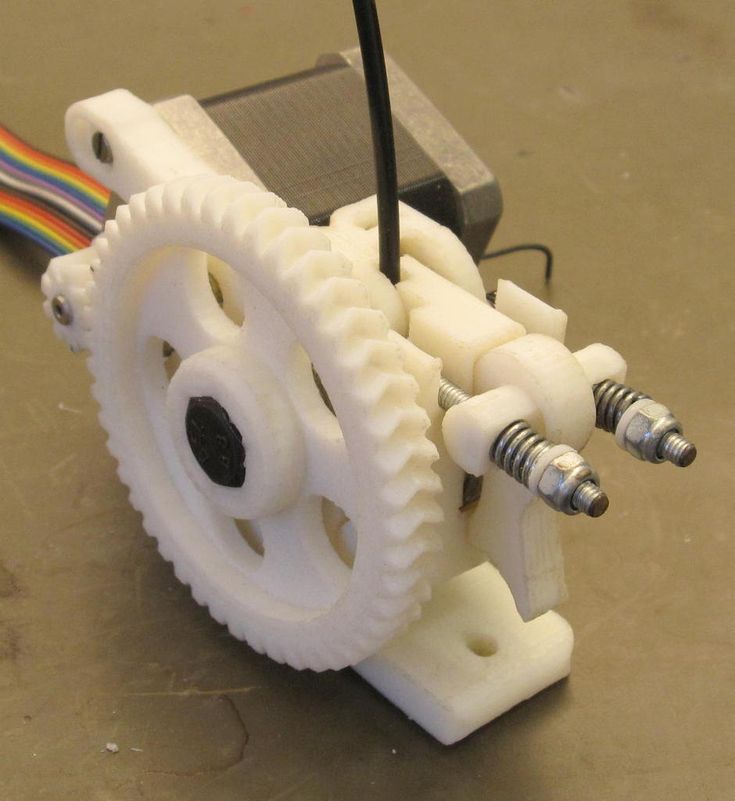 nine0005
In this article, we'll take a look at the three most durable types of 3D printing materials. However, before that, we will take a closer look at what strength means in terms of filament materials.
What is strength and how do we evaluate it?
The strength of a material can be measured and evaluated in different ways. In this article, we will mainly use tensile strength (stress before something breaks). We will list the tensile strength of each 3D printing material in pounds or pounds per square inch (PSI). nine0005
Despite the apparent number of pounds the material can support, there is still a margin of error depending on how the part was printed. We've compiled research from a variety of sources to make sure these three materials are the strongest.
You must also understand that the material itself is not the only factor that affects the strength of the finished product. The design itself, post-processing and the 3D printing process also affect the strength of the part.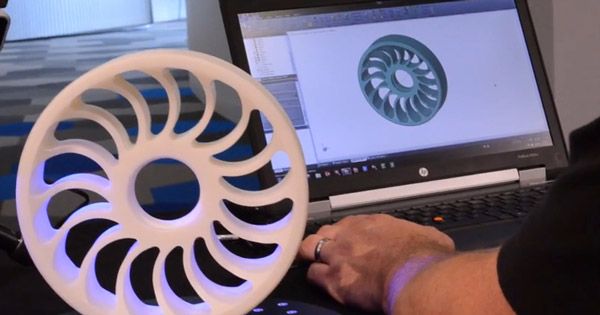
Polycarbonate
Polycarbonate (PC) is considered by many manufacturers and reviewers to be the strongest 3D printing filament available. In particular, it is possible to achieve high strength of polycarbonate products by 3D printing with an all-metal hot end and a 3D printer in a case that is isolated from the influence of the external environment.
Some Numbers
Airwolf 3D, after many filament tests, have come to the conclusion that polycarbonate is the best choice of durable filaments for desktop 3D printers. They were able to hang up to 685 pounds on a hook printed with polycarbonate and found that this material had a tensile strength of 9800 psi. In contrast, the same part printed in PLA could only support 285 pounds.
Using a similar test, MatterHackers studied the tear strength of this type of thread, as well as a number of other materials. They were able to hang an average of 409 pounds on the polycarbonate hook, while the PLA parts had a significantly lighter average weight of just 154 pounds.
Finally, renowned 3D printing YouTuber Thomas Sunladerer reviewed several polycarbonate materials and gave very positive feedback on the strength of the material. nine0005
3D printing with polycarbonate
It is worth noting that the quality of 3D printing with polycarbonate is not very good. Compared to other materials, protrusions and small details may not turn out as well as using the same PLA.
According to Rigid.Ink, polycarbonate is mostly sold in clear. This 3D printing material has excellent heat resistance as well as impact resistance. But note that you will have to print at high temperatures. As mentioned above, it is better to use an enclosed 3D printer and a solid metal hotend. nine0005
Pros of polycarbonate : extra strong, excellent thermal and impact resistance.
Cons of polycarbonate : does not cope well with protrusions and small details of a 3D model, requires a body and an all-metal hot end, a limited number of colors.
Nylon
Next on our list of durable 3D printing materials is nylon. This material is considered by many to be the most reliable for desktop 3D printers. Nylon is inferior in strength to polycarbonate, but still clearly stronger than other competitors such as PLA and ABS. nine0005
Some numbers
A hook printed with nylon (910) thread had a breaking strength of 7,000 psi, while the same ABS hook only had a strength of 4,700 psi, according to Airwolf 3D. Airwolf 3D also noted that the nylon filament-printed clip holds 485 pounds.
MatterHackers posted similar results and noticed that a hook printed with their NylonX material can hold an average of 364 pounds before it breaks. Rigid.Ink also reviewed some nylon threads and gave them a four out of five rating for strength and a five for durability. For comparison: the strength and durability of PLA is three conventional units. nine0005
Nylon 3D printing
Nylon is slightly easier to print than polycarbonate, but it's still not PLA. Nylon filament is quite hygroscopic, so it must be kept dry and requires a high printing temperature of 220-270°C. This material is prone to slight warpage, but is also resistant to impact, fatigue, and high temperature.
Nylon pros: impact resistance, fatigue resistance, heat resistance, easier to print than polycarbonate.
Nylon 9 cons0042 : hygroscopic, warping, very high hot end temperature required.
Composites
Finally, composite threads, although not essentially a single material, can be extremely strong. Composites are threads with certain additives that affect the properties of the material, including to increase strength. The names of these threads usually have the words "pro", "reinforced" (reinforced) or "infused" (infused), since they are usually a mixture of different materials. nine0005
For this reason, it is impossible to assess where the composite fibers are compared to the two previous materials.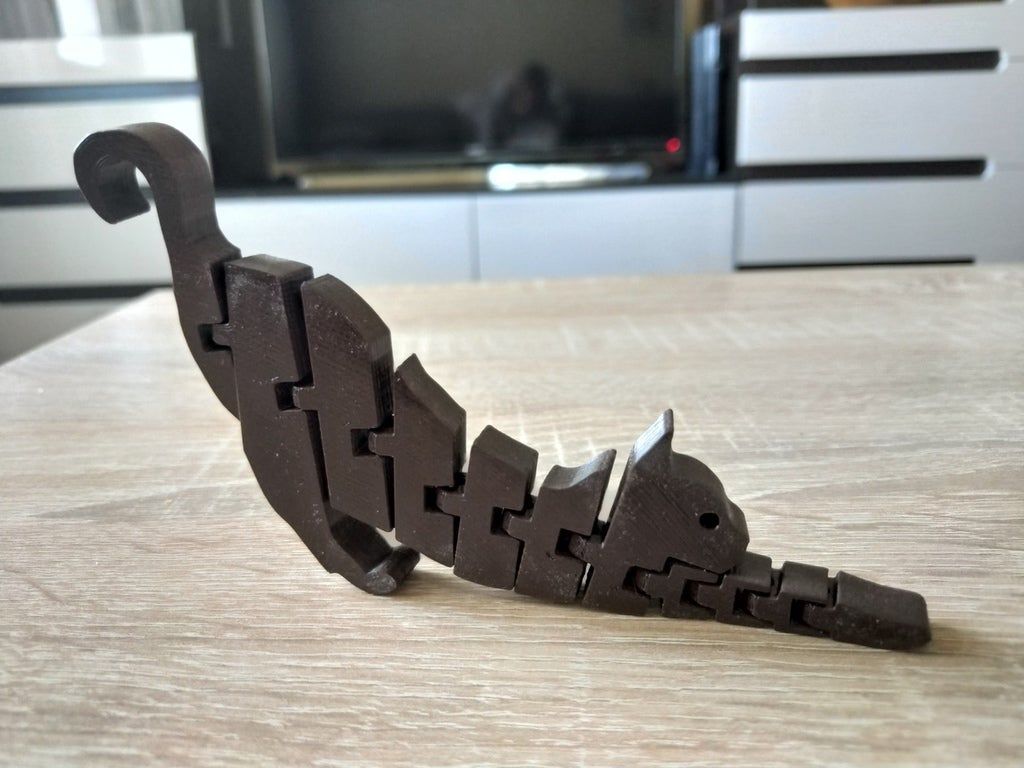 Some composites, such as Carbonyte, can compete with nylon threads for strength, while some composites are less durable.
It all depends on what the composite thread consists of. Durable is usually a high strength material such as nylon impregnated with another high strength material such as carbon fiber or glass. nine0005
Speaking of carbon fiber, this is also a very strong filament that is sometimes used for 3D printed bicycles. However, some composite fibers are stronger than many pure carbon fibers, so they are not in the top three, but deserve special mention as composite fibers.
Some numbers
We will use carbon fiber nylon and glass fiber nylon threads as examples. MatterHackers has determined that hooks printed on these materials can hold an average of 349and 268 pounds respectively.
Rigid.Ink gave the fiberglass nylon filament four out of five ratings for strength and five for durability. They also gave the carbon fiber nylon a five out of five rating for both strength and durability.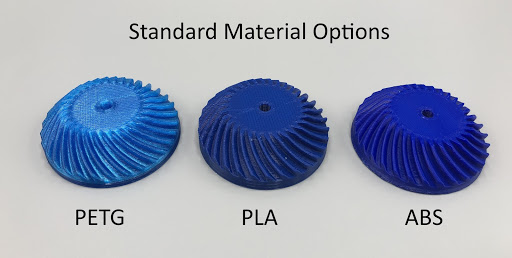 In comparison, PLA and ABS were in the top three for strength.
3D printing with composites
Composites vary in the way they are 3D printed, but they are generally relatively similar to their base material. Durable composite fibers are usually made from nylon, so you'll have to print at fairly high temperatures. These threads are also quite expensive. nine0005
Advantages of composites : This is a combination of several materials to achieve the best possible properties, durable.
Cons of composites: Expensive, requires high 3D printing temperatures.
Steel 3D Printing - A Quick Guide / Sudo Null IT News
Any metal 3D printing technology can print with steel. This is the most popular material. But which steel grades and which technology is best for your application? Will printed steel parts really be as strong and durable as traditionally made parts? nine0005
Let's see how a 3D printed steel part is revolutionizing manufacturing and opening doors to new applications in aerospace, medical equipment, automotive, tool making, heavy industry, architecture and more.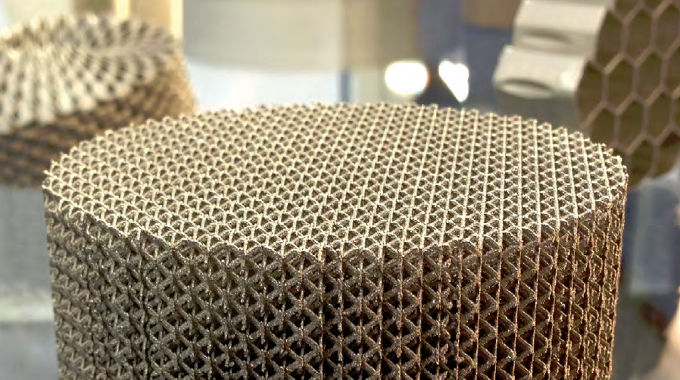 In addition, more affordable desktop printers are expanding the scope and scope of real steel 3D printed parts.
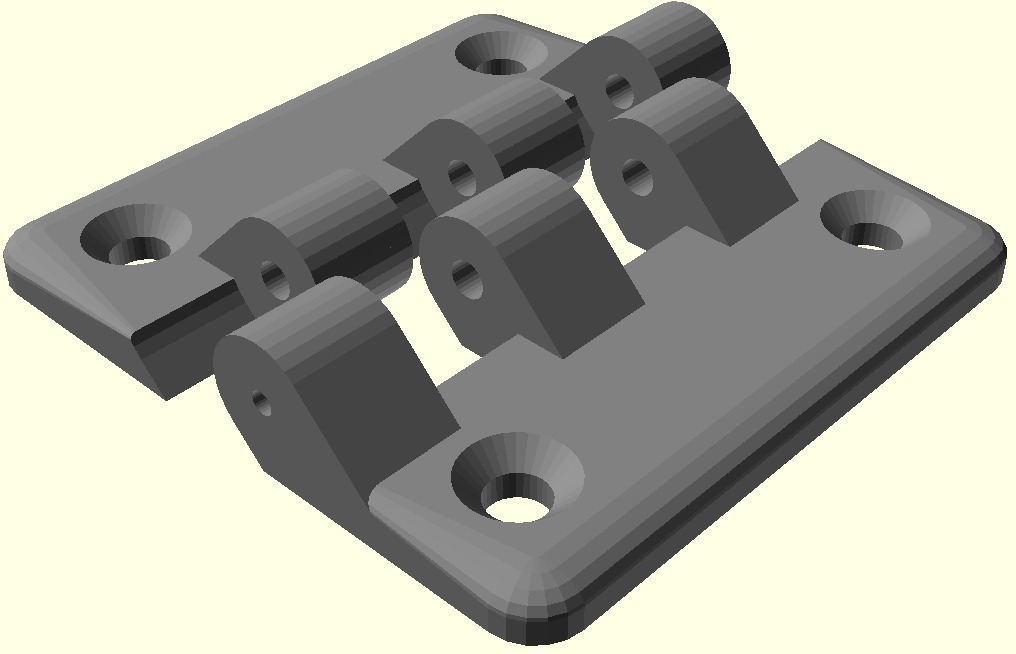
Strength of steel printed parts. nine0011 Cast steel part (left), 3D printed version (center). On the right, a fully 3D printed hinge requires no assembly. (Source: Desktop Metal)
The most common question when it comes to a 3D printed metal model is "Will it be as strong as a forged or cast part?" ?". The short answer is yes... and no.
3D printed steel parts can be just as strong, and sometimes stronger, than traditionally made. It depends on many factors such as: end use, type of steel, choice of 3D printing method, post-processing and shape of the part. Also, the comparison depends on which of the strength characteristics you focus on: tensile strength, static load strength, fatigue strength, etc. nine0005
Parts printed from steel are used in the aerospace industry, for the military, and also, for example, for the manufacture of a footbridge, shown below. Therefore, the strength of printed products is beyond doubt, but let's take a closer look.
A 3D printed or laser powder sintered (LPBF) steel part has a finer grain structure than cast metal products. This provides better tensile strength characteristics, but in other respects the cast parts are currently still stronger. Most often, LPBF 3D printing is used to replace cast components, but in some cases, 3D printed components can replace forged parts. nine0005
One study showed that, under certain conditions, stainless steel parts made using LPBF 3D printers were three times stronger than parts made from the same steel using the traditional method.
In experiments comparing 3D printed steel parts to traditionally made steel parts, researchers create identical parts using two methods and compare their performance. However, head-to-head comparison of details is only part of the big picture.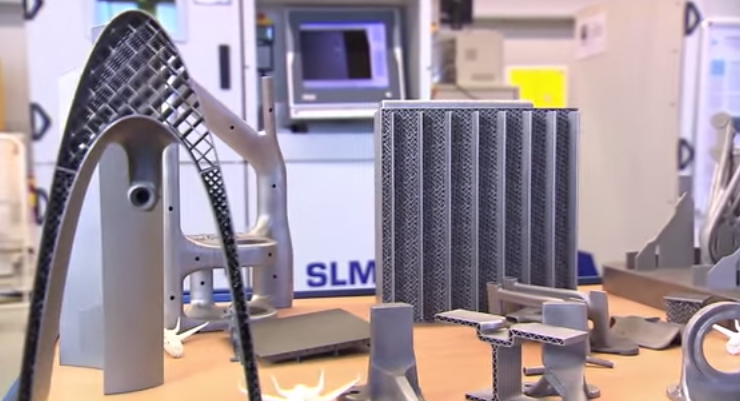 nine0005
The main advantage of printing with steel is not only its strength, but also the unique ability to create internal channels and lattice fillings in parts, which is impossible with traditional manufacturing methods. Metal 3D printing makes it possible to produce parts faster than traditional production, since this method does not require the use of special equipment and tools, it allows you to create assemblies as a whole, eliminating the need for subsequent assembly and welding. Designing a printed part usually means that less metal is needed to make it, and therefore less weight, for the same strength. nine0005 MX3D Wire Arc Additive Manufacturing (WAAM) printed steel architectural support (Source: MX3D)
Steel 3D printing is also more stable and cost effective as it reduces waste. When using subtractive manufacturing methods, such as CNC machining, you make a part by cutting it out of a large one, with a lot of waste. With additive manufacturing, you only use the material you need to make the finished product. nine0005
Steel 3D printing is not intended to replace traditional methods in all areas, but it may be a better choice for a wide range of applications. Particularly when the required parts are unique and designed for specific applications, such as rocket engines, racing cars or the oil and gas industry. 3D printing is the fastest and most flexible technology for mass production and prototype production. For military and industrial applications, steel 3D printing is a faster and more efficient way to create individual parts for vehicles and machines. Stainless steel 3D printing is rapidly finding applications in medicine to create unique surgical instruments and implants. nine0005
If you know what characteristics your final product should have (tensile strength, compressive strength, hardness, density, etc.), then all these parameters can be incorporated into the product at the production stage.
Kinds of steel for 3D printing
Metal powder is the most used metal material for 3D printing (Source: GKN Additive) There are thousands of kinds of different steel grades and alloys with different mechanical properties, used in traditional manufacturing but in 3D printing there are only a few dozen of them, and some of them are unique, created specifically for this technology. Among the steel options, the following can be distinguished:
-
Stainless steel (316L, 304L , 17-4PH, 15-5PH, 420, 254, Ph2, GP1, 630, 410).
-
Tool steel (D2, M2, h23, h21, MS1, 1.2709).
-
Low alloy steel (4140).
-
Structural alloyed (20MnCr5).
Recently, unique alloys have been developed specifically for 3D printing, designed to solve the problems that occur with classical production methods. nine0005
For example, 3D printer manufacturer Desktop Metal released a patented stainless steel in 2022 that the company says combines the tensile strength, ductility, and corrosion resistance of 13-8 PH stainless steel, combined with the hardness low alloy steel like 4140. The company says customers can go to market with this material and skip the galvanizing step to protect products from corrosion.
ExOne offers two special blends of steel and bronze that the company says allows 3D printed steel parts to achieve increased corrosion resistance while being easy to machine and polish. nine0005
While most of the metal powders used in 3D printing are similar to those used for other manufacturing methods, their numbers are on the rise as more companies adopt the technology. Some metal powder manufacturers, such as GKN, also make custom powders for specific 3D printing applications.
How to print with steel
The strength, properties and applications of 3D printed steel products largely depend on which 3D printing technology you use. Some methods produce stronger parts, other methods provide better hardness or abrasion resistance, and some technologies are simply very fast. nine0005
Below are the main metal 3D printing methods, their properties and some of the most common application examples.
Fused Deposition Printing (FDM)
BCN3D's Epsilon printer extrudes metal filament from stainless steel (Source: BCN3D) as more printer manufacturers certify metallic filaments for use on their printers, such as Ultimaker, BCN3D, Makerbot, Raise3D.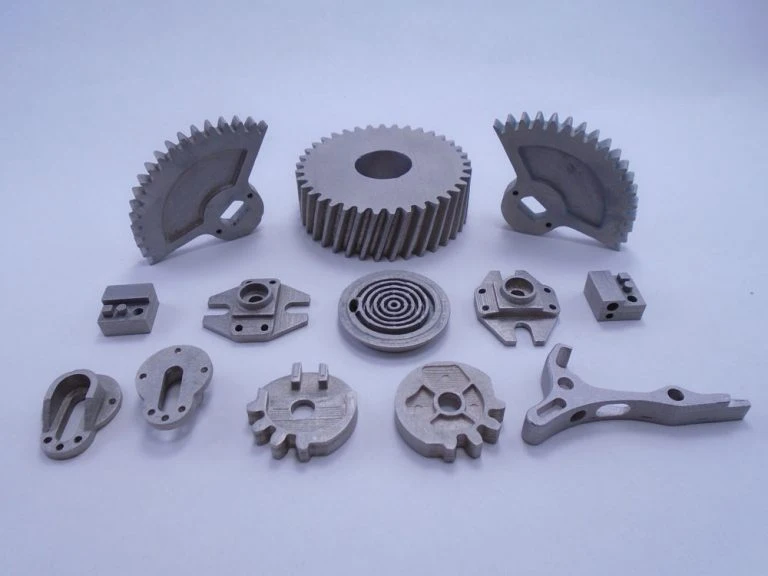 Raise3D has recently released a complete metal printing suite - Metalfuse (3D printer, debinding oven and sintering oven). This method is still much more popular for printing plastics, but with new plastic filaments filled with stainless steel powder, strong metal parts can be produced. nine0005
 FDM media was once limited to thermoplastics. Companies like BASF Forward AM and The Virtual Foundry now offer metal filaments that can be used on almost any FDM printer as long as it has a hardened steel nozzle for abrasive media.
These materials are approximately 80% metal and 20% plastic. After printing, the post-processing process removes the plastic, resulting in 100% metal parts. nine0005
Due to the removal of the bonding plastic, FDM metal parts shrink during post-processing. The amount of shrinkage is constant and can be taken into account in CAD systems, which allows to obtain relatively accurate finished parts.
Forward AM's Ultrafuse 316L stainless steel filament produces finished parts with material properties that the company claims are comparable to injection molded metal parts.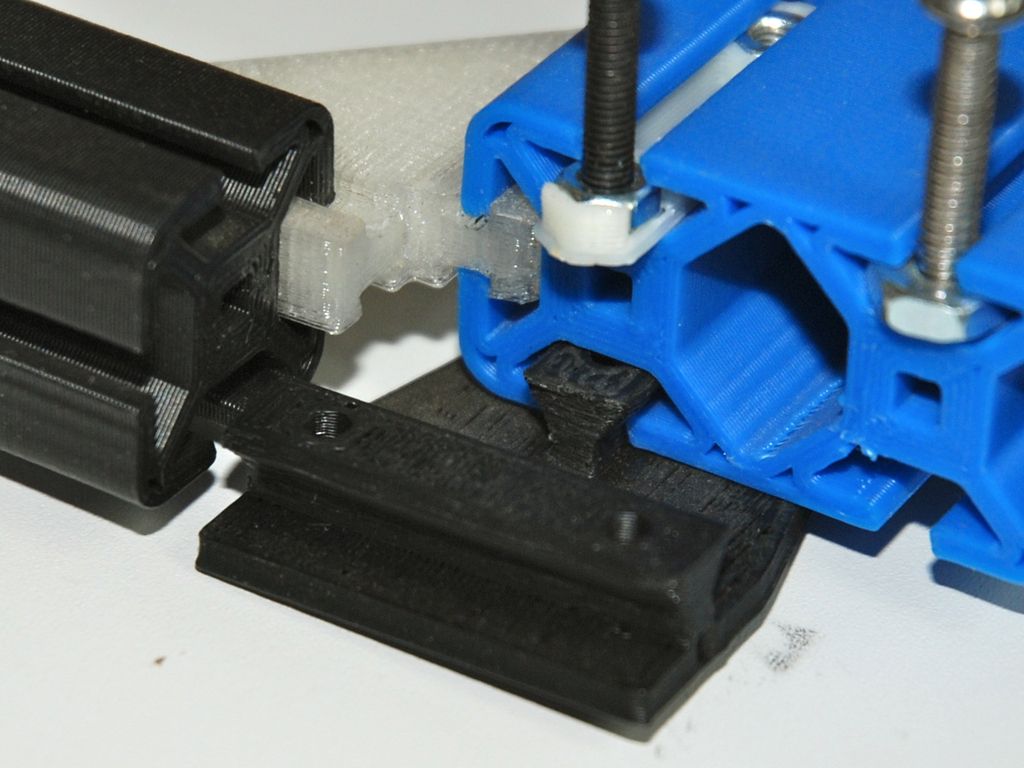 nine0005 (Source: BCN3D)
While 3D printing with metallic materials may not be suitable for demanding applications such as aerospace, the economics of producing simple metal components without critical loads on an affordable FDM printer can outweigh the impossibility of applying them in some areas.
Metal prototype parts and finished parts that will not be subjected to extreme stress are ideal uses for this technology. nine0005
Bound Metal Deposition (BMD)
Desktop Metal's Studio System 3D printer used bonded metal bars that were extruded layer by layer to form a metal part. Metal mesh deposition method (BMD) or bonded powder extrusion (BPE) is a 3D printing process based on extrusion. This method uses bonded metal rods or bonded powdered metal filaments, which consist of a much higher percentage of metal powder than the filaments used in FDM. As with FDM, post-treatment to remove the binder and heat treatment in a final sintering oven are required. nine0005 There are only a few 3D printers using this method such as Desktop Metal, Markforged and more recently 3DGence, but more companies are entering this market, so stay tuned. These printers are valued as a convenient solution for office 3D metal printing, they are more expensive than most FDM printers, but cheaper than the powder-based metal 3D printing technologies described below.
These printers use their own proprietary filament. Desktop Metal and Markforged offer four types of steel. nine0005
Ideal niches for this technology are metal prototype parts, where it is necessary to test the functionality of the part before mass production using traditional methods. Popular applications are molds, punching dies, nozzles, impellers, fasteners and heat exchangers.
For example, Shukla Medical uses Markforged's Metal X printer to print steel prototypes of its orthopedic implant removal tools. nine0005
Laser powder sintering.
Laser powder sintering technology uses one or more lasers to melt powdered metal into a desired shape layer by layer (Source: GE Additive) metal printing. This technology is used by 80% of all metal 3D printers on the market.
This method uses powerful lasers to selectively sinter metal powder layer by layer. nine0005
LPBF 3D printers come in a wide range of sizes, prices and laser powers. These and other characteristics affect the properties of the finished part, print speed and other parameters of the finished products.
Steel and steel alloys are the most popular material for LPBF equipment and, unlike FDM and BMD, metal powders are commercially available as they are most commonly used in traditional production methods.
LPBF is a technology that maximizes the quality of a 3D printed part. Applications include aerospace components such as monolithic thrust chambers, rocket engine components and heat exchangers, molds, tools and other applications, as well as high wear parts and surgical instruments. nine0005
Binder Jetting
Binder 3D printing technology uses powdered metal and a binder to form metal parts (Sorrce: ExOne) binder, and not with a laser. During post-processing, the binder is removed.
Binder application stands out for its high printing speed compared to other 3D printing methods or traditional manufacturing, and metal parts made with this technology have material properties equivalent to those made by metal injection molding. nine0005
The number of manufacturers producing metal-bonded inkjet 3D printers is much smaller than that of LPBF machines. Leading manufacturers include ExOne, Desktop Metal, Digital Metal, GE Additive and HP.
Binder blasting is ideal for medium to high volume production of metal tools and spare parts.
In fact, HP claims that its Metal Jet 3D printer was designed specifically for mass production of 316L stainless steel products. HP has partnered with Parmatech to produce metal parts for the medical industry. Pennsylvania-based ExOne uses this technology to manufacture hard metal cutting tools and tool steels. nine0005
Electron Beam Melting (EBM)
(Source: GE Additive) Electron Beam Melting (EBM) is another powder cladding technology. It works in a similar way to selective laser melting (SLM), but instead of using a laser as the energy source, it uses a much more powerful beam of charged particles.
The recoater moves the powder onto the printing plate and an electron beam selectively melts each layer of powder. After each layer is printed, the plate is lowered and another one is applied on top of the previous layer. nine0005
EBM can be much faster than SLM, but SLM produces smoother and more accurate pieces. The electron beam is wider than the laser beam, so EBM cannot produce the same precise parts as SLM. Another difference is that the manufacturing process takes place in a vacuum chamber, which reduces the amount of impurities in the material that can lead to defects. That is why EBM is often chosen for printing components for the aerospace, automotive, defense, petrochemical and medical implant industries. nine0005
Titanium is the most popular metal for most EBM applications, however steel can be used.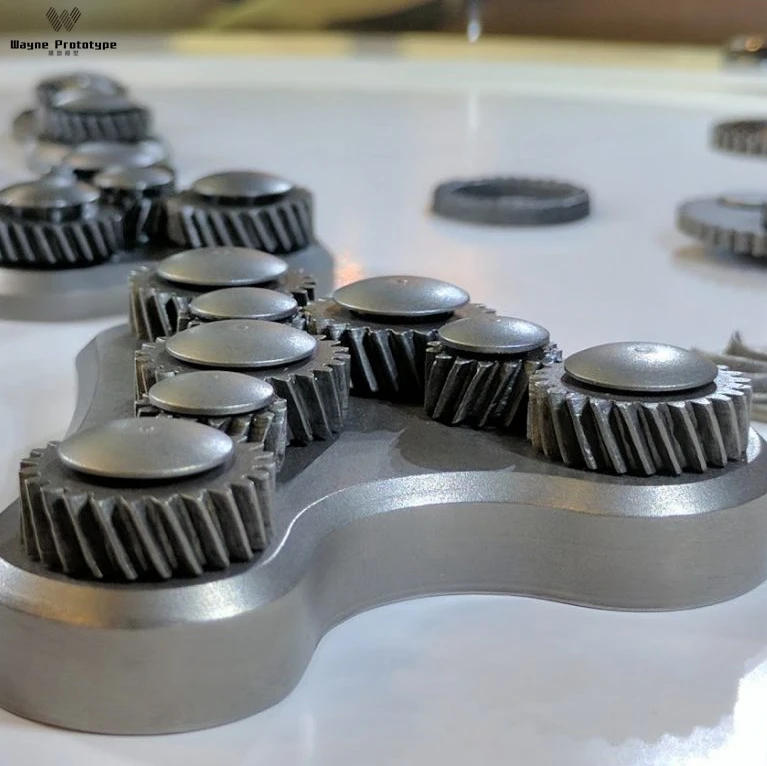
Cold Spray
(Source: Impact Innovations)Cold spray 3D printing is done by injecting metal powders through a jet nozzle into a supersonic stream of pressurized gases such as air, nitrogen or helium. The process is called "cold" because the metal particles do not melt, but hit the metal substrate and adhere to its surface during the so-called plastic deformation. nine0005
Cold spray printed products are not prone to porosity, thermal cracking and other defects associated with melt-based technologies. This method has several advantages over other production methods. The technology is used in the military and aerospace industries around the world. For example, the US Army uses cold spray to repair the mounts of a worn Bradley 25mm steel turret gun.
In the automotive industry, cold spray steel is used for post-accident repairs because high-strength steel substrates in automobiles can be susceptible to thermal repair methods such as welding. nine0005
Direct Energy Deposition (DED) and Wire Arc Additive Manufacturing (WAAM)
WAAM Steel Parts from MX3D (Source: MX3D) Direct Energy Deposition (DED) uses welding powder or wire that enters through a nozzle and is fed into the power source to melt the metal. A melt region is created and applied to the substrate. DED is a new process, reminiscent of an old building technology known as "cladding", in which a coating is applied to a substrate, often for thermal insulation or weather resistance. DED is useful for fabricating large objects as a whole, as well as complex geometries that require extensive machining. DED can get such parts much closer to finished than traditional CNC machining. nine0005
Because DED uses a coating process, it can be used to add complex geometries to existing steel parts, thus combining complexity with cost reduction. For example, the French company AddUp advertises a rocket nozzle that uses a preformed large 304 stainless steel hopper cone printed with an isogrid structure, usually made from a larger piece by traditional methods.
A technology related to DED is wire-arc additive manufacturing (WAAM). Instead of powder, WAAM uses a metal wire that is melted by an electric arc. The process is controlled by robotic arms. WAAM is also capable of producing large-sized metal parts, as demonstrated by the Dutch company MX3D and its nine thousand-pound 41-foot stainless steel bridge in Amsterdam, as well as an oil and gas equipment repair part, proving that parts can be made in the field. nine0005
Micro 3D printing
Micro parts printed from steel (Source: 3D MicroPrint)Micro scale additive manufacturing, or micro 3D printing, can produce products with a resolution of a few microns (or less). There are three micro 3D printing methods to produce metal parts.
LMM (lithography-based metal fabrication) is a light-based technology that creates tiny parts from raw materials, including stainless steel, for applications such as surgical instruments and micro-mechanical parts. nine0005
Electrochemical deposition is the latest micrometal 3D printing process developed by the Swiss company Exaddon. In this process, the printing nozzle applies liquid with metal ions, creating details at the atomic level.