Makerbot digitizer desktop 3d scanner software
3Dnatives Lab: Digitizer 3D Scanner by MakerBot
Published on April 19, 2017 by Alexandrea P.
Today, the 3Dnatives lab will be analyzing the Makerbot Digitizer 3D scanner to continue our series of tests on 3D scanners and printers! Don’t forget to check out all our scanner tests here, and to give us any comments, tips or feedback that you have!
Unpacking
To start things off, we begin by unpacking the scanner. Right away, we found an array of items that it was packaged with, which are as follows:
- The digitizer tucked between two blocks of foam for protection
- A regulator for the calibration of the scanner
- A power supply (for our friends in Europe, there is no European plug. Your dealer should add the suitable cord if they are aware of where you are in the world)
- A USB connection cable (A classic USB printer cable)
- A user manual
The Digitizer’s careful packaging
Functioning
The Digitizer 3D Scanner creates a 3D model of a physical object by taking a quick sequence of photos while the object rotates on a turntable. To accomplish this:
- The scanner has two lasers that are mounted on the left and right corner of the Digitizer that allows it to perform a linear scan that determines the profile of the object. The camera will then take a series of photographs of the object
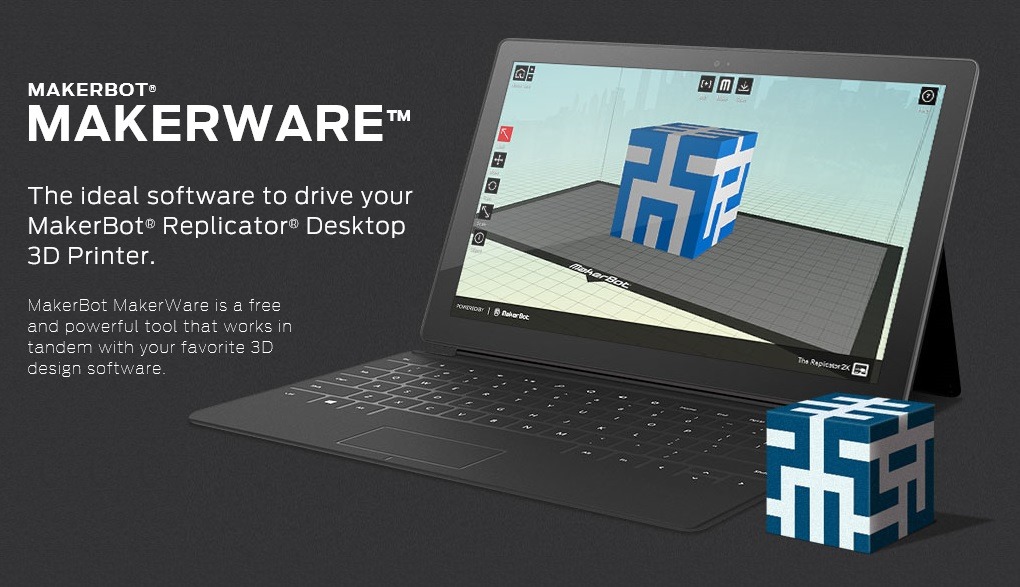
- MakerWare software for Digitizer combines the photographs and the linear scan to create a scatter plot.
- Once the scan is complete, the MakerWare software will then generate a 3D mesh from the collected data. It will then send the mesh directly to the 3D MakerBot printer via MakerWare, share it through a sharing site like Thingiverse, or can be edited with a modeling software (this scanner can be used with most modeling softwares).
- In addition, the Digitizer has a dimensional accuracy of up to 2mm.
First Steps and Calibration of the Scanner
The first thing to do once your scanner is unpacked and plugged in will be to calibrate it. It is important to follow the following 2 points:
- Brightly illuminate the scanner tray by using a light source, such as a desk lamp for example.
 The light source must not be visible to the camera in order to no disrupt it. Good brightness is paramount and is directly related to the quality of your scan.
 - Place the Digitizer at about 20 cm from a uniformly colored wall. The laser pointers will be pointed towards the wall, giving you better results.
Next, install the latest version of the MakerWare software. Once MakerWare has been launched, you will need to turn on your scanner and connect it. After, you can calibrate the horizontality of your tray, prepare your camera, and align your lasers using the template given with the guidelines in your software.
- The checkerboard gauge for calibration of the Digitizer
Scanning of an Object
As part of our test, we decided to use a model of the Sphinx that had dimensions of 15 x 5 x 10 cm. After scanning, which lasts 9 minutes regardless of the size of the object, the scatter plot was created.
Once the first scan is complete, you are able to see the imperfections that can occur when scanning objects with sharp edges or hollow parts. When this happens, you may need to do a new scan with new positioning of the object at another angle. In the MakerWare version 2.4 (which we used), it was possible to do by clicking on the “Multiscan” option.
Video of our digitization of our Sphinx model:
Thanks to this option, it was possible to generate several models that we could merge together over time. After 3 scans of our Sphinx, the space between the legs and the sharp angles were all perfectly digitize, which was not the case after just one single scan. If you want to digitize more than 5 times with one object, we would advise against it, as it will give you worse results than ones that show improvement. This is because the state of the surface will depreciate. Once your file is created, you can then save the 3D model in a .thing format for MakerBot or in STL format.
Below you can find a comparison between the digitized Sphinx after one scan and the same Sphinx digitized after our 3rd scan thanks to the “Multiscan” option. You will be able to notice the improvements between the two versions, mainly at the hollow levels and base.
Results with 1 scan:
Results with 3 scans:
Advice for Scanning
Some objects will give better scans than others, so we decided to give you some guidelines to help improve your scans. Typically, be sure to scan:
- An object whose dimensions are greater than that of a cylinder (50 x 50 mm)
- An object whose dimensions are smaller than that of a cylinder (203 x 203 mm)
- Objects who weigh less than 3 kg
- Stable objects
- Opaque objects
On the opposite side, avoid scanning:
- Transparent objects
- Shiny or reflective objects
- Very dark objects
If you still want to scan a transparent object, a tip would be to paint or powder the object to get a better capture. Also, recalibration of the Digitizer is advised after every 20 scans. In general, there is no other maintenance operation that you need to perform on this scanner.
Here you can find a preview after our rendering of our 3D printed scan (the original is on the right):
The result is far from perfect but it still was a cool experience!
Review: MakerBot Digitizer Desktop 3D Scanner
The MakerBot Digitizer is perhaps one of the most exciting pieces of tech I’ve seen in a while. The Digitizer is the reverse of a 3D printer. Instead of turning a computer file into a 3D object, the digitizer turns a 3D object into a computer file. Think of the possibilities! Lose one of the mounting brackets to a network switch? No biggie! Scan the remaining bracket with the Digitizer, print the scan to a 3D printer, and you’re back in business. Work for an organization or school that creates products by hand, such as small sculptures or wooden trinkets? Digitize these precious items and be able to recreate them later. Of course, potential is one thing while real results are another. It’s time to put the MakerBot Digitizer through its paces and see how it performs.
MakerBot Digitizer: Hardware
The MakerBot Digitizer has a pretty cool design. It’s basically a turntable with an arm overhead that holds two lasers at opposing angles and a camera in the center. The turntable slowly rotates the object to be scanned while one of the lasers projects a beam onto it. The camera, with a red filter in place, records the profile of the laser where it is hitting the object. After one 360-degree rotation the whole process is completed again with the other laser. Once the second rotation is complete, the data is merged into a complete scan and a 3D model is built within the MakerWare for Digitizer software. The turntable always rotates at the same speed, thus all scans take precisely nine minutes. As such, throw out any crazy ideas to use this turntable to play your old 33 or 45 records.
(Photo by John O’Neill, Sr.)
Setting Up the Digitizer
MakerBot doesn’t include software with the device, instead it requires downloading the latest version from their website.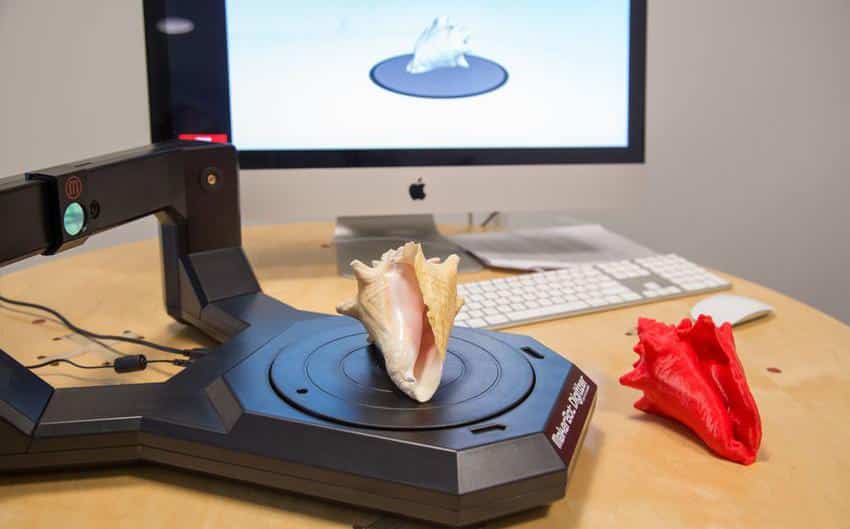 This is a great choice, considering this technology is rapidly evolving. By forcing a free download, MakerBot can guarantee that users start out with the latest and greatest software. Once downloaded, click through the easy installation process.
After installing the MakerWare for Digitizer software, it’s time to set up the digitizer. Following the guide in the manual ensures the whole process is super easy. Basically unbox the device, set it on a stable surface, and hook up the power and USB cables. It doesn’t get much more straightforward than that.
After powering on the device, Windows will detect new hardware and automatically install the appropriate drivers. Guaranteeing the appropriate drivers are available is why the MakerWare for Digitizer software is installed before the hardware is setup.
Opening the MakerWare for Digitizer software the first time after the hardware is connected results in the app running an initial setup wizard.
MakerWare for Digitizer Setup Wizard.
This is another fine example of how MakerWare really strives to simplify the process of getting their products up and running. I’m definitely impressed!
The wizard begins by providing guidance for setting up the scanner to be calibrated. Calibration is necessary in order to ensure the best quality 3D scans are produced. Calibration should be completed at initial setup as well as after every 20 scans or so. In addition, you should recalibrate if you move or bump the digitizer.
When preparing for calibration, make sure that the camera filter on the digitizer is in place over the camera lens. Try and position the digitizer so that the light in the room is coming from behind, not directly overhead or from in front of, the digitizer’s camera. The best room lighting for digitizing is normal to a little brighter than normal. Basically, avoid extremes. You know… avoid digitizing in a pitch black cave or on the beaches of a Caribbean island at midday.
MakerBot includes a handy calibration tool that is oriented on the digitizer differently during each stage of calibration.
Orientation of the tool is indicated by letter markings, but there’s another key step in making sure the tool works properly. In the A and B orientations, there are small tabs that must be inserted into a hole in the center of the digitizer. Not doing so could result in poor calibration and thus poor digital scans.
While the digitizer is working, a progress indicator is displayed. Don’t bump or mess with the digitizer while calibrating. If calibration doesn’t work, the software will throw an error. In my experience, errors during calibration are either a result of the Digitizer being bumped or lighting that is too dim or too bright.
After adjusting lighting to normal levels and retrying camera calibration, a much happier message is displayed.
After the camera is calibrated, the system needs to calibrate the digitizer’s turntable. Simply adjust the tool so the letter B is pointed up, the tab is in the small hole in the center, and let the software do the rest.
The final, and coolest, calibration step is for the digitizer’s lasers. Come on, admit it: anything with lasers is pretty cool. This step involves removing a panel from the calibration tool and then centering the tool on the Digitizer with the letter C facing up. There’s no tab to worry about during this step.
Scanning Objects
Now that calibration is complete, the system will prompt to set preferences such as a friendly name for the digitizer, credentials to Thingiverse, and if the software should automatically backup scans to your Thingiverse account. Once these are set, it’s time to digitize!
The digitizer is designed to scan objects that weigh less than 6.6 pounds and that can fit completely within an imaginary 8 inch by 8 inch cylinder. The digitizer is not designed to scan anvils or Buicks, or the like. Obviously, for an object to be scanned it has to first be placed on the turntable. I tend to center objects, but don’t worry, this isn’t a requirement. Just be sure the object doesn’t overhang off the turntable and it is stable. Next, verify the little red filter is slid into position over the camera. It’s fairly obvious when the filter is in place as the preview of the object in the software will be completely tinted red.
The only option in the scan dialog of the software is to select a description of the object’s appearance. Three options exist: Light, Medium, or Dark/Difficult to scan.
After the scan completes, MakerWare for Digitizer will launch a wizard providing guidance on utilizing the software’s MultiScan technology. MultiScan facilitates scanning an object from multiple angles and then combining that data into a single object. Scanning an object with a hole in the bottom is a perfect scenario where MultiScan is of benefit. Scan the object standing up and then again laying on its side. Both scans will be merged into a single object complete from top to bottom including the hidden hole. This technology is a great way to ensure the most complete and best quality scan of an object.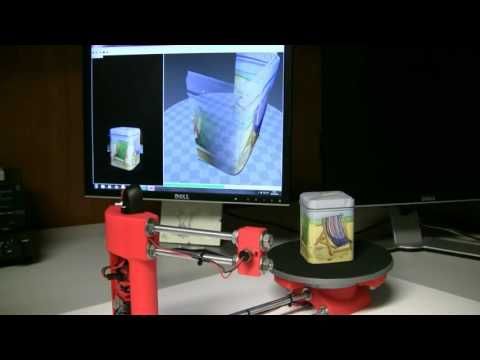
My test scan is a handcarved wooden head I picked up some years ago. It’s about six inches tall and has unique “hair” carved into the top. This feature makes the object perfect for testing the MultiScan functionality of the MakerWare for Digitizer software. I scanned the object once standing up, then once more laying on its back. MultiScan did a good job putting the data together and producing a final 3D model.
The only way to really compare the quality of the scan with the original is to 3D print the produced model. Firing up my MakerBot Replicator 2 and printing on Standard resolution produced a pretty good facsimile of my original wooden head.
The original wooden head (left) and its 3D facsimile.
A few tips for making the most of the MakerBot Digitizer:
Tip #1: Realize that not every object can be scanned well. Dark, shiny, or fuzzy objects are difficult to scan. I’m not saying a stuffed animal won’t scan – I’m just saying to temper expectations.
Tip #2: Lighting is super important! The documentation doesn’t emphasize enough that lighting is the key to success. If the room is dim, there’s massive sun glare, or the lighting is coming from straight in front of the camera, my experience is that scanning will produce very poor results. Follow the lighting guidelines in the manual and make sure the room is well lit.
Tip #3: If the scan doesn’t turn out well and lighting isn’t the issue, then scan again with a different description preset. The different presets can produce significantly different results. For instance, the wood carving I scanned for this article didn’t do well on the Light or Medium presets because it’s coated with lacquer, which makes it shiny. I needed to scan using the Dark/Difficult to Scan preset in order to get good results.
Tip #4: Don’t let people, animals, or anything else move around in front of the camera’s view while scanning is in progress. Set it and forget it, but stay out of the way for nine minutes.
Overall, I’m happy with the MakerBot Digitizer and pleased with my purchase. 3D printing’s popularity is growing by leaps and bounds. The ability to reproduce existing objects without being a 3D software design expert only enhances the appeal. The MakerBot Digitizer jumps in to fill this niche. It doesn’t scan every object perfectly, but it does an admirable job in most cases. I’m pleased with my purchase and look forward to incremental improvements in new releases of the software. Now it’s time for me to get back to digitizing and printing all the goofy trinkets in my office!
MakerBot Digitizer (MakerBot, $1250)Pros: Good construction, nice design, and easy to setup. The software is simple to use and scanning is fairly quick. The MultiScan technology does a good job filling in fine details found anywhere on an object.
Cons: No software tools for cleaning up scanned objects. Dark, shiny, and fuzzy objects can have difficulty scanning.
Bottom line: The MakerBot Digitizer is an exciting piece of tech with awesome potential. It will open up digital 3D scanning to the masses, although the $950 to $1,250 price tag will still keep it from appearing on every desk. Scan quality is good, but it will surely only continue to improve as newer software and firmware are released.
MakerBot Digitizer 3D Scanner
MakerBot Digitizer is a desktop 3D scanner from the world famous American company MakerBot. The scanner was announced in 2013 and immediately proved itself well.
Scanning is carried out using one camera and two lasers that scan an object mounted on a rotating stand, measuring 20.3 x 20.3 x 20.3 cm. Since you do not move the object, but the scanner, the scanning time is almost halved , but now the size and weight of the scanned item is limited.
The printer scans objects of complex geometry worse due to rigidly installed lasers, however, with a resolution of 0.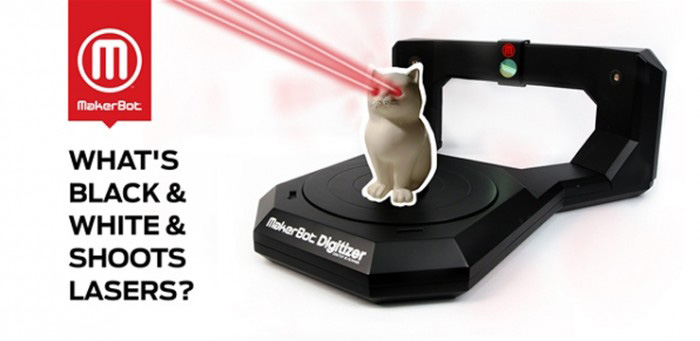 5 millimeters, the scanner is perfect for scanning at home, which does not require complex technical solutions and high accuracy.
As a result, you get a digital model in STL format, which is suitable for both 3D printing and further use in digital form.
Key features
| Manufacturer | MakerBot |
| Camera resolution | 1.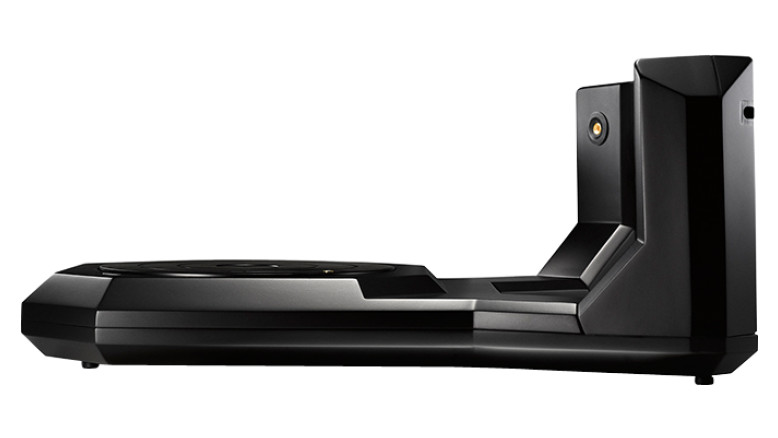 3 MP 3 MP |
| Model | MakerBot Digitizer |
| Manufacturer: | MakerBot |
| Scan area: | up to 20.3 cm (diameter) x 20.3 cm (height) |
| Scan time: | About 12 minutes |
| 3D model formats: | STL |
| Accuracy 3D point 1 zone: | 2 mm |
| 3D resolution 1 area: | 0.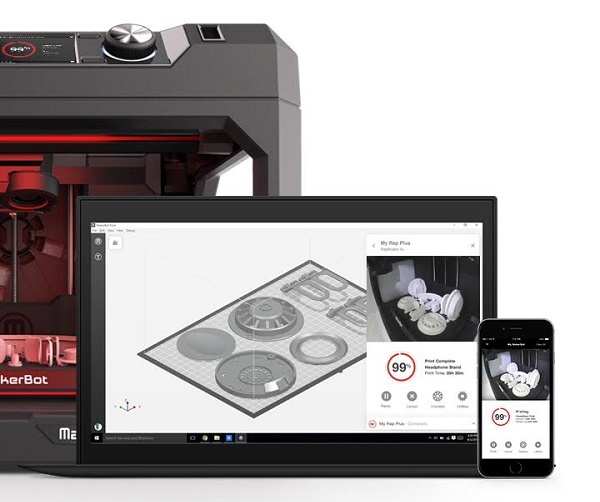 5 mm 5 mm |
| Camera resolution: | 1.3 MP |
| Light source: | laser |
| Scan principle: | contactless |
| Object size range: | 203x203x203 mm |
| Country of manufacture: | US |
| Model: | MakerBot Digitizer |
| Dimensions: | 475x411x203 mm |
| Weight: | 2.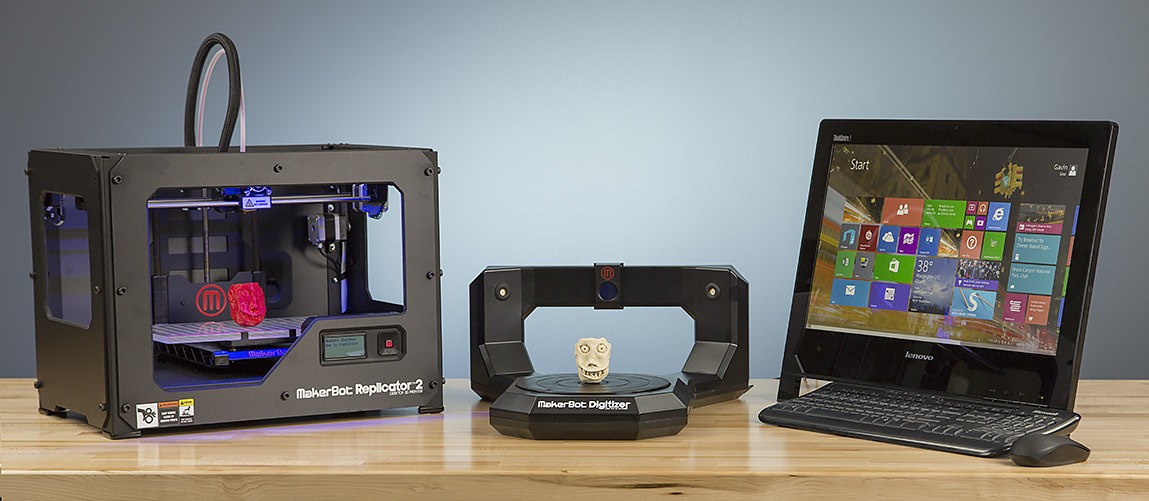 1 kg 1 kg |
| Specialization: | Education |
| Interfaces: | USB |
| Software: | MakerWare for Digitizer |
| Optional: | Scanner type: desktop |
Other offers:
- 3D Scanner
Price:
- MakerBot Digitizer 3D Scanner
Price:
- 3D scanner Shining 3D EinScan
Price:
- 3D Scanner RangeVision Smart
Price:
3D printing - CMIT "Photonics"
Equipment for 3D printing
This section presents 3D printers and 3D scanners and consumables that can be used by users of the center for research and educational purposes.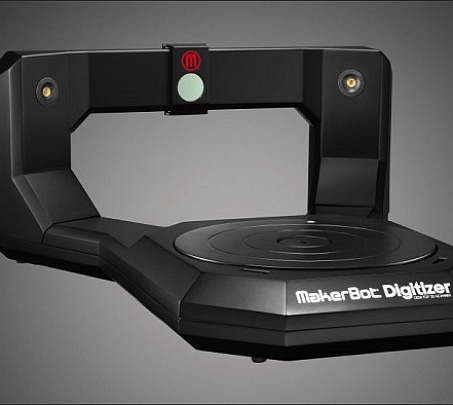
- Details
- Category: 3D printing equipment
The Makerbot Replicator 5 GEN sets the standard for quality and reliability in custom 3D printing and is the best in MakerBot's fifth generation printers. With a layer thickness of only 100 microns, high stability and reliability, cost-effectiveness in material consumption, convenience and ease of use, the Makerbot Replicator 5 GEN is an excellent choice for all 3D printing enthusiasts, educational institutions, small workshops, design studios, laboratories and plastics manufacturers. .
Read more...
- Details
- Category: 3D printing equipment
The MakerBot Replicator Mini is a compact version of the MakerBot Replicator desktop 3D printer optimized for maximum ease of use. The dimensions of the device are 295x310x381mm with the maximum size of printed models 100x100x125mm. Printing is done with a single extruder using polylactide (PLA) as a consumable. The minimum thickness of the applied layer is 200 microns. The device is equipped with a USB port and a wireless interface (Wi-Fi)
Read more...
- Details
- Category: 3D printing equipment
MakerBot Digitizer is a desktop 3D scanner from the world famous American company MakerBot. The scanner was announced in 2013 and immediately proved itself well.
Scanning is carried out using one camera and two lasers that scan an object mounted on a rotating stand, measuring 20.3 x 20.3 x 20.3 cm. Since you are not moving the object, but the scanner, scanning time is reduced by almost twice, but now the size and weight of the scanned item is limited.
Read more...
- Details
- Category: 3D printing equipment
Ultimaker 2 is an evolution of the successful Ultimaker Original, equipped with a heated platform, closed housing and an enlarged working chamber measuring 230x225x205mm.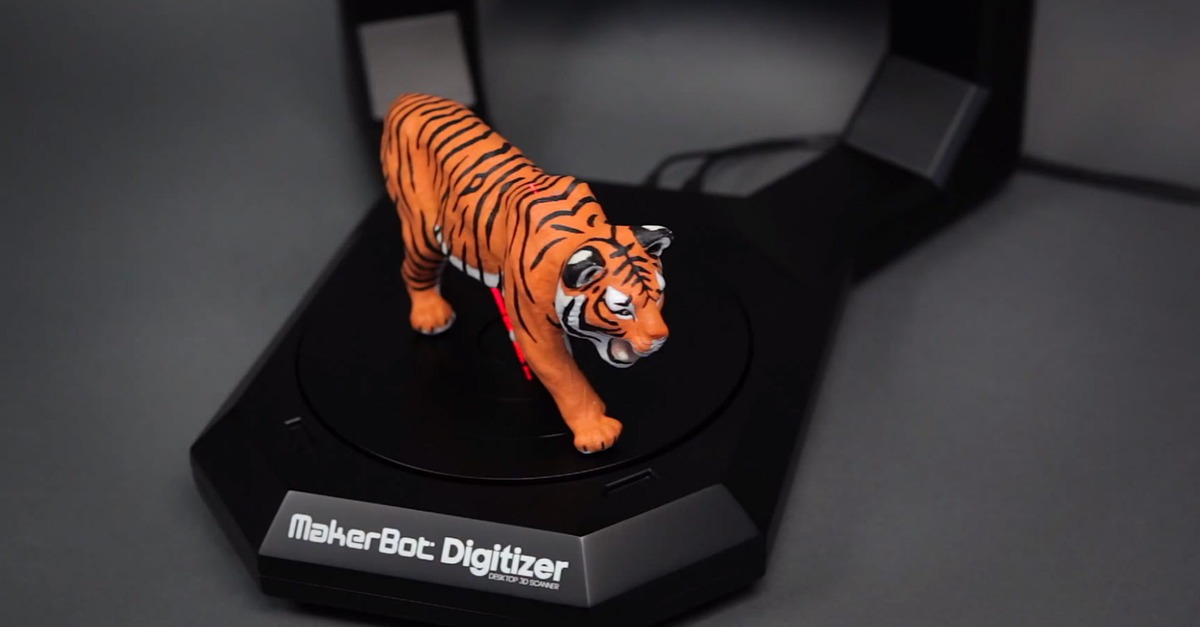 Like its predecessor, the Ultimaker 2 is capable of printing in 20µm layers. The device is equipped with an LCD display and a slot for an SD memory card, which allows you to work offline. Printing is carried out by fusing. The device is characterized by low noise, no more than 49dB is an excellent indicator for domestic or office use.
Read more...
- Details
- Category: 3D printing equipment
The Sense 3D Scanner is quite light, and very similar in design and shape to a sci-fi movie device. To scan, you need to hold Sense in your hands and move around the object being scanned. The scanner projects an invisible and eye-safe infrared grid onto the object, which is then detected by the scanner's webcam. Your computer converts the data received from the scanner, using the supplied software, into a 3D object. The scanner also has a regular webcam that transmits the color and brightness of the scanned object to the 3D model.
Read more.