How to use 3d scanner
How to Use 3D Scanning and 3D Printing for Reverse Engineering
Reverse engineering is a powerful way to create digital designs from a physical part, and can be a valuable tool in your prototyping toolkit alongside technologies like 3D scanning and 3D printing.
3D scanners measure complex objects very quickly, and can speed up your design workflow tremendously when real-life references are involved. With the ability to capture and modify physical shapes, you can design 3D printed parts that fit perfectly on existing products of all kinds. 3D printed jigs allow you to repeatedly locate a drill or saw, or assemble parts precisely with adhesive. Create close-fitting, reusable masks for sandblasting, painting, or etching.
In this post, we’ll walk through the step-by-step reverse engineering process for an aftermarket digital gauge and explain how to scan a part for 3D printing, with tips along the way for using the right reverse engineering tools, from CAD software to to 3D scanners and 3D printers.
For a full breakdown of 3D scanning workflows and technologies, download our white paper.
Download the White Paper
Looking for a 3D scanner for your 3D printer? Read our detailed guide on choosing the best 3D scanner to use with your 3D printer.
One of the biggest challenges people encounter when converting physical objects to digital is a major incompatibility between two different types of 3D models: meshes and solids.
A 3D scanner outputs a mesh, rather than a constructive “solid” model. Meshes need to be reverse engineered to be made editable.
Meshes are the main output of all 3D scanners, and the format commonly understood by 3D printers (STLs). A mesh represents the surface of a shape with a large number of triangles, connected edge to edge. Mesh models don’t contain any information about the object, besides the position of the triangles that define the shape.
On the other hand, engineers are trained to work with solid models. Solid models hold information about how an object is designed, and this information is explicitly encoded into the model as features in a ‘stack’ of logical steps. In solid CAD, it’s possible to change the dimensions for a single feature, and the rest of the model will update to accommodate the change.
Since meshes lack information about the construction of the object, the ways you can alter a mesh model are limited—CAD software like Solidworks and Onshape can’t directly modify meshes. If you need to make major modifications to the underlying design of a scanned part, the mesh needs to be converted to a solid CAD drawing: this process is reverse engineering.
Reverse engineering is important when you want to create new parts that reference or incorporate older designs, where the original CAD design isn’t accessible.
For example, you can create replacement parts that match the original design of damaged existing pieces, or use reverse engineering processes to integrate complex surfaces from existing objects into 3D printable jigs, which are useful when modifying mass manufactured and handcrafted products.
To demonstrate the basic steps in a reverse engineering workflow, let's take a look at the process for creating an assembly jig for an aftermarket digital gauge that fits onto the air vent of a Volkswagen Golf.
Spray coat the object with a temporary matte powder to improve scan accuracy. Even slightly glossy surfaces tend to degrade scan quality, while reflective and transparent surfaces cannot be scanned at all without a matte coating.
Use a temporary matte powder to improve the scan accuracy of your object.
Use a high accuracy 3D scanner to capture the important sections of the part. Tabletop structure light or laser scanners are the right tools for the job, with accuracy of ±100 or better.
Learn more about how to choose the right 3D scanner for your application in our 3D scanning white paper:
Note: You may need to orient and re-scan your object several times if the object has deep recesses.
Some scanners produce extremely large mesh files, which will make later steps grind to a halt.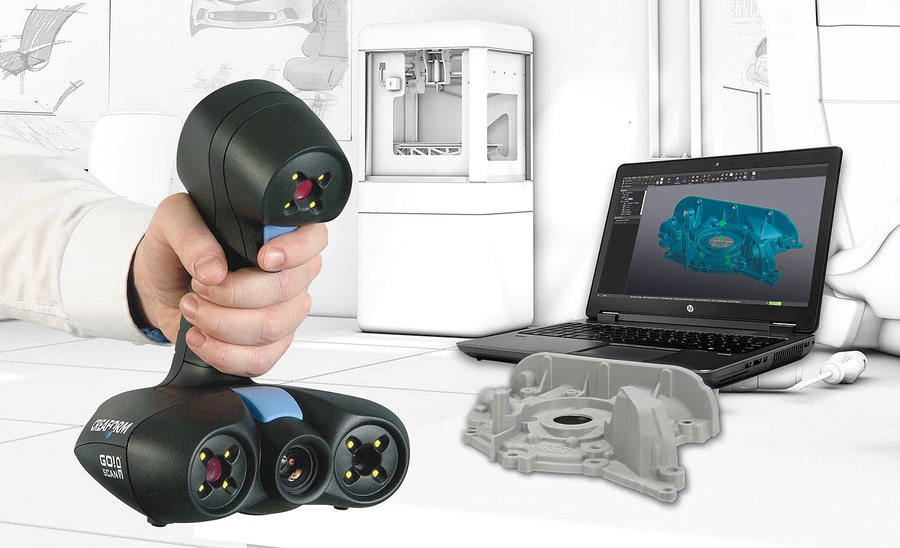
Scanner software repairs small gaps and simplifies the scan, making the data more manageable in CAD. Try to reduce the model as much as possible without destroying important details.
Tip: If you need more control, Meshmixer is a great choice for refining scanned meshes.
Import the mesh into CAD software equipped with reverse engineering tools. Geomagic for Solidworks is a powerful choice for resurfacing complex, organic shapes.
If you are reverse engineering a part with simpler flat surfaces, Xtract3D is a less expensive, lightweight alternative.
In this step, move and rotate the scan mesh into alignment with any existing design components.
Tip: Make drawing easier by rotating and aligning your scan to face the orthographic view directions.
There are three paths to extract the shape of the scan in order to create a solid model that is editable with CAD tools: semi-automatic surfacing, automatic surfacing, and manual redrawing.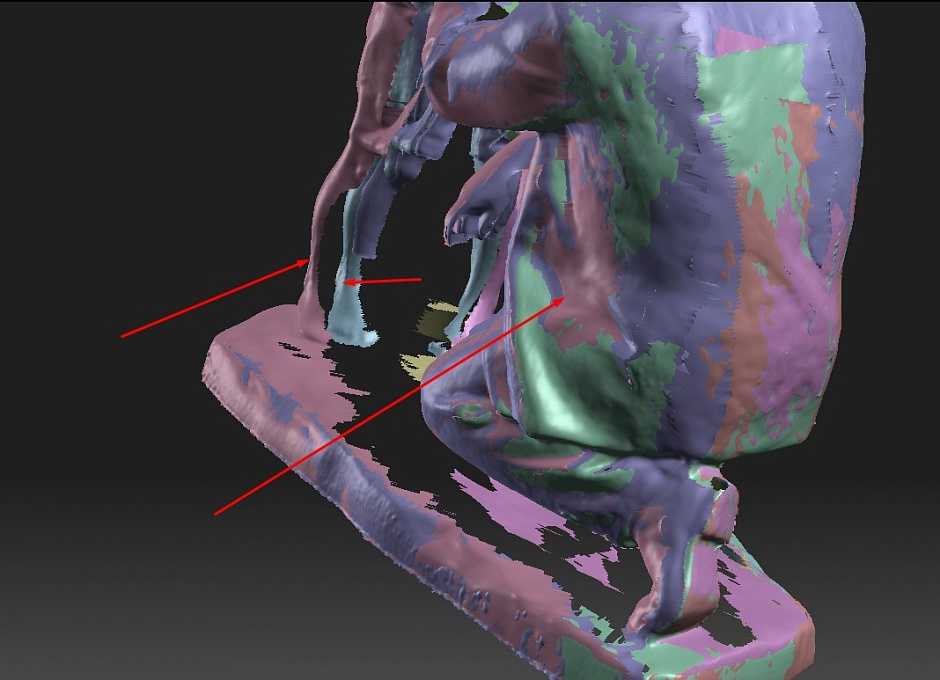
Semi-automatic surfacing
Complex curved surfaces are difficult to manually draw, so you may choose to use semi-automatic surfacing. This function generates surfaces that fit to detected regions of the scan. By varying the sensitivity of the surface detection function, different surfaces will be found.
Tip: Geomagic for Solidworks detects surfaces on the scan to fit 3D curves. Use a “brush” to manually add or subtract areas on the scan from each region.
You may need to repeat this process several times with different sensitivity settings to detect all your surfaces. These surfaces can then be trimmed and knit together to create an editable solid.
Use semi-automatic surfacing to re-create curved shapes when you want maximum editability later on, and when sharp edge accuracy is important.
The re-surfaced result, after trimming.
Automatic surfacing generates a solid model from any watertight scan. You can use standard CAD tools to subtract and add to this auto-surfaced body, but it will be more difficult to move basic features around on the body itself.
You may not need control over edge placement. For example, if you are scanning a part of the human body to create custom ergonomically-shaped products, or want to create a jig to precisely or repeatably modify a handmade object. In these cases, automatic surfacing is a great way to save modeling time.
Note: Compare the results of a automatic surfacing to semi-automatic surfacing: some accuracy is lost, especially around sharp edges.
For simple features such as bosses, holes, and pockets, it’s usually fastest and most accurate to redraw the features using the scan model as a reference. Reverse engineering software allows you to create sketch planes aligned with flat surfaces on the scan and to extract cross sections from the scan mesh, which helps you match the shape of the original object.
Once the scan has been converted to a solid, it can be subtracted from another solid body to create a jig that securely holds the original part.
The design of the new gauge component also references the dimensions of the scan, using curves extracted with semi-automatic surfacing.
Printing the jig on a Formlabs stereolithography (SLA) 3D printer gives you a high degree of accuracy comparable to the output of engineering-grade 3D scanners. Use Formlabs Rigid 4000 Resin for its strength and precision.
Once these steps are complete, the 3D printed jig is ready to use to assemble the new gauge onto the OEM air vent.
The final 3D printed assembly jig, printed in Rigid 4000 Resin.
How to Scan 3D Objects for 3D Printing – 3D Printerly
3D scanning objects for 3D printing can be tricky to get the hang of, but once you learn the right software and tips to follow, you can create some pretty cool models. This article will give you some good insights into scanning objects to create 3D prints.
To 3D scan 3D objects for 3D printing, you either want to get a 3D scanner or use your phone/camera to take several pictures around the object and stitch them together using photogrammetry to create a 3D scan. Make sure you have good lighting while scanning to get the best results.
Keep on reading for more information and tips to 3D scan objects for 3D printing.
Can I Scan an Object to 3D Print?
Yes, you can scan an object to 3D print using various scanning methods. One example of this is by a grad student who 3D scanned and 3D printed a Shuvosaurid Skeleton for a museum exhibit. It’s an ancient crocodile-like creature that he 3D scanned using a premium professional scanner called the Artec Spider.
It’s currently priced at around $25,000 but you can get much cheaper 3D scanners, or use free options such as photogrammetry which is creating 3D scans through taking several pictures.
He mentioned an open access repository called MorphoSource which is a collection of several 3D scans of animals and skeletons.
This student further revealed that he then used a visualization software called AVIZO to prepare STLs for the surface of each scan, after which he 3D printed it.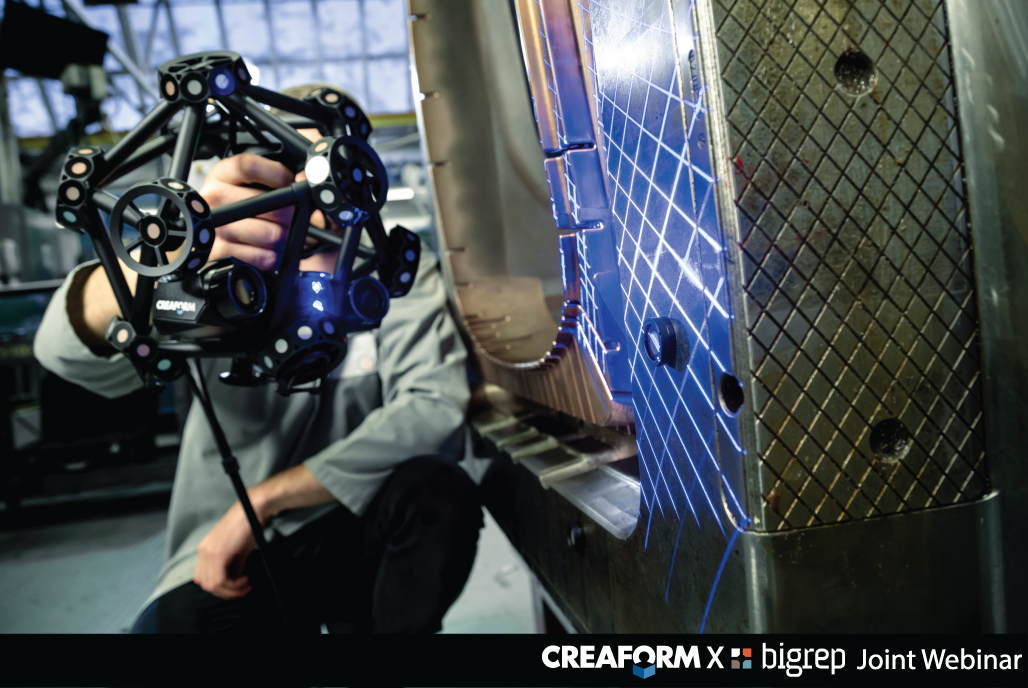
When it comes to more standard objects that you might have around the house, or even with cars parts, it’s definitely possible to 3D scan and 3D print them. People have been doing it for many years successfully.
I also came across a user who scanned and printed his friend’s farm with the help of a drone. Not only was it a significant success, but it had a fantastic architectural look.
I scanned and 3d printed a friends farm using a drone and my new 3d printer. from 3Dprinting
He started by generating a mesh model after mapping using Pix4D and then processed it afterward using Meshmixer. The Pix4D was costly, but there are free alternatives such as Meshroom that you can use if you can’t bear the cost.
It took around 200 photos and in terms of the scaled dimensions and detail from the drone, it works out to be around 3cm per pixel. The resolution mainly depends on the drone’s camera and height of flight.
3D scanning is not only limited to what you interact with daily, but as seen on NASA’s 3D scan page, many types of objects can also be 3D scanned.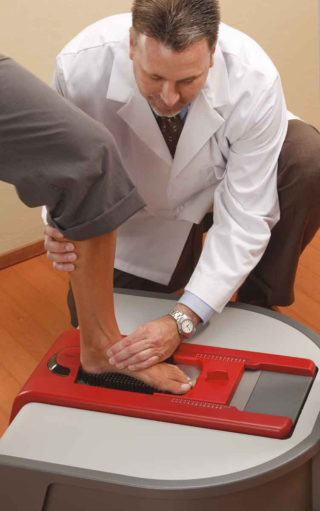
You can see more about this on the NASA page of printable 3D scans and see several 3D scans of space-related objects like craters, satellites, rockets, and more.
How to Scan 3D Objects for 3D Printing
There are a few methods on how to scan 3D models for 3D printing:
- Using an Android or iPhone App
- Photogrammetry
- Paper Scanner
Using an Android or iPhone App
From what I have gathered, it’s possible to scan 3D objects straight from the apps you have installed on your device. This is possible because most newly manufactured phones have LiDAR (light detection and ranging) by default.
In addition, some apps are free, and others require paying for them first before using them. See below a brief explanation of some of the apps.
1. Polycam App
The Polycam app is a popular 3D scanning app that works with Apple products like the iPhone or the iPad. It currently has an app rating of 4.8/5.0 with over 8,000 ratings at time of writing.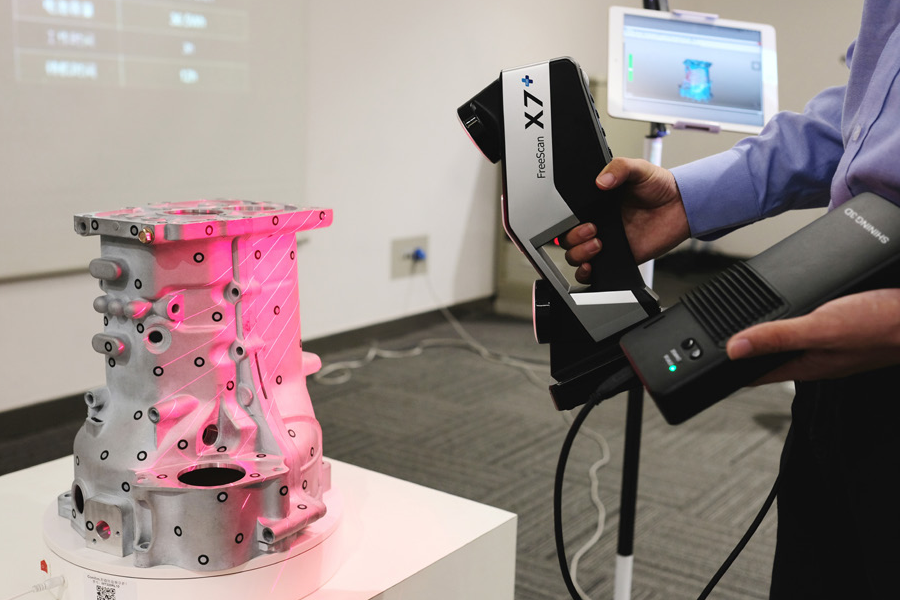
It’s described as the leading 3D capture application for the iPhone and iPad. You can create plenty of high quality 3D models from photos, as well as quickly generate scans of spaces using the LiDAR sensor.
It also gives you the ability to edit your 3D scans directly from your device, as well as export them in many file formats. You can then share your 3D scans with other people, as well as the Polycam community using Polycam Web.
Check out the video below to see how a Polycam user scans a large rock and captures plenty of detail.
The lighting is a very important factor when it comes to 3D scanning, so consider that when you are scanning your objects. The best type of light is indirect light like shade, but not direct sunlight.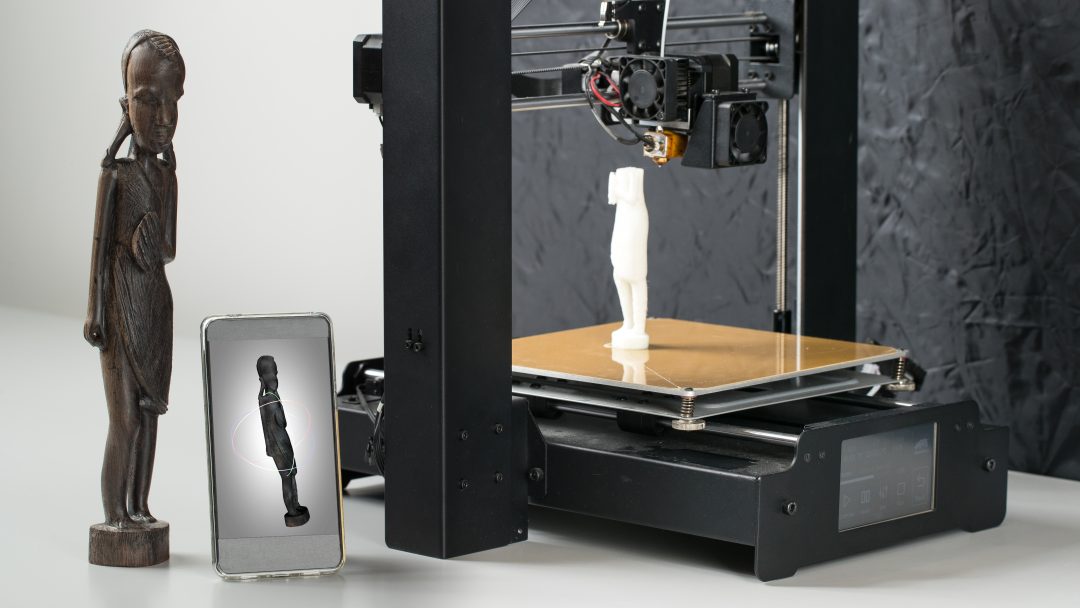
You can check out Polycam’s Official website or the Polycam App page.
2. Trnio App
The Trnio app is a great method of 3D scanning objects for 3D printing. Many people have created some stunning 3D prints using existing objects, then scaling them as they desire to create new pieces.
One great example of this is the video below by Andrew Sink who 3D scanned some Halloween decorations and made it into a pendant for a necklace. He also used Meshmixer to help achieve this result.
Previous versions of the app weren’t the best, but they have done some useful updates to scan objects faster and easier. You no longer have to tap during scanning, and the app automatically records and compiles the video frames.
This is a premium app so you’ll have to pay to download it, currently priced at $4.99 at time of writing.
You can check out the Trnio App page or the Trnio Official website.
Photogrammetry
Photogrammetry is an effective method of 3D scanning objects, used as a basis for many apps. You can use raw photos directly from your phone and import than into a specialized software to create a 3D digital image.
It’s a free method and has some impressive accuracy. Check out the video below by Josef Prusa showing off 3D scanning from just a phone with the photogrammetry technique.
1. Use Camera – Phone/GoPro Camera
Someone had posted how he scanned a broken stone and then printed it, and it came out perfectly.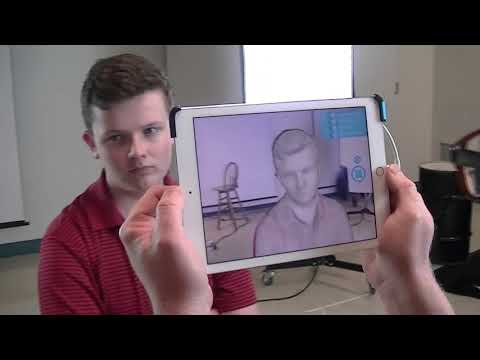 GoPro camera assisted him in achieving this. He also used COLMAP, Prusa MK3S, and Meshlab, and he reiterated how important lighting is.
Uniform lighting is the key to success with COLMAP, and outdoor during an overcast day gives the best results. Check out the video below for a useful COLMAP tutorial.
He also mentioned that it is difficult to deal with shiny objects.
He actually used a video clip as the scan source and exported 95 frames, then used them in COLMAP to create a 3D model.
He also mentions that he did some tests with Meshroom in terms of getting good scans with bad lighting and it does a better job at handling unevenly lit objects.
You have to handle the GoPro camera carefully because you may get a distorted image if you do not take care of the wide-angle. Follow the link to get a detailed explanation.
2. Professional Handheld Scanner – Thunk3D Fisher
There are many professional handheld scanners out there with varying levels of resolution, but for this example, we’ll look at the Thunk3D Fisher.
Even though the scanner takes detailed pictures and is specialized, it still falls under photogrammetry. One 3D user wrote about how through 3D scanning and printing, he managed to come up with Mazda B1600 front headlights.
3d scanning and 3d printing a perfect match, we recreated a front headlight for a Mazda B1600. Car owner only had right side, scanned and flipped it fits the left side. Printed in generic resin and post processed with epoxy and painted black. from 3Dprinting
The car owner only scanned the right side using a handheld Thunk3D Fisher scanner then flipped it to fit on the left side.
This scanner gives accurate scans and it is said to be ideal for scanning large objects. It is also perfect for objects that have intricate details. It uses a structured light technology.
The good thing with this scanner is that it scans objects ranging from 5-500 cm in high resolution and 2-4 cm in low resolution. It has free software that is frequently updated. The exciting bit is that the Thunk3D Fisher Scanner has additional software for Archer and Fisher 3D scanners.
3. Raspberry Pi-Based OpenScan Mini
I came across a piece on how someone had used a Raspberry Pi-based scanner to scan a 3D printed rook. It was 3D scanned using a combination of the Raspberry Pi based OpenScan Mini, along with an Arducam 16mp camera with autofocus. They mentioned that the increase in detail was significant.
The camera resolution for these types of scans is very important, but proper lighting along with surface preparation may even be more important. Even if you had a bad quality camera, if you have good lighting and a surface with rich features, you can still get pretty good results.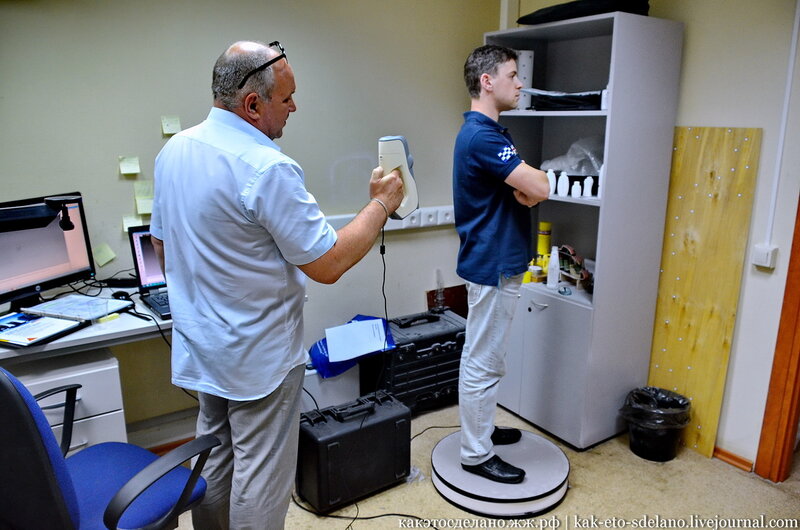
3D scanning this 3D printed rook showing some incredible details – printed at 50mm height and scanned with the Raspberry Pi based OpenScan Mini (link&details in comment) from 3Dprinting
He went ahead to reveal that if you want to use this scanner, you should be well aware of how it depends on the Pi camera. You can expect excellent results when using the two together.
Using a Paper Scanner
It’s not the usual method but you can actually 3D scan using a paper scanner. A great example of this in action is with CHEP who experienced a broken clip, then went on to glue the pieces together to then 3D scan it on a paper scanner.
You then take the PNG file and convert it to an SVG file.
Once you’re through with the conversion, you can download it to your chosen CAD program. Then, after a few processes, you can convert it into an STL file before taking it to Cura for slicing as you prepare to 3D print it.
Check out the video for a visual tutorial on getting this done.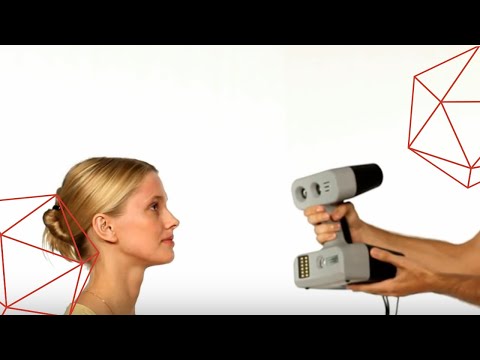
How Much Does it Cost to 3D Scan an Object?
A 3D scanning service can cost anywhere from $50-$800+ depending on various factors such as size of the object, level of detail the object has, where the object is located and so on. You can 3D scan your own objects for free using photogrammetry and free software. A basic 3D scanner costs around $300.
There are even options to rent your own professional scanner so you can get a really high quality scan for several objects.
Many phone 3D scanning apps are free as well. When it comes to professional 3D scanners, these can cost around $50 for a DIY kit, upwards of $500+ for low range scanners.
3D scanners can definitely get pricey when you are looking for high specs, like the Artec Eva for around $15,000.
You should also be able to find 3D scanning services in your local area through searching on places like Google, and these costs will vary. Something like ExactMetrology in the US and Superscan3D in the UK are some popular 3D scanning services.
Superscan3D determine the different factors for the cost of 3D scanning being:
- Size of the object to be 3D scanned
- Level of detail the object has or complex curves/crevices
- Type of material to be scanned
- Where the object is located
- Levels of post-processing required to get the model ready for its application
Check out this article from Artec 3D for a more detailed explanation of 3D scanner costs.
Can You 3D Scan an Object for Free?
Yes, you can successfully 3D scan an object for free using various software 3D scanning apps, as well as photogrammetry which is using a series of photos of your desired model and a specialized software to create a 3D model. These methods can definitely create high quality 3D scans that can be 3D printed for free.
Check out the video below for a visual explanation of how to 3D scan with Meshroom for free.
Turning a 3D scan or photos to an STL file can be done using software like this. They usually have an export option to turn the series or photos or scans into an STL file that can be 3D printed. It’s a great method to make 3D scans printable.
How does a 3d scanner work? Device, principle and technologies of 3D scanning
3D scanner is a stationary or small hand-held device for scanning objects with complex spatial geometry. Simple scanners process images in a plane, while 3d scans physical volumetric objects, displaying information as a polygonal model or a cloud of points. Three-dimensional scanning devices are used in medicine (dentistry, plastic surgery, making prostheses, organ models, etc.), for creating computer games, in the film industry, design, architecture, engineering, for designing industrial parts, cars, for reconstructing objects in archeology. Scanners analyze and digitally recreate a three-dimensional model of an object, its shape and color with a high degree of detail, working in different conditions (with insufficient visibility, in the dark, with vibration), with any materials, provide the desired format of output information for software for work with her on the computer.
How does a 3D scanner work?
The principle of operation of the 3d scanner is the ability of the device to determine the distance to an object, convert the received data into a digital image (three-dimensional model), and transfer it to a computer. The scanner determines the coordinates of points in space on the surface of the processed object, analyzes them, and forms a detailed digital model.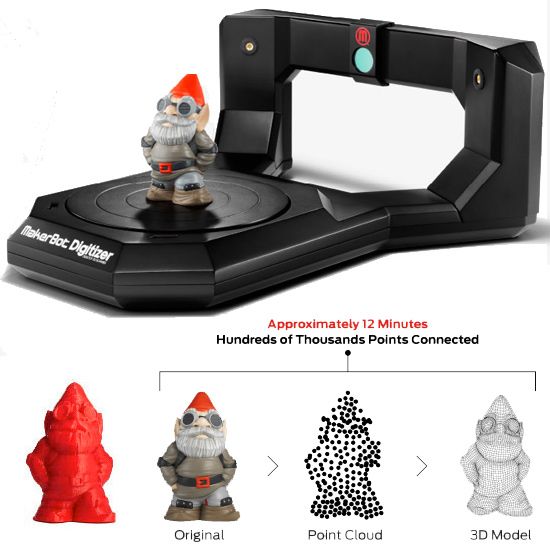 Cameras, lasers, rangefinders, devices for illumination are involved in its work.
3D scanning technologies
- Contact (contacts with the object).
- Non-contact (without object contact). These are the most promising and new technologies that allow you to create models of objects simply by directing a laser beam, light, waves at them. The scanner is applied at a distance and is able to create a copy of a hard-to-reach object without physical contact with it.
Non-contact 3d scanners
The two most common scanning technologies are optical (passive and radiation) and active laser.
Active emission principle
Scanner emits structured, intermittent light, laser triangulation. A laser beam, a beam of light generated in a special way (diodes, lamp flashes), and waves are directed to the object under study. Based on the analysis of their reflection and position, a three-dimensional copy of the object is formed.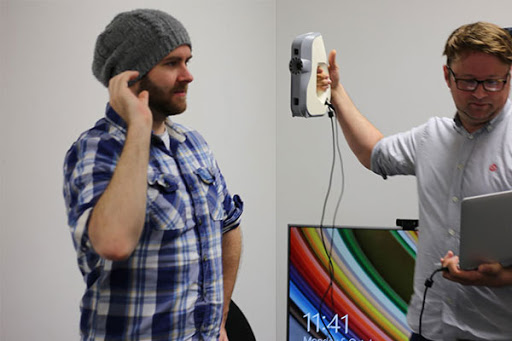
Passive radiation principle
Do not emit anything, analyze the light or infrared (thermal) radiation of an object. Work like a human eye;
Photometric non-contact passive 3d scanning technology
Scanners from this group are represented on the market by the XYZprinting model. These are quite compact simple models that have only basic 3D scanning functions.
Pluses: reasonable price and compactness.
Device
Passive 3d scanner device (on the example of the specified model): housing, one compact camera, USB cable for connecting to a computer and transferring the image of the scanned object to it. Scanner without stand, manual, made in the form of a stapler.
How it works
A light-sensitive camera captures light from an object, processes it, and forms a three-dimensional model, exporting it to a computer.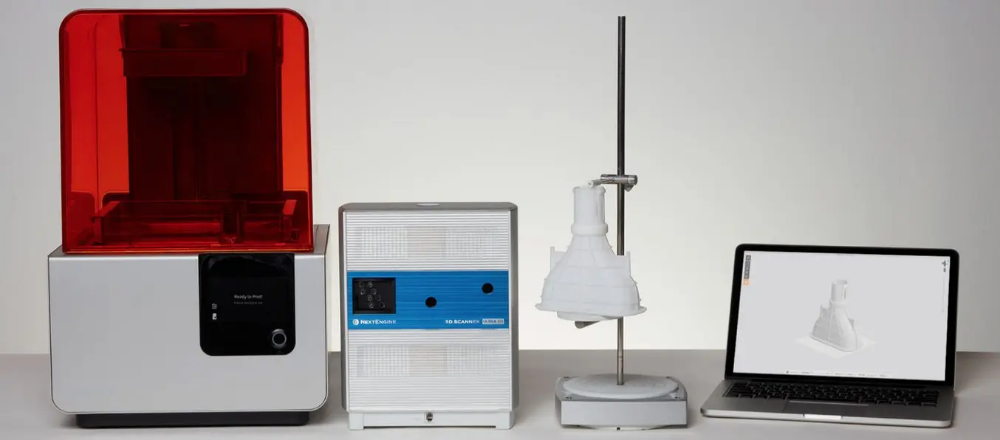 The user can have two modes of operation: scanning a person or objects. To get started, you need to install the software on your computer, connect the device to it via a USB cable, select the operating mode, press the button on the scanner and, slowly swiping it in front of the object, scan.
How the technology works
The device works with passive scanning photometric technology without any radiation and projection onto the object. The work is carried out with a slightly improved simple optical camera that captures visible light. The disadvantage is that if the lighting is insufficient, the object needs to be additionally illuminated.
Scanning is performed using the so-called silhouette method. It reproduces the contours of an object based on a sequence of frames captured by a video camera swept around the object against a well-contrasted background.
Stereoscopic non-contact passive 3d scanning system
Models with non-contact passive scanning technology
This type of device is represented by 3D Systems Sense, 4D Dynamics Gotcha models.
Device and principle of operation of a 3d scanner based on the non-contact passive scanning system
Devices are equipped with two cameras and an infrared sensor. The 3D Systems Sense scanner is made in the form of a stapler, it is a compact handheld device, it can be used with a tripod, in Gotcha (with a tripod and a handle), it is included. The principle of operation is passive optical. In both cases, power and data transfer is carried out via a USB cable. The devices have standard modes: scanning a person and an object.
Scan technology
The camera uses this technology to detect infrared (thermal) radiation and normal light reflected from an object. The systems are stereoscopic, that is, they use two cameras. The device compares frames, based on small comparisons of differences between them, determines the distance at each point of the image and recreates the object in digital form.
3d scanners with laser active scanning
This group of devices is represented by the following scanner models: 3D Systems iSense, DAVID Starter-Kit ver. 2, MakerBot Digitizer.
Device
Devices have two lasers and a camera. It should be noted that the laser safety of gadgets corresponds to level I, which is completely safe for the eyes. The iSense scanner is designed to work only with the iOS operating system and with Apple iPad above 4 generations. It is made in a compact case, which is installed on a mobile gadget and connected to it with a USB cable, the battery lasts for 4 hours of its operation. It attaches like a webcam, scans and immediately displays the image on the iPad.
Models
DAVID Starter-Kit ver.2 3D scanner device: webcams and laser sensors with automatic adjustment function. The device comes with a tripod and tripod.
Maker Bot Digitizer is somewhat different in design from the previous model. The body of the scanner is made as a pedestal, one part of which is a rotating platform, the other is equipped with two lasers on the sides and a camera in the middle.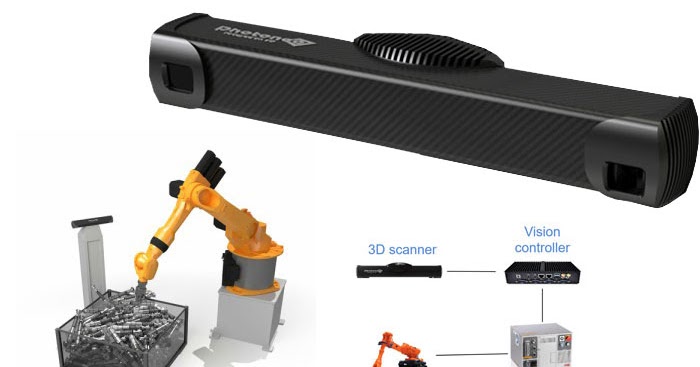 They scan an object located on the site.
How technology works
Let's describe how a 3D scanner works. Laser scanning is based on the triangulation method. This is an active scan tool. It uses laser beams by projecting it onto an object. The laser processes the surface of the object, its points are fixed on its different parts. The camera captures the laser dots on it, the angle of displacement of the laser beam and transmits the data to a computer with the appropriate software, which forms the object in digital form.
The scanning technology is called “triangulation”, because the triangle of functional elements of the device is involved in the work: the laser point on the object, its emitter, and the camera. In most cases, the dot is formed by a laser streak or spot passing over the surface of the object.
Structured light 3d scanning technology
Models that use structured or intermittent light technology in their work: DAVID SLS-2, RangeVision Smart, RangeVision Standard Plus, RangeVision Advanced, RangeVision Premium. A separate group includes manual Artec Spider, Artec Eva, Artec Eva Lite.
Device
The main functional elements of these devices are cameras and a light source that structures it in a special way and directs it to the scanned object. In the DAVID SLS-2 model, a video projector serves as a light source. These are mounted on a tripod with a tripod, which are included. This allows you to set up and calibrate instruments, install them in different positions and securely fix them, reducing vibration. Light sources in devices are halogen lamps, diodes, video projector.
Artec Spider, Artec Eva, Artec Eva Lite are made in a compact body with an iron-like handle. The handle has control buttons and outputs for interface and power cords. At the bottom there is also a hole for standard photo tripods and legs for fixing the device on the surface. 3d scanner device has the following. From the bottom it is equipped with a 3D camera (there are three of them in Artec Spider) with increased resolution, from the top of the device - a flash (projector) of structured illumination, a central color texture camera in the middle, along with light sources in the form of 6 or 12 diode bulbs. All light sources have white radiation. The device comes with a standard mini-USB interface cable and a power cable. Additionally, you can buy a rechargeable battery.
How the technology works
Such devices are also called structural-light 3D scanners. The scanning technology is similar to laser triangulation (light, emitter, camera). The important thing is that they can work without markers - the object does not need to be glued with a lot of markers and marks. The essence of structured light technology lies in projecting a pattern of light onto an object and fixing and analyzing its deformation. The luminous flux is projected onto the object by several types of light sources: LCD, video projector, diodes, halogen lamps.
The camera detects shifts in the light pattern that enters its field of view and looks like moving lines of light on the surface of an object. It calculates and analyzes the distance from each illuminated point of the object and thus forms its detailed digital copy.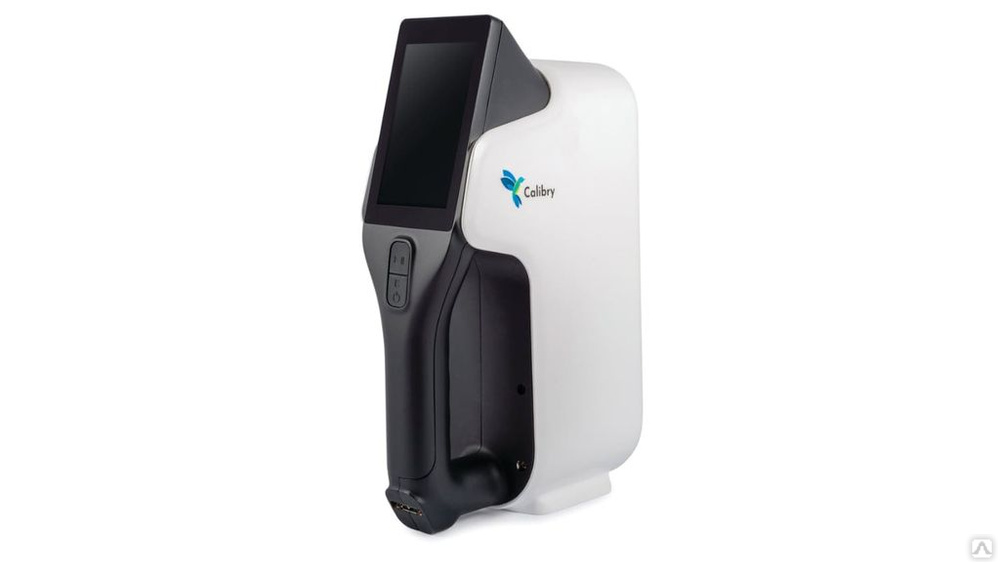 The advantage of Light 3D scanners is speed and high accuracy. They scan not one or several points, but simultaneously a cluster of points or the entire field of view at once.
technologies, methods and principles of operation of 3D scanners
16.04.2021
Content
-
- What is 3D scan and for which it is used
- How 3D scanner
- 3D scanning technologies
- Methods 3D scanning
- Contact 3D scanners
- Non-contact 3D scanners
- Types of 3D scanners by usage
- Advantages and disadvantages of 3D scanners
- Things to consider when choosing a 3D scanner
- Applications
Currently, few people are not familiar with such a concept as 3D printing. Many companies are using modern 3D printers with might and main, recreating layouts of various shapes and sizes with their help. There are also those that recreate whole objects - not only small ones (for example, phone cases, souvenirs, sneakers), but also large ones (houses, engine parts, etc.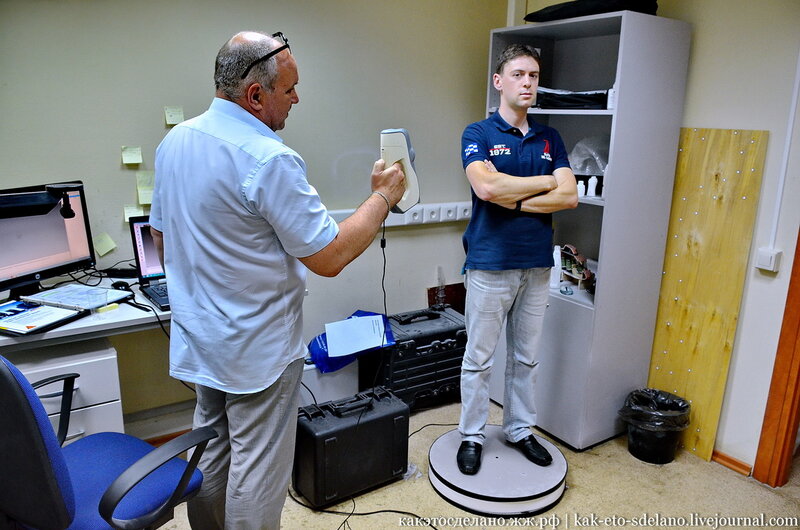 ). But all this would not be possible without 3D scanners. It is they who allow you to accurately copy almost anything - from huge buildings and structures to humans, animals, small objects and much more.
What is 3D scanning and what is it used for
Three-dimensional scanning is a technology that appeared in the 60s of the 20th century. It was created in order to transfer the physical parameters of the object into a digital format in the form of a three-dimensional model. The need for this naturally arose when people around the world increasingly began to use computers both in everyday life and in production.
The first samples of 3D scanners were quite simple and did not have wide functionality. Gradually, they became more complex and improved, making it possible to achieve an ever clearer image of the object. This has become especially relevant with the advent of lasers.
3D scanners allow you to transfer object data into digital format
3D scanning has opened up new opportunities in various areas of human activity - from the automotive industry and the military industry to design, medicine and cinema.
How a 3D scanner works
A 3D scanner is a device that examines an object by digitizing it using sensors and using the information received to create a three-dimensional model. In fact, a 3D scanner creates a digital copy of a physical object of any configuration and complexity. In this, it fundamentally differs from its predecessors - conventional scanners that can only read information from documents and photos.
The scanning process itself can take place in different ways - depending on the type of 3D device and the technology used, as well as on what object you want to process with it - moving or static.
3D Scanning Technologies
There are 2 main types of 3D scanners - laser and optical. Their fundamental difference lies in how and with the help of what the “removal” of data takes place. Let's take a closer look at both.
3D laser scanning, as the name implies, uses a laser and can be carried out both at near and far distances from the object.
Laser Scanner
For the most part, 3D laser scanners work on the principle of triangulation, when the camera finds a beam on the surface of an object and measures the distance to it, after which a cloud of points is created, each of which has its own coordinates in space, and a 3D model is built. Their "advantages" are affordable price and ease of use combined with high scanning accuracy. Of the "minuses" - there are restrictions on the remoteness and size of the object.
Another type of laser scanner works by measuring the response time of a beam from the surface of an object - the so-called laser range finder. They are widely used where it is necessary to create 3D models of various buildings and structures. It is not advisable to use them at short distances, since in such cases the response time is very short and the accuracy of the data is reduced. Otherwise, this type of scanner is characterized by high scanning speed and the ability to read all the details.
The disadvantage of laser scanners is the impossibility of their use on moving objects. Then optical 3D scanners come to the rescue, which shoot with one or more cameras from different angles an object illuminated by a special projector. Based on the received image, a three-dimensional image is built.
Optical scanner
A "contraindication" for the use of this technology are reflective and translucent surfaces - shiny, mirror or transparent. But when scanning a person, they are simply irreplaceable.
3D scanning methods
Any object can be digitized both by contact and non-contact methods. In the first case, active interaction with the subject is necessary, in the second, accordingly, no. Both of these methods have their advantages and disadvantages.
Contact 3D scanners
They have a mechanical probe with a special sensor that measures parameters and transmits the collected information to the device.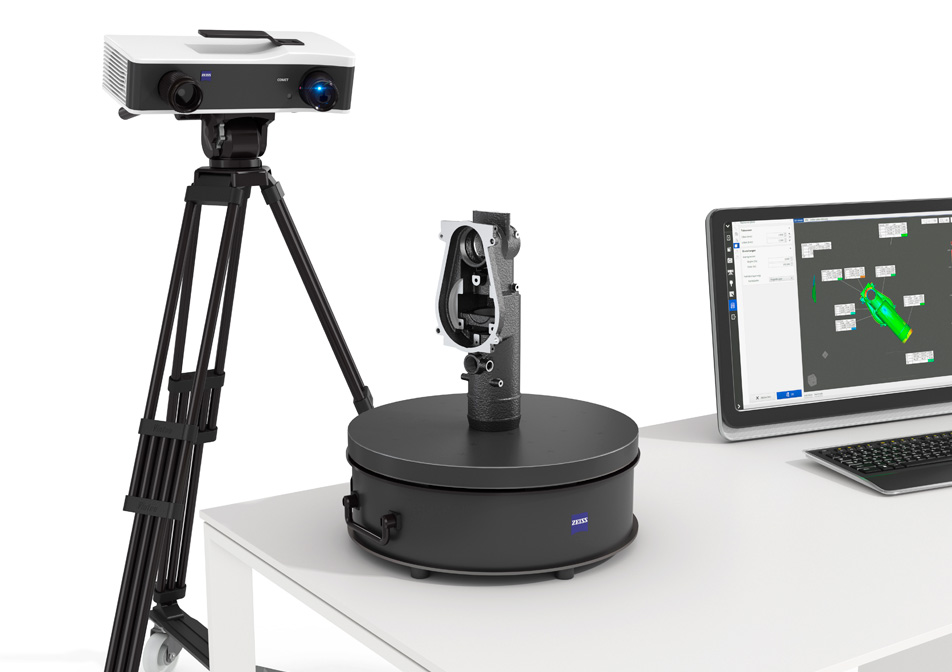 To do this, the object under study is placed on a special surface and fixed (if necessary). Such tight physical contact makes it possible to determine and then build a 3D image as accurately as possible, however, there is a small risk of damage to the prototype.
Non-contact 3D scanners
This category includes all devices capable of scanning at a distance. This is especially true for objects located in hard-to-reach places.
Non-contact 3D scanner
A stream of radiation (it can be ultrasound, light, X-rays or a laser) is directed to an object and reflected from it, it is recognized by a 3D scanner. They are similar in principle to a video camera and may require the use of additional devices for better illumination.
Non-contact 3D scanners come in 2 types:
-
Active - work with the help of a laser beam or structured light directed at an object, which, when reflected, give information about the location of the object in the form of coordinates.

-
Passive - use time-of-flight rangefinders that read the time and distance that the laser beam travels to the object, and so - for each point in space, which ultimately allows you to accurately recreate its three-dimensional image.
Desktop 3D scanners are very popular and widespread, since they are mostly simple and safe to use, do not require any special technical skills and are quite cheap. The EinScan-SE 3D scanner is one such example. It can be used both at home and in the office. It has access to the API of many popular 3D printers, which makes it possible to immediately print the created three-dimensional model.
Add to compare
Product added to compare Go
| Manufacturer | Thor3D |
Add to compare
Product added to compare Go
| Manufacturer | Shining 3D |
Add to compare
Product added to compare Go
| Manufacturer | Shining 3D |
Add to compare
Product added to compare Go
| Manufacturer | Range Vision |
Types of 3D scanners according to the principle of use
There is also a variety of species here. Let's highlight the main ones:
-
Manual: The are handy and simple models that are easy to use as they are quite compact and do not require special skills. True, their technical capabilities may be somewhat limited.
-
Portable: are mainly used for field work, they are convenient to take with you.
-
Desktop: have extended functionality and are used to create high-quality 3D models. Most often used in offices.
-
Stationary: are used, as a rule, in production, various enterprises, as they can scan a large number of objects of the same type at once. Mounted on special turntables.
Handheld 3D Scanner Calibry
Such a choice of products allows you to select the right model for a specific task. In some cases, scanners independently measure objects, in others - with the help of a person who sequentially moves the device until all the necessary information is collected.
Such options for hand-held 3D scanners as Calibry are in high demand among buyers. Despite the apparent simplicity of execution, it has a high resolution and scanning accuracy, due to which it is able to digitize objects with a length of 0.2 to 10 meters. Objects that have a non-standard surface - dark or shiny, with a large number of corners and small details will not become a problem either. Among other things, its undoubted advantage is its low weight, only 900 grams.
Advantages and disadvantages of 3D scanners
Surely, many of the potential buyers are wondering: do you really need a 3D scanner to invest a lot of money in it? What can this acquisition give and will such an investment be justified?
3D scanning has become an integral part of any modern manufacturing process
In order to understand how much you need this equipment, we will list its advantages and disadvantages.
Benefits:
-
They make it possible to scan objects located at a remote distance and in places inaccessible to the presence.
-
They have the ability to "read" not only colors and images, but also to convey the texture of the surface.
-
Significantly speed up the process of "taking" data from any object, even a very complex one with a large number of planes.
-
A variety of models allows you to choose the most convenient version of the scanner, including manual or portable, which can be easily taken with you.
Weaknesses:
-
Some scanners are unable to recognize transparent or black and white objects. In this case, their preliminary preparation (treatment with a special composition) is required.
-
I do not always display complex objects correctly, with a large number of inserts and partitions.
-
To obtain a high-quality result, they require skills and abilities to work with certain computer programs for creating 3D models.
-
If the rules of operation are constantly violated, it may become necessary for expensive repairs to the equipment.

If you need high-precision and high-quality three-dimensional copies of objects, then you cannot do without a 3D scanner. It makes it possible to work in almost any conditions - indoors and outdoors, and with any objects by type and size. It is not surprising that now these devices are in great demand, which gives rise to the annual release of a large number of models, from which you can always choose the one that suits you in terms of quality and price.
Things to consider when choosing a 3D scanner
The computer equipment market offers a huge amount of all kinds of equipment, including devices for three-dimensional scanning. Navigating that variety is sometimes not at all easy: some buyers are only concerned about the cost, others are interested in the number of options (sometimes completely useless), but the most far-sighted look at the ratio of the first and second.
Choosing the right 3D scanner is a responsible matter
It is not always easy to take into account all the technical points that can significantly affect what result will be ultimately achieved. We will tell you what you should pay attention to if you are thinking about buying a 3D scanner.
Be guided by the following parameters:
-
How high is the accuracy of the 3D scanner. This is one of the most important features. It needs to be targeted first.
-
Resolution also plays an important role. It follows from the first, since the accuracy of measurements and the quality of copying depend on the resolution.
-
In what range the device operates, how close / far it can be from the scanned object.
-
The scanning field is the parameters of that object, thing that it is able to process in 1 session.
-
Does the scanner capture various atypical types of surfaces with complex terrain - channels, partitions, holes, etc.).
-
Portability, mobility of the device - how easy it can be moved if desired, taken with you, its size.
-
The time it takes to prepare for work, as well as the duration of the digitization process itself.

-
The range of possibilities in terms of copying: are there any restrictions on shapes, textures, material, as well as operating conditions - temperature, light, etc.
Of course, the better the quality of the 3D scanner, the more expensive it is. However, you should focus primarily on the tasks that you face, and only then take into account everything else.
Applications
Three-dimensional scanners are in demand in many areas of human life. They are irreplaceable both in the industry, and for household needs. The range of their application is so wide that it is possible to list for a very long time. It's easier to say where they are not needed.
The most common areas of use are, of course, medicine, industry, architecture, construction, film industry and design.
For example, in dentistry, these devices allow you to create ultra-precise three-dimensional models of dentures. One type of such a scanner is Shining 3D's AutoScan DS-EX PRO, which does a great job with a variety of tasks while being quite affordable and reliable.
Medical 3D Scanner
In engineering, such technologies are also indispensable. Digital building prototypes are now much easier and faster to obtain than in the past, when it required multiple manual measurements and then entered into a database. Any physical object can now be recreated in three-dimensional form, moreover, in the shortest possible time and with a minimum error.
In cinemas, we can see with our own eyes "revived" fantastic characters, which were created using motion capture technology, which made them as realistic and impressive as possible. This would not have been possible without 3D scanners.
A few decades ago, it was even difficult to imagine all the things that we use all the time today. And in many ways this has become achievable thanks to three-dimensional digitization. This approach provides huge advantages in work (especially for technical specialists - engineers, designers, designers), however, in order to use them to the maximum, it is also necessary to understand computer programs for 3D scanning.