How to pause a 3d print
Can You Pause a 3D Print Overnight? How Long Can You Pause For? – 3D Printerly
If you wonder whether you can pause a 3D print, you are not alone. 3D prints can last many hours, and even days in some cases, so being able to pause a 3D print would be very important.
Yes, you can pause a 3D print directly from your 3D printer’s control box. Simply click your 3D printer to bring up your standard options, then select “Pause Print” and it should pause and home the 3D printer head and print bed to the home position. You can simply resume the print by pressing the “Resume Print” button.
Keep on reading for more information about pausing your 3D prints, and how you can use them to your advantage.
Can You Pause a 3D Print?While it is not recommended that you pause prints, it is very possible to pause a 3D print. Even though 3D printers are designed to run for several hours, it may become necessary to pause prints for several reasons.
Some users are not comfortable leaving the printer running unattended for most of the day when they will be at work. Others consider running it overnight to be too loud since it may disturb people’s sleep.
As soon as you are ready to resume your 3D printing, open the UI and initiate resume. This will undo the pause command and return the 3D printer to the printing state.
If you don’t know where the pause print option is on your 3D printer, kindly read the manual.
You’ll notice a pause option on the user interface (UI), and this can be used to do following:
- Disable heating elements
- Changing filaments
- Changing colors after a certain layer
- Embed various objects into a 3D printed object
- Move the printer to a different location
It is possible to pause your 3D printer for as long as you want, as long as the 3D print stays in place and isn’t removed from the bed or jolted. There may be a mismatch on the layer depending on how well the printer resumes. People usually pause a 3D printer for a few minutes to a few hours.
Some 3D printers are going to perform better with pausing, especially if they are proven among 3D printer hobbyists, like the Prusa Mk3S+ or the Ender 3 V2.
The main goal with how long you can pause your 3D printer is being able to keep your 3D print from moving off the print bed.
The main reason why a 3D printer should not be paused for too long is as one user puts it, after leaving the printer to cool down totally, his print lost adhesion and failed.
The longer you leave a 3D printer paused, there is a higher chance of the print falling off.
For the most part, failures that happen from pausing a print occurs from warping which is when there are significant temperature changes in the extruded plastic.
For more information on how to pause a 3D print watch this video on pausing an Ender 3. The main thing you want to do is to make sure you initiate the SD card so you get the resume option.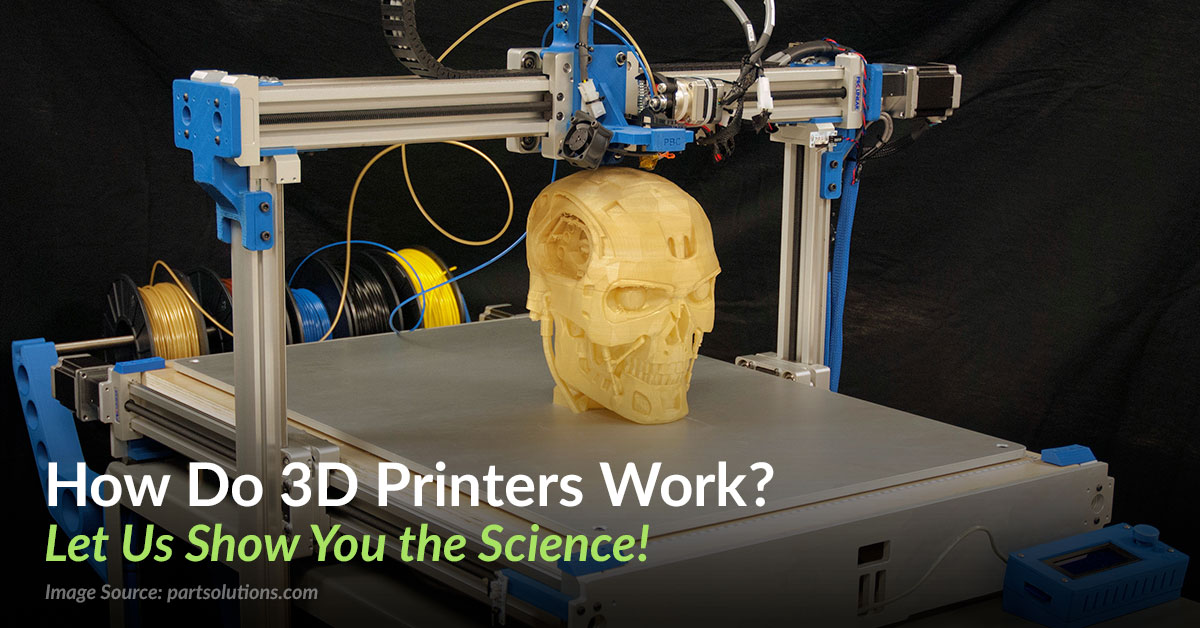
Some people have mentioned that they paused a 3D print overnight. Their recommendation for doing this is that all the parts of the 3D printer must be in good condition.
Upon confirmation, you can turn off the machine, allowing you to take a long pause without any major negative impact.
Some users have paused their 3D prints for several hours and still successfully resumed the print. As long as your print stays in one place, you can pause it for a long time. Using adhesives can make your 3D prints stay in one place better.
To be on the safe side, some users recommend that you pause the print but keep the machine on. This can keep the build surface warm. As long as the build plate is warm, it won’t be too hard for the print to retain its shape.
To slow down the change in temperature, you may use an enclosure or a material that is known not to warp as much. The faster your 3D prints cools down, the more chance it has to warp and change shape. This could eventually lead to losing adhesion from the build plate.
You may also choose to break your 3D prints into smaller parts. This will ensure that you have a hard pause between printing each part without impacting the overall design negatively.
After that, you can simply bond the parts together using superglue or another strong adhesive.
Do 3D Printers Need a Break?A 3D printer doesn’t need a break as long as it is maintained properly and has good quality parts. Many people have printed for 200+ hours without any issues, so if you have a reliable 3D printer, your 3D printer won’t need a break. Make sure your 3D printer is lubricated well and has fresh belts.
3D printers are designed to run for hours and hours at a stretch, with some users confirming that they have kept it running for up to 35 hours. Others have 3D printers that can run for more than 70 hours.
Some 3D printers are better than others at running for longer periods of time. You want to test how your 3D printer runs because some can handle 3D printing for plenty of time while others might not do so well.
If you have a cheaply made 3D printer that isn’t very well known, you might just have a machine that won’t run for so long without needing a break. A popular and reliable 3D printer that has been tried and tested is a lot more likely to not need a break.
These have high quality designs and cooling systems that make sure the 3D printer doesn’t run too hot and can handle constant movement.
As long as everything is fine and no prior faults have been detected, your 3D printer should keep working flawlessly, even for an extended period.
If your 3D printer is not well maintained or has come of age, it may be beneficial if you subject the printer to short breaks at intervals. 3D printers are designed to be long-lasting, but not every part.
Each 3D printer should have Thermal Runaway Protection installed, which is a safety feature designed to protect your printer, your home, and the environment around.
The Thermal Runaway Protection works by checking the readings from the thermistor. If this firmware detects a more-than-required temperature, it automatically stops or pauses the printer until it cools off.
If after an extreme temperature is noticed the printer continues working, it could set the home on fire so having this protection is important, especially when running for long periods of time.
Can I Pause an Ender 3 Printer Overnight?Yes, you can pause an Ender 3 printer overnight by using the “Pause Print” feature within the control box. Make sure not to click “Stop Print” instead because this will end the print altogether. You’ll be able to easily resume the print in the morning.
You can even turn off the whole 3D printer and still resume your 3D print but you have to make sure you initialize your SD card, so your 3D printer recognizes that there is a print to resume.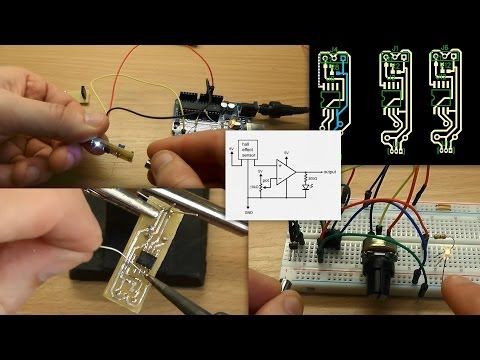
On confirmation, it brings the nozzle back to temperature and on top of the previously paused 3D print to continue from where it stopped.
Can You Pause a 3D Print Overnight? [A Very Clear Answer]
by Mike Brooks | Last Updated: April 15, 2022
3D printing is an amazing technology. It can be used to create prototypes, new products, and even art pieces. But what if we need to pause the print?
Can you pause a 3D print overnight? How long can you pause? This blog post will answer these questions and more!
As an Amazon Associate, I earn from qualifying purchases. If you make a purchase after clicking on a link I may earn a small commission at no extra cost to you.
You can pause a 3D print directly from your 3D printer control box, through your 3D printer file instructions in your slicer, or through control software like OctoPrint or Pronterface. Also, you can pause a 3D print by selecting the “Pause Print” option from the display screen.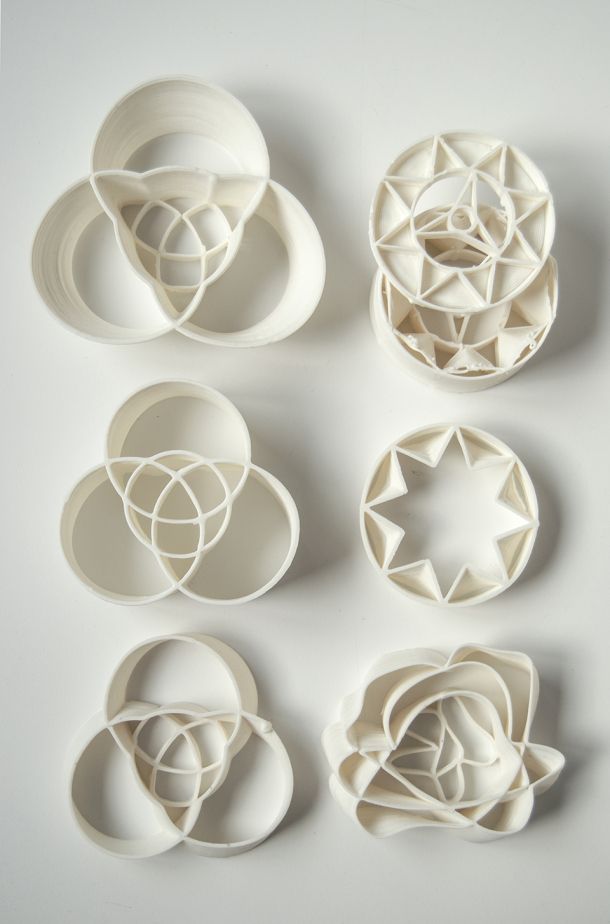
Learn about how to pause prints, and learn how you can use them to your advantage.
Quick Navigation
- Is It OK to Pause a 3D Print?
- How Long Should You Pause a 3D Printer?
- Do 3D Printers Need a Break?
- Do I Need to Pause an Ender 3 Printer Overnight?
- How do you pause the Ender 3 Pro print?
- Does Ender 3 Pro turn off after printing?
- Can a 3D Printer Catch on Fire?
- Conclusion
Is It OK to Pause a 3D Print?
It’s not recommended to stop prints in progress, but it is possible to pause a 3D print. Stopping a 3D printing process is tricky, but there are several reasons why you might need to stop or pause your print.
Some people are scared to leave a printer running unattended for most of the day when they will be at work. Others consider printing overnight to be too loud since people need sleep.
When you are ready to resume your 3D printing, open the UI and click on “Resume” This command stops the 3D printing action, and returns the printer to its previous state.
When you aren’t exactly sure how to pause a print on your 3D printer, you’re in luck because the instructions are always available.
You have a pause option on the user interface, and this can be used to do the following:
- Prevent heating elements from being turned on
- Replacing filaments
- Change colors after a certain layer
- Embed objects into a 3D printed object
- Move the printer to a different area
How Long Should You Pause a 3D Printer?
You can pause your 3D printer as long as you want, so long as the print doesn’t move from the bed or be knocked off. Sometimes the printer can be a bit slow to reprint after setting or changes are made, so just keep checking in on it. Typically, you need to pause a 3D printer for as little as 5 minutes or as many hours as you want.
Some 3D printers, including the Prusa Mk3S+, or the Ender 3 V2, produce better results when they pause. The main goal with how long you can pause your 3D printer is to keep your print from sliding off the print bed.
When we let the 3D printers cool down, sometimes it is not always necessary to unpause them. But if you want something reliable with a long-lasting and strong grip on your print material then you need to take care of it properly.
If you leave a 3D printer idle for an extended period, there is a chance that your print will drop off.
If the problem with your print can be traced to something external and not a property of your filament, it is likely that you have experienced a warp or twist in your prints.
Learn how to pause a print for 3D printing with the Ender 3. It’s important to make sure you initiate an SD card so the resume option is on.
Several people have mentioned that they paused a 3D print overnight. Their recommendation is that all the parts of your 3D printer must be in good condition.
Within a few seconds, the machine will stop, allowing you to take a long pause without any major negative impact.
Some users paused their 3D prints for several hours and were able to resume the print without any difficulty. As long as your print remains stationary, you can pause it for a significant period of time. Adhesives can help your 3D prints to stay in one place better.
Some users recommend that you pause your print, but keep your printer on. This helps to keep the surface you’re working on warm. Make sure the build plate is warm when you resume a print to make it easier for the print to retain its shape.
You can ward off the effects of temperature fluctuation by using an enclosure or a material that is known not to warp. If you want your 3D print to stay cool and not change shape, it’s important to take the time to allow the object itself to cool down. This can lead to adhesion issues with the build plate.
You can break the 3D print into smaller sections. This will ensure no gaps exist between printing each part and that the detail level of your overall design is not impacted.
Once the parts are stuck together, you can use superglue or another strong adhesive to affix them.
Interesting: Impact of 3D Printed Houses on the Market
Do 3D Printers Need a Break?
A 3D printer will need to have an occasional break, but it is manageable if you properly maintain the quality of its parts.
If you have a 3D printer that not only is reliable, but prints multiple times daily without any problems, then you won’t need to worry about having your printer break down on the job. Take the necessary time to ensure that your 3D printer is well-lubricated, and has fresh belts.
3D printers tend to run for hours with some users stating that they have used them for a resting state of up to 35 hours. Others have 3D printers that can run for more than 70 hours.
Some 3D printers are better for running for longer periods of time than others. You want to test how this 3D printer operates because some can handle 3D printing for hours while others might not do so well.
If you have an inexpensive 3D printer that isn’t well known, then you will likely get a machine at some point where it just stops working. A popular and reliable 3D printer that has not been tampered with or repaired before is a lot more likely to last for longer than an average model.
These 3D printers have high-quality designs and cool down quickly so they won’t underperform or malfunction.
Your 3D printer should function normally unless there has been damage or an issue that could compromise the print quality.
You don’t want to completely give up on your 3D printer, so you should take short breaks from the printing state to prevent problems. Some parts of a 3D printer can wear out over time, but this is generally rare.
The safety feature, “Thermal Runaway Protection,” protects your printer and the rest of your home as well as the surrounding environment.
Thermal Runaway Protection connects directly to the thermistor and uses it to do temperature readings. If this firmware detects that the temperature has been excessive, it automatically stops or pauses the printer.
If a printer gets into an extreme temperature and keeps working, it could turn your home into a fire hazard.
Do I Need to Pause an Ender 3 Printer Overnight?
How do you pause the Ender 3 Pro print?
You can pause an Ender 3 printer for a long period of time (such as overnight) by using the “Pause Print” feature within the control box. Make sure not to click the “Stop Print” button instead because this will end a print that you initiate. You’ll be able to resume printing with ease in the morning.
You can even turn off your 3D Printer while in progress and still restart the print later on, but you need to ensure you re-initialize the SD card so that your 3D printer will recognize that a file is simply paused rather than completed.
On confirmation, the nozzle is brought back to temperature and resumes printing from its previous stopping point.
Does Ender 3 Pro turn off after printing?
Ender 3 Pro (see on Amazon) – the printer for all your needs. Its automatic power-off feature keeps both you and the machine safe, keeping it a budget-friendly alternative to more expensive models. The short answer: Yes, Ender 3 Pro does turn off automatically after printing.
You might like: Does a Printer Use a Lot of Electricity?
Can a 3D Printer Catch on Fire?
You might think that a 3D printer is the safest place in your house, but it can actually be one of the most dangerous. The filament used to create objects inside a 3D printer can become extremely hot and catch on fire if not stored correctly!
If you want to avoid this risk, make sure you store any unused filament away from an open flame or heat source and when printing anything with heated filament, always keep a fire extinguisher nearby in case you see some fumes from your 3D printer.
Conclusion
If you’re concerned that your 3D printer is overheating, it might not be a good idea to leave it on overnight. This can be done by using the pause command.
This should be a fairly easy task because it’s already built into the system. This feature allows you to suspend printing and resume your printer in the morning.
When you want to start printing again, use the resume print option. If you’re planning on doing this, there are a few potential issues that you might want to look for, such as creating an uneven finish and having the print come out of position.
To make these minor adjustments, like changing the filament or adding a nut, you will need to keep your engine and bed warm.
Michael Brooks is the founder of M3DZone.com. He sees a very bright future for 3D printing that's why his mission is to try and make this easy for everyone. Discover your hidden talent and creativity. You can follow here: Facebook, Twitter & Pinterest.
Recommended Reading
3D printing for "dummies" from the "teapot" - Personal experience on vc.ru
757 views
I recently became the owner of a 3D printer, before that I knew practically nothing about 3D printing, so I decided to share my experience with the same "dummies", people who are far from this technology.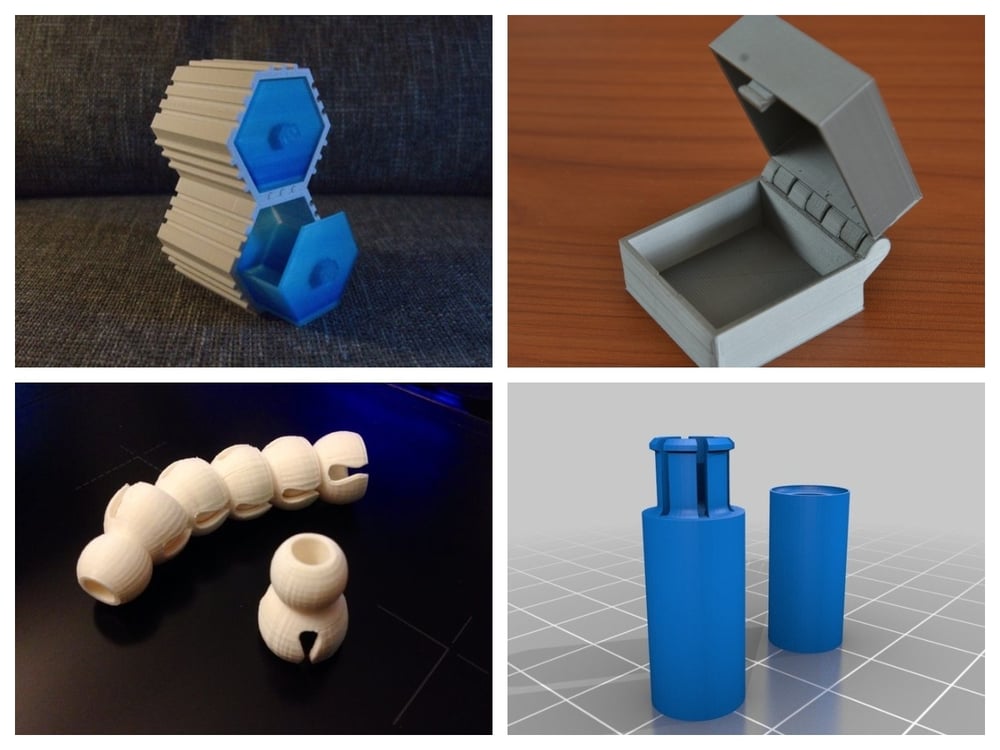 My article is intended precisely and only for such people. The advice of “3D printers” with experience for beginners may turn out to be useless, due to their complexity or certain specifics. I think that my post, based on personal experience (and personal mistakes), not overloaded with technical details, will be very useful to a wide audience. Also, my description is based on personal experience with the Creality Ender 3 Pro 3D printer. The information below may not be useful for models from other companies. Unfortunately, I am not aware of the current Russian realities, and therefore everything described below applies to 3D printer models that are popular in the United States. I also apologize in advance for some words and terms in English (I honestly tried, but could not always find an adequate term in Russian).
First, I will give a few “maxims” and refuted stereotypes, perhaps, however, only mine:
- “3D printing is a complex, expensive, and requires special knowledge” - this is absolutely not true! Perhaps this was once the case, but at the moment a 3D printer is a consumer device that is no more complicated (but rather, even much simpler!) TV, smartphone, computer.
 In addition, it is quite cheap, by modern standards, a hobby - one of the cheapest, probably. Special knowledge for 3D printing at home is not required, or rather, no more, which can be gleaned in a short time from the FAQ on the official website, as well as in user forms.
 - “The 3D printer needs a special room because it stinks and makes a lot of noise” - this is also not true (or, more precisely, not quite true). There are plastics such as PLA and PETG that emit virtually no odor when printed, as well as printer models equipped with near-silent fans. However, the noise from the entry level models is not “fatal”, but, say, like from a gaming desktop / laptop in a “fancy” 3D game.
- “3D printing can make a lot of money by printing at home and selling fun crafts on eBay, well, or save a lot of money by printing things you need for the home, like auto parts, etc.” – unfortunately, this is also not true. Yes, there are a lot of 3D prints for sale on eBay, but as you can imagine, the competition is up to par.
 The simplicity and affordability of this technology has now brought 3D printers to millions of homes; it is clear that a lot of people have made a "brilliant discovery" about the possibility of earning money by selling what they print. Consider 3D printing only as an interesting and low-cost hobby (set yourself an initial budget, for example, no higher than $200-250) that can please you, your family, as well as friends and acquaintances with original crafts and gifts.
 - “For 3D printing, you need to know a 3D modeling program or a CAD system - not at all necessary! There are a huge number of sites offering all kinds of 3D models for printing: scans of famous and not so famous sculptures, and busts of historical figures, and all kinds of figures of cartoon characters, films and computer games, and original witty crafts, like a sundial that shows time in digital form, and most of the models can be downloaded for free - at most, you will be asked to register for downloading! However, owning a CAD program is a very good skill (and, especially, for a DIYer - it was one of the “points” for buying a printer for me), but I haven’t gotten to that yet - but once I master it, I’ll definitely I will describe my experience0012
So, as I wrote above, I got an Ender 3 Pro printer from Creality. Entry level printers from this company are among the most popular in the United States, due to good quality, both manufacturing and printing, low prices, and wide community support. Well, and I will not hide it, a great "deal" in our local Microcenter-e (this is a computer store located in Cambridge, MA) played a significant role: they were sold for $99 at a promotion, plus a $10 off coupon for filament (a plastic thread for print), which I managed to use as many as three times 😊. For the printer itself, I also had to ride a couple of times to the store: they diverged, in the words of the classic, “like meat pies at a vegetarian lunch”!
The printer comes neatly packaged as a DIY kit.
However, assembly, greatly facilitated by the video (paper instructions are also useful, but the video is much more visual), attached to the micro SD-card that comes with the printer, will take you no more than an hour or two maximum, after which the printer is literally ready to work ! What you should pay attention to when assembling: this is the location of the "limit switch" of the vertical axis (Z) - he strives to stand in, as it were, the place allotted for him, but everything is not so simple. This sensor is very important (however, they are all important, so it is important to follow the assembly instructions punctually, and understanding what exactly you are doing), because it determines the distance of the print head nozzle (hot end) from the print bed (heated / print bed).
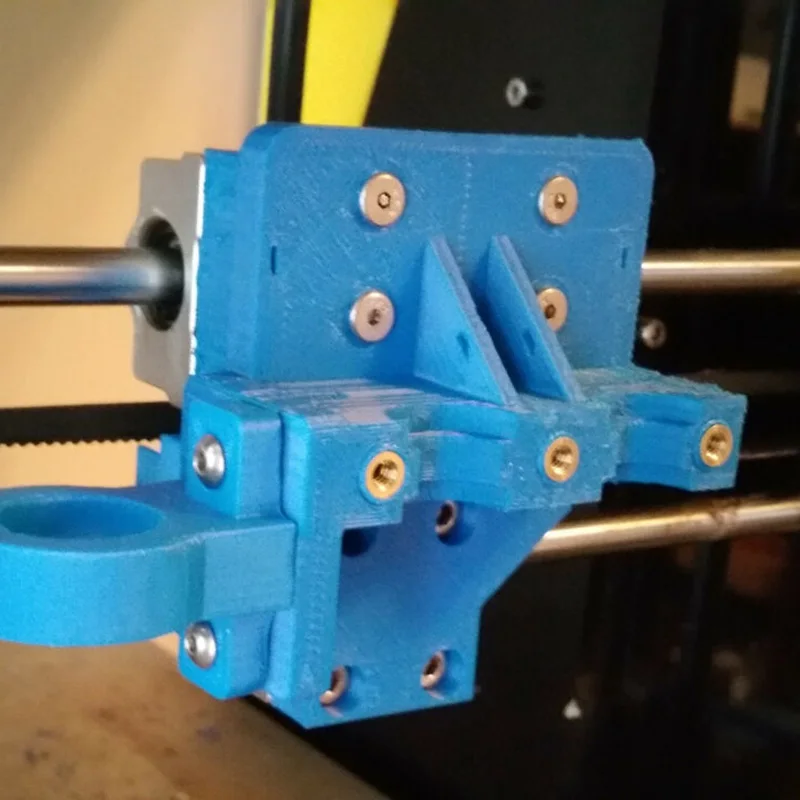
The main elements of the 3D printer
And this distance is very important: if it is large, you will not be able to correctly calibrate the position of the print head, and if it is too small, then the print head may damage the surface of the printing plate. As I did (however, this can be found in a bunch of online manuals, and, probably, on the official website in the FAQ - but I did not look): after assembling the printer, I set all four calibration "lambs" under the printing table to a "relaxed" state , and the “endstop switch” of the Z axis was fixed at a deliberately greater distance so that the print head (hot end) was guaranteed to be at a distance from the printing table. Then I turned on the printer, and chose the command from the “Auto Home” menu. After the printer set the head to the “home” position, I turned it off, and rotating the motor (stepper motor) of the Z axis by hand, as well as carefully moving the “limit switch”, I ensured that the “click” of the “limit switch” (and this means the sensor is triggered) was heard by touching the head of the table surface, after which he fixed the “limit switch” tightly with a key. Then, taking a sheet of ordinary paper, and rotating the “lambs” of the calibration screws, as well as moving the print head across the entire surface of the desktop, he ensured that it moved, slightly “scratching” the sheet. But, unfortunately, such a “cold” calibration will not be enough for a successful print, so I will recommend the “hot calibration” or “battle check” method. Here in this video you can see how the calibration process takes place, as well as download the necessary files (the link is in the video description). There is also a link to print profiles for Ender 3 Pro - I also recommend downloading them (and what they are for, I'll tell you later).
After assembly and calibration is complete, your 3D printer is ready to go! If you stocked up with a kilogram coil with PLA plastic in advance (PLA filament, more about the plastics used for printing will be in the next part), then you can safely install it, and if not, then a small skein of plastic filament comes with the printer (but it’s better to buy a coil right away, because filament is also required for calibration!). On the micro SD card that came with the printer, there are several models ready for printing - these are files with the extension .gcode (G-code is a programming language for CNC devices, understood by most 3D printers. Don't worry, you won't need to learn features of this language - special programs called "slicers" (slicer) will take care of this for you, so that you load the filament (plastic thread from the spool) through the extruder (extruder, filament feeder into the print head) through a small hole in the extruder ( pressing the clamp with your hand and directing the thread through the feed tube, move the thread all the way into the print head), insert the micro SD card into the printer, and select the model in the form of a . gcode file, you can safely start printing!
Models in gcode bundled with Ender 3D Pro
You can print anywhere - in the office, in the dining room, in the living room, in general, where you assembled the device. Later I will tell you where it is better to place the printer on a permanent basis, but any place is suitable for test printing - there will be no unpleasant smell or much noise.
But here's one thing you need to consider beforehand: 3D printing takes a hell of a lot of time! Even a small model can be printed for several hours (and a large one for several days!), Depending on the selected slicer settings, speed and printer settings. So, when starting to print, take this into account - the printing process, of course, can be paused (and then resumed), but for a start, I would recommend bringing the process without interruptions - well, to see a real good result, and feel confident in on their own, as well as the capabilities of the printer.
It should be noted that Creality uses the open source Marlin software as the firmware for its entry level 3D printers, but unfortunately pre-installs a very outdated version. If you are a programmer, or just “on you” with a computer for a long time, then it will not be difficult for you to assemble the latest version of Marlin yourself, for example, through VSCode, and then “flash” it via an SD-card (you just need to clear the card, and copy the release file with the .bin extension there). Otherwise, you can use my build - download, unzip, copy to a blank SD-card, turn off the printer, insert the card, turn on the printer. After a short time, the new firmware will be installed on your Ender 3 Pro (other printer models may require different builds). However, you can postpone this option for later - the printer is ready to work right out of the box.
Here I want to mention a few more useful printer improvements that will be useful for a beginner (however, these improvements are optional).
First, I recommend that you install and connect the open source OctoPrint software to your printer - you will need a Raspberry Pi with a camera for this. I used a cheap Raspberry Pi Zero W (with built-in WiFi) which, while not officially supported, works great. OctoPrint will add to your entry level printer far from entry level "features" - the ability to remotely control and manage the printer via a web interface, as well as from a great smartphone application.
This application is actively developed and well supported, has a very large and friendly community; many useful features are implemented either directly out of the box or using plugins; the documentation is also extensive and comprehensive. Installation, as well as connection to the printer, are extremely simple: download the sd-card image, edit the configuration file (specify the credentials of your WiFi access point), copy it to the card, connect it using a micro USB ↔ micro USB OTG cable to the printer - and profit!
My RPi Zero W with camera and temperature sensor connected to Ender 3D Pro
Secondly, I recommend that you immediately get spare surfaces for printing (build surface plate, this is a removable surface that is installed on a heated bed (heated bed), and on which, in fact, printing takes place). The printer comes with a "standard" flexible magnetic surface, and I assure you: you'll have to get a new one soon enough! So, it's better to take care in advance, because their cost is low, on Amazon they ask for $9.99 for a pack of two. You can also “upgrade” to a glass plate (it costs a little more), it has both its advantages and certain disadvantages, I will list them briefly. Advantages of the stock flexible magnetic plate: thanks to the magnet, it is easy to attach and remove from the heating bed for cleaning, thanks to the flexibility, it is very easy to remove finished models. Disadvantages: the plastic coating, on which, in fact, the printing takes place, is quite easily damaged and deformed both by the “regular” printing process itself and by the print head, in case of incorrect calibration, as well as by excessive heating of the heated plate - in general, a short-lived part. But, due to its low cost, it may well (and should!) be considered as a “consumable”. The advantages of glass plate include greater durability, cleanliness and "adhesive" properties of this surface.
![]() Disadvantages: slightly more difficult to attach to a heated bed (usually it is recommended to use ordinary office clamps for this, but personally I don’t recommend it because of their size; it’s much easier to buy special small clamps, they cost a penny on Amazon), and the difficulty of detaching printed models - you can't bend a glass plate. By the way, glass plates are also very inexpensive;
Disadvantages: slightly more difficult to attach to a heated bed (usually it is recommended to use ordinary office clamps for this, but personally I don’t recommend it because of their size; it’s much easier to buy special small clamps, they cost a penny on Amazon), and the difficulty of detaching printed models - you can't bend a glass plate. By the way, glass plates are also very inexpensive;
Thirdly (albeit looking ahead a bit), I would like to recommend this small "update", namely, glue for "sticking" models. Such glue is cheap (for 6 "sticks" they ask for $ 13), it is completely environmentally friendly, unlike popular home-grown products (there will be a story about them later), it is washed off with ordinary water, it does not smell. When using it, there are also a couple of “nuances”: you should not apply it to a cold surface, and you should not apply too little, because it will lose its adhesive properties when heated, and requires some practice in determining the optimal amount, but the ease of use of glue more than covers everything this is.
Now I want to share my thoughts on where is the best place to place your new 3D printer you just bought. 3D printing is actually a “heat-loving” process, so it is highly desirable to place the printer in a heated room with room temperature (at least 20 ° C - 3D printing traditionally uses temperatures in degrees Celsius - well, or 70 Fahrenheit). As I already wrote, at the very beginning, when printing with some types of filament, for example, PLA, there are no unpleasant odors, and the noise from the fans is comparable to the noise of the fans of a gaming desktop or laptop during a fancy 3D game. Those. in the absence of a special room (workshop in the basement or garage), it is quite possible to install a printer in the office, or even a children's playroom, or family room. What's more, there is a way, by purchasing a printer enclosure, to reduce or even eliminate both possible odors and likely noise. I will talk about this in more detail later.
I personally installed the printer in my "workshop" in the basement. We do not heat much there, but we maintain the temperature just below room temperature. Keep in mind that the printer, by itself, takes up a certain amount of space; you will also need a place to place spools of filament, a place to process models. But, if you are going to work with ABS plastic, and deal with the "finishing" of ABS models by means of an "acetone bath", then it is definitely better to work in a non-residential area. I will talk about the properties of some plastics used in 3D printing in the next part.
To be continued.
The material was prepared by the ITSOFT data center - hosting and renting servers and racks in two data centers in Moscow. Over the past years UPTIME 100%. Hosting GPU farms and ASIC miners, renting GPU servers, communication licenses, SSL certificates, server administration and website support.
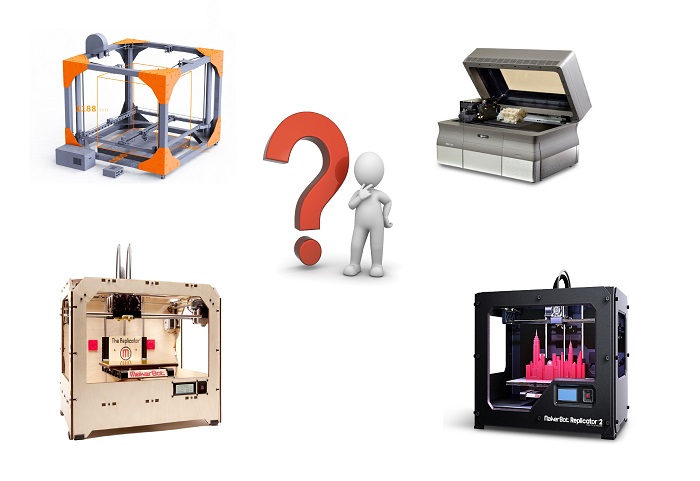
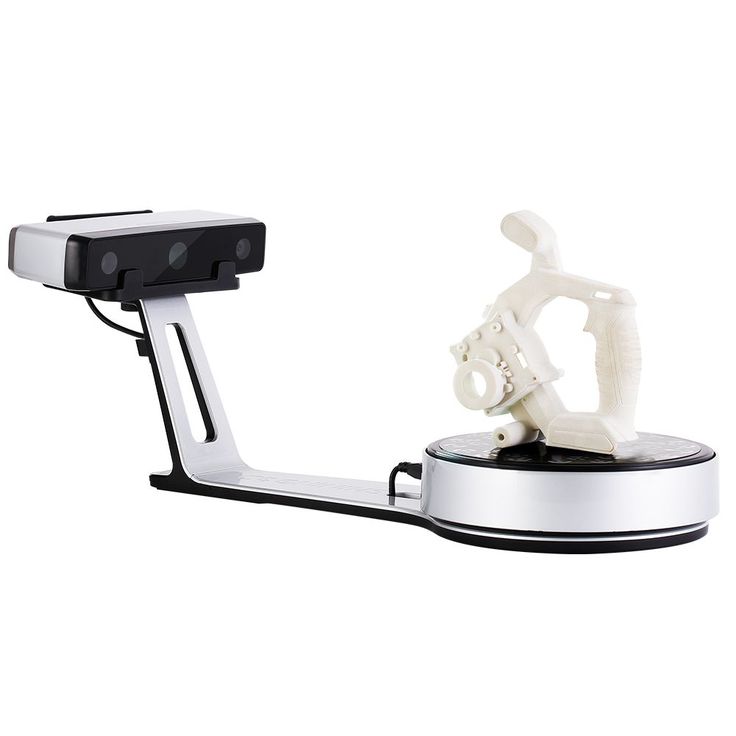
Single extruder color 3D printer
top sellers
-
Bearing 604UU U604ZZ
U-bearing U604ZZ 604UU 4*13*4
35.
 00 UAH
 -
Thermal mat for 3D printing 200 x 200 mm
Thermal mat for 3D printing
150.00 UAH
-
Buy epo3d+ 3D printer
Epo3d+ Ukrainian FDM 3D printer on HIWIN rails. Thanks to reliable...
UAH 35,000.00
-
ABS granules
ABS granules for extrusion
400.00 UAH
-
PLA
PLA environmental plastic from Plexiwire.
 100% advance payment....
 UAH 375.00
-
Buy ABS plastic (ABS)
ABS plastic from Plexiwire. 100% prepayment. Free shipping...
UAH 220.00
-
Mini motor reducer 12v 100 rpm
high torque mini electric motor. Its size is...
150.00 UAH
-
Nozzle for 3D printer 1.75 mm, for E3D and MK8 hotends
Nozzle for 3D printer 1.75 mm 0.2/0.3/0.4/0.5
35.00 UAH
-
PETG plastic for 3D printer
PETG plastic from Plexiwire.
 100% prepayment. Free...
 UAH 360.00
-
SHF-20 shaft support
SHF-20 shaft support for CNC
60.00 UAH
-
A4988 stepper motor driver
35.00 UAH
-
Buy epo3d 3D printer
Ukrainian epo3d 3D printer built on the basis of modern kinematics...
UAH 18,000.00
All best sellers
categories
Information
Single extruder 3D printer in color
Until recently, 3D printers with multi-color printing were high-end printers, the cost of which was beyond the reach of the average consumer. Now there are various options for creating colorful 3D models.
Let's take a look at direct color 3D printing, where the color comes from multi-colored filaments used in a single nozzle FDM printer.
This article will focus on color printing with a single extruder by assigning multiple tasks to the software. The resulting G-code will give tasks to the printer, start with a single colored thread, and then pause at a certain layer height. At this point, the new filament is replaced and the print job is resumed. This method allows anyone with a standard single extruder printer to create a multicolor object.
If changing filament while printing seems tedious, you can install an external device Mosiac Manufacturing, Prusa MMU 2.0 or a device with a large print head standing on the Micro, Crane Quad.
But if you do not have such multi-color devices, but you need to complete the task, you will have to resort to manual color replacement.
3D printing with layering a certain color at a certain height can be used in the production of: logos, board games, patches, badges, key rings, etc.
How to set pauses when printing in Gcode to replace the thread in Simplify3D and CURA
This quick guide will help the user without knowing Gcode to easily insert pauses into the code using standard slicers.
Simplify3D
this piece of code will do all the magic:
G91; Set to relative position
G1 Z20 F5000; Raise the nozzle (lower the table) 20mm along the Z-axis at a speed of 5000mm/min.
G90; Return to absolute position
M0; Pause and wait for user input to continue printing
At this point, change the thread with a different color.
In Simplify3D, we will use the Process > Scripts > Post-Processing setting to inject the above Gcode (no comments) something like this:
{ REPLACE "; layer 3, Z=" " nG91 nG1 Z20 F5000 nG90 nM0 n ; layer 3, Z ="}
Of course, you will need to choose a layer number for the pause (more on that in a moment). Also note that the " n " parts of the code just create a newline in GCode.
Switching to the slicer preview of your model will make this part easier. In Simplify3D, it's a matter of dragging the slider at the bottom of the preview screen (or entering the layer number).
CURA
These settings give you complete control over how you pause printing:
• Pause Height / Layer: The height or layer number where you want to pause printing.
• X and Y Parking Printhead: Moves the nozzle to the specified coordinates when printing is paused.
• Head movement Z : raises the nozzle (lowers the table) during the pause, bringing it to the specified value.
• Retraction: parameters for retraction during the pause period.
• Extrusion amount and speed : amount of material to be extruded when reloading a new filament.
• Repeat Layers: You can repeat all previously completed layers to increase adhesion.
• Standby temperature: Nozzle temperature in pause mode.
Slic3r
Locate the Custom G-code section on the Printer Settings tab.
Scroll down to the heading After layer change G-code and paste the following code:
; LAYER: [layer_num], Z HEIGHT: [layer_z]
{if layer_num == 45}M600 ; Color change {endif}
If you want to do more filament changes, just duplicate the last line like this:
{if layer_num == 45}M600 ; Color change 1 {endif}
{if layer_num == 65}M600 ; Color change 2 {endif}
{if layer_num == 85}M600 ; Color change 3 {endif}
Gcode Edits
If you're a bit versed in G-code and you're interested, then this method is for you.
Select the desired saved file with *.gcode extension. Open with a simple text editor - for example Notepad (Notepad) and start editing.
To do this, we determine on which layers it is planned to replace the color or material. Press Ctrl-F (search by text) and enter in the search window “layer 10” where for example the number 10 is the layer where the replacement takes place and click “Find”. After the line “layer 10”, paste the previously copied text with the code.
G91; Set to relative mode
G1 Z10; Lower table (raise print head) 10 mm
G90; Return to absolute mode
G1 X0 Y0; Zero (Home) X & Y
M0 Click to reset; Pause and wait
G91; Set to relative mode
G1 Z-10; We go back 10 mm
G90; Return to absolute mode
After executing these commands, the 3D printer returns to the last location it was in when the print was saved.
M600 command
This method, like the previous one, allows you to manually insert the M600 command into the G-code.
The advantage over the above is that you insert only one line with the M600 command into the code, and the printer itself rolls back the head to a safe place, ejects the filament and then loads it, and continues printing from the interrupted place.