Freecad 3d printing tutorial
FreeCAD Beginner Tutorial & How-To | 3D Printing Blog
by Fabian | September 13, 2018
Are you thinking about getting started with 3D modeling and 3D printing but don’t know exactly where to start? Then it probably makes sense to take a look at FreeCAD – a free yet powerful 3D design program. This hands-on tutorial by Bram de Vries will enable you to create your first 3D printing project with FreeCAD – all the way from your first sketch to the final product!
In this tutorial you will learn to create a 3D file in FreeCAD:
from a sketch (left) to the final 3D model (right).
About the 3D Modeling Software FreeCAD
FreeCAD is a popular open source design software for creating 3D models of real-life objects. Best of all it – but you already know this – it comes for free (just download it from on the FreeCAD website)! The ‘CAD’ in its name simply stands for ‘Computer-Aided Design’.
FreeCAD is a 3D design program that allows you to easily navigate and modify your 3D model by browsing back into the model history and changing its individual elements. It can be used on Windows, Mac and Linux, and reads and writes many open file formats including popular 3D printing formats such as STL, OBJ, and DAE.
This 3D modeling software is most suitable for geometric designs, such as precise technical parts, replacement parts, gadgets, cases, scale models, etc. It’s less suited for creating organic objects such as figurines of humans, animals, or plants.
Enough of the small talk – we’re here to design! Let’s get started with the FreeCAD tutorial!
FreeCAD Tutorial Part 1: Creating and Editing PrimitivesFreeCAD comes with several ‘work benches’. These are basically a pre-defined set of tools that you are going to use. For example, you can create a draft by choosing the ‘Draft’ work bench. However, we will start by using the ‘Part’ work bench – because we are here for creating a real physical object!
In the video below, your instructor Bram will first show you the very basics: how to choose the ‘Part workbench’, how to start your first project, how to navigate (press Alt + left mouse button), how to add basic primitives (a box, a cylinder, etc. ), and how to change the size, radius, and position of these primitives (under the menu ‘Property’).
FreeCAD Tutorial Part 2: Subtracting and Combining Primitives
In this second video, Bram will teach you some more tricks on how to use primitives. For example, you can rotate them by changing their angle.
You’ll also learn how to subtract different primitives from each other with the ‘cutout’ tool. For example: if you place a cylinder within a box and subtract them, the box will have a cylinder-shaped hole. However, the cylinder can still be edited. Changing the height and radius of it will now affect the height and radius of the hole.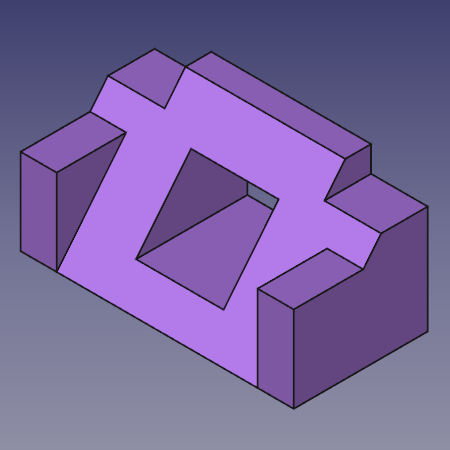
You will also learn the opposite of subtracting two primitives: combining them. You can do this by selecting both elements and clicking on the ‘Make a union of several shapes’ button.
FreeCAD Tutorial Part 3: Creating A 2D Sketch
For creating more complicated designs, Bram prefers to create two-dimensional sketches first. He switches the work bench to ‘Part Design’ and shows you how to set the best sketch orientation (‘XY-Plane’).
FreeCAD lets you draw lines freehand with the ‘polyline’ tool. If you draw straight lines, FreeCAD will notice this and will ‘constrain’ them immediately for your convenience – which means that the line will be perfectly parallel with the horizontal or vertical axis.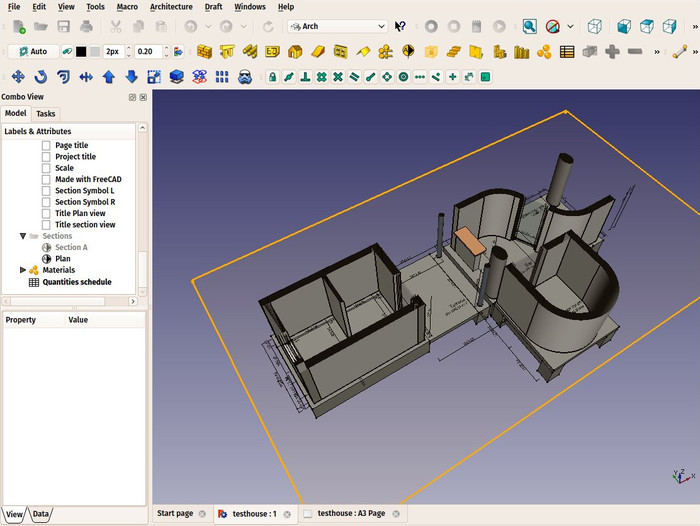 You can also add or delete these constraints manually.
Furthermore, you need to precisely define the length of each line by selecting it and choosing the ‘Make a dimension’ tool. Once all dimensions are set, FreeCAD will tell you that your sketch is ‘fully constrained’. Sounds complicated? The video below will show you that it’s quite easy!
FreeCAD Tutorial Part 4: From 2D Sketch to 3D Model
Your 2D sketch is ready – it’s about time to turn it into a 3D model! First of all, click the ‘Close the editing of the sketch’ button, then head over to ‘Tasks’ and select ‘Pad’. Choosing the ‘pad’ means that FreeCAD automatically turns your sketch into the third dimension (side remark: choosing ‘pocket’ subtracts a three-dimensional shape).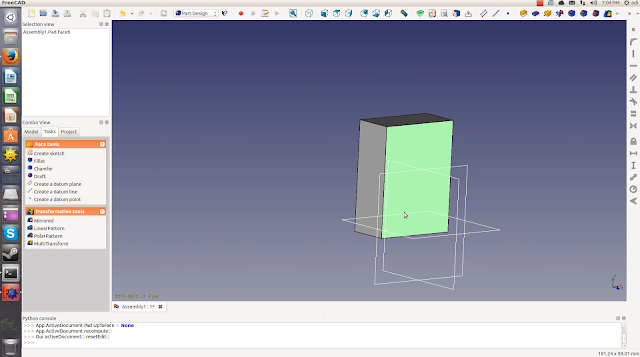
Once you see this 3D object, Bram will show you how to add additional features to it. You can click on any face (surface) of your three-dimensional object and click on ‘create a sketch’. Wait… what?! Yep, that’s going to happen a lot: in FreeCAD you often jump back and forth between sketches and 3D models.
You create a 3D model based on a sketch. Then click on one face (surface) of the 3D model and continue with the next sketch. After that, you turn this sketch in a new 3D shape, etc. This way of working enables you to add (from ‘sketch’ to ‘pad’) or subtract (from ‘sketch’ to ‘pocket’) new features and create more complicated shapes.
The best thing about this: you can always go back. Each and every sketch, pad, and pocket can be re-edited any time.
FreeCAD Tutorial Part 5: Advanced 2D Sketching
In this part of the FreeCAD video tutorial you will learn how to use some advanced tips and tricks to work with 2D sketches. Bram will show you how to logically split up and think about your model and how to use shortcuts to reach the desired results.
FreeCAD Tutorial Part 6: Analyzing a Finished 3D Model
Now we come to one of the most powerful parts of the tutorial. We’ll be looking at a 3D model of an audio knob that Bram created. He’ll go over his design step by step and show you exactly how he created it. This will give you a good understanding of all the working processes needed for creating a design in FreeCAD.
FreeCAD Tutorial Part 7: Hands-on Exercise
It’s time to get our hands dirty! Bram’s downloaded a sketch of a real spare part and wants to create it from sketch. He will go through the design process step by step and repeat everything you learnt in the previous videos. If you can create this file you have successfully mastered this tutorial and are good to go for your own creations now.
FreeCAD Tutorial Part 8: 3D Printing
Now the last thing to do is the most fun part: 3D printing your design! Save your design (best to save it as an STL file), hop over to i.materialise’s 3D printing service, and upload your file. You will instantly see how much your model costs in 19 different materials and 100+ different finishes.
Upload your model to the i.materialise online platform for an instant price quote
If you liked this tutorial you might be interested in learning to use SketchUp as well. Click here for our beginner-friendly SketchUp tutorial. Also make sure to avoid these 5 common mistakes when modeling for 3D printing.
Prepare your model for 3D printing with FreeCAD
This tutorial has been realized for FreeCAD users interested in 3D printing. With that FreeCAD tutorial they will learn some tips to realize a printable model with that software.
Thus in this 3D modeling software tutorial, you will learn best practices to model, correct and export a part for 3D printing. You will be able to :
- Model for 3D printing with FreeCAD
- To analyse and export in an optimal way your 3D file
- To resolve common modelization issues
Freecad is a 3D modeling software oriented to industrial design. It’s based on geometric shapes manipulation (entirely sized) or constraints sketches. (eg : each point of the drawing has a specific coordinate). In that way, this 3D design program is an excellent tool for modeling a functional part which you have already in mind.
Written in Python, Freecad has a parametric functioning. The operations sequence is accessible in the arborescence, which permits to modify at any time, the sizing of the manipulated parts.
With FreeCAD, it’s possible to directly export to .STL (format), with a good accuracy. As .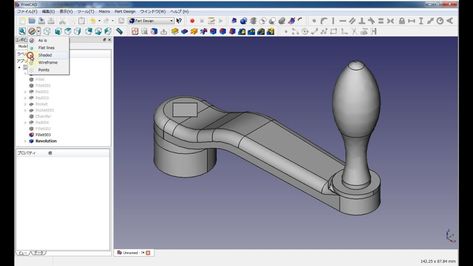 STL format is the reading format for 3D printers, Freecad is adapted for designing for 3D printing.
You don’t need to be an expert in Freecad to follow and understand that 3D design tutorial. Nevertheless, it’s important to manage the main functionalities as we will here be focused on good design practices to create 3D models for 3D printing. We won’t have the opportunity to present in details the Freecad design features step by step. To get more information on the basics of this 3D modeling software, you can look for a video tutorial for FreeCAD on YouTube, for instance.
FreeCAD is an Open Source software, completely free. Adapted to do-it-yourself projects or to light corporate modeling, FreeCAD allows to make a layout, has functionalities (modules) for robotic, architecture, and has also a finite elements calculations module. Being an Open Source software, this 3D CAD software presents the advantage to be entirely modular, thus you can add your own Python functionalities if needed, either download it and add it as a macro.
When you will be done with reading this FreeCAD tutorial, you will be ready to use our 3D printers! Simply send us your FreeCAD file, choose one of our 3D printing materials, and you will get your 3D objects!
Summary
1. Designing (modeling) for 3D printing
- 1.1. The Part module
- 1.2. Part design workbench
- 1.3. Hollow out your model
- 1.4. Text and relief patterns
- 1.5. Moving parts and assembly
2. Analyse and export your 3D file with FreeCAD
- 2.
 1. Measuring elements and distances
 - 2.2. Choice of format and export
3. Fixing frequent mistakes
- 3.1. File too heavy
- 3.2. Mesh smoothing tool
- 3.3. The meshing orientation
- 3.4. Evaluate and repair Mesh
- 3.5. Boolean tools operations
- 3.6. The multi-bodies Files
guide for beginners and pros, features of the software
In order to create high quality 3D objects , you can use the Freecad program. It is easy to learn, has a large number of useful tools, allows you to expand functionality. This program creates parametric objects that allow you to correct the shape of the model without making changes to the previously prepared drawing.
Contents
- 1 Scope
- 2 Functionality of Application
- 3 features of the interface
- 4 Work with
- 5 Advantages of the editor
- 6 Disues
- 7 CONCLUSE
- 8 Useful video
This program can be used for designing 3D parts . It is easy to learn and has a clear, thoughtful interface. Freecad is designed for parametric modeling. This means that by doing model , its can be changed , adjusting the parameters and not making more complex changes. Thus, the risk of reducing the quality of the drawing during revision is reduced.
Modular structure allows to expand the functionality of by adding new components . The use of scripting languages makes it possible to independently create the necessary additions that improve functionality.
This application will be useful for the following categories of users:
- Freecad for beginners as a home hobby . Suitable if the user wants to draw a 3D drawing without having professional 3D design skills. When working, practical experience in using such systems is not required. The network has a large number of understandable training materials and even a Freecad manual in Russian.
- Software for experienced users . Using a professional system at work, it will be easy to find similar tools in the standard version of the graphic editor.
- This program will be convenient to work with programmer who knows scripting languages. It will not be difficult for him to figure out how to work, using Python and Qt.

Help! Freecad can work with different operating systems: there are options for Windows, Linux and MacOS. The software is open source, meaning the application code is available to users. This makes it possible to make adjustments to the program if necessary.
Interested : FDM 3D printer
Application functionality
The program was created for 3D CAD modeling. The main type of drawings are engineering . The application has proven itself to be used as a program for architectural modeling . The program also falls into the following categories: CAD , CAE , PLM , Cax . There are opportunities for to work with other applications, such as KiCad .
The program provides a large number of 2D tools .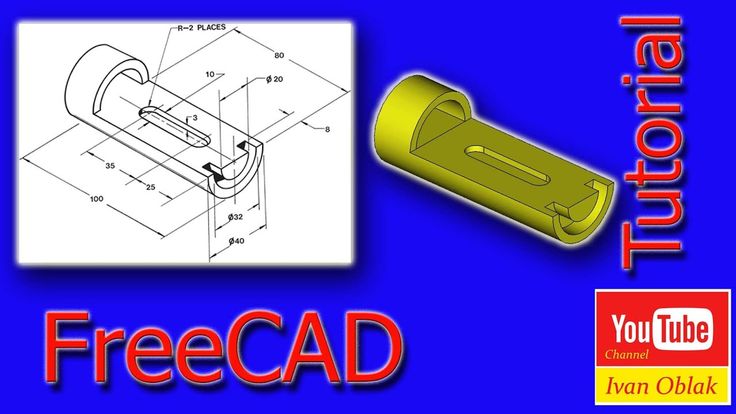 They allow you to make a high-quality two-dimensional image of a three-dimensional object .
The functionality of the application allows you to do the following:
- High quality 3D models .
- Parametric objects giving advanced design options.
- With Freecad you can do architectural modeling .
- Here you can design the appearance of objects, working with its three-dimensional model.
- You can create a set of 2D sketches for 3D parts .
- Obtain high quality drawings based on 2D models .
- Use large set specialized tools for design .
- The kit contains a large number of primitives , with which you can compose complex shapes .
- You can select the optimal dimensions of objects after creating the initial drawing.

- Special environments are provided for performing professional tasks in certain areas.
- Architectural objects can be displayed as combinations of blocks of different shapes and sizes .
- Program interface can be customized according to your requirements.
These and other features allow Freecad to be used effectively for 3D modeling. In the latest models, additional measures have been taken to ensure that the program demonstrates stability and reliability.
Useful reading : All about 3Ds Max
Interface features
The tools used are divided into groups :
- The second group opens access to existing primitives . Their use allows you to speed up the work on the model.
 Here you can choose the following options: sphere, cube, pyramid, parallelepiped, torus, cone and others. There are the ability to create self-designed primitives . In order to get started, just click on the appropriate button.
 - The third group provides the possibility to perform logical operations on the displayed objects. They can be used to select, for example, union or intersection of shapes .
embedded spreadsheets available. They are used to store Freecad model parameters. The contents of tables can be changed by modifying the created object.
Creation of multi-component structures is available. In this case, parts are first created, and then the desired object is assembled from them.
Attention! The interface provides links to a large number of tutorials and model drawings that can be used as an example.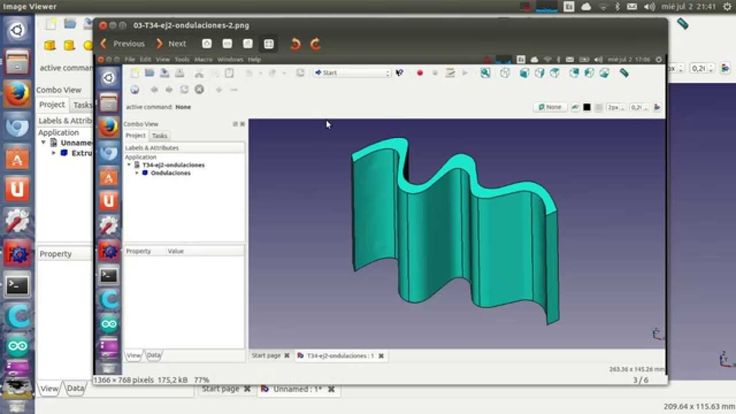
Might be interesting : SolidWorks
Working with the software0003 the main window
of the program. It is divided into two parts. To the right there is field , in which three-dimensional model will be created. For , the left fields can be selected from two tabs: "model" and "Tasks" . On the first one, you can switch the view , select the necessary elements , change the scale , rotate the part or do other actions. The second displays features tasks performed . If some of them are active and require input from the user, then a pencil icon is displayed next to them.
In order to select suitable tools set the corresponding mode . It does not provide for the simultaneous presence of all of them at once.
Before starting work, go to the main menu item - "Desktop" . After that, it is possible to choose from all available operating modes. Available draw , edit or view .
The program uses its own graphic format
: FCStd . When saving, you can choose one of the most common options: Freecad DWG, DXF, SVG, PDF, and many other common options.When working with models , can be used as follows:
- There is a module for rendering.
- Having created a three-dimensional object, it is possible to create two-dimensional drawings on its basis in various projections.
- Predefined primitives can be used to create a model. It is not difficult to create new ones yourself, if necessary.
- Before working in Freecad, it is possible to choose from several raster formats.

- The program can use a module that simulates the processing of a metal part.
- There is a built-in environment for creating, debugging, and working with macros.
- You can work in the editor not only visually, but also with the help of script commands.
This program, although it has significant capabilities, is nevertheless distinguished by a modest consumption of computer resources. It is convenient to work with it even on budget-class machines with RAM from 800 MB . The distribution kit occupies 125 MB , which is quite a bit for modern utilities.
Useful to read : 3DRESHAPER
Benefits of the editor
Reviews left about Freecad show that the program has the following advantages: Available to work with figures of varying degrees of complexity .

The drawings created with the editor are parametric. And when drawing them, you do not need to make significant efforts to obtain a high-quality result.
It can be interesting : PTC Creo
Disadvantages
The program has only two obvious disadvantages:
- It does not include
Conclusion
Freecad helps you draw 3D details. Here you can create your own add-ons to increase the functionality of the editor or use ready-made ones. However, the level of functionality is not sufficient for use in complex commercial projects.
Helpful video
Software for modeling and printing on a 3D printer
Contents
-
- Programs for 3D modeling
- types of files for 3D printing
- Free programs
- Paid programs for 3D moderation
- Programs for cutting 3D models (slisers) 9000
- To summarize
The whole cycle of creating a part on a 3D printer can be fit into three stages: Creating / finding a model, cutting a model in a slicer, printing on a 3D printer.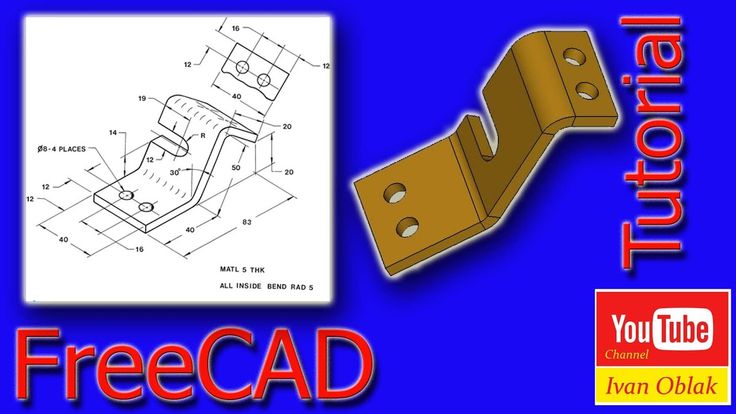 Each stage is tied to its own program. Models are created in special programs, then in the slicer the model is “cut” into steps that the printer will sequentially execute. The resulting list of steps (commands) is either placed on a memory card and run from the printer itself, or sent to the printer via a wired/wireless connection. As a result of all these actions, we get the product. Therefore, looking for a “3D printer program” is wrong: you need to look for a modeling program and a slicer.
3D modeling software
Programs for 3D modeling are divided into two large groups:
Obviously, when creating a drawing, an engineer needs precise tools: a ruler, pencil, compass, etc. But the artist needs more free tools: brushes, pastels, palettes and others. Programs are divided according to the same principle: in engineering programs, there are all the tools that allow you to accurately specify the characteristics of each element of the part, and in art programs, tools are created to give smoother forms so that the model looks as natural as possible.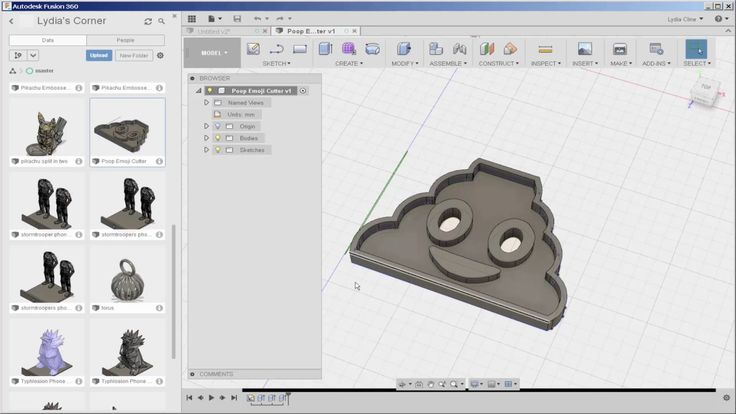 Of course, in art programs it is possible to model technical products, but this is comparable to drawing a drawing with pastel: it is inconvenient, difficult and inaccurate. Therefore, it is very important to determine why you need a simulation program.
Tip: It is best to learn one or two programs at a professional level, as this will allow you to create complex models. But you should also know the basics in other programs, since a large circle of knowledge allows you to more flexibly choose the approach to creating models.
File types for 3D printing
To begin with, it is worth understanding what types of files are involved in the manufacturing process of the part. The first step is to create a model. It can be saved in the format of the program itself (for example, KOMPAS-3D files have the .m3d extension, while 3ds Max has the .MAX file extension). Such files can only be opened in the programs in which they were created. But we need a universal format - STL. All programs can save models in this format. It stores the polygons that create the model.
All files are divided into 3 categories:
-
Files that store polygonal information (STL, OBJ, etc.). They are analogues of a raster image. It is possible to increase the quality of 3D models in this format only by smoothing, but in this case small details will be lost, and the file weight will increase greatly.
-
Files that store the steps for creating a part (STEP, STP, etc.). Here you can draw an analogy with vector images. Each element is specified either using simple dot connections (for example, as in a cube or pyramid), or using formulas (any curved, rounded objects). Models in this format can be scaled without loss of quality, while maintaining a relatively small file size.
-
Utility files that store steps for a 3D printer (GCODE, GCOD). These files store the commands that the printer executes and, in some cases, comments (for example, with what settings the model was cut).
 Some slicers can simulate the movements of the printer, thereby rendering the model, but it is impossible to convert a file from this format to a full-fledged model.
Be careful! If you are not sure that the GCODE file is intended for your printer, then you should not print it, because the print area for each printer is different. On third-party firmware there is no limit on the maximum travel distance, some third-party software commands may lead to incorrect operation of the control board. If the printer tries to move the print head out of the printable area many times, then it can harm itself!
If the files are in the same category, then they can be easily converted from one format to another with almost no data loss. The formats indicated in brackets are a kind of “transits”. For example, Inventor has its own file format - itp, and Fusion 360 has its own - f3d. But if you save the file in Inventor in the generic STEP format, you can open it in any engineering program and then save it in that program's format.
Free programs
Usually, free programs are either limited in functionality or created by enthusiasts, which is why they have a very crooked interface and a lot of errors. But their functionality is enough to create simple models, and in some cases, such programs can completely replace paid software.
Tinkercad
In essence, this is not even a program, but a website, that is, it does not need to be installed on a computer and it opens from any device that has Internet access. But this is its main disadvantage - without Internet access, you will not be able to download any model for yourself, because each project is initially saved in the cloud. You also need to register to use this site. Initially, the site was created for children, so each tool is intuitive. The program is suitable for modeling simple products: gaskets, bushings, adapters, covers, boxes, etc.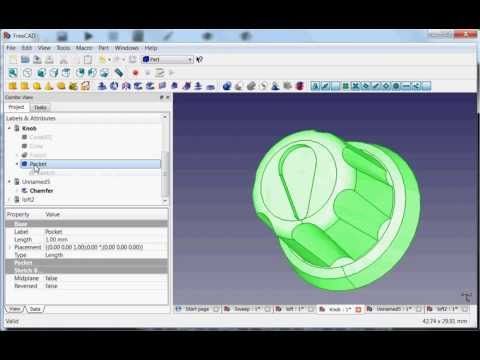
Pros:
Cons:
-
Inability to work without the Internet
-
Each individual project needs to be downloaded
-
Limited number of tools
FreeCAD
This program is designed to create technical products: fasteners, bushings, hinges and more. Since this is an open source project, it is distributed free of charge. At the same time, it has all the necessary functionality for opening and editing files with the .step extension - a universal format for all engineering programs. It is also worth noting the ability to add addons - special subroutines that allow you to perform any actions in a fully automatic mode. For example, there is an addon that makes it easier to create various gears. In this program, you can create more complex products: mechanisms, gearboxes, hinges, etc.
Pros:
Cons:
OpenSCAD
This CAD is closer to programming languages than to modeling: each object or any action is specified as a code. This allows you to create universal models. For example, a coin sorter: once you write the “model code”, you can create a huge number of variants of this model for different countries, changing just a few parameters. This program, like the previous one, is an open source project, as a result of which it is regularly updated.
Pros:
-
Works on weak PCs
-
Ease of creating universal models
-
Easy to learn if you have programming experience
Cons:
-
No Russian interface
-
Is a programming language
-
Difficult to create curvilinear geometry
Free Shipping
Add to compare
Product added to compare Go
| Manufacturer | Anycubic |
Free shipping
Add to compare
Product added to compare Go
| Manufacturer | Phrozen |
Free Shipping
Add to compare
Product added to compare Go
| Manufacturer | Raise3D |
Free shipping
Add to compare
Product added to compare Go
| Manufacturer | Anycubic |
Meshmixer
Art program for entry-level 3D modeling. There are simple tools for processing STL files and functions for recovering “broken” files. Using Meshmixer, you can conveniently cut the model into several parts, as it is possible to set the size of the print area of your printer. And one of the most useful tools is the installation of tree supports. This function has already appeared in many slicers, but it is in meshmixer that they can be flexibly configured and installed manually. Despite the many tools, this program is rather auxiliary, as there are more suitable programs for creating a model from scratch.
Pros:
Cons:
-
Limited functionality for creating 3D models
-
Lack of Russian interface
-
Some operations require a powerful PC
Blender
A completely free program with huge possibilities not only for creating models, but also for animation, rendering, simulations and much more. It is mainly used by multipliers, but due to the large number of extensions, this program covers a huge range of tasks. At first glance, Blender may seem too complicated, but everyone can master the basic functionality. Also worth noting are constant updates that improve performance and add new tools. A large community of people working in this program and developing it will help with the solution of many problems.
Paid 3D software
This category includes programs for professionals and enterprises, as well as their simplified versions for home use. Many companies have begun releasing a product at a low cost for home use, although initially the designs were intended only for enterprises and were priced accordingly. The common advantage of these programs is great functionality and constant support. For example, Autodesk Inventor was first released back in 1999 and is updated annually. Next, we will look at the most popular of them.
Fusion 360
The new product from Autodesk tried to combine several tasks at once: modeling, simulation and rendering. In many ways, it adopted the functionality of the previously mentioned Inventor, but supplemented it with a simple interface: many tools are similar to those that can be used in the previously mentioned Tinkercad. You can also edit STL files in it, albeit with a limited set of tools.
The main feature of this program is cloud data processing, such as simulations and renders. At the same time, almost all functions can be performed offline using the power of a PC. To process tasks in the cloud, you need to buy additional tokens, but when creating models, they are not necessary. It is worth considering that despite the presence of a native file format (f3d), all files are initially stored on Autodesk servers, and then they can be saved to your computer.
There is a version for schools and universities, but obtaining such a license requires the educational institution to register and issue you a personal license.
Pros:
Cons:
Price: from 7,123₽ to 25,721₽ for 1 year
Netfabb
The program is designed to prepare the model before slicing.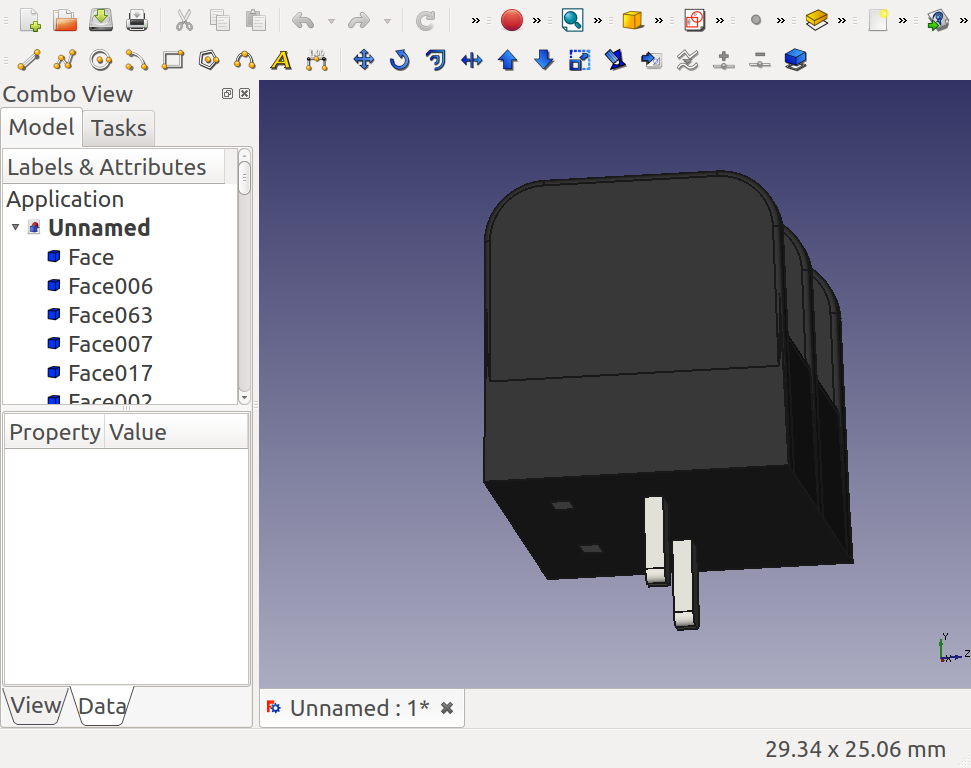 In many ways, it is similar to meshmixer, but it does not have the tools to create a model from scratch. Merging several models in STL format can be called a distinctive function, but the most important tool is the “repair” of models. That is why everyone should install this program, even if you have another model editor or model repair built into the slicer. Also in Netfabb it is very convenient to cut the model into several parts for printing separately. At the moment, the Netfabb functionality is built into Fusion 360 and is not officially available separately, but can be found on third-party resources as a separate program.
Pros:
-
Great functionality for repairing the model
-
Convenient cutting into pieces
-
Easy to learn all the necessary tools
Cons:
Price: from 18 024₽ for 1 month
KOMPAS-3D
A professional program created by Russian developers for Russian enterprises. It has a huge functionality, but at the same time, each function has a description, and the main tools have explanatory animations, a huge database of standards and GOSTs is built in. The program is free for all students and does not require verification of documents. There is also a paid version of KOMPAS-3D HOME, which, although intended only for home use, retains all the functionality of the “professional” version. Because of this, and also because of the low price, this CAD system is the best choice as the first professional program for creating complex 3D models.
Pros:
-
Completely Russian interface
-
A large number of tools
-
Availability of a free student version
-
Very low price
Cons:
Price: from 1 490₽ for 1 year
SolidWorks
One of the oldest programs on the market that has become a standard. If you learn how to work in SolidWorks, then you can work in any CAD. It has a relatively simple interface, an average number of tools that are enough even for professionals, but since the program is designed for production, many functions will only interfere with work. It should be noted that this program is available in Russian, and this is one of the reasons for the prevalence of this program in Russia.
Pros:
-
Easy to learn
-
The presence of the Russian interface
-
Large community of people using SolidWorks
-
Widespread in Russia
Cons:
Price: from 8 431₽ to 292 560₽ for 1 year
Inventor
The main program at many enterprises, but due to the simplicity of the interface and the presence of the Russian language, it is easy to learn. In many ways, it is similar to SolidWorks, both in functionality and in purpose.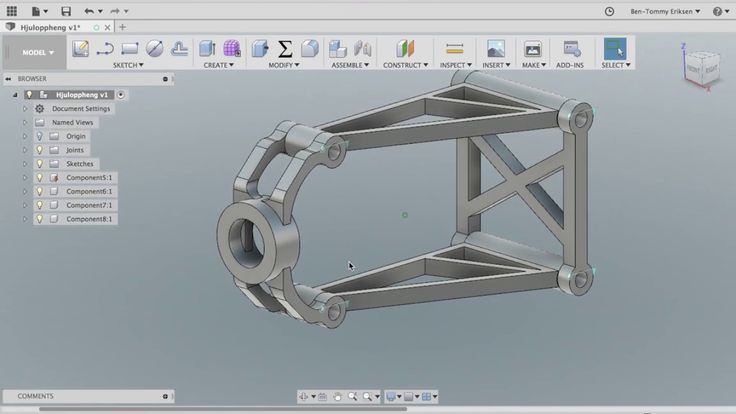 The main distinguishing feature of this program is a large number of high-quality video tutorials and text courses. It is studied at many universities both around the world and in Russia.
Pros:
-
Prevalence among the Russian community
-
Lots of learning materials
-
Intuitive interface
-
Availability of student version
Cons:
Price: from 106 860₽ for 1 year
SelfCAD
It is the simplest program for technical modeling. As easy to learn as Tinkercad, but not for kids, but for professional 3D printing. This program is not CAD, so there is no editing history, which allows, for example, to change sketches without entering edit mode.
You can download this program for free, but this version will have limited functionality. There are also paid versions with monthly payment or a one-time purchase forever. Only paid versions have a simple slicer, but its functionality is extremely limited.
Pros:
Cons:
-
Small functionality
-
Big cost
Price: from 1160₽ ($14.99) for 1 month
3ds Max
The program is designed to create 3D models and render images. It has great functionality, but it is extremely difficult to learn due to the lack of the Russian language and a complex interface. This is due to the fact that 3ds Max was originally developed for 3D animation and video game studios. It was to create a simple and free analogue that the previously mentioned Blender was created. Due to the above reasons, this program is not suitable for creating 3D models for subsequent printing on a 3D printer, but nothing prevents you from doing this.
Pros:
Cons:
Price: from 9 791₽ for 1 month
Free Shipping
Add to compare
Item added to compare Go
| Manufacturer | Phrozen |
Free Shipping
Add to Compare
Product added to compare Go
| Manufacturer | Anycubic |
Free Shipping
Add to compare
Product added to compare Go
| Manufacturer | PICASO 3D |
Free Shipping
Add to Compare
Product added to compare Go
| Manufacturer | Phrozen |
3D cutting software (slicers)
Having any model in STL format, you cannot immediately place it in the printer and start printing, because the printer only executes commands, and these commands form a slicer.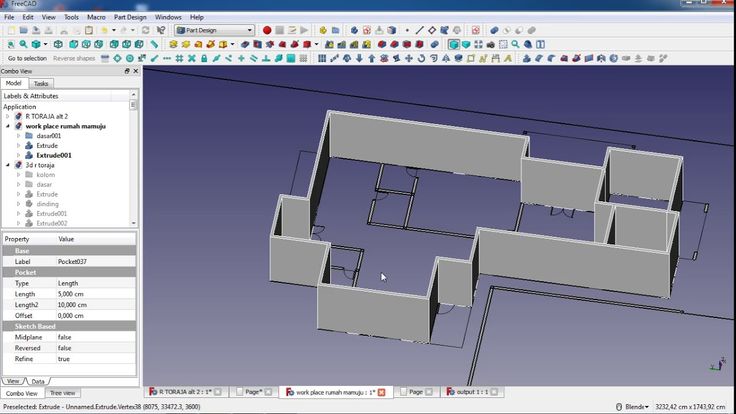 According to the etymology of the word, one can understand that the program cuts the model into layers, or rather into separate commands. But the number of cutting options for one model is almost endless. In this regard, a large number of programs have appeared that allow you to fully customize the operation of the slicer, or rather, how it will split the model into separate commands. The slicer itself consists of two parts: the core and the shell. The slicer core performs slicing based on the specified parameters, and the shell allows you to set these parameters and visually evaluate the slicing result before sending the model to print. In addition, many slicers have built-in functionality for direct access to the printer, which allows you to manually control the printer and carry out its settings and diagnostics. Next, we will consider the most popular slicers, which have their positive and negative sides.
Free slicers
The availability of free slicers is due to the fact that without them the printer becomes a useless machine that can only heat coffee and play a melody with the help of motors. Therefore, many companies that create 3D printers supply slicers with them, while laying them out in the public domain. Often these are large companies such as Ultimaker, CraftUnique, Prusa, etc.
Ultimaker Cura
It was originally created only for Ultimaker 3D printers, but soon became an open-source project. Now in its library of profiles you can find a huge number of printers from various manufacturers. Uses its own core Cura, which has many settings and functions: tree support, wireframe printing, color printing, etc.
Frequent updates bring innovations and even more profiles for various 3D printers. It is a standard choice for beginners, as it has two control modes: simple and professional. Recently, support for add-ons has appeared that allows you to save backup copies of settings, repair the model directly in the slicer, integrate various programs for 3D modeling, and much more.
It is also possible to control the printer by sending commands directly from the computer.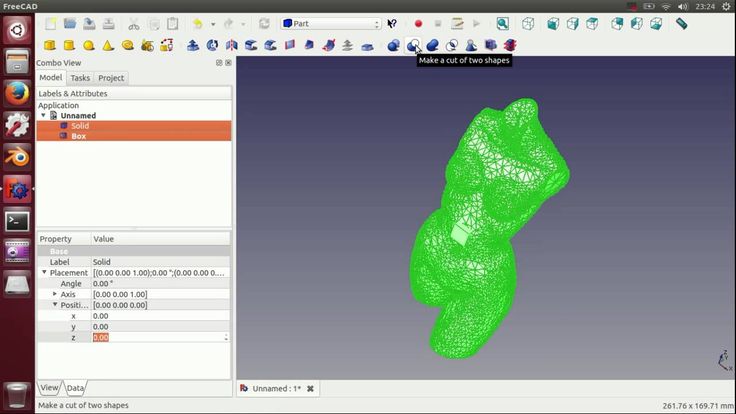 But there is no feedback from the printer, apart from receiving information about the temperature of the nozzle and table.
Pros:
Cons:
Prusa Slic3r
Sometimes you can find other names: Slic3r Prusa Edition or Slic3r PE. Prusa decided not to reinvent the wheel, and took the open-source Slic3r project, partially reworked it and began to actively develop it. Like Cura, Prusa Slic3r has many printer profiles, but Prusa's printer profiles are the most optimized. The core of the slicer of our own design, while the number of settings is less than that of the same Cura.
A distinctive feature is the flexible adjustment of the layer thickness and the support of a special extruder capable of printing 5 different plastics at once (again, produced by Prusa). The program will be extremely useful for people who have more than one 3D printer: all settings are divided into 3 tabs, each of which can be saved to separate profiles. But the printer control console disappeared completely, only the send button for printing via wire remained. In general, this program will be a reliable and convenient slicer, especially if you have a large number of printers.
Pros:
Cons:
Repetier
This slicer was created more for remote control of the printer, but it can also cut models. One of the few programs where you can choose the slicing core: Cura, Sic3r, Prusa Slic3r. The number of settings for the slicing itself is extremely small, but they are enough to cut the test cube.
The most important plus of this slicer is the huge functionality for managing and configuring the printer. It is worth noting the convenient interface for sending commands, as well as customizable temperature graphs. This is extremely useful, for example, when tuning the PID or checking the movement of the axes. Even if you choose a different slicer, this program is handy to have in order to 3D print using GCODE from another slicer.
Pros:
Cons:
MatterControl 2.0
One of the few programs that combine functions for editing stl files and a slicer. You won't be able to create any serious model, but you can add text or cut out part of the model. The slicer has not so many settings, but they are enough for a beginner 3D printer. This slicer can be useful if you need to make art products with minor changes. Supports saving to the cloud.
Pros:
Cons:
3DprinterOS
This software is designed to remotely manage printers from anywhere in the world. All that is needed is to connect the printer to the computer and install this program on it. From now on, all printer management occurs through the web interface. In it, you can remotely change the model, cut it and put it on print. It is also possible to connect a camera and observe the printing process. There are very few slicing settings, some will not even be enough to calibrate the printer, not to mention serious printing.
Carefully! It is not recommended to leave the printer unattended, especially if it is no longer new: at any time there may be a risk of fire due to wiring or mechanical problems.
Pros:
-
Simple interface
-
Start printing from anywhere in the world
-
Ability to monitor printing
-
Availability of tools for editing the model
Cons:
IceSL
It is a combination of OpenSCAD with its “modeling language” and slicer. In addition, models can be edited using a “brush”, like the one in Meshmixer. It has many small pluses that are not found in other slicers, but it is not suitable for everyday use due to an inconvenient interface and a small number of slicer functions. This program can be described in one phrase: interesting, but not recommended.
Pros:
Cons:
Octoprint
In many ways it is similar to 3DprinterOS, but is an open source project, as a result of which it has many additions. Designed for home use. It is the most popular way to remotely control a printer, and the user community is constantly growing. Therefore, it will be very easy to transfer your printer to remote control due to the large number of lessons and articles. The program itself does not have a slicer, but direct export of files from Slic3r is supported, which is already good in itself. Just like Repetier, it has an excellent printer management and monitoring console. But, unlike the aforementioned analogue, most of the functions will have to be configured manually.
Pros:
-
Large user base
-
Lots of tutorial articles
-
Ability to create a video broadcast of the printing process
Cons:
Paid Slicers
At the moment, many paid slicers are no longer used, as free ones have either caught up or overtaken them. But some of them are still unique.
Simplify3D
One of the first thundered paid slicers. At the time of its introduction, it was the most advanced due to the ability to change the print settings for one model at different layer heights and the functionality of printing with more than one extruder. But at the moment it has been replaced by Cura and Prusa Slic3r. Nevertheless, the convenience of setting up print settings and their number still remain the main advantage of this slicer. Also worth noting is the excellent printer management interface, second only to Repetier host.
Another difference is the ability to manually install supports and a large number of filling patterns. Viewing models also has several features: changing the way models are displayed, viewing in section, displaying normals to planes.
Pros:
-
Lots of print options
-
Convenient printer management interface
-
Manual installation of supports
-
Changing print settings at different heights
-
Easy print setup with two extruders
Cons:
Price: from 11499₽ ($149)
Read also: A detailed review of 3D printing slicers: Ultimaker Cura, Simplify3D, IdeaMaker, UP Studio, FlashPrint
Astroprint
Many believe that this particular software is a direct competitor to 3DPrinterOS. The most important difference is user friendliness, achieved through a user-friendly interface and easy installation. The program is based on Octoprint, essentially providing only a server, a modified interface and several add-ons that allow you to fully manage the printing process while away from the printer - from finding a model, to cutting and printing. At the same time, the program positions itself as a serious business solution, so the company also provides special PCs and management consoles that make it easy to connect the printer to the system. A trial plan is available where only 2 printers can be connected, but all basic features will be available.
Pros:
-
Easy connection and setup
-
Trial Availability
-
Interface specially designed for mobile devices
Cons:
Price: from 765₽ ($9.90) for 1 month
KISSlicer
This slicer is another representative of programs that failed to keep up with the times. Previously, its functionality was a cut above the rest, but now the same Cura has all the same settings as KISSlicer, and also adds its own. Of the useful in this program, we can note the function of joint viewing of GCODE and model.
There were two versions: free and PRO. The only significant difference between them is that the paid version has support for printing in multiple colors. At the moment the project is dead, even the main site does not work, but the program can still be found on third-party sources.
Pros:
Cons:
Price: from 3240₽ ($42)
Summing up
After considering all the popular programs, we can highlight the clear favorites:
For beginners in 3D printing, Tinkercad is the best 3D modeling software because it combines simplicity with the necessary functionality. The best programs for professional-level 3D modeling are KOMPAS-3D, Fusion 360 and Blender, due to the huge number of tools and a large community that makes it easy to find lessons and guides.


