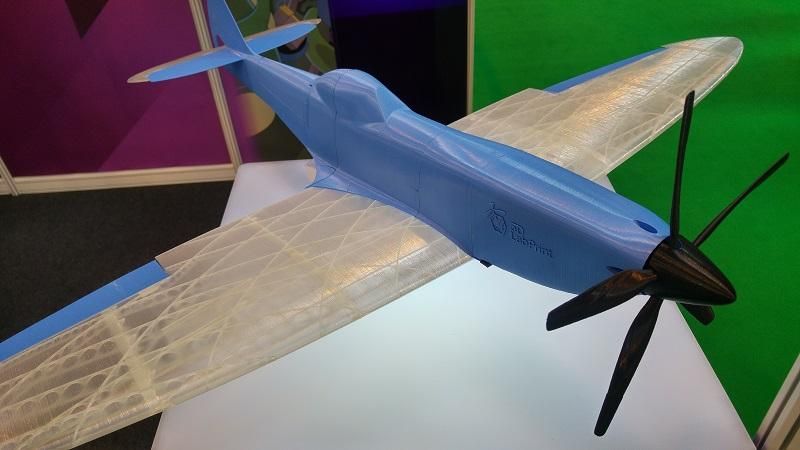
Castable wax 3d printing
3D Printing Materials: Jewelry Resins
3D Printing Materials: Jewelry ResinsSkip to Main Content
3D PRINTING MATERIALS FOR JEWELRY
Reliably reproduce crisp settings, sharp prongs, smooth shanks, and fine surface detail with Formlabs Jewelry Resins and the world’s best-selling desktop stereolithography 3D printers. Whether you are 3D printing try on pieces for customers, ready to cast custom jewelry, or masters for reusable jewelry molds, Formlabs offers a material up to the task.
Request a Free Sample Part
Digital jewelry workflows with the Form 3 reduce the time and labor intensive process of traditional manual workflows. Custom designs are now within reach as digital designs can be preserved, modified or recreated as needed. With easy to cast materials like Castable Wax 40 Resin, the Form 3+ can efficiently create elegant cast pieces that are tailored to your customers.
Explore the Form 3+
See the future of digital jewelry firsthand and assess our materials for your application: we’ll mail you a free 3D printed sample part.
Request a Free Sample Part
Need more information or help transitioning to a digital workflow? Interested in ordering resin in bulk? We’re here to help!
Data Sheets
Download safety and technical data sheets for all Formlabs materials.
Handling & Safety
Handling & Safety
Resin should be handled with care. Proper handling will ensure safe printing and efficient use. Our resins have been designed to be similar or safer to handle as other household chemicals or adhesives. Formlabs materials do not contain volatile solvents so special ventilation is not required. Skin contact should be avoided.
The Safety Data Sheets (SDS) are up to date for every resin product and follow the latest government guidelines. Always consult the SDS as the primary source of information to understand safety and handling of Formlabs materials. For more information about handling resin, learn more tips for resin maintenance in our Help Center.
Technical Data
Technical Data
Plastics are complex materials, and finding the right one for your specific application requires balancing multiple attributes. Our library of resins is ideal for product development, rapid prototyping, and a variety of specialized applications. Download our Technical Data Sheets to explore the mechanical properties of each material.
Material
– Select –BioMed AmberBioMed BlackBioMed ClearBioMed WhiteBlackCastableCastable WaxCastable Wax 40CeramicClearColor BaseColor PigmentsCustom TrayDental LT ClearDental LT Clear V2Dental SGDigital DenturesDraftDurableESDElasticElastic 50AFlexibleFlexible 80AFull Materials LibraryGreyGrey ProHigh TempIBTModelModel V3Nylon 11Nylon 11 CFNylon 12Nylon 12 GFPU Rigid 1000PU Rigid 650Permanent CrownReboundRigid 10KRigid 4000Soft TissueSurgical GuideTemporary CBToughTough 1500Tough 2000White
Language
– Select –BulgarianChineseCroatianCzechDanishDutchEnglishEstonianFinnishFrenchGermanGreekHungarianIrishItalianJapaneseKoreanLatvianLithuanianMalteseNorwegianPolishPortugueseRomanianRussianSlovakSlovenianSpanishSwedishTurkish
Technical Data Sheets
There is no technical data sheet available for the chosen material.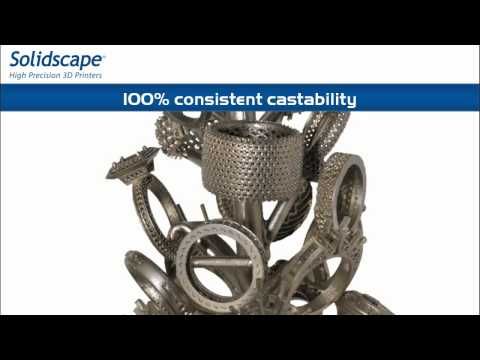
Safety Data Sheets
There is no safety data sheet available for the chosen material.
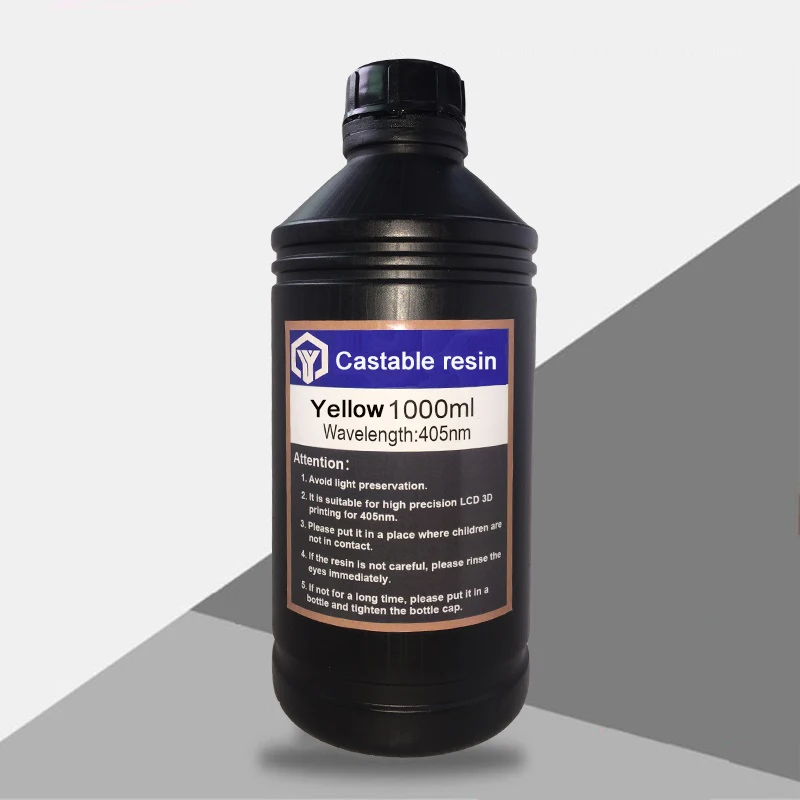
Wax Castable 3D-printing resin for Jewelry parts
Liqcreate Wax Castable is a blue wax-based photopolymer with reliable processability and accuracy on LCD/MSLA, DLP and laser based 3D-printers. 3D-printed parts from this material captures intricate features and show crisp details. This wax-based material offers smooth surfaces with clean burnout for a reliable casting process. Create custom made elegant organic geometries with positive and negative engravings according to your preferences. Liqcreate Wax Castable creates perfect casting patterns for jewelry, dental and industrial parts.
Key benefits
- – High precision
- – Wax-based
- – Clean & ash free burnout
- – Excellent casting of engravings
3D-printer compatibility
- – Phrozen Sonic Mini 4K
- – Anycubic Photon
- – Elegoo Mars
- – And many more 385 – 405nm DLP, LCD and SLA 3D-printers
Wax-Based Clean and ash-free burn-out High accuracy
Ash free, clean burn-out wax castable resin perfect for jewelry engravings
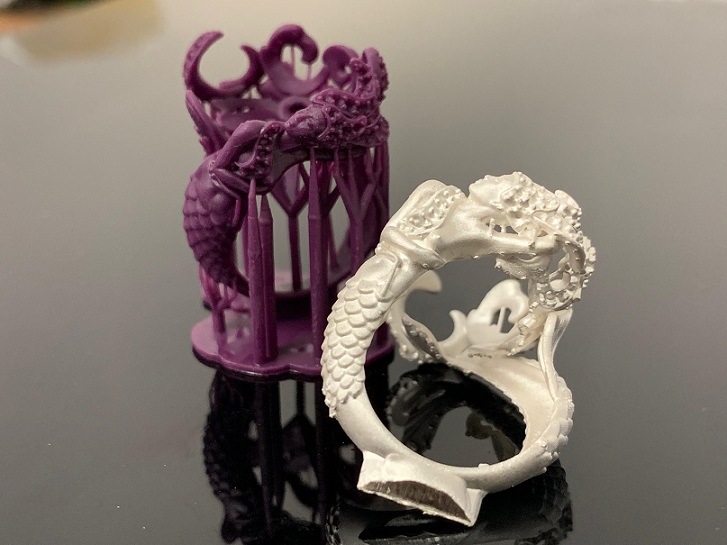
One of the key benefits of using Liqcreate Wax Castable resin is the precise and flawless engravings in rings, as displayed in the rings below.
Processing Wax Castable resin
Due to the significant amount of wax, Liqcreate Wax Castable will solidify around 17 – 18˚C. It is not advised to use this product in environments with temperatures below 18˚C. storage or transport of Liqcreate Wax Castable below 18˚C is possible. Before processing, it is necessary to heat-up the product to its liquid phase. This can be done by leaving the product for 5 hours at room temperature or by placing the packaging in a warm environment (without direct light, in the original packaging) up to 50˚C for 20 minutes.
3D-printing with Liqcreate Wax Castable resin
It is important that the 3D-printed parts are flawless to get the best casting results. Layer thickness of below 0,05mm is strongly advised along with a well calibrated 3D-printer. Find the parameters of your printer here, or send an e-mail to [email protected] for more information about printer settings and compatible 3D-printers.
Investment material for Wax Castable resin
During the development of Wax Castable all casting tests were performed using the Prestige Unicast investment material.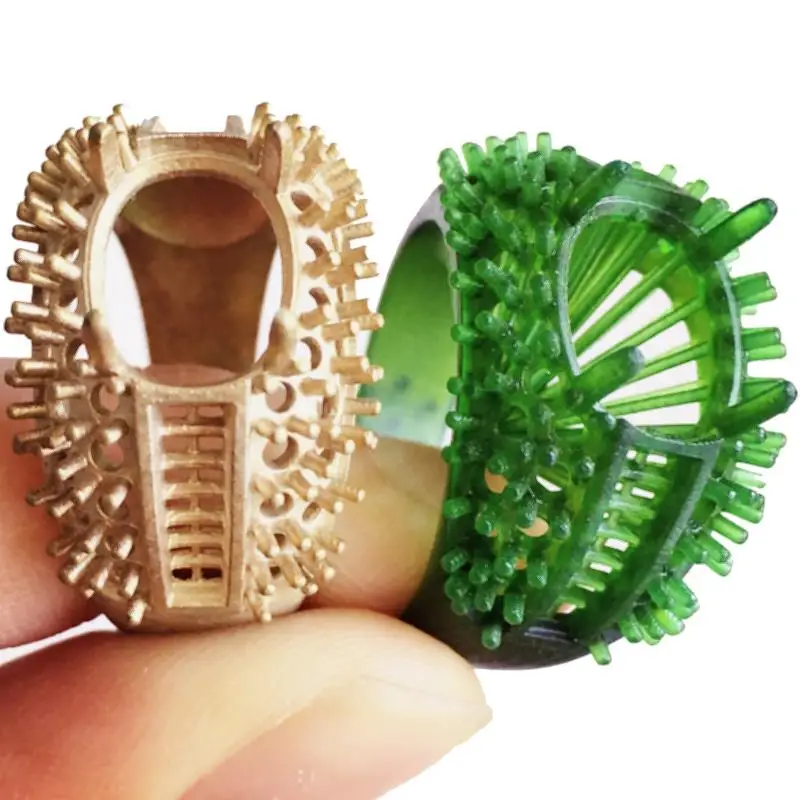 Other materials might also be suitable to work with Liqcreate Wax Castable. It is important to follow the instructions of the investment material to get the best results
Burn-out schedule for Liqcreate Wax Castable resin
We followed the instruction of the investment material (Prestige Unicast). The following burn-out schedule is used:
Parts have a matt finish after casting and polishing is necessary to get high-gloss metals. As a reference we shared a picture below of a printed part, freshly casted part and on the right side a (partly) polished part.
Frequently asked questions
In this section we cover the most frequently asked questions. Most of the defects after casting, can be traced back to the printed part, post-processing or type of investment material.
Printing with Liqcreate Wax Castable resin.
The investment material will take over every detail of the printed part. Meaning that the quality of the 3D-printed wax-like model needs to be as perfect as possibly.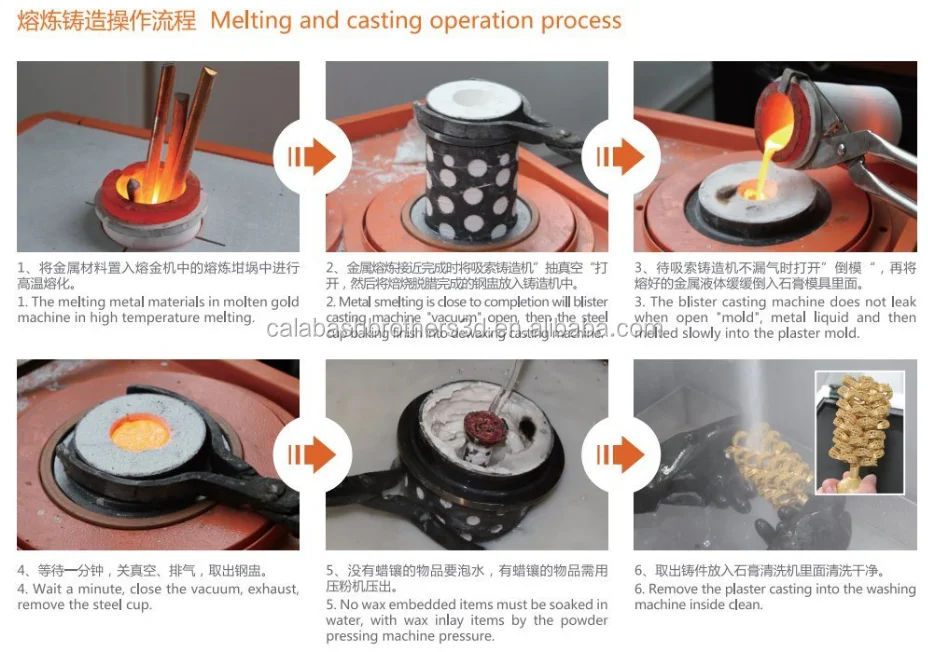 Printing with Wax Castable resin can be more difficult compared to other resins, due to the significant amount of Wax present in the resin. At temperatures below 18 degrees Celsius, the resin will solidify. It is important that the resin is completely liquid during printing. Also the room temperature were you are using the Wax Castable resin should be at least at 20°C. Usually the resin wont solidify during printing, however, when printing in a cold room, the droplets left on the platform can solidify. This will make the washing process more difficult. It is important that the washing solvents are also at least 20°C to prevent solidification during washing.
A lot of 3D-printers have already been optimized with Liqcreate Wax Castable resin. Find out if your printer is listed here. Send an e-mail to [email protected] if your printer is not listed. Most of the settings have been optimized on filigree designs, these are thin designs which often require a longer exposure time. If you have more bulky designs, the exposure time can be lower for your parts.
We have noticed that the wax inside the resin gives a low adhesion to anodized alumina platforms, like the Elegoo Mars series. To get the parts to stick to the platform better, it is advised to make some support changes. The raft of the supports has a big area and often pulls the part from the platform. To change the raft settings, printing will be much easier. Changing the raft height and raft thickness to 0,1mm will fix most of these issues.
Orientation of your parts.
Especially for rings with engravings, the orientation of your part is very important. For rings with engraging it is advised to place the rings under a 20 degree angle instead of printing vertical. The reason is that the chance of overcuring your engravings is far lower in this position. For best orientation see the image below. If you still have questions if your orientation or settings are good, don’t hesitate to contact us at [email protected]
Post-processing Liqcreate Wax Castable resin.
Next to adhesion, it is important that all layers of the parts are completely visible. The parts should be non-sticky and have a matte surface finish after washing and drying. Excess resin or sticky surfaces can react with the investment material and create pores in the casted parts.
If no Anti-aliasing or blurring settings are used, in perfectly printed and washed parts should the layers should be clearly visible. An example of a part that is printed and washed correctly can be found in the image below. It should be noted that the investment material, and thus also the casted metal parts will have these visible likes as well. If that is not wanted, grinding before casting, or using Anti-aliasing or Blur settings can help reduce the layer effect.
Investment material for Liqcreate Wax Castable resin.
Choosing the right investment material when using 3D-printed wax resin patterns is very important. Resin and also Wax-based resins have a higher thermal expansion compared to regular wax.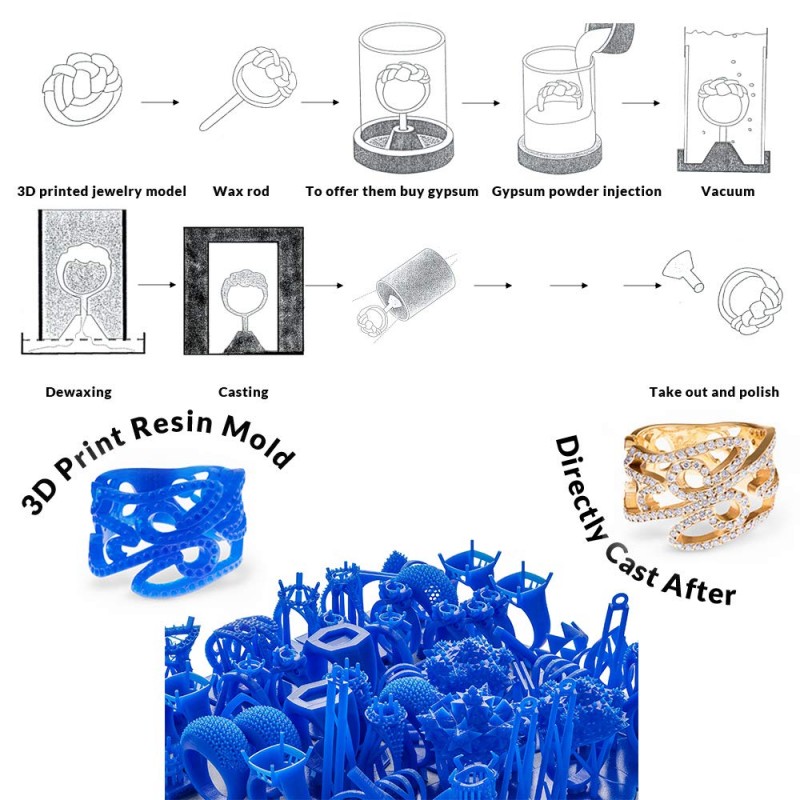 The investment material should be strong enough to survive this expansion and not crack. For jewelry applications, our beta-partners have had great success with Prestige Unicast investment material. Our dental partners at 3D-Dental Store are using both N&V and Ambervest investment materials with success for casting dental applications.
We wish you a great journey with our Wax based Castable resin. If you have printed or casted a great part and want to be featured in our social media, or have any questions about the product or processing, send us an e-mail to [email protected]
3D wax printing: advantages, features, equipment
Basics of 3D
Casting
Jewelry industry
3D printers
Author: Viktor Naumov
Author: Viktor Naumov
Wax 3D printing vs traditional technologies | Wax 3D printers: advantages, disadvantages, applications | Wax 3D Printing Technology | FlashForge WaxJet: large-format machines for creating high-precision models | Order a consultation and printing services
Wax is an environmentally friendly, non-contact, soluble material commonly used in the manufacture of investment casting products.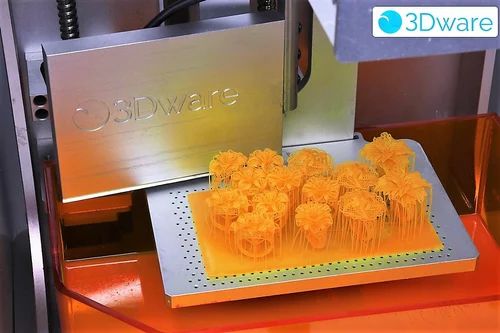 A casting mold is removed from the investment model, into which molten metal is then poured and the final product is obtained.
Wax 3D printing vs traditional technology
For traditional casting, as well as for other classical technologies, the advent of 3D printing was a turning point: additive methods immeasurably expanded the possibilities of production, making it possible to significantly optimize the technological cycle in enterprises of various industries.
Wax, characterized by good meltability (at temperatures above 60°C) and requiring simple post-processing, has become one of the most affordable and popular materials used in 3D printing. Today, even in a typical office or laboratory setting, you can install an additive machine and print high-quality wax models that closely match CAD models around the clock.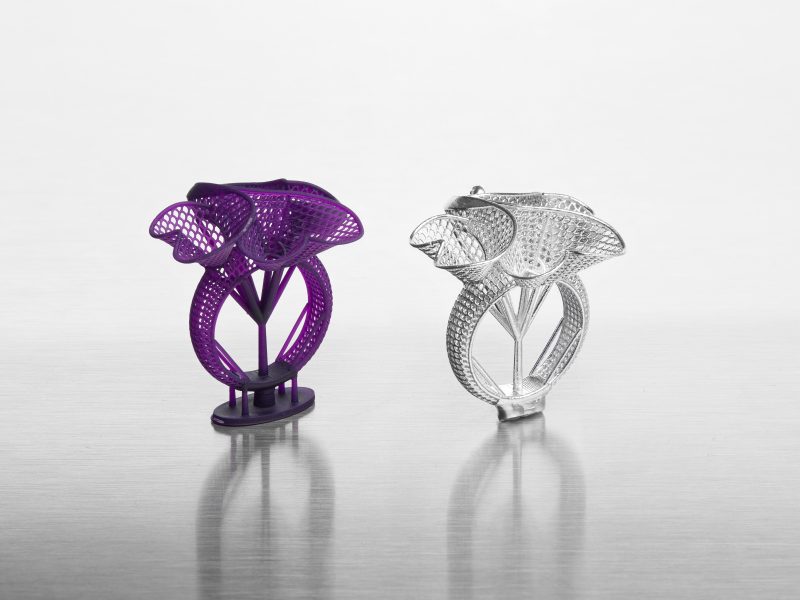
Thanks to the high performance of 3D wax printers, an enterprise can reduce the time it takes to make prototypes by several times, and sometimes even dozens of times, and, accordingly, reduce production costs. Models printed from wax are distinguished by high precision, perfectly even and smooth surfaces, as well as the finest detail, which makes it possible to create products of complex shapes and textures that cannot be made using traditional technologies.
How to make a casting mold in a week? Read the history behind wax and photopolymer 3D printed gas valve models.
Wax 3D Printers: Advantages, Disadvantages, Applications
Pluses
- High print speed.
- High level of detail for the production of geometrically complex products (printed layer thickness up to 16 microns).
- Ability to simultaneously manufacture parts of different configurations on the same platform.
- Perfect model accuracy (up to 0.
 1016 mm per 25.4 mm part size).
 - Convenience and ease of use.
- Possibility of continuous operation.
Cons
-
Fragile and vulnerable to sunlight models.
-
Primarily functional prototyping.
-
High cost of consumables.
Wax models on the FlashForge WaxJet 400 build platform
Where is 3D wax printing used?
Wax 3D printing is used to create functional prototypes, tooling molds, and investment casting master patterns in areas such as jewelry, manufacturing, consumer goods, automotive, aviation, and medicine.
In particular, wax 3D printers are used to create:
- industrial components for the automotive and aerospace industry, mechanical engineering and instrumentation;
- items of jewelry and watch industry;
- prostheses and other medical devices;
- art objects, souvenirs.
Order a 3D test print of your product for free! Other services available - find out more and apply online:
Order service
Wax 3D printing technology
Wax 3D printers use multi-jet printing (MJP) technology. One of the features of this method is that the protruding parts of the product require supporting structures - they are easily removed at the end of the printing process or dissolve themselves.
When comparing wax and photopolymer, the latter wins in terms of the quality of the printed model, strength and cost, however, in terms of the quality of the final molded product, the advantage is definitely on the side of the wax.
MJP technology works in much the same way as conventional inkjet printing. The layer is applied by a print head with a large number of tiny nozzles through which the model material is fed onto a horizontal platform.
3D printed wax models and finished jewelry
Steps of the wax printing process
- The material is melted in a heated cartridge.
- The printhead applies wax to the build platform at the desired location.
- The build platform is lowered in the chamber by the thickness of the layer, and the process of applying the material is repeated layer by layer until the model is completely built.
- Wax solidifies immediately upon contact with the build platform.
- Models are removed from the build platform.
- Supports are removed with a special solution.
- The model is drying.
When printing with wax, two types of materials are used:
- harder (melting at about 70°C) - model wax for product printing;
- is softer or fusible - for creating supports.
Read on our blog: 3 Case Studies of Additive Manufacturing in Investment Casting
FlashForge WaxJet: Large Format Machines for Precision Modeling
Introducing professional MJP printers from the Chinese manufacturer FlashForge WaxJet 400 and 410. This is a line of large-format machines for printing high-precision and extremely smooth waxes up to 289 x 218 x 150 mm in size. The inclusion of WaxJet in the process will reduce production costs by 20-30% compared to a traditional casting cycle and create products 2.5 times faster than with classical methods.
Benefits of the WaxJet 400 and 410
printers- Increased productivity: print up to 180 (WaxJet 410) or 360 (WaxJet 400) items per day.
- High resolution 1200 x 1200 x 1600 dpi and a layer thickness of only 16 microns.
- An ideal choice for printing jewelry, industrial tools, watches and souvenirs, as well as investment casting in aviation.
- Automatic material loading system.
- Stable material supply due to the immobility of the main print module with a movable build platform.
- An enclosed build chamber that isolates the printing process from external influences such as dust, microscopic debris, or excess moisture.
- Compatible with two kinds of materials: 100% purple wax and white support wax material.
- Easy management and maintenance of 3D printers.
Read our review of WaxJet wax printers
WaxJet 400 3D printer example: impeller
Print time: 4 hours 38 minutes
Wax Model Weight: 7.18g
Application: For In713c
Alloy Turbine Casting Benefits compared to traditional process: 80% faster time to market, 45% less labor
So, wax 3D printing will allow your business to achieve better efficiency by saving time and money on designing and manufacturing prototypes and master models for casting.
Are you convinced by the benefits of wax 3D printing?
Learn more about implementing 3D technologies, get detailed advice, order a demonstration of equipment or 3D printing services you can contact iQB Technologies : we have been successfully implementing 3D solutions for industry and business since 2006.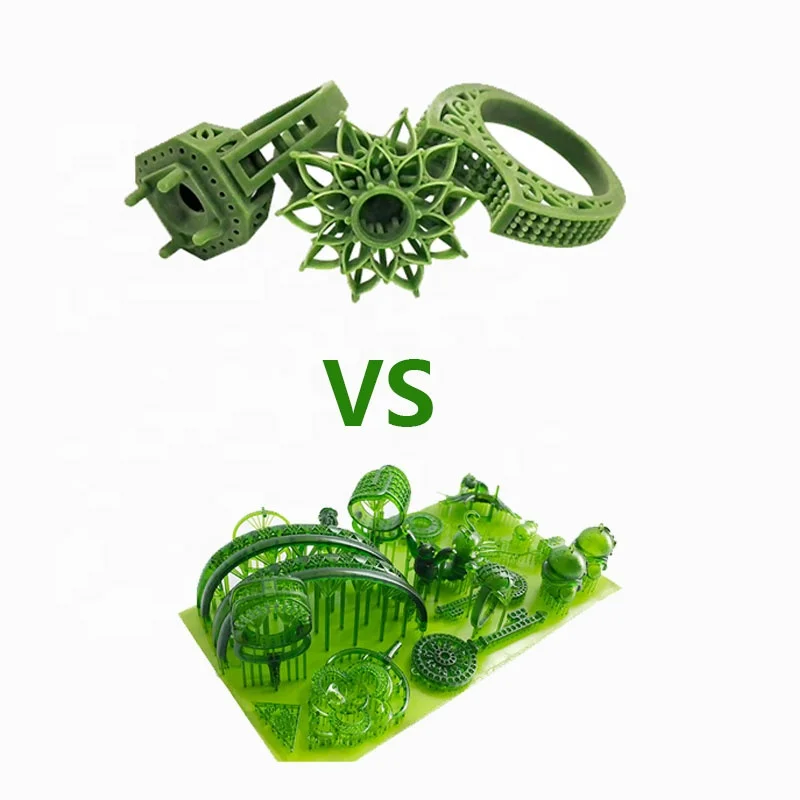 Contact us: +7 (495) 223-02-06, [email protected] .
Article published on 05/19/2022, updated on 11/30/2022
3D printing with wax on an FDM 3D printer. Recommendations and settings on the example of 3D printer PICASO Designer X.
- 1. First, a little history of
- 2. What is Filamentarno Wax Base?
- 3. Which printer is suitable for printing?
- 4. Why is Picaso Designer X good for Wax Base printing?
- 5. Preparing Picaso Designer X before printing Wax Base
- 6. Printing process
- 7. Result and output
Hello friends, 3DTool is with you!
Investment casting is a fairly popular method of manufacturing metal products. Most of the jewelry is produced in this way, this method is used to create parts of mechanisms, cases and other elements and assemblies that require increased strength. The starting point in the casting process is the original model or ready-made matrix, from which a copy is made from wax or other easily melted material to create shell molds into which the metal is already poured. But what if we bypass the initial model creation phase and make an immediately meltable wax model? This is where 3D printing and new material from 9 come to the rescue.0215 Filamentarno - Wax Base .
1. A little history first
The idea of printing waxes on a 3D printer is far from new, initially, the technology appeared in the camp of photopolymer 3D printers, was used, and is still used today, for example, by such giants as 3D Systems and Solidscape . Entire lines of devices have been honed to produce high-precision lost wax printouts with a perfect surface. However, such printers had and still have one tangible minus - what if the desired object is much larger than the size of the working area of the device, and the quality of the surface, in general, does not matter much within reasonable limits? The first thing that comes to mind is to find a device with a larger working area, however, among photopolymer printers, there are negligible models that meet this requirement and, basically, they are sharpened precisely for high quality and miniaturization.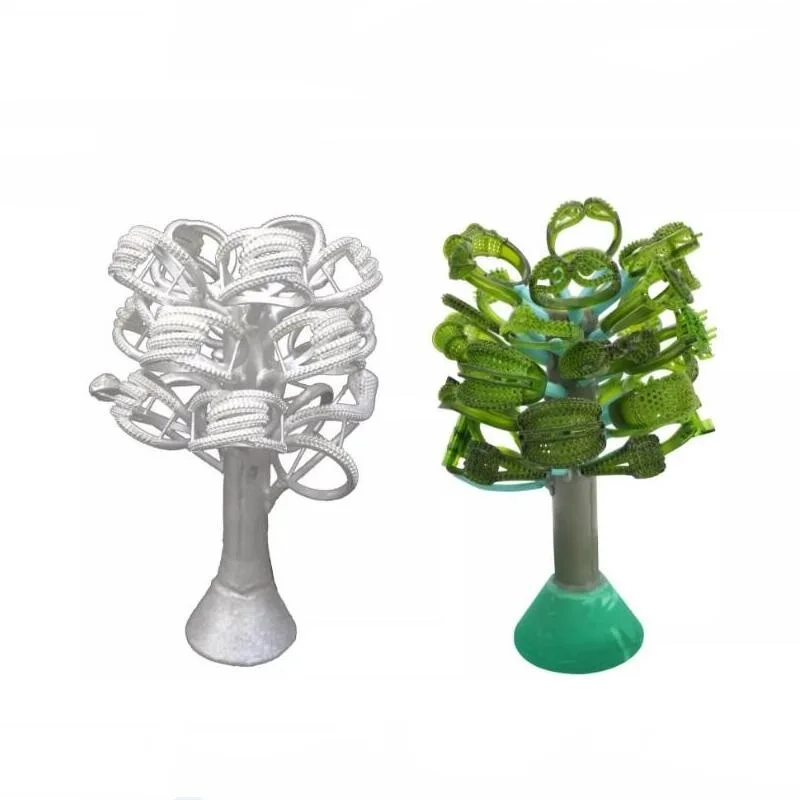 Or too expensive to maintain. What to do? But what if you use FDM for these purposes?
Photo from open sources, site sapr.ru
The first experiments with FDM 3D-printed/lost-waxed models used PLA and PMMA, the relatively low ash content of which, in theory, promised to achieve good casting quality, and some enthusiasts actually achieved quite good results. Instead of smelting, however, the technique of burning the material was used. However, widespread practice has shown too high a dependence of the result on the quality of the material, the presence or absence of a dye, the correct temperature regime and a strong limitation on the equipment and materials forming the shell form, not all of which withstand subsequent annealing and do not burst. Moreover, the crust-forming compound is able to transfer even the smallest defects and artifacts on the surface and any spills, cavities and flaws immediately appear on the final result. And avoiding the formation of unwanted gases when burning PLA is very difficult.
Photo from open sources, site sapr.ru
And if large-format casting in industrial, factory conditions allows the use of PLA and PMMA, due to the complication of production technology (there is a wide practice of using such giants of the world of FDM printers as BigRep for these purposes), then medium-sized workshops and small studios equipped with conventional boilerclaves require more flexible approach. And it is in this case that the Wax Base is perfect for them.
2. What is Filamentarno Wax Base?
Filamentarno WAX Base is a filament for 3D printing using FDM technology for subsequent investment casting from metals, the bulk of which is real jewelry wax. Of course, the composition contains other impurities to stabilize the rod and meet its characteristics in accordance with the requirements of fdm 3d printing, however, the final result is fully compatible with any melting techniques of conventional wax compositions and is easily glued to them, for example, to form sprues.
The company F ilamentarno took a long time to produce this material, the idea appeared a relatively long time ago, but the results were achieved only in the last couple of years, nevertheless, the sensation was such that the company even had to open a small 3D printing studio in order to gain experience applications and respond to the market demand since there were no analogues to this material before.
The material turned out to be promising, among its advantages there is a sharp increase in the maximum possible size of wax waxes, and printing speed, as well as the ability to greatly reduce costs, because the cost of melted wax in the form of a thread turned out to be much more profitable than photopolymer, not to mention the price of photopolymer 3D printers.
This material also has certain features that can hardly be called obvious disadvantages, but they impose strict requirements on the device on which it is planned to print. More about them below.
3. Which printer is suitable for printing?
Due to the physical characteristics of the raw material, Filamentarno Wax Base is printed at significantly lower temperatures than other materials. Softening occurs already at ~ 45 degrees, and melting, from ~ 95 degrees Celsius. Because of this, it can be easily smoothed out in post-processing using hot air guns, torches or soldering stations. The recommended print range is from 110 to 130 degrees, while most standard 3D printers do not allow the extruder temperature to drop below 190, less often 170 degrees Celsius, which is excessive in the case of Wax base .
Owners of simpler and cheaper models of 3D printers, as a rule, have the opportunity to correct the corresponding parameters in the printer's hardware firmware, or lower the temperature using special control commands. Meanwhile, expensive brands usually do not provide such opportunities and completely close both the firmware and the “console” commands from users from changes.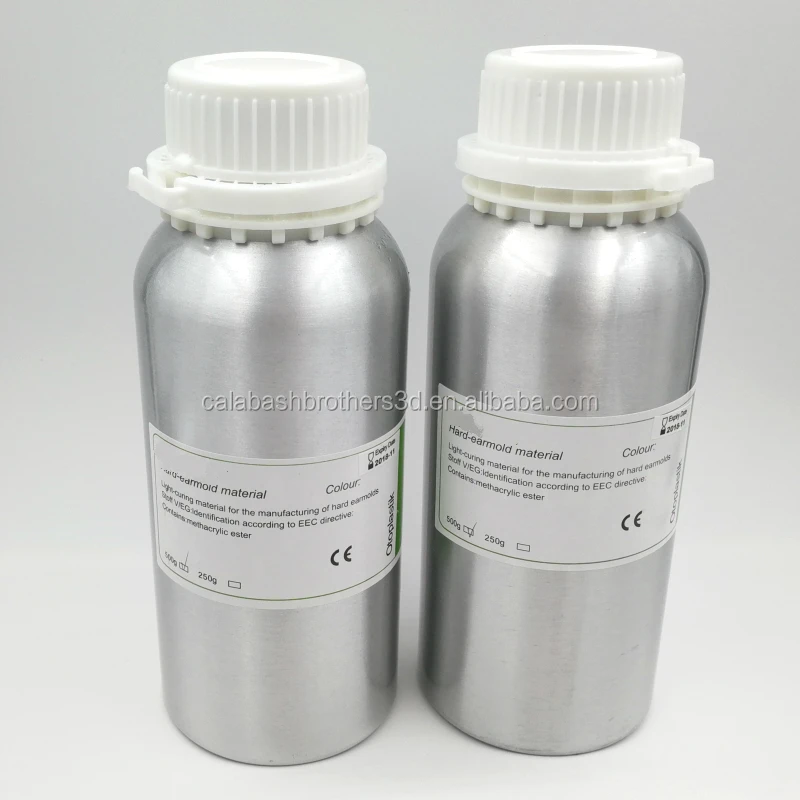 Here is what the manufacturer writes on its website in the description of the material in this case:
“Most often printing on a 3D printer with a nozzle temperature below 170°C is prohibited by the printer firmware. To bypass this limitation, use the G-Code command: "M302 S80" - it can be inserted into the starting G-Code in the slicer settings. This command will lower the print temperature limit to 80°C."
Also, since the material is quite easily torn, soft and melts easily even at low Cold End heating temperatures, you will need to use a direct extruder drive (Direct) for printing, a remote (Bowden) broaching mechanism will not cope with the task and, at best, will “jam » material.
Nevertheless, at least one manufacturing company that took care of printing with low-temperature materials “out of the box” and has printing units equipped with direct drive, we can definitely name. Of course, we are talking about the manufacturer of 3D printers Picaso3D and line of 3D printers Designer Series X .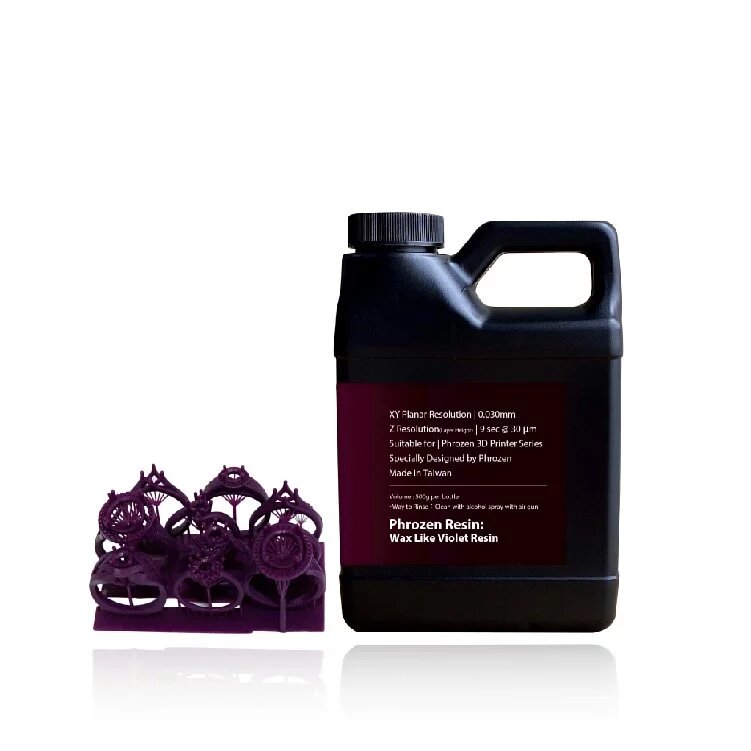
Let's take a look at the benefits of the Series X line for wax printing using the Picaso 3D Designer X as an example .
4. How good is Picaso Designer X for Wax Base printing?
In addition to the ability to set extremely low extruder temperatures for FDM 3D printing in material profiles, the Series X platform has a number of additional features that make working with the Wax Base easier.
First of all, it is the adjustable temperature of the cold zone (thermal barrier) of the printing unit. It has another temperature sensor that allows you to monitor and adjust peak performance by increasing and decreasing the cooling cooler speed.
This feature prevents the formation of plugs in the extruder tube above the melt zone. The special structure of the receiving "neck" in the pulling mechanism also plays into the hands, which eliminates the bending of the material during filling and printing.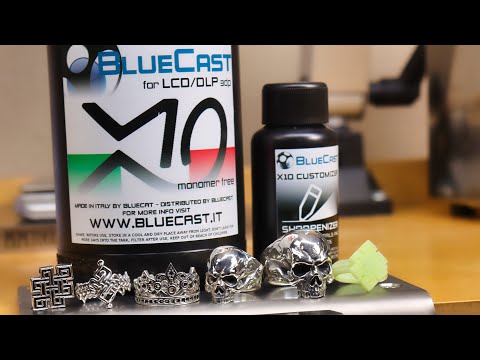
In addition, the system of active “purging” of the working area, thanks to several turbine fans, allows you to quickly cool the material during printing, which also has a positive effect on the quality of the surface when printing roundings and overhanging elements.
And sensors for the presence of filament and control of the upper layer will help prevent damage to many hours of printing in the event of a break or end of the thread.
5. Preparing Picaso Designer X for printing Wax Base
To confidently print Wax Base on your device, you need to stock up on a clean, preferably new, extruder block with a new or carefully cleaned copper nozzle with a diameter of at least 0.4mm. In our case, the most suitable in the Picaso Designer X line is the 0.5 nozzle.
It is also necessary to take into account the following nuances:
-
A rubber scraper is installed on Picaso 3D printers to clean the PG - when printing WAX, it smears the material and harms rather than benefits, it must be removed.
-
For normal adhesion, the heating table on the first layer must be heated to 85-90 degrees, subsequent layers must be set to 0-30 degrees so as not to deform the wax. To do this, you need to have two different material profiles.
-
Airflow - required when printing overhanging elements, the main thing is not to overdo it, otherwise the layers will not bake well.
-
Wax, like many elastomers, does not like retracts, this parameter must be set to 0.
-
Refilling plastic takes place in two stages. The first is filling at an elevated temperature of 190-200 degrees, to eliminate a possible wax plug. The second stage is filling at the extrusion temperature - 110-130C
-
It must be remembered that plastic is very sensitive to extrusion temperature, too high clogs the nozzle, too low gives poor interlayer adhesion. The optimum temperature for picaso designer x is 115 degrees for the first layer, 120-125 degrees for subsequent ones.
-
Periodically, it is necessary to check whether the plastic thread wound on the spool does not stick to itself, this can cause material slippage, because. it pulls out easily.
-
It is very important to correctly set the height of the nozzle above the table, because if the nozzle is pinched, a plug will quickly form in the extruder, which can be eliminated only by refilling the plastic again.
Before printing for the first time, be sure to replace the entire hot end or nozzle with a new / clean one, otherwise the desired result will not be achieved.
When preparing a 3D model for printing at Polygon X , you must adhere to the following rules, try not to make the outer wall very thin, the material may burst. The ideal option is 2 perimeters, approximately 1.2 mm, with a nozzle of 0.5
Percentage of filling, not less than 15%, if the geometry of the model allows.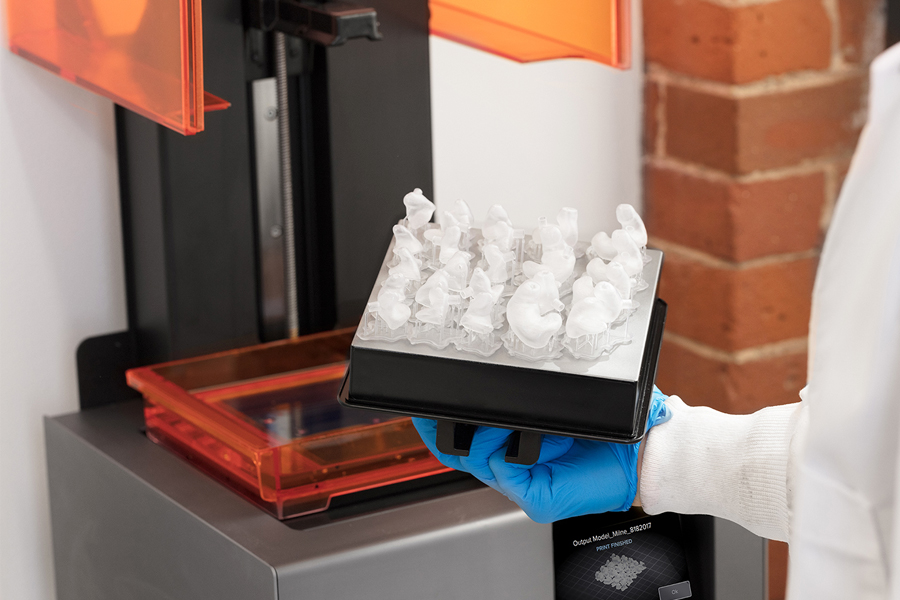
Otherwise, the requirements for the material are the same as for conventional plastics. It should be noted that the supports come off very easily and, if necessary, the attachment point can be treated with a burner or a building hair dryer in order to achieve a smooth surface.
We printed the current models at the following settings (pictured above).
It remains to create two print profiles for printing the first and subsequent layers, send them to the printer and wait for the print results.
6. 3D printing process
Before printing, be sure to thoroughly rinse the glass stage bed and apply fresh adhesive to it. In our case, a regular spray is suitable - glue from PICASO 3D , however, the manufacturer also offers a proprietary adhesive:
Next, you need to prepare two print profiles according to the following settings, experimentally they showed the best result when printing.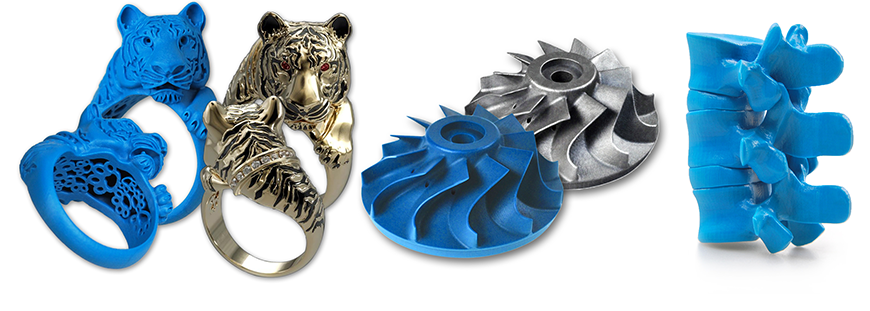
Wax3D_F - profile for subsequent layers, Wax3D(1Layer) for the first.
When rendering the model, be sure to manually set a pause after the second layer in order to have time to switch print profiles.
If you have previously printed with wax on the current printer, you need to start another profile with a higher temperature and load the material only after the old material has “melted through”.
Leaving material in the nozzle at high temperatures is not recommended. This is fraught with traffic jams.
7. Result and conclusion
When printing, we encountered several times the delamination and peeling off of the material from the heating table during the printing process and the selection of parameters.
As you can see in the photo, the material diverges in layers and it may feel that the temperature is insufficient for sintering. However, this is not the case, because when the temperature rises, the material does not extrude, but flows out of the die, which disrupts the layer structure, and the wax does not have time to cool. The difference is clearly visible in the photo below, on the left the temperature is too high.
However, after several reprints, we managed to achieve good print quality. Both with and without support.
The material withstands rather steep angles of inclination "perfectly", as can be seen from this flange in the photo.
The artistic approach is not alien to the material, we printed the head of this character for about a day and, as you can see, the result is excellent.
In general, when printing products with low detail, it is best to select a slow (quality profile) or medium (standard profile) print speed setting so that the material has time to properly form and cool during extrusion. Otherwise, sagging "pulling" of the thread may form.