3D printer specifications
Demystifying 3D Printer Specifications
This post was written by Jon Bryant, Formlabs Customer Development Team Lead, who shares insights gleaned from working with hundreds of industry professionals on better ways to evaluate 3D printer solutions.
When the 3D printing industry exploded in 2014, a myriad of new companies rushed in, claiming to be the next revolution in 3D printing. Every week, I’d see a new professional 3D printing company crop up—each of them touting a product with a “new” feature or a “unique” specification.
Naturally, all of this novelty caught the attention of consumers and business buyers. With each product launch, more and more people became interested in applications for 3D printing, particularly in industrial engineering and design prototyping. However, as that interest grew, so did the use of meaningless marketing jargon in professional 3D printer specification charts.
To illustrate that trend, here’s a common specification comparison chart:
What do you notice about it? For me, what stands out is all of the capital letters, numbers, and parentheses. If I didn’t know better, I might look at this information and assume that I needed the highlighted printer. After all, it has the best specs and the most impressive (albeit confusing) set of numbers.
The problem? That chart doesn’t actually say much of anything.
If I were buying a professional 3D printer, this chart wouldn't help me understand what really matters: how the part will come out. That approach doesn’t help customers choose the right 3D printer for their needs and, in the long run, it doesn’t help the professional 3D printing industry grow.
This post isn’t meant to be a super technical breakdown of every 3D printer specification out there. Instead, my goal is to shed light on what some commonly discussed 3D printer specifications really mean and help businesses understand what they should actually be looking for.
Let’s start by diving into some of the individual specs listed in the chart above:
XY resolution is the most talked about specification for stereolithography (SLA) 3D printers. In many circumstances, it also happens to be the most useless.
Typically, XY resolution is used to describe the details or features of a part. In the chart above, the XY resolution listed for this digital light processing (DLP)-SLA printer (25-80 microns) is amazing, but what does that number actually describe?
In all likelihood, it’s the resolution of the actual projector (which is why it’s a variable range). That number doesn’t really tell the whole story. Ultimately, there are a plethora of variables that can affect a printer’s output. By looking only at XY resolution, we’re led to believe that there’s a 1:1 ratio between the size of a pixel on the projector and the cured resin of the part.
Here’s why that’s a faulty calculation: It doesn’t take into account the material itself, the print process, the software used, or numerous other variables (professional 3D printers have over 100 different settings that impact part quality). As a result, this spec doesn’t tell us anything about what you could actually produce with this machine.
Layer thickness is typically used to describe the surface finish of a part. While the thickness of a layer is often better at lower layer heights, the issue is that the roughness of a surface is not standard in relation to the layer height.
To illustrate this, I printed a few parts on the Form 2 to show that the relationship between layer thickness and surface finish is not what one might expect. In the picture below, you’ll see two rings—one printed in Castable Resin and the other in Black Resin. The Castable Resin has a slightly smoother surface finish and the micro pavé is a bit crisper.
Black Resin (25 microns layer height).
Castable Resin (50 microns layer height).
Here’s the catch: the ring printed in Castable Resin was actually printed at 50 microns, whereas the ring printed in Black Resin was printed at 25 microns.
The reason the ring printed in Castable Resin looks better at 50 microns is because this resin was designed to produce the best results at 50 microns. Also, the Formlabs team dialed in the print/material settings on the Form 2 to make sure it produced the best results for casting.
Some companies list Z-axis resolution instead of layer height, which has the same usefulness as XY resolution because it speaks to the distance the Z-axis motor can mechanically move/step.
Formlabs recently introduced OpenFL, giving researchers access to an API for more control over the Form 1+. With OpenFL, the smallest Z-axis step for the Form 1+ is 2.5 µm, which you won’t see listed on Formlabs’ website. The reason that this information isn’t included is because it is a maximum of the motor, not the type of layer that can be printed.
The bottom line: just because a printer manufacturer claims “X” layer height, doesn’t mean that printer will have a better surface finish.
Maximum speed is a hard metric to quantify, particularly across different printers. Again, there’s not enough information for us to really understand how these printers will perform when producing parts. Not only do the standard variables impact print time, so too do factors like geometry and orientation of the part.
For instance, a taller part will take more time than one oriented closer to the build plate because there are more layers to print. Also, the way that an object is oriented and supported will change the time it takes to print the part.
A common benchmark is how fast a printer can produce a one-inch cube. The problem with that example is that it’s very specific. Unless you’re a dice manufacturer, one-inch cubes aren’t a great way to estimate how long your part will take to print.
Don’t get me started on this one. Decisions in life would be so much easier if “good” and “bad” were the only ways of quantifying specifications. Surface finish was discussed earlier in relation to layer thickness, but one thing to keep in mind: there is no real specification for surface finish. Surface finish can differ depending on the geometry (curved vs. straight surfaces) and orientation.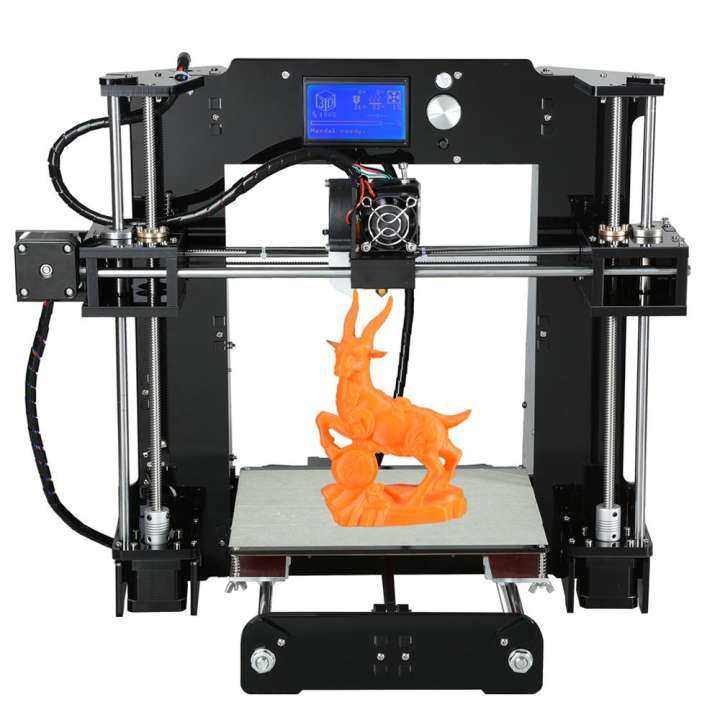 The only way to compare surface finish between printers is if every 3D printing company published results from an industry standard part and profilometer. Probably not going to happen anytime soon.
Accuracy isn’t included in the chart in the introduction, but it is something that a few 3D printer companies have been publishing recently. The mistake that a lot of 3D printer buyers make is assuming that XY resolution or layer thickness will determine the accuracy of the final part.
The truth is that global accuracy is hard to determine, largely because it can be impacted by length, geometry, and orientation. Here’s an example of an accuracy statement for a large industrial machine:
Accuracy for a large industrial printer (priced around $100,000).
At first it seems all parts will be within 25-50 microns but the footnote references just about every aspect of producing a part.
I don’t want you to walk away thinking everyone in our industry is misleading you.
The truth is, the 3D printing industry as a whole lacks a set of standard specifications that adequately describes what you can expect from a 3D printer. Even with established technology, specifications don’t tell the whole story. I’ve seen speed tests where a higher spec Windows computer is slower than a Mac with lesser specs.
Output is truly dependent on hardware, operating system, application, and several other factors.
With that said, all hope is not lost. Here are four tips that will help you effectively evaluate different 3D printers:
Talk to the company. You’re investing in something to help you iterate faster and build better products. The best way to better understand a company’s technology and how its products work is to talk to its team.
Request a sample part. We’ve established that 3D printer specifications aren’t a great way to evaluate what a printer can actually produce. To see if a specific printer will meet your needs, ask the 3D printing manufacturer to send you a sample part, such as this free sample part from Formlabs. Once you receive the sample, ask the company to provide more information. For example:
- How long did it take to print?
- How much material was used?
- What’s the layer thickness?
If you do this a few times with a few different companies, you’ll see that surface finish from different printers can vary, even at the same layer height.
Ask for custom sample parts. Not all companies will do this, but it doesn’t hurt to ask. Seeing your design printed will help you to understand what you can expect when you begin running the machine. If most of your parts are protected IP, try designing a part with similar features to avoid worrying about confidentiality agreements.
When sending a design for a custom sample, make sure the design is representative of your business or use case. For most prototyping applications, I typically recommend sending a design that represents roughly 80 percent of your business. Sending a complicated part that is a small percentage of what you’ll be printing can lead to purchasing a solution that doesn’t really make sense for your work.
Look for design guides. Most 3D printing manufacturers have published design guides that help customers understand how to better use and design models for their printers. Guides like the Formlabs design guide provide specifications for different types of features.
Request a Free Sample Part
Y Soft | YSoft BE3D eDEE 3D printer technical specifications
You have not given any consents yet.
| Product | 3D printer |
| Model | eDee |
| Trade name | YSoft be3D eDee |
| Printing technology | FFF (Fused Filament Fabrication) |
| Printing area | 150 × 150 × 150 mm |
| Nozzle diameter | 0.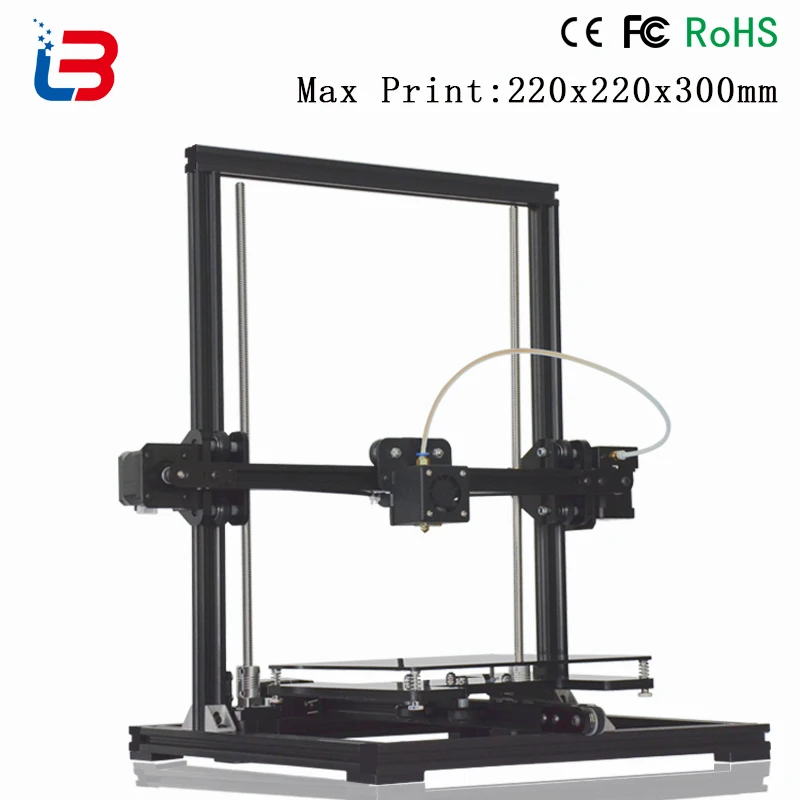 4 mm (expected lifetime 1 500 h) 4 mm (expected lifetime 1 500 h) |
| Print bed type | Glass, removable |
| Calibration | Automatic |
| Safety elements | Door locks, print bed sensor |
| Total dimensions | 496 × 414 × 397 mm |
| Weight | 27.5 kg (shipping weight: 31 kg) |
| Recommended operation conditions | 15–30°C (59–86°F), max. 60% humidity |
| Supply voltage | External source 24 V/3.75 A (90 W, input 230 V/110 V) |
DESCRIPTION OF PRINTER COMPONENTS
| 1. Touch screen | 8. Main power switch |
| 2. Print bed | 9. Ethernet port |
| 3. Print head | 10. Power connector for a 24 V power source (use the original power source supplied with the printer) |
4. Front doors Front doors | 11. Cable holder/slot for a Kensington lock |
| 5. Side doors | 12. Manufacturing label |
| 6. Electromechanical locks | 13. Filament entry point/filament detector |
| 7. Electromechanical lock strike plate | 14. Card reader holder |
3D printer operating conditions
- Surrounding operation temperature: 15–30°C (for PLA printing)
- Maximum environment humidity: 60%
- Dust-free environment
- A stable and firm base preventing the transfer of vibrations from the printer to the surrounding area
- Original power source
- The printer must be placed 1 m or more from any heat source
- The printer must be placed in a well-ventilated area
ACCESSORIES
- 1x power source 24 V/5 A
- 1x spool holder
- 1x glass print bed
- 1x spatula
- 1x print bed glue stick
This webpage uses cookies
Cookies enable us to tailor our services to your specific needs and help our website function better.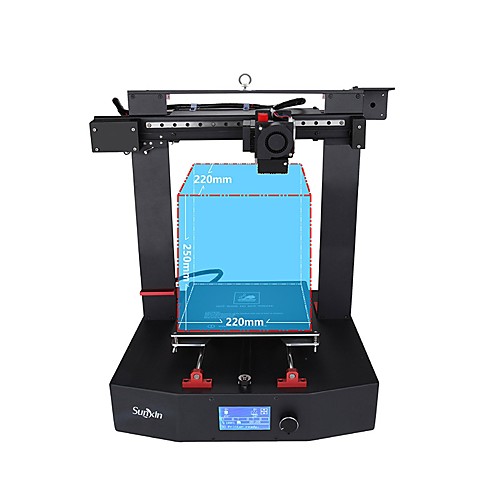
Information
Required onlyAllow all cookies
Required Cookies
Required cookies help the website to function so that it allows basic functionality such as site navigation and access to secured sections of the website. The website will not function correctly without these cookies.
<p>Advertising Cookies</p>
Analytical Cookies
Analytical cookies allow us to monitor aggregated information on site traffic and the usage of various functions. This helps us to improve our website. Analytical cookies are set up by third parties.
Analytical Cookies
Advertising Cookies
Advertising cookies are used to monitor website visitors.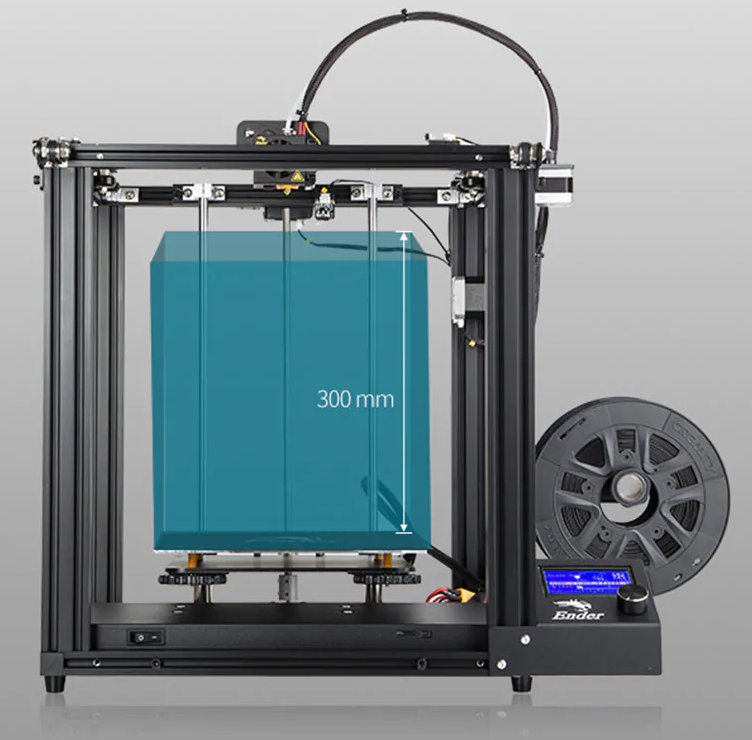 The aim is to display an advertisement which is relevant and interesting to an individual user and thereby more valuable to publishers and third party advertisers.
Allow those selected Allow all cookies
GET ACCESS TO PREMIUM CONTENT
Stay up to date with the latest industry news.
Subscribe to our newsletter
Country*AfghanistanAlbaniaAlgeriaAmerican SamoaAndorraAngolaAnguillaAntarcticaAntigua and BarbudaArgentinaArmeniaArubaAustraliaAustriaAzerbaijanBahamasBahrainBangladeshBarbadosBelgiumBelizeBeninBermudaBhutanBoliviaBosnia-HerzegovinaBotswanaBouvet IslandBrazilBritish Indian Ocean TerritoryBrunei DarussalamBulgariaBurkina FasoBurundiCambodiaCameroonCanadaCape VerdeCayman IslandsCentral African RepublicChadChileChinaChristmas IslandCocos (Keeling) IslandsColombiaComorosCongoCongo (Dem. Republic)Cook IslandsCosta RicaCroatiaCubaCyprusCzech RepublicDenmarkDjiboutiDominicaEast TimorEcuadorEgyptEl SalvadorEquatorial GuineaEritreaEstoniaEthiopiaFalkland Islands (Malvinas)Faroe IslandsFijiFinlandFranceFrench GuianaFrench PolynesiaFrench Southern TerritoriesGabonGambiaGeorgiaGermanyGhanaGibraltarGreeceGreenlandGrenadaGuadeloupeGuamGuatemalaGuernsey and AlderneyGuineaGuinea-BissauGuyanaHaitiHeard and McDonald IslandsHondurasHong KongHungaryIcelandIndiaIndonesiaIraqIrelandIsland of ManIsraelItalyIvory CoastJamaicaJapanJerseyJordanKazakhstanKenyaKiribatiKorea (Democratic Republic of)Korea (Republic of)KosovoKuwaitKyrgyz RepublicLaosLatviaLebanonLesothoLiberiaLibyaLiechtensteinLithuaniaLuxembourgMacauMadagascarMalawiMalaysiaMaldivesMaliMaltaMarshall IslandsMartiniqueMauritaniaMauritiusMayotteMexicoMicronesiaMoldaviaMonacoMongoliaMontenegroMontserratMoroccoMozambiqueMyanmarNamibiaNauruNepalNetherlandsNetherlands AntillesNew CaledoniaNew ZealandNicaraguaNigerNigeriaNiueNorfolk IslandNorth MacedoniaNorthern Mariana IslandsNorwayOmanPakistanPalauPalestinian TerritoryPanamaPapua-New GuineaParaguayPeruPhilippinesPitcairnPolandPortugalPuerto RicoQatarRe unionRepublic of DominicaRomaniaRwandaSaint BarthelemySaint HelenaSaint Kitts and NevisSaint LuciaSaint MartinSaint Pierre and MiquelonSaint Vincent and the GrenadinesSamoaSan MarinoSao Tome and PrincipeSaudi ArabiaSenegalSerbiaSeychellesSierra LeoneSingaporeSlovakiaSloveniaSolomon IslandsSomaliaSouth AfricaSouth Georgia and South Sandwich IslandsSpainSri LankaSudanSurinameSvalbard and Jan Mayen IslandsSwazilandSwedenSwitzerlandSyrian Arab RepublicTaiwanTajikistanTanzaniaThailandTogoTokelauTongaTrinidad and TobagoTunisiaTurkeyTurkmenistanTurks and Caicos IslandsTuvaluUgandaUkraineUnited Arab EmiratesUnited KingdomUnited States Minor Outlying IslandsUruguayUSAUzbekistanVanuatuVatican (Holy See)VenezuelaVietnamVirgin Islands (British)Virgin Islands (U. S.)Wallis and Futuna IslandsWestern SaharaYemenZambiaZimbabwe
I would like to subscribe to the Y Soft Newsletter.
I would like to receive other business offers from Y Soft.
Subscribe
DE
What do the characteristics of a 3D printer mean?
As I wrote the other day, I am currently writing a book on choosing a 3D printer. The working title is 'How to choose a 3D printer' In it I will tell you what to pay attention to first of all for a beginner. And what does this or that parameter mean. What are the schemes of 3D printers. And a lot of what is scattered over various discussions. Here the information will be compiled in one place. The book will be FREE, with free distribution.
Below is a draft of one chapter in which I will look at what the individual characteristics of 3D printers, which are published by equipment manufacturers and sellers, mean.
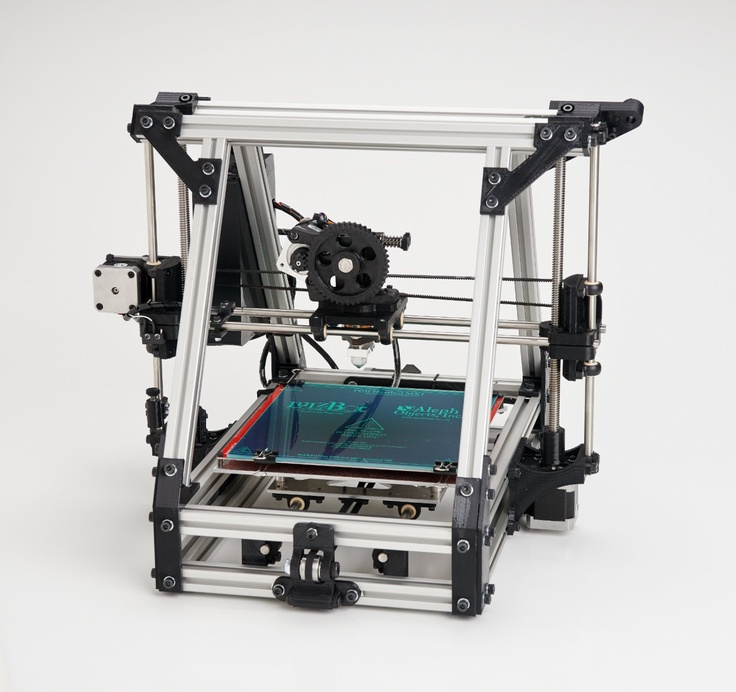
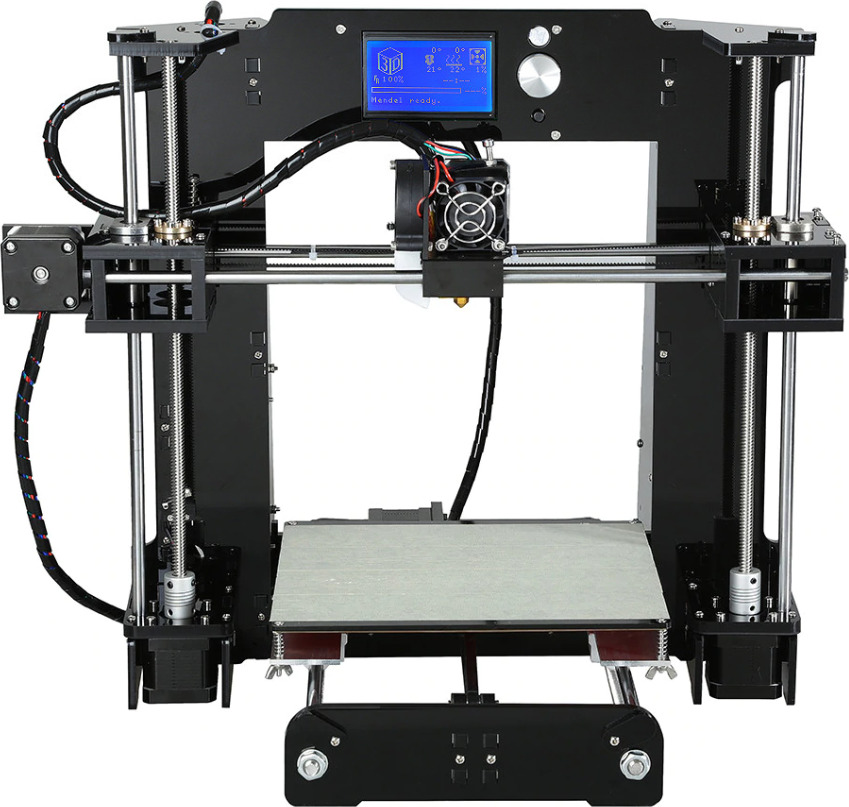
Using the Zenit 3D printer as an example, let's take a look at the 3D characteristics and I'll explain what they mean.
· Printable area: 240 x 215 x 230 mm
One of the main parameters. Tells us what is the maximum size we can print a part. In fact, the printable area is usually slightly smaller. And in reality, details of this size are not printed. Typically, a part can be larger than one of the sizes. But here we must understand that we can place the part diagonally on the desktop. Therefore, the maximum length of a part is usually limited by the length of the table diagonal. Although in some cases it is possible to connect a third dimension. But here we must already take into account the direction of the layers.
· X, Y axis positioning accuracy: 0.04mm
An important parameter that affects print quality. This is how accurately the printer can position the extruder over the printable area. Achieved with good mechanics. Tensioned belts. And greased guides.
· Positioning accuracy of the Z axis: 0.01mm
Also an important parameter that affects the quality. It depends entirely on the implementation of movement along the Z axis. There are different implementation options. We will consider them later.
Filament diameter: 1.75 mm
Parameter that tells us about the consumables used by the 3D printer. Now, in fact, there are two sizes of filament: 1.75 mm and 2.85 (3.00) mm.
1.75mm is now the most common. Such plastic is used by most 3D printers. All new materials first appear in this diameter.
2.85mm or 3.00mm older size. It is now used in 3D printers, Ultimaker clones and various homemade products. The original Ultimaker uses a diameter of 2.85mm. 3.00mm plastic is usually produced by "non-mainstream" manufacturers. And it is used in clones and DIYs.
There is no significant difference in usage between these standards. The only thing is that for 1. 75mm there are more types of media offered for printing. Basic ABS, PLA plastics for both standard sizes are in stock.
There are also technical differences in the extruder scheme used. The so-called Bowden extruder is more adapted to the "thick" plastic 2.85 (3.00) mm. This is one of the reasons why 2.5mm filament is used in Ultimaker 3D printers equipped with similar extruders.
Nozzle diameter, mm: 0.3
Everything is simple here. The thinner the nozzle, the more accurately we can print the part. In theory. In fact, a thinner nozzle is prone to clogging. And starting with a diameter of 0.2 mm, this can be a serious problem.
The second reason is that as the nozzle diameter decreases, the print time increases. Here the dependence is linear - the smaller the diameter of the nozzle - it is necessary to go through more layers and passages in order for the walls to have sufficient strength.
As a result, the most common nozzles are 0.3-0.4 mm in diameter. They achieve decent accuracy. And the print time is quite adequate.
Larger diameter nozzles 0.5-1.0mm are commonly used in printers with a large printable area. With them, a speed is achieved that is more important when printing large parts than the quality of printing small parts of a model.
In most printers, the nozzles can be changed and the correct diameter can be used for the job. But in fact, by setting 0.3-0.4mm you will close 95% of all possible tasks.
· Layer height : 50 to 150 microns
Many manufacturers declare layer heights of even less than 50 microns. This is 0.05mm. For most, the lower limit is 50-100 microns. Here you need to understand - the thinner the layer, the more the printing time increases. That is, a part with a layer of 0.05 mm will be printed at least twice as long as a part with a layer of 0.1 mm.
Therefore, for most applications, a lower limit of 0.1mm or 100 microns is more than sufficient.
As for the upper limit of the thickness, there is also a dependence here. For high-quality printing, it is necessary that the layer thickness be no more than 0.5-0.6 of the nozzle diameter. That is, for a nozzle diameter of 0.3 mm, the optimal upper limit of the thickness, as indicated here, is 150 microns or 0.15 mm.
· Print speed: 40-150 mm/s
Print speed is a relative term and is usually achieved on large straight parts. The print speed is uneven and depends on many parameters. And the more complex the model, the slower the print speed. The average speed of most printers lies in the region of 50-100mm/sec. If a printer can't print simple parts well at 50mm/sec with standard PLA or ABS, there's something wrong with it.
As I said, super quality is usually achieved at 30-40mm/sec. This speed is selected either manually in the settings or the slicer itself (print preparation program) itself reduces the speed to adequate values.
· Maximum print head speed: 300mm/s
Parameter that affects print speed. It is indirectly related to the overall print speed.
Demonstrates the maximum speed at which the extruder can move "idle". In theory.
· Heated table: Yes
Another important option that caused a lot of copies to be broken. The presence of a heated table allows you to use almost all available materials for printing. First of all, with a large shrinkage. For example, one of the two most common materials is ABS. But here is a nuance ... Now there are quite a lot of materials that replace ABS in many tasks. If you do not plan to use such plastic, then you can get by with a table without heating. Conclusion - a table with heating is certainly better than without heating. But if you do not plan to use ABS in your tasks, then you can safely do without it.
· Number of printheads: 1
Most 3D printers have one extruder and this is also usually sufficient for the vast majority of applications. The second extruder makes it possible to use the dissolved material to create supports. For example, HIPS or PVA.
You can also print in two colors. But it almost didn't work out. And apart from demonstrating the possibilities, it is usually not seriously used.
In general, two-material printing got its momentum after the introduction of the PRO250 printer from PICASO. It uses an extruder with JetSwitch rotary nozzles. It allows you to achieve high-quality printing with two materials. And most importantly, he dramatically reduced the printing time with two materials. The fact is that when printing with two materials, when the extruders are located next to each other, you have to build an additional technological “tower” next to the part. This leads to a significant increase in print time. Switching between extruders can take several minutes.
So if you don't need to print complex models, then you probably won't need a second extruder.
· Software : RepetierHost, Slic3r, Cura
With the exception of some 3D printers with their own software, most can work with universal programs. Both paid and free. These are Cura, RepetierHost, Slic3r, Simplify3D and many others.
Computer connection: USB
Most 3D printers connect to a computer using USB. Although more and more new models are appearing that also support connecting to the network using WiFi or Ethenet.
· SD card printing: Yes
This is the more important setting. Almost all printers have it. But there are still printers that cannot print from Flash or SD cards.
Why is this necessary? If possible, start printing using such memory cards. Printing via USB can lead to marriage. The fact is that the USB interface is quite dependent on the speed of the computer. And if you load your computer with a “heavy” program at the time of printing, it is possible to “hang” it, which will lead to marriage.
· Dimensions: 460x360x370 mm
The parameter is only important for understanding where you can place the equipment.
· Weight : 20 kg
The same - it will help you choose a place for the printer. Although it’s probably clear that it’s not worth putting 20kg on a flimsy stool.
· Warranty: 3 years
Everything is clear here too. The bigger the guarantee, the better. Most printers now have a warranty of around a year. This, of course, is about printers bought in Russia, and not purchases from Ali. Some models have a two-year warranty. Or as in this case, even for three years.
LOW FORCE STEREOLITHOGRAPHY (LFS)
Resolution XYᵃ
25 μm
25 μm
25 μm
Laser spot
85 μm
μm 9000 μm 9000 μm 9000 μm 9000 μm 9000 μm 9000 μA of power. One 250mW laser
Two 250mW lasers
Two 250mW lasers
Print volume (W x D x H)
14.5 x 14.5 x 18.5 cm
5.7 x 5.7 x 7.3 in.
33.5 x 20 x 30 cm
13.2 x 7.9 x 11.8 inches
33.5 x 20 x 30 cm
13.2 x 7.9 x 11.8 in.
Layer thicknessᵇ
25 – 300 µm
0.001 - 0.012 in.-kupit-v-soin-store.ru-1.png)
25 - 300 µmᶜ
0.001 - 0.012 in. ᶜ
25 - 300 µm ᶜ
0.001 - 0.012 inchesᶜ
ᵃ XY resolution indicates how accurately the printer can draw in the XY (horizontal) plane.
ᵇ The layer thickness depends on the material. Please refer to our Material Compatibility Chart to confirm availability.
ᶜ The Form 3L and Form 3BL models are capable of printing at 25µm layers, but we currently only plan to release one 25µm print setting for our large format printers. Please submit feedback to our support team if your job requires a 25µm layer thickness.
Printer
Form 3+
Form 3L
Form 3BL0161
Low Force StereolithHography (LFS)
Low Force SteLithography (LFS) ™
Polimer
9000
14.5 x 14.5 x 18.5 cm
5.7 x 5.7 x 7.3 inches
33.5 x 20 x 30 cm
13.2 x 7.9 x 11.8 inches
33. 5 x 20 x 30 cm
13.2" x 7.9" x 11.8"
Removal in one motion
Auto-generated
Removal in one motion
Auto-generated
One-Shot Removal
Design Specification/CAD
ᵃ XY resolution indicates how accurately the printer can draw in the XY (horizontal) plane.
ᵇ The layer thickness depends on the material. Please refer to our Material Compatibility Chart to confirm availability.
ᶜ Form 3L and Form 3BL are capable of printing on 25µm layers, but at the moment we only plan to release one 25µm print setting for our wide format printers. Please submit feedback to our support team if your job requires a 25µm layer thickness.
Printer
Form 3+
Form 3L
Form 3BL
Minimum Access Dimensions (W x D x H) 3 x 7 4 cm 5 9000
15.9 x 20.9 x 30.7 in.
90 × 96 × 104 cm
35.4 x 37.8 x 41 inches
90 x 96 x 104 cm
35. 4 x 37.8 x 41 inches
Printer dimensions (W x D x H)
40.5 x 37.5 x 53 cm
15.9 x 14.8 x 20.9 inches
77 x 52 x 74 cm
30.3 x 20.5 x 29.1 inches
77 x 52 x 74 cm
30.3 x 20.5 x 29.1 in.
Weight
17.5 kg
38.5 lbs
54.4 kg
120 lb
54.4 kg
120 lb
Internal temperature
Auto reheat to 35°C
Autoheat to 95°F
Autoheat to 35°C
Autoheat to 95°F
Autoheat to 35°C
Auto-heat to 95°F
Temperature control
Heated air chamber
Heated air chamber
Heated air chamber
Operating conditions
18 – 28 °C
64 - 82°F
18 - 28°C
64 - 82°F
18 - 28°C
64 - 82 °F
Power requirements
100 - 240 VAC current
2.5 A
50/60 Hz
220 W
100-240 VA
MAX. 8.5 A
8.5 A
50/60 Hz
650 W
100-240 VA
MAX. 8.5 A
50/60 Hz
650W
Laser specifications
1 Light Processing Unit (LPU)
Certificate EN 60825-1:2007
Class 1 laser system
Wavelength 405 nm
Power 250 mW
Laser spot 85 µm (0.0033 in.)
2 Light Processing Unit (LPU)
Certificate EN 60825-1:2007
Class 1 laser system
Wavelength 405 nm
Power 250 mW
Laser spot 85 µm (0.0033 in.)
2 Light Processing Unit (LPU)
Certificate EN 60825-1:2007
Class 1 laser system
Wavelength 405 nm
Power 250 mW
Laser spot 85 µm (0.0033 in)
Network interfaces
Wi-Fi (2.4, 5 GHz)
Ethernet (1000 Mbit)
USB 2.0
Wi-Fi (2.4, 5 GHz)
Ethernet (1000 Mbit)
USB 2.0
Wi-Fi (2.4, 5 GHz)
Ethernet (1000 Mbit)
USB 2.0
Printer control
Interactive touch screen 5.