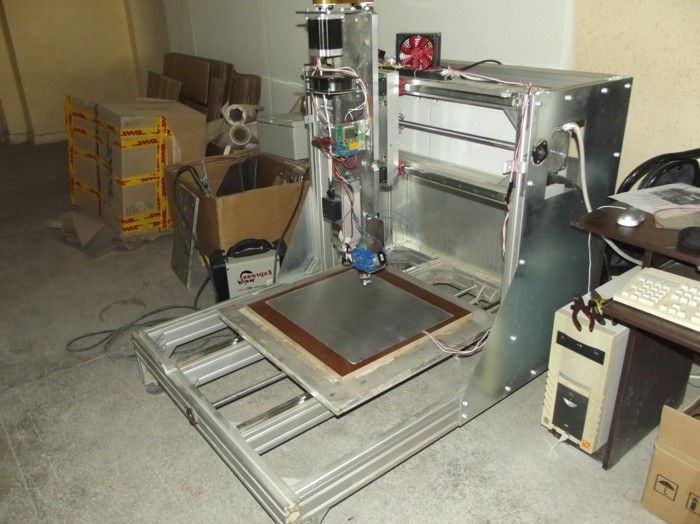
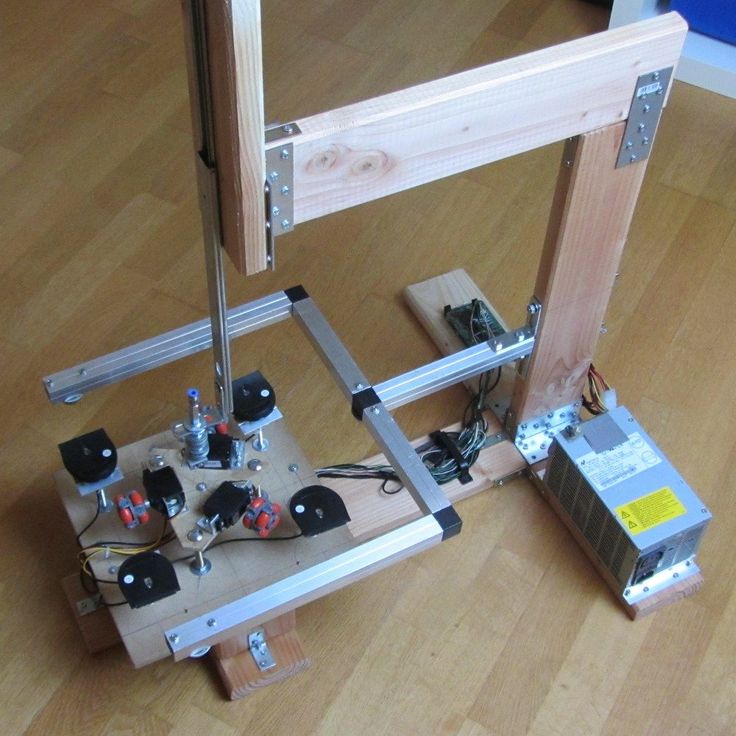
3D printer homemade
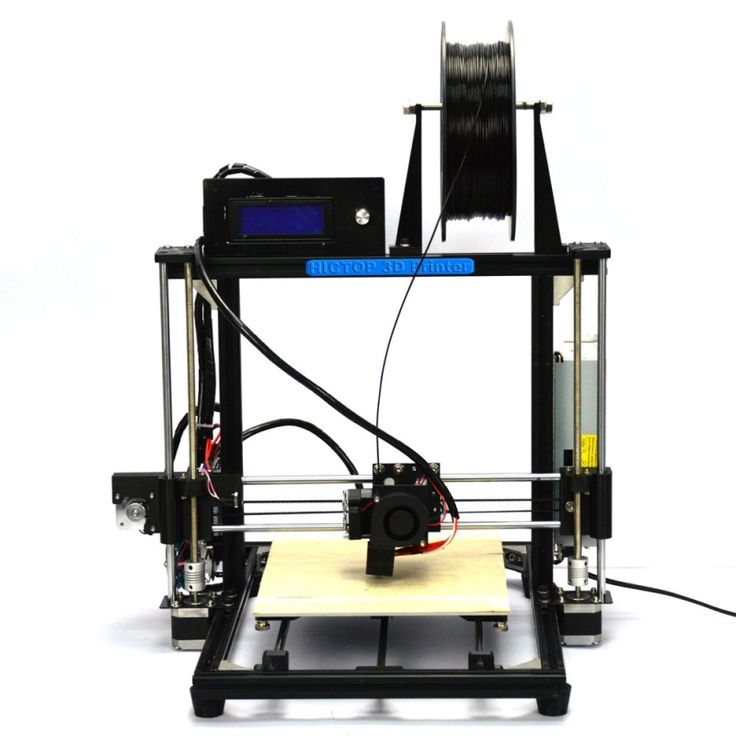
The 10 Best DIY 3D Printer Kits 2022 (Starting at $150!)
Increasingly, makers are turning away from desktop FDM 3D printers, preferring to buy a cheap 3D printer kit and build their own DIY 3D printer from scratch. Some of these are RepRap 3D printer kits, and some are specially designed kits.
The 3D printer kit revolution has reduced prices, led to a number of key breakthroughs, and has made 3D printing more accessible than ever before.
These 3D printer kits can take just a few minutes to assemble, or take hours or even days. They can also vary greatly in price, print accuracy, maximum build and print speed. Some even use technologies other than fused deposition modeling — you can now buy DIY SLS 3D printers and SLA 3D printers.
| 3D printer kit name and brand | Build Volume (mm) | Price | Where to purchase for best price | Alternative Purchase Option |
|---|---|---|---|---|
| Creality Ender 3 | 220 x 220 x 250 | $189 | Creality Store here | Amazon here |
| Prusa Mini | 180 x 180 x 180 | $399 | Prusa Store here | |
| Creality Ender 3 V2 | 220 x 220 x 250 | $279 | Creality Store here | Amazon here |
| Creality Ender 5 | 220 x 220 x 300 | $349 | Amazon here | |
| Flsun QQ-S | 255 x 255 x 360 | $369 | Amazon here | |
| Tronxy X5SA Pro | 330 x 330 x 400 | $399 | Amazon here | |
| Anycubic Vyper | 245 x 245 x 260 | $429 | Anycubic here | Amazon here |
| Creality CR-10 / V3 | 300 x 300 x 400 | $369 / $459 | Creality here | Amazon here |
| Prusa i3 MK3S | 250 x 210 x 210 | $749 / $999 | Kit available available on Prusa Store here | Fully assembled on Prusa Store here |
| Peopoly Moai | 130 x 130 x 180 | $1,295 | Matterhackers here |
Advantages of DIY 3D printers
- Open source: Most homemade 3D printers are also open source 3D printers, meaning they can be tinkered with, upgraded, and modded freely with the creators’ permission. Many Creality, Prusa and Anet printers are open source, as well as desktop 3D printers like BCN3D and Ultimaker printers.
- Open build areas: 3D printer kits rarely feature closed chambers or enclosures as standard. This would affect the printing of filaments like Nylon or PEEK, but is less of an issue for standard filaments like PLA or PETG.
- Easily upgradable parts: DIY 3D printer owners are frequently switching out parts, such as nozzles, hot ends and extruders for better quality parts.
- Lower price: For the quality and size, you get a better deal if you build your own 3D printer.
- Larger build volume: The open build area means that you can have a larger 3D printer build area for the same size, neglecting the need for an enclosing frame.
 Therefore, low cost kits like the Creality CR-10 can have huge build volumes.
Build your own 3D printer: what makes a good DIY 3D printer?
We used several criteria to determine which 3D printer kit made it into our ranking:
- Cheap DIY 3D printer kits: We only included FDM 3D printer kits under $1,500. The printers are listed in price order, cheapest first.
- Print quality
- It it easy to build your own 3D printer: Not everyone is a technology wizard. Therefore, any kit that can be assembled quickly, easily, and is simple to operate, is at an advantage.
The best 3D printer kits
3DSourced is reader-supported. When you buy through links on our site, we may earn an affiliate commission. Learn more
1. Creality Ender 3
- Price: $189 — Available on Creality Store here / Available on Amazon here
- Build volume: 220 x 220 x 250 mm
The original Ender 3 is still one of the most popular 3D printer kits in the world, more than three years after it was originally released. The low price, great build area, and reliability have cemented the Ender 3 as one of the best 3D printer kits around.
The reliability is a major selling point in such a cheap 3D printer kit. Whereas most DIY printers in this price range are plagued by issues caused by low-quality parts, the Ender 3 is dependable and consistent, partly due to its upgraded extruder to prevent clogging or poor extrusion.
The resume printing function is useful if you’re prone to power cuts or want to print for several days straight and don’t want to risk a huge ruined print, and the Ender 3 is fairly quick to assemble, and shouldn’t take more than an hour or so.
However, it doesn’t feature auto-leveling — you’ll need to install a BLTouch or similar kit for that.
2. Prusa Mini — Great Prusa 3D printer kit
- Price: $399 — Available on Prusa Store here
- Print volume: 180 x 180 x 180 mm
- Print speed: up to 200mm/s
The Mini 3D printer version of the wildly successful Prusa MK3S, the Mini retains the 0. 05mm layer precision and can still calibrate itself, but costs less than half of the i3 MK3S. With the Mini, you can build your own 3D printer — and one with Prusa-level reliability! — for just $349.
It’s more compact, with a smaller build volume, and features removable spring steel sheets that make removing finished prints extremely easy — just flex the build plate and prints will come off with ease.
The extruder cannot reach the same temperatures during printing as the MK3S, though you can still print a number of tougher filaments like ABS, PETG, ASA and flexible filaments. The Mini retains the fast 200mm/s max printing speed, and can be upgraded to feature a filament sensor.
Overall, it’s another reliable 3D printer by the trusted Prusa brand who have proven over the years that their printers are some of the best 3D printer kits around. If you have the money, go for the MK3S, but for those on a budget, the Mini does a great job.
3. Creality Ender 3 V2 — Best DIY 3D Printer Under $300
- Price: $279 — Available on Creality Store here / Available on Amazon here
- Build volume: 220 x 220 x 250 mm
Building on the success of the Ender 3 and improving and fixing its few flaws, the Ender 3 V2, while the same size build volume, is a much enhanced DIY 3D printer.
The upgraded motherboard makes the printer quieter than ever, and the extra power makes for a much more stable and precise printing experience.
Read more: the quiet 3D printer buyer’s guide
The upgraded extruder is also a great touch. It’s easier to load and feed filament into via the rotary knob, ideal for PLA and flexible filaments. The large 4.3-inch screen makes the interface more intuitive, and the Ender 3 V2 is really easy to use overall.
Another extra is the carborundum glass platform, which can heat up faster than ever and improves adhesion so you can be sure of a great first layer. Overall, if you have the extra $100 to spare, consider going for the Ender 3 V2 over the original.
4. Creality Ender 5 — The Best DIY 3D printer under $500
- Price: $349 — Available on Amazon here / 3DJake UK & Europe here
- Print volume: 220 x 220 x 300 mm
Another Creality kit, the Ender 5 is another great 3D printer you can build at home.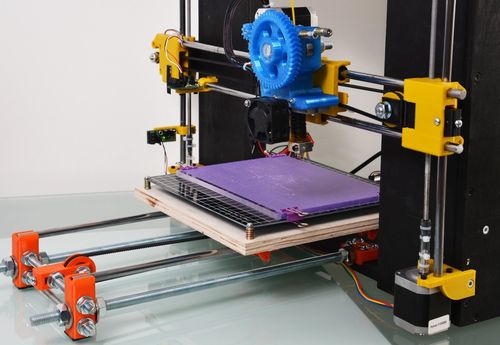 The Ender 5 is $100 more expensive, but boasts a number of improvements that make the extra money seem worth it.
Firstly, it can print taller prints than the Ender 3 — 300 mm high rather than 250 — important if you print tall structures like tall vases or monument 3D models. The structure is also stronger, having adopted a cube shape like the Tronxy X5SA which helps with stability, reducing vibrations or movements from external events, and improving part surface finish and quality.
Moreover, the minimum layer height of 50 microns is extraordinary for such a cheap machine. Review after review repeats how crisp the surface finish of their prints look with the Ender 5, so it’s fair to say the Ender 5 is a smash hit.
- For an extra $50 you can upgrade to the Ender 5 Pro printer kit, at $399. It’s available to buy here.
Note: while the Ender 5 can be tweaked to increase print speed without a noticeable loss in print quality, we recommend you don’t get too extravagant with this.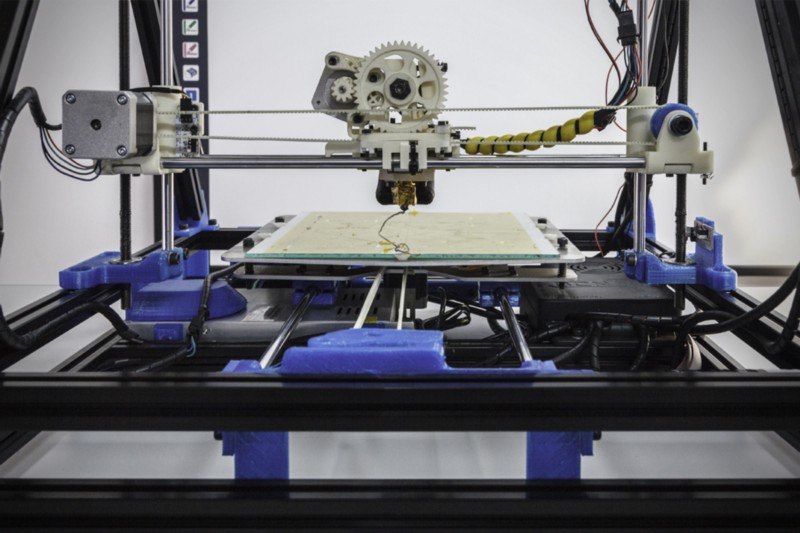 Stick with 60 mm/s or below for models with intricate parts — it’s worth a bit of extra printing time to guarantee crisp prints.
5. FLSUN QQ-S — Great Delta DIY 3D printer
- Price: $369 — Available on Amazon worldwide here
- Print volume: 255 x 255 x 360 mm
- Print speed: up to 300mm/s
One of the best DIY delta 3D printer machines out there, the Flsun QQ-S features notable improvements on the original Flsun QQ. It comes 90% assembled, so though technically still a 3D printer kit it will take under an hour to get up and running.
- We were lucky enough to test the FLSUN QQ-S, make sure to also check out our FLSUN QQ-S review.
Not only does it have a fantastic build volume for the price — especially the ability to print tall parts! — but it also comes with an upgraded lattice glass print bed, allowing for faster heating up to 100C in under 5 minutes, less warping and better adhesion during 3D printing. This is perfect for materials such as ABS filament, which are known to warp significantly under the wrong conditions.
Another advantage that beginners will enjoy is that as delta 3D printers don’t move the print bed — the print head does all the moving — the printer only needs to be auto-leveled once. It comes with a titan extruder, and can print with common printing materials like PLA and ABS, PVA, and HIPS for supports, as well as wood-filled filaments and flexible filaments.
It’s accurate, too, able to print at up to 50 microns. Overall, it’s a fantastic delta 3D printer kit that prints accurately, and super fast — it even made it into our fastest 3D printer ranking. It’s also one of the easiest DIY 3D printers to build, coming almost fully assembled — you just need to attach the gears and rods to hold the structure up, and then attach the extruder and filament holder.
6. Tronxy X5SA Pro — Huge Self-Assemble 3D printer
- Company based: China
- Price: $399 — Available on Amazon here
- Build volume: 330 x 330 x 400 mm
Kit 3D printer kings Tronxy showed humility and dedication to improve the X5SA Pro, fixing a number of small issues that affected the original. The X5SA Pro addresses the X-axis issues and has made it more stable, and upgraded the materials forming the printer kit’s structure. Now on the X5SA Pro, most of the printer is made from aluminum and is heavier and more stable, reducing vibrations and generally improving print performance.
As for the X5SA’s specs, it’s a large 3D printer DIY kit with similar printing sizes to the Creality CR-10, and boasts a 330 x 330 x 400 build volume. It claims increased precision vs the original Tronxy X5SA, and has a maximum accuracy of 125 microns. It’s impressive, reliable and one of the best cheap 3D printers you can get with such a large size — so those with big 3D printing ideas will enjoy both this and the Creality CR-10.
It’ll probably take you around four hours to build this printer kit, but it’ll be worth it once you start printing!The Tronxy X5SA Pro’s cube shape offers stability benefits resulting in good surface finish.
7. Anycubic Vyper
- Price: $429 — Available on Anycubic store here / Available on Amazon here
- Build volume: 245 x 245 x 245 mm
A key feature on the Anycubic Vyper missing from many printers in this price range is that the Vyper self-levels. This is a huge relief for busy makers who would rather not re-level their printer every few prints, and who just want to get to the fun part — printing! The 16-point bed leveling process accounts for differences between the nozzle and bed and can be done in just one click.
The 32-bit motherboard is beefed up compared to previous Anycubic 3D printer kits, offering silent printing and improved stability. We tested the Anycubic Vyper and found it to be consistent in printing, easy to operate with the 4.3-inch touchscreen, and it was incredibly easy to assemble — we built it in 10-15 minutes.
The new PEI spring steel magnetic print bed can be lifted off the platform easily for easy removal of your finished parts, and is designed to be scratch and heat resistant and to work well with standard filaments such as PLA, ABS, PETG, and TPU.
The Vyper also features an innovative new two-fan dual cooling system, cooling down parts quicker and enabling faster printing without causing errors — the Vyper can comfortably print at 100mm/s.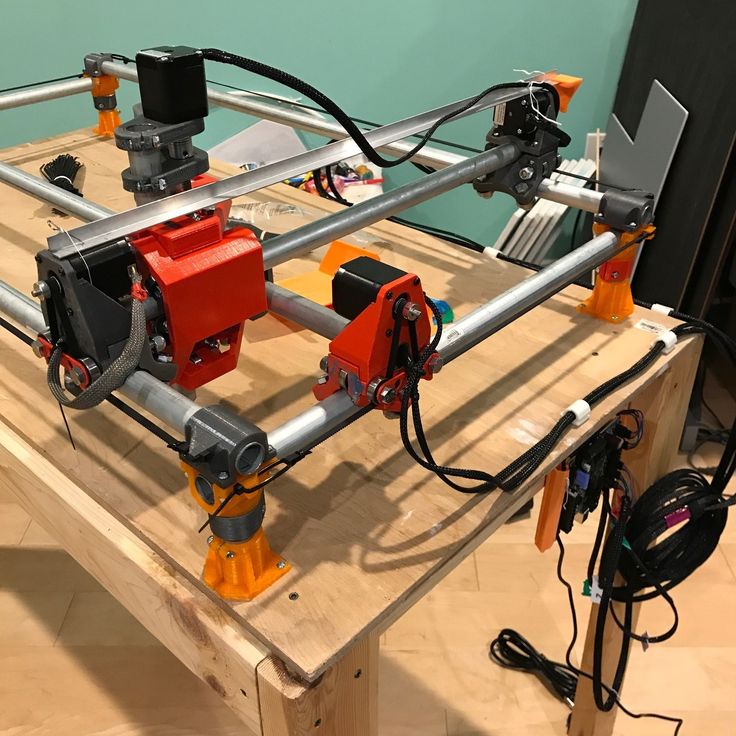
8. Creality CR-10 / V3
- Price: $369 / $459 — Available on Amazon here / Available on Creality Store here
- Print volume: 300 x 300 x 400 mm
The Creality CR-10 has a passionate group of supporters who hail it as the best DIY 3D printer kit in its price range. Manufactured by Creality, the CR-10 is a fantastic 3D printer build kit that can be built within 45 minutes.
- For a larger version, the Creality CR10 MAX has 450 x 450 x 470 mm maximum build volume, and costs $999. You can buy it here / or on 3DJake UK & Europe here
- For a smaller version, the CR10 Mini is available — you can buy it here / or on 3DJake UK & Europe here
The Creality CR-10 has an accuracy and print volume which is competitive with printers 5 times more expensive. With it’s minimum layer thickness of 0.05mm and fantastic 300 x 300 x 400 mm build volume, the Creality CR-10 is a great printer for just $370. It’s easy to use, making it the perfect 3D printer for beginners.
9. Prusa i3 MK3S — best 3D printer kit
- Company based: Czechia
- Price: $749 as a kit — Available on the Prusa store here / $999 fully assembled — Available on the Prusa store here
- Build volume: 250 x 210 x 210 mm
The Prusa i3 is known as the undeniable king of DIY 3D printer kits. These RepRap kits are fantastic, sporting an impressive print volume of 250 x 210 x 210 mm, and being able to print at speeds up to 200mm/s! It’s also accurate, durable and a complete workhorse, with layer heights from 0.05 mm and a bendable print surface to make removing finished prints as easy as possible.
Accessible via USB stick or by SD card, the Prusa i3 MK3 kits are designed to be simple to use as well as effective. With layer resolutions up to 50 microns, the Prusa i3 homemade 3D printer is so effective that it outperforms far more expensive 3D printers. It can print tougher filaments than more expensive printers too, with a Bondtech extruder that can reach temperatures of up to 300C, making printing Polycarbonate, ABS, Nylon, and other difficult filaments no problem. Colorful prints are possible with the Multi Material Upgrade Kit, which we discuss below.
Additionally, you can print up to 5 colors simultaneously with your Prusa if you purchase their multi-material upgrade kit, costing $300. This makes colorful model printing a breeze, and opens up for far more extravagant printing projects.
- With a Multi Material Upgrade kit, it can also print multiple colors. We explain more in our color 3D printer buyer’s guide.
- You can buy the Multi Material Upgrade Kit 2.0 here.
You can choose to either assemble the kit yourself or buy the printer pre-assembled, though this costs a few hundred dollars more. Overall, the Prusa remains the undisputed king of DIY 3D printer kits, with its competitors needing to do a lot of catching up to dethrone it.
The Prusa, with Multi Material Upgrade kit, allowing it to print multiple colors simultaneously. We explain this in our color 3D printer guide.10. Peopoly Moai SLA Kit — Homemade resin 3D printer kit
- Price: $1,295 — Available on Matterhackers here
- Build volume: 130 x 130 x 180 mm
The only resin 3D printer featured in our 3D printer kit guide, the Peopoly Moai is an incredible feat of engineering. It’s huge, offers incredible accuracy and precision, and best of all, you can build your own 3D printer at home from scratch.
For those looking for an effective SLA 3D printer, and who do not want to pay full price, the Moai kit could be the perfect printer for you. It is so accurate that it can mechanically print up to an astonishing 5-micron layer height, according to Peopoly, though you’ll likely never reach this accuracy because you won’t need to, nor would most resins or models accommodate this.
Featuring a 70-micron laser spot size, once you’ve built this homemade 3D printer you’ll be ready to create resin molds for 3D printed jewelry, dental models, engineering pieces, as well as prototypes for rapid prototyping or fun characters if you use the Moai as a 3D printer for miniatures.
The Peopoly Moai is open to use third-party resins, for those who want to save money on lower-cost resins and are fine with the slight quality drop-off. The printer itself however does not come with any resin, so you’ll need to purchase that with the kit. It is only to be expected that the Moai will take some time to assemble, as resin 3D printers are more complex than their FDM 3D printer counterparts, but most makers will be able to build their own 3D printer within 4 hours.
How to Build a 3D Printer From Scratch
If you are reading this article that means that you’ve probably decided to join the community of 3d printing enthusiasts and find out more about 3d printers, or maybe you have already got some experience in it and are ready to try to create your own 3d printer from scratch.
In this article you will find general understanding how 3D printers can be built as well as links to really useful resources where you can find more detailed information with step-by-step description.
Currently there is a big variety of 3d printers in the Internet that already assembled and are ready to print right after you unpack them from a box, of course you also need to buy a 3d printer filament for it.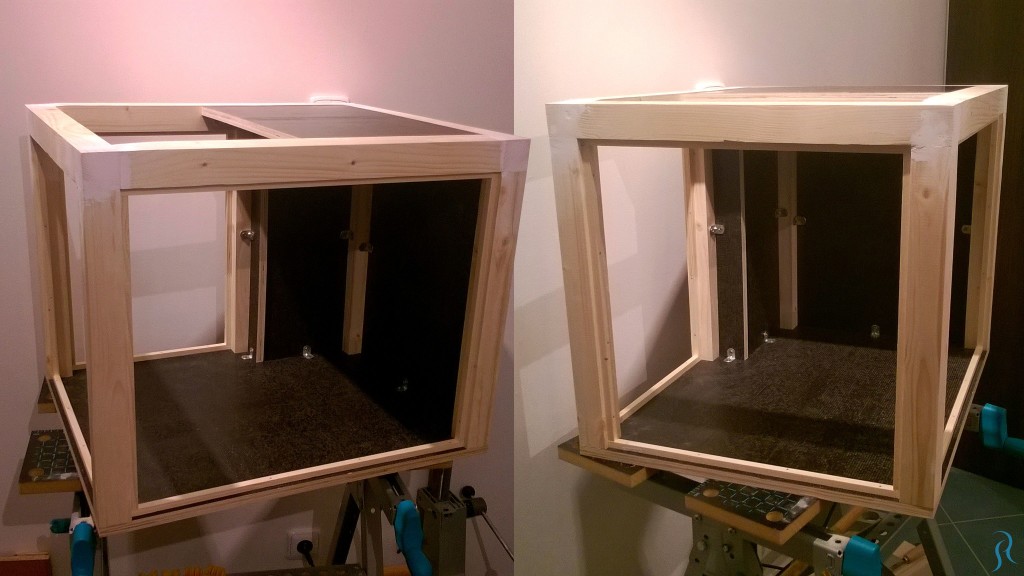 Do not forget that not all 3d printers can use the same filament types, so please read the instruction before you purchase it.
But for some people who love to make something new with their own hands can be more interesting to build their own 3d printer from scratch. Based on our research the 3D printing community is filled with many enthusiastic people so called DIY’ers (Do It Yourself’ers), who are fascinated with building 3d printers literally almost from scratch.
Good example of it is RepRap movement. RepRap is short for a Replicating Rapid-prototyper. In other words it is the self-replicating 3d printer. In fact most of today’s top consumer level 3D printers (picture above) are originated in one way or another from RepRap.
You can find a lot of examples on how to build a 3d printer from scratch on RepRap website, but we also want to describe some of more essential steps in order to give an overall understanding of what to expect if you really decide to make your own 3d printer.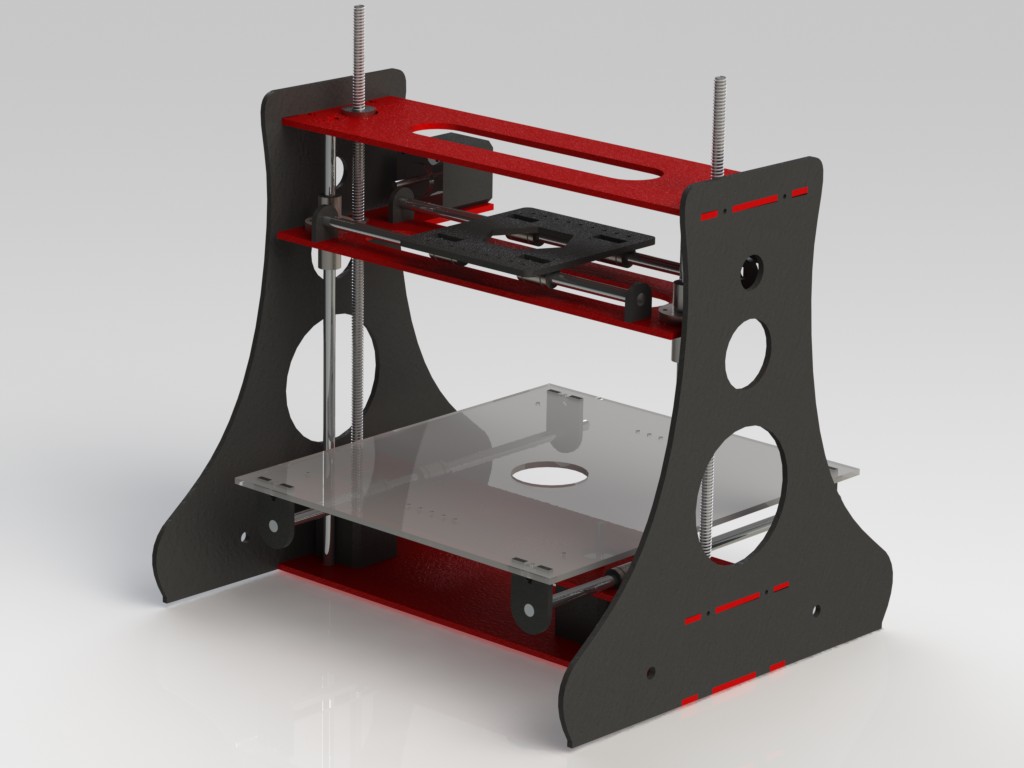
The first step is to find and buy 3d printer DIY kit. Kits usually contain most of parts needed to assemble the printer and can be divided into two main types:
Scratch Built 3D Printer – This 3d printer DIY kit is for those who prefer to build thing from scratch, or in other words go to DIY RepRap route. Apart from some essential advantages this approach has also its disadvantages. In theory it can save you some money and since you build it from scratch you will know every nut and bolt in it by the time you can use it and successfully print your first object. Main disadvantage of this method is time. Literally it will take a lot of time to deal with all these hundreds of bolts, wires, belts and much other stuff. In the end you still need to select and purchase or build a controller board, but it depends on your skills level.
Kit Built 3D Printer – This type of kit is good if you want to save some money and at the same time not to deal with all challenges described in the 1st kit type. Many manufactures sell such kits with “easy-to-assemble” instructions included. I doubt that it will be as easy as assemble a chair from IKEA, so you still have to be mechanically inclined and able to understand basic geometry. Some of such kits contain not all parts and you may need to buy something in addition.
The next step will be to determine the design for your 3D printer. In my humble opinion most of DIY 3D printers have not very breathtaking and futuristic design in comparison with MakerBot and other brands. But it is also a matter of taste, for some people the design is not very important.
Once you have got your 3d print DIY kit and chosen the design you could go ahead and start the most fascinating and time consuming part – build your own 3d printer. Be prepared for sleepless nights and a lot of fun. Maybe you will make up something new and present your findings to RepRap community.
When the hardware part of the 3d printer is ready you also need to add a software component to it. It basically does the following things: allows you to view and alter 3d graphical objects, as well as converts the 3d images into instructions that 3d printer can understand.
Finally you can 3d print your first object! If you do not have anything to print, you can find a big variety of objects on specialized marketplaces such as Shapeways, Thingiverse and others. Before printing make sure that the object you want to 3d print has the right size and fit on the printer frame.
At the end there is a list of some links where you can find more information about how to build your own 3d printer from scratch:
- RepRap options
- 3D Printer DIY: How to Build Your Own 3D Printer from Scratch
- 3D Printing: Build Your Own 3D Printer and Print Your Own 3D Objects
- Arduino Controlled CNC / 3D Printer Hybrid
- El34 World – 3D Printer Build using 1 inch T-Slot extrusions
- CNET 3D Printer Build Week
Also watch a video from Ben Heck in which he answers on some 3d printing related questions.
Related Articles:
- What is 3d printing – 3D printing technologies overview
- What is 3D Printing?
- History of 3D Printing
- Direct and Binder 3D Printing techniques
- Photopolymerization and Sintering
- 3D Printing Process
- 3D printing revolution
- 3D Printing Materials
- How to choose a right 3D printer filament type
- 3D Printer Filament Types Overview
- Types of 3D printers or 3D printing technologies overview
- How to find and buy a right 3D printer
- History of 3D printing in one picture
- Places to download 3D printer files and files formats overview
- 3D Printing Services Overview
- You Should Know These Important 3D Printing Concepts
Homemade metal 3D printer, but something went wrong / Sudo Null IT News
Hello everyone, my name is Sergey. In this article, we will talk about 3D printing with metal, more precisely, about my attempt to implement 3D printing with metal.
Very often, people who are interested in or engaged in any activity, no matter what, stumble upon something completely new and previously unknown to them, something that can help develop/improve their main activity. A similar situation happened to me.
Surfing the expanses of your Internet, I came across a wonderful technology for vacuum deposition of metals on various materials. On Habré there is an interesting article about this technology. In addition, on many other resources it was said that the evaporated metal moves towards the target in a straight line.
Many resources0003
And then I thought, what if I spray metal in the place I need, gradually increasing the thickness? I looked for information about whether someone did this - I did not find it.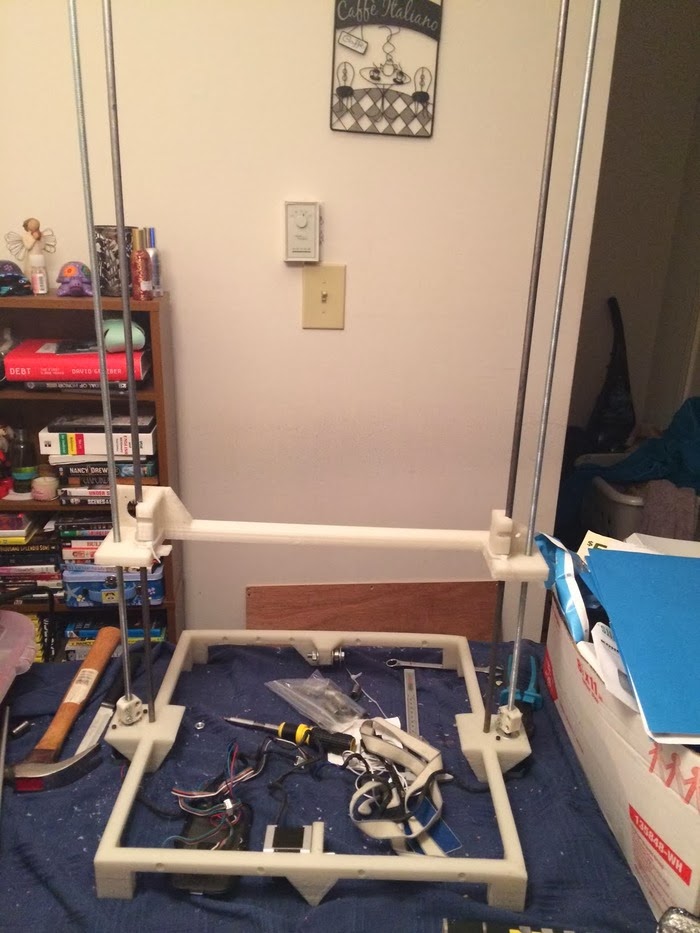
Registered on a forum where sprayers gather together and began to disturb them with questions like: is it possible to build up a “film” with a thickness of 1 or more millimeters. To which I caught a lot of misunderstanding what it was for, but received a positive answer.
General information received, you can begin to prepare for experiments.
It is known from various articles and documents that a vacuum of no more than 10⁻² Pa is needed. For comparison, the order of magnitude - the pressure that gives a household vacuum pump (Value and others) - about 4 Pa (measured value), i.e. pressure is 400 times greater than necessary. How to deal with it and what to do? To achieve low pressures, turbomolecular vacuum pumps are used, they work in parallel with the foreline pump and, literally by molecules, capture the remaining air from the chamber. The process is not fast. The pump looks like this.
We installed a pump, it pumps out air and everything seems to be fine, but how to find out the pressure? For this I chose an ionization vacuum gauge.
In fact, nothing else is needed, except for the chamber and evaporator. I did not find a ready-made affordable (in terms of finances) camera, therefore, I decided to make my own. It is of a small volume (about 8-10 liters) in order for the air to be pumped out faster. Usually, the chambers have a spherical shape, in my case it is, on the contrary, elongated, in order to be able to set the “target” (the place where the metal is deposited) at different distances from the evaporator. In addition, the camera has a lot of flanges for connecting all kinds of inputs/outputs and sensors. I modeled the camera in a well-known CAD program, drew drawings and transferred it to production.
Current leads and conductors I made from a brass bar and a brass rod, bought on the local market. (Juno, who is from St. Petersburg).
In the photo below, a tungsten boat is fixed between two conductors.
The bottom part looks like this. The photo shows the cooling tubes of the current leads. Subsequently, I abandoned them, due to the simplification of the system.
Assembling the camera did not take much effort and complexity. It is much more difficult to achieve vacuum retention in this chamber. To do this, I polished the flanges and all mating surfaces to avoid the slightest leakage through the rubber seal (in the photo below, I processed only the top flange).
As it turned out later, the weld is not airtight at all (meaning for low vacuum). I, out of inexperience, assumed that by pumping a pressure of 300 kPa into the chamber and immersing it in a bath of water, I would carefully find all the leaks and eliminate them. Yes, at the first stage I did just that, but the pressure in the chamber did not fall below 10-2 Pa, there were leaks. Interestingly, before the start of the test, at a pressure in the chamber of 300 kPa, bubbles emerged from the welds with an intensity of approximately 1 bubble (diameter 2-3 mm) in 30-40 seconds. And those were big losses that I eliminated. But what to do with minimal vacuum losses that cannot be tracked in "kitchen" conditions?
The solution was close. To do this, all you need is a mass spectrometer.
The idea is simple – the investigated chamber or container is connected to the vacuum chamber of the spectrometer. Air is pumped out, on the graph they look for extraneous peaks of any gases. After that, helium is supplied locally, to the places of possible leakage. It is helium, because its penetrating power is higher and the helium peak can be easily tracked on the spectrum. As soon as helium enters the chamber through a micro-hole, it is immediately visible on the spectrum.
I drove twice and looked for leaks twice. Now the chamber with the installed pump is hermetic and it is possible to carry out experiments further, having previously assembled all the components of the system on the rack.
General view of the incredible installation.
Starting up the plant and checking it comes down to maintaining the lowest possible pressure.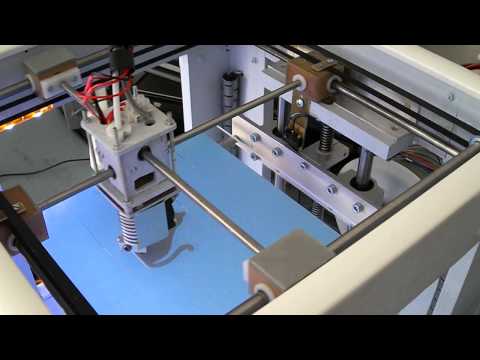 The foreline pump is started first.
The pressure after the operation of the foreline pump can be seen in the picture below.
After the pressure is established (does not change). You can launch "heavy artillery" - a turbomolecular pump. It reduces the pressure by another 3 orders of magnitude.
The time has come for experiments, what I have been going for so long and what I have been waiting for so long.
First experiment.
Place a small amount of silver into the boat fixed between the conductors. Above the boat I install a steam conduit - a soldered tin cylinder, which, as I thought, should limit the spread of metal through the chamber. Above the steam conduit there is a lid with a hole of 2 mm, behind the lid there is a target on which the metal should condense. It is a pity that there are no photos left, but the vacuum chamber was completely dusty. There was not a single place where there was no applied layer of metal. In the photo below, it’s not a different planet at all, but silver sprayed onto the inner surface of the wall.
Second experiment.
I thought it was because of the large gaps between the boat and the steam line. The solution was born immediately and quickly. I took two boats and combined them so that a shell was obtained. I placed silver inside, and cut a hole with a diameter of 2 mm in the upper half.
And he began to heat up the whole thing. But, I did not take into account the rigidity of the boats and the rigidity of the current leads. The shells parted a little and a gap formed between them, through which steam also flew in all directions.
As a result - spraying in the entire volume of the chamber. In the photo below there is a viewing window, the boat in which was slightly above half, but the window was completely dusty.
Third experiment.
After a little thought and grief, I thought that the container with the evaporated metal should be airtight and with only one outlet, but how and what to make it.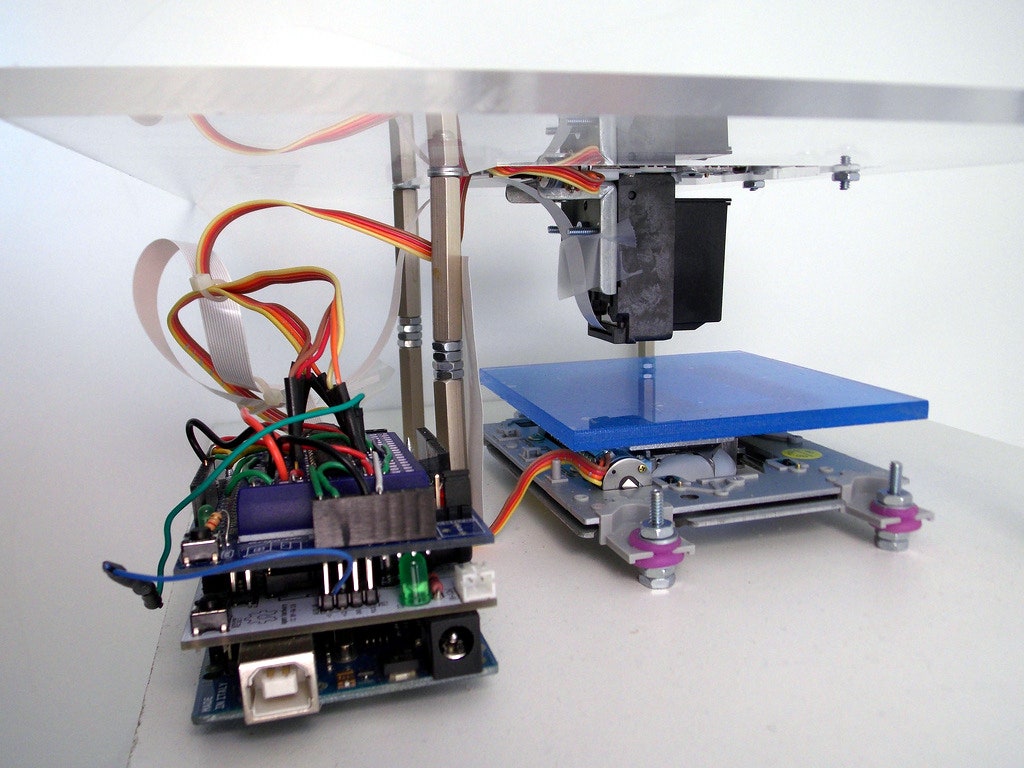 From tungsten - very expensive and difficult to process. The way out has been found! Graphite is an excellent material for making a crucible, let's call it that. On the ad site, I found an ad for the sale of graphite bars from the contact whiskers of a trolleybus, cut out a bar with a hole in the center and made a cover for it. In the photo below - just a bar with a hole for the material (without a cover).
And in this photo already in the chamber with the lid installed (the hole in the lid is 1 mm in diameter).
Under the spoiler are a few photos with a short period of time, from which you can see how dusty the viewing window is.
Loss of transparency
It is obvious that in this case, too, there was no success, to my great regret. All three experiments were carried out with a gradual increase in temperature from the state when evaporation does not occur.
A small video in which the information is presented in a slightly different way, in a different form and volume.
Video link
www.youtube.com/watch?v=4yWQOWIG1qw
Unfortunately, it was not possible to get what was intended, but, on the other hand, invaluable experience was gained in the design and manufacture of vacuum equipment. Most of this experience I have shared with you and I would be very grateful if you express your opinion on this issue.
Thank you all and good luck.
Homemade Black Pill 3D printer (STM32F401CCU6)
Good afternoon.
I would like to tell you my thorny path in building a homemade 3D printer.
For a long time I dreamed of a 3D printer, but I could not decide whether to buy ready-made or build it myself.
It all started with an analysis of the models offered on Aliexpress. I understood that due to the increase in prices, it does not make sense to buy a ready-made version, since I will not use the printer often. After watching a "bunch" of videos about homemade 3D printers, I decided what kind of printer functionality I need.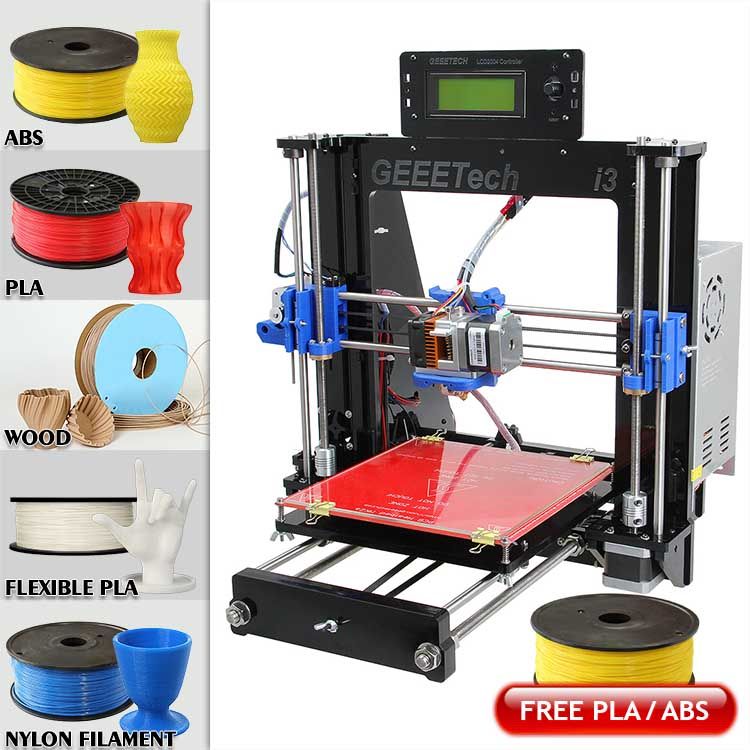 Most of the DIY was done with an Arduino Mega 2560 expansion board called RAMPS. There is nothing wrong with this solution as it is quick and easy. But I never liked the concept of a “sandwich”, and in consequence of the rise in price of the Arduino Mega, I decided to find another electronic basis for my homemade 3D printer. After reviewing a lot of offers, I realized that buying a board designed for 8 bits in 2021 is no longer relevant, and ready-made solutions for 16 and 32 bits are unreasonably expensive and most of the presented models have many functions that I will not use. Suddenly, I "stumble" on an article by a respected 3dmaniack with his solution and a board called RABPS. I'm redoing a project on short notice, but I'm running into an unforeseen problem. The RABPS board is based on the Blue Pill (STM32F103C8T6) microcontroller, but there are two versions of the microcontroller with 64kb and 128kb Flash memory. Naturally, our "friends from the Middle Kingdom", replacing labels, sell a cheaper option under the guise of an expensive one.
 As a result, firmware weighing more than 120 kb did not fit on the board. This failure did not stop me, but on the contrary, gave me an incentive to look for solutions. And continuing the search, I found a mini project by zooinginer, based on the same RABPS board, but based on the Black Pill microcontroller (STM32F401CCU6). With minimal modifications in the form of a pair of jumpers and cut tracks, this microcontroller will function in this board. The big difference between STM32F401CCU6 and STM32F103C8T6 is that under this marking there is always a 256 KB Flash memory, which is enough for flashing. Well, that's all, I found the answer to all my requests and it remains only to design a printed circuit board and manufacture it.
Next, I will divide my path into 3 parts.
1) PCB manufacturing;
2) Firmware;
3) Housing and kinematics.
I would like to start my story about the thorny path of a homemade 3D printer.
So, in this part of the article, I will consider everything related to the board, from design to the finished solution.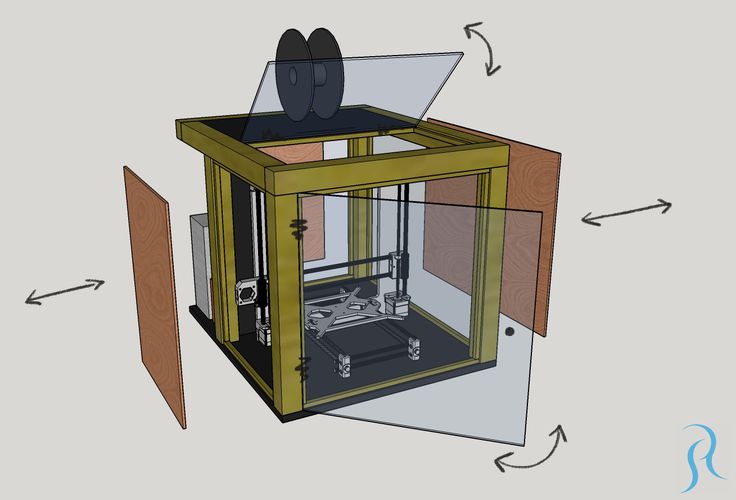
As mentioned in the introduction, I took as a basis the project of the respected 3dmaniack with his solution and board called RABPS and the zooinginer's project with the adaptation of the RABPS board to Black Pill (STM32F401CCU6). Having experience in the Sprint Layout program, a PCB design was created in a couple of evenings, but, as it happens, there were some mistakes. From a banal error in the size of the board components, which is quickly corrected, up to errors in the LUT technology. Looking ahead, I left him in the direction of the photoresist.
Let's get started.
We print photomasks, which will illuminate the photoresist. I printed on a laser printer and the toner density on the template was medium, which subsequently led to a poor result.
Violet streaks and dots are visible on the unexposed areas. This indicates that in these places the photoresist began to light up through the gaps in the template. This led to the fact that in the process of washing off the excess photoresist, the necessary tracks began to be washed off. The solution to this problem is simple: you should make graphite dust by rubbing the pencil tip on sandpaper, and gradually rub it into the template. As a result, the template becomes more contrast and the problem is eliminated. Having corrected the defect in the template and obtained an excellent result, we wash off the unnecessary photoresist in a 3% solution of soda ash, and proceed to the etching process. I poison in a solution of peroxide and citric acid. The process is not fast. Although when the solution is heated, it goes faster. After etching, we remove the remnants of the photoresist from the tracks by soaking the board in the same 3% soda ash solution overnight, and enjoy the good result.
Next comes the optional part, namely the solder mask coating of the board. There are many types of masks, I settled on a Dynamask 5000 film solder mask, bought at the Chip and Dip store. The application process is very simple. Gradually peeling off the protective film, we rub the mask to the board. Next, according to the template, we illuminate the mask, and after that, wash off the unexposed places in a 3% solution of soda ash, and send it to be tanned in the oven for one hour at a temperature of 100 degrees Celsius. We receive.
Then we move on to soldering the components.
Since I don't have a device (mini-machine) for drilling boards, I use a conventional screwdriver. But because of its mass, at the slightest inclination, the drill often breaks. I tried to translate most of the components into smd execution, for example, voltage stabilizers, resistors and capacitors. All denominations are indicated in the scheme. The result is such beauty.
This is the second part of the story about a homemade 3D printer.
It's about the firmware, or rather about the problems that I encountered.
For me, this stage was the longest. First, I dealt with the Visual Studio Core program and its platformio ide add-on. Then there were “dancing with a tambourine”, due to the selection of the platformio ide version, since the firmware refused to assemble with some versions.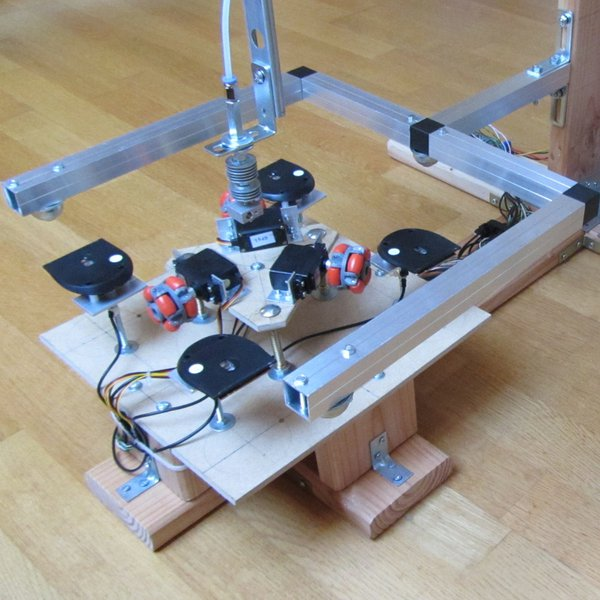 I first put Visual Studio Core not on drive C, but on an additional one, because of this, the firmware also did not compile. It also took a lot of time that when you open the firmware you don’t need to immediately press build (first you need to wait 10-20 minutes for all libraries to be downloaded from the Internet). Dear zooinginer in his article described what needs to be done so that the firmware is compiled and installed on Black Pill. With a lot of torment, with the help of diman77, I still managed to compile and assemble the firmware, and then, using the Marlin setup video, I set the parameters for my configuration and for my self-made Smart_Controller.
Under the article I will leave all the necessary links. If you are interested in my homemade Smart_Controller, I can post a separate article on it.
This is the third part of the story about a homemade 3D printer.
It's about choosing kinematics and bringing drawings to life.
There are many types of kinematics on the Internet, but for myself I singled out three: Prusa (“drygostok”), H-Bot and Ultimaker. I will briefly describe the pros and cons of these kinematics (in my opinion).
Prusa (“drygostol”)
Pros: ease of assembly, cost of components, easy access to the part.
Cons: open working chamber.
H-Bot
Pros: Precision print, closed oven .
Cons: stretching of the belt due to its large length.
Ultimaker
Pros: Printing accuracy, enclosed build chamber, use of short belts.
Cons: Dependence of the print quality on the quality of the guide rollers.
Since I don't need a printer for bulk printing, I settled on the kinematics of the "drygostok". There are many ready-made drawings on the Internet, but I wanted to make something of my own. For the course "Computer graphics" at the institute, I learned how to draw in AutoCAD. A frame drawing was created in 3-4 days. Next, I had a choice: to cut parts out of plywood with my own hands or contact a laser cutting company. I turned to professionals. The advantage of laser cutting is its accuracy and quality.