3D printer belt tension test
How To Properly Tension A 3D Printer Belt?
3d printer belt tension is the most common problem in 3d printing. The tension of your 3d printer’s belt is crucial to ensuring a high-quality 3D print.
If you’re not sure how to tension the belts on your 3D printer properly, this article will walk you through it.
To overcome the problems of belt tension and how to prevent this on your 3D printer- Follow this Guide.
If you’re new to 3D printing or have been having problems with the results of your prints that you can’t figure out what’s causing them, you could find that adjusting the tension on your printer belt solves the problem.
Belt tension may appear to be a minor aspect of your 3D printer, but it has a substantial impact on the quality of produced items. Let’s look at how and why they should be tightened and maintained.
Read More About:
- How To Fix Layer Shifting Ender 3 V2? (5 min read)
- 7 Simple Steps to Fix 3D Printer Layer Shifting (3 min read)
- How To Function 3D Printer Belt?
- How Tight Should a 3D Printer Belt be?
- How To Properly Tension The 3D Printer Belt?
- How Do I know If My 3D Printer Belt is Too Tight?
- About Tighten an Ender 3 Belt
- Belt Tension Spring3D Printer
- Weighty belt and roller + tensioners
- Radical-short-profile channel-lead roller chain tensioners
- Short–side view- channel-lead- roller chain tensioners
- Delta 3d Printer Belt Tension
- Anycubic Vyper Belt Tension
- Conclusion
How To Function 3D Printer Belt?
3D printer belt works as the print bed. The belt only moves when a layer is in printing. 3D printer belts use titled nozzles, not FDM nozzles. It is less of a Standard Cartesian frame.
Its top is tilted sideways and CoreXY gantry. One side is tilted downward. In the printer, because of the hot end being suspended by using the CoreXY frame, the belt pulls and pushes ongoing prints away from the printer nozzles.
Hot end visits a titled XY-plane while the printer belt travels in the Z and Y-axes of the printer. 3D printers are presumed to have infinite Z-axis.
How Tight Should a 3D Printer Belt be?
To be specific, the belts should be tight enough to avoid slack. But the belt shouldn’t be too tight that they start to place a lot of stress on the motor shift or printer pulleys. The belt should be loose to a point when you pluck the belt, it should move four or five times before stopping.
Another way to check is the belt should click back quickly when you pull it but not too tight that you can’t pull your finger in. On the y-axis, you can tighten or loosen the belt through screws.
If you put too much pressure on it, you can notice some separation or some peeling on the actual belt. Though the pressure can be different for different printers the mentioned process can be a starting point.
Over tightening of the belts puts stress on the gear as well as on the bolts that hold the gears together in the printer. It also puts pressure on the shaft that the stepper motor has gone into it with the operational gear on it.
Due to that, the shaft can bend. Gates power grip belt is a good choice to use for a 3D printer belt.
How To Properly Tension The 3D Printer Belt?
A loose belt on your 3D printer can lead to a few issues, the most widely recognized skipped steps, or missed layers during printing. Assuming that the belt is excessively free, it will slip, and the print quality will again be poor.
Figuring out the perfect balance where the belt is tight enough to stay in place but not so tight that it significantly worsens printing accuracy can be challenging.
When tensioning your 3D printer belt, there are a few factors to keep in mind. One of the most significant is to involve the right tensioning tool for your belt type. You’ll require a hex wrench, requiring only a couple of moments.
Start by tracking down the belt tensioning screws on your printer. They will be situated on the top or lower part of the printer and have a tiny Allen wrench head. Relax the screws until the belt is, as of now, not tight, then fix them until the belt is simply cozy. Don’t overtighten the screws, which can harm the belt or printer.
How Do I know If My 3D Printer Belt is Too Tight?
Much strain can put pointless weight on the belt and pinion wheels, prompting skipped advances or harmed parts. One sign that your 3D printer belt is too tight is poor print quality.
When the belt is excessively tight, it puts weight on the orientation and different parts, which can cause them to fail; it can’t move freely or slips. You can determine whether the belt is excessively tight, assuming the carriage on your 3D printer moves gradually or doesn’t move by any means.
Also, a tight belt can prompt little commotion and vibration. The belt will likewise be hot to the touch, assuming it is excessively tight.
Assuming that your belt is excessively tight, it can create a few issues, including poor print quality, lack of filament flow, and even harm to the printer. Watching out for your printer’s belt tension and making adjustments is necessary.
About Tighten an Ender 3 Belt
It is important to keep the belt of our 3D printer machine tight. We can look at the following common things to keep the belt of our 3D machine tight.
The belt I need to tighten has to be accessed by locating the tensioner on one end.
If the tension on the frame is loose, hold the frame with one hand and apply moderate force.
Hold the tensioner in the back position and release the frame. Then reattach the belt tensioner to the frame with the previous tool.
In this way, all the belts of the printer have to be tightened.
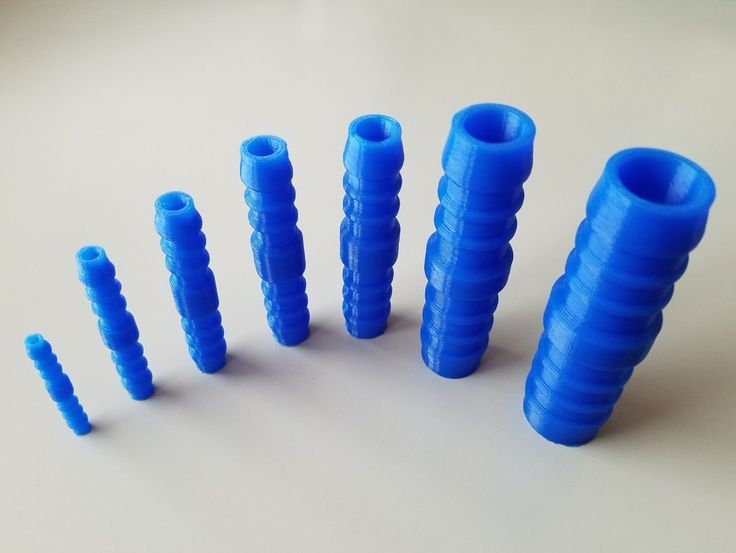
Belt Tension Spring3D Printer
3D printer belt tension spring consumes loose and permits you to modify tension on your rolling wave chain or belt. A built-in spring authorizes the adaption arm to apply continuous tension. 3D printer belt tension spring uses sprockets or pulleys.
Weighty belt and roller + tensioners
Keep right drive tension to make sure easy operation for highest power and an extended favor life. Planed for use on the big belt and string drives, tensioners are spring full to give sustained tension and reflex adaptation for pulsating loads. An idler shaft (sold separately) is needed.
Radical-short-profile channel-lead roller chain tensioners
These tensioners are small enough to fit in confined spaces and are only 3″ tall. Built-in springs set sustained tension on roller chain to sock up and buffer shock, bring down vibration, and better drive performance
Short–side view- channel-lead- roller chain tensioners
A minimum of 4″ in height is better for utilization on low-authorization drives. Intraoral-in springs set continuous tension on string chain to sock up and buffer shock, and down vibration, and improve drive performance.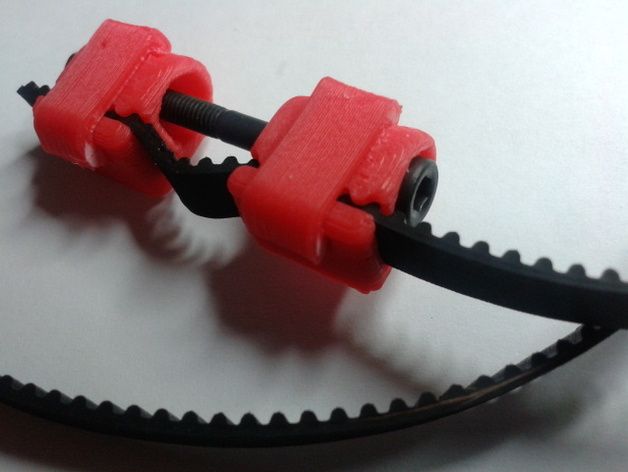
Delta 3d Printer Belt Tension
Delta 3D printer is the printer that executes its movement differently. Most 3D printers move by following the Cartesian method. While Delta printers move the print head by arms. These three arms are connected vertically with three posts. That gives it a triangular shape.
Although the arms can move only up and down vertically, by moving this way the print head can be executed in different directions.
Like all other 3D printers Delta 3D printers also use belts to execute the functions smoothly. But sometime you may find some problems in adjusting belt tension.
Most of the users declare that the most effective method for testing the printer’s belt’s tension is to feel it. You might be wondering how this is feasible.
All you need to use your finger to check the appropriate measure of tension. If you push it down, the belt moves slightly. The belt will also vibrate to and forth rapidly. Though it is not a secure method with experience, you will be used to the technique.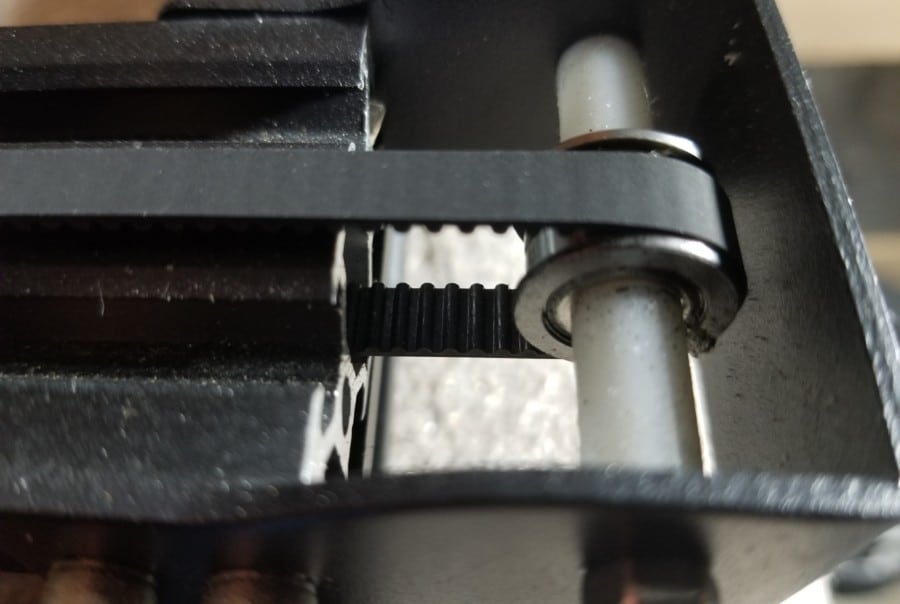
You can also try to notice the sound that a perfect tensioned belt makes. As many users say that the sound should be like a profound, cello-like tune. There are also some useful mobile apps to test the tension.
Here you can see the video to enrich your knowledge,
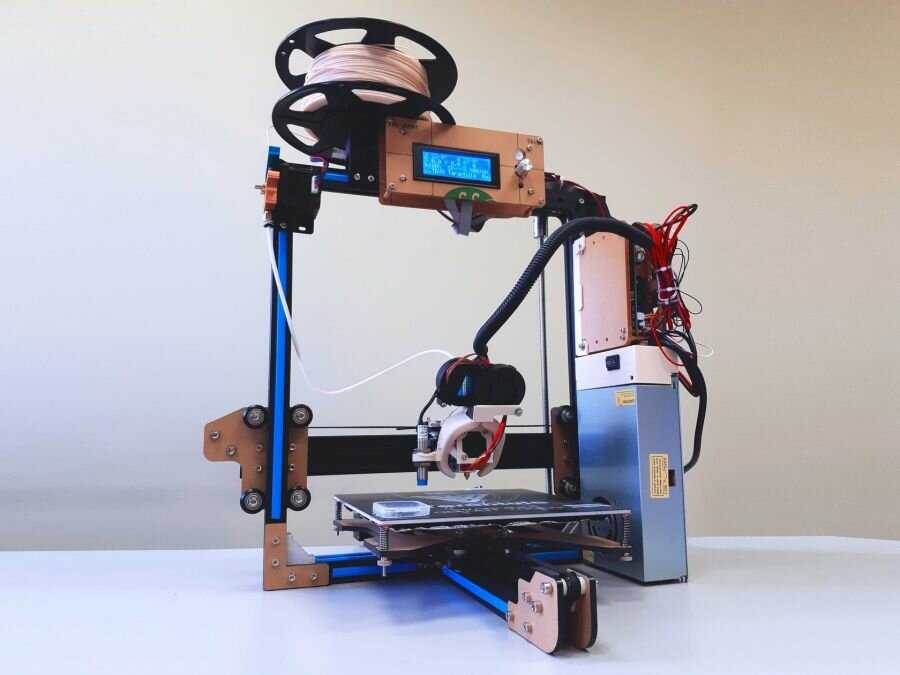
Anycubic Vyper Belt Tension
The Anycube Vyper is assumed to be one of the best options for beginners. It’s a 3D printer with an open frame. It has a rather large printing area. It is quite faster than other printers. Users also say it is amazingly easy to maintain the machine.
There is no doubt all types of machinery need to be adjusted. The Anycubic is not different from this. The most common issue found by many people is the belt tension adjustment.
To know more about your Vyper check the video below:
Conclusion
We will feel ourselves succeeding if this article helps eliminate your frustration with 3d printer belt tension.
This article has elaborated that the easiest technique to verify that your 3D printer belts are correctly tensioned is to tighten them until they have no slack and are resistant to being pushed down.
It should be about the same tension as a stretched rubber band, but don’t over tighten your belts because this will cause them to wear out faster.
Moreover, this article through a detailed examination has covered the topics such as functions of 3d printer belts, how to properly tension 3d printer belts, how to know the belt is too tight, etc.
The basic idea here is that a motor rotates a belt which, in turn, rotates a pinion shaft. The pinion shaft then meshes with your spool or reel such that it can deliver the filament to the printer head when instructed to.
How to Properly Tension Belts on Your 3D Printer – Ender 3 & More – 3D Printerly
There are several factors that affect 3D print quality, one of those things being your belt tension. If you aren’t sure about how to properly tension the belts on your 3D printer, this article will guide you through that process.
The best way to ensure you properly tension your 3D printer belts is to tighten it so it hasn’t got any slack and has some resistance to being pushed down. It should be around the same tension as a stretched out rubber band, but don’t tension your belts too tight because it can increase the wear on the belt.
The rest of this article will detail the best process to figure out how tight your belt tension should be, as well as other useful information regarding this topic.
A Guide on How To Properly Tension/Tighten Your 3D Printer Belts
The proper technique to adjusting your printer belt tension does vary across printer brands and styles, since many 3D printers are built differently, but there are similarities.
It’s a good idea to first figure out how your 3D printer works and how the belts are joined on the X & Y axes. For this article, I’ll be talking about how you tighten an Ender 3 belt.
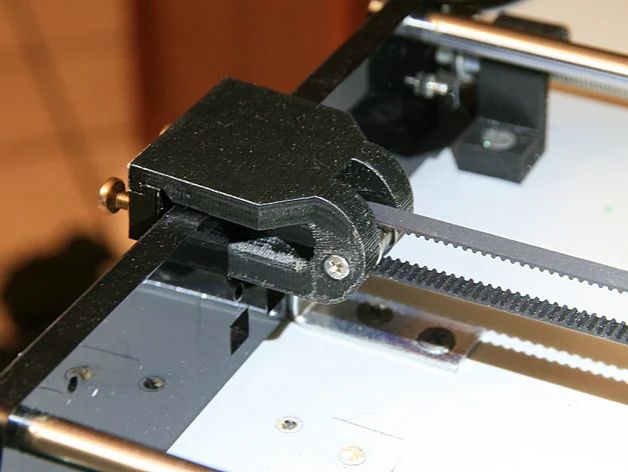
The X-axis belt runs directly through the extruder, and the extruder is attached to a motor that allows it to move back and forth across the X-axis belt. Some methods which can be followed are explained below to adjust the tension of the printer belt.
Tighten Screws on X-axis: In most printers, the belt is attached to X-axis and a pulley that is further attached to a motor shaft to maintain tension in the belt.
If you look closely, you will find screws on both sides of the X-axis. Tighten these screws as it helps you in getting the right tension in the belt of the printer.
Adjust the Tensioner: To adjust the tension, you will require a hex key that comes with the printer. The remaining process is given below.
How Do You Tighten an Ender 3 Belt
- Loosen the two nuts that hold the tensioner in place
- Use the larger hex key and slide it down between the tensioner and the x-axis extrusion rail.
- You can now use this as a lever to apply force on the tensioner and keep it as far out as possible to keep the belt tight.
- At that moment, tighten the bolts back up on the tensioner
- Once it is done, you can repeat the same process on the Y-axis.
Adjusting the Belt Tension at Y-Axis
Adjust the belt tension on your Y-axis works the same way as on the X-axis, but usually it doesn’t require as much tension adjustment.
Your printer belt is moved through stepper motors from one side to the other, and they don’t usually need replacing if treated right, unless it’s been years. Over time, they can stretch and break, especially if used constantly.
The video below shows a nice visual on tensioning an Ender 3 belt, which you can do for the Y-axis.
If you would rather choose an option that allows you to tension your belts with ease, I’d consider getting yourself the UniTak3D X-Axis Belt Tensioner from Amazon.
It fits around the end of your 3D printer on the 2020 aluminum extrusion, but instead, it has a wheel tensioner to make the job easier.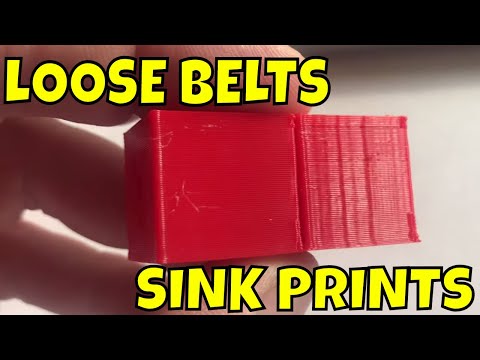 It’s very easy to install and requires no assembly!
You can also get the BCZAMD Y-Axis Synchronous Belt Tensioner from Amazon to have the same functionality on the Y-axis.
How Tight Should My 3D Printer Belt Tension Be?
Your 3D printed belt should be relatively tight, so there is a good amount of resistance, but not so tight that you can barely push it down.
You don’t want to over-tighten your 3D printer belt because it can cause the belt to wear out a lot quicker than it would have otherwise. The belts on your 3D printer can be pretty tight, to the point where getting underneath it with an object is fairly difficult.
Below is a little visual on how tight the Y-axis belt is on my Ender 3. Getting the belt to this position takes a decent amount of push and that is really stretching it, so you can look towards having your belt around the same tightness.
You can gauge belt tension pretty well by watching a video and seeing how tight it looks and springs.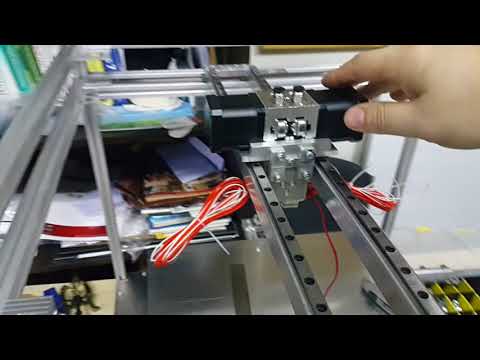
A loose belt can result in skipped layers and is very likely to decrease your print quality, so I’d advise making sure you have it at a good resistance level.
Make sure to move the X and Y axis slowly from one end to the other to make sure the belt is in good working order and not rubbing hard on the aluminum extrusion.
How Do You Know If Your 3D Printer Belt is Tight Enough?
Setting the proper tension in the belt is all about trial and error. However, there are many manual ways to find the belt’s tension and tighten it until you feel satisfied.
Some methods that are commonly followed to check the tension of the belt:
- By touching the belt to check the tension
- Listen to the sound of a plucked belt
This is one of the easiest ways to test the printer belt’s tension as it would only require fingers and sense to feel. If the belt is pressed with the fingers, they should be tight enough to move very little; if not, the belt must be tightened then.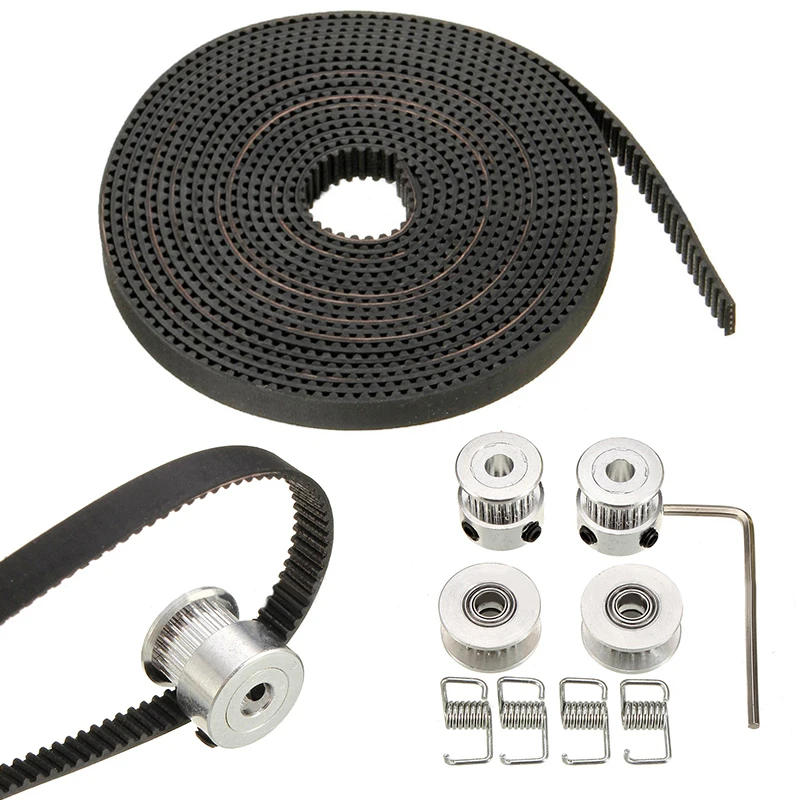
Listening to the Sound of a Plucked Belt
The sound that emits from your belt after plucking it should sound like a twang, similar to a low-note guitar string. If you don’t hear any note or a lot of slack, it’s likely that your belt isn’t tight enough.
How to Fix A 3D Printer Belt Rubbing (Ender 3)
You can sometimes experience your 3D printer belt rubbing against the railing, which isn’t ideal. It can create plenty of vibrations throughout the axis, resulting in poorer surface finishes on your models.
Luckily, there are a few ways to fix this.
A solution that you can try is having the belt tightener at a downward angle, allowing the belt to get low enough to get space on the metal. This works because there is still some up and down motion after tensioning your belts.
So basically tilt your belt tensioner downwards so it runs below the lip of the railing.
Once your belt is below the part of the rail which it rubs against, you can fully tighten the two T-nut screws that hold the pulley in place.
Something that has worked for many users is using either a spacer or installing a 3D printed Belt Tensioner from Thingiverse for their 3D printers.
Another user who had the same issue of their 3D printer belt rubbing on an Ender 3 was to turn the bolt itself a quarter of a turn at a time, then testing whether it ran smoothly until the belt ran center.
One guy had some luck by replacing the thin nut on the left with two M8 washers and an M8 sprung washer. After implementing this, their belt ran perfectly fine.
Ender 3 x axis fix
Best Ender 3 Belt Upgrade/Replacement
A good Ender 3 belt replacement that you can get yourself is the Eewolf 6mm Wide GT2 Timing Belt from Amazon for a pretty good price. Many reviews talk highly of this belt for good reason.
The rubber material is a high strength synthetic rubber called Neoprene, along with glass fiber throughout. It can comfortably be used for your X-axis and Y-axis and you’re getting 5 meters of belt so you can replace it easily when needed.
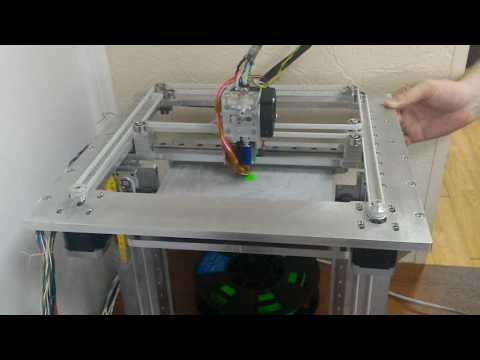
How the belt tension of the Ender-3 (Pro/V2) 3D printer affects print quality. How to properly tighten them.
In this article, we're going to look at some pretty important and useful information about the straps on Ender 3 (Pro/V2) 3D printers and how tight they should be.
We will also look at the results of 3D printing in three ways: one with loose belts, one with tight belts, and one with optimal belt tension.
This will give you a visual and understanding of the importance of keeping the printer belts tight and the impact they can have on your print quality. Looking ahead, let's say that in one of these cases, printing a part turned out to be an impossible task. nine0003
Of course, we will also tell you how to properly tension the belts, as well as where to find convenient tensioners for Ender 3 and Ender 3 Pro (Ender 3 V2 already comes with tensioners) to make the whole process easier.
How tight should the straps be on the Ender 3?
Only trial and error will help determine the correct belt tension.
First check the belt to make sure it is tight and not slipping off the pulleys. You should feel some resistance as you squeeze the top and bottom of the belt. nine0003
You must pull the belts as tight as possible to prevent slack, otherwise your belt will slip and the printer will skip.
After tensioning the belts, be sure to carry out a test. To do this, print some simple model, a small test cube is best for this. If you still see ripples, layering, or some other negative effect on the surface, it might be worth checking the tension again.
If your belt is too tight, it can cause you to skip steps, overheat the engine and prematurely wear out the mechanics. An overtightened belt will cause unusual deformations on your part. nine0003
Also note that belts that are too tight are subject to faster wear and in some cases may even break.
Some signs that you need to check the belts on your 3D printer:
- Loud sounds coming from the printer.
- Your belt appears to be loose when you look at it.
- Parts are rippled and/or deformed
- Your printer stops for no apparent reason.
Inspecting the printer will allow you to locate the problem. Similar effects can be caused by other reasons, however, do not forget to check the degree of tension of the belts.
Difference in print quality between loose and tight straps.
We have loosened the belts enough to show you the quality of the 3D printer with the X and Y belts loosened.
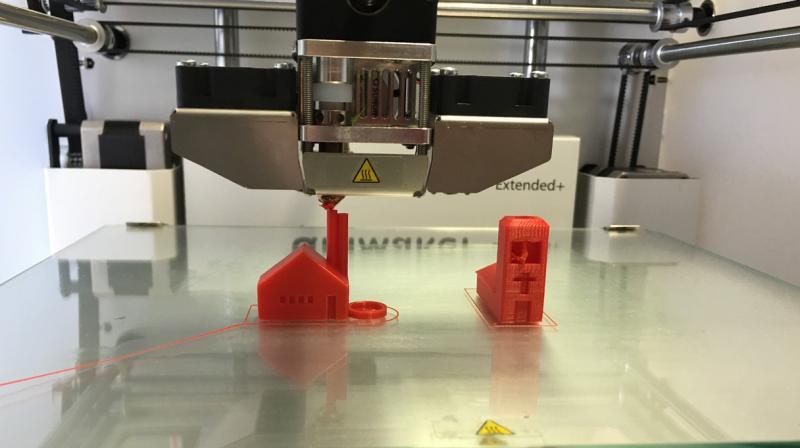
3D printed results.
Cube 1: The belts are too loose, the efficiency of the transmission chain is reduced, as a result the entire cube has shifted to the left. nine0003
This phenomenon is quite common when 3D printing with a loose X-axis belt, but it can be easily diagnosed and corrected because you can clearly see what is happening.
For Cube 2, we tightened the straps, but not tight enough.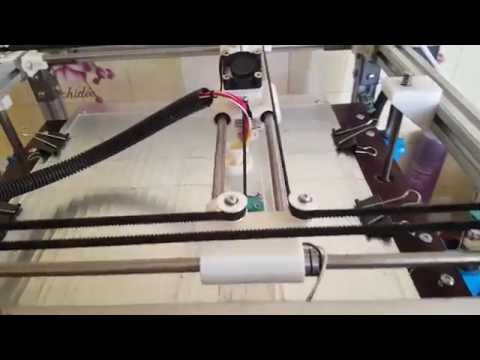 Layers and waves are clearly visible on the model.
Cube 3 printed with optimally tensioned straps. The print quality has improved a lot, there are no visible waves, layer lines are also less visible.
With cubes 2 and 3, you can clearly see how belt tension affects 3D print quality. nine0003
Loosely tensioned belts can also cause your prints to show more visible layer lines, detracting from the appearance of your model.
This problem can be caused not only by weak belts, but also by uneven extrusion. However, in this situation, most people do not think that the reason is in the belts and forget to check the degree of their tension.
Another example of the difference in 3D printing quality between weak and tight belts.
Can the belts on the Ender 3 be too tight? nine0011
For best 3D printing quality, 3D printer belts should be pulled as tight as possible without stretching or breaking.
Under-tensioned belts create a stepped effect on your part, and in the worst case completely distort its geometry.
However, it is worth noting that you can damage the straps when overtightening. So while you should do your best to tighten them as tight as possible, do so carefully.
In the next section, we'll show you how to adjust the tension on both belts on the Ender 3 using the provided tools, which is quite simple but won't allow you to tighten them as much as you could with the special belt tensioners.
How to adjust belt tension on Ender 3 (Pro).
The Y-axis belt is often tensioned at the factory by the manufacturer and is usually well adjusted. We had to loosen it on purpose to show you the print quality on loose belts. nine0003
You install the X-axis belt yourself, so something can go wrong here.
How to adjust the X-Axis Belt on the Ender 3.
You only need one tool for this, the second largest hex wrench that comes with the printer.
Loosen the two screws on the idler on the far right side of the X-axis.
Use a larger hex wrench and insert it between the tensioner and the X-axis guide.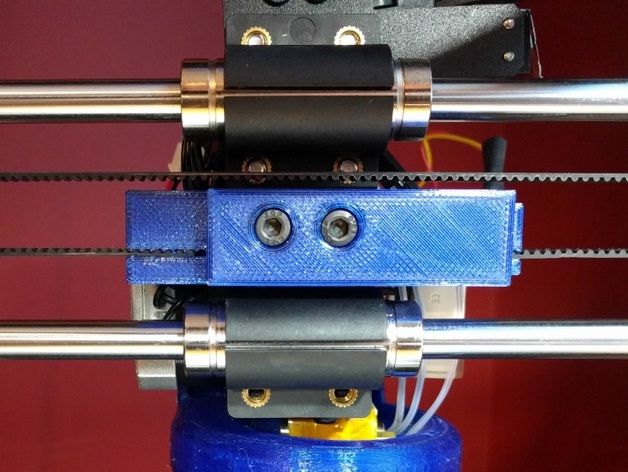 0002 You can now use it as a lever to apply force to the tensioner and hold it as far as possible to keep the belt tight.
Tighten the strap and, holding it with one hand, tighten the screws again.
How to adjust the Y-Axis strap on the Ender 3.
The Y-Axis strap is a little trickier to tighten because there are more screws holding the entire bracket in place, and if you're doing it by hand, you'll need to put in some effort to tighten it tight enough. nine0003
However, you will need the same hex key as before.
Loosen all four screws on both sides of the bracket using the included hex wrench.
Pull the tensioner to tension the belt.
Tighten the four screws while holding the belt so that it does not loosen.
After adjusting the tension of the belts, make sure that the carriage moves smoothly along the X and Y axes from one end to the other, and the belt does not rub against the guides. nine0003
Installation of adjustable belt tensioners.
Adjusting the tension of the belts on the Ender 3 or Pro is a little trickier because, unlike the Ender 3 V2, earlier Ender 3s don't come pre-installed with adjustable belt tensioners.
Instead, Creality uses fixed belt pulleys that are at the ends of the X and Y axes and cannot be moved easily.
Fortunately, the Ender 3 development community, Creality and others have developed adjustable belt tensioners that allow you to change the belt tension on the axle by simply turning a knob. In this section, we'll look at how to upgrade your Ender 3 or Pro with an adjustable belt tensioner. nine0003
Belt tensioners are an efficient way to adjust belt tension without having to manually move the pulley on the axle.
Ender 3 and Ender 3 Pro are very similar and the X-axis belt tensioner will work on both printers. However, since the Pro version has 40x40 Y-rails, while the original Ender 3 uses 20x40 rails, the Y-axis tensioner for the two printers is different.
Ender 3 Y-Axis Tensioner
Ender 3 Pro 9 Y-Axis Tensioner0003
X-Axis Tensioner for Ender 3 and Ender 3 Pro
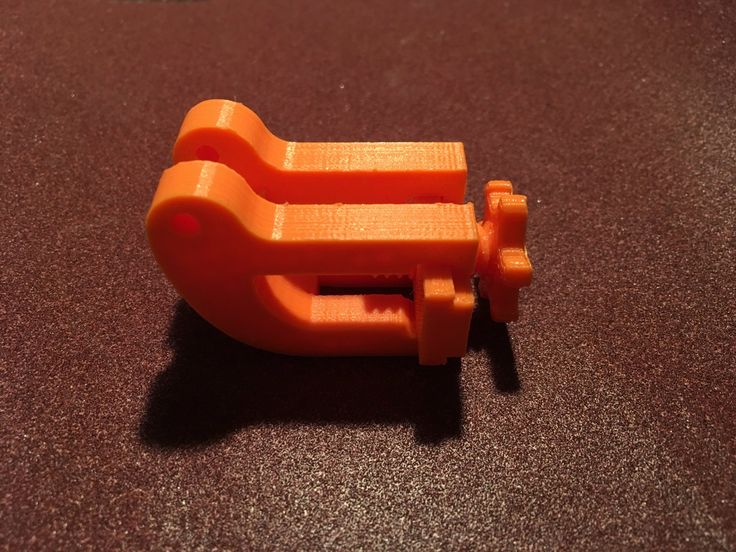
It is important to note that in order to 3D print belt tensioners for Ender 3 or Pro, you must use print settings that will produce a strong and durable part. The belt tension will depend on the structural integrity and strength of the belt tensioner, so give it due consideration as you don't want it to break in the middle of the process.
Free STL file Belt tension tool・Template for download and 3D printing・Cults
Advent calendar "GREAT CHARIOT
2 €
Birthday calendar
2 €
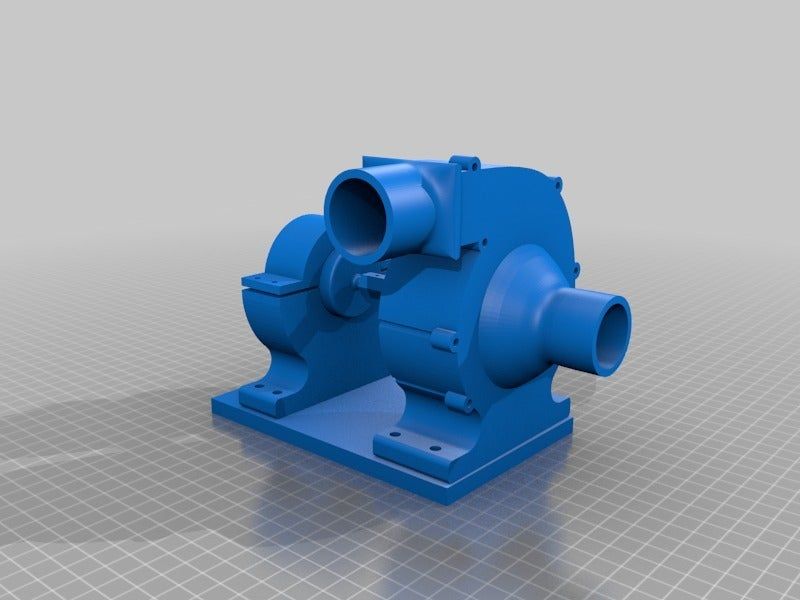
Duct fan D12 300 PRO MAX WANHAO D12/300 UPGRADE
2 €
Wall decoration VEGVISIR + DRAKKAR
2 €
nine0024 HALLOWEEN decoration (wall chart)1 €
Vase 0010
0. 50 €
50 €
Vase 0021
0.50 €
Heart-shaped vase for Valentine's Day
0,50 €
The best files for 3D printers in the Tools category
nine0024 Mac PiFree
Box for washing dental braces
2,50 €
Pegboard Square Holder
Free
Jet vehicle Rc
Free
Customizable Simple Pulley/Gear
Free
nine0024 3D-printable coffee scoop (20 ml)Free
Charging shelf
Free
#3DBenchy - fun 3D printing torture
Free
Bestsellers in the Tools category
Ender 3 Briss fang Gen2, red lizard, spider, nf crazy, dragonfly, etc.

1.75 €
Business card embossing system
3 €
SUPERBOX
1,50 €
ARTEMIS -> Shop for Alligator 2 || 6.5" arrows || Repeating crossbow
6.25 €
PRECISE DIAL INDICATOR 3D PRINT DIY
1.91 €
nine0024 PET-Machine, make your own plastic bottle filament at home!15 €
Ender 3 S1 pro fan duct 5015 4020
1,30 €
Shrek Pooping Toothpaste Topper
2.85 €
Ratchet holders - magnetic - holders for tool box organization
2,70 €
nine0024 'ELEGANCE' Bambu lab set and general 3d printers5 €
ENDER 3 S1/S1 PRO REEL HOLDER AND DEPORTED REEL
2,13 €
Display holder FLSUN v400
€9. -50% 4.99 €  99
99
0,90 €
Cooling system Minimus Hotend
€2.72 -10% 2.44 €
Paint stand with scissors
5.25 €
Phone holder
2.46 €
Do you want to support Cults?
Do you like Cults and want to help us continue our journey on our own ? Please note that we are a small team of 3 people, so supporting us in maintaining activities and creating future developments is very easy. Here are 4 solutions available to everyone:
-
AD: Disable your AdBlock banner blocker and click on our banner ads.

Learn more