3D printing and injection molding
How to Use 3D Printing for Injection Molding
The majority of plastic products in the world today are manufactured by injection molding. However, fabricating molds can be prohibitively expensive and time-consuming. Fortunately, molds don’t always need to be machined out of metal—they can be 3D printed.
Stereolithography (SLA) 3D printing provides a cost-effective alternative to machining aluminum molds. SLA 3D printed parts are fully solid and isotropic, and materials are available with a heat deflection temperature of up to 238°C @ 0.45 MPa, meaning that they can withstand the heat and pressure of the injection molding process.
Download our free white paper to learn how to create 3D printed injection molds.
Download the White Paper
Webinar
In this webinar, we'll show you how to use stereolithography (SLA) 3D printed molds in the injection molding process to lower costs, reduce lead times, and bring better products to market.
Watch the Webinar Now
3D printed injection molds in an aluminum frame with the finished injection molded part.
With affordable desktop 3D printers, temperature resistant 3D printing materials, and injection molding machines, it is possible to create 3D printed injection molds in-house to produce functional prototypes and small, functional parts in production plastics. For low-volume production (approximately 10-1000 parts), 3D printed injection molds save time and money compared to expensive metal molds. They also enable a more agile manufacturing approach, allowing engineers and designers to prototype injection molds and test mold configurations or to easily modify molds and continue to iterate on their designs with low lead times and cost.
SLA 3D printing technology is a great choice for molding. It is characterized by a smooth surface finish and high precision that the mold will transfer to the final part and that also facilitates demolding. 3D prints produced by SLA are chemically bonded such that they are fully dense and isotropic, producing functional molds at a quality not possible with fused deposition modeling (FDM). Desktop and benchtop SLA printers, like those offered by Formlabs, simplify workflow as they are easy to implement, operate, and maintain.
Formlabs Rigid 10K Resin is an industrial-grade, highly glass-filled material that serves as an ideal molding material for a wide variety of geometries and injection molding process conditions. Rigid 10K Resin has an HDT of 218°C @ 0.45 MPa and a tensile modulus of 10,000 MPa, making it a strong, extremely stiff, and thermally stable molding material that will maintain its shape under pressure and temperature to produce accurate parts.
Rigid 10K Resin is Formlabs' go-to material for printing sophisticated molds for injection molding, which we showcase with three case studies in our white paper. French industrial technical center IPC ran a research study and printed thousands of parts, contract manufacturer Multiplus uses it for low-volume production, and product development company Novus Applications has injected hundreds of intricately threaded caps with a single Rigid 10K Resin mold.
High Temp Resin is an alternative material that can be considered when clamping and injection pressures are not too high and Rigid 10K Resin cannot meet the required injection temperatures. High Temp Resin has a heat deflection temperature (HDT) of 238°C @ 0.45 MPa, the highest among Formlabs resins and one of the highest among resins on the market, allowing it to withstand high molding temperatures and minimize cooling time. Our white paper goes through a case study with Braskem, a petrochemical company that ran 1,500 injection cycles with one mold insert printed with High Temp Resin to produce mask straps. The company printed the insert and placed it inside a generic metallic mold integrated in the injection system. This is a powerful solution to produce medium series quickly.
High Temp Resin, however, is quite brittle. In the case of more intricate shapes, it warps or cracks easily. For some models, reaching more than a dozen cycles can be challenging. To solve this challenge, French startup Holimaker turned to Grey Pro Resin.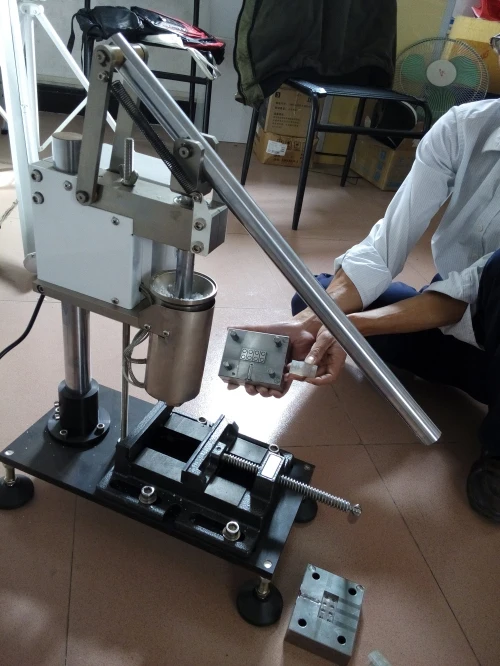 It has a lower thermal conductivity than High Temp Resin, which leads to a longer cooling time, but it is softer and can withstand hundreds of cycles.
Download our free white paper for the detailed case studies and to learn how to create 3D printed molds in-house for injection molding.
Download the White Paper
Injection molding with 3D printed molds can be used for a wide variety of applications. Download our white paper for five real-life case studies to learn how this hybrid manufacturing process enables on-demand mold fabrication to quickly produce small batches of thermoplastic parts:
- IPC conducted a technical study on injection molding with 3D printed molds
- Multiplus uses Rigid 10K Resin 3D printed molds for low-volume production
- Novus Applications injection molded hundreds of threaded caps with a Rigid 10K Resin three-parts mold
- Braskem fabricated 3000 mask straps in a week with a High Temp Resin mold insert
- Holimaker produces 100s of technical parts with Grey Pro Resin and Rigid 10K Resin molds
Textures on the Rigid 10K Resin 3D printed injection mold and the final molded part.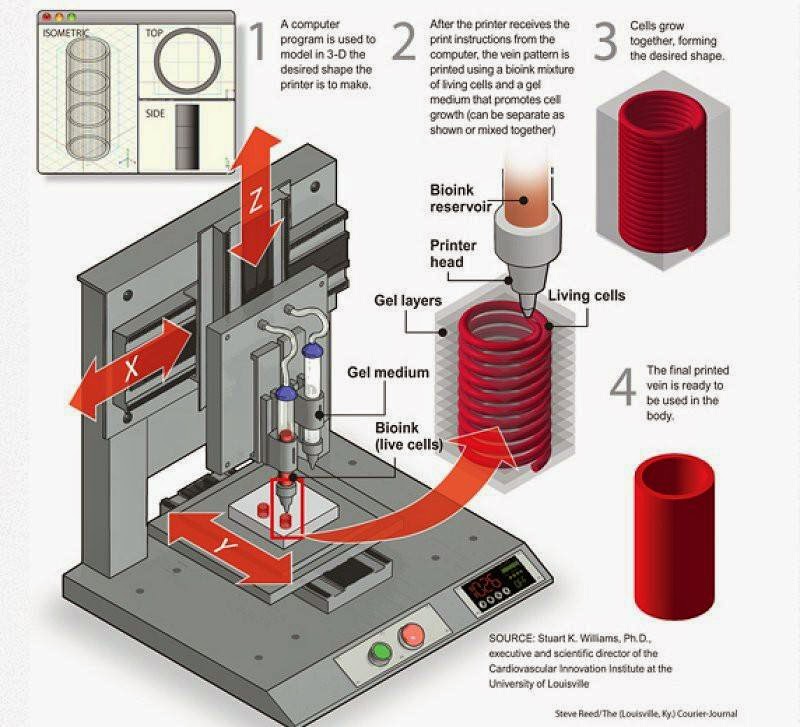
An injection mold 3D printed with Formlabs High Temp Resin.
Based on internal testing and case studies with our customers, we suggest to choose the 3D printing resin based on the criteria from the table below. Three stars means the resin is highly effective, one star is less effective.
| Criteria | High Temp Resin | Grey Pro Resin | Rigid 10K Resin | |
|---|---|---|---|---|
| High molding temperature | ★★★ | ★ | ★★ | |
| Shorter cooling time | ★★★ | ★ | ★★ | |
| High pressure | ★ | ★★ | ★★★ | |
| Increase cycle number for complex geometries | ★ | ★★ | ★★★ |
The complexity of the injection molding process is mostly driven by the complexity of the part and the mold structure. A broad range of thermoplastics can be injected with 3D printed molds such as PP, PE, TPE, TPU, POM, or PA.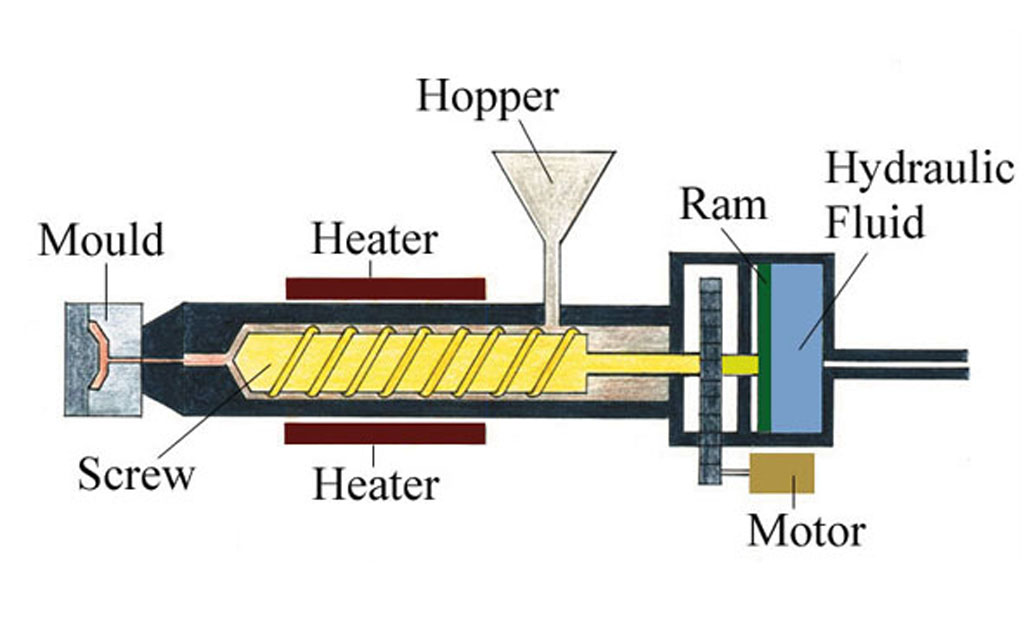 A low viscosity material will help reduce the pressure and extend the lifetime of the mold. Polypropylene and TPEs plastics are easy to process at a high amount of cycles. In contrast, more technical plastics like PA will allow a lower number of runs. The handling of a release agent helps to separate the part from the mold, in particular for flexible materials such as TPUs or TPEs.
The type of injection press does not have a significant influence on the process. If you are new to injection molding and are looking into testing it with limited investment, using a benchtop injection molding machine such as the Holipress or the Galomb Model-B100 could be a good option. Automated small scale injection molding equipment such as the desktop machine Micromolder or the hydraulic machine Babyplast 10/12 are good alternatives for mass production of small parts.
White Paper
Download our white paper for guidelines for using 3D printed molds in the injection molding process to lower costs and lead time and see real-life case studies with Braskem, Holimaker, and Novus Applications.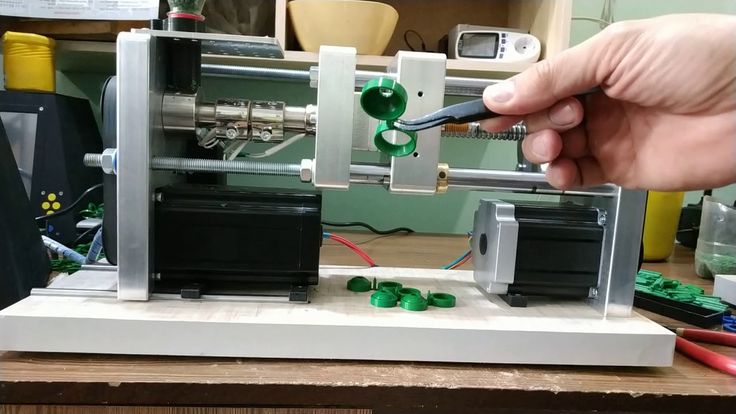
Read the White Paper
We recommend respecting the rules of design for additive manufacturing as well as the general rules for injection mold design, such as including two or three degrees of draft angles, maintaining a uniform wall thickness across the part or rounding up the edges. Here are a few helpful advice from users and experts, specific to polymer printed molds:
To optimize dimensional accuracy:
- Plan stock allowance on the mold to post-process and adjust sizes.
- Print one set of mold to understand dimensional deviations and account for this in the CAD model of the mold.
To extend the lifetime of the mold:
-
Open up the gate to reduce the pressure inside the cavity.
-
When possible, design one side of the stack flat while the other side carries the design. This will lessen chances of blocks misalignment and risk of flashing.
-
Include large air vents from the edge of the cavity to the edge of the mold to allow the air to escape.
 This yields a better flow into the mold, minimizes pressure and alleviates flashing in the gate area to decrease cycle time.
 -
Avoid thin cross-sections: surface thickness less than 1-2 mm may deform with heat.
To optimize the print:
-
Adjust the back of the mold to minimize material: reduce the cross section in areas that are not supporting the cavity. It will save costs in resin and diminish risks of print failure or warpage.
-
Add chamfer to help to remove the piece from the build platform.
-
Add centering pins at the corners to align both prints.
If you have more questions about the workflow, make make sure to check our article FAQ: Injection Molding With 3D Printed Molds. For the complete process workflow and other best practices, download our white paper.
3D printed injection mold can accommodate side actions.
Combining moldmaking with desktop 3D printing allows engineers and designers to expand the realm of materials they’re using and bring the capabilities of their 3D printer beyond rapid rototyping and into the realm of production.
Using 3D printed molds, dies, and patterns to supplement molding and casting processes tends to be both faster and less expensive than CNC milling, and easier than working with silicone molds.
Beyond injection molding, 3D printed molds can be used for the following molding and casting processes:
- Thermoforming and vacuum forming
- Silicone molding (also overmolding, insert molding)
- Vulcanized rubber molding
- Jewelry casting
- Metal casting
Follow the links to download our white papers with the specific guidelines for each process.
White Paper
Interested in other applications of 3D printed molds? Download our white paper that also covers thermoforming and casting with elastomers.
Download the White Paper
White Paper
Download our white paper to see how to create complex molds with 3D printing fast and learn about tips and guidelines that you’ll want to follow when preparing your mold parts.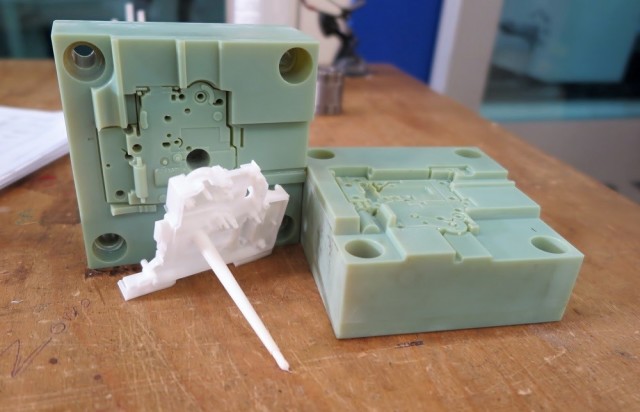
Download the White Paper
White Paper
Download this report for case studies featuring OXO, Tinta Crayons, and Dame Products that illustrate three different implementations of silicone molding for product design and manufacturing, including overmolding and insert molding.
Download the White Paper
Plastic Injection Molding vs 3D Printing – Which is Better?
Among today’s manufacturers, both 3D printing and plastic injection molding are viable options for producing complex plastic parts and components. While originally considered competing technologies, these techniques are now each largely recognized as having unique advantages and can even be used together to help optimize production efficiency.
For OEMs wondering whether plastic injection molding or 3D printing is the right process for their next project, we’ll explain when to use each technique and how they can be used collectively to support one another.
When to USE 3D PRINTING AND PLASTIC INJECTION MOLDING
3D printing and plastic injection molding are both helpful processes in their own right. 3D printing has given engineers the power to create plastic designs at their desks and bring them to life in a matter of hours. Injection molding, on the other hand, is the go-to for quality and value. It is commonly used to quickly and reliably produce high-volume runs of complex plastic designs.
3D Printing is Best-Suited For:
- Quick turnaround times (1-2 weeks)
- Low volume production runs (100 parts or fewer)
- Designs with frequent changes
- Relatively small plastic parts or components
Injection Molding is Best-Suited For:
- Longer turnaround times (5-7 weeks for simple parts)
- High volume production runs (1,000+ parts per run)
- Final part design (no more prototyping)
- Parts of any size or complexity
The use of 3D printing in innovative and experimental scenarios has been grabbing recent headlines, but the reality is that the majority of today’s plastic parts are manufactured using plastic injection molding. The choice is understandable given how the process helps OEMs control quality, costs, and design complexities such as tight tolerances.
Tooling Design
Tooling design is one of the most expensive and time-consuming parts of the injection molding process. It is also an opportunity for some injection molders to leverage 3D printing to create tools during prototyping that help reduce development time and lower tooling costs. Stereolithography (SLA) 3D printing, for example, can be a cost-effective alternative to metal tool fabrication, as SLA parts are fully solid and isotropic, and can withstand the pressure of low-volume molding.
For larger volume production runs and more precise molds, however, traditional tooling remains the best option. Likewise, if a part requires the use of thermoplastics, metal tools are the best option to handle resins with melting temperatures at or exceeding 500°F.
Custom PLASTIC Part Design
Due to its ability to create custom plastic part designs and prototypes in a matter of hours or days, 3D printing technology has exploded in popularity.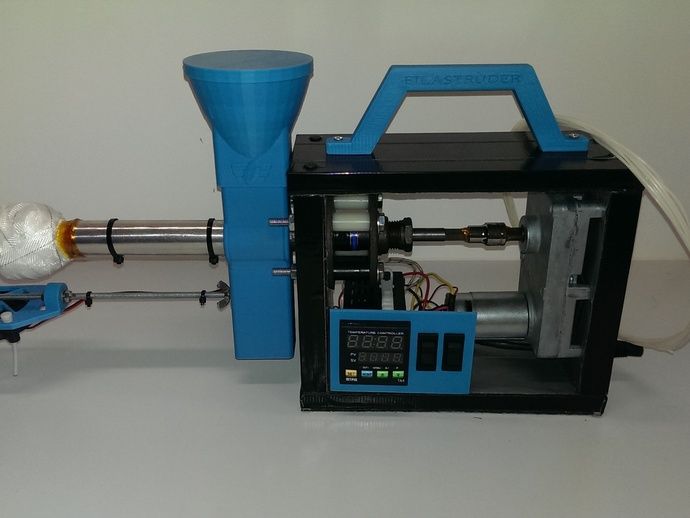 The medical industry, for example, has embraced the quick-turn technology to create custom items like prosthetics, dental products, orthopedics, exoskeletons, bones, implants, artificial heart valves, and more, with researchers even working on 3D organ printing technologies.
That's not to diminish plastic injection molding's contributions and ongoing demand within the medical community. The value of consistently producing large quantities of defect-free, complex medical devices and components simply cannot be underestimated.
Viewing 3D printing and plastic injection molding as complementary instead of competing technologies is beneficial for OEMs and molders alike. Combining these two techniques as situations warrant can ultimately help shorten pre-production iteration cycles and allows for better testing, manufacturing, and outcomes. Interested in learning more about how the tool qualifying process helps to ensure quality outcomes? View our infographic.
You might also like.
 ..
..How to use 3D printing for injection molding
Today, most plastic products in the world are made using injection molding. However, creating molds can be time consuming and costly. Fortunately, molds can not only be obtained on a metal milling machine, but also printed on a 3D printer.
Stereolithographic (SLA) 3D printing is an affordable alternative to milling aluminum molds on a machine. The 3D printed models are hard and isotropic, and the materials used have a thermal distortion temperature of 238°C at 0.45 MPa. This means that they can withstand the temperature and pressure of injection molding. nine0003
Download our free white paper to learn how to 3D print injection molds.
Download white paper
3D printed aluminum framed molds and finished die-cast model.
With affordable desktop 3D printers, heat-resistant 3D printing materials and injection molding machines, you can create molds yourself to produce functional prototypes and small models from industrial plastics. In the case of small-scale production (approximately 10-1000 models), injection molds created using 3D printing save time and money by eliminating expensive metal molds. They also provide a more flexible approach to manufacturing, allowing engineers and design professionals to prototype injection molds, test mold configurations, or easily modify molds while continuing to iterate, thanks to short order lead times and turnaround times. nine0003
Stereolithography (SLA) technology is a great solution for injection molding. It is distinguished by the fact that it allows you to create molds with a smooth surface and high precision, giving these qualities to the finished model, as well as simplifying the process of removing from the mold. SLA 3D printing provides chemical bonding, density and isotropy of the manufactured models, which makes it possible to produce functional molds of a quality that cannot be achieved with Fused Deposition Modeling (FDM) printers. Desktop stereolithography printers, such as those offered by Formlabs, simplify your workflow because they are easy to implement, use, and maintain. nine0003
Formlabs created High Temp Resin for small production runs of injection molded models. It has the highest heat distortion temperature on the market and one of the highest among Formlabs resins: 238°C at 0.45 MPa. High Temp Resin can withstand high casting temperature and shorten the cool down time. Our white paper provides a case study from Braskem. She completed 1,500 casting cycles using a single 3D printed High Temp Resin profiling insert to make the face mask neck straps. The company printed the insert and placed it in a conventional metal mold integrated with the injection molding system. This is an effective solution for the production of medium batches of models. The printed insert can be replaced as the project parameters change or if it breaks. This solution allows molds to be created as needed with complex geometries that are difficult to create with traditional methods, and also provides the possibility of multi-stage casting. nine0003
However, High Temp Resin is quite brittle.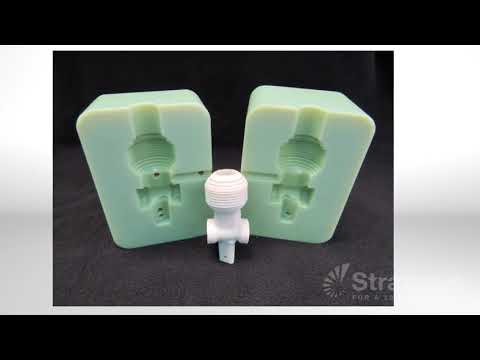 In the case of more intricate shapes, it is easily deformed and cracked. For some models, it is difficult to complete more than a dozen cycles. To solve this problem, the young French company Holimaker used Gray Pro Resin. This polymer has a lower thermal conductivity than High Temp Resin, which increases the cooling time. However, it is softer and able to withstand hundreds of cycles.
Formlabs recently released Rigid 10K Resin, an industrial grade material with a high fiberglass content. It can convey a variety of geometric features and withstand injection molding processes. Rigid 10K Resin has a thermal distortion temperature of 218°C at 0.45 MPa and an elastic modulus of 10,000 MPa, making it strong, incredibly stiff and heat resistant. Novus Applications has cast hundreds of structurally complex threaded caps with just one Rigid 10K Resin mold. As more companies start using Rigid 10K Resin, we believe this resin will be a great help in 3D printing complex injection molds. nine0003
Download our free white paper to learn about practical use cases and how to make your own injection molds using 3D printing.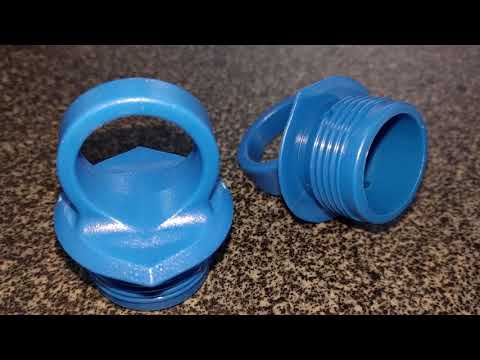
Download white paper
Based on our customers' internal testing and case studies, we recommend selecting a 3D printing resin based on the criteria shown in the table below. Three stars mean that the polymer is very effective, one star means that it is not very effective. nine0049
The more complex the model and mold design, the more difficult the injection molding process. Using 3D printed molds, models can be molded from various materials such as polypropylene, polyethylene, thermoplastic elastomer, TPU or polyamide. Low viscosity material can reduce pressure and increase mold life. Polypropylene and thermoplastic elastomers are easy to process. Using them, you can perform a large number of cycles. In contrast, more technical plastics such as polyamide allow for fewer cycles. The release agent makes it easier to separate the model from the mold, especially for flexible materials such as TPU or thermoplastic elastomers. nine0003
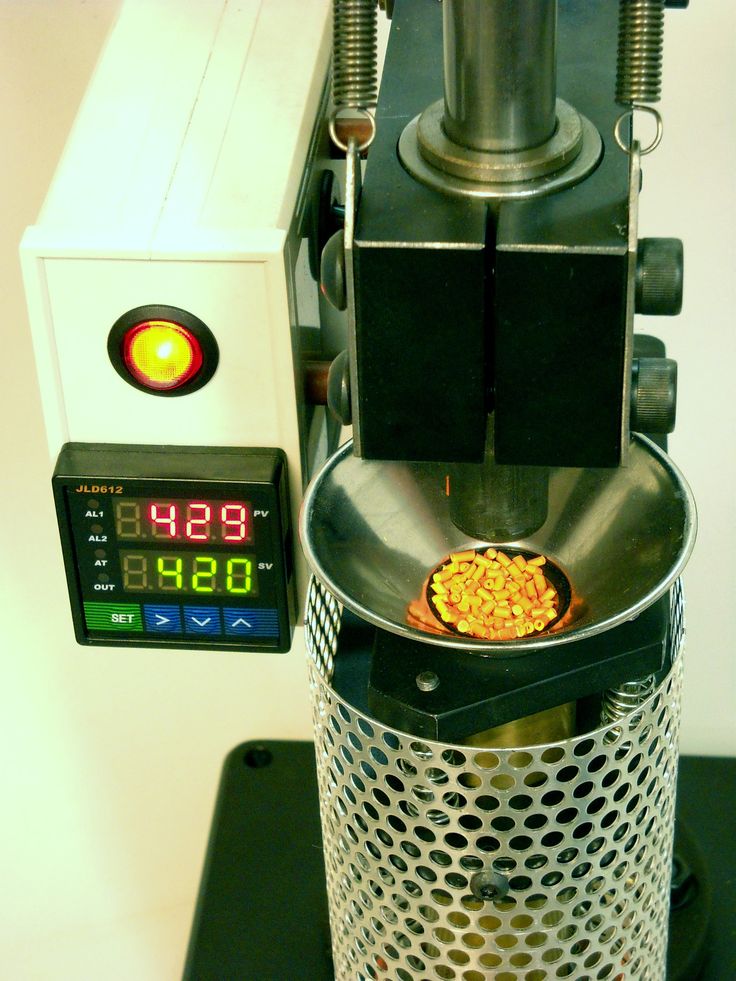
The type of injection molding machine does not greatly affect the process. If you have little experience with injection molding and would like to try this method at no extra cost, we recommend using a desktop injection molding machine such as the Holipress or Galomb Model-B100.
White paper
Download our white paper to learn how to use 3D printed molds for injection molding to help you cut costs and order lead times, and see real world application examples 3D printed by Braskem, Holimaker, and Novus Applications. nine0003
Read white paper
We recommend that you follow the design rules for additive manufacturing as well as the general design rules for injection molding, such as 2 or 3 degree taper, uniform model wall thickness, and rounded edges. Here are some helpful tips from users and professionals regarding resin printed molds:
To optimize dimensional accuracy:
- Plan the mold allowance for post-processing and dimensional changes.
:quality(80)/images.vogel.de/vogelonline/bdb/1186000/1186052/original.jpg) nine0113
nine0113 - Print one batch of a mold to learn about dimensional deviations and account for them in a CAD mold model.
To increase mold life:
-
Open the sprue to release pressure in the cavity.
-
If possible, design one side of the floor flat and the other as designed. This will reduce the chance of blocks shifting and splashing.
nine0112 -
Avoid thin cross-sections: under the influence of temperature, a surface with a thickness of less than 1-2 mm may be deformed.
Create large air ducts from the edge of the cavity to the edge of the mold. This will improve the flow of material into the mold, minimize pressure, and reduce the chance of splashing in the sprue for faster cycle times.
For print optimization:
-
Modify the back of the mold to minimize the amount of material used: reduce cross-sections in areas that do not support the cavity.
 This will save resin and also reduce the chance of printing errors or warping. nine0003
 -
Add a beveled edge to remove the product from the work platform.
-
Add centering holes at the corners to align both models.
If you have any questions about the workflow, please read our article in the FAQ section titled "Injection Molding in 3D Printed Molds". For full details of the workflow and recommended practices, download our technical white paper. nine0008
3D printed injection molds can withstand side loads.
By combining mold making with desktop 3D printing, engineers and designers can expand their 3D printer's material range and capabilities beyond rapid prototyping into industrial manufacturing.
3D printed molds, dies and samples to complement molding and casting processes are generally faster and cheaper than CNC milled models and easier than silicone molds. nine0003
In addition to injection molding, 3D printed molds can be used for the following molding and casting processes:
- Thermoforming and vacuum forming
- Silicone molding (including multilayer and insert molding)
- Molded using vulcanized rubber
- Jewelry casting
- Metal casting
To download our technical reports with specific recommendations for each process, use the appropriate links.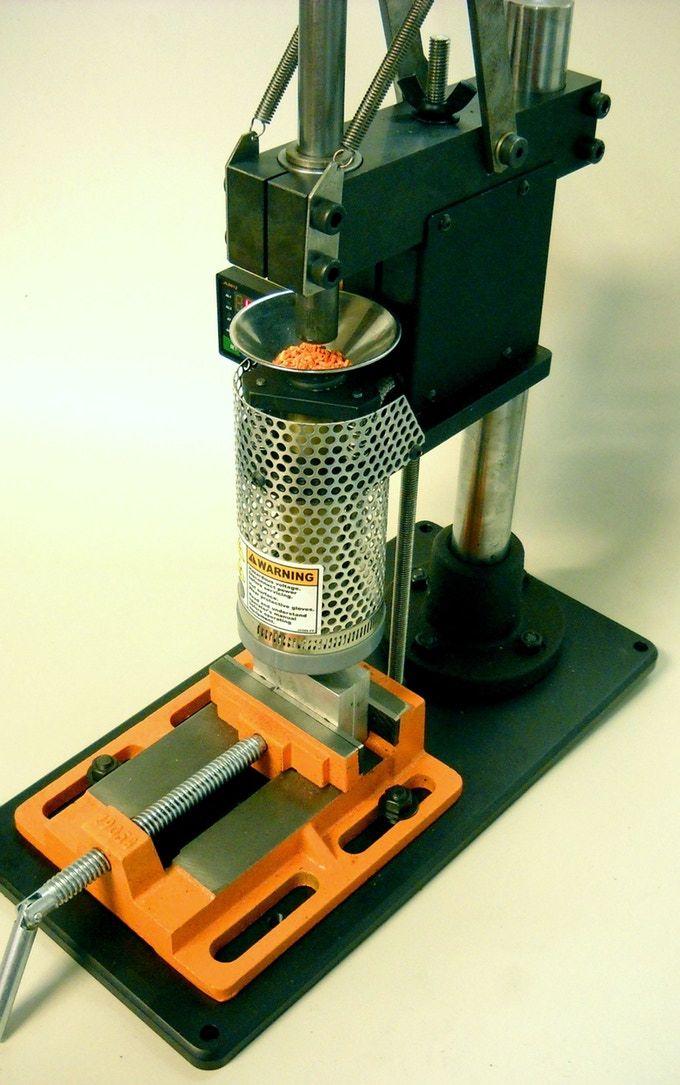 nine0003
White paper
Are you interested in other uses for 3D printed molds? Download our white paper which also talks about thermoforming and injection molding of elastomers.
Download White Paper
White Paper
This white paper contains case studies from OXO, Tinta Crayons and Dame Products illustrating three different applications of silicone molding for product development and manufacturing, and multi-layer and insert molding. nine0003
Download White Paper
3D Printing Applications: Injection Molding
Skip to Main Content
Accelerate product development, reduce cost and lead time, and bring better products to market using 3D printing and low volume injection molding in its production process.
Read white paperRequest a sample
Use 3D printed injection molds on desktop and industrial machines to efficiently and cost-effectively produce hundreds to thousands of functional prototypes, as well as prototyping or final models.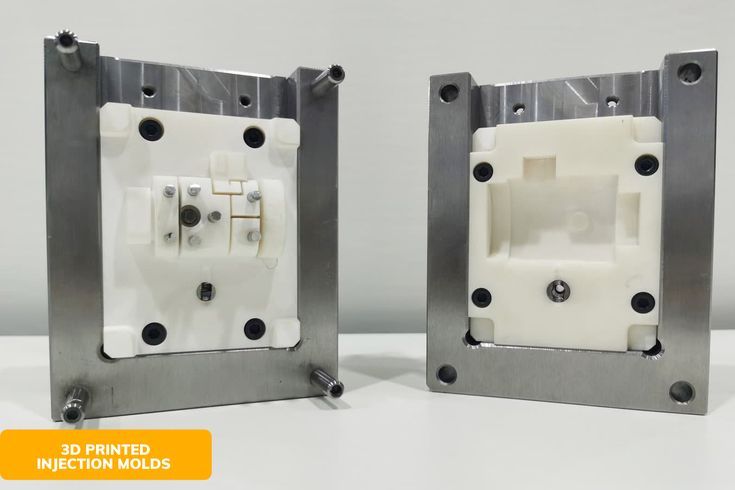 nine0003
Molds created with Formlabs 3D printers have been validated for use on desktop and industrial molding machines with varying pressures, temperatures and materials.
View molding conditions customers have used
A complete desktop ecosystem
You can easily start 3D printing injection molds yourself with a Formlabs 3D printer and desktop molding machine. Quickly test, validate and reproduce prototypes, create pre-production models from material that will be used in production, and produce small series of final models without the need for a lot of equipment and training. nine0003
A complete, easy-to-use Formlabs ecosystem can be integrated into any injection molding workflow. Save time and money on low-volume injection molding projects by taking advantage of 3D printing to quickly and cost-effectively produce hundreds to thousands of models from common thermoplastic material.
Read the Quick Start Guide
Step 1
Mold Design
Use conventional manufacturing design methods to create 3D printed molds.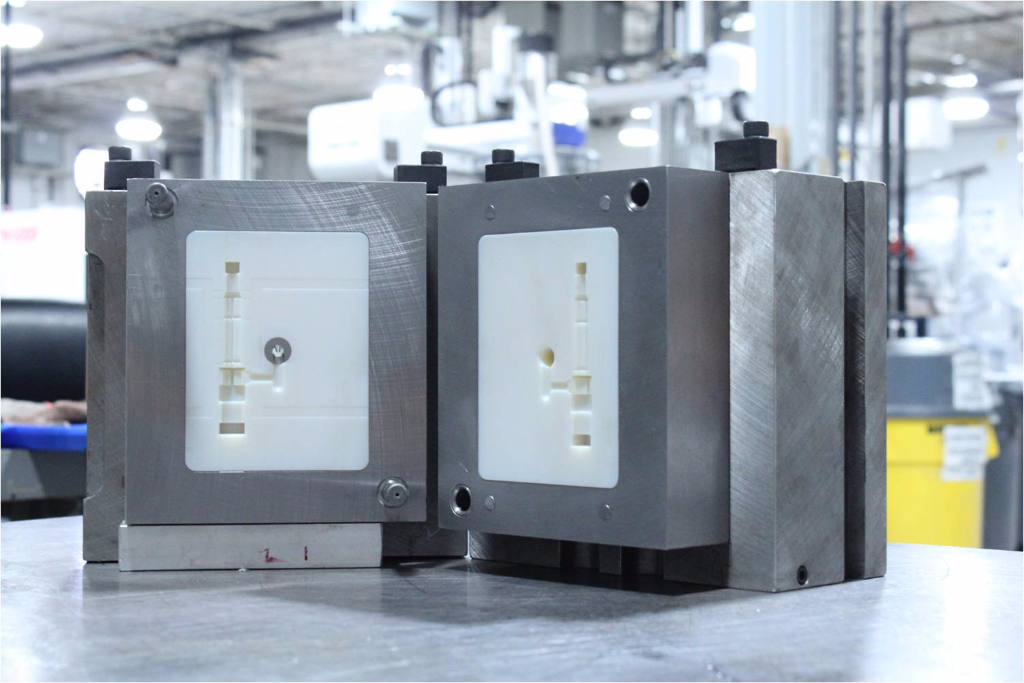 nine0003
Stage 2
Printing molds on the
Form 3 3D printer uses high performance materials such as Rigid 10K Resin to produce durable, smooth and detailed models.
Stage 3
Assembling the mold
Assembling 3D printed molds with a mold block increases their durability.
Stage 4
Mold closure
3D printed molds can be used on desktop and industrial molding machines. nine0003
Stage 5
Injection Molding
Molds created with Formlabs 3D printers have been validated for use in a variety of process conditions.
Stage 6
Cooling
The cooling process, which usually takes a long time for plastic molds, can be accelerated using compressed air.
Step 7
Removing the model from the mold
You can add ejector pins to automate the process of removing the model from the mold. nine0003
Formlabs' ecosystem of affordable 3D printers and high-performance materials produces durable, smooth, detailed injection molds that can produce hundreds to thousands of models in difficult casting conditions.