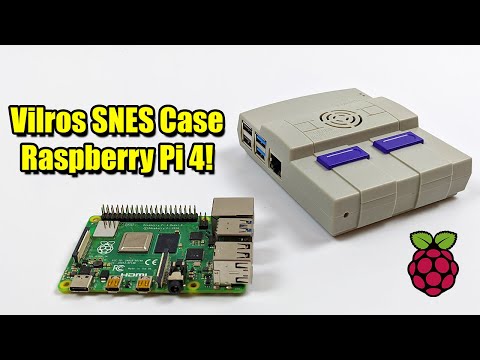
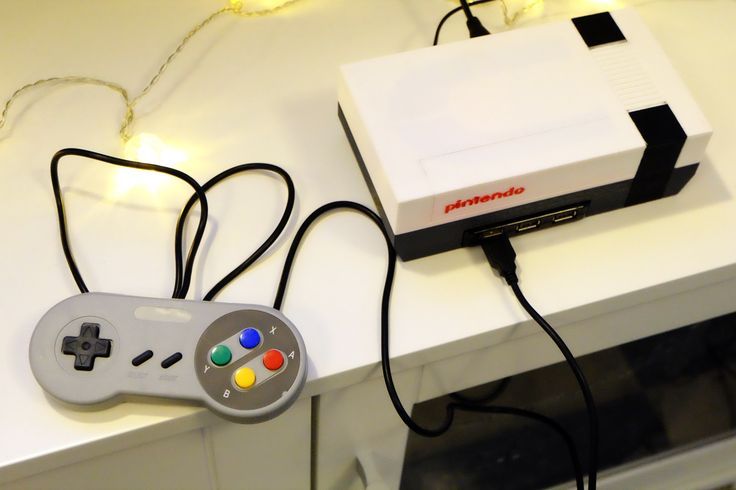
3D printed nintendo raspberry pi case
▷ nes case for raspberry pi 4 3d models 【 STLFinder 】
Raspberry Pi 4 NES case
thingiverse
I couldn't find a NES-inspired case for Raspberry Pi 4, so I remixed this one. I only did a big cutout for all the ports on the side, and the network port is completely blocked, since I don't use it, and it didn't align with the original design. ... I...
Raspberry Pi 4 NES case
thingiverse
I really like [Discobanan case](https://www.thingiverse.com/thing:3893465) since it's screwless and super compact! Therefore I remixed it to add NES black bands. ...The lid seemed not large enough, so I added some mm on each side too.
Raspberry Pi 4 NES case
prusaprinters
I really like this model since it's screwless and super compact!Therefore I remixed it to add NES black bands. ...The lid seemed not large enough, so I added some mm on each side too.</p>
raspberry pi 4 nes case remix
thingiverse
raspberry pi 4 nes case
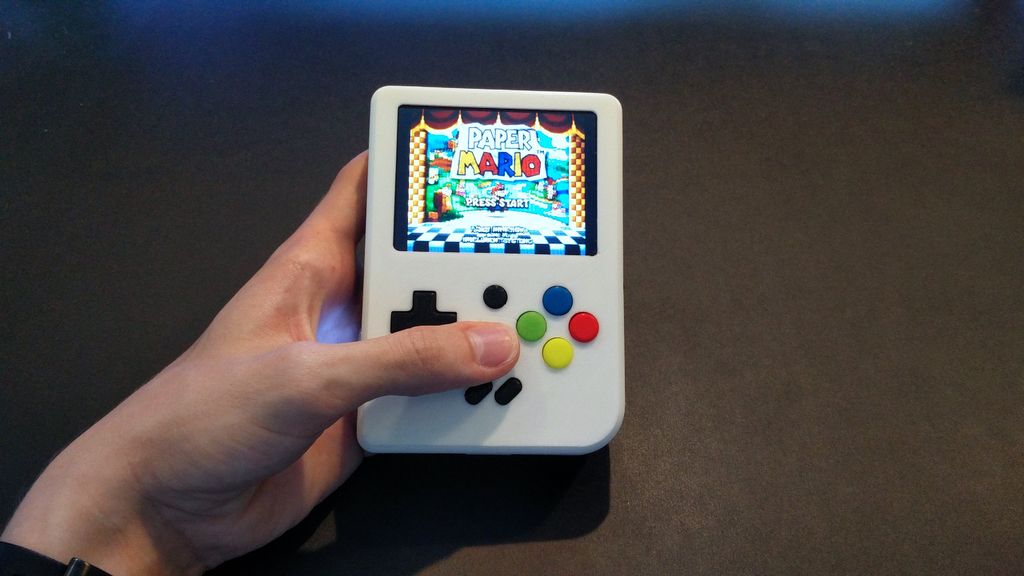
Mini NES Raspberry Pi 4 Case
thingiverse
I also made some changes for a custom case that I wanted, which had one button and a Raspberry Pi logo instead of the NES ports, a fan shroud, and a custom logo (with . psd) This case has a working power button, a power LED, and a temperature...
Raspberry Pi 3 & 4 Case - Nintendo NES
thingiverse
I keep improving the design over time. ... The pictures are from the first design. Probably the only small accurate version of the NES.
Raspberry Pi 3 & 4 Case - Nintendo NES
prusaprinters
I keep improving the design over time.The pictures are from the first design.Probably the only small accurate version of the NES.
Baby NES Case for Raspberry Pi 3
thingiverse
For this remix of the Baby NES Case I used the bottom from jrebeiro and the top and lid from CyB.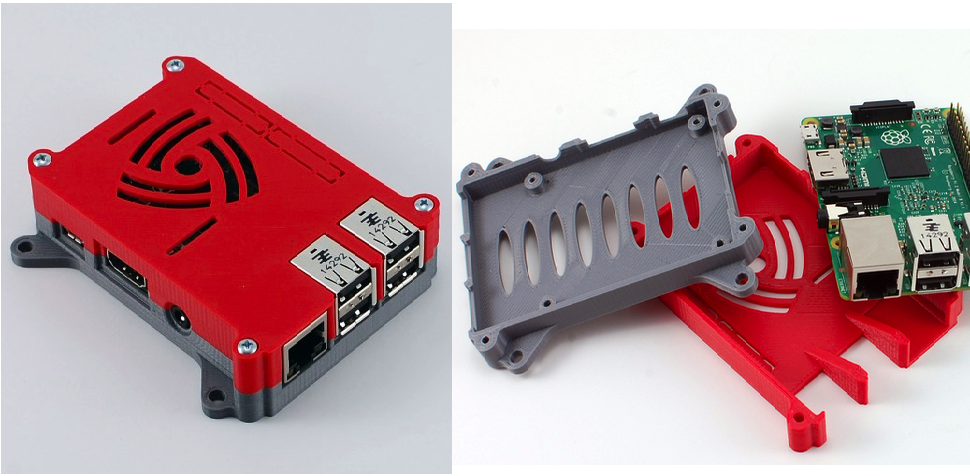 NES Bottom: I made the supports smaller and resized to fit the Pi 3 so that none of the chips would sit on the supports. I also added an LED hole and an...
Raspberry pi case nes
thingiverse
If you like our modified design and would like to build it so that it is as strong as Samson himself, then please order some 3Dynamic Systems Carbon Fiber Filament $50 for 1kg of 1.75mm diameter filament. ...To order your free sample of 3DS Carbon Fiber...
Raspberry Pi 4 NES case with Ethernet friendly top
thingiverse
I did a somewhat hacky remix of the rather nice Pi 4 NES case to enable ethernet port usage. The lines don't quite match up, top to bottom, but it's close enough for me. ...Have fun!
Raspberry Pi 4 NES case w/ optional fan
thingiverse
A remix of Bocklar's NES case adapted to fit the Raspberry Pi 4. This design blocks access to the Ethernet port, but all four USBs are accessible under the "cartridge door". ...Includes an alternative top with a spot to mount a 30mmX30mmX8mm fan such as...
Raspberry Pi 4 NES case w/ optional fan
prusaprinters
A remix of Bocklar's NES case adapted to fit the Raspberry Pi 4. This design blocks access to the Ethernet port, but all four USBs are accessible under the "cartridge door". Includes an alternative top with a spot to mount a 30mmX30mmX8mm fan such as...
NES Raspberry Pi 4B case
thingiverse
A Raspberry Pi 4B case in the shape of an NES game console.
Mini NES Raspberry Pi Case 4 front USB
thingiverse
A remix of daftmike's case (https://www.thingiverse.com/thing:1727668/#comments) but to support 4 front USBs. The parts named "_Remix" is the new ones. ..."USB_divider" is just a plastic piece to put between the two usb connectors so they are correct...
NES Classic Raspberry Pi Case
thingiverse
This was my attempt at a raspberry pi case for my RetroPie setup back when the NES Classic Edition was first released. For this model, I scaled the dimensions of the original NES console and kept the same proportions of that design. I wanted to keep...
Mini NES Raspberry Pi Case
cults3d
This is a case for Raspberry Pi made to look like a scale NES console. Mini cartridge files available here. It's part of my 'NESPi' project that you can read more about on my blog. ... I've also put together a kit for the electronics available here.
NES mini Raspberry Pi Case
thingiverse
Inspired by the original NES console and recent NES Classic Scaled to eliminate the need for connector extensions Features an easily removable top for quick access Cartridge 'door' hinges to reveal the PI and power lights (i. e. ...non-functional, for...
traypart_peg.stl for daftmike Mini NES Raspberry Pi Case
thingiverse
tray part_peg.stl file for daftmike Mini NES Raspberry Pi Case Cart_tray
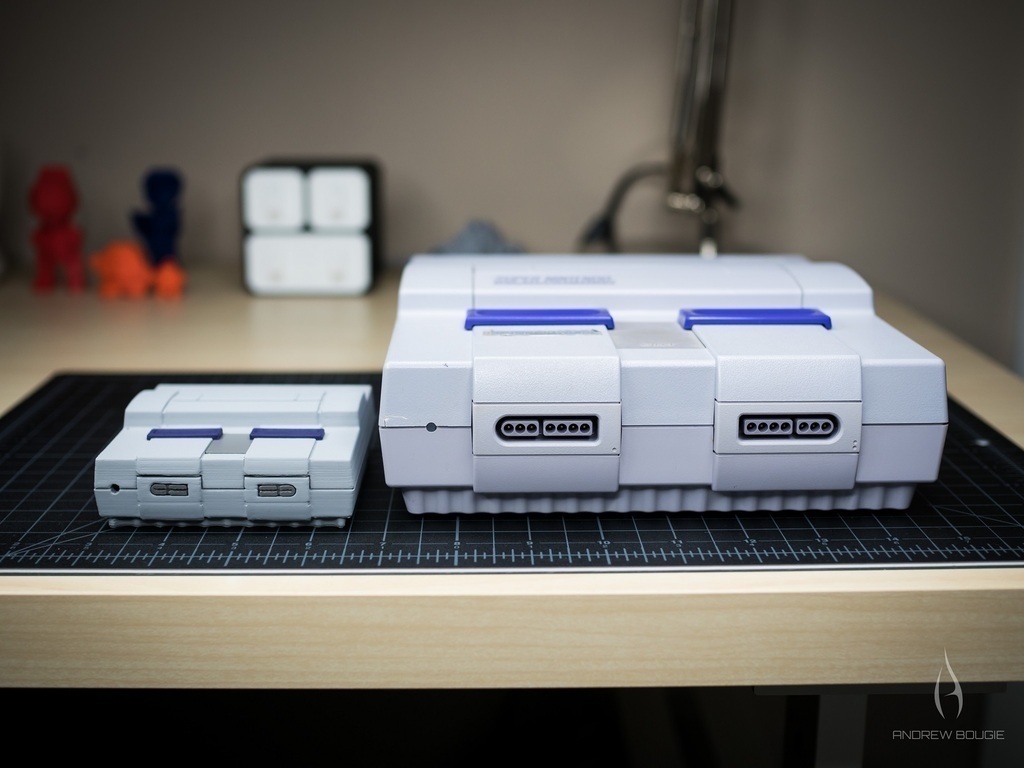
PiNES - The scaled NES case for your Pi 3/4
thingiverse
Info and assembly video here: https://www.youtube.com/watch?v=AzHNTnjC3QI For this case, I used the measurements of the original NES and scaled them to fit around a Raspberry Pi! Print of the parts in the appropriate colors, glue and screw the case...
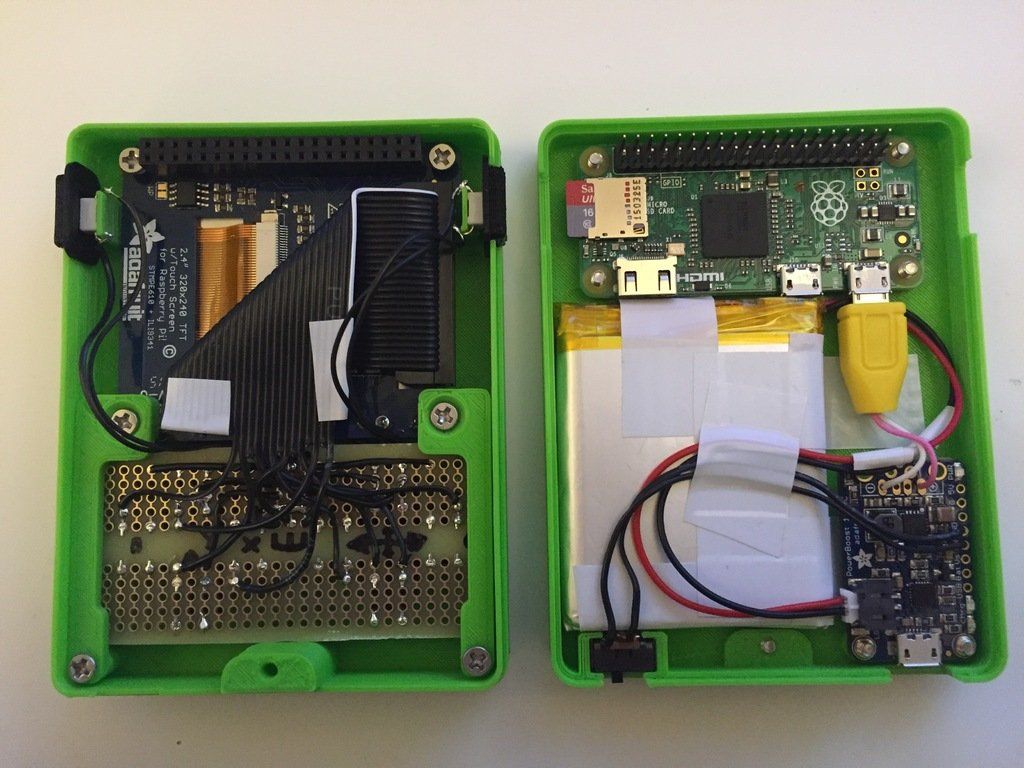
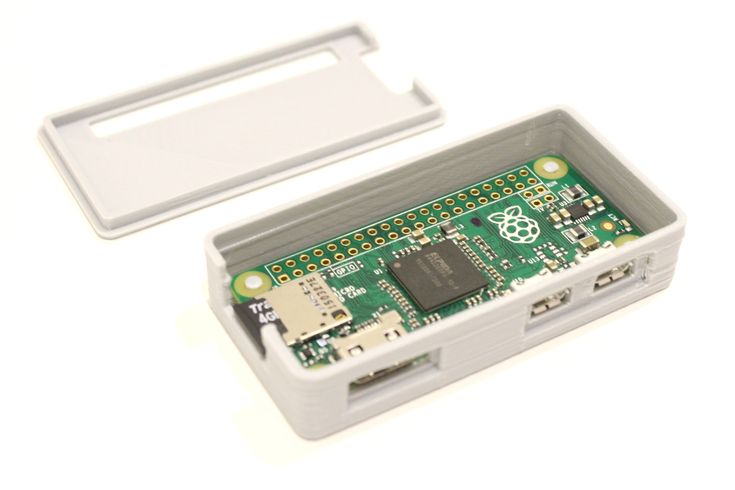
Raspberry Pi Zero NES Case
thingiverse
Assembly What you will need: 4x - #2X1/4" wood screws to secure the Raspberry Pi Zero to the bottom half of the case. 4x - #4X1/2 wood screws to attach the bottom of the case to the top. A couple small lengths of 1.75mm filament for the hinges on...
Remixed Raspberry Pi NES Case
thingiverse
Recalbox has a script built in that allows you to use a switch to start and stop the raspberry pi (https://github.com/recalbox/recalbox-os/wiki/Add-a-start-stop-button-to-your-recalbox-(EN)), the LED is connected to the serial port TX pin so that it...
RetroPi NES Classic Nintendo Housing for Raspberry Pi 4
thingiverse
This housing will hold a Raspberry Pi 4 with a ControlBlock installed. I power the system using a DC Power Plug Jack Socket Female Connector 2.1x5.5mm and switch it on with Lockless Momentary ON/OFF Push button Black Mini Switch PBS-110 M121. I used...
Mini Nintendo NES case for Raspberry Pi 3 B
thingiverse
This is a remake of the BabyNES Raspberry Pi B+ case: http://www.thingiverse.com/thing:449877 This case fits for the actual Raspberry Pi 3 Model B. Some gaps are included so the pcb lies flat on the holding blocks. Also the screw guides at the top...
NES Raspberry Pi B+ Case for Printrbot 1405
thingiverse
I couldn't print the BabyNES Raspberry Pi B+ Case on my tiny Printrbot 1405 so I quartered jrebreiro's stl files and they worked out really well. ...Just glue pieces together and drop in your Pi.
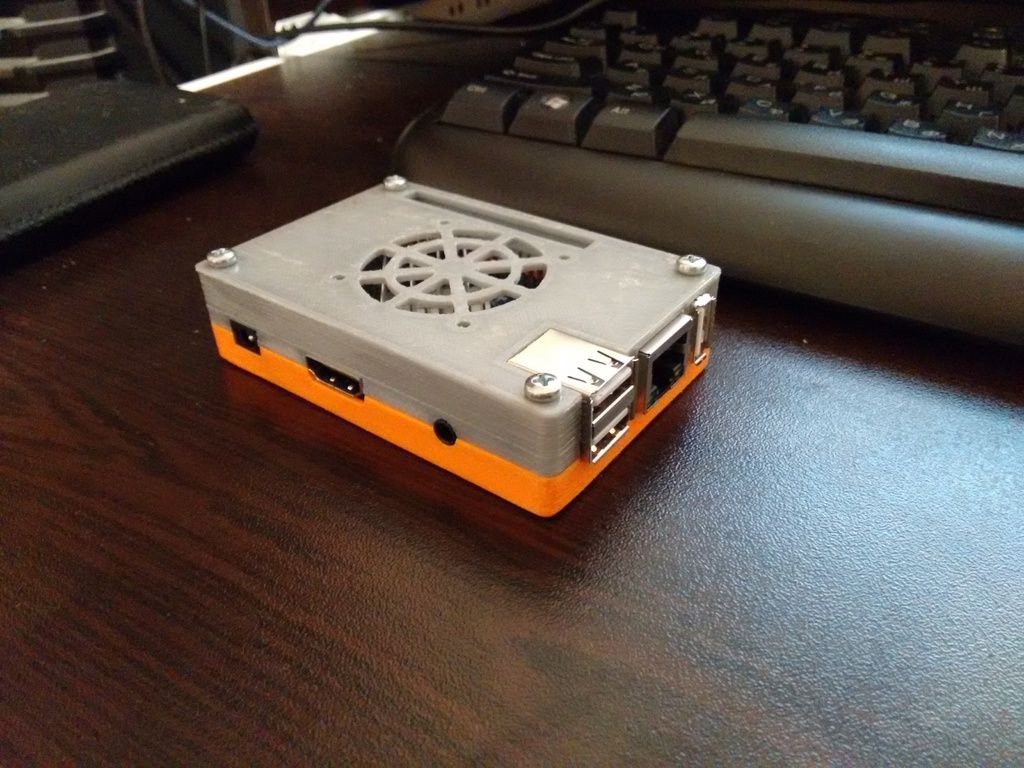
Case for Raspberry Pi 4
thingiverse
Case for Raspberry Pi 4 that can accommodate a 40mm x 10mm cooling fan
Case for Raspberry Pi 4
thingiverse
Made a generic Raspberry Pi 4 case in Fusion 360.
NES CHASSIE FOR RASPBERRY PI
grabcad
... is only so you can se the size of the chassi. #Update! just added a version for the raspberry PI B+, but still a work in progress waiting for my new 3D printer which should arrive next week! .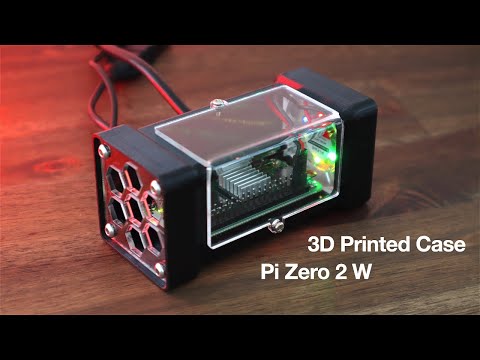 ..then the work will begin to finalise the model.
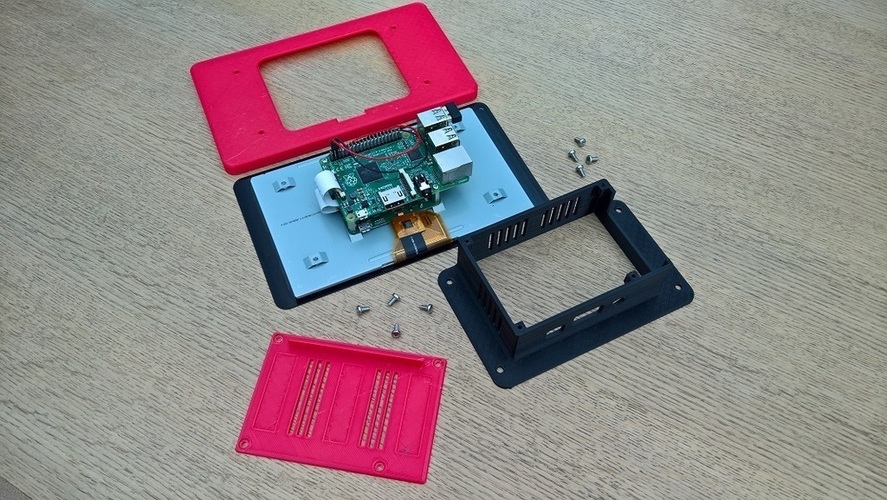
Case for Raspberry Pi 4
thingiverse
Desktop Mode: If the Raspberry Pi 4 is primarily used as a PC, then the lid can fit flush to the shell of the case for a sleek, enclosed cooling module. Development Mode: If you are going to use the Raspberry Pi as a development board, like you...
Case for Raspberry Pi 4
grabcad
Too see a full write up of this case, check out our blog post: https://www.219design.com/cool-your-raspberry-pi-3d-printed-case/Here’s where you can buy a compatible fan: https://www.adafruit.com/product/3368 Our case is designed for two. ..
..
Case for Raspberry PI 4
thingiverse
This is my box for the Repetier print server. ... For my Raspberry Pi 4. Printed on MK3S & MMU2S. ... You will need: 4 pieces M2,5x6mm screw 4 pieces M4x16mm screw
10.000 Nintendo raspberry pi 3D Print Models
Reset Filters
10.000 Models available (0.05s)
Did you mean:
-
nintastic nintendo style case raspberry pi video games console emulation emulators gaming nes rasppi...
-
babynes raspberry pi b+ case video games 2600 atari emulator genesis mame megadrive nintendo raspber...
-
mini bartop sega aero city game city gaming video sega candy astro arcade mame recalbox retropie bat.
 ..
.. -
retrocade - desktop arcade machine + retropie video games arcade arcade cabinet arcade game bartop a...
-
super famipi raspberry pi case modeled after super famicom video games console emulation emulator ni...
-
cart lid mini nes raspberry pi case video games nes nintendo raspberry raspberry pi raspberry pi cas...
-
pigrrl zero plus remix games handheld nintendo pi zero raspberry pi zero retro retrogaming retropie ...
-
nintastic bishop fox edition nintendo style case raspberry pi video games console emulation emulator...
-
snes raspberry pi b+ case no text computer games nintendo raspberry pi case video game
-
retropie case raspberry pi 2 model b raspberry pi b+ diy nes nintendo entertainment system raspberry.
 ..
.. -
mini snes raspberry pi zero case wip video games 1980s 1990s arcade atari classic classic edition co...
-
minines diy case diy emulator instructables making minines nes nintendo raspberry raspberry pi raspb...
-
raspberry pi case nintendo 64 3d printing
-
raspberry pi game boy printrbot 1405 games 1405 adafruit console gameboy game boy nintendo noor elah...
-
mini nintendo nes case raspberry pi 3 video games console emulator gaming nintendo 64 raspberry pi c...
-
raspberry pi game boy horizontal layout model b+ model a+ games console game gameboy gameboy game ha...
-
makerobgreatagain parts model robots emulation gaming nintendo nintendo rob raspberry pi raspberry p.
 ..
.. -
nespi wall mount switch nes nintendo nintendo cartridge raspberry pi raspberry pi case
-
picube3 gamecube nintendo gamecube pi3 raspberry pi
-
bottom part microsd access gamecube nintendo raspberry pi rpi
-
freeplay zero cm3 game boy advance cartridge blank video games freeplaytech freeplay cm3 freeplay ze...
-
stalker front cover super pi boy video games chernobyl nintendo pi boy pripyat radiation radioactive...
-
pi zero nes controller pins computer arcade emulation emulationstation emulator emulator controller ...
-
buttons updated mintypi video games 3d parts 3d printing mintypi nintendo nintendo 3ds raspberry pi
-
nintendo n64 raspberry pi case toys & games n64 nintendo raspberry pi raspberry pi case video games .
 ..
.. -
mini snes raspberry pi zero case w usb controller ports video games nes classic killer nintendo rasp...
-
nes pi electronics box case console dd ddd design development disher holder nintendo raspberry raspb...
Can't find what you are looking for?
Find a professional for your 3D project
Look for the best 3D Maker to bring your project to life
Request a 3D Service from a professional
Publish a request with your requirements for a 3D Maker
Store and request to print a 3D model list
Create your print list of 3D Models for 3D Makers to get a quotation
Print your models or execute your ideas on a safe mode.
Free STL file Case for Raspberry Pi 4 Playstation・Design for download and 3D printing・Cults
USB Rally Handbrake
2 €
NEW RALLY HANDBRAKE V2.
 0 - PC/PS/XBOX
 2 €
Swiss Flag
2 €
Flag of Valais (Switzerland)
2 €
Harley Davidson Ashtray
Free
Logitech G29 G27 Simple Shifter conversion
Free
Harley Davidson Piston Ashtray Multimaterial
Free
Best 3D Printer Files in the Gadget Category
SWAMP THING 2.0 coin bank
Free
PLP ROBOT HEART
Free
Surprise Egg #14 - Tiny Dump Truck
Free
Gopro extension
Free
Card box (printed on site)
2. 50 €
50 €
Retro mobile phone holder
2,50 €
Donkey Kong Chest Pound Automata (without support)
3.50 €
Minimalist wallet
Free
Bestsellers in the Gadget category
Candy Gat - PEZ 3D printed gun
9.30 € -50% 4.65 €
Application for creating switchable business cards
3.50 €
Flexi Duck Print in place Multiparts
2.78 €
Automatic thread loader. Never run out of filament again while printing!
€9.30
PiPBOT 1 - ROBOT for printing on the spot
4. 66 €
66 €
FLEXI GIRAFFE
0,92 €
Dock Flame switch
2.99 €
Italian hand
1 €
Cubone joystick holder
3.50 €
Car air vent phone holder PRINT-IN-PLACE
2,50 €
Application for creating a double text illusion
3,50 €
F18 SUPER HORNET - 50 MM EDF JET [RC AIRPLANE]
11.64 €
Penis valve cap (Schrader valve)
1 € -50% 0.50 €
Case set for Samsung Galaxy s23 ultra (3 in 1)
2. 31 €
31 €
Application for cutting cookies
3.50 €
Bambu AMS Color 2 tier rack (for 2 AMS units 1 top 1 bottom)
2.26 €
Do you want to support Cults?
Do you like Cults and want to help us continue our journey on our own ? Please note that we are a small team of 3 people, so supporting us in maintaining activities and creating future developments is very easy. Here are 4 solutions available to everyone:
-
AD: Disable your AdBlock banner blocker and click on our banner ads.
-
AFFILIATION: Shop online with our affiliate links here Amazon.
-
DONATIONS: If you want, you can donate via Ko-Fi here 💜.
-
INVITE YOUR FRIENDS: Invite your friends, discover the platform and the great 3D files shared by the community!
I bought a 3D printer as a beginner.
 Selection, configuration, problems and solving practical problems / Sudo Null IT News0001
 The more 3D printers appear on the market, the lower the prices - now you can buy an entry-level device for $200-300.
A few months ago, I was thinking about getting one because I wanted to print a broken part of my robot vacuum cleaner. About a month ago I bought a device I liked on eBay. That's what was important to me when choosing a 3D printer.
Which printer do you need?
Considering that I knew almost nothing about 3D printers (except for a few articles read here on Habré), the important points were:
- Out of the box printer performance. I have seen several articles describing how long it takes to set up a "simple Chinese printer". It needs to be assembled from a large number of parts, and it is not a fact that there will not be defective ones among them. Once assembled, you can mess around with the device for a couple of days, and then it turns out that for some reason it does not work.
 In short, I needed a printer that didn't need to be assembled and that could work right out of the box.
 - It shouldn't be too expensive. Seriously, I'm new, I was not sure that after a couple of days I would not abandon the device. And a printer for 500-600 euros would be too expensive a toy. So I was willing to spend a couple of hundred, no more.
- It should not be too big. Before buying, I allocated a little space for installing the printer, somewhere around 50 * 50 cm. Therefore, the printer had to stand on the allocated area without any problems.
- It shouldn't be too difficult to maintain. This point is closely related to the first. I didn’t want to spend a lot of time on operation and maintenance work - there is sorely not enough time, so constantly eliminating emerging glitches is not an option.
- I wanted to get a printer with WiFi, it was not critical, but important.
What did I end up buying?
Model Geeetech E180.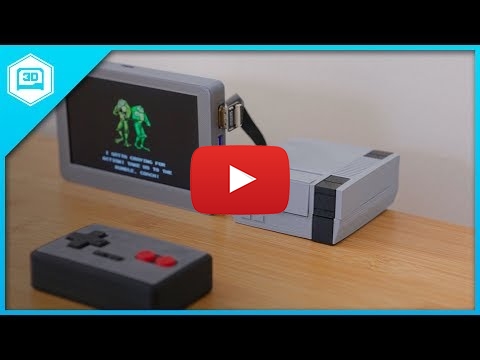 It was shown by Google after the query “3D printer for beginners”. There were other models in the search results, but this one was liked by the design and the presence of WiFi.
The developers of this printer raised money for it with the help of Kickstarter and a couple of years ago it appeared on the free market. Its price is from 200 to 350 euros, depending on the company that sells it and the store.
Bought on eBay, starting price was 200 euros, but the seller agreed to drop 50 euros, so the total price is 150.
Printer specifications:
- Print technology: FDM
- Working space dimensions: 130 x 130 x 130 mm
- Printing accuracy: 0.05 mm
- Positioning accuracy: X / Y 0.11 mm, Z 0.0025 mm
- Print speed: 80-110 mm/s
- Thread diameter: 1.75 mm
- Nozzle diameter: 0.4 mm
- Supported material: manufacturer claims PLA, but may work with other materials
- Operating system: Windows
- Management software: EasyPrint 3D
- File format: .
 STL, G-code
 - Maximum extruder temperature: 230 °C
- Power supply: DC 12V 6A
- Connectivity: WiFi, USB, TF card (offline printing support)
- Display: 3.2" full color touch screen
- Chassis: metal plate + injection molding (portable console 3D printer)
- Work table: aluminum alloy plate
- XYZ Rods: wear resistant, stainless steel screw and lead (Z axis)
- Stepper motors: 1.8 degree stepped angle with 1/16 micro stepping
Unpacking and setup
Before setting up, I looked at several reviews and tests of the printer. If not for them, I would not have done it myself, the explanation in the instructions is slurred. The setup is simple, but not for a beginner.
The printer "wound up" as soon as I connected it to power and a laptop. I calibrated the position of the table - it turned out to be simple - inserted a microSD card into the slot, found the contents through the menu on the printer screen, inserted the fiber into the channel and started printing.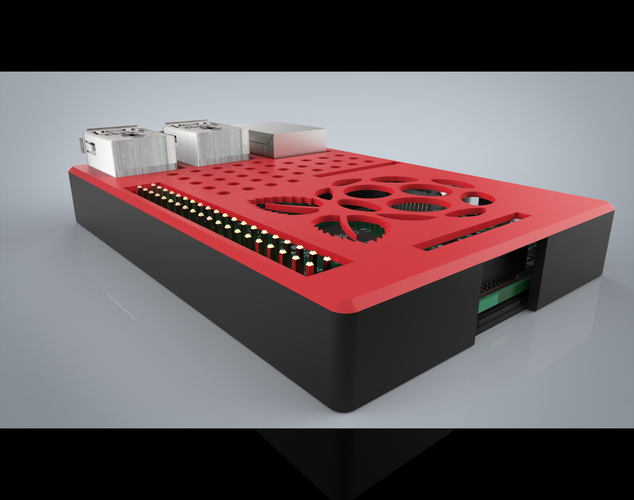 The printer made a noise and started printing. Or rather, I thought that he started typing, in fact it was not so.
Problems
The printhead moved, the temperature reached 205 degrees Celsius, but there was almost no plastic - in the first few seconds, a few plastic “hairs” came out and that was it. The printer continued to work, but the plastic was not squeezed out of the head.
I wasted several Saturday hours trying to figure out why. I tried to look for an explanation on the net, but solutions to similar problems did not suit me.
The joy of buying disappeared in the first couple of hours of fuss. I wanted a printer that “just works”, but it didn’t work out. As a result, I realized that the fiber was not being fed - the feed mechanism hidden under the plastic cover simply did not work. It did not work because the constituent elements did not rotate. There was no movement at all.
I have decided that the printer has a defective electric motor that is responsible for feeding, and I cannot repair it.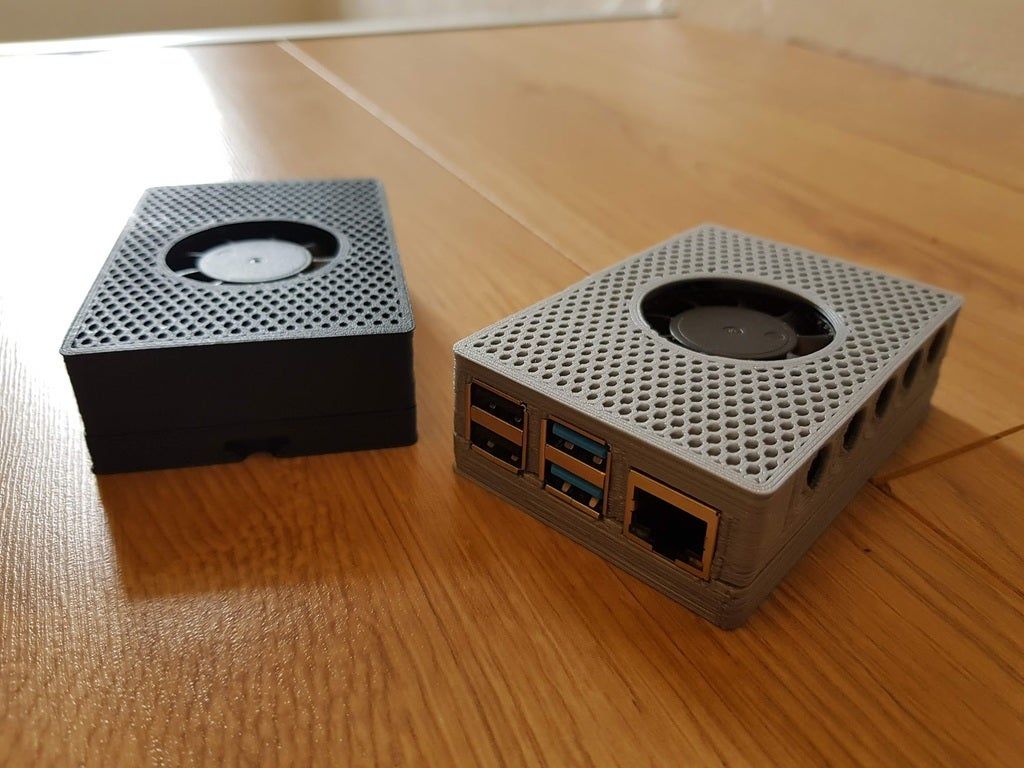 The next step is to click the Return to Seller button on eBay. After clicking the button and describing the problem, I decided to pack the printer for shipping. Before sealing it in a foam box, just in case, I decided to carefully examine those “insides” that are visible through the holes in the case.
And the reason was immediately found - the assembler at the factory simply forgot to connect the power supply to the engine. Seriously, the cable just dangled inside the case. I connected it to the right connector with tweezers without disassembling the printer. Then I turned on the device again and this time everything was fine, the plastic feed worked as it should.
Then a few more minor problems arose:
- Misaligned table. This caused the table to skew and the print head was pressed against the surface in one place. As a result, the plastic could not be squeezed out of the head, which led to solid print defects;
- Impossibility of direct printing of models downloaded from the Internet.
 Being a beginner, I thought that everything works like with a regular printer - I downloaded a document, sent it to print. It turns out that slicing is also needed. I will not repeat what it is and why it needs to be perfectly described in this article on Habré;
 - Slicers are not compatible with the printer model. Slicer needs to set printer desktop size. Some slicers for some reason did not want to work with the dimensions of my printer (13*13*13 cm). Some even crashed (including the printer's native application), some did not "understand" the dimensions. As a result, I settled on ideaMaker;
- No WiFi. As it turned out, there are two varieties of E180 - one with an integrated WiFi module, the second - without a module, you need to buy it in addition. At the seller, the inscription "need a separate module" was applied to one of the photos of the printer, small and in French (everything else was in English). Not a scam, but close to it. The module decided not to buy more, it is not really needed;
- Long printing time.
 I thought it would take several tens of minutes to print. I was not ready for the fact that large models can be printed for 6-8 hours. This is my own fault - I did not carefully look at the reviews.
Practical use
I didn’t buy a printer for a game, I wanted to get a device that would allow me to create things I need in everyday life, and not run to the store. Before buying, I outlined what I wanted to create:
The lever for separating the water tank in the iRobot Scooba robot vacuum cleaner, the repair review of which I published on Habré. His native pen broke, he did not want to spend money on buying a new one (they are relatively rare, since Scooba is no longer produced and expensive).
Finally found a suitable model on Thingiverse and printed it. To my surprise, everything fell into place the first time, the pen still works quite normally (it's been about a month since this part was printed).
Chinese electron microscope stand. I needed it for soldering small parts. I do not want to buy a professional microscope for 400 euros, since I myself do not do repairs very often. A Chinese microscope connected to a laptop is quite an option. But his native tripod is just terrible. Therefore, I wanted to make a new, normal one with my own hands.
Soldering iron stand. I just need a comfortable stand that won't let the soldering iron fall off, like from a Chinese stand that I once bought.
Paste tube squeezer. Yes, the thing is not the most necessary, but practical.
iPhone stand. Convenient, there is a hole for the cable, sound amplification.
Toys for children. Why buy another little doll or dollhouse piece when some things can just be printed out?
Stylus for Nintendo DS Lite. I had a game console bought at a flea market for a long time. The stylus was lost and I (and my daughter) played using the PDA stylus. Recently I found a stylus model for the console, printed it out - it turned out perfectly. It fits into the connector like a factory one.
Extractor for printed parts stuck to the table. Nearly all parts stick to the printer's desktop backing. You can’t do without a special device - an ordinary knife will scratch and cut a special sticker. I found a model that is compatible with the blades of a standard utility knife - works great.
The printer lived up to my expectations. It was possible to print almost everything that is indicated above. All these things fulfill their purpose, and most importantly, I am not afraid that any of them may fail. You can always print a new one.
There are a lot of ready-made models on the net. If you need some detail or thing, in 90% of cases you can find everything you need.
Troublesome little things
Printed parts are far from perfect. In some cases, deformation of some elements occurs and it is necessary to “finish” manually, using a knife and, in fact, a file.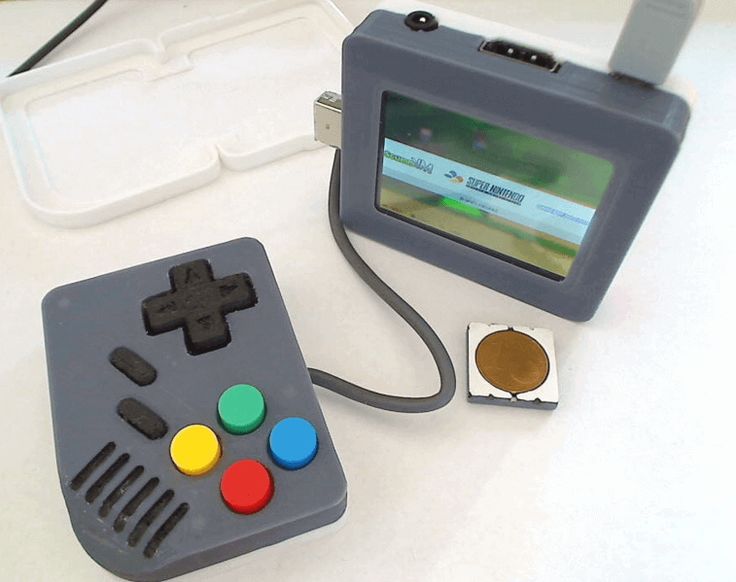 It doesn't happen that often, but I wish the printed part didn't need to be reworked (yes, I know you can get it by buying a professional 3D printer).
Sometimes parts are printed out, but for some reason the actual and declared size do not match. So, I tried several times to print different dispensers for AA and AAA batteries, but for some reason the ready-made dispensers did not fit. The diameter of the holes into which the batteries are inserted was always somewhat smaller than the diameter of the batteries themselves. I still do not understand whether the problem is on my part, or the model is problematic. As a solution, you can simply increase the scale of the part in the slicer, by 10 percent. But it’s a pity for the spent plastic - after all, you can find out whether a quality part will turn out or not only after a solid part of it is ready.
It takes a long time to print a part. Some printouts take hours to complete, so making a simple car phone stand can take half a day.
In order to develop something of your own, you need knowledge of CAD , at least at an elementary level. Otherwise, you will have to look for ready-made objects on sites that host models created by someone. In the end, I never found a battery cover for one of the remotes. I am not able to develop it myself - there is almost no time to master CAD.
My printer desktop is small . Not all objects that I would like to print can be implemented. In particular, I wanted to get a different microscope stand model. But it did not work out, because it is larger than the printer table. The same problem with the handle of a robot vacuum cleaner (not the one in the photo, another one).
Fin
Am I satisfied, as a beginner, with the printer? Yes very. It met my expectations almost completely. True, it must be borne in mind that I got the printer relatively inexpensively. If I had bought it for, say, 300-400 euros, I would have been less satisfied with the purchase.