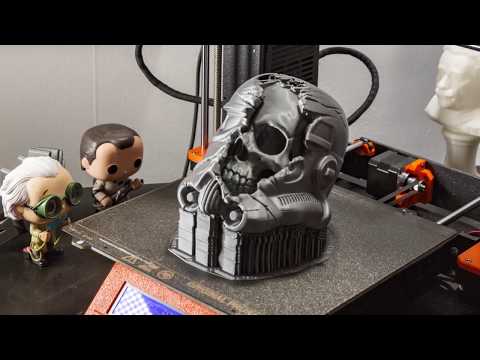
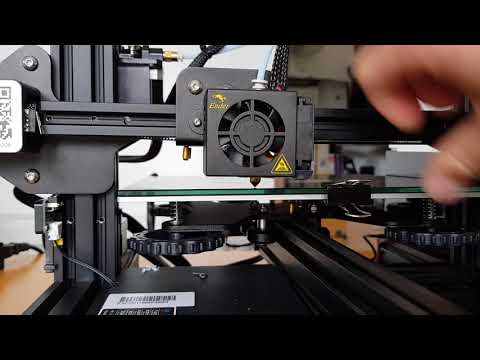
3D print time
How long does 3d printing take?
You're on a very tight deadline and you're probably wondering how long would it take to 3D print your 3D model.
Here's our short answer to that:
On average, 3D printing an object can take anywhere from 30 minutes up to 12 hours to print. Sometimes, it can even take several days depending on how large and detailed your 3D model is.
Why does 3D printing take so long?
First, it depends on your 3D model that you want to 3D print.
Larger and more complex designs take longer to 3D print than smaller and simpler objects. Higher quality 3D prints would also take longer to 3D print.
As you can see there are many variables that can affect the time it takes to 3D print.
The time it takes to 3D print depends on multiple factors such as the type of 3D printing technology, material, size of your 3D model, and any post-processing you wish to do.
In this article, we're going to break down each factors so you can have a better understanding of how long it really takes to 3D print an object.
Factors that affect the time it takes to 3D print an object
3D model
This one is fairly obvious. As mentioned earlier, more complex or larger 3D models would take longer to 3D print compared to much simpler designs. The time it will take to print something can be hard to predict, without a 3D model.
The volume of your 3D model is also a factor. Hollow models are faster to 3D print than models that are solid inside. This is because the 3D printer's nozzle or laser (depending on your 3D printer) would need to travel around the whole object if it's solid. The less surface area it needs to cover, the faster it takes to 3D print.
Layer height and layer thickness
The higher the layer height, the longer it will take to 3D print an object. Similarly, a print with a lower layer thickness takes longer to 3D print.
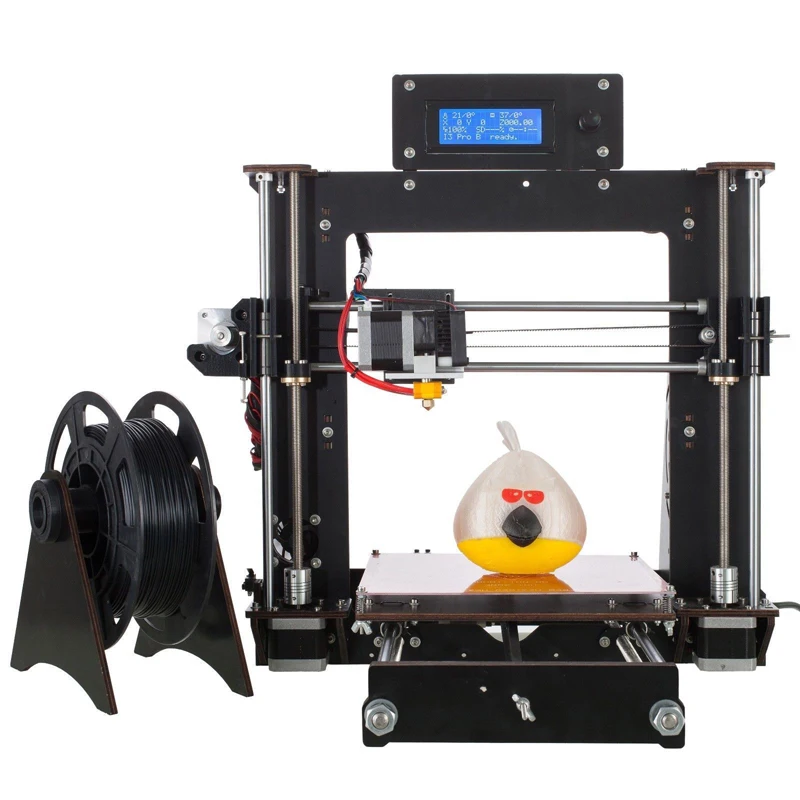
3D Printing Technology
Different 3D printing technologies also affect how fast your 3D print will finish.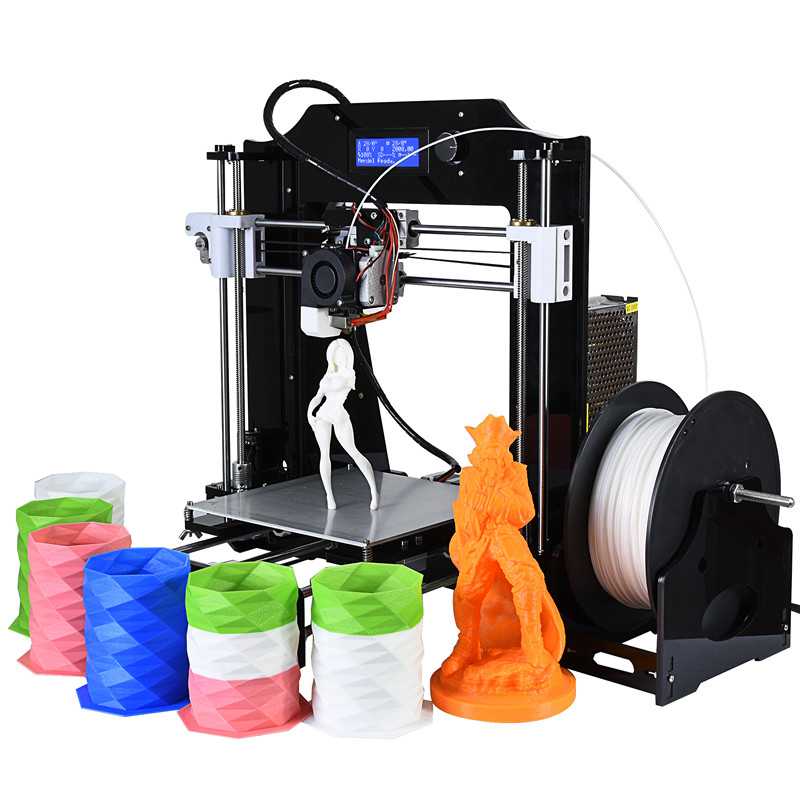
Let's take this miniature figurine for example and see the different 3D printing speeds based on the technology being used.
| 3D Printing Technology | 3D Printing Time For A Miniature |
| SLA 3D Printing | ~ 5hrs |
| LCD 3D Printing | ~ 4hrs |
| FDM 3D Printing | ~ 6hrs |
LCD 3D printers tend to 3D print faster compared to SLA 3D printers. While SLA and LCD 3D printing are faster than FDM when 3D printing a complex part or a large object. When it comes to 3d printing simple objects, FDM might have a slight edge.
Again, 3D printing speed can vary and your 3D model matters.
3D printing settings
Your 3D printing settings also matter when it comes to the the time it takes to 3d print. If you want more accurate, high quality 3D prints then choosing a slower print speed might be a better option for you.
Better quality means sacrificing speed for accuracy. So if you need a high quality part, then you need to to forget about printing speed and focus on the result.
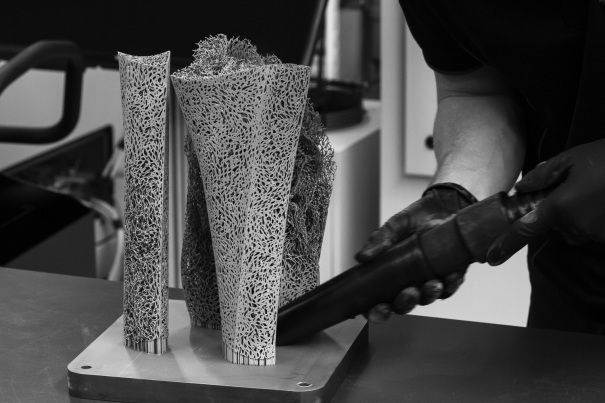
Post-processing
The 3D printing process doesn't end when it comes out of the 3D printer. We wish it does because it would make our lives so much easier. But in most cases, you still need to clean the resulting print to make it work.
Here's what a typical post-processing looks like:
Remove the supports
Cure the print. (For resin 3D prints)
Start polishing
Post-processing time for FDM 3D prints
Approximate time: 4-24 hrs depending on complexity
Polishing can take forever for objects printed using an FDM machine. We've experienced this first hand. It took us a full day of work just to polish a simple art sculpture and we still ended up with those annoying lines that you see on low quality ABS/PLA 3D prints. To add salt to the wound, removing supports was time consuming as well.
Post-processing time for SLA 3D prints
Approximate time: 2-8 hrs depending on complexity
Compared to FDM, the 3D prints from SLA 3D printers are easier to clean and polish. Objects that used to take us several hours to polish (by hand) would only take a 20 minutes or less with a resin 3D print.
Although 3D prints from an SLA machine requires UV curing, it's less labor-intensive as we usually leave it in a UV oven after cleaning the resin with alcohol.
Post-processing time for SLS 3D prints
Approximate time: 0-2hrs depending on requirements
One of the caveats of additive manufacturing is that supports are usually required in order to print an object. Without them, your 3D print will likely fail.
SLS 3D printers, however, do not require any supports which makes them faster and easier to work with when it comes to post-processing. This makes them popular among on-demand 3D printing companies like Shapeways or 3D Hubs because it doesn't require a ton of labor.
Keep in mind though that SLS 3D prints are rougher than SLA prints, so if you require smooth finishing then you need to take that into account as well.
Finishing touches for your 3D print
Metal finishing
Approximate time: 2 - 3 weeks
Metal finishing can also add time to your 3D printing processes. Want it gold? Chrome? It can take an additional 2-3 weeks as metal plating 3D prints requires a delicate approach as sometimes there is no room for error. A casting house would need to redo the whole process again. So if you're in a rush, getting 24k gold or other metal finishing might be out of your option.
Painting
Approximate time: 1 day - 3 weeks
Painting a 3D print requires less time than metal finishing so this might be a good alternative if your on a tight deadline. Again, it depends on the complexity of your project. If you require a very detailed, multi color painting, then that would take longer.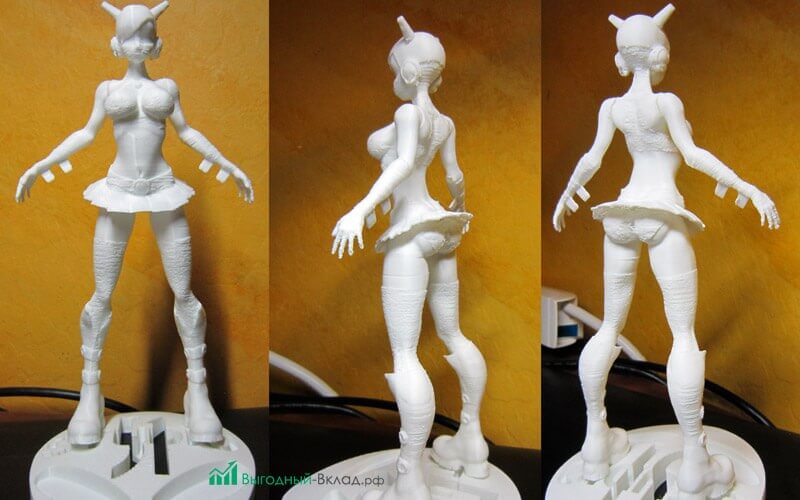 But if you want it in one color, then that would take less time.
With that in mind here are some ways to speed up your print time based on the factors that we mentioned.
How to speed up your 3D printing process
Keep in mind that there are tradeoffs when trying to speed up your 3D printing
Optimize your 3D printer settings for speed. You might lose quality and increase your risk of failure so be careful with this.
Scale down your 3D model. If size don't really matter then 3D printing it at a smaller scale would decrease the time it takes to print
Print all of them at the same time. If you have a large enough 3D printer, then you might be able to get away with 3D printing your parts next to each other.
Hire a professional 3D printing service to save you time. 3D printing companies like us can do 1-2 day turnaround depending on your project.
 We also have large scale 3D printers that can print multiple parts at the same time.
Frequently asked questions
These are some of the questions that our clients keep asking us, so we've summarized them for you.
How long does it take to 3D print a miniature?
It can take approximately 3-4 hrs for 28mm miniatures to 3D print. For large miniatures, it can go up to 12 hrs and sometimes, even more. It also depends on how accurate you want your 3D printer to print. More accurate prints would mean a slower 3D printing time.
How long does it take to 3D print a phone case?
Contrary to popular belief, 3D printing a phone case is not economical because they can take awhile to 3D print. A phone case can take anywhere between 3-8 hrs to 3D print depending on the complexity of your design and your chosen 3D printing technology. If you're planning to sell 3D printed phone cases, take this into account as it will affect your pricing.
In Summary
There are many factors that affect the time it takes to 3D print something, that's why how long it takes to 3D print varies on a project basis. If you're only counting the time from loading it in a machine, it can take between 30 mins up to 12 hours or even days to complete. And if you take into account the additional time it takes to make your 3D print functional or aesthetically pleasing, then 3D printing would take even longer.
If you ever need a 1-2 Day turnaround 3D printing, check out our 3D printing service to see if we're the right fit for your 3D printing needs.
How to Calculate 3D Printing Times
- Author
- Recent Posts
Martin
Martin has a M.Sc. in physics and has gained many years of experience in industry as a lab manager and quality assurance manager. He has now tested dozens of 3D printers and is happy to share the collected experience with each new article.
Latest posts by Martin (see all)
Disclosure: Links marked with * are Affiliate Links. I earn from qualifying purchases if you decide to make a purchase through these links – at no additional cost for you!
3D printing of an object can take minutes, hours or even days, depending on various factors.
However, there are several ways to get an accurate estimate of the printing time and thus find out when the 3D model will be completed.
The best way to estimate how long a print will take is to use slicing software, such as Cura. There you can upload your design or STL file, enter various parameters such as the layer height, nozzle diameter and filling settings and you will then be shown an approximate printing time.
This is only a short version of a possible solution, but there are many details you should know.
So how exactly can the printing time for 3D printing be predicted as accurately as possible?
Cura Estimated Printing Times (source: reddit)Table of Contents:
- 1 The Easiest Way to Estimate the Print Time of an STL File
- 2 The Estimated Total Printing Time
- 3 Printing Speed Calculator
- 4 The Estimated Total Weight of Your 3D Print
- 5 Related Questions
The Easiest Way to Estimate the Print Time of an STL File
As already mentioned, the slicer software gives a first estimation of the expected printing time for your 3D print. This is based on the various instructions your printer receives from the G-Code or the STL file.
The G-code is a list of instructions from an STL file that your 3D printer can understand.
Here are a few examples of G-Code commands:
- G1 X0 Y0 F2400: Sets a speed of 2400 millimeters per minute at a position of X = 0 and Y = 0 on the printing bed
- G1 Z10 F1200: Reduces the speed of the Z axis from 1200 millimeters per minute to Z = 10 millimeters.
- G1 X30 E10 F1800: Fills 10 millimeters of filament into the nozzle while the nozzle is moving at a position X = 30.
- M104 S190 T0: Heating from T0 to 190 degrees Celsius
- G28 X0: Brings the X-axis to the starting position while the extruder is still heating.
- M109 S190 T0: Wait until T0 is at 190 degrees Celsius before continuing with other commands.
The slicer software analyzes all G-codes and then estimates the expected total printing time based on the number of instructions and other factors such as layer height, nozzle diameter, outer shell, as well as circumference, printing bed size and acceleration.
These slicer settings can be changed at will and all have a significant influence on the printing time. The estimate provided by the slicer software includes pure printing time.
You should therefore note that both the time required by the printing bed to heat up and the cooling time at the end are not included in this estimate.
The Estimated Total Printing Time
As already mentioned, there are various settings in the slicer software that can affect the printing time. These include, for example, the layer height, the nozzle diameter, the different speed settings, the acceleration and retraction settings, the set scaling, the filling settings, and also the selected thickness of the skin.
These factors have different effects on the total printing time, but the greatest effect is produced by the layer height, the print size and the nozzle diameter.
Printing with a layer height of 0.1 millimeter takes twice as long as with a layer height of 0.2 millimeters.
Example 1
A calibration cube with a layer height of 0.2 millimeters takes 31 minutes to complete. However, if the same calibration cube has a layer height of 0.1 millimeters, the total printing time on Cura is 62 minutes.
The print size of an object increases exponentially, which means that as the object grows larger, this also means a longer total print time, depending on how large the object is scaled.
Standard Calibration Cube (source: reddit)Example 2
A 100 percent scaled calibration cube is completed within 31 minutes. The total printing time of the same cube at 200 percent scaling is 150 minutes.
According to Cura, material consumption will then increase from 4 grams to 25 grams.
The nozzle diameter also influences the feed rate and determines how fast the material is extruded. The larger the nozzle, the faster the filament is applied, but the lower the quality.
Example 3
A calibration cube printed with a 0. 4-millimeter nozzle takes 31 minutes to complete. If it is a 0.2-millimeter nozzle, the printing takes 65 minutes.
If you combine these examples, the total printing time of a simple cube would increase by 1632 percent if the cube were to have a layer height of 0.1 millimeters at a scale of 200 percent and a nozzle of 0.2 millimeters. This corresponds to a total printing time of 506 minutes!
Printing Speed Calculator
Another possibility to get a reliable statement about the expected printing time before the start of 3D printing is the print speed calculator.
This is an easy-to-use tool that provides the user with practical information on speed based on a large amount of collected data, which in turn is summarized and evaluated in diagrams.
The basis of this calculation is the extrusion width, the layer height, the minimum and maximum line width as well as the material you use, which determines the temperature and thus also affects the printing speed and thus the total printing time.
The formula you can use in this context is:
Flow Rate = Extrusion Width × Layer Height × Printing Speed
The various slicer programs have been continuously developed in the past and now provide very precise information regarding the total printing time.
Calculation by Software or Slicer
There is software that can even predict the filament length, filament weight and expected material costs relatively reliably.
If you have saved the G-Code files instead of an STL file, you can enter these files into the G-Code viewer. This will provide you with a variety of helpful measurements and estimates of your respective file.
With this browser-based G-Code solution, you can, for example, analyze the G-Code and have the printing time, filament weight and layer height determined. It is also possible to have the printing, movement and retraction speeds displayed. Furthermore, you can have partial layers of the 3D print shown, which even contain animated sequences of the layer print. You have the option to display two layers at the same time to search for overhangs. Another option is to adjust the line width to simulate prints more accurately.
The output values are only estimates, since your 3D printer may behave fundamentally different than expected by your slicer software. However, experience has shown that Cura provides quite reliable estimates, but other slicer softwares also show larger differences in accuracy. It may happen that certain factors, such as acceleration settings, are not taken into account or are entered incorrectly by the slicing program. As a result, the estimated printing times vary more than usual. In some cases, this can be easily corrected by editing the file delta_wasp.def.json and entering the acceleration settings of your printer.
With a few adjustments, you can achieve a very accurate estimate of the total printing time, and for the most part, these estimates will not differ from the actual result.
The Estimated Total Weight of Your 3D Print
In addition to the printing time, your slicer software also gives you an estimate of the weight of your 3D print. Depending on the settings you choose, the final model can be quite heavy.
Some factors that determine the weight of the 3D print are its fill density, the selected infill pattern, the number of individual walls and the overall size of the desired model.
After you have changed your slicer settings, the new print is sliced and an estimate of the weight of the 3D print object in grams is given. You also have the practical option of maintaining the part thickness while reducing the part weight.
3D prints have already been documented where the print weight has been reduced by about 70 percent while still maintaining significant strength. This is possible through the use of efficient infill patterns and optimal part alignment to maintain the directional strength of the parts.
As 3D printing continues to improve over time and new technologies are developed, it is likely that further progress will be made in terms of printing speed and the associated quality of the 3D model.
Related Questions
Is it possible to run a 3D print when you are not at home?
Particularly with prints that take several hours or even a day, the question arises as to whether you can let the print run when you leave the house.
This is generally not recommended, but numerous preventive measures can be taken to eliminate any risk of fire. Very high temperatures, electrical current and inadequate circumstances repeatedly lead to the development of a fire without alarm systems being triggered in time.
However, if you have the necessary experience and knowledge of how to complete a 3D print, which would normally take ten hours, within a few hours, this problem is not necessary. In general, the longer the 3D printer is in operation, the greater the risk of problems that can have devastating consequences.
What preventive measures can be taken when leaving the house during a 3D print?
Various measures can be taken to ensure that problems do not occur during an absence while the 3D printer is working.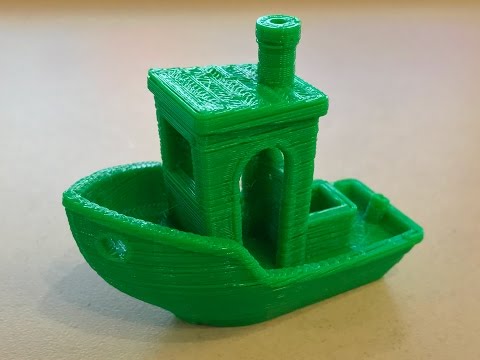
As a general rule, before each print, the various components should be visually inspected and all parts should be in their intended place. It should also be determined whether the device has an automatic switch-off function.
It is advisable to install special fire/smoke detection switches, as these automatically cut off the power supply if they detect any hazards.
The 3D printer should always be insulated from flammable objects, because filaments are flammable. It is also important that the printer is reliable and that no problems have occurred so far.
Print at low speeds and low temperatures during absences to reduce the fire hazard.
PLA should be used without a heated printing bed if possible. A webcam with a view of the 3D printer, which can be connected to a smartphone, for example, is useful in order to be able to check the situation on-site from a distance.
All cables and screws should be secure and well fastened. Most fires are due either to operating errors or lack of maintenance. It should be noted that even with a high-quality printer, unexpected problems can occur.
What happens if the print speed is set too high?
Especially for the first layer, care should be taken to select the correct printing speed. If the first layer is printed too fast, the plastic has no time to bond with the surface of the building platform.
Therefore, it makes sense to print the first layer at a slower speed than the rest of the 3D model. In this way, the plastic has enough time to bond with the printing bed.
Most common slicer programs offer a setting for this problem and allow the working speed to be reduced during the production of the first shift. It is recommended to use 50 percent of the speed used for the rest of the model.
How long does a 3D print take on average?
The 3D printing of a model can take between 30 minutes and seven days or even longer. There are several factors that determine the total printing time, including the overall size and geometry of the 3D model and the printing technology used.
The larger the part and the more complex its geometry, the longer the printing process takes.
The volume is usually the first indicator. The larger the model is, the more time is needed for printing. Small parts measuring one cubic inch may take as little as five minutes, while very large models over 100 cubic inches may take more than 200 hours to print.
The area that the model occupies on the printing bed is also known as the footprint. The greater the space required, the further the print head has to move from its initial position to complete each layer, which takes time.
The overall height of the 3D model is probably the most important dimension to determine the printing time. Although the volume of two different parts can be the same, a different height can also mean a different printing time. This is due to a higher number of layers and that in such a case the print head has to make more passes to create them.
A complex geometry can also mean a longer duration for a 3D print. A part with many small features has layers that resemble a group of small islands, while a simple cube or sphere looks like a single large island. The print head has to draw the boundary of each island and then fill it in, so that more islands also means more time.
Disclosure: This website is the property of Martin Lütkemeyer and is operated by Martin Lütkemeyer. Martin Lütkemeyer is a member of the Amazon Services LLC and other Affiliate Programs. These are affiliate advertising programs designed to enable websites to earn advertising revenue through advertising and linking to Amazon.com and others. Links marked with * are affiliate links.
with what resolution 3D printers are printed
threaded parts of the printed parts
6 safe ways to remove 3D scribes
9000 3D-spent at home gives us the opportunity to give us the opportunity to produce given objects at a very low cost. However, the time it takes to turn a 3D model into a physical object is not as short as one might think. The size and quality of the print has a decisive influence on the speed of printing, and it can take many hours to get the final result. In fact, various tests show that printer speed has a much smaller effect on print time than size and quality settings.
 Desktop printers
3D print speed settings
In general, there are currently three blocks of speed settings supported by 3D printers. The first block includes speeds from about 40 to 50 mm / s, the second - 80-100 mm / s, the fastest printing is carried out at about 150 mm / s. Some printers can even print at speeds over 150mm/s.
Usually, though, faster 3D printing means lower quality. At speeds above 150 mm/s, the quality drops significantly, and problems can arise, since the filament is prone to slip at such speeds.
How to set the print speed
Typically, the 3D print speed is set in the slicer software used to prepare the 3D model for printing. In Cura, for example, you just need to enter the desired print speed in the Print speed field in the Basic tab (in previous versions, you first had to switch to the Advanced mode and open the Speed tab).
Cura calculates the duration of the print process based on print speed and quality settings.
As soon as the print speed ( Print speed ) or other setting is changed, Cura recalculates the print time and displays it (see arrow). Cura's calculations turn out to be very close to real-time printing.
How long does 3D printing take in practice?
To find out how fast 3D printers actually print, two popular desktop printers, the Ultimaker 2 and the Wanhao Duplicator 6, were tested on two more or less complex objects.
These two models were printed:
3DBenchy. This 3D model is designed to test and measure the speed of 3D printers; it is quite complex and requires attention.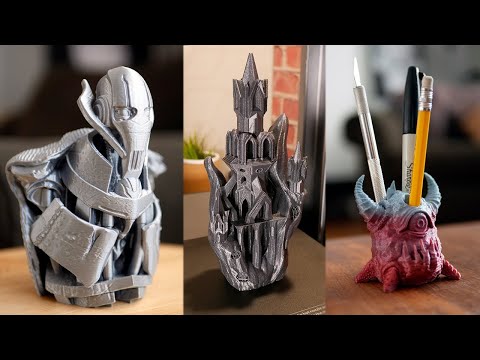 The boat is 6 cm long, 4.8 cm high and 3.1 cm wide. Here you can get the 3DBenchy STL file for testing for free.
3DBenchy's 3D printing speed is relatively slow, the model is quite difficult to print (Photo: 3DBenchy.com).
Universal tablet stand (up to 1.2 cm thick). The stand is 14 cm long, 4.2 cm high and 9.8 cm wide. The STL file is available for free on Thingiverse.
The stand is quite large and difficult to print (Photo: Thingiverse).
These objects were printed at two speeds, 100 mm/s and 50 mm/s, at similar settings. Here are the results:
Printer
Model
50 mm/sec
100 mm/sec
Ultimaker 2
3DBENCHY
h 09 min 9 min.0003
1 h 55 min
Wanhao Duplicator 6
3dbenchy
2 h 13 min
1 h 51 min
Ultimaker 2
Stand
9000 H 23 min4 h 36 min 9000 min
Wanhao duplicator 6
Stand
6hrs 27mins
4hrs 45mins
- For the smaller models, the difference between slow and fast printing is not particularly striking: almost 2.
 25 hours versus less than 2 hours. Unless you're insanely short on time, choose a slower speed for better print quality.
 - For large models, the print speed varies more significantly: 6.5 hours versus 4.75 hours.
Cunning. If you don't have your own 3D printer, download the free Cura software from the Ultimaker website. Cura has profiles for most desktop printers (FDM), so you can check how long it takes to print a specific 3D model on a particular device - just import the STL file and play with Cura settings. To try another 3D printer, select Machine > Add new machine.
Does high-speed sintering promise the fastest 3D printing?
On an industrial scale, even more impressive prospects dawn on the horizon. The University of Sheffield has announced that its scientists have built a £1m-funded 3D printer that can produce plastic parts as quickly as traditional mass-production methods such as injection molding.
The process is called high-speed sintering (HSS), which melts the polymer layer by layer (similar to the additive printing process), but instead of using lasers, HSS prints on a powder substrate with infrared-absorbing inks. After the layer is printed, it is exposed to infrared radiation, the ink-coated powder is heated, resulting in melting, while the non-irradiated powder remains cold.
A team led by Prof. Neil Hopkinson claims that their machine is capable of producing parts up to 1 m³, i.e. with a washing machine, which is three times more than existing printers can. The print speed is dependent on the size of the object, however, Hopkinson estimates that small components will be created at speeds of less than one second per part.
What use is this to us? The good news is that HSS technology has been licensed to industrial 3D printer manufacturers on a non-exclusive basis, and new machines are expected to hit the market in 2017. This means that in the near future we can expect the transition of this industrial technology to the "home" level.
3D printer speed: how to set it right?
3DPrintStory 3D printing process 3D printer speed: how to set it up correctly?
3D printing is often referred to as "rapid prototyping". The irony is that the creation of individual models can take up to several hours. Fortunately, 3D printing speed can be adjusted to reduce production time, but setting the speed incorrectly can also lead to defects and 3D printing failures.
In this article, we will introduce you to the general speed settings of a 3D printer. By the end of this guide, you'll know how to find the perfect balance between print speed and quality.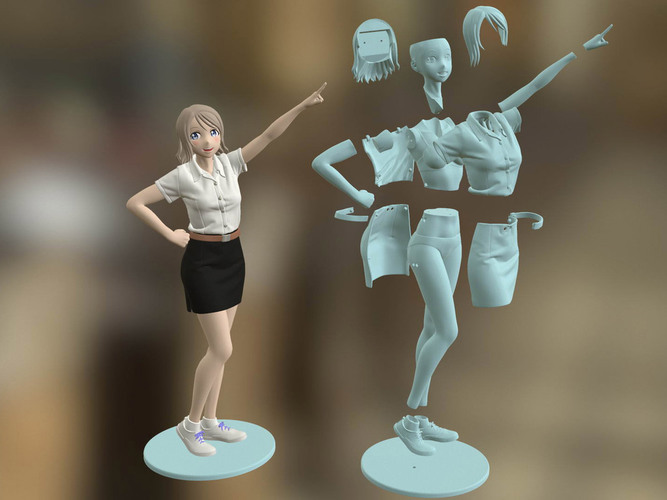 Please be aware that different 3D printers, slicing software and materials may behave differently and retesting may be required.
So, run the slicing software and let's get started!
3D Print Speed
3D Print Speed is the main setting that affects the printing of your 3D model. As the name suggests, print speed determines how fast your printer's motors move. This includes the motors that control the X and Y axes, as well as the motor(s) of the extruder.
To test your 3D printing speed, download the test model above to determine the optimal print speed. The description of this 3D model also contains recommendations for speed settings. In essence, the experiment is that the same model will be printed, but at a gradually increasing speed, which will allow you to visually determine the optimal speed setting.
Too low a 3D print speed can cause deformation due to the nozzle being on the plastic for too long. If too fast, other overheating artifacts may appear, caused by insufficient cooling, as well as extrusion and poor adhesion of the layers. The optimal speed should be as fast as possible for your 3D printer without compromising print quality too much. This 3D model will help you determine what speed will be optimal for your particular case.
To optimize print speed, this parameter is usually divided into several sub-parameters:
- Outer Wall/Shell 3D Print Speed : This parameter controls the print speed of the outer perimeter of the model. Usually it is slightly reduced to improve the surface quality.
- Inner Wall/Shell 3D Print Speed : This parameter controls the print speed of the inner perimeter(s) of the model. It is usually the same as the overall print speed to reduce print time while maintaining durability.
- Infill 3D Print Speed : This parameter adjusts the infill print speed of the model. This is usually the same as the overall print speed to reduce 3D printing time while maintaining strength.
- Top/Bottom 3D Print Speed : This setting adjusts the print speed of the top and bottom of the model.
 Usually it is slightly reduced to improve the surface quality.
Travel speed (idle)
Travel speed controls how fast the printer print head moves when it is not extruding plastic. Increasing the movement speed can save a lot of 3D printing time, but increasing it too much can lead to many defects, including misaligned layers (and therefore 3D printing failure).
To determine the optimum idle travel speed for your printer, print this test pattern at various travel speeds, starting at 100 mm/s and working up in increments of 5 mm/s. Continue to increase the speed if the surface quality is acceptable, and decrease if the 3D print quality is deteriorating. Pay attention to defects such as mismatched layers.
Retract Speed
The Retract Speed controls how fast the 3D printer pulls material back before moving. This setting is critical for reducing material waste and improving 3D print quality. Too slow and you may be left with unsightly threads and blemishes on your models. Too fast and you can get excessive material wear on the extruder drive gear, resulting in voids.
To determine the optimal retract speed for your 3D printer, print this test model at various retract speeds starting at 25mm/s and adjusting in 5mm/s increments. Pay attention to the remnants of plastic in the form of a web, stretched between the spikes of the model. The ideal retract speed should be the maximum value that minimizes these artifacts without deforming the material in the feed mechanism.
To better tune the retract speed, this parameter is usually divided into two additional parameters:
Retraction Retract Speed : This parameter controls how fast the retract (actually pulling the thread back) occurs. This is usually the same as your overall retract speed and is set the same way.
Retraction Prime Speed: This setting controls how quickly the filament is re-feeded after the initial retraction in preparation for further printing. Increasing this speed will result in shorter 3D printing times and fewer defects due to prolonged exposure to heat on the plastic. However, increasing it too much can also cause the newly fed media to not heat up enough before printing resumes. For most cases, this setting should be left the same as Retraction Retract Speed.
To learn more about reducing retraction speed defects, see our separate guide to retract speed tuning.
Walls, infill and layer height
The speed of your 3D printer is not only affected by "speed". It is also significantly affected by how much and how thick plastic is extruded onto each layer of the 3D model. These settings are incredibly detailed, so we'll only cover general information about how each of them affects 3D print speed.
- Walls : The wall setting specifies how many perimeters of plastic are extruded to form the outline of your part. Increasing the number of layers increases the strength of the part, but also increases the 3D printing time.
- Infill : Infill is an internal structure designed to save material when 3D printing the interior of 3D models.