3D print fasteners
How to Choose the Best Fasteners for 3D Printed Parts
Time to read: 6 min
We get a lot of questions about the best methods for fastening different 3D printed components. When prototyping hardware products — like electronics enclosures or robotic assemblies — you often need to design mating structures that are more complex than a single 3D printed component.
Other times, you may need to print components larger than the build envelope of a 3D printer, so you need to consider methods for permanently or semi-permanently assembling printed parts. One of the best ways to assemble 3D parts is with snap-fit components, but another great method is to use screw threads.
There are many ways to implement threads into your 3D printed parts, so in this article we’ll cover the pros and cons of the most common methods. Then we’ll discuss some specific installation steps to help get you started.
Threaded Inserts for 3D Printed Parts
The method we recommend most often is threaded inserts, due to their easy installation and high-quality feel. In addition, threaded inserts for 3D printed parts provide a more secure, robust assembly — they’re even used on aircraft!
Pros
- Fast, easy, and clean
- Can handle repeated installation/removal without degrading the plastic
- Production quality
Cons
- More expensive
- Requires increased wall thickness
Materials and Tools
- Brass Inserts (choose those made for plastic)
- Soldering iron
- Exacto knife
Installation Steps
- Place your insert into its associated hole (see insert guidelines for the size of the mating hole)
- Take your heated soldering iron, place it in the middle of the insert and apply a small amount of pressure
- As the insert starts heating up you’ll see it sink into the hole
- Once the insert looks to be flush with the part surface, use your Exacto blade to trim away any extra material
An alternative to threaded inserts for assembling 3D-printed parts is self-tapping plastic screws. It’s the easiest and cheapest way to go, so if this is your first prototype or you’re using a low-resolution material like PLA, self-tapping screws are a great option.
Pros
- Easy installation
- Minimal design requirements (simple holes)
- Less expensive
Cons
- Brittle material may break (ie. verowhite)
- Limited assembly/disassembly
- Low strength
Materials and Tools
- Self-tapping screws for plastic
- Screwdriver
Installation Steps
1. It’s as easy as a screwdriver and a screw… just twist 😀
Designing Threads into a 3D Model
When designing a part that requires substantial threads, the best method is to design the threads into the 3D model itself. However, note that 3D printing screw threads only works when you are using the correct material and your printer has high enough resolution.
Pros
- Can design custom threads
- Good when inserts aren’t available (ie.
 M50 thread)
 - Works well with brittle materials
Cons
- Threads will wear down over time
- Difficult to model accurately
- Requires high-resolution prints
Materials and Tools
- Your preferred CAD tool for 3D printed model design
Installation Steps
- Ensure your to-be-3D-printed threads are modeled accurately (use equation-driven features in your model — here’s a helpful resource for modeling in inches (UTS), a resource for modeling in millimeters (ISO), and my favorite Engineering Design textbook. You can also follow these quick tips:
a. Shear area of the threaded feature = 2 x the tensile area of the threaded fastener
b. Utilize the following equation for the minimum length of thread engagement needed (for ISO):
Where L=minimum thread engagement length
AT=tensile stress area
D=screw major diameter
P=inverse of number of threads per inch
- Print the component using high-resolution materials (such as Verowhite)
- For internal threads, use a tap to ‘finish’ the threads (see next section).
 If you don’t have a tap available, try using a machine screw.
 - If you need an externally threaded fastener, use a nut sized to your thread dimension and use this to finish the threads on your component.
- Be sure to tap completely through the component for through-holes — this will ensure excess material is removed from the tapped feature and prepare the part for fastening.
- For blind holes, be sure you’ve tapped deep enough for assembly and make sure to clean any excess material — trying to torque fasteners into components with debris could damage your features.
When using this method to add threads to a 3D printed part, be sure to maintain perpendicular alignment to the threaded feature. It’s worth taking extra care to avoid cross-threading, which could result in permanent damage to the part.
Cutting 3D Printed Part Fastener Threads with a Tap
This is the most traditional method for creating internal threads in a 3D printed part and any other type of manufactured part.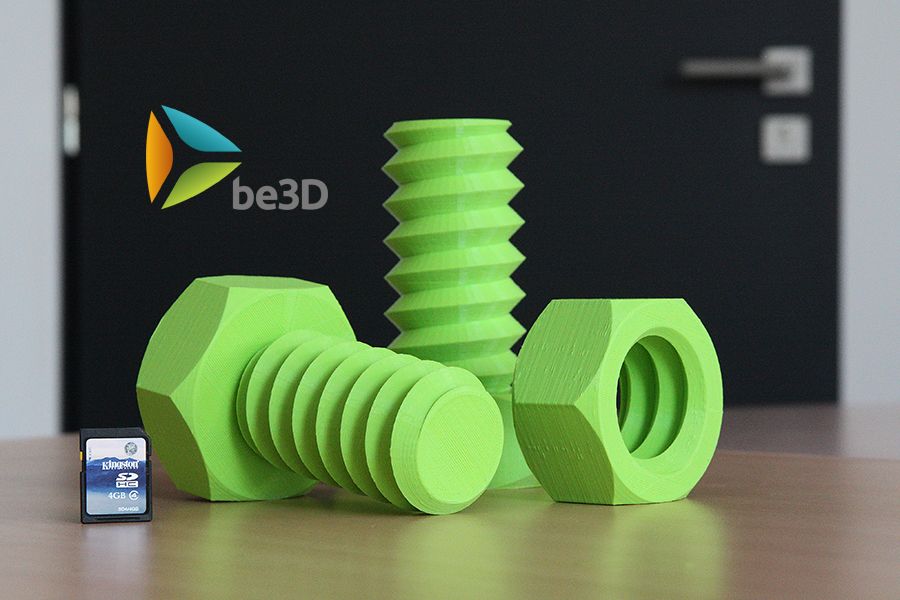 In subtractive manufacturing, once a CNC places holes where threads will go, a drill tap is used to create the desired threads in each hole.
When prototyping with 3D prints, you can use the same method with a hand drill tap to create threads in your plastic prototype. I recomment using a hand drill tap (as opposed to a powered drill) to prevent smearing and distortion of the 3D-printed plastic.
Pros
- Better assembly/disassembly than self-threading screws
- Doesn’t involve additional design time
Cons
- Low strength
- Plastic threads wear down over time
- Time intensive
Materials and Tools
- Drill tap
- Screws
Installation Steps
- Tap the threaded feature with a corresponding drill tap to cut usable threads
- Be careful not to damage the component when applying torque
- Install your threaded fasteners in the 3D printed part
Captured Hex Nuts
Another commonly implemented strategy for fastening components together is to create printed-in pockets for capturing hex nuts. This involves recessing a hex-shaped blind volume in the 3D printed part design to allow for simple fastener installation for 3D printed parts.
Pros
- Low-cost solution
- Good holding force
- Easy install
Cons
- Only works on outside surfaces
- Extra material is required to capture the nut
- Design constraints
Materials and Tools
- Hex nut
- Screws
How to use this method
- Measure the size of your fastener — here’s a good resource to help you out.
- Add a bit of tolerance (0.005” – 0.010”) to the hole size to accommodate any dimensional error.
- Before press-fitting the nut into the pocket, apply a bit of glue on the nut to adhere it to the inside pocket surface. Otherwise, as you apply torque to the nut, it may be pulled from the pocket
Pro Tip: For more information on fitment and tolerance, pick up a copy of Machinery’s Handbook
Mechanical Considerations: Fasteners for 3D Printed Parts
Here are three questions to help you consider which fastener method is best for your project:
- Will you need to disassemble and reassemble the components?
- What are your strength requirements or holding forces?
- What are the geometric or spatial constraints inherent in the design of your parts?
Additionally, here are three crucial considerations to keep in mind as you design your fastening features:
- Bending along the axis parallel to printing should be generally avoided becuse printed components are structurally much weaker in this direction.
- Be mindful of the allowable stress and strain of your materials when adding assembly features.
- Double-check your CAD model before adding fastening features. For example, if you’re adding a hex nut, check the height of the hex nut you’re using and If you’re using a threaded insert, check the pitch of the insert you’re installing.
With these ideas in mind, you should have no trouble creating larger, more complex assemblies with your 3D prints, and for additional questions ,send us a note at [email protected].
Sourcing SimplifiedIf you’re tasked with sourcing and supplying 3D printed parts, Fictiv has you covered as your operating system for custom manufacturing. We make procurement of prototype and production parts faster, easier, and more efficient. In other words, Fictiv lets engineers, like you, engineer.
With our design and manufacturing expertise, and innovative platform that provides instant DFM feedback, complete production visibility, and quick turnaround times, manufacturing your parts is easier than ever!
Get Instant Quote
Thank you for subscribing!
How do you assemble 3D-printed parts? Practical tips on threads & screws for 3D printing
What are the ideal ways to assemble 3D-printed components? This article compares different methods for designing threads for 3D printing and provides step-by-step instructions on how to install screws and other fasteners.
Threaded fasteners, such as screws and inserts, are a popular method for securing 3D-printed parts together. Threaded fasteners allow quick assembly and disassembly, granted the threading has been designed and printed properly, and provide robust connectivity so parts don’t come apart easily.
This article covers the optimal threaded fastening techniques to apply when dealing with 3D-printed parts and examines the methodology behind implementing each of them.
To learn more about the different types of threads, especially if you're also interested in CNC machining custom parts, read our extensive guide to threads .
What are threaded fasteners for 3D printing?
As a rule of thumb the minimum wall thickness around a thread should match the diameter of the fastener (e.g. an M5 fastener requires a minimum of 5mm wall thickness around the threaded hole). If the wall thickness is too low, parts can bulge and distort due to the added stress and in some cases (particularly with FDM) delamination or fracturing can occur.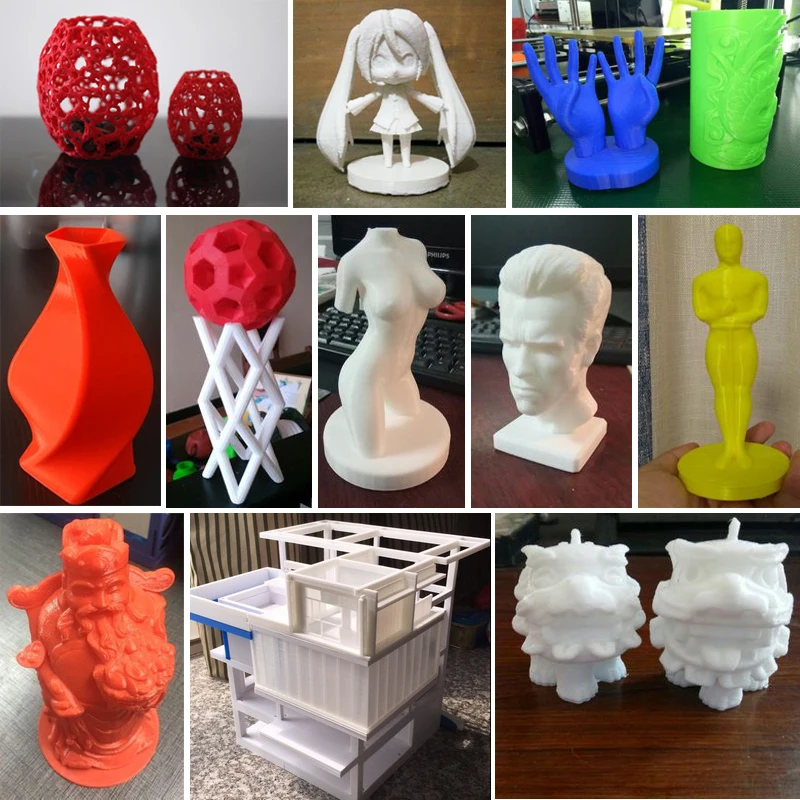
The table below introduces the threaded fastening methods that are best suited to 3D printing.
| Process | Description |
|---|---|
| Inserts | Popular method used regularly that gives a strong metal-on-metal connection but requires additional components and installation |
| __Embedded nut __ | Fast method for securing components. Accurate design and print are needed |
| Self-tapping screws | One-off method for securing parts that is not optimal for repeated disassembly |
| __Cutting threads __ | Provides design freedom however correct tapping procedure is important |
| __Printing threads __ | Not suited for small threads (less than M5) and requires high printer detail/resolution to print accurately |
Note: Drilling the pilot or alignment hole to the desired diameter post-printing, before implementing any of the fastening methods discussed in this article, will typically give a more accurate diameter compared to a 3D-printed hole.
What are inserts for 3D print assemblies?
The two types of inserts that are best suited for 3D printing are heat-set inserts and tap-in inserts. Inserts provide strong metal-on-metal contact and are very easy to install. An accurate pilot hole is required, so drilling is recommended before installation.
Methodology for heat-set inserts
-
Align the insert with the pre-printed or drilled hole (for hole sizes refer to the insert manufacturer's recommendations)
-
Insert a soldering iron into the insert, heating it and the surrounding material up (avoid overheating and melting the surrounding material)
-
Slowly apply pressure, pushing the insert down into the hole to the desired depth.
Methodology for tap-in inserts
-
Align the insert with the pre-printed or drilled hole (for hole sizes refer to the insert manufacturer's recommendations)
-
Using a hammer gently tap the insert down into the hole to the desired depth.
What is an embedded nut in 3D printing?
Another method of securing 3D printed components together is to embed a nut into the component via a nut-shaped cavity (often referred to as a nut boss). This method does not require any material removal. Often determining the optimal nut boss dimensions requires several iterations. Printing small test parts to determine the ideal dimensions can save on time and material costs.
Methodology for embedded nuts
-
Measure your nut. If you do not have access to the nut a quick internet search will reveal standard overall dimensions for both metric and imperial nuts.
-
Include the desired nut profile in your CAD model . An iterative process may be required to find the best nut clearance based on printer calibration. As a starting point a 0.2 mm offset around the nut (0.1 mm on each side) should give a loose fit. This also may need to be increased for nuts greater than M12.

-
Select the appropriate cut-out depth (typically just below flush).
-
Including a drop of superglue on the back side of the nut will help secure it in place.
What are self-tapping screws?
Self-tapping screws cut a thread into a pre-drilled hole as they are screwed down. This offers a quick assembly method but is not suited for applications where parts will regularly be assembled/disassembled. Special self-tapping screws for plastic can be used that limit the radial stress on 3D printed holes lowering the likelihood of bulging, delamination or fracturing occurring.
Methodology for self-tapping screws
-
3D print or drill a hole in the desired screw location. For optimal pilot hole size consult the self-tapping screw provider. A pilot hole size that provides 75% to 80% thread engagement is a good starting point if this information is difficult to come by.
-
Assemble components to be secured ensuring to correctly align all holes where the self-tapping screws will be used.

-
Slowly screw the self-tapping screw down into the hole, ensuring it remains perpendicular to the hole during fastening.
What is thread cutting (or cutting a thread) for 3D printing?
Thread cutting (more commonly known as tapping) involves using a tap wrench to cut a thread in a pre-printed or drilled hole. Threads are regularly cut in 3D printed plastics.
Methodology
-
3D print or drill a hole in the required location of the thread. For pilot hole (tap drill) sizes that correspond to each thread size refer here
-
Using the correct size tap wrench and ensuring it remains perpendicular to the hole, slowly cut the thread regularly reversing or “backing off” to remove excess material to avoid binding.
-
Avoid forcing the tap wrench as this can lead to fractures or splitting of the 3D printed material.
-
Continue tapping to the desired depth.
Insert your desired threaded fastener before assembly to ensure a clean fit.
Cutting a thread with a tap wrench3D printing threads for assembly
The process of 3D printing threads eliminates the need for any extra steps post printing and allows parts to quickly be assembled together. Limitations on printer accuracy and resolution will govern the success of a printed thread. Threads smaller than M5 printed via FDM should be avoided with one of the other threaded fastener methods discussed in this article implemented instead.
After printing the threaded fastener should be screwed and removed from the hole several times to clean the printed thread before final assembly.
Practical advice for threads, screws & more assembly methods for 3D printing
-
For a more accurate fastener pilot hole consider drilling the hole after printing rather than printing it in the part.
-
The minimum wall thickness around a thread should match the diameter of the fastener (e.g. an M5 fastener requires a minimum of 5mm wall thickness around the threaded hole).
-
Heat-up or tap-in inserts and embedded nuts are the most popular methods for securing 3D printed components due to their simple installation, connection strength (metal-on-metal) and ease of repeated assembly and disassembly.
Curious about the cost of prototyping with 3D printing?
Our online 3D printing services Upload a CAD file for a free, instant quote
Ready to transform your CAD file into a custom part? Upload your designs for a free, instant quote.
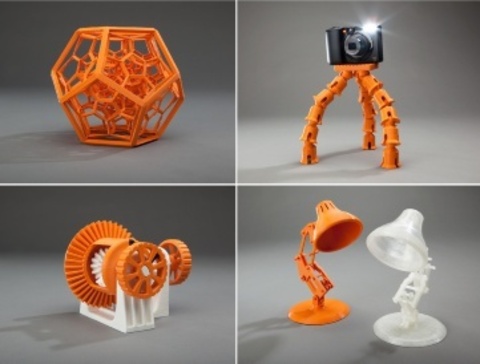
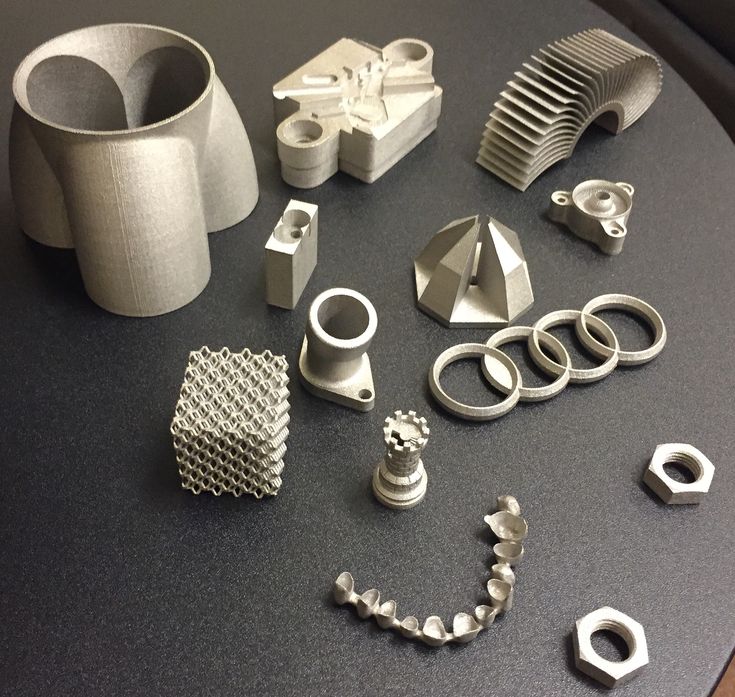
Get an instant quote[CASE] 3D printing in light industry on the example of FullPower / Sudo Null IT News
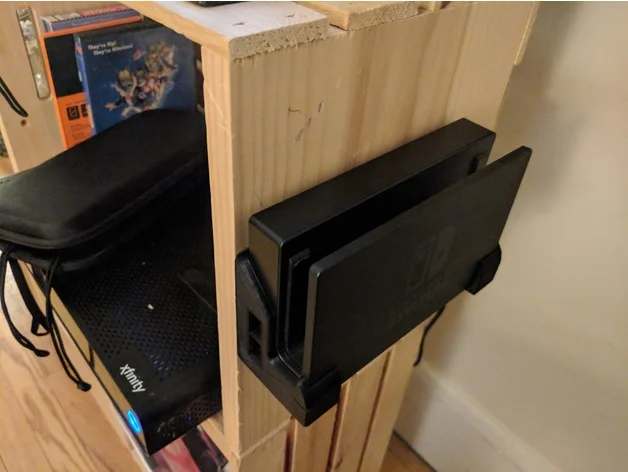
This is another story about the use of 3D printing technology by our customers.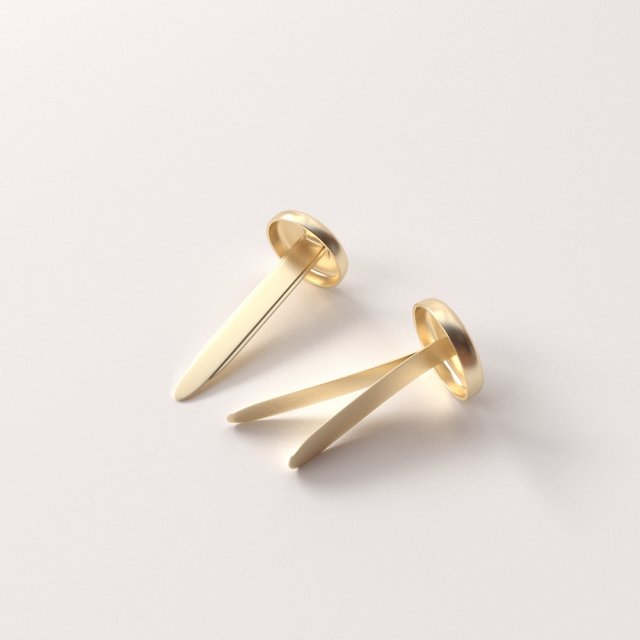
The company Full Power is engaged in the development and production of plastic products of its own production, the main direction is the production of accessories used in backpacks and clothing for hunting and tourism.
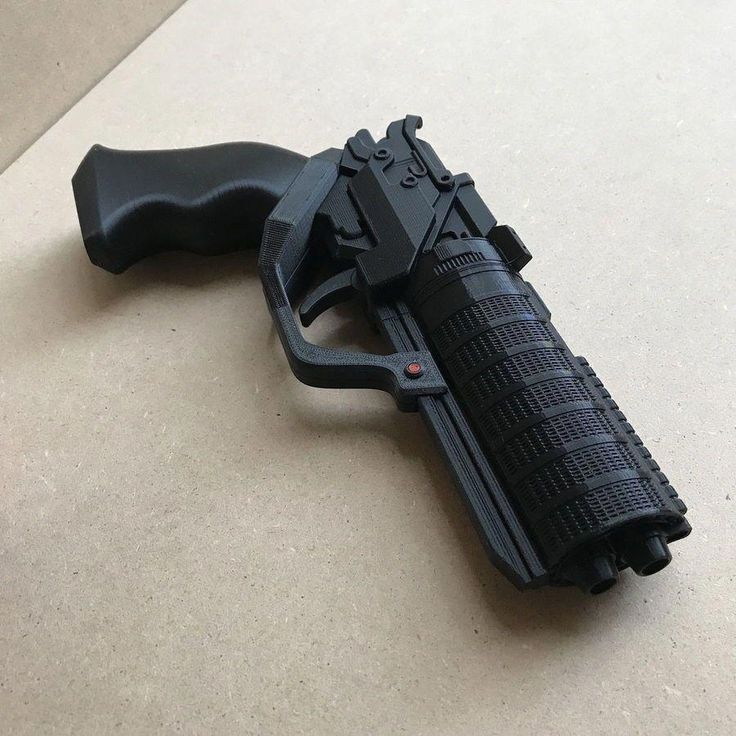
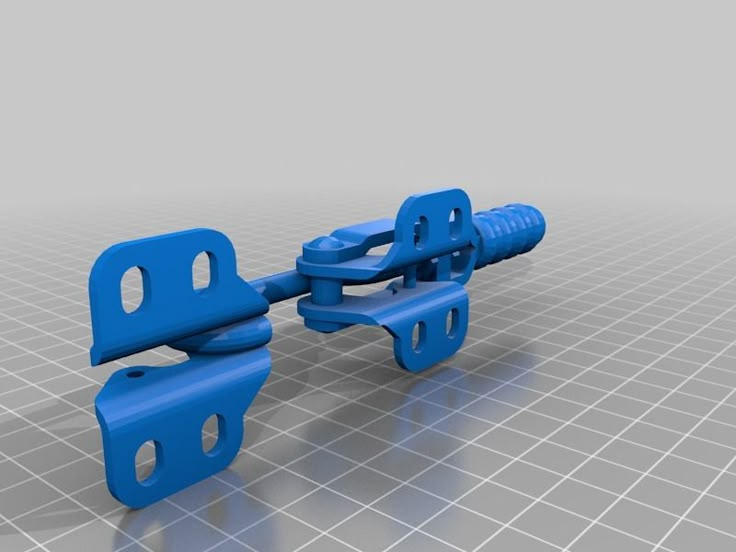
Belt clip for a scabbard or holster.
Buckles and snaps for backpack.
Jacket accessories.
They also make custom-made products that are not related to the main profile.
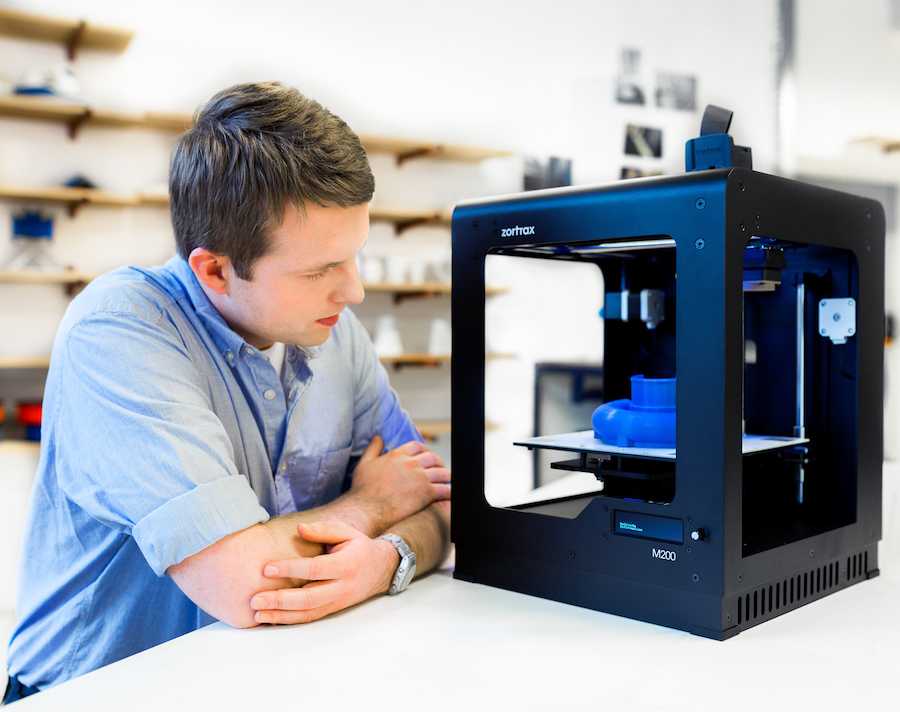
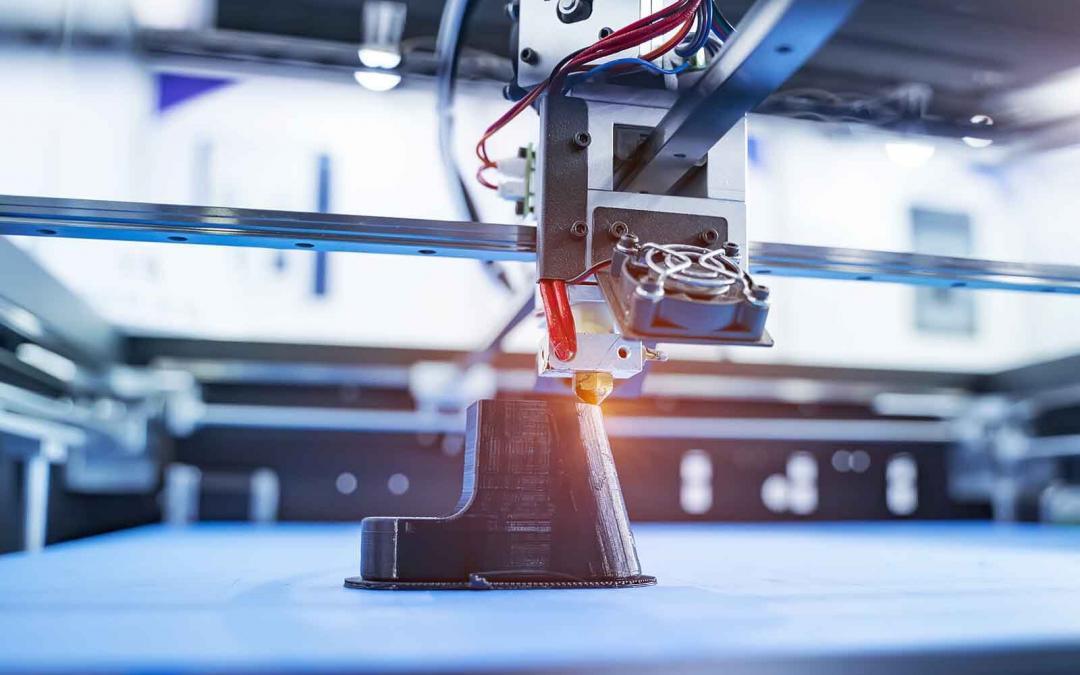
What kind of printer
Formlabs Form 2
- Technology: SLA
- Working chamber: 145 x 145 x 175 mm
- Layer thickness, from: 25 µm
- Dimensions, mm: 350 x 330 x 520
- Weight, kg: 13
- Specialization: Design; Architecture; Package; Advertising; Prototyping; Medicine; souvenir industry; Jewelry business; Education; Dentistry; Production
- Materials supported: photopolymer
- Interfaces: Wifi, Ethernet, USB
- Price: 336 500 rubles.
The most famous and one of the best stereolithographic 3D printers.
To date, it is the standard of desktop stereolithography, with which all analogues are compared.
How to use
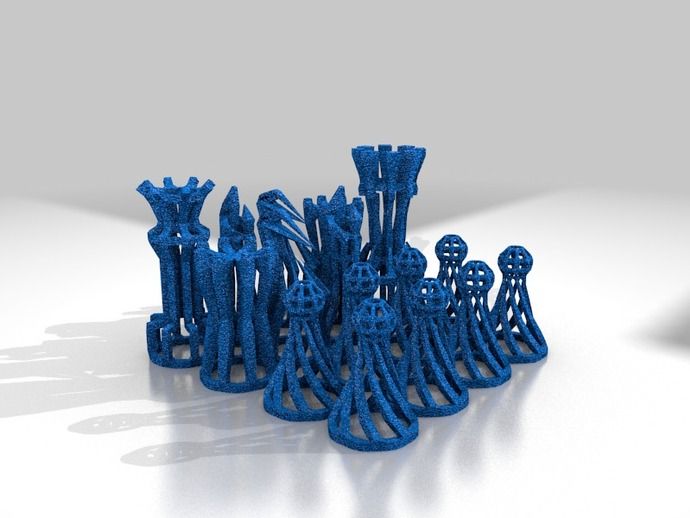
Used for prototyping 3D models created in Fusion 360 before they are directly released in plastic on an injection molding machine.
A significant advantage of using 3D printing technologies in the production of fittings is the ability to quickly obtain a finished product according to the developed model.
Roughly speaking - in the morning or in the afternoon I drew in the program, sent it to print in the evening, and the next day there is already a ready-made sample for further work, on which all the shortcomings of the developed model are visible, it is possible to correct them immediately.
3D printing allows you to check the functioning of the created models and their compliance with the intended characteristics, dimensions and appearance.
How they chose
The printer was chosen on the basis of reliability - a well-known, proven device.
How it used to be
Before 3D printing, prototypes were made by hand and then sent to the factory for mold making and replication.
Later, when the first 3D printers appeared in the public domain, prototypes began to be printed using FDM technology. Stereolithography is the next step.
Pros
- High Precision
- Convenient friendly interface
- Automatic resin addition and mixing system for native resins
- General reliability
Cons
The disadvantages include expensive consumables. Cartridges run out quickly with constant use. It is also worth remembering that the bath is also a consumable item, it will need to be replaced after some time of intensive work.
Conclusions
The benefit of using the Form 2 is time savings and model accuracy. You can create a product and immediately print it, and stereolithography gives much less tolerance than layer-by-layer deposition.
No need for manual surface finishing. No need to order printing from a third party, waste time waiting and delivering, and this can be a significant time - this service is now in great demand.
Owning such a 3D printer is more than justified when it comes to permanent professional use, but can be too expensive if the printer is used for hobby purposes.
You can purchase Formlabs Form 2 and get advice on the properties of consumables for it in the Top 3D Shop. The printer comes with free shipping and training, and as part of the promotion - a liter of photopolymer and a discount of up to 20% on consumables for 2018.
Want more exciting news from the world of 3D technology?
Follow us on social media networks:
Serial 3D printing
-seal . “What is it and how is it different from conventional 3D printing?” - you ask. We will try to answer these and other questions in detail in this article.
So, what is serial 3D printing? As the name implies, this is a 3D printing of small batches of identical products. At one time, it was believed that 3D printing was created exclusively for the manufacture of single unique products, well, or a small run of 10-20 pieces. Comparing 3D printing with traditional production methods, the following graph of manufacturing cost versus number of products was often given in the past: methods have clear advantages at sufficiently high production volumes.
But recently, 3D printing firms dealing with high production volumes have empirically concluded that as the volume of printing of the same parts increases, the cost of products begins to decrease and dependency graphs actually look like this:
What is the reason for this? First of all, this is due to a decrease in the preparation time for printing, since in serial printing it is enough to prepare the model once. Also, with constant printing of the same parts, it is much easier to optimize the printing processes: choose the optimal modes and settings, develop a print plan for shifts, etc. Even if only these conditions are met, it is already possible to achieve a reduction in the number of print defects, which in turn will also affect the cost of the product and the entire batch.
We started thinking about opening this line a few years ago and offered this service to some of our clients as a test. Now that the necessary results have been obtained, we can offer a serial 3D printing service to everyone.
Who might be interested?
If you have a need to produce small series of products or want to try to replace or upgrade parts of your products, but do not want to lose a lot of money, then this service can be useful to you.
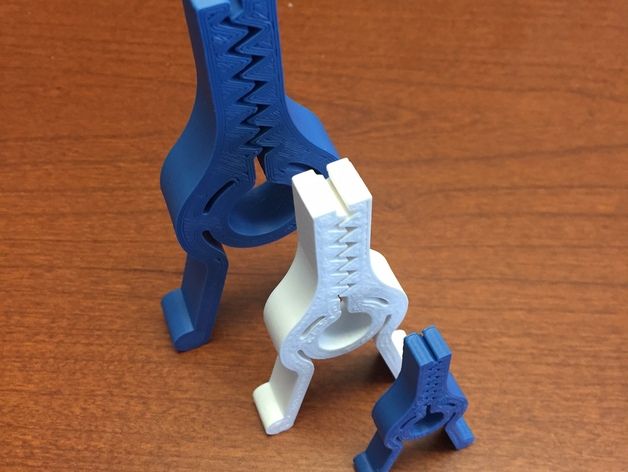
Serial 3D printing can be used to make:
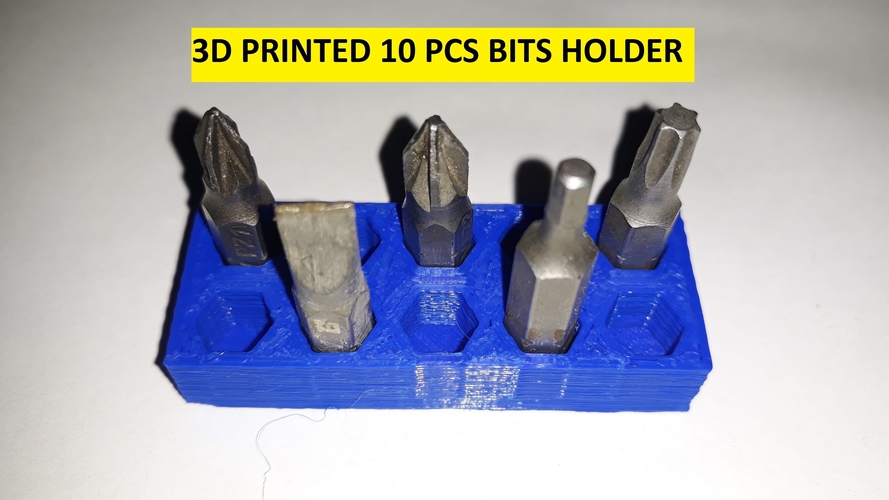
- cookie cutters, polymer clay cutters, etc.;
- gears, plastic pulleys, guide rollers, etc.
 ;
; - REA housings, mounts for electronic boards and devices;
- spare parts for robotics, RC models, parts and protection for quadcopters;
- elements of decor, interior design, fittings for repairs;
- accessories and elements of textiles and clothing design.
This is only a small part of the areas of activity in which serial 3D printing can be in demand. If you doubt whether it is suitable for you, our specialists will be happy to help you with a free consultation and an assessment of the possibility of manufacturing and the cost of your idea.
What are the benefits of serial 3 D - printing?
-
Unit and lot cost reduction.
As mentioned above, the production of identical parts allows you to reduce the cost of the product. In this regard, we offer our customers discounts for a batch of products.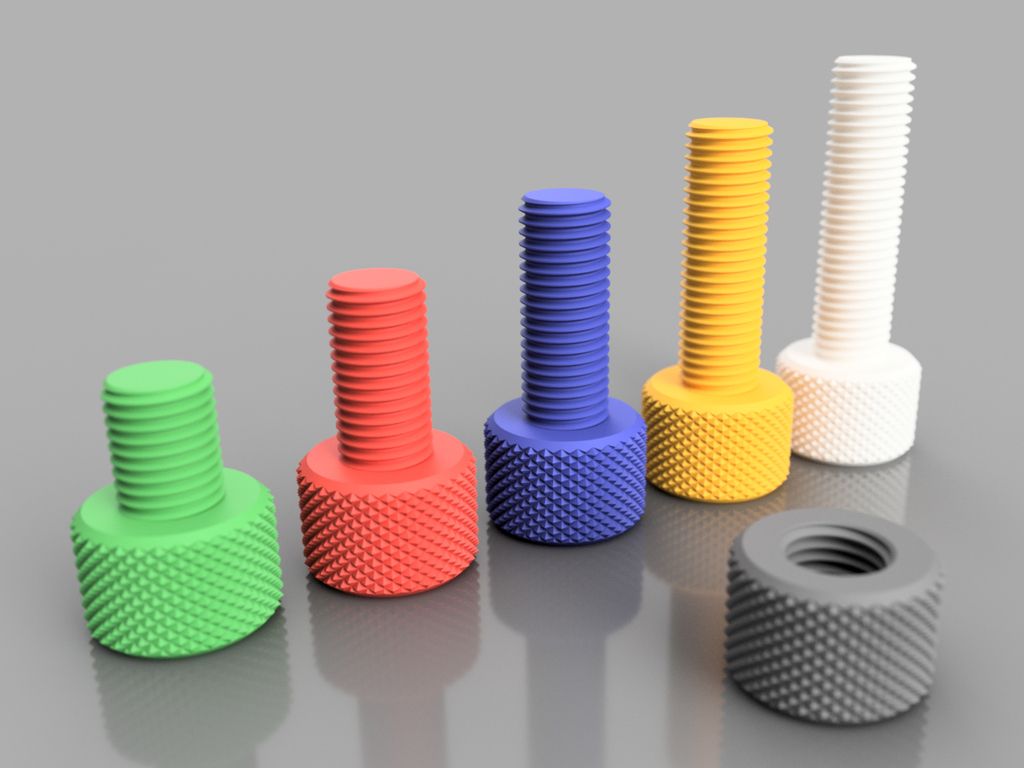 (You can see and read all the conditions below in the “Conditions for serial printing” paragraph.)
-
Improving the quality of products.
As products for mass production 3D printing go through a series of checks, experimental runs, fitting parts to correct for shrinkage, etc. It is possible to more accurately select the print settings for a particular part, which in some cases allows to significantly improve the quality of the final product, to achieve its maximum repeatability. Of course, these activities take more time than a single 3D printing, however, the time spent can be compensated later by reducing the number of defects and increasing productivity.
-
Serial printing sequence.
When drawing up a contract for serial printing, the number of products and the timing of their production are agreed in advance, so you can be sure that you will receive your products by a certain date. The client of this service bypasses the queue for the manufacture of their products, which can occur in the case of the usual "piece" 3D printing, when all the machines are busy.
Serial conditions 3 D - print.
Serial 3D printing service is provided for batches of identical products.
| Quantity (pcs) | Discount (%) |
| 30 | 5 |
| 50 | 10 |
| 100 | 15 |
| 200 | 20 |
| 400 | 25 |
| Over 400 | by agreement |
To conclude an agreement and start the service, you will need:
- Have a ready-made 3D model for printing in STL format.
 Or OBJ. or you can contact us for creation 3 D-model .
 - Determine the number of items in the lot.
- Determine the lead time for a batch of parts.
- Conclude an agreement on the basis of these data.
- Pay at least 50% of the lot value.
Notes:
- If you change the configuration of the part, the discount for the series is reset to zero, exceptions may be changes that do not affect the printing process.
- If small lots identical products are printed periodically (every month), the number of products in these batches is added up and may affect the discount.
Example: you have ordered 30 pieces in one month. and received a 5% discount if you order a batch of the same products from 30pcs next month. the discount will be 10%, since the total is a batch of 60 units of products, etc.
If you have any questions about this service, we are always ready to help you.