3D printer stormtrooper
Stormtrooper best 3D printing models・Cults
Stormtrooper
€2.27
Imperial AT-AT Driver
€6
Star stormtrooper
€4.99
Star wars soldier
€3.99
Luke Skywalker
€4.99
StormTrooper Paper Towel holder
€7.76
Stormtrooper keychain
€2
Droid from Star Wars
€4.99
Star Wars Death Star Elevator Bank for 3.75" and 6" figures
€5.31 -20% €4.25
EQUERRE D'ÉTAGÈRE / shelf bracket Star Wars Stormtrooper
Free
Duck / Ducktooper Star Wars
Free
Star Wars Death Star Sensor Pod for 3.
€2.64 -20% €2.12
Star wars stormtrooper
€4.99
stormtrooper wine bottle holder wine bottle holder even for ender 3
€3.75 -50% €1.87
lamp "balloon" lithophanie stormtrooper star wars
€4
Simple knife
€1
Star wars stormtrooper
€1.99
Shore trooper Squad leader Fan art Star wars
€11.03
X-Wing pilot helmet (Poe Dameron) from Star Wars The Force Awakens
€23
Tantive IV diorama/playset Combo 4
€9
Browning gun
€2
E-11 Blaster - 3D Print Files
€13.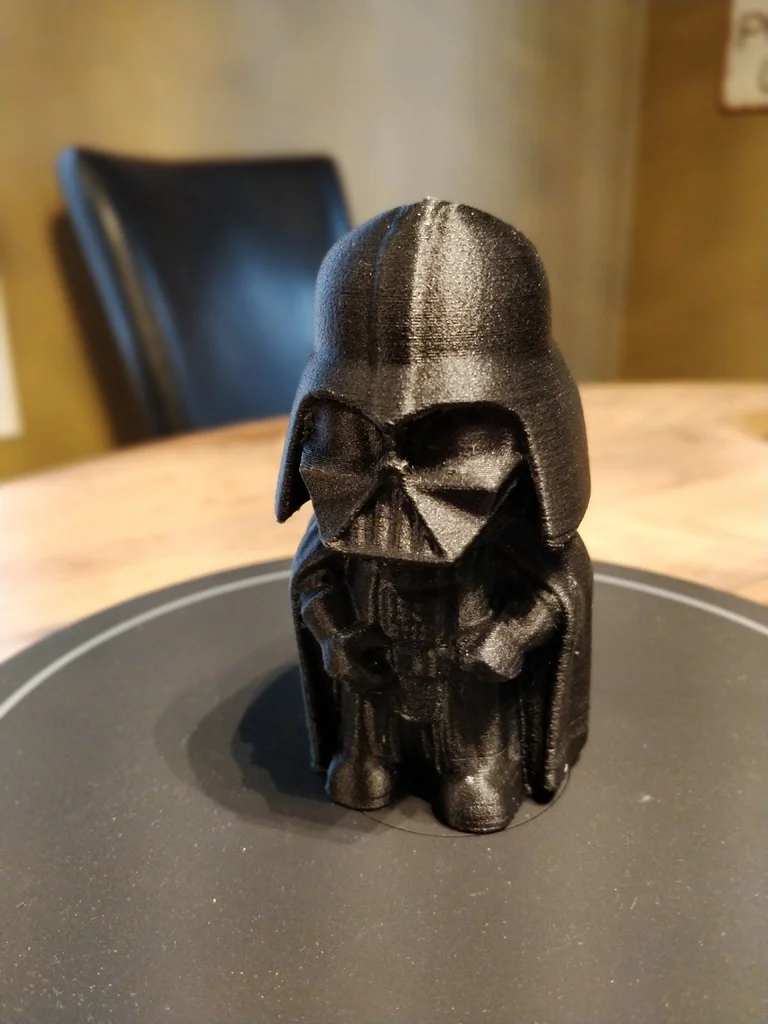 80
80
Purge Trooper Helmet
€11.50
Star Wars Endor Trees for 3.75" and 6" figures
€2.55 -20% €2.04
Stormtrooper Lightsaber
Free
15mm Doomed Shotgun Troopers
Free
Darth Vader Stormtrooper magnet
€1.25
Stormtrooper Stormparty on the Beach
€22.08
Female Storm Trooper Remix remix
Free
Imperial Scout - K2 - Open Source Minifig
Free
Female Stormtrooper
€0.70
Star Wars - cookie cutter set
€3
Stormtrooper controller stand xbox / ps5
€3.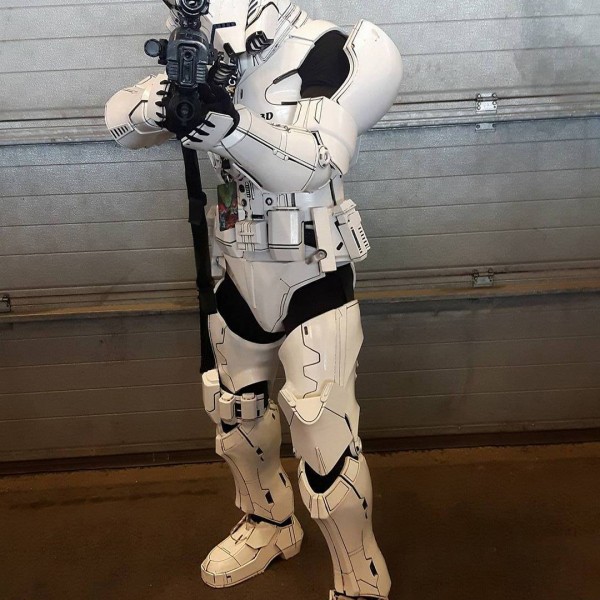 50
50
Vympel
€3
m 16
€2
FAMOUS ak 47
€2
Sentry Gun
€2
Star Wars/laser saber/stormtrooper LED sign
€3.50
Santa Head accessory for my Stormtrooper 1/12 articulated action figure
€0.50
Star Wars SnowTrooper Fan Art
€11.03
Stand with Pauldron for Stormtrooper helmet
€15.64
PACK 35 Keychains ANIME, MOVIES, VIDEOGAMES
€7.50
Pack 7 Keychains Classical movies
€2.45
Dual/Multi Material Star Wars Keychains
Free
Stand for Stormtrooper helmet
€13.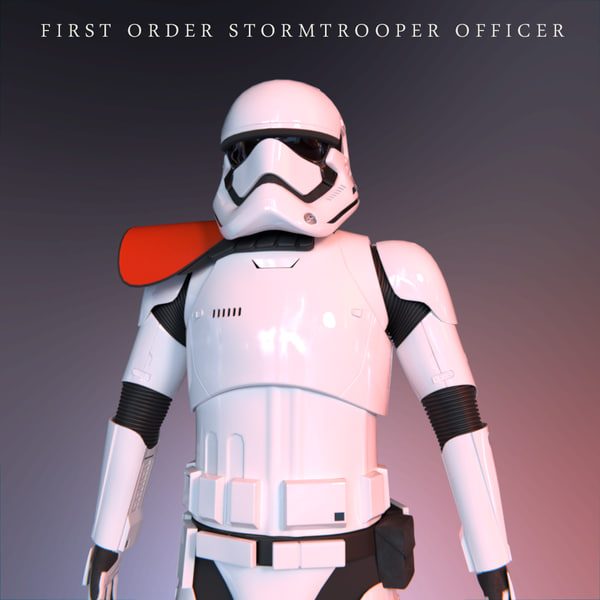 80
80
Led stormtrooper Star Was poster
€1
StormRing
€1
Gambody STL files of Stormtroopers for 3D Printer
These 3D models consist of files in StereoLithography (.Stl) format that have been optimized for 3D printing.
Before printing the files, we strongly recommend reading the PRINTING DETAILS section.
Version 1 and Version 2 are the files for Stormtroopers 3D Models optimized for 3D printing, the preview pictures of which you see above.
It is recommended:
- to print Version 1 STL files on FDM/FFF 3D printers;
- to print Version 2 STL files on DLP/SLA/SLS 3D printers.
| version: FDM/FFF 1.0 version: DLP/SLA/SLS 1.0 | |||||
|---|---|---|---|---|---|
| File Name | File Size | Time / Filament | Object Size (x/y/z mm) | ||
1_GE_Connector_B_B (5x2).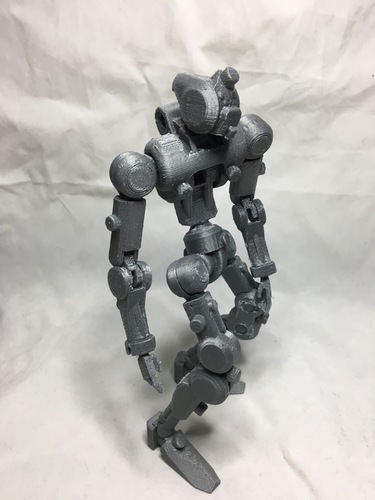 STL STL | 0.04 MiB | 8 min | Download | ||
| 2_st_1_Head.stl | 3.73 MiB | 2 h 28 min 1 m | Download | ||
3_st_1_Body.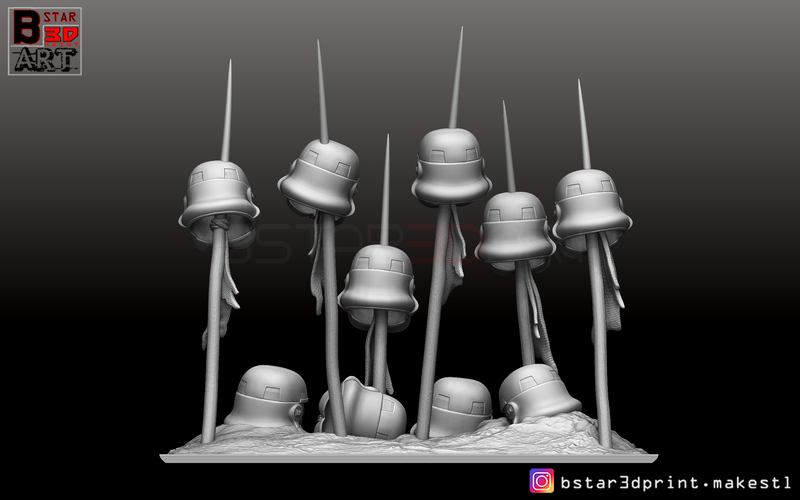 stl stl | 9.80 MiB | 13 h 28 min 9 m | Download | ||
| 4_st_1_arm_R.stl | 2.12 MiB | 1 h 19 min 1 m | Download | ||
5_st_1_wrist_R.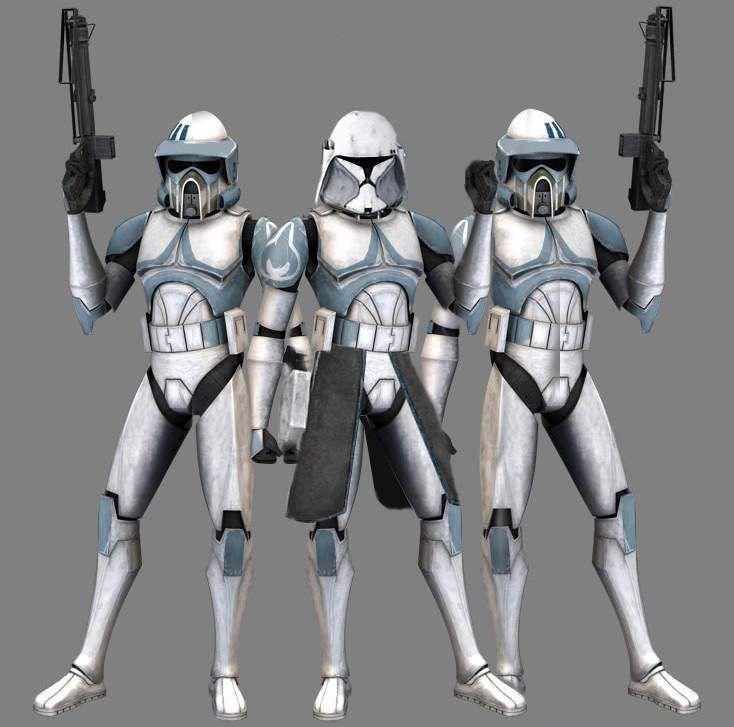 stl stl | 0.70 MiB | 27 min | Download | ||
| 6_st_1_arm_L.stl | 1.97 MiB | 1 h 24 min 1 m | Download | ||
7_st_1_wrist_L.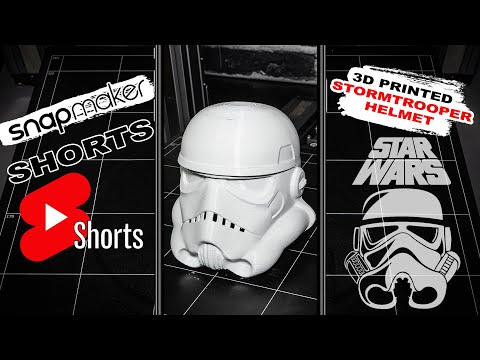 stl stl | 0.89 MiB | 36 min | Download | ||
| 8_st_1_blaster.stl | 5.40 MiB | 2 h 10 min 1 m | Download | ||
9_st_1_leg_R.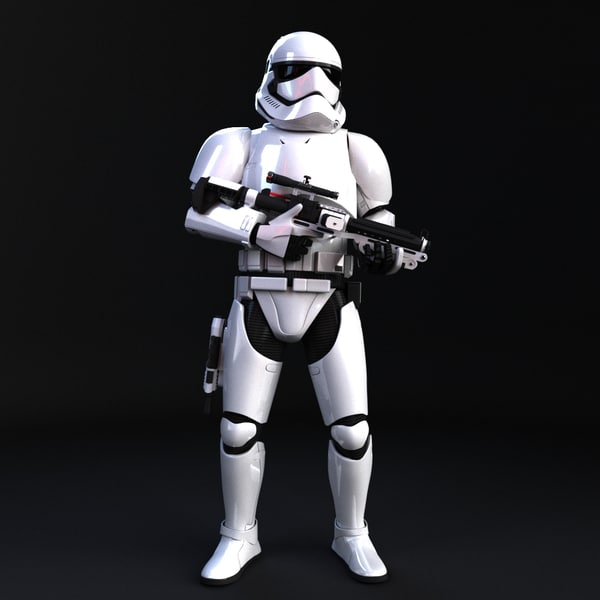 stl stl | 5.16 MiB | 3 h 56 min 2 m | Download | ||
| 10_st_1_leg_L.stl | 5.12 MiB | 3 h 56 min 2 m | Download | ||
11_st_2_Head.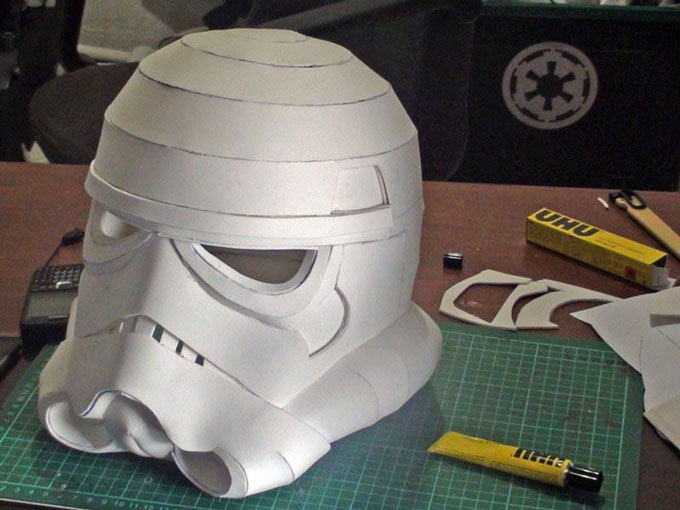 stl stl | 3.73 MiB | 2 h 34 min 2 m | Download | ||
| 12_st_2_body.stl | 10.55 MiB | 14 h 10 min 9 m | Download | ||
13_st_2_arm_R.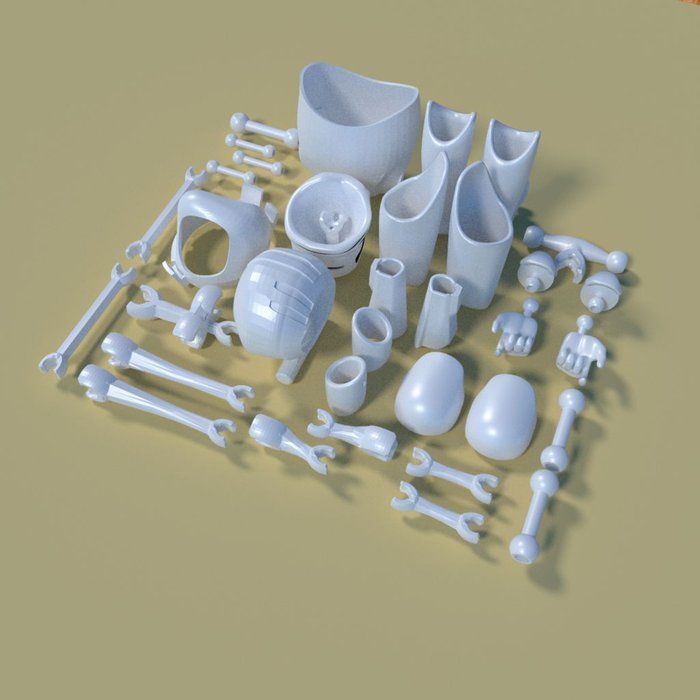 stl stl | 2.14 MiB | 1 h 16 min 1 m | Download | ||
| 14_st_2_wrist_R.stl | 0.79 MiB | 31 min | Download | ||
15_st_2_arm_L. stl stl | 2.04 MiB | 1 h 25 min 1 m | Download | ||
| 16_st_2_wrist_L.stl | 0.58 MiB | 31 min | Download | ||
17_st_2_blaster. stl stl | 5.26 MiB | 1 h 46 min 1 m | Download | ||
| 18_st_2_leg_R.stl | 4.91 MiB | 4 h 18 min 2 m | Download | ||
19_st_2_leg_L.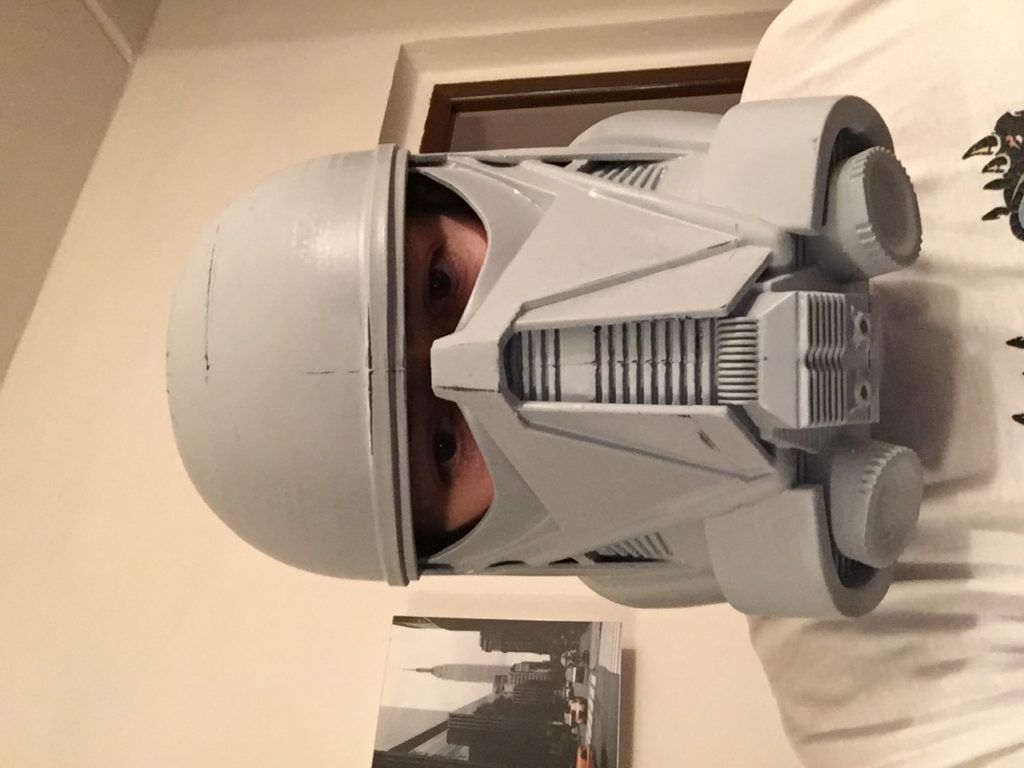 stl stl | 4.97 MiB | 4 h 38 min 3 m | Download | ||
HISTORY OF STORMTROOPERS
Stormtroopers are elite warriors of the Galactic Empire. They are the embodiment of the absolute authority of Emperor Palpatine. These faceless servants of the New Order by force and cruelty carried the will of the Emperor into thousands of stellar systems throughout the Galaxy. In the heyday of the Empire, stormtroopers became a living embodiment of the power of ruthlessness and fear. All Stormtroopers are dressed in white armor that distinguishes them from other military units of the Empire.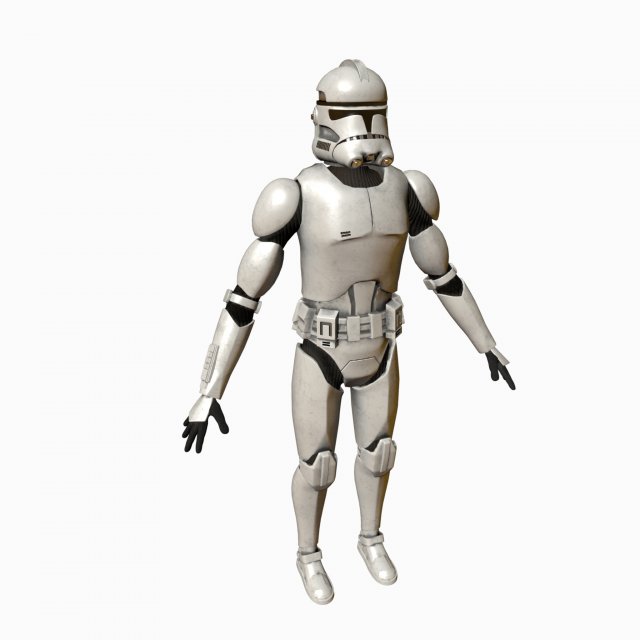 Imperial stormtroopers originated from soldiers-clones of the Great Army of the Republic. At the end of the Clone Wars, the Galactic Republic was reorganized into the first Galactic Empire. As a result, the Great Army was transformed into the Assault Corps and the clones were renamed into "stormtroopers". As Imperial soldiers, stormtroopers participate in combat operations together with the forces of the imperial army and navy because all the stormtroopers are unconditionally loyal to the Emperor.
ABOUT THESE 3D MODELS
Stormtroopers 3D models for printing were created in ZBrush. These models are saved in STL files, a format supported by most 3D printers.
FDM version features:
- Contain 19 parts;
- Made in 2 variants: Stand and Offensive;
- Made with connectors. One part of connector (1_GE_Connector_B_B (5x2)) you need to print 5 times for each varian of Stormtrooper 3D Model;
- Removable part of gun in each variant;
- All parts are divided in such way that you will print them with the smallest amount of supports.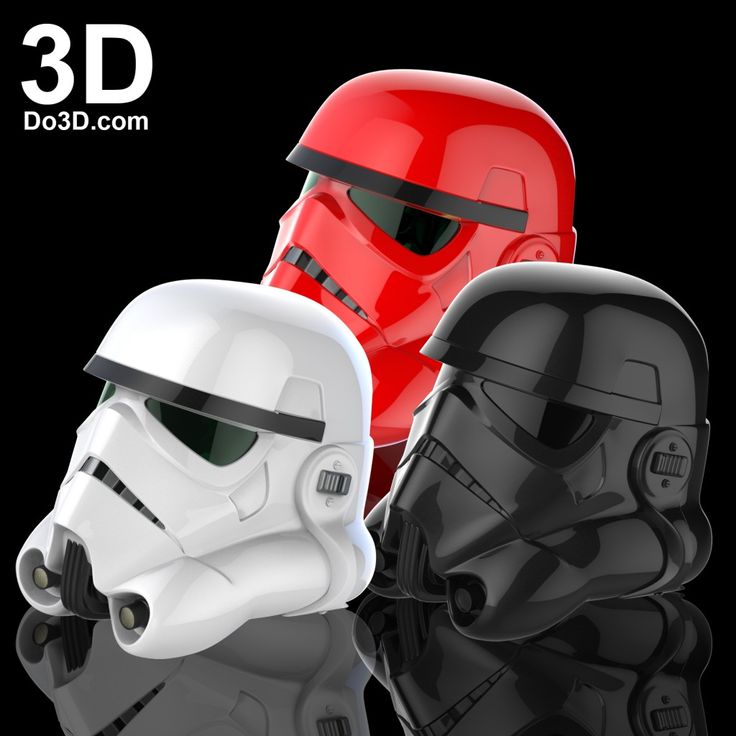
SLS/SLA version features:
- Same as FDM but smaller and made as 1 part in 2 variants.
All .STL files for 3D printing have been checked in Netfabb and no errors were shown.
Note: Before starting 3D printing the models, read the Printing Details for CURA 3.1.0. Software.
There are 19 parts for FFF/FDM version and 2 parts for SLS/SLA version.
All parts of connectors should be printed at 100% infill.
Scale: His tall in life is 1830 mm. Models made as 1/8 scale in FDM version and 1/16 in SLS/SLA version.
FDM version dimensions:
After being printed will stand:
- 228 mm tall, 78 mm wide, 72 mm deep - Stand;
- 223 mm tall, 91 mm wide, 110 mm deep - Offensive;
- Connectors should be printed at 100% infill to make them solid.
SLS/SLA version dimensions:
After being printed will stand:
- 115 mm tall, 39 mm wide, 36 mm deep - Stand;
- 111 mm tall, 46 mm wide, 55 mm deep - Offensive;
- Has only 1 part in each version, to keep printing costs down.
WHAT WILL YOU GET AFTER PURCHASE?
- .STL files of Stormtroopers for 3D printing which consist of 21 parts;
- 2 versions of files for these models for FFF/FDM and SLS/SLA;
- 2 variants in each version of Stormtroopers: Stand and Offensive;
- Removable part of gun;
- High-poly detailed models of Stormtroopers;
- Detailed settings that we provide for Cura 3.1.0. for the best print;
- Full technical support from the Gambody Support Team.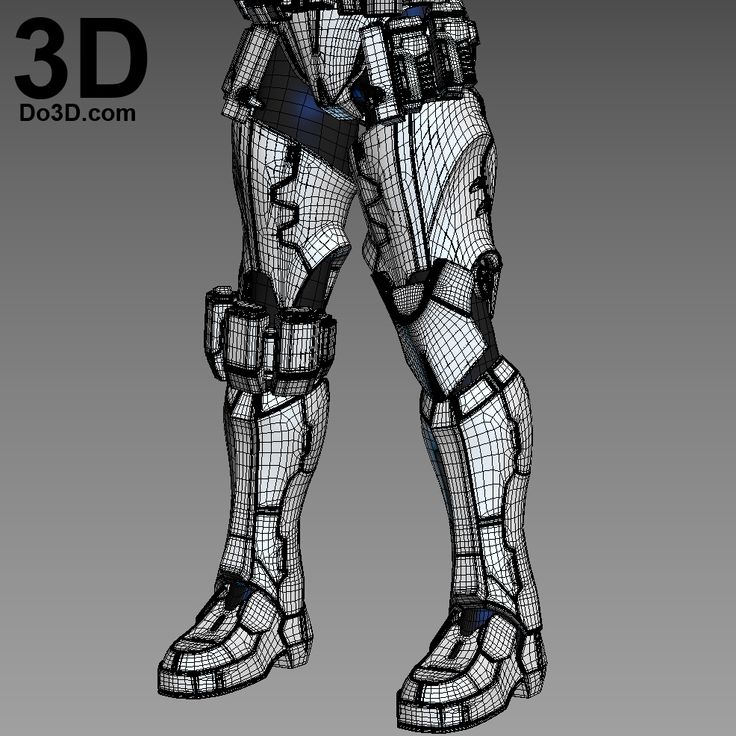
Watch the tutorial video on how to assemble Stormtroopers 3D Printing Miniatures at Gambody YouTube channel.
You can get Models of Stormtroopers for 3D Printing right now! Just click the green Buy button in the top-right corner of the model’s page. You can pay with PayPal or your credit card.
Also, you may like another Space War 3D models.
_______
FAQ:
Where can I print a model if I have no printer?
How to get started with 3D printing?
How to set up my 3D printer?
How to choose right 3D model print bed positioning?
How to paint printed figurine?
These models were tested in Cura 3.1.0. and printed on an Ultimaker 2 in PLA material.
Note: All parts of connectors should be printed at 100% infill. One part of connector (1_GE_Connector_B_B (5x2)) you need to print 5 times for each variant of Stormtrooper 3D Model;
To avoid printing problems, we recommend the following settings:
Quality
Layer Height: 0. 1 mm
1 mm
Initial Layer Height: 0.3 mm
Slicing Tolerance: Middle
Line Width: 0.4 mm
Wall Line Width: 0.4 mm
Outer Wall Line Width: 0.4 mm
Inner Wall(s) Line Width: 0.4 mm
Top/Bottom Line Width: 0.4 mm
Infill Line Width: 0.4 mm
Skirt/Brim Line Width: 0.4 mm
Support Line Width: 0.4 mm
Initial Layer Line Width: 100%
Shell
Wall Thickness: 0.8 mm
Wall Line Count: 2
Outer Wall Wipe Distance: 0.2 mm
Top Surface Skin Layers: 0
Top/Bottom Thickness: 0.8 mm
Top Thickness: 0.8 mm
Top Layers: 8
Bottom Thickness: 0.8 mm
Bottom Layers: 8
Top/Bottom Pattern: Lines
Bottom Pattern Initial Layer: Lines
Top/Bottom Line Directions: [ ]
Outer Wall Inset: 0 mm
Compensate Wall Overlaps: Check
Compensate Outer Wall Overlaps: Check
Compensate Inner Wall Overlaps: Check
Fill Gaps Between Walls: Everywhere
Filter Out Tiny Gaps: Check
Horizontal Expansion: 0 mm
Initial Layer Horizontal Expansion: 0 mm
Z Seam Alignment: Sharpest Corner
Seam Corner Preference: Hide Seam
Ignore Small Z Gaps: Check
Extra Skin Wall Count: 1
Infill
Infill Density: 20% (all parts of the connectors should be printed at 100% infill)
Infill Line Distance: 4.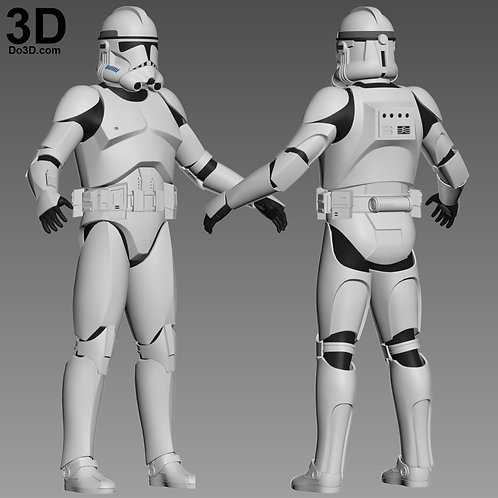 0 mm
0 mm
Infill Pattern: Grid
Infill Line Directions: [ ]
Infill X Offset: 0 mm
Infill Y Offset: 0 mm
Infill Overlap Percentage: 10%
Infill Overlap: 0.04 mm
Skin Overlap Percentage: 5%
Skin Overlap: 0.02 mm
Infill Wipe Distance: 0.1 mm
Infill Layer Thickness: 0.1 mm
Gradual Infill Steps: 0
Infill Before Walls: Check
Minimum Infill Area: 0 mm2
Skin Removal Width: 0.8 mm
Top Skin Removal Width: 0.8 mm
Bottom Skin Removal Width: 0.8 mm
Skin Expand Distance: 0.8
Top Skin Expand Distance: 0.8
Bottom Skin Expand Distance: 0.8
Maximum Skin Angle for Expansion: 90˚
Minimum Skin Width for Expansion: 0.0
Material
Enable Retraction: Check
Retraction Extra Prime Amount: 0 mm3
Retraction Minimum Travel: 0.8 mm
Maximum Retraction Count: 90
Minimum Extrusion Distance Window: 6.5 mm
Nozzle Switch Retraction Distance: 16 mm
Nozzle Switch Retraction Speed: 20 mm/s
Nozzle Switch Retract Speed: 20 mm/s
Nozzle Switch Prime Speed: 20 mm/s
Speed
Print Speed: 45 mm/s
Infill Speed: 50 mm/s
Wall Speed: 22. 5 mm/s
Outer Wall Speed: 22.5 mm/s
Inner Wall Speed: 45 mm/s
Top/Bottom Speed: 15 mm/s
Support Speed: 45 mm/s
Support Infill Speed: 45 mm/s
Travel Speed: 80 mm/s
Initial Layer Speed: 15 mm/s
Initial Layer Print Speed: 15 mm/s
Initial Layer Travel Speed: 26.6667 mm/s
Skirt/Brim Speed: 15 mm/s
Maximum Z Speed: 0 mm/s
Number of Slower Layers: 2
Travel
Combing Mode: All
Avoid Printed Parts when Traveling: Check
Travel Avoid Distance: 0.625 mm
Cooling
Enable Print Cooling: Check
Fan Speed: 100%
Regular Fan Speed: 100%
Maximum Fan Speed: 100%
Regular/Maximum Fan Speed Threshold: 10 s
Initial Fan Speed: 0%
Regular Fan Speed at Height: 0.3 mm
Regular Fan Speed at Layer: 2
Minimum Layer Time: 5 s
Minimum Speed: 10 mm/s
Support
Generate Support: Check
Support Placement: Everywhere
Support Overhang Angle: 60°
Support Pattern: Zig Zag
Connect Support ZigZags: Check
Support Density: 15 %
Support Line Distance: 1. 3333 mm
Support Z Distance: 0.3 mm
Support Top Distance: 0.3 mm
Support Bottom Distance: 0.3 mm
Support X/Y Distance: 0.7 mm
Support Distance Priority: Z overrides X/Y
Minimum Support X/Y Distance: 0.2 mm
Support Stair Step Height: 0.3 mm
Support Stair Step Maximum Width: 5.0 mm
Support Join Distance: 2.0 mm
Support Horizontal Expansion: 0.2 mm
Support Infill Layer Thickness: 0.1 mm
Use Towers: Check
Tower Diameter: 3.0 mm
Minimum Diameter: 3.0 mm
Tower Roof Angle: 65°
Build Plate Adhesion
Build Plate Adhesion Type: Brim
Skirt/Brim Minimum Length: 250 mm
Brim Width: 8.0 mm
Brim Line Count: 18
Brim Only on Outside: Check
Mesh Fixes
Union Overlapping Volumes: Check
Maximum Resolution: 0.01 mm
Merged Meshes Overlap: 0.15 mm
Special Modes
Print Sequence: All at Once
Surface Mode: Normal
Disclaimer: This model will look outstanding if printed on SLA/SLS 3D printer.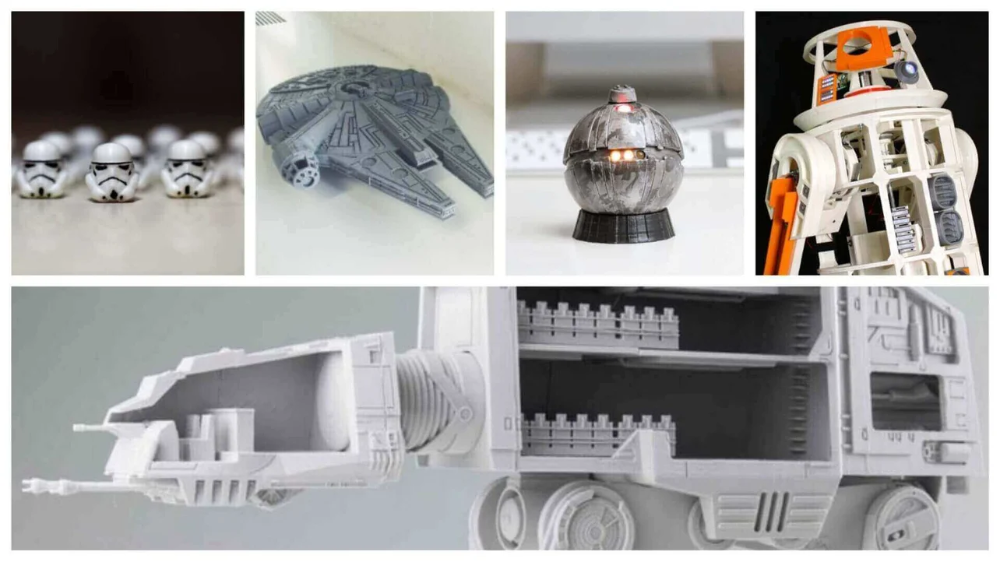 The accuracy of the model printed on FFF printer can vary from the result shown in the pictures.
3D printed movable Star Wars Stormtrooper figurine - printable files included!
Report from the battlefield! Captain Phasma is leading a wave of attacks on the rebels! Defeating resistance is no easy task! The First Order needs to send a few more soldiers to join our fight!
Inspired by Autodesk Tinkerplay 3D Printer and my experience with Lego and Bionicles (leave a comment if you have any), this tutorial will show you how to build any custom figure! I love figurines with ball joints! I grew up with Bandai and Lego figurines and I love how easy they are to assemble and build! No need to constantly screw and unscrew something. I've tried traditional sculpting before, this is my attempt at making a figurine with CAD! nine0003
Download the file and 3D print a stormtrooper figurine with realistic articulation! I hope you enjoy this guide and learn from it some tricks for 3D printing.
I am making this figurine as a Christmas present for my dear friend Susie! I want to make a decent photo-op figure for her! You can have different attitudes to the new Star Wars trilogy, but the design in the films is, as always, on top. Personally, from the first teaser, I really liked how the imperial attack aircraft looks. nine0009
Note: This article is a translation.
Step 1: Master TinkerPlay in 10 minutes!
First off, Tinkerplay is my dream toy printing software! Autodesk launched this application at the beginning of 2016, and as a 3D printing enthusiast, I was very happy to work with it.
The user interface (UI) is designed to be intuitive, easy to learn for both children and parents. Available on iOS, Android and Windows Store! I tried the Android app on my phone, but I prefer the desktop version. The app is so easy to use that it doesn't even start with a tutorial! Provides 10 character templates with unique limbs and body parts connected by ball joints. Select one of the templates and the guided build process will begin. The program has an interactive environment, customization of parts, inverse kinematics and the ability to copy and paste, as shown in my video. nine0003
The assembly process is strictly drag and drop. In addition to templates, the user can mix and match parts as they are available in two catalogs:
1) Parts from a specific character;
2) The same body parts from other characters.
Feel free to watch the video demo if you're interested!
Press the print button and you will see the approximate dimensions and weight of the figurine, these parameters are a general price indicator. You can have your figurine printed at your local 3D workshop. nine0003
Unzip the STL files and load them into Blender, arranging them to match your printer! I installed mine on UPBOX at the university library. I printed this skeleton to test the printer and print file. Moving on to Maya! I hope in the future I will become a professional in Maya.
After printing, I cleaned the entire raft and support with pliers, assembled the skeleton and had some fun with it. The ball joints are very well articulated, with acceptable friction. He can take difficult poses, such as standing on one leg. A slight imperfection in print quality doesn't seem to affect functionality much! nine0009
Step 2: 3D Modeling
This is the most creative part, you can model anything you want or download any game character you like on TurboSquid.
As a 3D artist, I will obviously model the stormtrooper myself. 3D modeling has been my passion for a few years now, I am so drawn to it, with more practice, I hope to get a proper postgraduate study and build a career on it! For beginners, I have the following tips:
1. Sculpt! put your brain to work with 3D shapes! (I tried paper clay figurine 2 years ago but it was too heavy and not hard enough, that was before I tried fimo.
2. Watch tutorial videos online! Long or short!
3. Watch disassembly
4. Follow digital artists on Instagram
5. Learn about topology and test your knowledge!0002 6. Post your work online! You will receive feedback, and you never know who will look at your work and where it will lead!
I've attached a timelapse of the process, I'm certainly not a pro (yet) but I hope you learn something!
Step 3: Tinkerplay modifications and refinement of the model
I sketched out the general scheme (see attached drawing) the main features are:
1. Double ball joints in the elbows and knees for higher bending angles; nine0003
2. Hinges have 2 standard sizes instead of 1 as in tinkerplay to reduce weight.
I used an app called Camera Scanner, it's very handy and does the job. Autocorrect does indeed give the quality of the scanned image in most cases.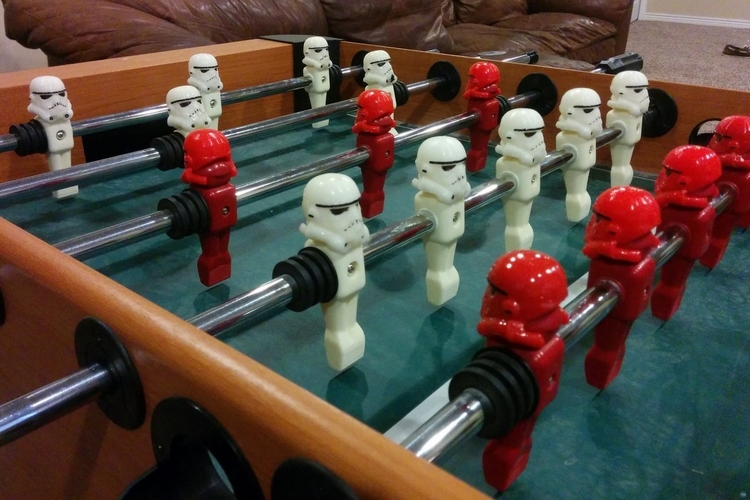 Great for converting finished quality documents to PDF using your phone.
I roughly assembled the stormtrooper from a sketch in Blender. I then selected the ball joint from a .stl file that I exported from Tinkerplay. Scale to two sizes. Then I placed the joint on top and tested it. You can see me making a lot of adjustments to improve the articulation. After setting the connections and sockets in place, I began to connect them. nine0003
I then aligned the bone piece with the stormtrooper model. I made them overlap, they're not even connected. I decided to redo the connections. Some parts did not receive any support or raft at all, the basis of the seal was also shifted, some layers are visible sliding. It seems that the foundation was not fixed at the very beginning.
Step 4: Test print
Strong slip can be observed
nine0044My initial approach to setting the bones inside failed due to generated support. I had to separate them.
Last successful print.
I doubted that everything would be fine from the very beginning, since this is a rather difficult thing to print. I expected that I might have to redo the model. I did a test print on the only printer I have access to. It was the printer in the university library. Unfortunately I have a 6 hour limit and can only print it in a very small size due to the complexity of the design. nine0003
It fails miserably due to size, ball joints have been disconnected. The printed base was not set properly, parts of my figure were shuffled like a deck of cards. There was a serious slip of the layers, it is clearly visible on the helmet. I just got unlucky.
Step 5: Modifications + Reprint
Position the taller part in the center and the less layered parts in the surrounding area to optimize timing and print head stability. nine0013
This is a skeleton demo, feel free to use this in your project.
The cylindrical part should normally stand upright due to the even distribution of thread around the circumference.
Right previous failed attempt
The fingers are difficult to orientate, this was my best attempt given the curvature of the shapes. nine0013
I separated the ball joint armature from the armor and reprinted it, I also realigned the parts so that the required support was minimal. You can also notice that I modeled the mesh in more detail... After fixing the printer and fixing its operational glitches, I finally got a working 3d printer. The print took 10 hours, the weight was about 100 g, and the cleaning of the prop and raft took more than an hour. I really wish I had my own 3d printer at home. nine0003
Modeling for printing is similar to modeling for games and graphics, but keep in mind some important differences:
- Use high-poly printing if necessary, as the printer does not usually work with bump maps or normal maps. If you need more shape definition, add more geometry.
- Mesh must be watertight and topologically connected.

- If that's not possible, make sure the two meshes overlap each other to a large extent (like the sternum and pelvis that I did). nine0141
Step 6: Assemble a stormtrooper and take down the rebels!
clear extraction from the grid, start with the parts located around, work inwards.
all parts are ready!
Roll the foam inward to secure the chest.
nine0002 Looks like sushi.It took me an hour to remove the part from the grid and support. Keep a swab with alcohol handy, I scratched my finger on the hard support. Freeing the part on the outskirts, move to the center, as you can see the head I took off the last
Then comes the real assembly. I'm testing the fitted parts. Because they are empty shells, the armor and some other parts dangle a little, such as the chest and thighs. I recommend adding kraft foam padding. If necessary, glue the shells to the appropriate places with hot glue.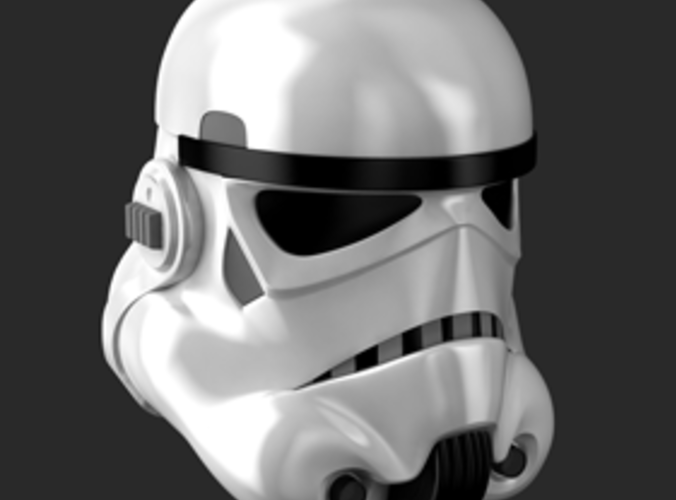 nine0003
As I already mentioned, the printer on which I printed this project had a number of problems. If the filament or printer fails a little, then the ball joints may not fit perfectly. If the parts do not fit, take a cutter and cut off the excess. Take a hot glue gun, put a drop of glue on the ball joint and rub it gently to apply a thin layer. The joints must be tight to lock in place and get difficult poses. Feel free to prime and sand the figurine to make it look cool and smooth. nine0003
Step 7 Flexibility
With more articulation than a mid-range action figure, my soldier is able to take such interesting poses. In particular, he has movable shoulder joints, not many figures refer to this subtle but important articulation. The stand on one leg is also a point of pride for me... I think the figure could be improved if the topology of the bones themselves was improved.
I hope you see how cool projects can grow from a creative mind and CAD! nine0003
Stormtrooper 3d printing files:
FYV6DI5IJHFFCF3.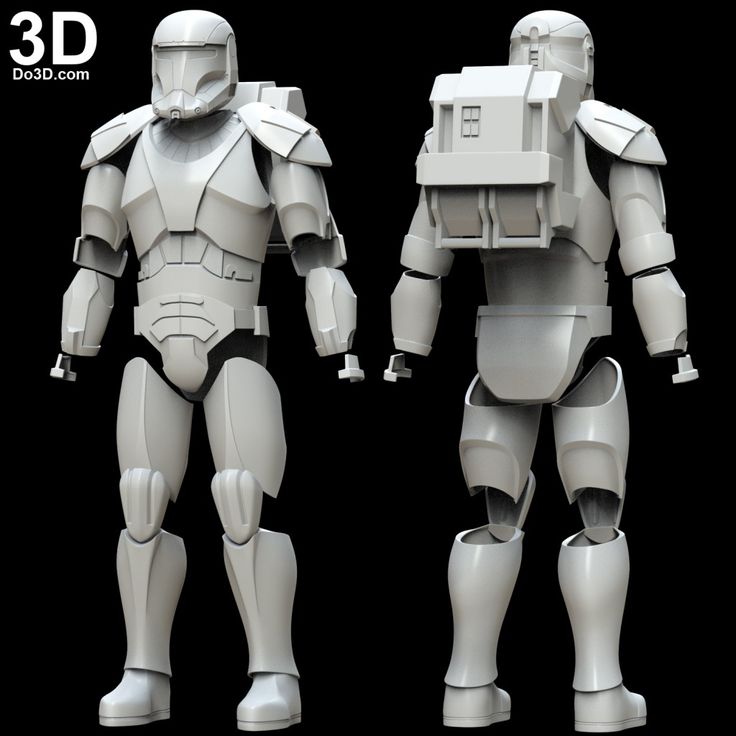 stl 214 Download
FAED2KBIJHFFC8R.stl 180 Download
Step 8: Service and Notes
I believe the strength of the seams will depend on the filament you use and the print resolution.
If the connection is not as tight as before, reprint the part or just rub with a layer of hot glue, as I mentioned, this may seem a little dishonest, but I think there is nothing wrong with it. nine0003
If you've read this far, thank you very much for following my experience with 3d printing. Thank you for your time and support Leave a comment and share this guide with your Star Wars-loving friends!
May the force be with you!
3D maniac or how I made a stormtrooper suit.
Hello everyone! It's finally time to write about the grandiose 3D printing of a complete attack aircraft suit.
The beginning of the story can be read here http://3dtoday.ru/blogs/byrdalak123/printprocessingreview-or-how-i-do-the-stormtrooper-costume/
The article will focus on the following:
- General history of printing
- Gluing parts + post-processing
- Print settings, technical points
- Connecting the suit, general conclusions and impressions
.
It all started with the fact that I won a Cheap 3d V300 printer and wanted to make my own suit on it. Unfortunately, there was not enough time for modeling, and I already wanted to use some kind of interesting costume in December last year at my big science shows. The choice fell on the attack aircraft, it most suited the script and it was decided to start printing it. nine0003
The stormtrooper helmet was pretty simple. Many people printed it, there are already honed stl models, everything is divided into parts that fit without problems in the field of my printer. There was also a description and gluing sequences, and the whole print is not very large, so here I went along already explored paths.
But now, the helmet is printed, it's time for the costume. Everything turned out to be much more complicated here, since it was extremely difficult to find models in the public domain, and what I found turned out to be either with the wrong geometry, or did not look pretty enough and was very different from the original.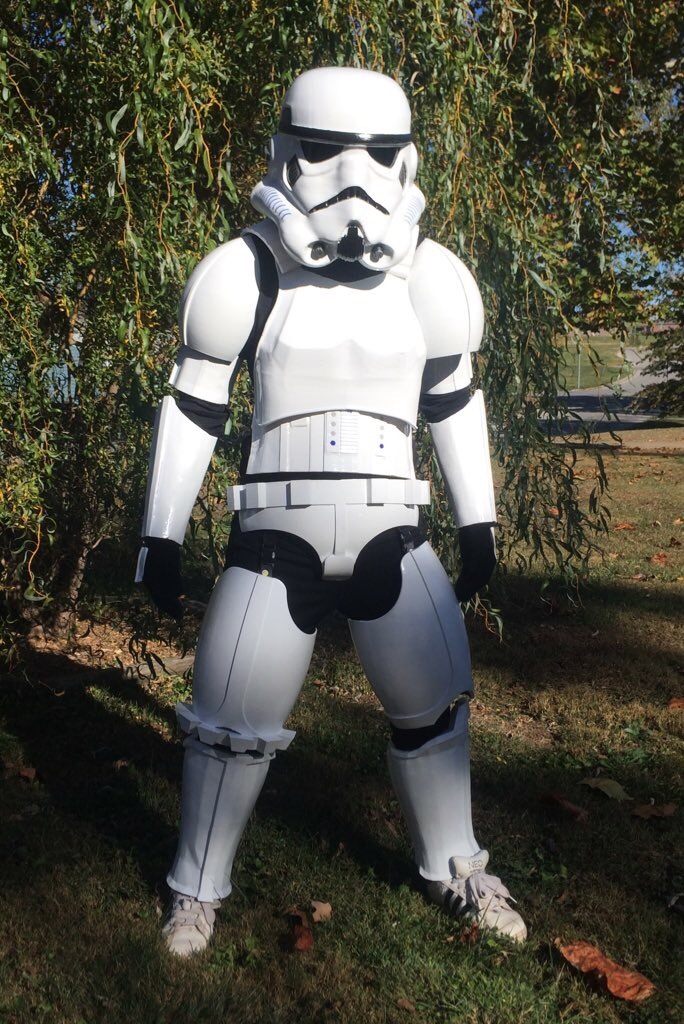 I even thought about buying a model from American guys who sell professional costume models, already tested and cut. But still, I found a person in the states who printed the entire suit of an attack aircraft and posted a couple of photos and a short video with him. I contacted him and found out everything that was needed, and still found suitable stl. nine0003
Appropriate - this is very approximate, but more on that later. The main difference between my attack aircraft and the American one was that it was printed with ABS, and I haven’t tried much with it yet, but I’m good at making PLA parts, so the entire attack aircraft is PLA printing.
All models were on hand, and they were not from a single archive, but still some of the different ones found on the Internet. The main problem that I encountered is complete anarchy on a scale. All the details were in different scales and I often had to reprint some parts so that they looked normal and that I could move normally in them).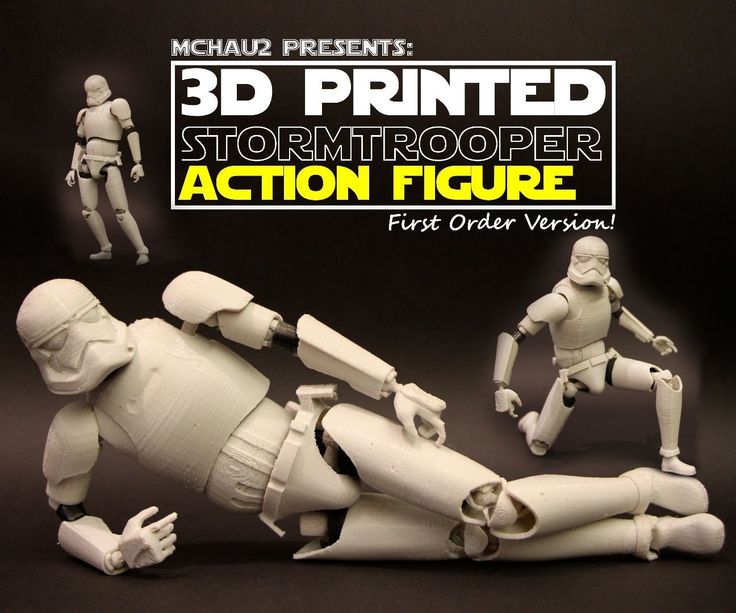 Of course, the models had to be sawn for printing in parts (the print area does not allow you to print the sternum or dorsal part at once, although cheap 3d has a huge print area of 300x300x300). nine0003
Finally, the first parts began to be printed.
Of course, the amount of plastic required was brutal .... but more on that later.
Each piece was glued together using the proven method - Methylene Chloride. I dipped the edges for 5-6 seconds of the parts to be glued and connected. The connection is the strongest. The main thing when working with this reagent is gloves, a ventilated area, respiratory protection (I used 3M with all possible filters), eye protection from vapors is also desirable. Also, with the help of methylene, it was possible to remove the ribbing from the print itself, as well as to align the junctions. nine0003
Parts were printed exclusively with one plastic - FD Plast. Cheap and cheerful.
And there is a feeling that black was printed better than white. The walls were smoother and more glossy.
- Gluing of parts + post-processing
Gluing of parts was carried out at the expense of methylene chloride (which, by the way, costs a penny in comparison, if you take it from stores associated with 3D printing, I took it in Ruskhim). Dip each side to be glued for 5-6 seconds per 5-8 mm protrusion in methylene and then simply connect and hold for about a minute. Strong bonding occurs in 5-6 minutes. Full bonding - up to 5 hours. nine0003
The parts were then 'smoothed' with the same methylene and a lint-free cloth. I wetted the fabric and rubbed the part, leveling the layering.
IMPORTANT! I read somewhere about dipping the whole part (complete immersion in methylene) for a while. I'll tell you what happens in practice. If the part is not 'closed' on all sides (there are gaps in the internal structure - filling, then the part will most likely come to an end. The methylene will get so deep and dissolve everything making your model 'rubber' and warped. If you are sure that your entire model ' If the thickness of the closing of the model is small and the walls of the model are too small, then be sure that methylene also deforms your part, when taken out of the solution, there will be dents from your fingers, and then the model will generally twist So it's better to wipe the model.0003
The parts were then dried. Then somewhere it is necessary - with sandpaper and again methylene. Further degreasing of parts, primer on plastic in 2-3 layers (slightly evens out, which is not wiped with methylene), then paint in 2-3 layers and at the end varnish, also in 2-3 layers. Of course you need to dry between layers.
The lacquer will give not only shine to the plastic, but also protect it from scratches, because even when touching a part on a part without lacquer, hello to scratches.
To be honest, since I had a lot of details and there was little time, somewhere I did not completely 'methylene' the part, and painted in 1-2 layers.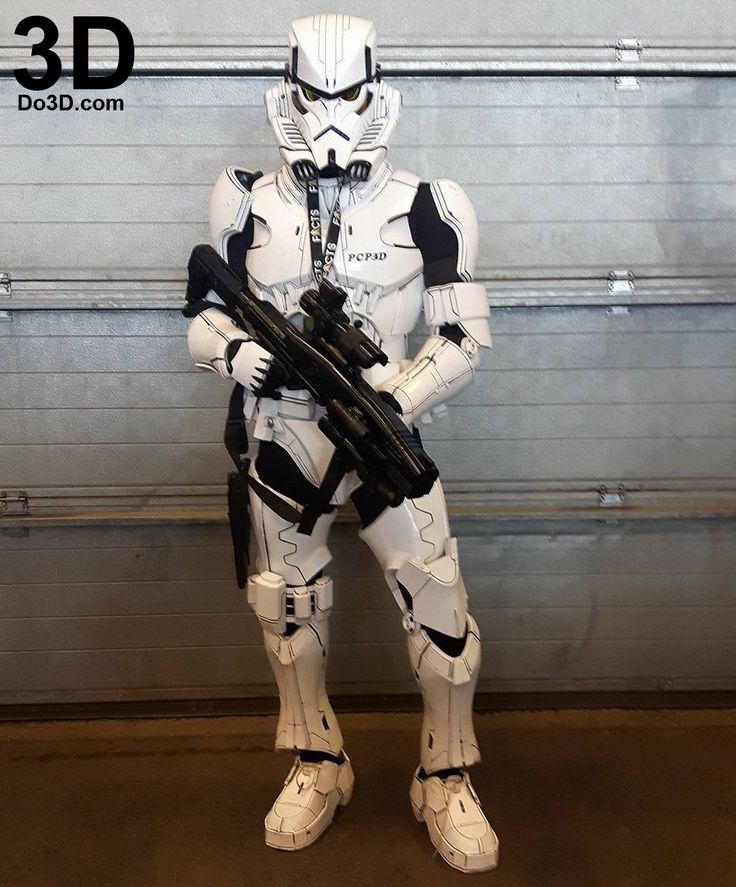 Only the most visible parts were directly polished with methylene. nine0003
- Print settings, technical points
Print settings, studio!
- SLICE via Cura
- Printing speed 50
- Moving extruder 110
- Filling 50
- layer thickness 0.2
- Filling up/bottom thickness 0.6
- Filling of the floor 25%
- Printing temperature 210 degrees
- Table temperature 70 degrees
- Sticking method - PVA glue
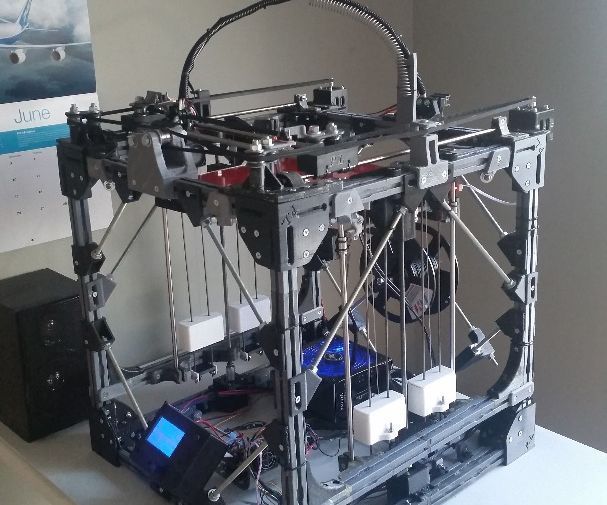
Printer: Cheap 3D V300
Plastic: FD plast PLA
The printing took place indoors, so there were no drafts.
Now I want to talk about the numbers associated with the costume:
3 broken glasses on which the models were printed (strong adhesion was plus the haste to tear the part off the table)
11 plastic spools of 750 gr.
7 kg weight suit with helmet
More than 50 days of printing
Suit consists of 50 parts
At all stages of printing - no clogging of the nozzle, no 'noodles' of the model, no distortion of the model during printing (delamination).