3D printer projects for kids
Educational 3D printer projects to do with kids
As we enter 2021, many of us are stuck in regional lockdowns owing to the COVID-19 pandemic, and schools are closing. With that challenge on their hands, parents around the world are looking for solutions to keep their children out of mischief, keeping them from having too much time on their tech, away from YouTube and gaming consoles. But it isn’t just during global pandemics that parents need projects to engage children – you might be looking for fun projects that have an educational element for during school holiday times.
When you’re trying to juggle home schooling or you need to keep kids entertained during the long summer holidays alongside your job, you need projects that are multi-faceted, and provide multiple opportunities for learning. And depending on how old your children are, you might have to explain the ideas that you’re showing them a bit differently for each child. Luckily, there are some fantastic resources available, not only to create your 3D printer projects, but also to help you explain whatever theory you’re trying to teach.
What can kids learn from 3D printer projects?
Depending on whether you are home schooling or you’re keeping kids entertained through the long summer break will depend on what you want them to achieve from their 3D printer project. The great thing is, you can link 3D printing to almost every part of the national curriculum – even when it doesn’t quite seem like it is possible to. The age of the children you’re teaching will influence the sort of lessons you’ll teach them, and perhaps the depth of the lesson too.
It might not be immediately how English or history can work, but if you think creatively there are plenty of options. And don’t forget, there are many ways that one subject can lead into teaching an idea from another subject – so look for different aspects to draw out the project.
English: An easy way to get started is to 3D print something from the book they’re reading – the Harry Potter series is a perfect example, since there are already plenty of projects available on communities that you can use as a reward to encourage them to keep reading. But that doesn’t have to be the end of 3D printing for English – war poetry could link in with 3D printing a tank or a spitfire, for example, which can then lead into explaining history, engineering and so on.
Maths: If you’re already a 3D printing enthusiast, we probably don’t have to explain how maths can come into many types of 3D print projects! If you’ve got younger children you might cover shapes and measurements, and older children can use their 3D print project to practice working through bigger calculations such as ratios.
Science: Like maths, it is pretty clear already how your 3D print projects can cover lots of science. There’s plenty of scope to demonstrate theories from physics with 3D printing, and with the right type of project (such as the skeleton project we detail below) there are plenty of ways you can cover biology too. If your child has had difficulty understanding tiny concepts such as atoms, elements and compounds or other areas of the chemistry curriculum, you’ll find plenty of 3D print projects to aid their understanding.
History: While you’ll probably want to combine 3D printing projects for history with other subjects, there are plenty of cool projects that you could do with your children to encourage their learning. If they’re studying ancient civilisations such as the Greeks or Romans, you might print a model of the Parthenon or the Colosseum, while British history provides plenty of options. Viking longboats, models of historical sites – there’s plenty to inspire those prints, especially if you’ve got the design capability.
Geography: When studying planet Earth, there is a lot of scope for working with 3D prints. 3D print a globe, help children understand map contours, river or coastal landscapes as well as understanding environmental issues and the weather. There’s loads of opportunity for teaching across different subjects with many of these types of projects, as well as being able to teach moral issues such as why littering is a bad thing.
Art and design: This one goes without saying really – in fact, this might be the place that we’d start working on 3D print projects! We’d start by getting youngsters to draw their own toy – whether that is a monster, something from Minecraft, Pokémon or whichever current cartoon is their favourite. Then, (depending on their age) we’d show them, or encourage them to use whichever 3D design package you have to create the print files before printing it. For older children, the possibilities are endless.
IT: Learning how to use CAD or design packages is just one aspect of IT that you can encourage them with. If you’re using open source software for your 3D printer, then there’s a good chance you’ll be a fan of other open source packages – and with that, there’s much more to learn that can help advance their IT knowledge. There’s loads of opportunity to learn coding alongside those 3D printing projects too, which is a requirement at most schools – so getting them ahead is only going to be a benefit in the long run.
Music: Of course, you’re never going to create a Fender Stratocaster (that’s a guitar for those of us that are better at listening to, rather than playing music!) or an instrument that would provide the same quality of sound as a traditionally made instrument. But there are plenty of projects that are available to create musical instruments with your 3D printer, whether they are full size or models. There’s also plenty of ways to design and print their own unique instruments – and who knows where that might lead! We should mention though that if you’re creating musical instruments with your children, you might want to have earplugs handy….!
PE: While you can probably come up with all kinds of ways to get children moving without additional 3D printing projects, having projects that teach maths and physics and then get them running around or active in other ways is absolutely no bad thing in our opinion! There are all kinds of 3D prints that would work for encouraging exercise and play as well as learning more academic concepts – or linking it to their favourite book, in the example of the Harry Potter series! If they’ve got a bit attached to the TV or their games console, search for print projects that are linked to their latest obsession that can help to get them moving.
RE: Perhaps one of the subjects that many parents are less concerned with their children succeeding in, it is still part of the curriculum, and offers 3D printing enthusiasts loads of options to print. Check out 3D printing communities for projects to print your own religious items, such as models of Buddha, angels, models of places of worship and items that are used in worship. Don’t forget to talk about the need to be respectful of different religions and items that are used by followers of different faiths.
Where to find beginner projects
Once kids have caught the bug for 3D printing (as you probably already have yourself, if you’ve invested in a 3D printer at home!) then they’re going to have all kinds of ideas for things to create with your 3D printer. Before they have mastered how to use CAD packages, it is often simpler to spark their imagination and get them started using files that are already ready to go to print.
As we’ve mentioned before, there are loads of places online that have files available to use for free, with instructions.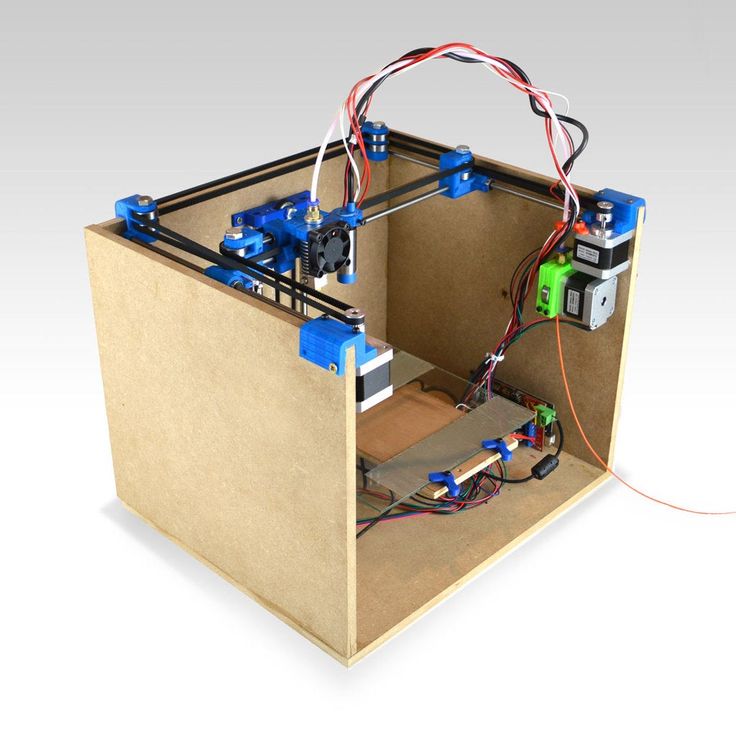 Here are some of our favourite places to search for simple and beginner level projects – with many of these being ideal for kids, as long as you’re supervising the print! If you’ve been 3D printing for a while, we probably don’t need to tell you about many of these resources, but we’ll cover some of our favourites here.
Thingiverse has an absolutely massive community of 3D printing enthusiasts, and a wide range of projects to download and print for free.
MyMiniFactory has 3D print designs that have been created and uploaded by users of their community. Some of these are chargeable though, so keep a close eye on the projects your children are picking!
YouMagine is a full of projects that cost nothing to download, which is ideal when you’re starting out and don’t want to spend a lot.
PinShape offers a wide range of free and paid designs to download, with many of them particularly high quality, with technical information that allows you to get your project printed quickly.
GrabCAD has some free to download projects that are ideal for first-time 3D printers.
If you’ve got a child that wants a project to adapt to their own specifications, then Repables has projects that are uploaded by anybody. That means that the quality of some of the projects may not be as high as on other platforms, but could be perfect for learning more about how to edit and adapt.
Educational 3D printer projects for kids
While there are loads of potential projects to find for yourselves on the 3D printing communities, and can create your own curriculum or project list through the summer, or to support learning through lockdowns, we thought we’d find some great projects as examples. We think some of these are fun enough to want to do for grown-ups too!
Elastic band powered glider
Creating an aeroplane that can actually fly is a great little project – especially if you’re jetting off on a holiday any time soon! Once you’ve downloaded the files and 3D printed your plane, you simply need an elastic band to make this project take off.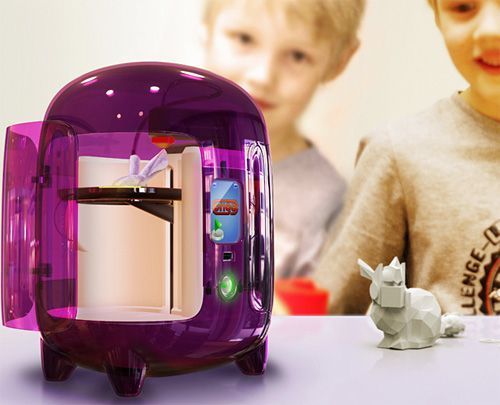 Head out into the garden, or if your garden is on the smaller size you might want to head for the nearest big (and empty) field for a walk to test your creation. The last thing you need is broken windows, after all!
With this project you’ll be able to help kids put theories of angles and motion into action, and if you are able to measure how far the plane can fly, you’ll be able to help them understand distance as well. If you’ve got older children, you’ll be able to teach them about speed, and cover the speed = distance / time equation, which they’ll need to know for GCSE science. If you’re heading out on a windy day, you’ll be able to explain the impact of the weather on how the plane flies, depending on which way you aim the plane.
There are absolutely loads of variations of this type of project that can be found, so if the one we’ve linked to doesn’t suit your needs, you’re bound to find one that does on one of the 3D printing communities.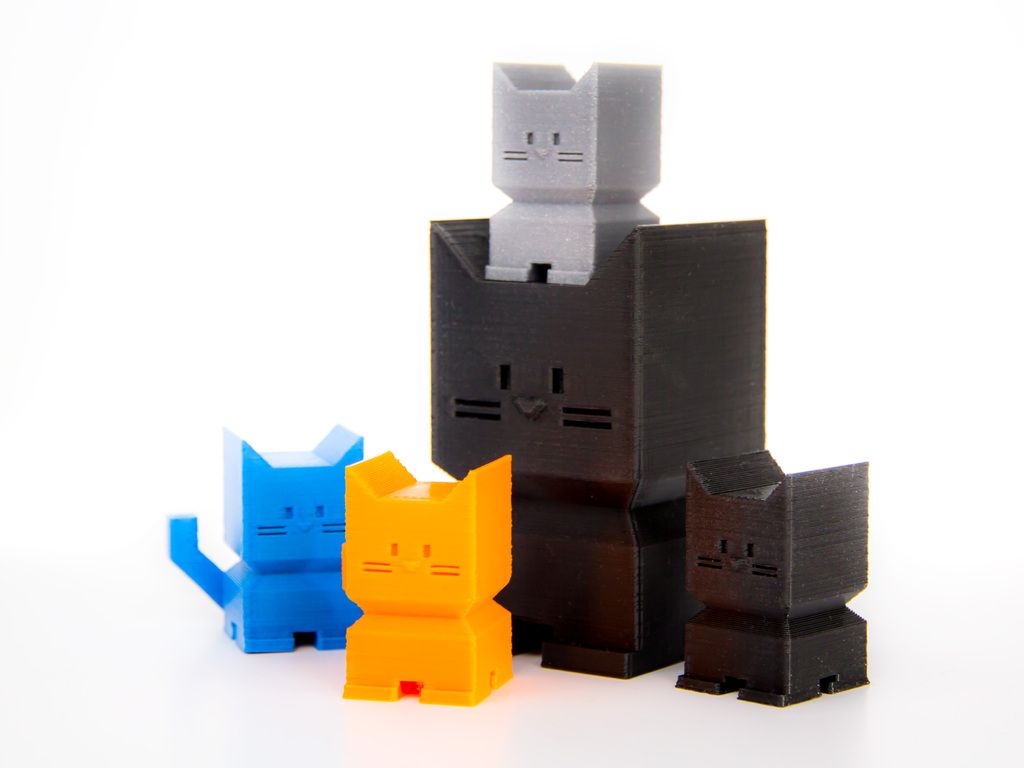 There’s a hidden bonus for tired parents with this project too! Not only will you have loads of fun seeing how far the plane can actually go, you’ll also be able to tire the children out as they run back and forth chasing it.
Suggested age range: 6+
Teach kids about: Angles, motion, elasticity, distance, speed, weather (physics, engineering, mathematics, geography)
Files available here.
3D cube puzzle toys
This project is a much simpler one that is suitable for younger children to play with when they’re a bit more advanced than playing with simple blocks. While this project probably isn’t going to hold too much interest for older children, 3D cube puzzle toys have endless combinations, helping little minds learn about geometry and engineering concepts from a young age.
If you’re a grown-up fan of building blocks and Lego, you might print this toy at a smaller scale for your desktop – we fancy it on ours for those long Zoom calls!
Suggested age range: Age 3+
Teach kids about: Basic geometry, balance and engineering concepts
Files available here.
Bottle rocket launcher
We recommend this type of project for when it’s a hot sunny day and the kids want to play with water in the garden. Essentially pumping air into a bottle with water, in this project the print is simply to create the housing for the launch pad and nozzle. You can use an air compressor, or keep it low tech using a bike pump.
You’re going to be teaching children about pressures and forces in this project, and if your child is really into rockets and going into outer space, there is a whole section on the NASA website about rockets that you might find useful – and there’s a variation on the bottle rocket launcher project using other materials here.
While this is a great project for combining fun and understanding science, is also a great one to teach them how important safety measures are! If you’re going to tackle this project and the fun that can come from it, we strongly recommend the use of safety glasses, in case any parts fail or end up flying in the wrong direction.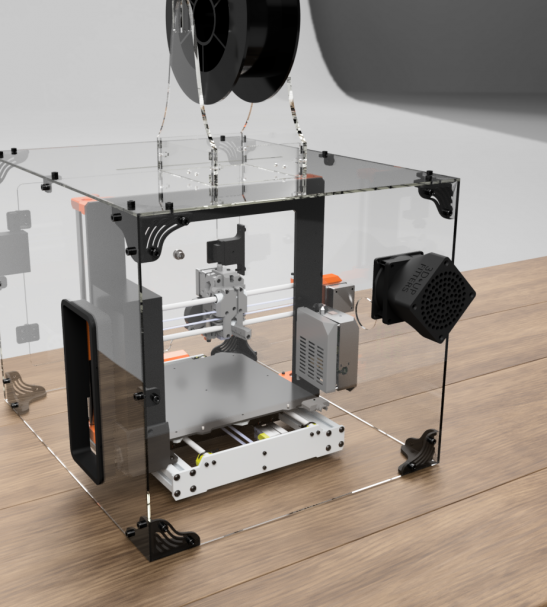 And finally, it should go without saying that children should never be left unsupervised with this type of setup.
Suggested age range: Age 7+ (supervised)
Teach kids about: Pressure, force (physics, engineering, mathematics)
Files available here.
Spinning tops
There are very few adults that can say that they never played with a spinning top as a child – even if it was just one that they had out of a Christmas cracker! However, spinning tops are great for teaching balance and motion, and if you want to do a really thorough lesson, you might also print a spinning top that is unbalanced, to show how spinning time is impacted.
If you want to make this project last a bit longer and touch on more points, there’s a great lesson plan suitable for children age 8 and up here that gets children creating their own spinning top from household materials that could work well as a secondary project.
Suggested age range: 3+
Teach kids about: Energy, motion, force, engineering design, mathematical concepts (physics, engineering, mathematics)
Print files and instructions available here.
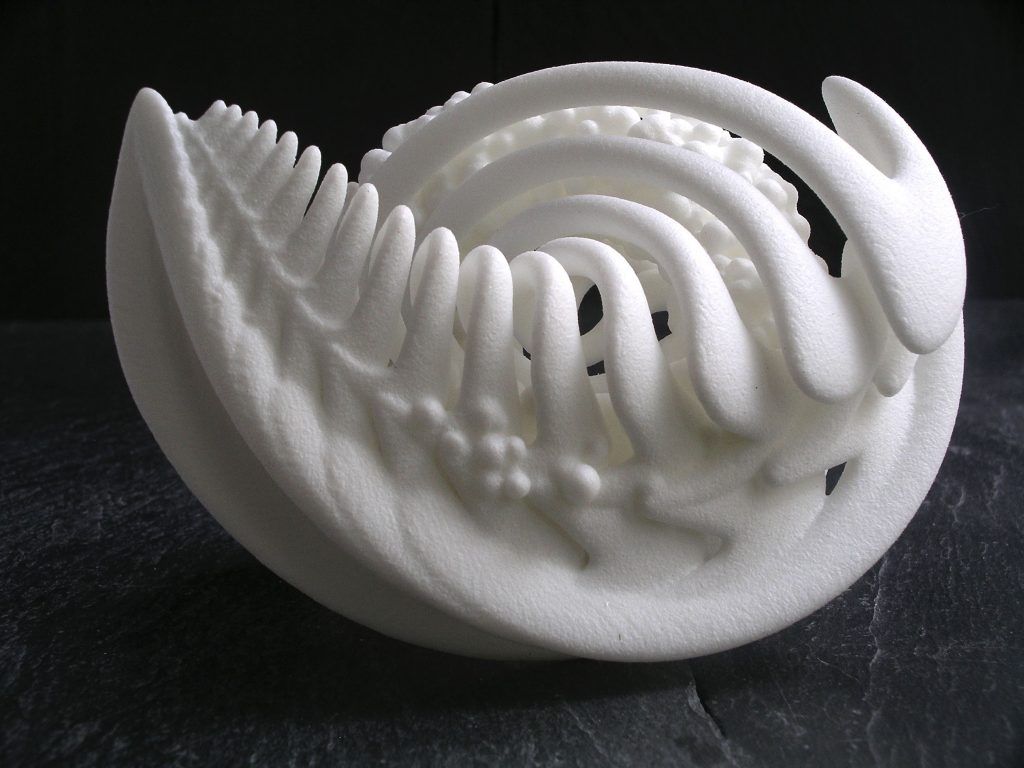
3D print skeleton
Spooky, scary skeletons aren’t just for Halloween decorations (although this project would be absolutely brilliant to do in October too!) they’re also perfect for teaching children about what is under their skin! This project is great for children who are curious about their own anatomy, but also for older children who need to learn the names of bones for their GCSE or A-level exams.
Since this particular project involves printing multiple parts that are designed to come apart and snap together, you’ll want to keep those parts away from small children.
Suggested age range: 7-8 years +
Teach kids about: Biology
Files and instructions available here.
Maths spinner
Learning how to add, subtract, multiply and divide is much more fun – and memorable – when there is a toy involved! This rotating maths spinner isn’t high-tech, but is great to help younger children learn their number bonds from 1 to 10, and remains relevant as they move through primary school and are learning times tables and division.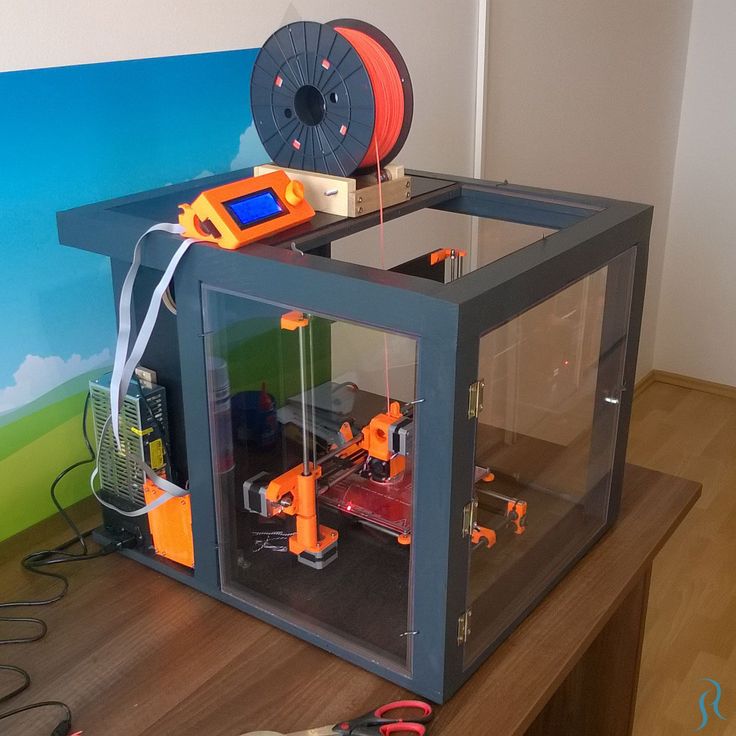
This type of rotating maths toy is available to buy in loads of places online that you can buy toys, but having their own version 3D printed in the colours they love, while they wait means they’re more likely to actually reach for the toy. And frankly, having Mum or Dad print something to help them with their maths sounds like the sort of memory that many kids would love to have – even if they decide they don’t like maths in the long run.
Suggested age range: 3+
Teach kids about: Adding, subtracting, multiplication and division (primary school mathematics)
Files and instructions available here.
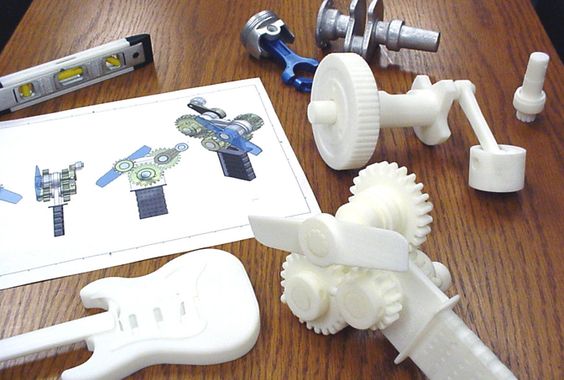
Jet engine
Children that are interested in (or obsessed with – let’s face it!) engines or aeroplanes will absolutely adore learning more about how jet engines work. Since it isn’t easy to get children up-close and personal with this type of engine, (particularly during COVID-19 lockdowns!) having a 3D printed model of one can help children understand exactly how they work.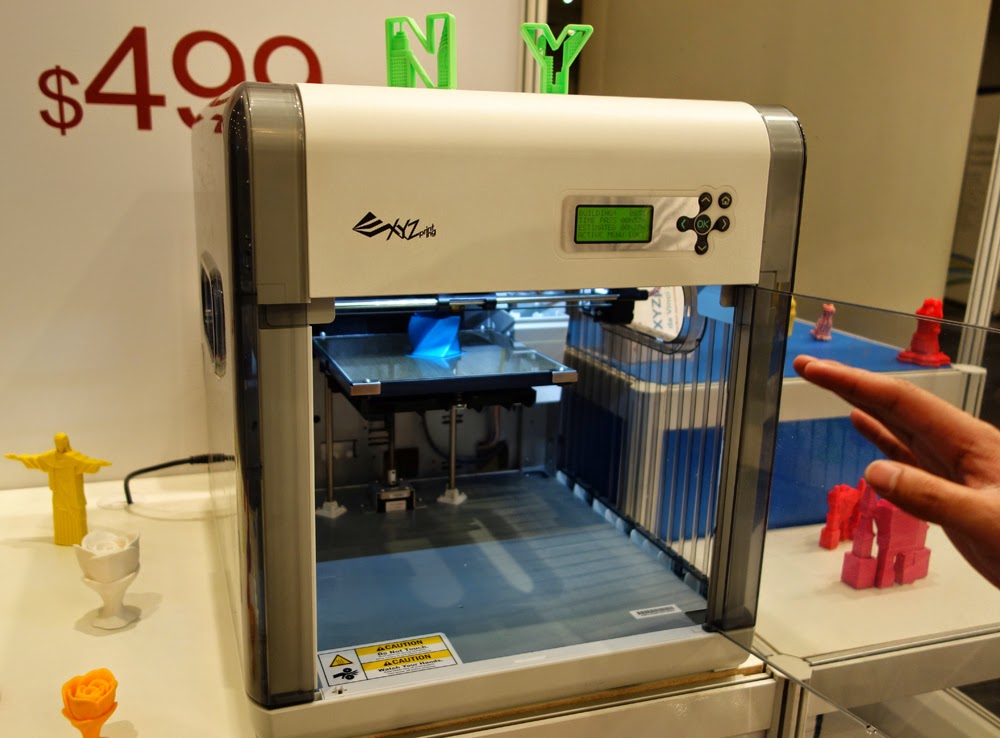 If you’re heading off on holiday on an aeroplane, why not make a lesson part of it? This Aviation for Kids mini course would be a great way to deflect their attention from their holiday countdown.
There are loads of ways to combine this jet engine print and lesson with all kinds of other cool stuff from the world of engineering and physics – or move into the history of jet propulsion and other types of transport.
Suggested age range: 6+
Teach kids about: Engineering, physics, mathematics
Files available here.
Harry Potter projects
There’s more time than ever during lockdowns and summer holidays to read, and Harry Potter is still one of the most loved series of books for children. We applaud anything that helps to get children reading more, and you might use this Harry Potter wand project as an incentive to get on and finish that book they’re going slowly with.
Need another incentive to keep them reading? Well, there are quite literally hundreds, if not thousands of Harry Potter projects for 3D printers across different 3D printing communities.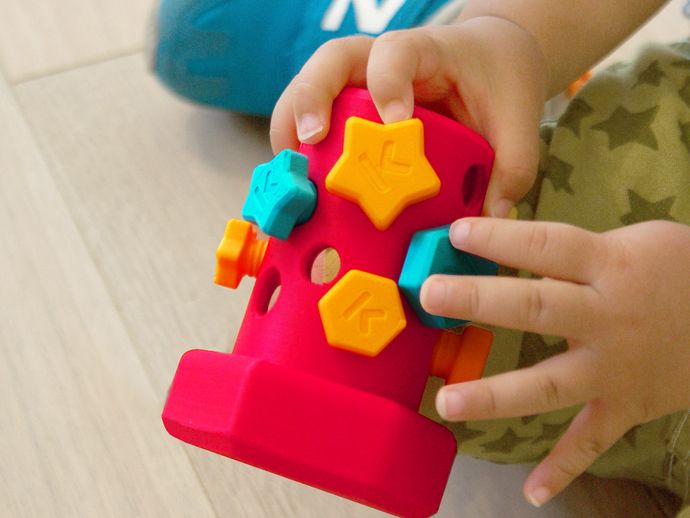 We think this Deathly Hallows inspired wand holder would be a fantastic addition to a bedroom, and this Harry Potter bookmark would be a great reward for reading regularly over the course of a week or so. If you’re trying to work Harry Potter into the whole curriculum, you might try these cookie cutters for baking, and a golden snitch for playing quidditch in PE!
Although some of the later books as Harry and friends get older are darker and more intense, once a Harry Potter fan, almost always a Harry Potter fan, we think!
Suggested age range: 7+
Teach kids about: Almost any part of the curriculum can benefit from a little Harry Potter magic!
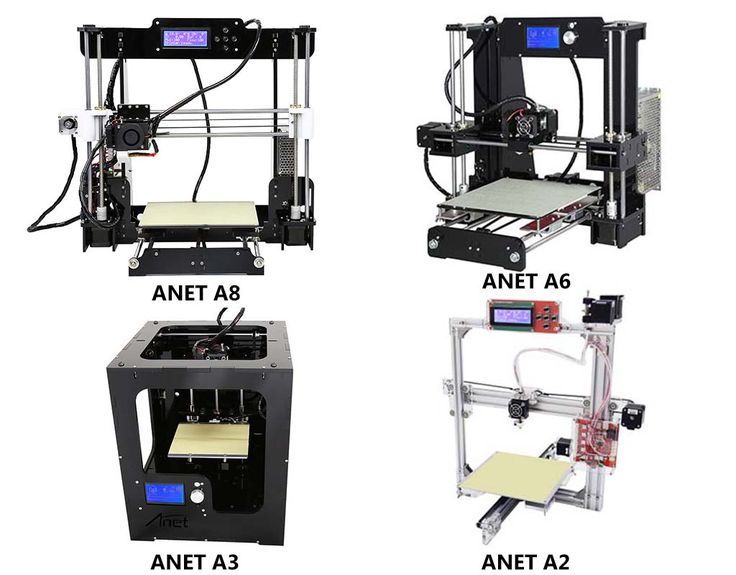
Build a 3D printer
With a desire to make, there might come a point at which your children want their own 3D printer. Rather than buying another item, why not inspire them to create their own? This project is really low budget, and uses recycled parts, so is not only low cost, but also a great way to show them how to reduce their consumption of raw materials.
This is a more advanced project, and probably for teenagers but if your child has an interest in electronics and engineering, and they want to get to grips with building their own machines this one is a good one. You’ll need a stash of old items that they can use to make it, or have access to second hand items. The best thing about this project? They get to create even more stuff with their new, self-built 3D printer!
Suggested age range: 12 upwards
Teach kids about: Electronics, engineering, computing, coding,
Files available here.
Get them to design their own 3D print projects
If you’ve got an older child, or one that is particularly creative, get them started designing their own print projects in 3D. Autodesk’s Tinkercad is a great design tool that is easy to use, and can be used for 3D design, electronics, and coding. For kids who are obsessed with Minecraft (and there are plenty of them!) there are options for doing Minecraft modelling, as well as designing with bricks and Lego.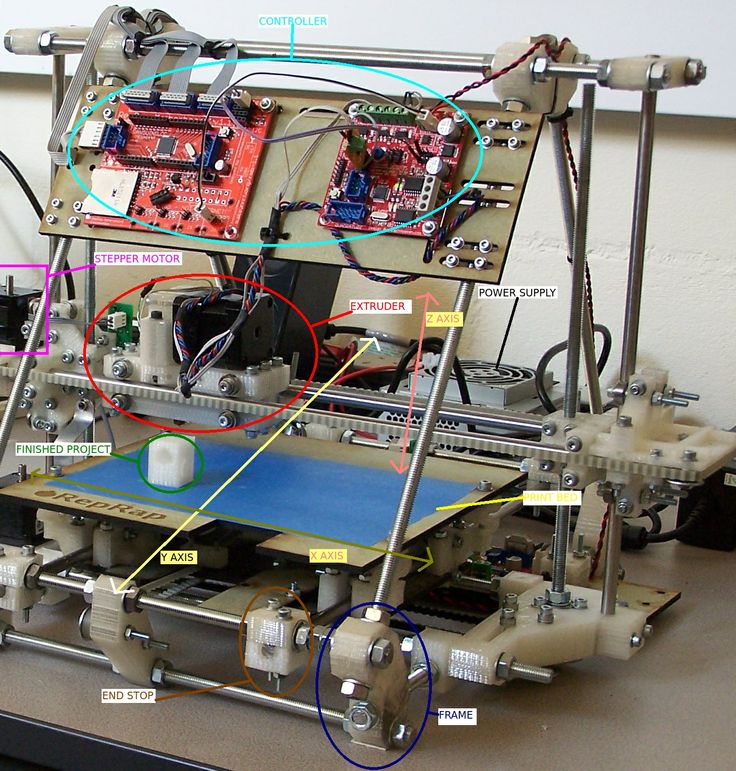 There are no downloads, and it can be used on tablets or PCs – so once you’ve got them signed in with an account (you can sign up with a Google account) it really couldn’t be easier to keep them engaged.
If you don’t want you children on your PC, getting them a very inexpensive PC like a Raspberry Pi is a great way to get them designing and working differently. We’re assuming you’ve got access to a 3D printer if you’re this far into the post – in which case, a great first project is for them to 3D print a case for their Pi! These little but powerful PCs are great to work with, and since they run most types of open source software, you can have them using open source 3D printing packages such as MatterControl or FreeCad.
Suggested age range: 10 +
Teach kids about: Almost anything – but mostly design, computing, coding
3D designs with robotics
If your children are already on board with the 3D printing projects, you can take it up a notch and get them to add robotics in.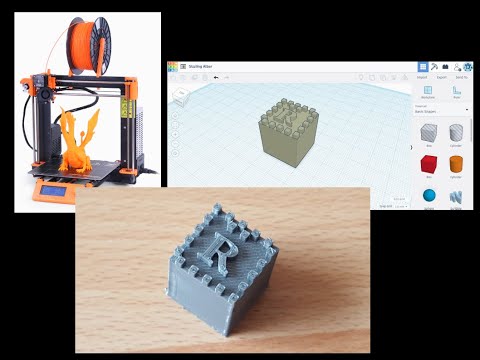 Creating a robotic arm that is controlled with Arduino software (open source software) might not be the most straightforward of projects, since there are electronics and coding required. But with the right settings, it might just be a long-term challenge that you and your child can focus on together.
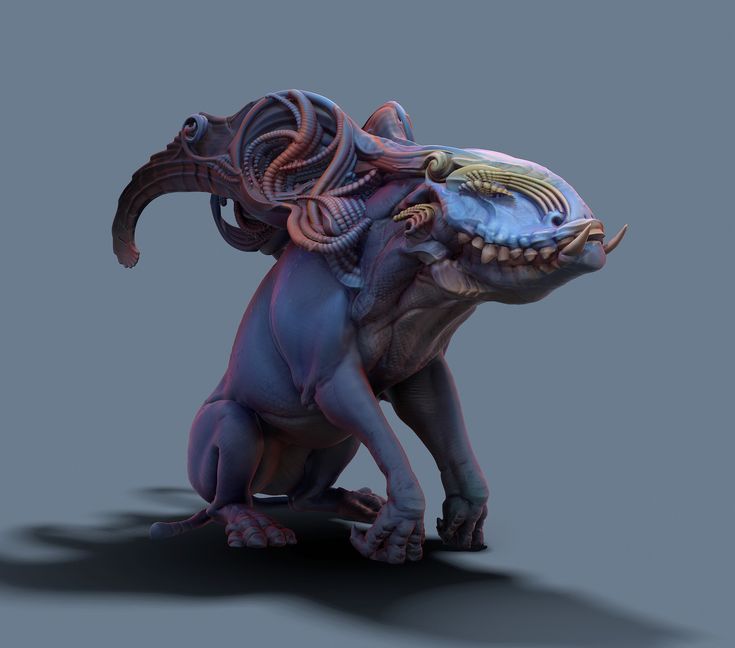
If a robotic arm isn’t quite your thing, how about a robotic animal? As with all types of 3D printing projects, there are plenty of options to get your children involved in, but this robot snake is a great option. It requires printing several parts as well as the electronics, but there’s something pretty cool about being able to control a snake – especially one that isn’t going to harm you!
Suggested age range: 12 upwards
Teach kids about: Electronics, engineering, computing, coding
Useful resources for teaching children
When you’re trying to explain something to your child and they don’t quite understand it, things can get frustrating. Don’t worry, that isn’t your fault – sometimes even teachers with years of experience don’t get it quite right for every student, and it takes another person to explain the idea before the proverbial penny drops. With that in mind, don’t feel like a failure if you need to refer to another resource to succeed. Since many of us are in the same boat with home learning this year, we thought we’d mention some of the resources we refer to regularly.
We can’t talk about learning at home without mentioning BBC Bitesize. Whether your child is in their first term at primary school or they’re preparing for GCSE or A-level study (and beyond in many cases) the BBC Bitesize website has some amazing resources that follow the curriculum, and you can search for a particular topic.
This post from publishers Scholastic has 50 online resources for at-home lessons in almost all subjects, so if you’re stuck with what to teach them in the summer holidays, or you’re searching for a way to demonstrate a concept, you’re bound to find something in one of the links here.
There are (quite literally) millions of videos about all kinds of subjects on YouTube – from experts in their fields to self-taught amateurs. You’ll want to check videos for yourself before watching with the kids – unless it is from a well-known content provider. However, there is a separate section for learning-based videos, which is a good place to start.
Pinterest is another great source of inspiration and there are some amazing links to be found on there – however, after we’ve lost an awful lot of hours to Pinterest, we recommend scrolling with care, since you can lose a lot of time once you start pinning!
Final thoughts
Although having kids at home during COVID lockdowns can be challenging, especially if you are attempting to work from home at the same time. But having projects that they can work on alongside you, that are fun and still educational will help them learn those valuable lessons and give them memories that will last forever. Who knows, they might even inform their future career choices and you could have a talented designer or engineer on your hands as a result of this type of project!
If you’re in need of materials for projects with your children, be sure to check out our range of materials. If you’ve been inspired by the projects in this article, tag us in your social media posts – we’d love to see your work!
Facebook: @hobartsgroup
Twitter: @hobartsgroup
Instagram: @hobartslasers
Top 10 3D Printer Projects to Try at Home
3D printing is at the forefront of innovative teaching and learning. It has numerous benefits for kids, and not just because of its technology. 3D printers for kids build confidence, promote hands-on learning, and make learning fun. If you’re looking to engage your kids at home with fun and fulfilling learning opportunities, keep reading to learn more about why 3D printers are so beneficial and for some of Makeblock’s suggestions for 3D printing activities you can do at home.
When kids realize they can design and print something, they feel successful. 3D printers for kids allow for unlimited creativity and experimentation, so kids can design at their level and build their skills over time. But even beyond the growth of confidence that comes from creating objects, kids also find themselves feeling more confident because of what 3D printers can provide for them. Students with certain physical disabilities may find that 3D-printed prosthetics and tools make their lives, and their learning, much easier.
When schools integrate 3D printers for educational purposes, kids learn by doing. This is a huge step up from pencil and paper learning, which doesn’t work for every student. Some kids learn through hands-on, kinesthetic activities. 3D printers are perfect for these kids because they get to design objects that they can then manipulate and use. This makes information adaptable for students with different learning styles and abilities.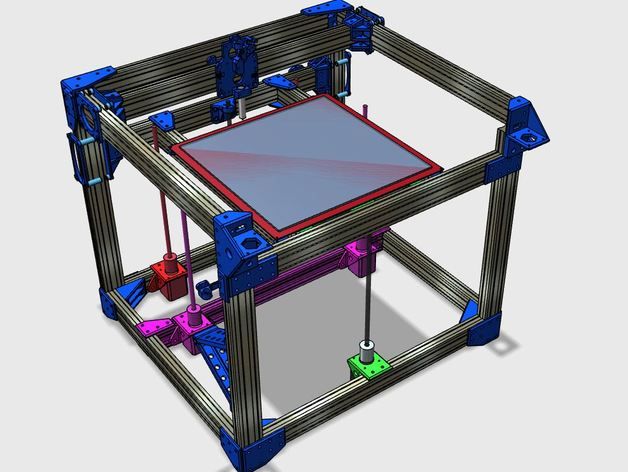
3D printers for school make learning fun. 3D printing tasks may seem challenging, but they’re engaging for kids as they learn to use their innovative and problem-solving skills. Plus, 3D printing feels different from more traditional learning. Students pick up concepts and skills, but they gain this knowledge through experiences that apply to their everyday lives.
Top 10 3D Printer Projects to Try at Home
1. Survival Whistle
A great activity for 3D printing for kids is one that has important, practical uses in their everyday lives. A survival whistle is an example of a tool kids can design, print, and might actually need one day. For this project, kids will be creating a whistle that is sturdy and has practical use for camping or sporting events. You can do some online research with your kids on how a whistle works, and, through trial and error, design and print one that’s successful, or you can use a design template like the one here.
This project may not be one that has survival use, but it’s certainly practical. When earbud cords get tangled, it can affect their sound quality. Helping your kids design an earbud case is a great way to engage them in digital design and technology, all while allowing them to come up with a creative way to keep their earbuds working properly. Here is the instruction for this earbud case.
3. CarabinerCarabiner clips are pretty neat tools that are used as connectors. For a child’s 3D-printing project, you’ll want to help your kids create one with two parts: the hook and the working hinge. Here’s a great example of a template for one that’s pretty sturdy. A word of caution, though: while climbers often use carabiners to support their body weight, you don’t want to try that with a plastic, 3D-printed one! But your kids can still use it for attaching something like a water bottle or tools to a belt loop.
A lot of pencil holders just look like cups, and you could help your kid create one like this with 3D printing. But you could also really let their imaginations run wild with this one. A pencil holder can take practically any shape, as long as there are holes in it for holding a couple of pencils and pens. Guide your kids to measure the ideal diameters of individual large or small holes, and help them make sure the holder won’t tip over. You can find the instruction for this pencil holder here.
5. BowlFancy bowls can cost a fortune. Not so with ones you get from 3D printing! The option for bowls is pretty endless when you have a 3D printer. Start by asking your kids what they want to hold, and remember that bowls aren’t just for food. Once they have a goal in mind, they can be innovative and create some neat designs to replace what’s usually a pretty generic household object. Here is the instruction for this 3D printed bowl.
If your kid loves technology and electronics, you’ve probably encountered the mess of cords that result from all the chargers and cables. Set this project up as a problem-solution: the problem is that the cords get tangled, so what can they 3D print as a solution? The easy answer is a cable holder, but with some trial and error your kids will experiment with how to create one that’s truly effective at holding cords in place. Find the instruction for this cable organizer here.
7. Fidget SpinnerFidget spinners have become a popular way to help people focus, and kids tend to love them. Think about how much more they’ll love one they create on their own! It’s probably easiest to start with a template for this activity, so check out a preliminary idea and supplies here. Once your kids have the basics down, they can get a little more creative with the design.
8. Sliding Chip ClipHere’s another children’s 3D-printing project that has practical use. Need a way to keep that bag of chips closed? Help your kids create a sliding-style bag clip that can seal up a bag with less mess. This type of clip works by sliding the chip bag between a long, thin cylinder and a piece that wraps around it. You could design it in two pieces, or cleverly in just one, but either way it will take some careful measuring and creative thinking to get it just right. Here is the instruction for this 3D printed chip clip.
This fully functioning robot arm, which can be controlled with Arduino software, might be the most advanced project on our list, but don’t let it overwhelm you or your kid. It’s a great long-term project for 3D printing and robot enthusiasts! You can find all the parts and supplies needed, plus some videos for inspiration and guidance, here.
10. Robot
Can you 3D print a working robot? Yes, you can! Your kid will need to design and print several components, and you’ll need a few extra supplies for the electronics, but this is a great, longer project for a kid who’s ready to embrace a challenge.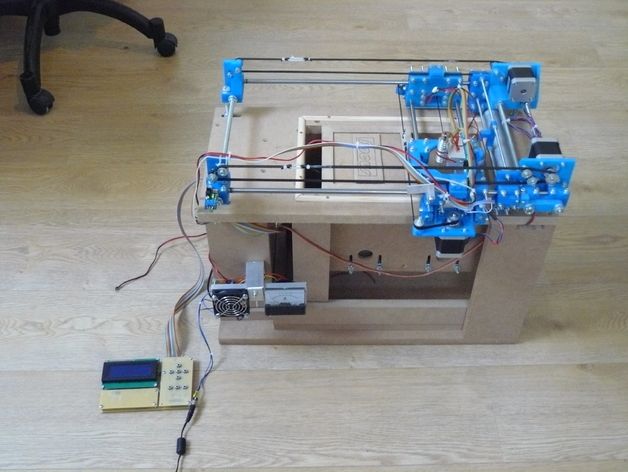 Check out these instructions for how to create a super-neat snake robot.
If you’re looking for a great option for at-home 3D printing for kids, look no further than the Makeblock mCreate. Because it isn’t very large, it will be easy to fit into your home’s existing “creative space,” and it’s easy to use, accurate, and has tons of options that will keep your kids busy and learning.
You can trust Makeblock to create products that produce amazing designs. With mCreate, you’ll know that your kids’ designs will print well, so they can enjoy it without worrying about print defects. Your kids will also enjoy mCreate’s versatility. It can print in a variety of materials, and it can also work as a laser engraver on paper, wood board, fabric, and plastic.
The great part is that while your kids are having fun creating and printing an assortment of objects, they’ll also be building their confidence, learning about design, and enhancing life-long skills, such as creativity and critical thinking.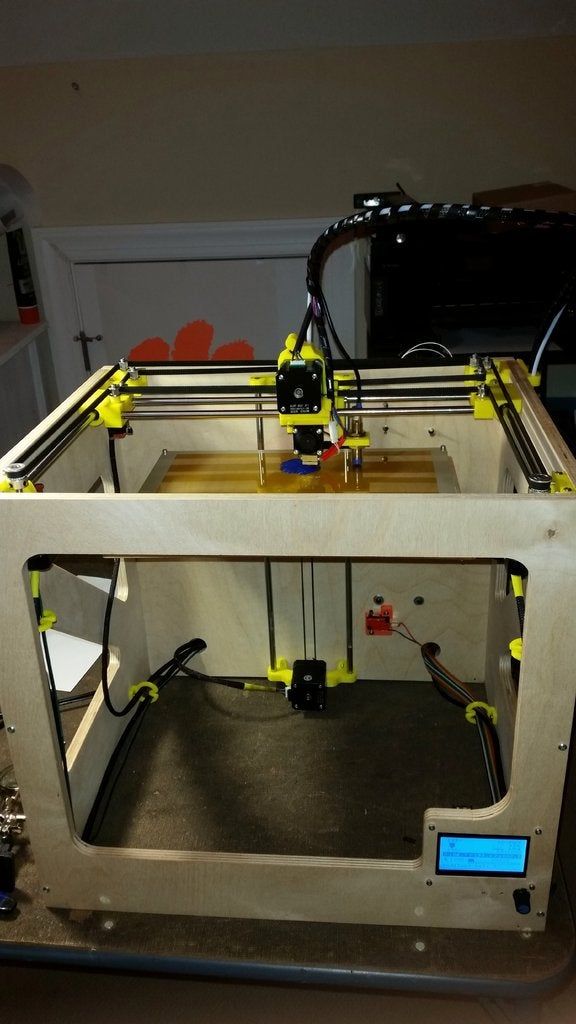
If you’re an educator, the mCreate is also a great option for 3D printing for schools. With 3D-printing tools available to them, teachers will be able to appeal to multiple learning styles and levels, helping make learning easier and more fun for all students. Don’t be intimidated by the 3D printing trend. With a great 3D printer and a few ideas for 3D printing for kids, you can bring all the benefits of 3D printing into your home.
CHOICE Rules and Actual Models
Content
-
- Why a child needs a 3D printer
- Benefits 3D printer
- Criteria for choosing a 3D printer for a child
- TOP 3D printer for children 8-12 years old
- 5th place - Wanhao Duplicator I3 mini
- 4th place - Anycubic Mega-S
- 3rd place - Anycubic Photon Mono
- 2nd place - FlashForge Finder
- 1st place - FlyingBear Ghost 5
- Top 3D printers for 12-18 year olds
- 5th place - Creality3D Ender 3
- 4th place - Phrozen Sonic 4K
- 3rd place - Wanhao Duplicator 6 Plus
- 2nd place - Flashforge Adventurer0 3 905 905 - Anycubic Mega Pro
- Accessories and spare parts
- COLLS
- Glue
- Drying Plastic
- Post -cutting
- Summarly
Many people have heard about 3D printing, every day you can see the news that scientists have been able to print a kidney, a house, a spacecraft and almost anything. Because of this, 3D printing seems so far from ordinary life that even the thought of using a 3D printer personally arises. But this is a long-standing misconception: almost everyone can afford to buy a 3D printer and learn how to use it. Many schools already have an "Engineering Graphics" class, in which children are taught how to work in 3D modeling programs.
Why a child needs a 3D printer
Indeed, many of the activities of children pass from generation to generation: mathematics, drawing, football, carving and others. So why give a child something seemingly difficult to learn. First, as mentioned above, 3D printing has become easier than ever: it is often enough to press one button and after a while get the finished part made on a 3D printer. Secondly, any hobby starts small: you can’t become an artist without starting with sketches in a notebook, you can’t become a biologist, despite the bugs and ants. It's the same with 3D printing: you can't become a good engineer without working with technology. It is the 3D printer that will be the first step into the world of engineering and even art sciences. In general, understanding the principles of operation of 3D printers and CNC machines allows you to open a huge range of specialties that may interest your child. Thirdly, a 3D printer can be an addition to the main hobby. You don't have to be fully versed in the world of 3D printing to use a 3D printer as a tool. For example, if your child is building models, then a 3D printer would be a great addition, as it can print extra parts or entire build kits.
Benefits of a 3D printer
In addition to the above educational benefits, a 3D printer also has a utilitarian purpose. For example, with it you can print those things that you can’t get in other ways. Let's say you have a broken hardware mount in the car. It is quite rare to find such a part for sale. And your child will be able to make a model and print it, maybe even improve it. Also, a 3D printer can be used to make gifts: maze boxes, vases, figurines, and even paintings! The scope of fantasy is limited only by the imagination of the child and the capabilities of a 3D printer. Therefore, it is important to choose a 3D printer that will not limit the child's imagination. How to do this will be discussed further.
Criteria for choosing a 3D printer for a child
It should be understood that different printers have their pros and cons, that is, there is no perfect printer. Therefore, it is necessary to choose the appropriate model based on the preferences of the child. The main characteristics of any 3D printer are: 3D printing technology, print area size, maximum table and nozzle temperatures. The rest of the characteristics will simply change the printing time or the list of plastics that can be used. But the most important thing will be security, or rather openness. Older children can be given a printer that has more functionality and features, but it will require more care. And it is better for small children to give a simple and understandable printer, albeit with fewer features. The best 3D printer models for different ages will be outlined below.
Top 3D printers for kids aged 8-12
This age category includes entry-level 3D printers. Their purpose is to show the child what 3D printing is and how to work with it. They have some limitations, but are easy to use and maintain. This will allow the child to independently engage in them with minimal help from adults.
5th place - Wanhao Duplicator I3 mini
This 3D printer has established itself as a reliable entry-level device. The kit comes with everything you need to start printing out of the box. The absence of a heated bed reduces the risk of burns, and it also allows you to safely set up the table during printing. You can print with any materials that do not require heating of the table (PLA, SBS and others). Best choice for 8 to 10 years old child.
Key Features:
- Print Technology: FDM/FFF
- Printing area: 120 × 135 × 100 mm
- Maximum extruder temperature: 260 °C
- Maximum table temperature: without table heating
- Print travel speed: 10-70mm/s
Pros:
Cons:
4th place - Anycubic Mega-S
The Anycubic Mega-S is a classic first printer choice due to its versatility. Features intuitive touchscreen controls, medium print area and heated bed. The latter opens up the possibility to print with more demanding plastics such as ABS, PETG, HIPS and others.
Key features:
- Print technology: FDM/FFF
- Print area: 210 x 210 x 205 mm
- Maximum extruder temperature: 260 °C
- Maximum table temperature: 110 °C
- Print travel speed: 10-100mm/s
Pros:
Cons:
3rd place - Anycubic Photon Mono
Unlike the previous ones, this 3D printer prints using ultraviolet curing resin (SLA/DLP). This technology achieves incredible precision compared to FDM/FFF printers. But after printing, it is necessary to process the model - to clean it from the rest of the resin. Therefore, when using this printer, the child must be careful.
Key features:
- Print technology: SLA/DLP
- Print area: 130 x 80 x165 mm
- Display resolution: 2560x1620 (2K)
- Print speed: up to 50 mm/h
Pros:
-
Small size
-
Accuracy
Cons:
2nd place - FlashForge Finder
Finder deservedly takes its second place.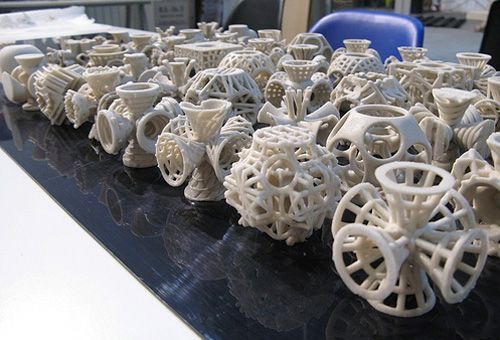 This 3D printer has outstanding reliability. This model uses CoreXY kinematics, so the print speed can reach 150mm/s. Due to its small size and body material (high-strength plastic), this printer can be easily moved: it will fit in the trunk of any car. However, it comes fully assembled, allowing you to print right out of the box.
Key features:
- Print technology: FDM/FFF
- Print area: 140 x 140 x 140 mm
- Maximum extruder temperature: 250 °C
- Maximum table temperature: None
- Print travel speed: 10-150mm/s
Pros:
Cons:
1st place - FlyingBear Ghost 5
The latest model of a 3D printer from the manufacturer FlyingBear. Just like the previous printer, FlyingBear Ghost 5 uses CoreXY kinematics, so that the speed of movement during printing can reach 150 mm / s. The X and Y axes use TMC2208 drivers, and this greatly reduces the overall noise during the operation of the 3D printer. The menu has outstanding customization functionality. Since the printer has a partially closed case, you can not be afraid of drafts when printing.
Key Features:
- Print Technology: FDM/FFF
- Print area: 255 x 210 x 200 mm
- Maximum extruder temperature: 260 °C
- Maximum table temperature: 110 °C
- Print travel speed: 10-150mm/s
Pros:
Cons:
Free Shipping
Add to compare
Product added to compare Go
| Manufacturer | Anycubic |
Free Shipping
Add to compare
Product added to compare Go
| Manufacturer | Anycubic |
Free Shipping
Add to compare
Product added to compare Go
| Manufacturer | Wanhao |
Free Shipping
Add to compare
Product added to compare Go
| Manufacturer | Flash Forge |
Add to compare
Product added to compare Go
| Manufacturer | Flyingbear |
Top 3D printer for 12-18 years old
This category contains 3D printers that border on professional, so some experience may be required to use all their functionality.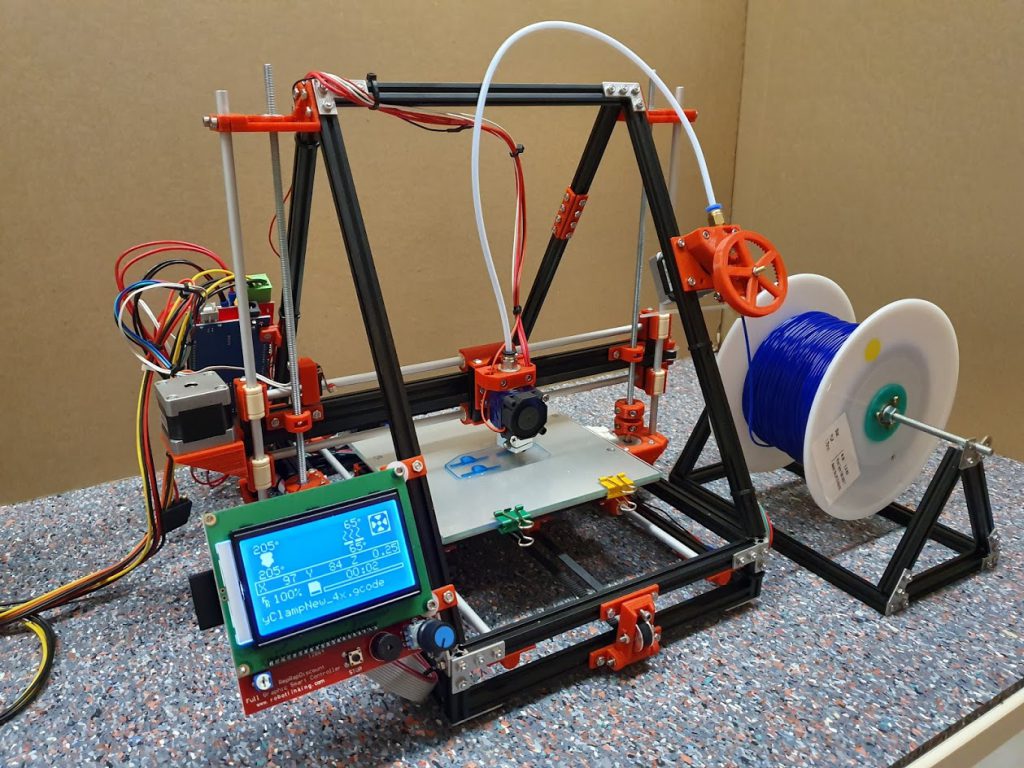 They are the next step in the development of 3D printers as a hobby.
5th place - Creality3D Ender 3
Many adults choose this 3D printer for its reliability and its ability to be deeply modified, but without them, the Ender 3 is an unremarkable printer without any distinguishing features. Comes as an assembly kit, so you may need an adult to help you get started. After assembly, the child will be able to figure out the printing process himself thanks to a large number of video tutorials and text instructions.
Key Features:
- Print Technology: FDM/FFF
- Print area: 220 x 220 x 250 mm
- Maximum extruder temperature: 255 °C
- Maximum table temperature: 100 °C
- Travel speed when printing: 10-60 mm/s
Pros:
Cons:
-
Assembly required
4th place - Phrozen Sonic 4K
Bright representative of SLA/DLP printers.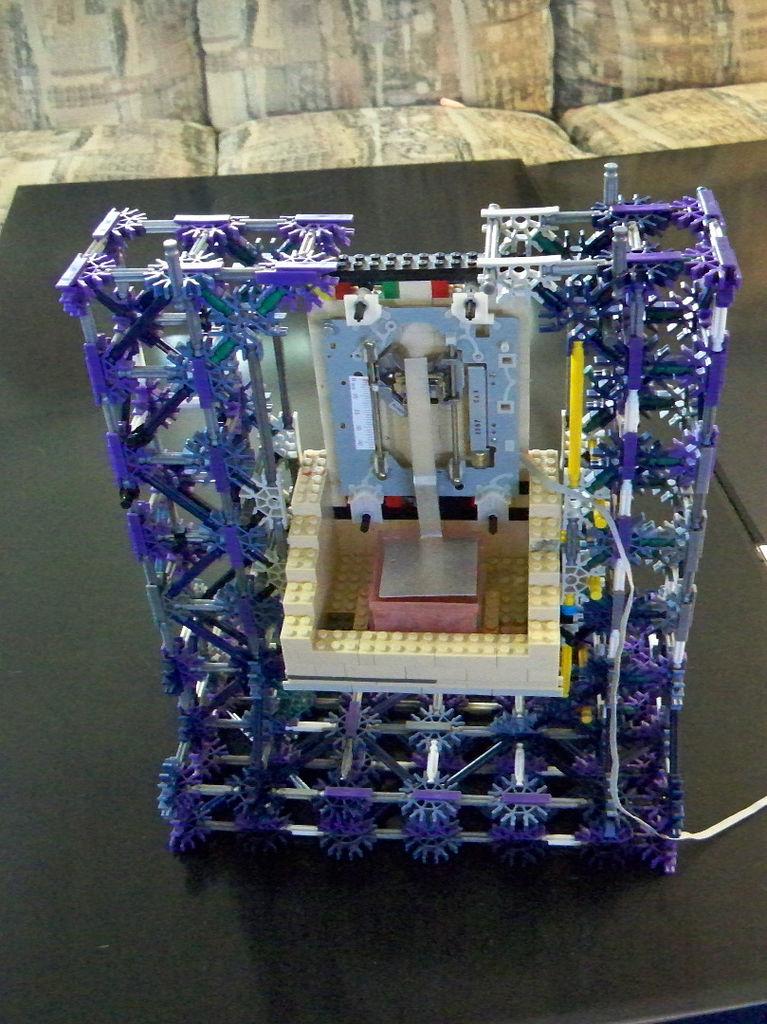 Thanks to the 4K display, this printer has the highest printing accuracy among all printers from this top. But to use this accuracy, high-quality models are needed. Also, this 3D printer has software specially designed for it, so the child will not have any difficulties when working independently with the program.
Key Features:
- Print Technology: SLA/DLP
- Print area: 134 x 75 x 200 mm
- Display resolution: 4096 × 3072 (4K)
- Print speed: up to 90 mm/h
Pros:
-
Reliability
-
Small size
-
Outstanding accuracy
Cons:
3rd place - Wanhao Duplicator 6 Plus
This printer is a modification of the beloved Duplicator 6 printer. The modification consisted in the addition of auto-calibration and the function of resuming printing after a power outage. The latter can help save a part that took many hours to print.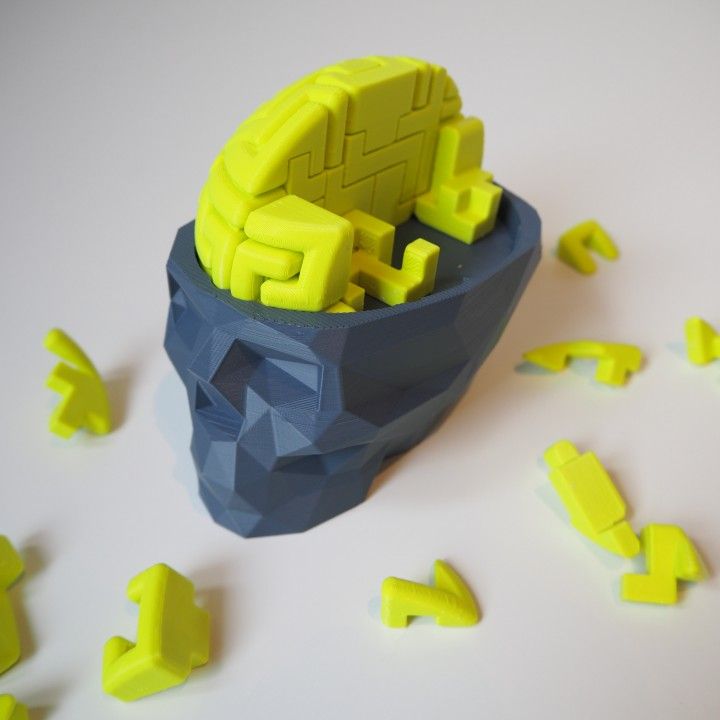 Thanks to the widespread use of connectors, the repair of this 3D printer will consist only in reinstalling spare parts, without the use of a soldering iron and other special tools.
Key Features:
- Print Technology: FDM/FFF
- Printing area: 200*200*180mm
- Maximum extruder temperature: 260 °C
- Maximum table temperature: 120 °C
- Print travel speed: 10-150mm/s
Pros:
-
Reliability
-
Ease of repair
-
strong frame
Cons:
-
Big weight
2nd place - Flashforge Adventurer 3
This model is quite close to the category of professional 3D printers. Because of this, in addition to excellent performance, Adventurer 3 has many additional features: Wi-Fi connectivity, a built-in camera that allows you to shoot amazing time-lapses, auto-calibration, a flexible removable table and a filament end sensor.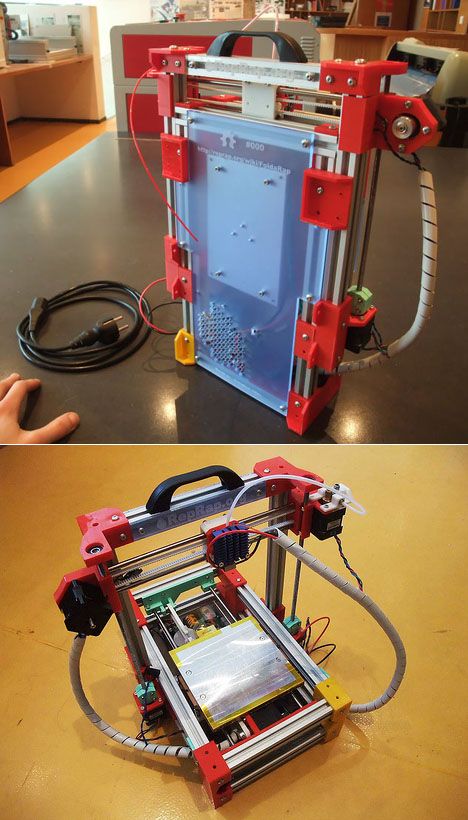 Despite its strict appearance, the printer has intuitive controls that even a child can figure out, not to mention teenagers and adults.
Key features:
- Print technology: FDM/FFF
- Print area: 150 x 150 x 150 mm
- Maximum extruder temperature: 240°C
- Maximum table temperature: 100 °C
- Print travel speed: 10-100mm/s
Pros:
Cons:
1st place - Anycubic Mega Pro
This printer deservedly takes first place in this top. It is an upgraded version of the previously mentioned Anycubic Mega-S. The most important improvements include the laser engraving module. That is, now, in addition to 3D printing, a CNC engraver will become available to you. With it, you can burn drawings and inscriptions on wood, paper and leather. Also worth noting is the auto-calibration sensor and the built-in multi-color printing function.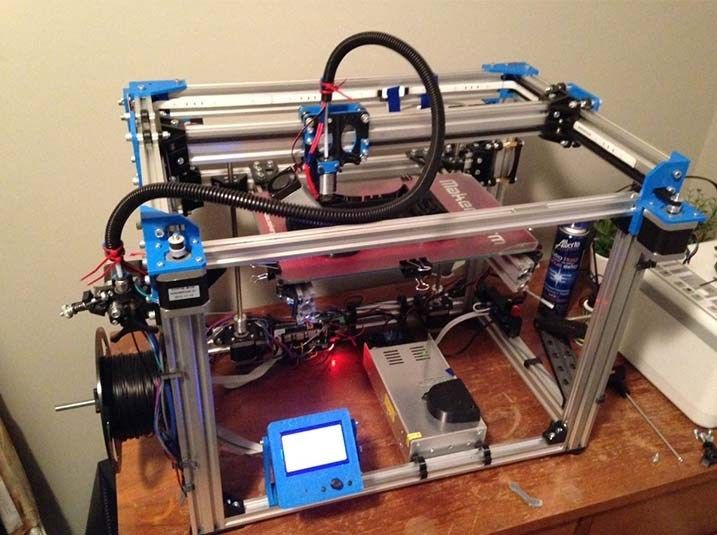
Key features:
- Print technology: FDM/FFF
- Printing area: 210 × 210 × 205 mm
- Maximum extruder temperature: 260°C
- Maximum table temperature: 100 °C
- Print travel speed: 10-100mm/s
Pros:
-
laser module
-
Versatility
-
High quality
Cons:
Free Shipping
Add to compare
Product added to compare Go
| Manufacturer | Anycubic |
Free shipping
Add to compare
Item added to compare Go
| Manufacturer | Phrozen |
Add to compare
Product added to compare Go
| Manufacturer | Creality |
Free shipping
Add to compare
Product added to compare Go
| Manufacturer | Flash Forge |
Free Shipping
Add to compare
Product added to compare Go
| Manufacturer | Wanhao |
Accessories and spare parts
Almost every 3D printer can be improved by changing some parts or using additional hardware. At the same time, sometimes it needs to be serviced and repaired. So that these actions do not take a lot of time, it is better to buy all the necessary spare parts in advance. Fortunately, regarding the cost of the printer, the total cost of spare parts will not be noticeable against its background. Next, we will look at everything you might need to repair and improve the printer, as well as accessories that make it easier to work with it.
Nozzles
The main part of the printer, on which the print quality depends, is the nozzle through which the plastic passes. Therefore, to improve print quality, you can replace the nozzle with a similar one, but with a smaller diameter. Basically there are two types of nozzles: short and long. The only difference between them is the length of the part outside the hotend. But keep in mind that manufacturers often make special nozzles designed for one 3D printer or for a model range. Therefore, it is important to choose a suitable nozzle, and only then choose the required diameter.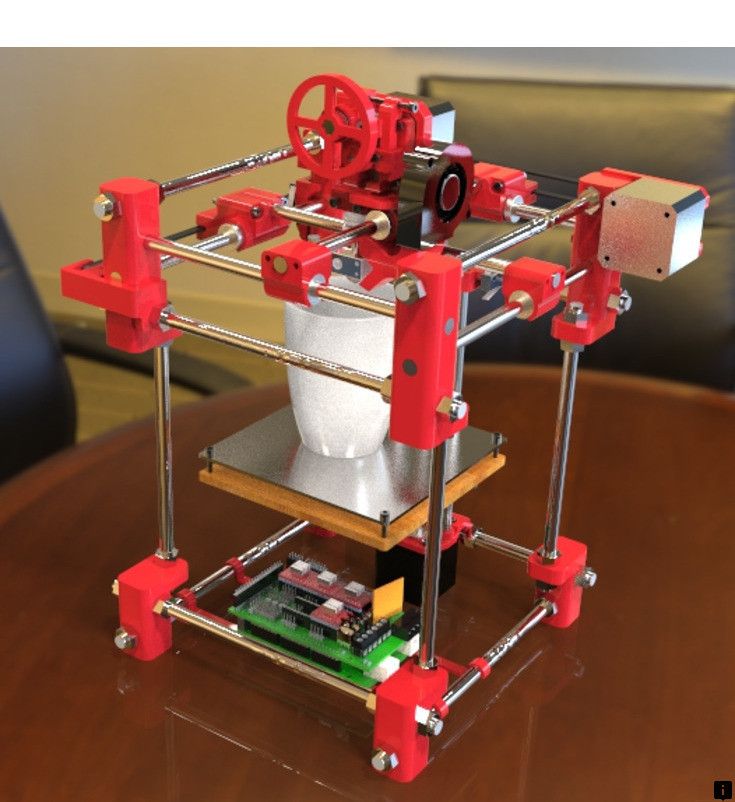 If you want to have several nozzles at once for different tasks, then it is better to take 2 nozzles with a diameter of 0.4 mm for standard tasks, 3 nozzles with a diameter of 0.2-0.3 mm for more precise products and 2 nozzles with a diameter of 0.5 - 0.6 mm to save time on models, in which do not require much precision.
If you want to print with composite plastic (for example, filled with wood or metal), then you can not do without steel nozzles. Wood and metal-filled plastics are distinguished by their abrasiveness, that is, the ability to grind off the nozzle as it is printed. Since brass is a relatively weak metal, when printing with such plastics, the nozzle is only enough for 4-5 hours of printing. Then the hole will increase its diameter uncontrollably, causing the print quality to drop dramatically.
Sometimes the nozzle will become clogged due to dust settling on the plastic. Then you can either replace the nozzle, or purchase a set of drills to clean the nozzle. To use it, you need to heat the extruder, which contains the clogged nozzle, and carefully clean it from the outside. After that, you can continue printing.
Be careful: these drills are very fragile, so do not press hard on them. If they break, you can get burned!
Adhesive
In 3D printing, glue is used not only to glue objects together, but also to increase the adhesion of the plastic to the table. The success of 3D printing depends on how firmly the model is held on the table. But some plastics do not adhere well to the table, so many printers have heated tables. Sometimes even the heating of the table is not enough, so various adhesives are used. There are many options for adhesives: in the form of a spray, in the form of a “pencil” and others. It is better to use special compounds, as they are guaranteed to be safe and work with a large number of types of plastics.
Plastic drying
Any plastic has the ability to absorb moisture from the air to varying degrees. Such plastic will give out a low quality model. Therefore, it is very important to make sure that the filament is dry. If you have a large amount of plastics, it will be very difficult to constantly dry each of them. To facilitate this task, there is ESUN eBOX. With it, you can quickly dry the plastic and start printing without removing the filament from the device.
Postprocessing
After printing the model on the SLA printer, it is necessary to remove excess resin from the surface of the model and illuminate the plastic so that it is completely cured. Some crafters use homemade UV lamps or even nail dryers. But they do not take into account the toxic fumes of the resin. Therefore, many companies have created special cameras for processing models. For example, Anycubic released their device called Wash&Cure. It allows you to clean the model without removing it from the table, thereby minimizing the likelihood of resin getting on the skin. Immediately after cleaning the model and removing it from the table, you can light the model in the same device.
Summing up
To summarize all of the above, we can highlight the best printers depending on your needs. If you want to show your child the world of 3D printing, then the FlashForge Finder 3D printer is the best choice. If a child is interested in 3D printing, but he wants something more, then FlyingBear Ghost 5 is the most suitable option. If you need a 3D printer as an addition to your hobby, then you can not do without Anycubic Mega Pro. And if your hobby needs more precision, then it's best to get Anycubic Photon Mono or Phrozen Sonic 4K, depending on the required quality. Also, do not forget about additional accessories that will help you use the 3D printer: spare nozzles, glue, a filament drying chamber and a device for post-processing parts printed on an SLA printer.
Best 3D printers for kids
This article will help you choose the best 3D printer for your child. The criterion that was used to determine these 3D printers is the age of the children. The printers discussed below will provide you with the opportunity to introduce your children to 3D printing and perhaps further interest them in engineering or a similar field.
Introducing children to 3D printers from an early age gives them hands-on experience making models to scale. Your kids will love creating their models and watching them take shape right before their eyes.
Below are only the best 3D printers based on both objective and subjective criteria, the final choice is up to you, but we will provide you with as much useful information as possible.
Is your child ready for a 3D printer?
If you have already mastered the technology of 3D printing, you must have noticed that this is no longer something from the future. It's already here. 3D printing is useful for everyday use, from smartphones to cars, jewelry to medicine and more.
Kids should be early on about 3D printing technology. And with the 3D printers below, your kids will not only learn the theory, but also get hands-on physical experience in 3D printing.
Price should not influence your decision when buying a 3D printer for a child. Instead, think about the benefits your kids will have in terms of hands-on experience using it.
3D printer develops creative thinking
With 3D printing, you can get a small physical 3D model of plastic or other material in just a couple of hours. This technology not only speeds up simulation, but also significantly reduces the tedious development cycle of product development, design, production, testing, and product improvement.
For children who want to make a career as an engineer, a 3D printer will definitely help in their development. A 3D printer will give your child a hands-on physical experience of making their own products. This is what engineers live for.
Coming up with a design and having it in your hands in a few hours is a very exciting process. It can also be a good way to show your kids that engineering is fun.
The future of manufacturing is 3D printing
The introduction of new technologies in schools is relatively slow. This is usually due to the fact that schools do not receive sufficient funding and must follow the existing curriculum. Do not be surprised to learn that schools are still teaching children what they taught more than 10 years ago.
If your children are lucky, they can be taught to work with metal or wood anywhere from elementary to high school. Even though they are learning these skills, it is very unlikely that they will touch a 3D printer. If the institution has a 3D printer, it may not be the latest model.
3D printers have changed a lot in the last 10 years. Today, printers have become much more affordable, and the choice and competition are quite high.
3D Printer XYZPrinting Da Vinci miniMaker
First Impressions of XYZprinting DaVinci miniMaker
XYZprinting DaVinci miniMaker looks like you will definitely like. Not only that, the bright appearance of this 3D printer will also impress your child. Instead of seeing a boring gray box, the first impression will be like a new toy.
A similar Da Vinci Mini is more orange and will cost about $30 more. However, it does have Wi-Fi.
The build quality of the DaVinci miniMaker is excellent. It is a rugged and reliable 3D printer with compact dimensions (15.75 x 13.23 x 14.25 inches).
Specification XYZprinting DaVinci miniMaker
Age group: 14+ (8+ with adult supervision). An adult will need to unpack it, set it up, remove the pre-assembled parts, and clean the 3D printer after each use.
- Price range: Budget
- Material type: PLA (non-toxic)
- Resolution: 1 mm - 0.4 mm
- Workspace: 9 x 5.9 x 5.9 inches
MiniMaker does not use the industry standard G-code. Instead, it uses the included XYZware software. This is the limiting factor for young hungry minds. However, the 3D printer is guaranteed to work immediately after purchase.
The XYZware software is a fairly simple program. However, there are problems in terms of feedback. For example, there will be no expected error warnings, etc.
XYZ MiniMaker Kids 3D printer displays useful information. For example, there is information about how much material the 3D model will use and how long it will take to print. Children usually lose patience when they have to wait a long time. So it's great that this 3D printer gives an estimated production time.
The program does a great job of automatically preparing your 3D models for production. Unfortunately, there are limitations in terms of adding support materials in case of complex 3D models, so that the child will not be able to master this area of 3D printing.
XYZprinting DaVinci miniMaker setup and print quality
DaVinci miniMaker is easy to set up. All you have to do is plug in the USB cable and power cable, install the printhead, feed in the 3D printing material, and you're done. Calibration is not required.
This 3D printer comes with setup instructions that are a little vague at times.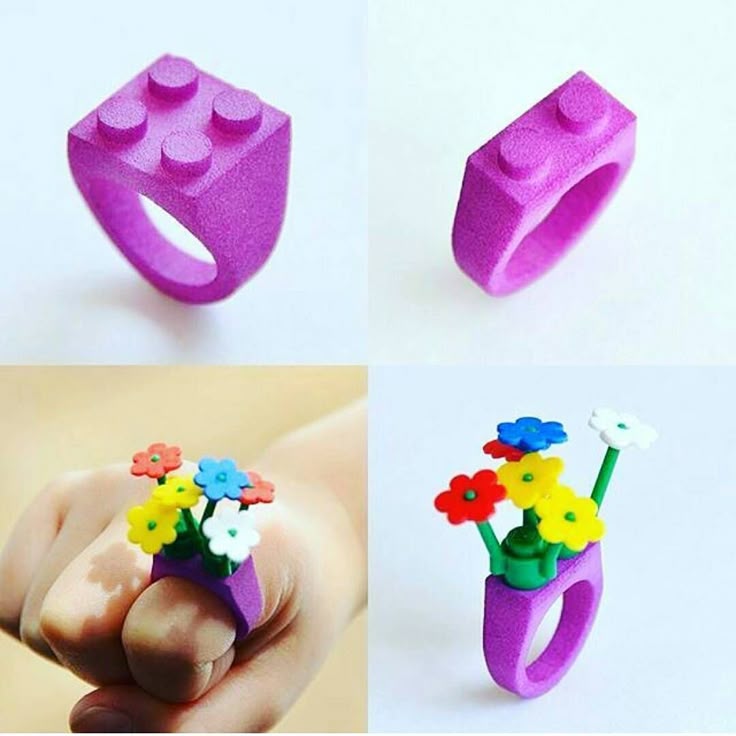 However, you won't have any problems setting it up, even if you're seeing a 3D printer for the first time.
3D printing process on XYZprinting DaVinci miniMaker
There are several models in the XYZ program that can be used for 3D proofing. If you need more models, I suggest you check out Thingiverse. Or, for example, you can download Pokemon characters and print their models.
The level of detail you get with DaVinci miniMaker 3D printing is commendable given how cheap this device is.
MiniMaker runs quietly. That's impressive considering it's an open design model.
Disadvantages of XYZprinting DaVinci miniMaker
The biggest disadvantage of the miniMaker 3D printer is that it can only use the exclusive XYZ filament. The problem is that filament is more expensive than conventional brands available on the market. The manufacturer of this 3D printer probably doesn't want entry-level users to put the wrong filament in the printer. Therefore, only one type of media is used in printers.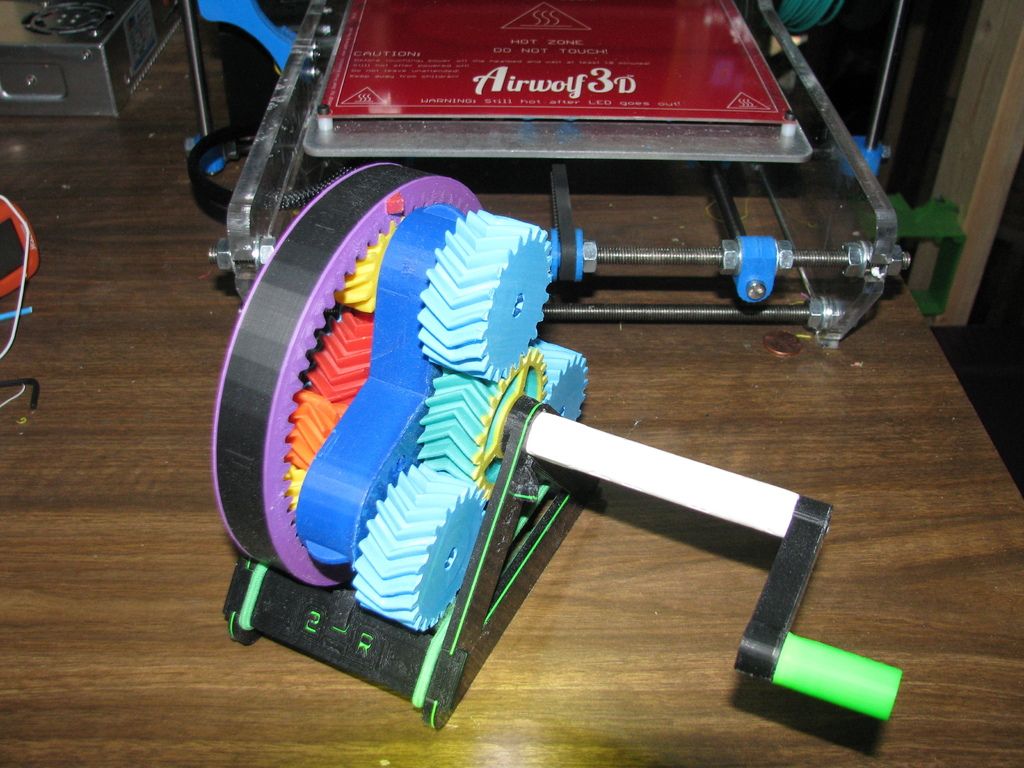 Inside this 3D printer there is a chip that checks the markers on the material. By checking, he can find out how much material was used up. Therefore, if you insert a different brand of media, the printer will indicate that there is no media and therefore it simply will not work. The only way to get this 3D printer to use a different material is probably to change the main board. So keep that in mind when you're shopping for this 3D printer.
However, the inability to use other manufacturers' filaments should not deter you from buying a DaVinci miniMaker, as the filament spool can last quite a while. In addition, the 3D print quality of this printer is exceptionally high.
XYZprinting Conclusions DaVinci miniMaker
The XYZ miniMaker is a great 3D printer for young children and non-technical parents. Finished 3D models are very highly detailed and of excellent quality.
However, the simplicity of this printer can be a disadvantage because your children can outgrow it quite quickly, especially when they reach their teens. In addition, this 3D printer will not be able to 3D print more complex models.
If you are interested in a 3D printer, you can check out an alternative review of the DaVinci miniMaker, in which it is considered not in the context of a device for children, but as a full-fledged 3D printer.
3D printer Monoprice Select Mini
First impressions of the Monoprice Select Mini
The Monoprice Select Mini V2 is a very durable 3D printer. The steel construction of this printer is quite simple, but it looks reliable and there can be absolutely no complaints about it.
Important parts of the 3D printer are well sealed to avoid damage or injury during use. This 3D printer gives the impression that it should be operated by a white-coated lab technician.
Enthusiastic teens will love this 3D printer with a full color display. Although the display is not touch-sensitive, there is a thin control wheel next to it on a fancy polished steel plate.
The great news is that you can use PLA plastic from any manufacturer to print on this 3D printer.
Specifications Monoprice Select Mini
- Age Group: 14+
- Price Range: Budget
- Material Type: ABS, PLA, XT Copolyester, PET, TPU, TPC, FPE, PVA, HIPS, Jelly, Foam, Felty
- Resolution: 1 mm
- Working space: 7 x 4.7 x 4.7 inches
Monoprice Select Mini 9 software0080
Monoprice recommends using Simplify3D, Replicator-G, Repetier or Cura software. All of these slicers are 3D printer compatible. Cura is the recommended software for Monoprice. One of the benefits of using third party software is that they have advanced settings and more options for preparing a 3D model. All of the programs listed above are also used with professional 3D printers.
Monoprice Select Mini 9 setup and print quality0080
Monoprice Select Mini V2 does not come with installation instructions. However, you can download instructions from the Monoprice website.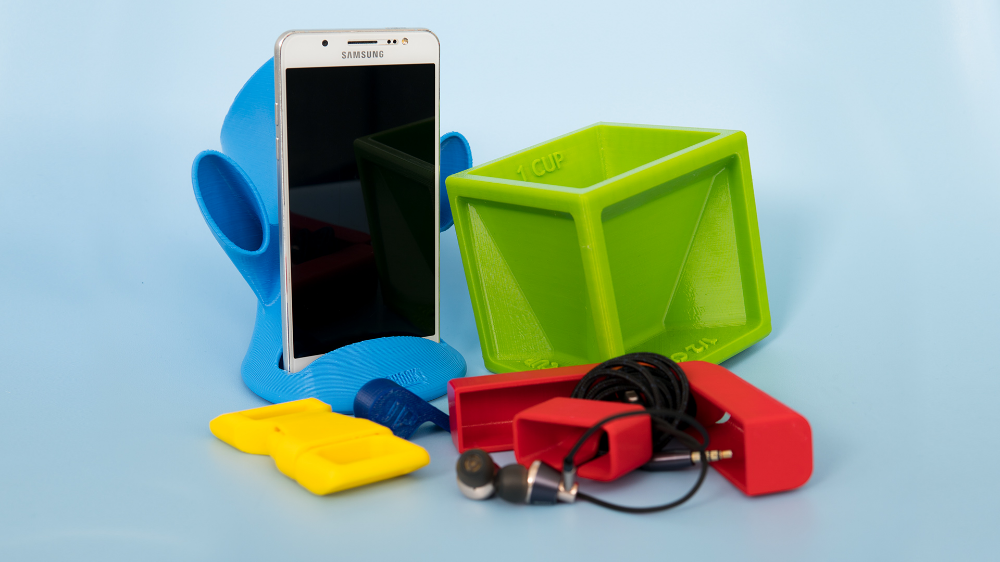
This 3D printer comes with some default settings. However, it is worth figuring out and tweaking these settings.
The material feed to the printer is not very well implemented and can cause problems, but in general these are tolerable little things that you will encounter in most 3D printers.
3D printing process on Monoprice Select Mini
The Monoprice 3D printer is quite loud compared to other 3D printers in this review. Moreover, it has the ability to use an SD card.
My 3D test model printed quickly and without problems. The quality of the model was excellent. However, test model settings can be optimized. The speed of 3D printing was also low, since the resolution in the Z coordinate was set to high. But this is the expected price that you have to pay for high-quality 3D printing. These shortcomings are corrected by the correct settings in the slicing program, as well as on any other 3D printer, so it's hard to say that this is a shortcoming.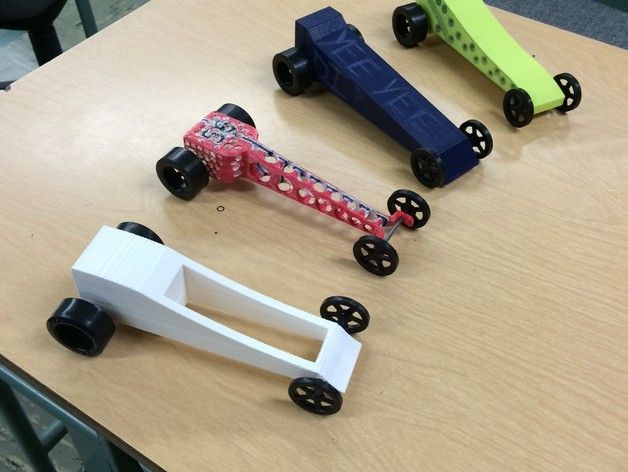 And the many options for print settings on the Select Mini will let your child (and probably you) learn even more about the 3D printing process.
Disadvantages of Monoprice Select Mini
Although Monoprice claims that you can use ABS plastic for 3D printing, you are bound to run into problems using this material. This is because ABS requires a table temperature of 220°F while Monoprice's maximum table temperature is around 140°F. If you want to use ABS to build your models, consider buying another printer. However, before thinking about using ABS plastic in principle, read the information about its toxicity and only then make a decision. Especially considering that a child will use this 3D printer. At the same time, it is worth noting that the quality of your PLA plastic products will be good, so this disadvantage should not play a decisive role in your choice of a 3D printer for a child.
Monoprice Select Mini Conclusions
Basically, if you're looking for the ultimate 3D printer for teenagers, the Monoprice Select Mini V2 is the perfect buy at an affordable price.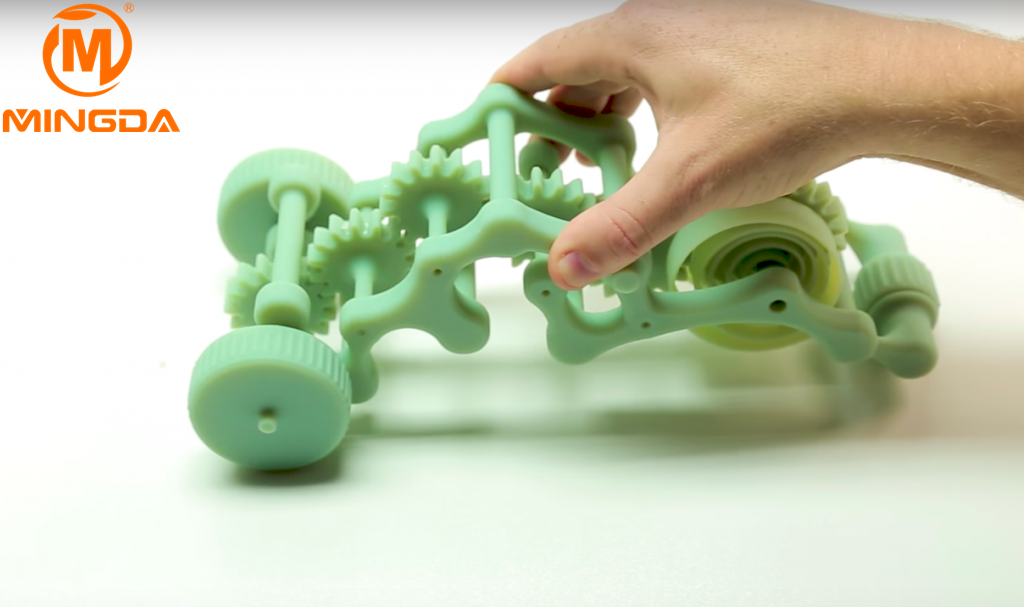
The disadvantages of this 3D printer can be overlooked, especially if you just want to buy your kids their very first 3D printer.
If you are interested in a 3D printer, you can check out an alternative review of the Monoprice Select Mini, which does not consider it in the context of a device for children, but as a full-fledged 3D printer.
Flashforge Finder 3D Printer
FlashForge Finder First Impressions
Unlike other 3D printers for kids presented in this review, FlashForge Finder 3D printer is more suitable for home 3D printing or normal apartment conditions. This model matches perfectly with all your other gadgets.
The front of the machine has a nice, clear, full color touchscreen display. In general, the 3D printer looks bright and at the same time concise and fits perfectly into a discreet but thoughtful interior.
FlashForge Finder Specifications
- Age Group: 11+
- Price Range: Budget
- Media Type: PLA
- Resolution: 0.
 8 - 0.4mm
 - Working Space: 5 x 08 x 5.5
FlashForge Finder Software
FlashForge Finder uses FlashPrint software to slice 3D models. The software allows you to fully automate the slicing, the support generator for complex 3D models works well. In manual options, you can change the temperature and speed of 3D printing for kids who want to take their part design to the next level. Standard features such as the amount of material used are also included in the software.
When you use the manual setting, you will notice that the FlashPrint software is more advanced than the XYZware that comes with DaVinci miniMaker. The software also has several advanced options, such as 2D to 3D, which allow you to create an approximate 3D model from a 2D image. For example, you can use the settings to turn a face into a 3D model and print it out.
FlashForge Finder 3D Printing Process
FlashForge Finder comes with a USB stick containing a user manual. When you turn on your 3D printer for the first time, the touch screen will guide you through the initial print bed calibration. You will see instructions on how to fasten the adjusting nuts and adjust them to the correct height. The guide is user-friendly and makes setup that would otherwise be frustrating for a novice as simple and straightforward as possible.
Feeding material to the 3D printer again can cause problems. You will need to apply some force to pull the filament through the extruder. You will definitely not succeed the first time, but it is a solvable task.
With this 3D printer, you can easily print almost any 3D model. The printer heats up quickly and is relatively quiet.
Frustration with this 3D printer is low; very close to zero according to consumer reviews, even after a few weeks of use.
FlashForge Finder Disadvantages
Although the FlashForge Finder 3D printer can be used with a variety of PLA filaments, the onboard filament container is slightly smaller than a standard 3D printer. So if you are using other brands of PLA, keep the spool away from the printer, such as on or right above a bookshelf.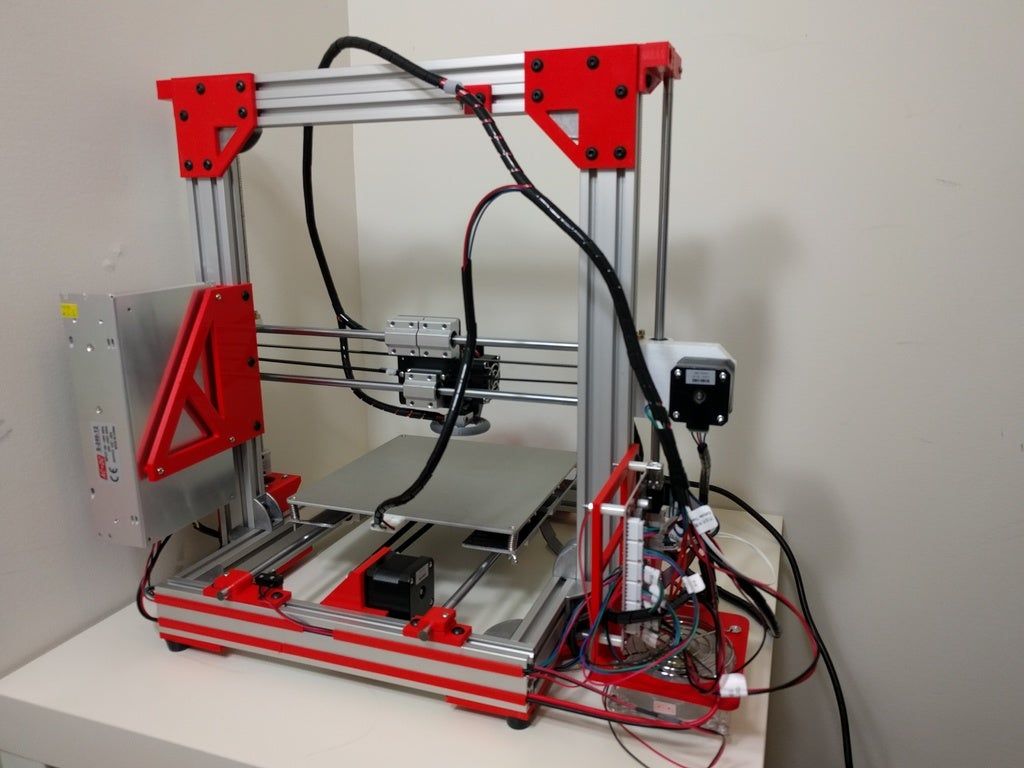
FlashForge Finder Conclusions
The FlashForge Finder 3D printer is a couple of years ahead of its time. Surely in a few years this 3D printer can be bought in any store, just like you do now with 2D printers.
The 3D printer is quite simple and given the manufacturer's warranty, this is the perfect option if you need to introduce your family to the world of 3D printing.
Sindoh 3DWOX DP200 3D Printer
Sindoh 3DWOX DP200 First Impressions
The Sindoh 3DWOX DP200 3D Printer looks more like home appliances than a 3D printer. The printer looks like an innovative microwave oven with a transparent front opening.
Media and print engine are inside the printer. The plastic parts inside the printer are solid to the touch, so the workmanship is clearly at a high level.
Since the material for 3D printing is inside the 3D printer itself, it is slightly larger in size than its counterparts. However, the printer's cubic shape makes it easy to install, unlike other open design 3D printers that require space to access removable covers and material.
DP200 is a large printer. 8.3 x 7.9 x 7.3 is one of the largest models in the home 3D printer market. If you are looking for a large 3D printer for kids, then Sindoh 3DWOX DP200 is your best choice.
Specifications Sindoh 3DWOX DP200
- Age group: 13+
- Price range: Expensive
- Material type: ABS, PLA
- Resolution: 0.5 - 0.4 mm x 90 4 inches
Sindoh 3DWOX DP200 software
Sindoh 3DWOX DP200 comes with its own 3DWOX Desktop software for slicing 3D models. The software has two modes: advanced and simple, and also provides adequate control when preparing a file for 3D printing.
Simple mode has an intuitive interface and in most cases allows you to get reliable and high-quality 3D models.
When you get comfortable with this 3D printer, you can switch to advanced mode and start experimenting with settings to improve the preparation of files for 3D printing and the quality of your 3D models.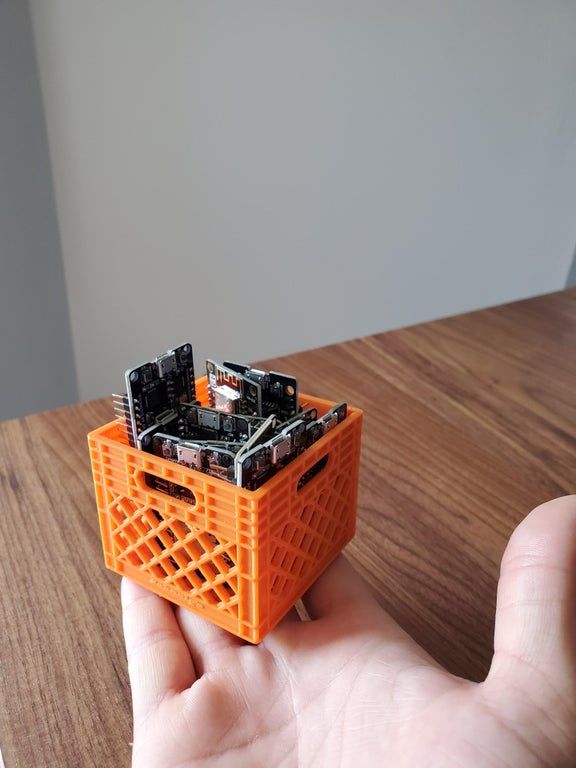
Setup and print quality Sindoh 3DWOX DP200
Sindoh 3DWOX DP200 is supplied already assembled. All you have to do is plug it in, add some material and calibrate the table to start printing. When you turn on the printer for the first time, the color display will guide you through the calibration process.
One advantage of the DP200 printer is that you can insert a filament cartridge into it just like you would with a regular desktop printer. The media container system that the printer uses makes changing media much easier.
Sindoh 3DWOX DP200 3D printing process
After you have sent the file to the Sindoh 3DWOX printer, press the 'Start' button to let the machine start creating your model. If you have other things to do, you can step away from the printer and continue to monitor the printing process through the printer's built-in webcam.0003
Once your 3D model is printed, it is easy to take it out of the printer thanks to the flexible table.
Disadvantages of Sindoh 3DWOX DP200
The 3D printer DP200 only works with Sindoh filaments. So your 3B models will be limited by materials and colors. The good news is that Sindoh filaments are of high quality. Moreover, they are affordable.
DP200 can print with ABS. Therefore, you should consider ventilation as the fumes are toxic to some extent. Make sure the room where your 3D models will be printed is well ventilated.
Conclusions on Sindoh 3DWOX DP200
If you don't mind spending money on a 3D printer for a child, then this printer will suit you. This machine produces high-quality 3D models, and its design is simple and concise. The installation and process of 3D printing will also not cause difficulties.
If your kids have experience with 3D printers or want to learn a little more about them, then definitely buy them this 3D printer, which can give them the joy of implementing their ideas with a minimum of time spent on 3D printer maintenance.