
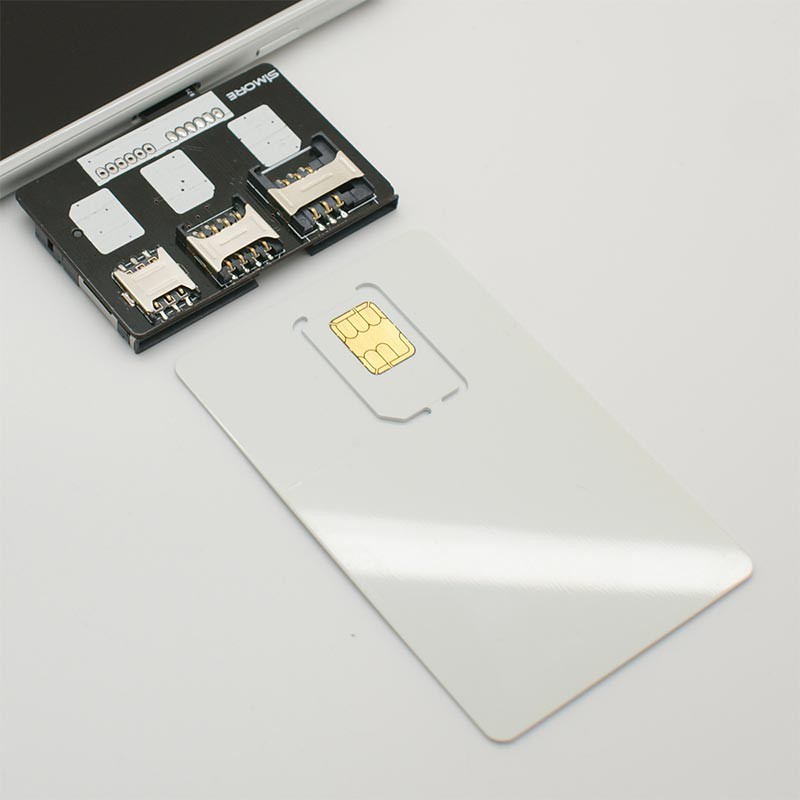
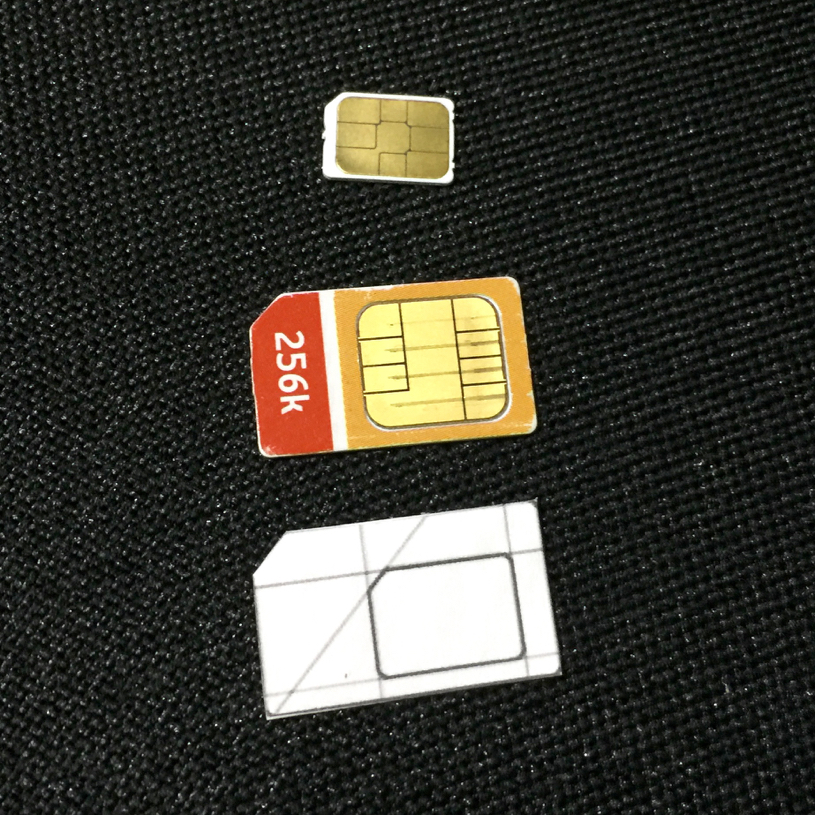
3D print sim card adapter
▷ nano sim to sim adapter 3d models 【 STLFinder 】
Yet Another Nano SIM to SIM Adapter
thingiverse
I was not satisfied with any of the online Nano SIM to SIM adapters so I made my own. Rather than try to make it according to the specs, I used my calipers and a SIM card and tweaked it to work. This one works for me, printed at 0.12 on my AIO...
"Nano Sim" to Sim Adapter (Tight Fit for iPhone 3GS)
thingiverse
I made a new Nano Sim to Sim Adapter, because i needed one with a very thight fit. The Nano Sim (T-Mobile, Germany) snaps into palce and stays in place - i even if i drop the adapter. The adapter has also a tight fit in the iPhone 3GS Sim-Draw. I...
Nano to Sim Adapter
thingiverse
This is a NanoSim (4FF) to SIM (2FF) adapter. ... Enjoy
Nano to Micro sim adapter
cults3d
Nano to Micro sim adapter
Nano to Micro sim adapter
thingiverse
Nano to Micro sim adapter
Sim adapter nano to micro
thingiverse
This is a SIM adapter nano to micro. ...I tried not to catch it.
Nano-to-Micro SIM adapter
thingiverse
Add a single-layer backing to push the SIM against the contacts in the phone better.
nano-SIM to SD-card adapter (remix)
thingiverse
... I put tapered holes behind them so you can easily pop them out with your finger. - softened some of the corners. _(more pictures to come)_ You can see my model on [Tinkercad](https://www.tinkercad.com/things/0P8gksl2fPf-nano-sim-to-sd-card)
Nano to micro sim card adapter
thingiverse
I use it to be able to insert the nano sim from my iPhone 5 into an iPhone 4. Instructions I printed the adapter on an Ultimaker. It fits nicely inside an iPhone 4 and works fine for me. ...If you run...
SIM Adapter Nano --> Micro
thingiverse
Adapter für NANO-SIM zu Micro-Sim ! ... Der letzte Strohhalm um ein neues Telefon in Betrieb zu nehmen ohne auf eine neue SIM zu warten :)
Nano Sim Card Adapter
thingiverse
We needed an adapter to insert a Nano Sim Card from a iPhone 5s into an good old Nokia phone. Mixing two allready existing Sim Card Adapter together did the job for us. Instructions We printed 4min with ABS 0. 1mm steps and a brim of 10 round to...
Nano Sim Card Adapter
grabcad
This is the nano-sim card adapter for micro sim card usage.It's quite simple part but it solved my adapter problem. ...Hope it will be usefull for you too.You can download and print the part with 3D printer in a few minutes.
Nano to Mini SIM Adaptor
thingiverse
Nano SIM to Mini SIM adaptor. Instructions Print at smallest layer height (I did 0.1mm using 0.35mm nozzle), 100% fill. ...PLA recommended
Adapter SIM STD-NANO
thingiverse
Adapter that you can print and switch it to Iphone or another mobile. ...Regards
Micro SIM Card to Nano SIM Card adaptor
thingiverse
This thing will allow you to use a nano SIM card in a Micro SIM card slot!
Sim to MicroSim adapter
thingiverse
I needed an sim to microsim adapter....so I made one... ... Instructions Just print.
Micro SIM to SIM Card Adapter
thingiverse
basic adapter to fit a new style micro sim in an older phone. Instructions Print it out, VERY cairfully remove, using some wet & dry, or simmilar, sand down nice & smooth. test fit micro sim, cut a...
Mini SIM to Micro SIM adapter
thingiverse
Let's you convert your Micro-SIM to a Mini-SIM (Standard size) Print Settings Printer: Migbot i3 Rafts: No Supports: No Resolution: 0.1 Infill: 100 Notes: The smaler the resolution the better it will fit, so if your printer can handle less than 100...
Microsim to SIM adapter
thingiverse
Ready to print and use
Nano sim to micro sim
thingiverse
Just a better upload than the rest. ...
...
Micro to Mini SIM adapter
thingiverse
This is a printable Micro to Mini SIM card adapter. ... I have printed and used many.
SIM Card Adapter for Nano to micro Free 3D print model
cgtrader
SIM Card Adapter for Nano to micro
Nano SIM card
grabcad
Nano SIM card for mobile phone
Microsim to sim adapter frame
thingiverse
Most Thingiverse links for sim adapters were offline so i made my own in Onshape. Printed with Prusa mini with speed settings. ...Fit is fine, not too tight not too loose.
Nano SIM - cut
sketchfab
nano sim card 12.3/8.8/0.6mm
Sim
grabcad
Sim
sim
thingiverse
sim
SIM
grabcad
SIM
sim
grabcad
sim
Nano Sim Keychain Holder
thingiverse
A holder to keep two nano sim cards safe while traveling. The slots are marked "1" and "2" to keep track of which card is which. The cap is sized 1% larger than the base in order for it to thread on a little easier. ...It's a fairly tight fit, to keep...
Micro Center - Ender 3 Pro 3D Printer Frequently Asked Questions
Description: This article contains some of the most frequently asked questions about Creality Ender 3 Pro 3D Printer from Winter 2019.
Q: Do I have to assemble the Ender 3 Pro?
A: The Ender 3 Pro comes partially assembled. However, there will be some parts that need to be put together. No worries however, as all of this is extensively documented!
Q: Can I use an SD card to print with this printer?
A: You can use an SD card to print files from.
Q: How do I print from an SD card?
A: To print from an SD card, simply insert the SD card into the SD card slot at the front left of the printer. Choose Print from SD on the on-screen menu and then select the file you wish to print.
Q: Can I print over my network?
A: Officially the Ender 3 Pro does not support network printing. You can however use third-party software such as OctoPrint to enable wireless printing using a Raspberry Pi. You can find instructions for that on the manufacturer's website. However, keep in mind this is not supported by the manufacturers of the printer. As such, Micro Center Tech Support is limited in troubleshooting anything concerning wireless printing if you run into issues with this.
Q: Can I print with a USB cable?
A: You can print via USB with a USB A cable to a USB Mini B cable. This cable is not included with the printer as printing via the SD card is the recommended method. However, you can pick up one of these cables at your local Micro Center.
Q: Can I print with TPE / TPU or other flexible filaments?
A: As this printer has a Bowden style extruder, it is not recommended to print with flexible filaments. Due to its design, it will typically end in a failed print and serious clogging of the extruder.
Q: Does this printer automatically level the bed?
A: There is no automation in the bed leveling whatsoever. It must be done manually. To level the bed, select Prepare, then Auto Home. After the printer finishes homing, choose Prepare, then Disable Steppers. This will allow you to move the extruder assembly so that you can properly level the bed.
Q: How do I level the bed after disabling the steppers?
A: Move the extruder to the four corners of the bed one at a time. Push the extruder assembly as low as it will go towards the bed. You should be able to place a piece of printing paper in-between the nozzle and the bed with the nozzle lightly scratching the paper. Adjust the knobs underneath the bed as needed. There will be 4, one in each corner.
Q: How do I load my filament?
A: You can load your filament by selecting Prepare on the on-screen menu, then Preheat PLA, or Preheat ABS depending on which filament you are using. Next press and hold down the extruder level, then insert your 1.75mm filament through the hole of the extruder. Continue feeding until you see filament come out of the nozzle.
Q: I’m not using PLA or ABS, how do I load filament?
A: If you need to select a different temperature to preheat the printer to, select Control on the on-screen menu, then Temperature, then Nozzle, and change this to the desired value. From there you will load the filament as normal.
Q: How do I unload filament?
A: Heat up the nozzle to the melting point of the filament you are using, press down the lever on the extruder, and pull the filament out quickly, ensuring you don’t let it cool down in the extruder and clog it.
Q: I am using Cura, but I don’t see an option for the Ender 3 Pro, which printer do I select?
A: You will need to select Creality CR-10. Change the Printer Name to Ender-3 Pro, and change the X and Y values to 220, and the Z value to 250.
Q: What comes with the Ender 3 Pro?
A: The Ender Pro 3 comes with pliers, an extra nozzle, an 8GB SD card, pneumatic fittings for your filament loading tube, cable ties, a blade to remove models from the bed, various allen keys for construction and maintenance, a needle to remove difficult clogs from the nozzle, a wrench, screw driver, rack for the filament spool, and a PTFE tube for guiding the filament into the hot end.
Q: What is the magnetic bed that is advertised for this printer?
A: The magnetic bed makes it much easier to remove prints. You can simply lift the bed off to remove your models, rather than the bed being glued down. This makes it much easier to remove your prints and can make the bed last longer as you do not have to scrape off the models with the included blade.
Q: Where can I purchase replacement magnetic beds for this printer?
A: You can purchase replacement beds directly from Creality.
Q: What Power Supply Unit (PSU) is included with this printer? Is it reliable?
A: The power supply used with this printer is a Mean Well LRS-350-24. You can find exact specifications on this PSU on the manufacturer's website. It is advertised to fully preheat the printer within five minutes.
Q: Can the Ender 3 Pro resume printing after powering it off?
A: The Ender 3 Pro can resume printing after a loss of power. Whether your power goes out, or you simply need to pause and resume later, the Ender 3 Pro will remember the exact coordinates it was printing at last and will resume when power returns.
Q: What upgrades are available for the Ender 3 Pro?
A: There are quite a few upgrades you can purchase or simply print for the Ender 3, and Ender 3 Pro. Creality has put together a list of those on their website, and unless otherwise specified they will work for both the Ender 3, and Ender 3 Pro.
Q: I want to upgrade to a glass bed. Is this possible?
A: You can absolutely upgrade to a glass bed for the Ender 3 Pro directly from the manufacturer.
Q: Can I download the source code for the Ender 3 Pro?
A: The sorce code is avaialble from the manufacturer's website.
Q: Where is the documentation and software for this printer?
A: Documentation and software is available from the manufacturer's website.
Q: What is the URL for the manufacturer's website?
A: As of the writing of this document, the manufacturer's website can be found at https://creality.com/.
Apple iPhone 14 Pro, 128 GB, Purple - Smartphone, MQ0G3PX/A
-
Telephone
Included cable
-
Common parameters
Manufacturer Apple
Degree of protection IP68
The case is dustproof.
 The device is suitable for continuous immersion under the conditions specified by the manufacturer. Waterproof at depths greater than 1m (usually up to 3m).
 Color violet
series iPhone 14
model iPhone 14 Pro
-
Browser and download
4G Yes
5G Yes
Bluetooth Bluetooth 5.
 3
3 WiFi Yes
-
CPU
Processor type Hexa Core
Chip Apple A16 Bionic
-
Memory / hard drive
Built-in memory 128 GB
RAM 6 GB
-
Screen
Technology
Screen backlight technology
Super Retina XDR OLED
Screen diagonal 6.
 1"
1" Screen resolution
Resolution is a term that refers to how densely the pixels are on the screen.
2556x1179
Screen glass type Ceramic Shield
-
Functions
Sensors accelerometer, barometer, gyroscope, LiDAR scanner, proximity sensor, UWB, ambient light sensor
GPS A-GPS, BDS, Galileo, GLONASS, QZSS
FM radio Not
NFC Yes
Fingerprint reader Not
Iridoscanner Not
Face recognition Yes
Stereo sound Yes
Dual-SIM Yes
SIM1 Nano
SIM2 E-SIM
-
Graphic arts
GPU Apple GPU
-
Interfaces
3.
 5mm headphone output Not
 Compound Lightning
-
Battery
Battery type Li-Ion
lithium ion
Wireless charger Yes
Removable battery Not
-
Software
Operating system Apple
Operating system version iOS 16
-
Main camera
Number of rear cameras four
1st camera 48 MP, f/1.
 8, 24mm (wide), 1.22µm, dual pixel PDAF, sensor-shift OIS
 2nd camera 12 MP, f/2.8, 77mm (telephoto), PDAF, OIS, 3x optical zoom
3rd chamber 12 MP, f/2.2, 13mm, 120˚ (ultrawide), 1.4µm, dual pixel PDAF
4th chamber TOF 3D LiDAR scanner (depth)
Functions Slow Motion, HDR, Time Lapse, Panorama, Portrait, Burst
Video 4K@24/25/30/60fps, 1080p@25/30/60/120/240fps, 10-bit HDR, Dolby Vision HDR (60fps), ProRes, Cinematic mode (4K@30fps), stereo sound
-
Front-camera
Number of front cameras one
1st camera 12 MP, f/1.
 9, 23mm (wide), 1/3.6", PDAF
 Functions Animoji and Memoji, HDR, Panorama, Portrait, Burst
Video 4K@24/25/30/60fps, 1080p@25/30/60/120fps, gyro-EIS
-
Dimensions
The weight 206 g
Height 14.
 75 cm
75 cm Width 7.15 cm
Depth 0.785 cm
3D printing in cinema - how technology has changed the film industry!
For the creators of entertaining science fiction films, there has always been a problem of the real embodiment of the most daring author's ideas. Many fascinating plots did not become masterpieces of world cinema due to weak and unrealistic effects that caused laughter from the audience and criticism from professionals. It seemed that in our era of digital technologies, when any scenes and fantastic attributes can be reproduced using computer graphics, the problems of filling any fantasy film with colorful spectacular details will become a thing of the past. However, screen masters have become convinced that not everything can be created with a graphic image, and therefore directors are still looking for ways to realistically convey the incredible appearance of the intended characters and create amazing objects of the fictional world. The graphics help to reproduce the overall environment in an incomparable way, but the human eye cannot be deceived and close-ups are often impossible to make believable using the style of a computer game. And then 3D printing came to the aid of directors and cameramen, thanks to the possibilities of which make-up artists and effects specialists today create unimaginable screen images.
Where and how did the 3D printer work?
A quarter of a century ago, it was hard to imagine that technological and scientific progress would so significantly change the technologies for preparing props for the film industry. Even in such a cult film of 1997 as "Men in Black", which was replete with alien guests, the process of creating unprecedented characters consisted in hand-molding from clay, familiar to the "kitchen" of the cinema. Not a single worthwhile spectacular scenario could do without the work of experienced craftsmen. The manual production of unique layouts and details for effects was time consuming and costly. And at the same time, there were always risks that the created images would not be able to fully convey what was intended. But 3D printing has changed everything, without which it is now difficult to imagine the process of modern film production.
Fans of Stranger Things may not know that it was the 3D printer that was used to create objects for the scariest scenes. The task of the authors was to accurately reproduce the atmosphere of the 80s, and to achieve their goals, the creators used a kind of hybrid method, combining the possibilities of graphic editing and 3D printing. As a result, we can say that both technologies perfectly complement each other. From simple sketches of the monster, with which the authors turned to the special effects studio, the creators came to a realistic embodiment on the screen not only of the character himself, but also completely reproduced the whole bewitching inverted world. A striking example of technological interaction is the Demogorgon model, which was created by a 3D printer, but the mouth mucus appeared with the help of graphics, and the fire was brought up for real. As a result, the viewer is completely immersed in believable footage, and the series has been in the top of the best films since the first season.
New technologies could not ignore the mastodon of Hollywood fiction, the recognized master and creator of space worlds Ridley Scott. The 2020 series Raised by Wolves, produced by HBO Max, required the director to think outside the box when it comes to screening another sci-fi story in which androids are busy creating a new population of people on a desert planet. Almost all the components and elements of the new world were reproduced by 3D printing. It was only thanks to the technological acceleration of behind-the-scenes production of props and furnishings that the famous director's production team was able to keep up with the tight schedule of working in the challenging conditions of South Africa. Each episode took 2-3 weeks to prepare and film. During this time, sketches were prepared, layouts were designed, final details were agreed. Everything happened with the direct participation of the art director of the picture Yako Snaiman and Ridley Scott himself.
The most difficult thing was to create the main character of the film - android. This required a head scan of the actress. Next, a transparent polymer copy was printed through which the liquid could be seen. Metal parts were highlighted in chrome, and the containers were filled with water with a common food coloring that mimics yellow acid. Small details of the severed head, muscles, skull were created by the Zbrush program. Many elements were printed separately and assembled together. When installing the details on the actor's head, it was possible to achieve a real feeling that an artificially created person was in front of the audience. If not for the possibilities of 3D printing, no previous technical tricks and skill of design technicians would have allowed the series team to meet the allotted time and give the characters such a realistic look.
Most of all, the creators of the Marvel Universe know about the indispensability and practicality of 3D printers. Not a single studio film is complete today without the use of 3D printing technology. Only such fast and precise production is able to provide the film sets with the necessary props. Russell Bobbitt, who is in charge of this direction at Marvel Studios, says that everything that we see on the screen in the hands of the Avengers, on their costumes and in the setting, is created only through printer printing. Without it, such an unthinkable number of objects and details simply would not have been physically possible to recreate. Thor's hammer and Captain America's shield, Iron Man's reactors and hundreds of other elements of a fictional space future - all this became possible only thanks to the latest technologies. Russell remembers first encountering 3D printing on the set of Star Trek in 2009.1999, where director and producer J.J. Abrams introduced him to new technology.
The first 3D printer that Bobbitt himself used cost an insane $150,000. Today, these technologies have become much more accessible. And most importantly - cost-effective. At a time when the financial success of films and series has become directly dependent on the speed of the filming process, when it is necessary to shoot not just spectacular science fiction, but entire series of space battles and sci-fi everyday life in the shortest possible time, only 3D printing provides the film industry with the necessary amount of stage props. Professionals are delighted with the prospects that have opened up and understand that with all the development of computer graphics, the times of 3D printing are just beginning, and the viewer will see more and more incredible frames with real and live special effects.
