Can a 3d printer copy an object
Can a 3D Printer Scan, Copy or Duplicate an Object? A How-to Guide – 3D Printerly
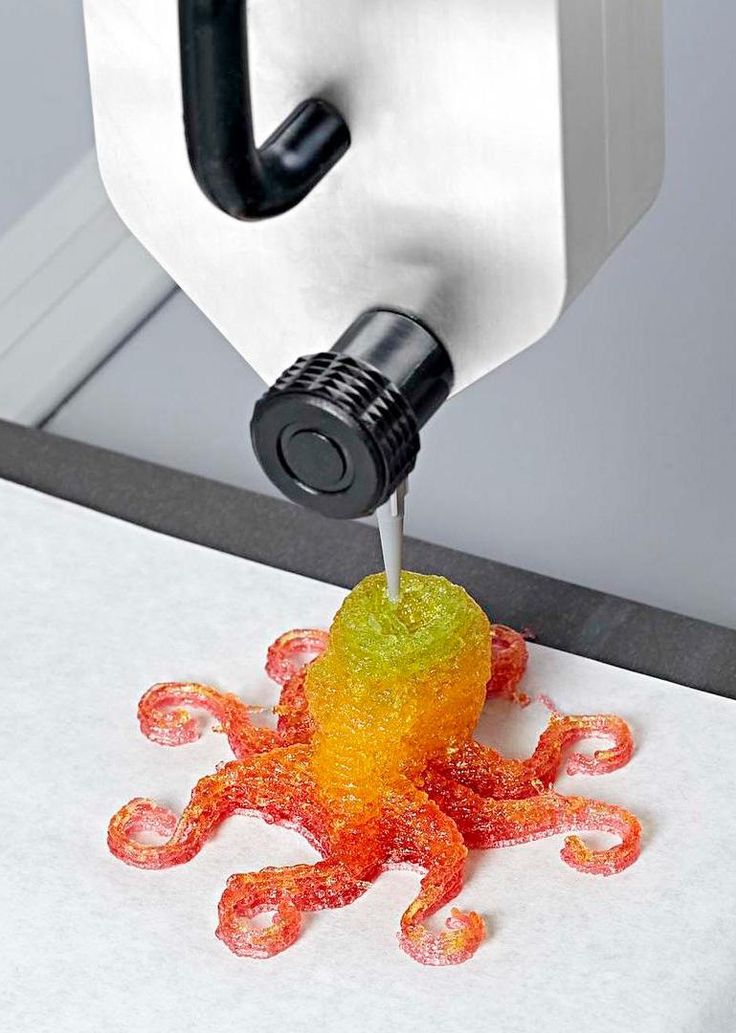
People who think about 3D printing wonder whether a 3D printer can copy or duplicate an object then create it right in front of you. This article is going to give you some insight into how the pros can scan and duplicate objects that can be 3D printed.
Keep on reading for some simple instructions on how to scan objects for 3D printing and more.
Can 3D Printers Copy & Scan an Object?
3D printers themselves cannot copy and scan an object, but once you scan an object using other tools like a 3D scanner or simple scanner app on your phone, you can process it to 3D print on your printer.
There are many techniques people use to create 3D printer files but generally speaking, you either download the STL model files from an online archive, or create the file yourself.
I’ve seen all types of objects be 3D scanned successfully. The accuracy of the object depends on many factors such as the scanning technique being used, the complexity of the object you are scanning, the lighting, and more.
With the right method of 3D scanning, you can scan objects of almost any size, detail, shape, and so on ranging from a container, to a ring, to even your own face and body.
The technology and accuracy of 3D scanners are definitely improving, so you should be excited at the future possibilities of cheap and accurate scanning of objects.
One user who shared his experience on a forum said he saw a charming statue that was supporting the foundation of a staircase, in an artistic manner. What he did was take 20 photos around the statue with his Nikon Coolpix, then meshed the photos together.
With some processing and filling in gaps or missing spaces, he managed to create a 3D printable file.
Some people have scanned famous buildings using a drone, as well as statues, museum pieces, or even just something at home that you want to replicate.
Another user scanned and 3D printed an anvil by taking 74 pictures using his Samsung Galaxy S5. Some of the other models scanned by him include a carved panel of Buddha’s statue, a home, needle, shoes, and his face as well.
The video below by Thomas Sanladerer compares photogrammetry (creating scans with images) vs a professional 3D scanner solution.
If you happen to have a dual extruder 3D printer, you can even activate a “mirror printing” feature that allows you to print two of the same objects using each extruder independently at the same time.
You can really speed up your printing with this cool feature.
This means you can make even make a mirrored version of an object in the X, Y, and Z directions. It can be useful if you want to, for example, make a left-handed and right-handed version of your model, or two attaching pieces.
Some dual extruder 3D printers that are popular are the Qidi Tech X-Pro, Bibo 2 3D Printer, Flashforge Dreamer and Flashforge Creator Pro. Check out my article on Best Dual Extruder 3D Printers Under $500 & $1,000.
How Do You 3D Scan Objects for 3D Printing?
When it comes to figuring out how to scan objects for 3D printing, there are some techniques that can work really well:
- Scanning with a professional 3D scanner
- Using your phone (iPhone or Android) and a scanner app
- Use a good quality camera to capture multiple images
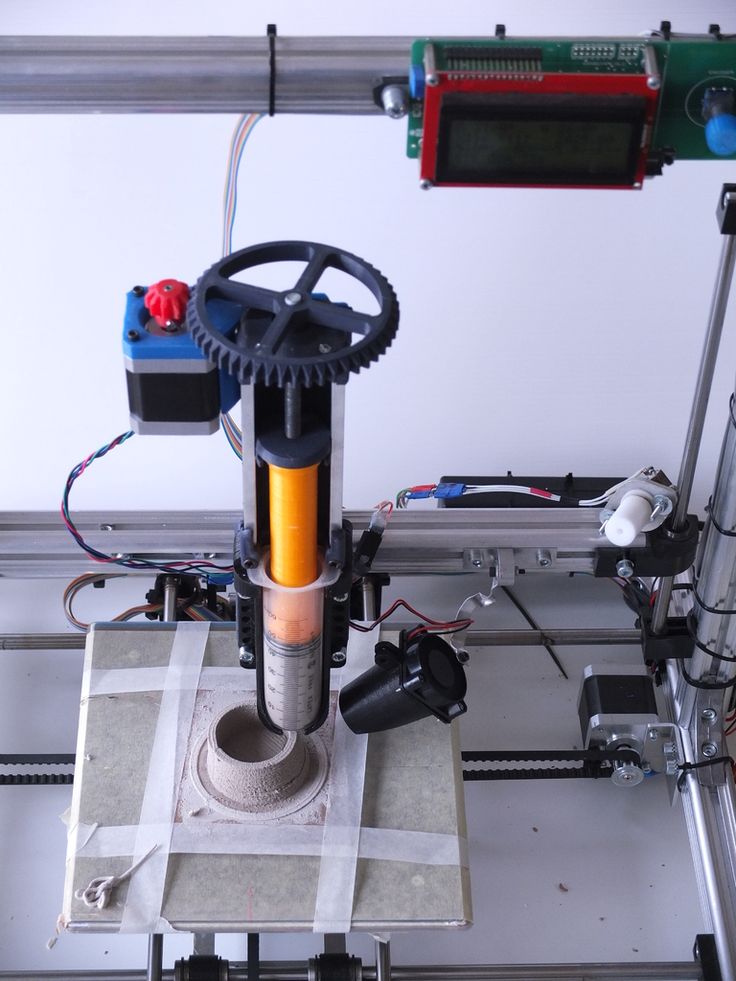
There are many budget options that people have designed for you to actually 3D print, such as Arduino controlled turntables and other creative designs.
Below are some great 3D scanner designs from Thingiverse:
- Ciclop 3D Scanner
- The $30 3D Scanner V7
- The $3.47 3D Scanner
This great innovation actually was inspired from the $30 scanner but because of some issues, a user decided to make their own version for a much cheaper price. When you have a 1Kg spool of filament at $25, this whole scanner costs just $3.47.
It’s a pretty popular model with around 70,000 downloads at time of writing, so join in on the fun with this cheap 3D scanner that works with your phone.
- Arduino-Controlled Photogrammetry 3D Scanner
- OpenScan 3D Scanner V2
When you are preparing your object to be sca
Below is the step by step procedure from preparing the object to starting the printing process.
- Get your Object Ready
- Scan your Object
- Simplify the Mesh
- Import to CAD Software
- Print your New 3D Model
Get your Object Ready
Prepare your object to be scanned by making sure you have a good stand or turntable for your object to sit on and get a good scan.
One of the most important things is to get some good lighting from all angles so the mesh that comes out at the end is of good quality. Your 3D model is only going to be as good as your initial scanning.
Some people advise to even use a coat of 3D Scan Spray on the object to improve the accuracy of the scan.
It will highlight each minor detail and is essential if you are scanning a transparent or reflective object. It’s not a necessary step, but it can help out with the overall results.
Scan your Object
Use a high-precision 3D scanner, camera or your phone to capture each key part of the object. I’d recommend checking out how other users take their pictures before you get into the process of scanning an object yourself.
The angles you take are going to give your 3D model that “complete” look, so you don’t have to use too much processing to fill in the gaps in the mesh.
The distance at which you are scanning makes a big difference, and the more pictures you take, the better. A good amount of photos to take usually ranges anywhere from 50-200 to capture every detail.
Make sure you don’t move the object while you are taking these pictures.
If your print has too many minor details, you may need to scan your object several times by changing its directions.
Simplify the Mesh
Scanners may produce some extremely complex and tricky meshes that may be difficult for you to modify for further usage.
Use scanner software that can refine your complex meshes and simplify the model mesh as much as possible while ensuring the perfect details.
Refining the mesh will allow you to easily modify and manage your model in CAD. Meshmixer software can be a great choice for this purpose, or AliceVision.
A full reconstruction of your mesh from all the pictures you took can take several hours to compute, so be patient when trying to get the best results.
Import to CAD Software
Now it’s time to import your scanned mesh design into CAD software for further modification and editing.
You want to do some basic clean up of your model before trying to print it, even though you can usually export the resulting mesh file straight to your slicer.
Print your New 3D Model
Once the mesh has been converted into a solid body, its original structure can be separated and can be used with the other objects to form new designs.
The design will have all the curves and dimensions that will provide you with that good quality print.
Now it’s time to finally start your printing process and get the results from all your efforts. Print on a high quality 3D printer that ensures high precision and uses strong resins to get perfect models.
Adjusting your printer settings and calibrating different aspects of the 3D printer is necessary so that you can have a perfect result without any hassle.
Can You 3D Scan Objects With Your iPhone or Android for 3D Printing?
Scanning with your phone has been made a lot easier to due to advances in technology and software alike. Josef Prusa did this great video describing the process from start to finish on how to scan objects with your phone.
He uses AliceVision, formerly known as Meshroom to create these amazing detailed 3D scans. Feel free to check out the video below for the step-by-step process!
There are many phone applications that you can also put to use to achieve similar results.
ItSeez3D is an application that lets you easily capture, scan, share and implement your 3D models. You can perform all these functions just on your mobile phone. Using this application is easy as the app will guide you through all the process by displaying instructions.
You can perform the complete process in just three simple steps.
- Scan: Just follow the app’s instructions and scan the object from all possible angles.
- View and Edit: View your raw scanned object on your mobile screen and send it to the cloud for further processing.
- Download and Share: Download your high quality 3D model from the cloud and edit it if necessary in your slicer or other software. You can also share the model to other people for 3D printing purposes.
One user shared his experience stating that he used the application for the first time and had a simple, straightforward experience due to the easy instructions and guide.
If you have a compatible mobile phone, this app is one of the best ways to scan objects.
There are many paid applications that can help you in the scanning process, but you can use several free scanning applications as well.
Some of the best scanning applications that are widely used for the 3D scanning process using mobile phones include:
- Trnio Scanning Software
- Scann3d
- itSeez3D
- Qlone
- Bevel
How to Clone a Physical Object
TriMech Blog, 3D Printing, 3D Scanning
By Andrew Sink on
One of the most exciting aspects of 3D printing in full color is the ability to take a 3D scan and a copy of the model in full color! Using the Artec Space Spider 3D scanner and the Stratasys J55 full color PolyJet 3D printer, this task can be accomplished easily in under a day. This efficiency empowers you and your team to make prototypes and replicas of just about anything quicker than ever before, and faster than many people realize. In this blog post, I will be summarizing the work we did to clone a regular household banana, from a 3D scan to a full color 3D print.
>> Skip ahead to the video we made
Creating the 3D Scan
The first step in this process is creating a 3D scan which we will use as our model. We chose a banana for this workflow because the matte texture and sporadic coloration gives us the perfect model for 3D scanning. The banana was scanned with the Artec Space Spider, a professional handheld 3D scanner that offers sub-millimeter accuracy as well as the ability to capture full color. This process is as simple as placing the banana on a turntable and rotating it while the Space Spider captures information with no color calibration or target stickers required. To fully scan the model, we scanned the top, flipped it over and scanned the bottom to fully capture the geometry of the banana.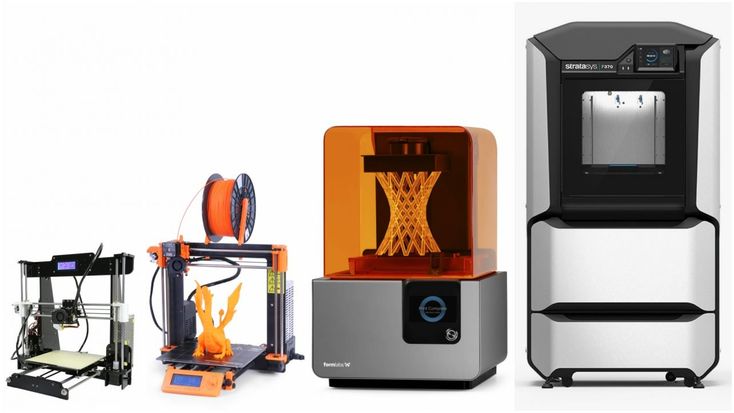 This resulted in a dense point cloud which we converted to a 3D model using Artec Studio.
Processing the Scan in Artec Studio
Once both halves of the scan have been completed, they can be processed in the Artec Studio app. This is a powerful software package that offers clean-up tools to help create a watertight textured mesh that can be exported for a variety of uses. For this project, the clean-up process was as simple as aligning the two halves of the scan, removing extraneous scan data and converting the point cloud to a mesh body. The mesh body is manifold (also know as watertight), which means it is a single solid body with no holes and can be easily processed by 3D printer slicing software. It also has an associated texture file which gives it a full-color appearance. Once completed, the model is exported as an .OBJ file with an associated .MTL (material library) and .JPG (full color texture).
>> Learn More About Using 3D Scanning for Reverse Engineering
Prepare the Model for 3D Printing
The full color textured 3D model can be opened directly in GrabCAD Print without any plugins, drivers or adjustments required. It also allows you to view print time estimates, material usage, and can automatically arrange the part to reduce the overall build time. In addition, you can select from various color profiles (absolute, relative, etc.) to get a 3D model that is an accurate representation of the original scan. After arranging the banana on the build platform, GrabCAD Print returned an estimate of three hours and one minute to print the model, with a total model material usage of 251 grams and support material usage of 103 grams.
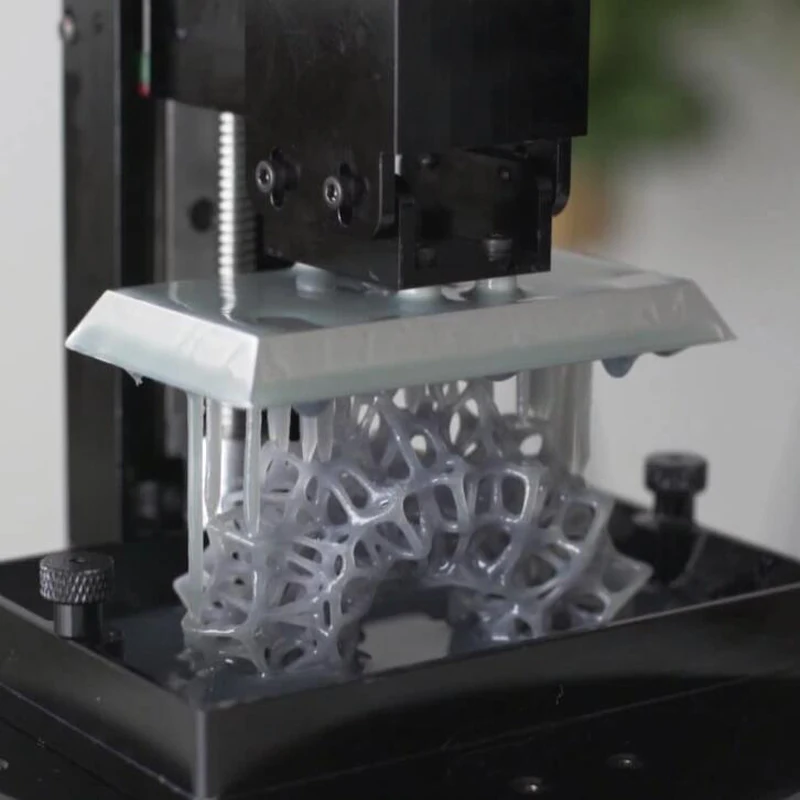
Print It!
Once prepared, the model is sent to the Stratasys J55 full color PolyJet 3D printer. The J55 uses a unique rotating build platform and a moving bar to quickly and efficiently create models using the PolyJet process. The J55 has the ability to load five separate model materials as well as support, allowing for full color mixing to create Pantone validated colors and vibrant details. For this print, we loaded VeroCyan-V, VeroMagenta-C, VeroYellow-V, VeroPureWhite, and VeroClear into the printer. This combination approximates the most commonly found color combination in print (CMYK) and also allows us to add clear to create a polishing layer if needed.
>> Read More About PANTONE Validated 3D Printing with PolyJet Technology
See the below final product mixed with a few real-life versions, can you spot the 3D printed one?This process is a perfect example of how 3D scanning and 3D printing can go hand-in-hand to create full color prototypes and replicas in a fraction of the time used by traditional methods. By creating a full-color 3D print the typical steps of priming, painting and clear-coating can be skipped. This saves you and your team valuable time and money.
Check out the video below with the full process demonstrating how an Artec 3D Scanner and a Stratasys 3D printer can bridge the gap between these two technologies for a scanned and printed object in less than a day!
If you’re interested in exploring how 3D scanning is being used in various industries, watch our on-demand webinar “The Advances of 3D Scanning in Industrial Applications. ”
”
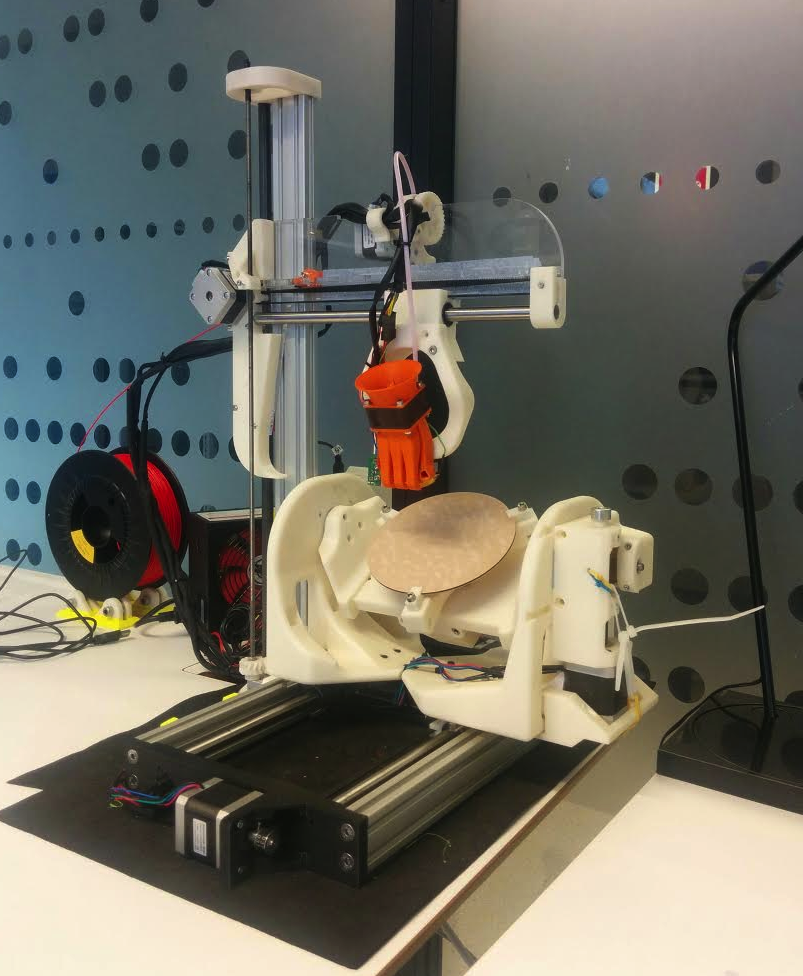
Cloning is legal again: Ciclop 3D scanner
Business
Subscribe to the author
Subscribe
Don't want
20
Good morning!
As you may have noticed, the collection of pre-orders for the first DIY 3D scanner has started on the official website of Witbox Russia. On this occasion, we are organizing a festival of unprecedented generosity - each 3DToday user who pre-orders will receive a 10% discount.
Using your discount is extremely simple - just write in the comment field when ordering that you came from 3Dtoday.ru. You will also need to specify your nickname on this site. It's not a joke. This is not a second action that will turn into a pumpkin at 00:00. This is a special love for an active community.
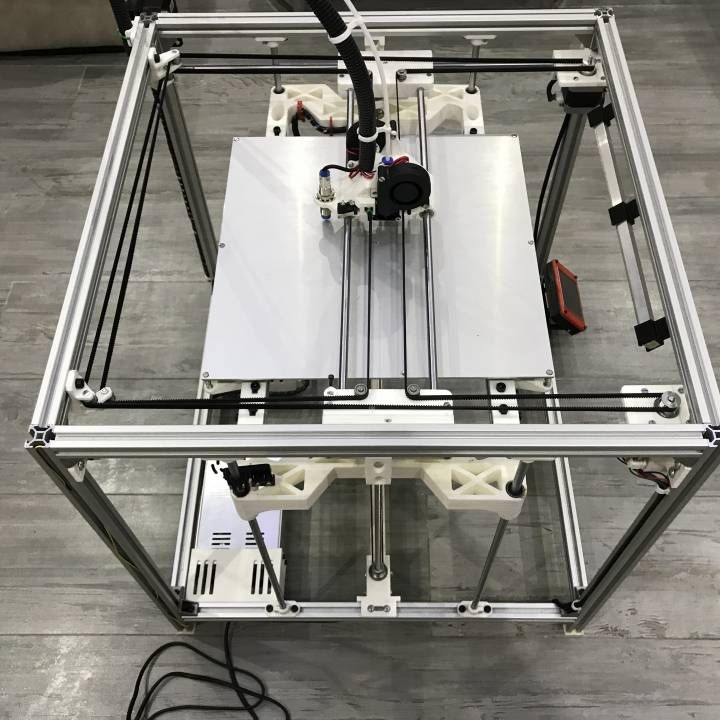
Cyclops is the first 3D scanner available. The DIY format and the general bq paradigm made it possible to lower the price to the minimum threshold. But a logical question arises:
WHY DOES A 3D PRINTER USER NEED A SCANNER?
Obviously to scan. But as with 3D printing, this concept is abstract and represents a huge field for imagination. We are sure that many people have come across the question: “What can be done on a 3D printer?”. And what questions will there be about a bunch of printer + scanner ...
The first thing to ask yourself is what can a Cyclops scan? The basic model (more on that later) allows you to scan an area 205 mm high and 250 mm in diameter. Man is a proud bird, you cannot stuff him into such a framework. If the task of a 3D printer is to turn virtual objects into quite real and tangible, then the task of a 3D scanner, on the contrary, allows you to translate real things into a digital file with maximum accuracy. What opportunities does it give?
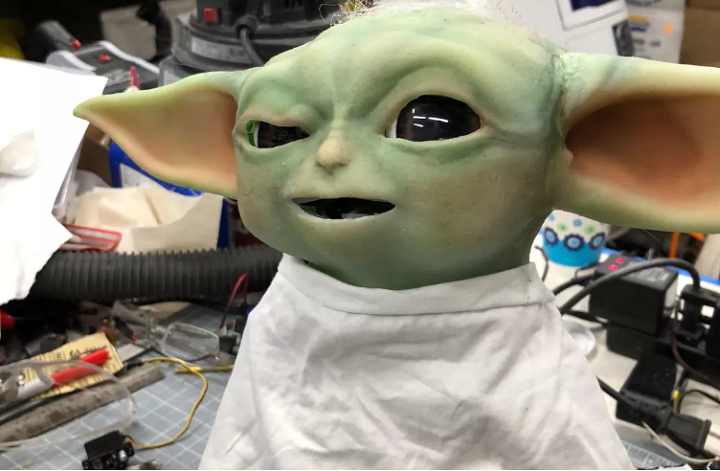
First, you can "clone" any part or toy that you have in a single copy on hand.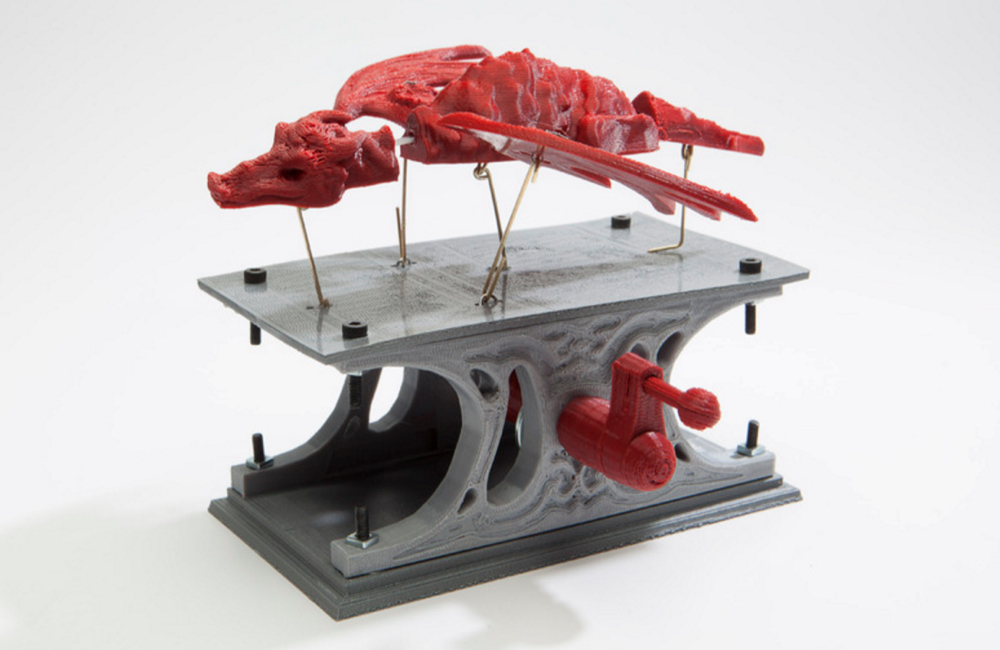 To the extent that you can create a digital library of things dear to your heart and, in case of a sad loss, you can always find this same object again with the help of 3D printing.
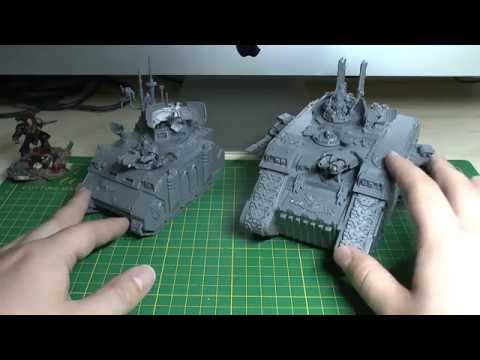
Secondly, it allows you to make changes to existing objects. You can open the scan result in a 3D editor and change whatever you want in it. To make a longer part of complex geometry for some kind of aggregate? Add a third hand to an anime character figurine? Engrave your name on the Champions Cup? Anything. This scanner from bq is a great addition to your 3D printer like Hephaestos - DIY or DIE .
Like any decent Cyclops, the Spaniard is armed with one single eye. But what!
The Logitech C270 HD is a great webcam, the owners will confirm. Such a “peephole”, coupled with a scanning accuracy of 0.5 mm, will allow anyone who wants to get a “cast” of even a complex technical object. In his article series daymon showed how important this can be, especially for those who do not know how to model.
So, back to the original question - does the user need a 3D scanner? The fact that such devices have areas of application is a proven fact, which is only confirmed by new scanners entering the market. But do you personally need such a scanner? What tasks can he solve, where can he help a person who has just stepped into the world of 3D printing? We know the answer to these questions, but what could be more valuable than the opinions of users? Well, if they manage to bake pancakes on Gefesh ...
A little higher it was said - “base model”. Does this mean that Cyclops has a lineup with more “pumped” versions? No. But he doesn't need it! All improvements are incorporated in the design and personally in you. Do it yourself.
ZUM BT-328 is installed on board the Cyclops instead of the usual Arduino Uno. Instead of releasing a supposedly new device that differs from the previous one only in the size of the working area, bq gives “human right to technology” - the number of pins allows you to install new or additional “eyes” or lasers. There will also be no problems with the software stuffing - the software for Cyclops, Horus (Horus) is absolutely open source and you can do whatever you want with your scanner and what is enough technical capabilities.
Since Horus has been mentioned, there is one feature that DIY printers lack so much. It often happens that the user assembles the device not quite as planned by the developer. Every backlash, under-twisted bolt, under-finished detail - all this upsets the delicate balance. However, not in the case of Cyclops - Horus's auto-calibration allows you to adjust the internal scanning parameters in such a way that any user design (within reason) will work. Like?
The full cycle of “cloning” of objects, which lacked only a popular accessible 3D scanner, has closed. The world of 3D printing is gaining momentum with renewed vigor. And time to think
ARE YOU PERSONALLY INTERESTED IN THIS SCANNER?
Is the development department of the Spaniards doing business or just shirking from working on real problems? Do users need an affordable scanner, or is there enough printers? Questions that only you can answer.
We are working for you,
team Witbox Russia
Subscribe to
Subscribe
I do not want
20,0003
CURA 3D textbook-how to use the Cura
9000 9000 9000 manner in the Cura manual in the Cura. for beginners, it shows you step by step how to use Cura and choose the right settings for 3D printing.Cura 3D is a slicing software with a user-friendly interface so user-friendly that many people don't know what it does. They simply load the model, select the quality and press the button. It's as easy as 2D printing.
Introduction to Cura 3D
In essence, all that Cura 3D printing software is is a tool to produce a digital file for a 3D printer on a computer in a format that the 3D printing hardware understands.
Compared to other slicing software, Cura 3D seems to be very simple, with limited features and settings. However, more complex settings, if you need them, are available - they are just very cleverly hidden.
Cura 3D is backed by 3D printer developer Ultimaker, a company renowned for its hardware perfectionism. The program hides (but not too deeply) almost all the settings and options that can be found in most similar applications. So if you're the type who likes to fiddle around with settings, you might as well do it.
If you just need to print, change quality and speed, Cura 3D has these settings neatly exposed and you're good to go.
This tutorial is for anyone just getting started with 3D printing. Let's assume that you have just turned on the printer and loaded the filament. From now on, we will help you get started with Cura 3D and start 3D printing.
Great overview of 3D printer software - Cura comes first
What is Cura 3D?
Cura 3D is a 3D printer slicer that takes a 3D model and slices it into layers to produce a file known as G-Code, which contains codes that the 3D printer understands.
Before we look at Cura 3D, let's take a look at the printing process in terms of 3D files and how they are prepared. It's about converting a computer file into a 3D object, which can be confusing. So it's helpful to get an idea of what's going on, even if you don't have to take that first step.
There are three main steps in preparing files for 3D printing.
- Simulation. It is done in 3D modeling software such as 123D Design or SketchUp, just two of the many examples out there. These applications have their own file formats, these programs allow you to open, edit, save and export data.
- Export 3D files. After you have created a model, you must export it either to an STL or an OBJ file. These formats are understood by Cura 3D. They differ from 3D modeling application formats in that they describe only the final geometry, without individual parameters and editable content.
- Export sliced files. The STL or OBJ file can then be imported into Cura 3D, where it is sliced and converted into a layered structure called G-Code, which is essentially just a text document containing a list of commands for the 3D printer that the printer reads and executes: this hot end temperature, such and such movement to the left, such and such movement to the right, etc.
This step of the process involves 3D modeling, but if your skills in this matter are not great, you can turn to sites such as Thingiverse or Youmagine and download one of the millions of models already prepared for printing. They are usually offered in STL format and are ready for direct import into Cura 3D.
10 catalogs of 3D printer models - a selection of quality models
What does Cura do?
Cura 3D slices 3D models. It translates 3D STL or OBJ files into a format that the printer understands. Fused filament fabrication (Fused filament fabrication) 3D printers create 3D objects by printing them layer by layer. Cura 3D takes a 3D model, converts it into layers that will be laid out on the desktop, and creates a set of instructions for the printer - how it should work, layer by layer.
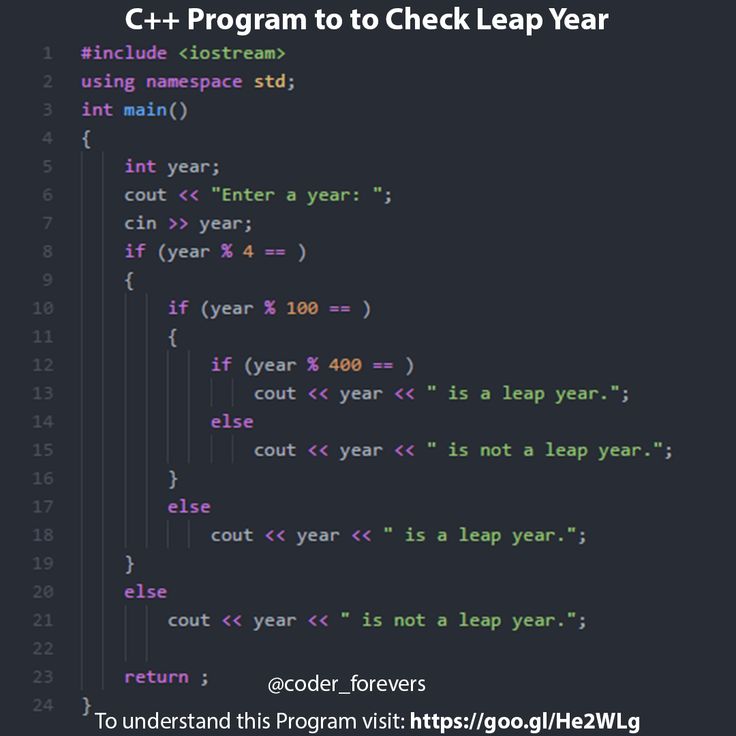
These instructions are G-Code, a text document with a .gcode extension. If you open such a file and see what is in it, you can see quite a lot of code and even figure out exactly what instructions are being sent to the printer.
Here is a piece:
G0 F7200 X19.698 Y28.262 Z.36
G1 F1500 E0
G1 F1350 X22 .20447
G1 X24.246 Y25.027 E0.25218
As you get more comfortable with 3D printing, you can learn how to edit this code by manually changing the cooling fan speeds, layer thicknesses, and hot end temperature at different points in the model. This may come in handy in order to solve some problems that may arise with 3D printing.
Since each printer has its own setup system, work area, desktop, and nozzle size, Cura 3D needs to know these hardware parameters that make up the device profile in order to calculate the exact set of instructions to print correctly on your printer.
Once these fundamental parameters have been set and the filament type has been specified, the layer thickness and filament thickness can be specified. Next, it calculates the contours and path of the nozzle to print your model and calculates a set of instructions that Cura 3D saves in a G-Code file.
G-Code can be saved to an SD card or sent to a printer, either wirelessly or via cable.
Main problems and defects in 3D printing and how to deal with them
The Basics
In the first lesson, you'll learn the basics of working with Cura 3D, from downloading and installing it, to optimizing your STL or OBJ files to prepare them for export to print-ready G-code files.
Installation
Cura 3D is a multi-platform program with installers for Linux, Mac and PC. All versions can be downloaded for free from the Ultimaker website.
Download the file for your operating system and start the installation. In this Cura 3D tutorial, we are working with version 2.3.1.
- Launch Cura 3D.
- Select your printer model. The first time you launch Cura 3D, you will be asked to select a printer. If you have an Ultimaker or Lulzbot, they come with a special version of Cura 3D. If not, or if you want to configure a new printer, select Settings > Printer after launching the application.

Now you have to select a printer. If you downloaded the program from the link above, then all printers offered will be Ultimaker. For any other printer, select Other, and with any luck, your machine will be listed as well.
If you're unlucky - as, for example, in the case of the Lulzbot printer, go to the printer manufacturer's website, where you can find and download a special version of the program. If it’s past here too, choose Custom and Add Printer.
You now have the Add Printer screen, and here you will need details about your specific device. These details can be found on the manufacturer's website, or if you built the printer yourself, you should know them by heart.
Simply enter these details and click Finish.
Cura 3D interface at a glance
This screenshot shows the main parameters of the Cura 3D interface.
Cura 3D top navigation
- Open file. You can open an STL or OBJ file by selecting File > Open File at the top left.
- Edit. This is for editing models on the desktop, removing them from it, for merging models. Basic but useful commands.
- View Mode. This menu item allows you to switch between viewing modes: Solid, X-Ray, Layers.
- Settings. Printer settings and media settings live here.
- Extensions. This is for advanced users who need to install Cura 3D extensions that allow manual G-code editing and more.
- Help. Help, of course.
Cura 3D Left Toolbar
- Open File. Loading STL or OBJ to prepare them for printing.
- Move. If you click here, arrows will appear around the selected model, allowing you to move it around the desktop.
- Scale. Increase or decrease the size of your 3D model.
- Rotate. Rotation.
- Mirror.
 If clicked, arrows will appear around the selected model, when clicked, the model is mirrored along the corresponding axis.
 - Select Settings. Select frequently used settings to display in the sidebar (wall thickness, infill, speed). Tied to the loaded model.
- View Mode: Solid, X-Ray and Layers. If you select Layers, a slider will appear that allows you to quickly scroll through the layers of the model.
Cura 3D right toolbar
It is divided into two sections, labeled at the top with the icons of the material (Printing settings) and the printer (Printer settings).
Printer Settings
This section provides detailed information on media and print quality settings.
Printer. This is the printer selected in the first step. If you have more than one printer, then the desired one is selected from the drop-down menu.
Material. Quick selection of media used by the printer.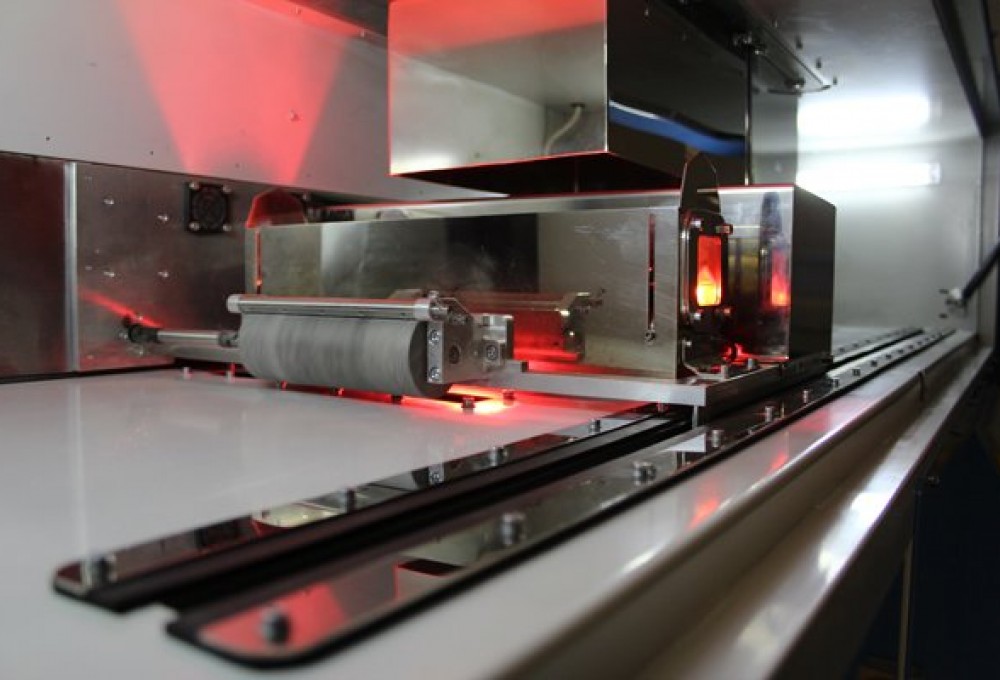 This option is for printers that have media linked to them and is not available if this feature is not available.
Profile. The Ultimaker comes with three print quality profiles: Low, Normal and High. They can be quickly selected from the drop-down menu. As you become more familiar with the program, printer, and printing process, you will be able to create profiles yourself that are better tailored to the type of object and model being printed.
Print Setup. Two options for setting up the print process: Simple (Recommended (Mac)) and Advanced (Custom (Mac))
Simple (Recommended)
The Simple (Recommended) mode is calculated based on the Cura 3D settings you previously entered for your printer. This is a great choice not only for beginners, but even for more advanced users who are just getting started with a new printer and want to see how software and machine interact. The number of settings here is limited: you can quickly change the infill, grip with the table and the main structures of the supports.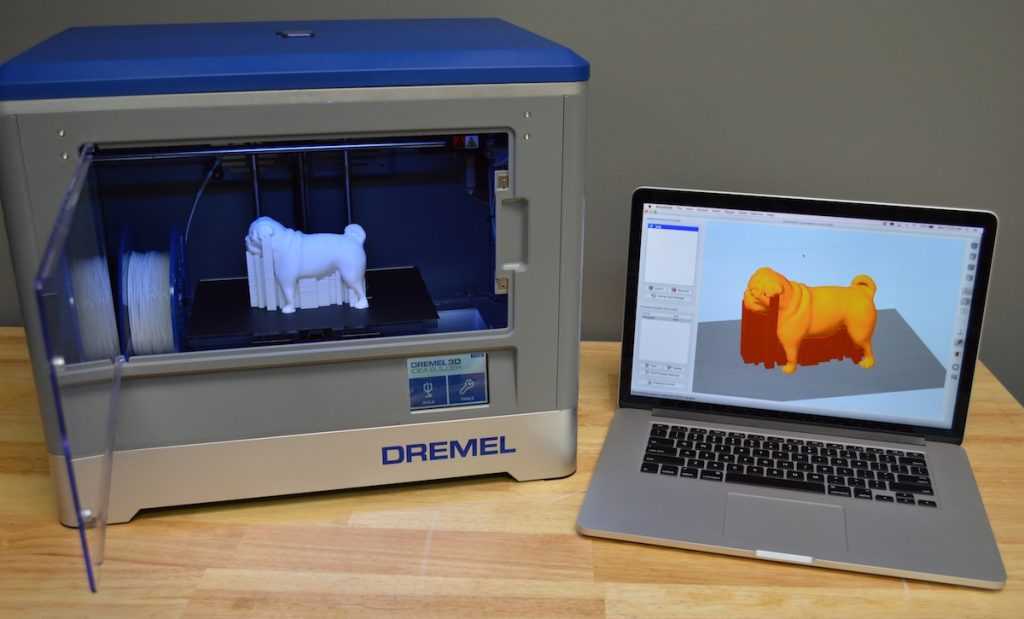
Advanced (Custom)
This is where the real fun begins! You can change a lot of printer settings - from print quality to speed. We will look at these possibilities a little later.
Working with the model in Cura 3D
Now that you've become familiar with the Cura 3D interface, it's time to start loading your 3D file. You can choose either a self-created model and an STL- or OBJ-file exported from it, or download it.
Loading a 3D file into Cura 3D
- Open the desired STL or OBJ file by selecting File > Open File at the top left. In this case, we are working with 3DBenchy - a great model for testing a new printer or program.
- The model is loaded and let's look at its location, if it needs to be moved. If everything is in order, the model will be highlighted in yellow. If there is a problem, the highlight will be gray and Cura 3D will tell you why the model cannot be printed.
The first thing to do is to check the printed object and make sure it fits on the desktop, ie. on the print platform. Here it will be useful to get acquainted with the model view modes and navigation in the Cura 3D window.
Moving the Cura 3D desktop. To move the desktop around the screen, hold Shift and the left mouse button. This is often useful to take a closer look at the model and check for some small details - just to make sure everything is in order and in the part of the object that, due to scaling, does not fit on the screen.
Rotation around the Cura 3D desktop. Hold down Ctrl and the left mouse button. So you can look at the model from different angles.
Enlarge or reduce the desktop. This is done with the mouse wheel. If you have a mouse without a wheel, it is highly recommended to purchase one with a wheel.
Different Model Views
Cura 3D has three main model views, each of which is useful in different situations, especially if you are having printing problems.
Solid.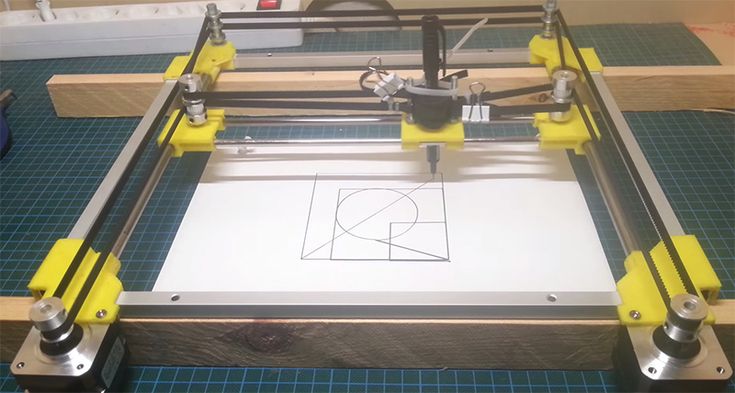 This is the (solid) default mode, which allows you to see the model as it will appear in the end. Here you can understand the relationship between the size and shape of the model and the desktop. Usually, if everything is fine, and you just looked at the model from all sides and perspectives, everything should print fine.
X-Ray. This option is useful when there are some problems with printing and you need to quickly look at the internal structure of the object. This mode is especially useful if your object has intersecting edges. X-Ray (i.e. "X-ray") will allow you to see problem areas.
Layers (Layers). If the print is constantly interrupted in the same place, or if you have some tricky detail and you want to make sure everything goes as it should, switch to this (layered) mode. Fine movement through the layers is carried out by arrows; you can also use the slider. As you get more comfortable with the program and printing process, this option will come in handy to accurately select layers that require a G-code change to, for example, increase fan speed, layer thickness, or filament.
Operations with the model in Cura 3D. If the model needs to be moved or rotated relative to the platform, scaled or reproduced, simply click on the object to highlight it, and then select one of the functions in the left panel. So: move, rotate, scale.
When you click on any Cura 3D tool, arrows and circles appear around the model. You just need to hook one of the arrows or circles and pull in the right direction. If something went wrong, right click and click Reset.
But what if you want to print multiple copies of the model? Right clicking on the selected model offers the Duplicate option. Cura 3D will automatically redistribute the copies on your desktop. If there is enough space on the platform to print two or more objects, all models will be yellow. If there is not enough space, the emerging models will be highlighted in gray.
Print Settings Simple (Recommended)
The easiest way to print something is to set Cura 3D to Simple (Recommended).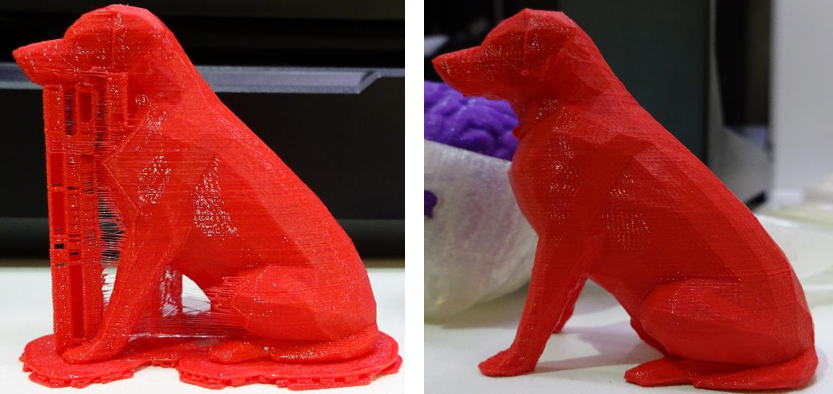 Although almost everything has already been done for you here, you can still change the quality and parameters of the props.
- Printer. Make sure the correct printer is selected.
- Material. If the printer has media defined for it, select.
- Profile. Select the desired print quality.
- Infill. Hollow mode prints fast but without internal supports. Solid (solid) will produce the most durable model, but it will also print the longest, and the material will require a lot. For starters, Light is better.
- Helper Parts. These "Auxiliary Points" describe props and platform traction. If you are printing for the first time, enable both. If your model has a lot of touch points on the desktop, it's best to turn off Print Build Paste Adhesion. If the model does not have overhangs (like balconies), turn off Print Support Structure.
Generating the G-code file
The model is now ready to be printed and all you have to do is either export the file from Cura 3D to an SD card or send it directly to the printer. Cura 3D will automatically convert STL or OBJ files into printer-friendly G-code.
- Save the 3D print file. Select Save to file or Save to SD or Send to Printer.
- Estimate of time for 3D print. Cura 3D will give you an estimate of how long it will take to print your object.
- Start the 3D print. If enabled, sit back and wait for the printer to warm up and start printing. If you saved the file to SD, remove the SD from the computer and insert it into the printer. Click Print, select a file and go ahead.
Cura settings
Using Cura 3D's Simple (Recommended) profile is just the beginning, but you can still get great prints. Over time, you will need a little more flexibility in the settings. The most advanced options are under the Advanced (Custom) tab. Here is a brief overview of what you can see there.
In the right settings panel, select Advanced (Custom).
- Quality.
 This is about the layer thickness. The value depends on your printer, but thinner layers provide better quality, larger layers provide faster speed. Layer Height (height, it is the same layer thickness) for the Ultimaker 2 Extended is set to 0.1 mm by default.
 - Shell. This refers to the thickness of any of the walls in your model, as well as the thickness of the bottom and top layers. The Shell value is a multiple of the nozzle diameter. A thickness of 0.8mm means the walls will be two lines wide (because our Ultimaker 2 printer has a 0.4mm nozzle).
- Infill. Infill is the force structure of your model. The higher the density, the stronger, the more will be printed inside.
- Material. Not all materials are the same, sometimes a little customization is required, which is exactly what is done here. As a rule, the only thing that needs to be changed is Retraction (retraction) in order to avoid excessive tension on the plastic thread.
 To avoid the most common problems, it is recommended to use a proprietary filament.
 - Speed. This is about the speed of the print head. Generally, the slower the better the print.
- Cooling. Cooling is an important thing for any printer, it must be turned on. Fans are usually fully turned on from the 5th layer.
- Support. If your model has overhanging elements, this option must be enabled, and then with a simple click you can choose where to put the support.
- Build plate Adhesion. Not all models have a footprint large enough to securely grip the desktop surface. In this case, this setting will help the adhesion of the model to the substrate.
- Special Modes. If you are printing more than one model, this option lets the printer know whether to print them at the same time or whether they will be installed one after the other.
Quality settings
- Quality.
 Each printer has its own minimum and maximum layer thickness. Enter the desired layer thickness here. 0.02 mm is high quality, but also a long print; 0.6 mm - the quality is low, but the process is relatively fast.
 - Shell. Wall thickness selection. Thicker walls are a stronger object that can usually be machined well. With a nozzle thickness of 0.4 mm, the proposed wall thickness will be a multiple of: 0.4 mm, 0.8 mm, 1.2 mm, etc.
- Top/Bottom Thickness. The thickness of the upper and lower layers is also a multiple of the nozzle diameter. For starters, you can choose a double diameter. This will help to avoid the most common problems - like "bloat".
Material settings
- Material. Each material has its own specifications and requirements, which, as a rule, are associated with the hardware of the printer, and not with the program. The only situation where you might need to change something here is if the print is underextruded.

- Enable Retraction. In Cura 3D, this option should almost always be enabled. It is about drawing the filament back into the nozzle so that when the print head moves, no webs appear.
Speed settings
- Print Speed. This is the overall print speed as the filament is extruded. The slower, the usually better quality. The speed can be increased (recommended value is 60 mm/s). If you increase the speed, it is useful to increase the print temperature as well.
- Travel Speed. This is the print head movement speed. On the Ultimaker 2 it is set to 120mm/s. The movement speed is related to the previous parameter and must be a multiple of it. In such a case, accelerations and decelerations occur more smoothly, for example when changing from infill printing to wall printing.
Infill settings
Infill Density. Infill density is the amount of material that is consumed by the support structure within the model.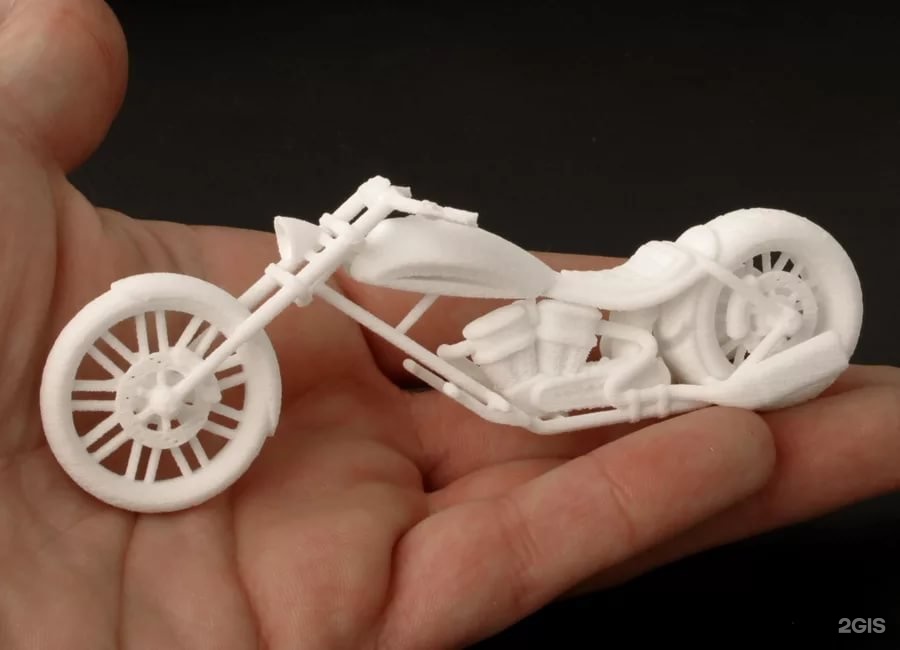 The higher the density, the higher the strength. Usually 20% is set here.
Cooling
Enable fan Cooling. It is not recommended to turn off cooling, as this will lead to distortion of the part and other unpleasant effects.
Support settings
- It's generally useful to enable supports (Enable Support) unless you're sure nothing is hanging or floating anywhere.
- The Placement option determines the location of the supports: Touching Build plate means that the supports have only a build plate base; Everywhere means that they can be anywhere, incl. on the model and inside it.
Plate Adhesion Settings
The situation where the printed object does not adhere enough to the substrate is very common, and the Build Plate Adhesion option is just provided in order to increase this adhesion by adding "skirts", "edges" and "rafts" ".
Skirt. It's good to have at least a "skirt" - a line around the first layer of the object, which simply helps to position the extruder.